Civic 365
Frequently Asked Questions
- To set up custom-level permissions, follow these steps:
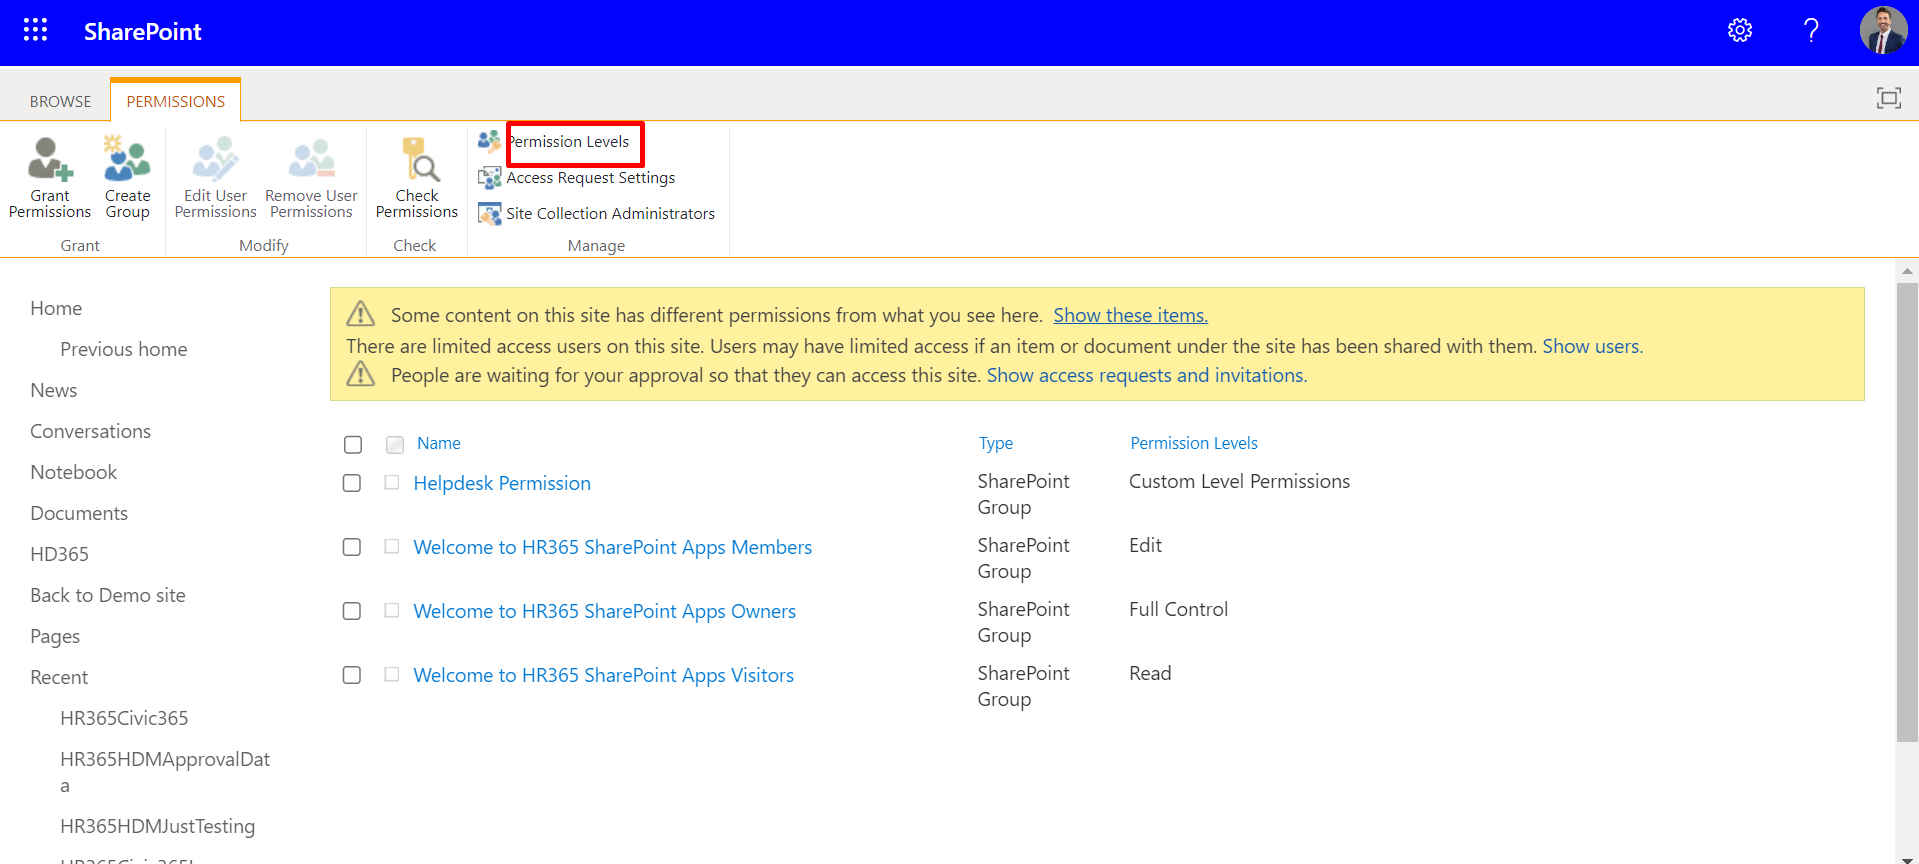
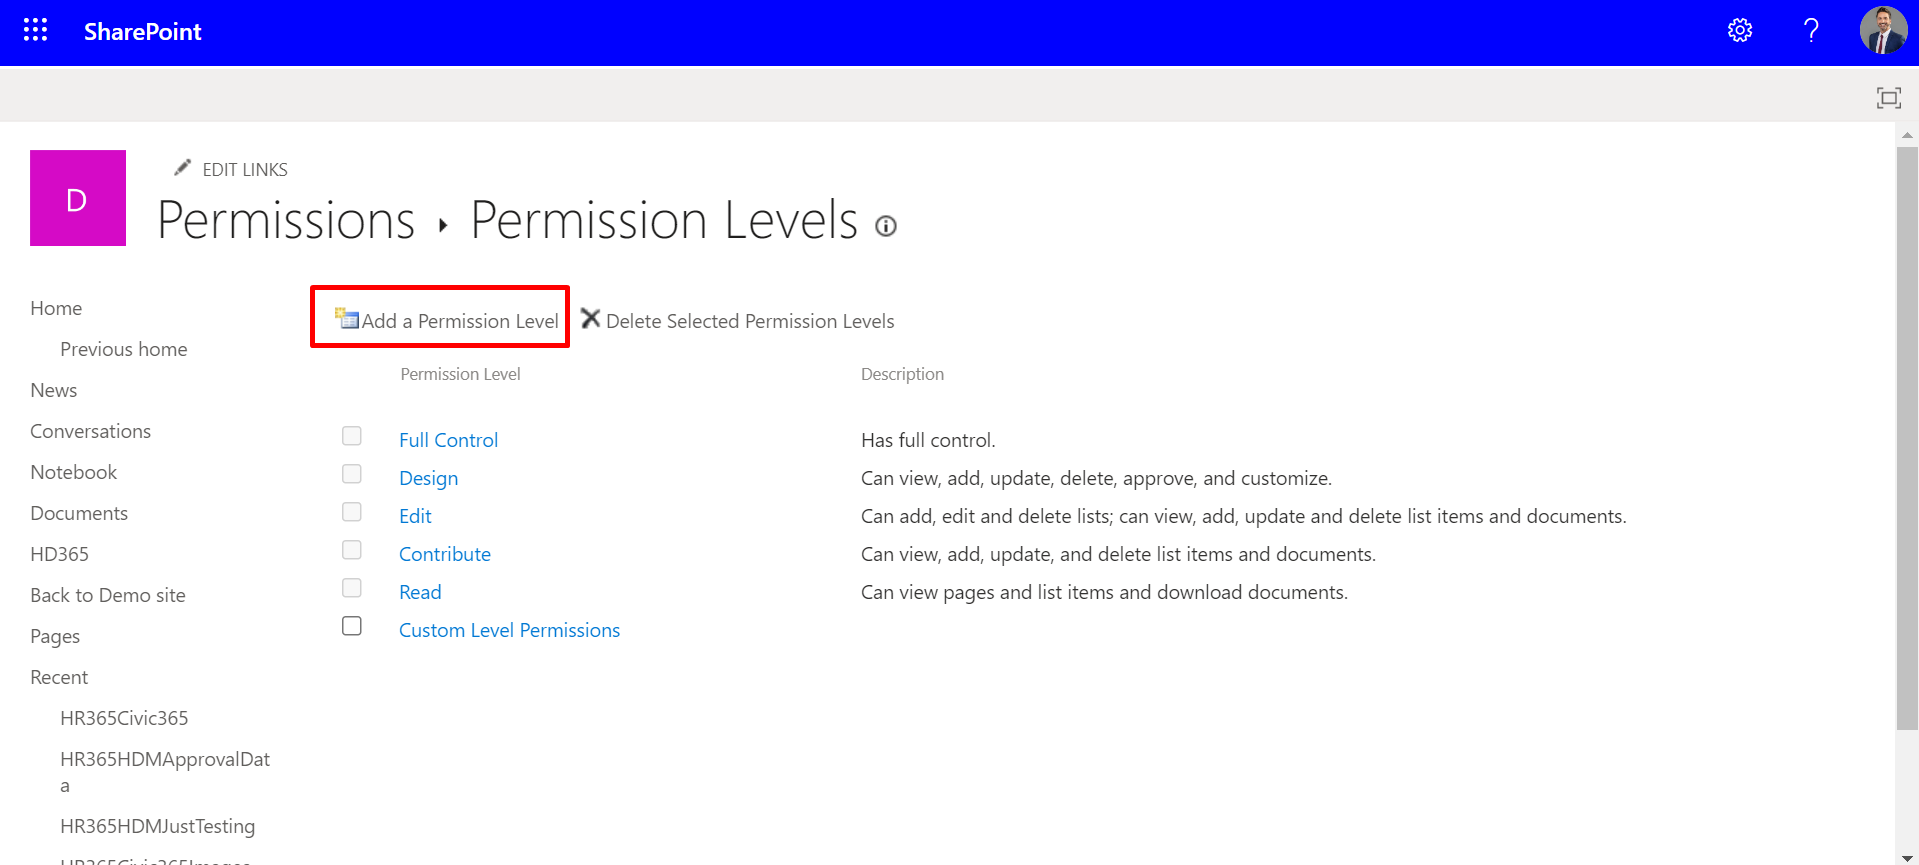
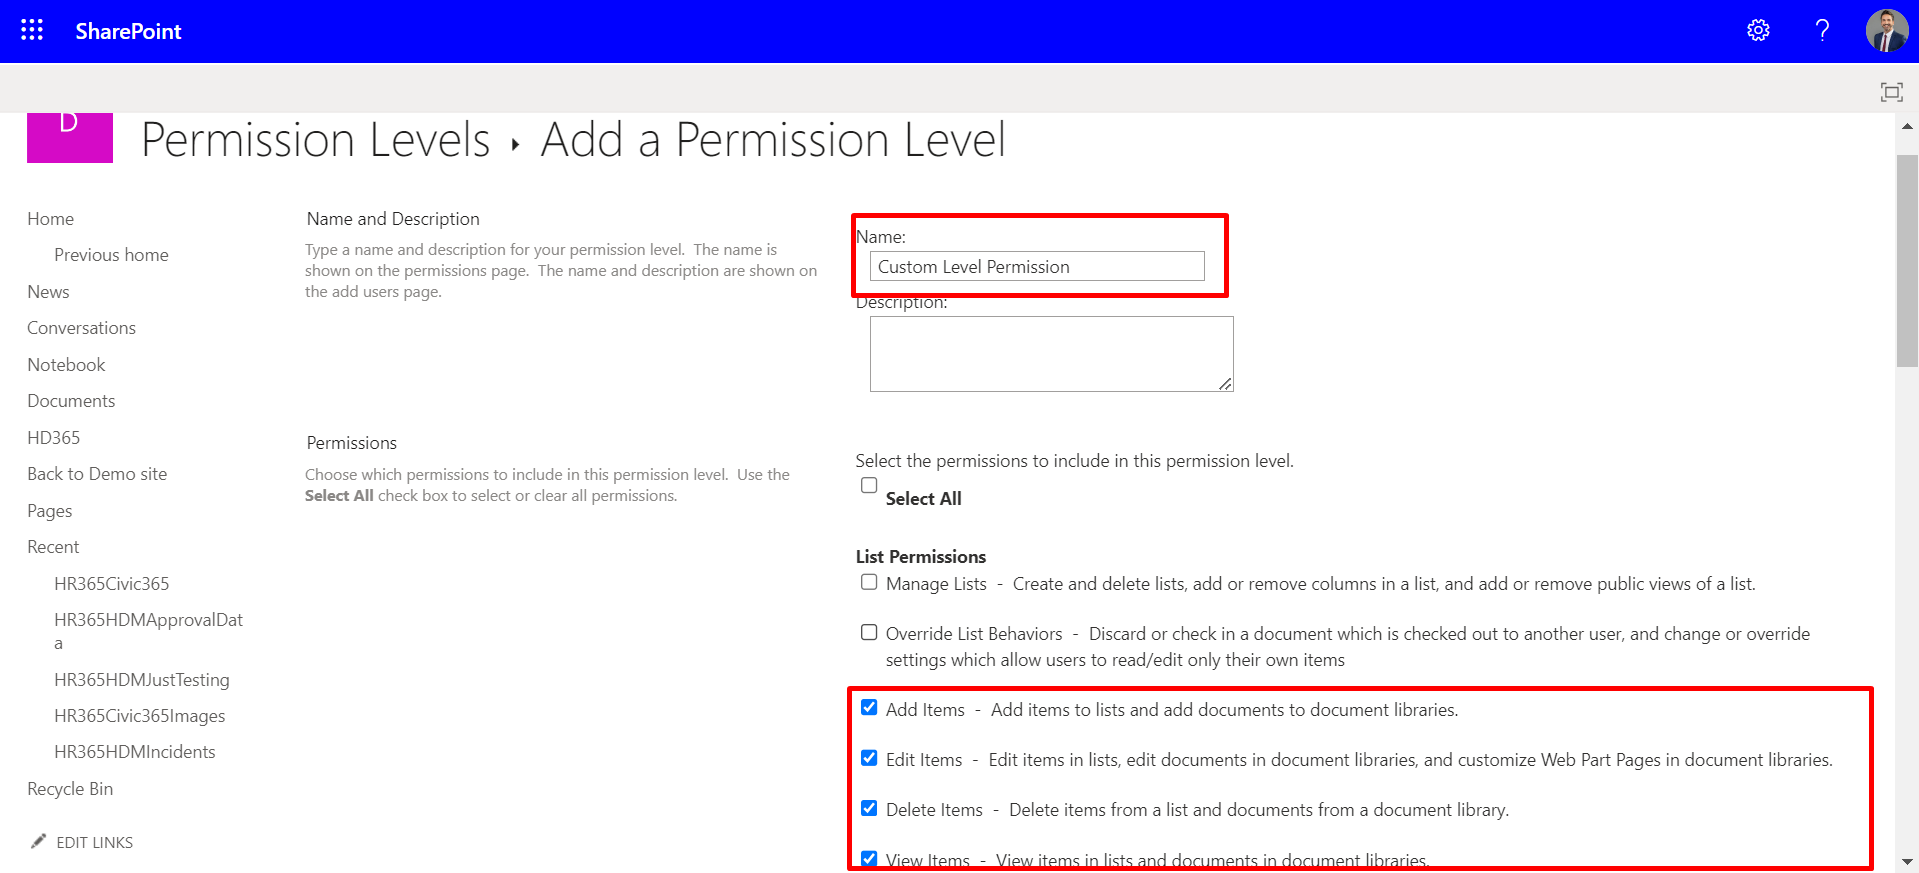
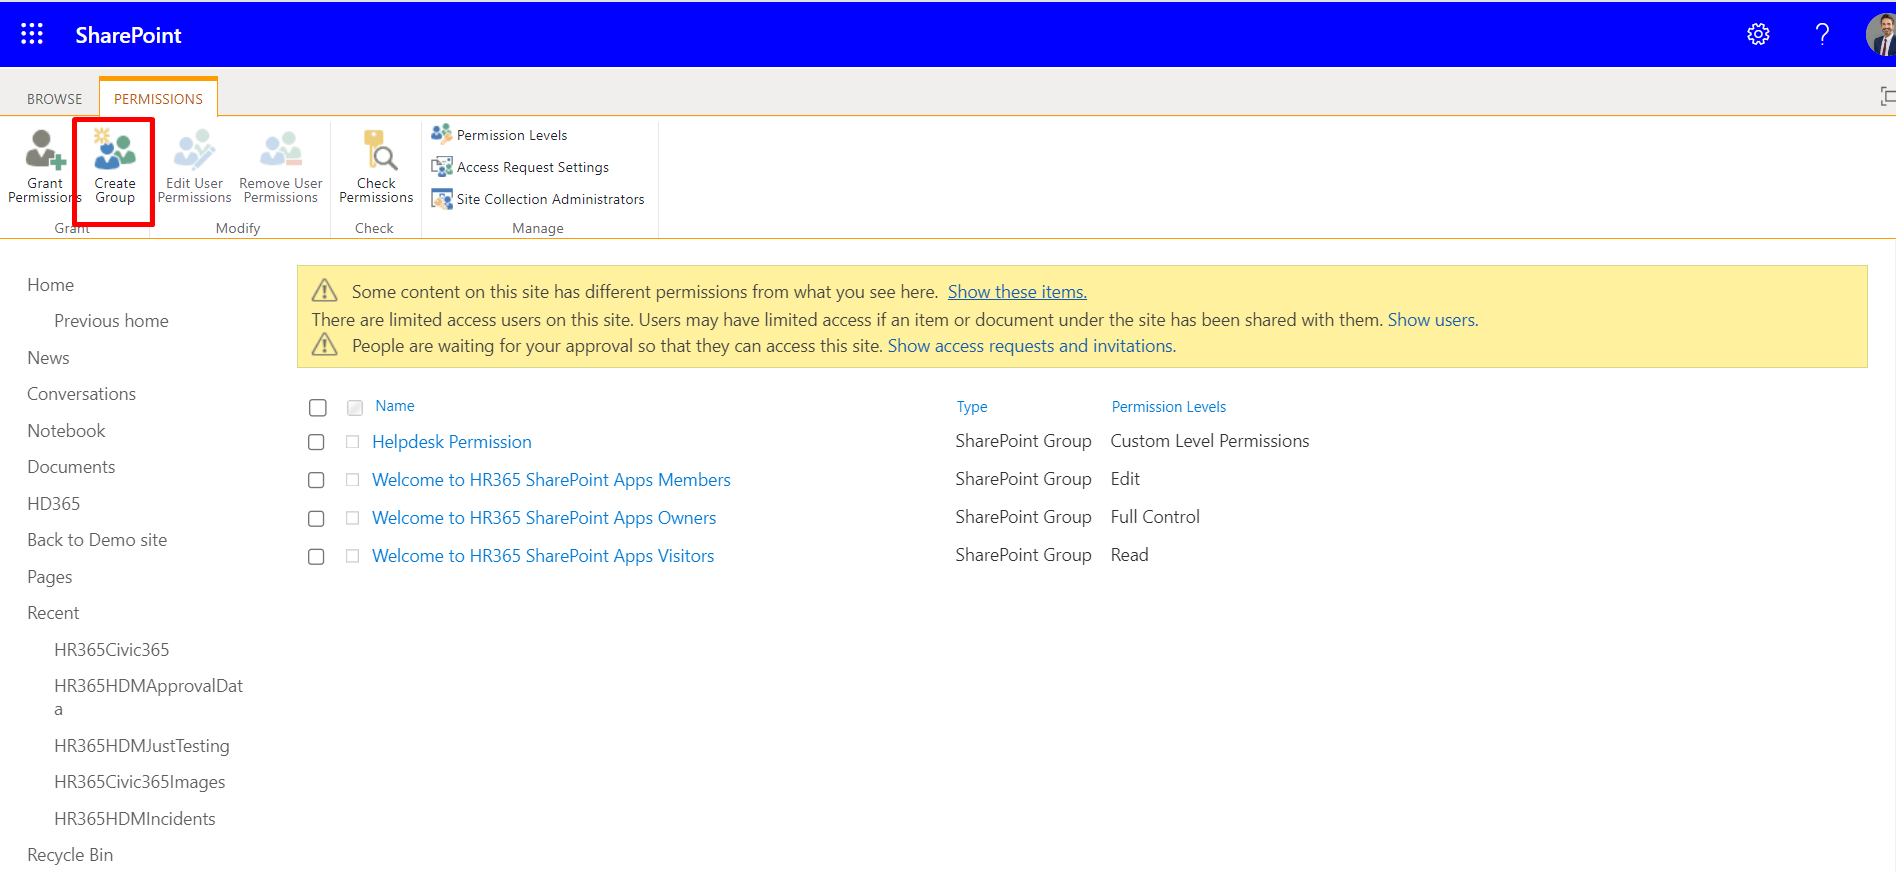
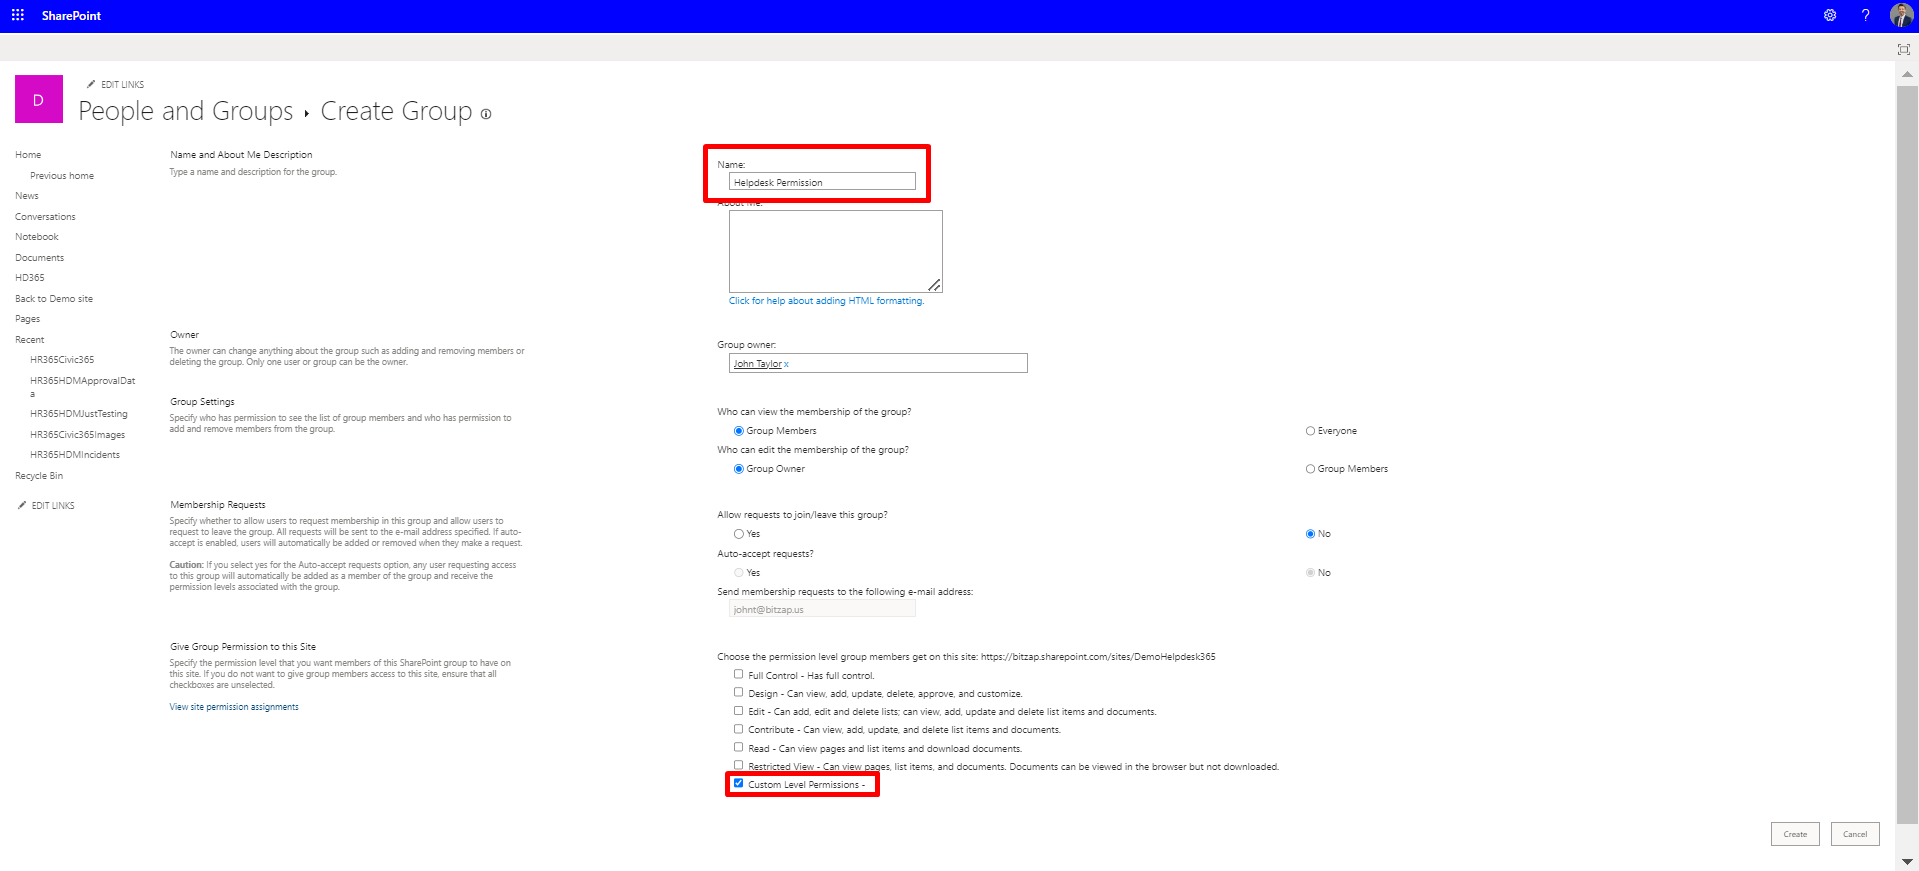
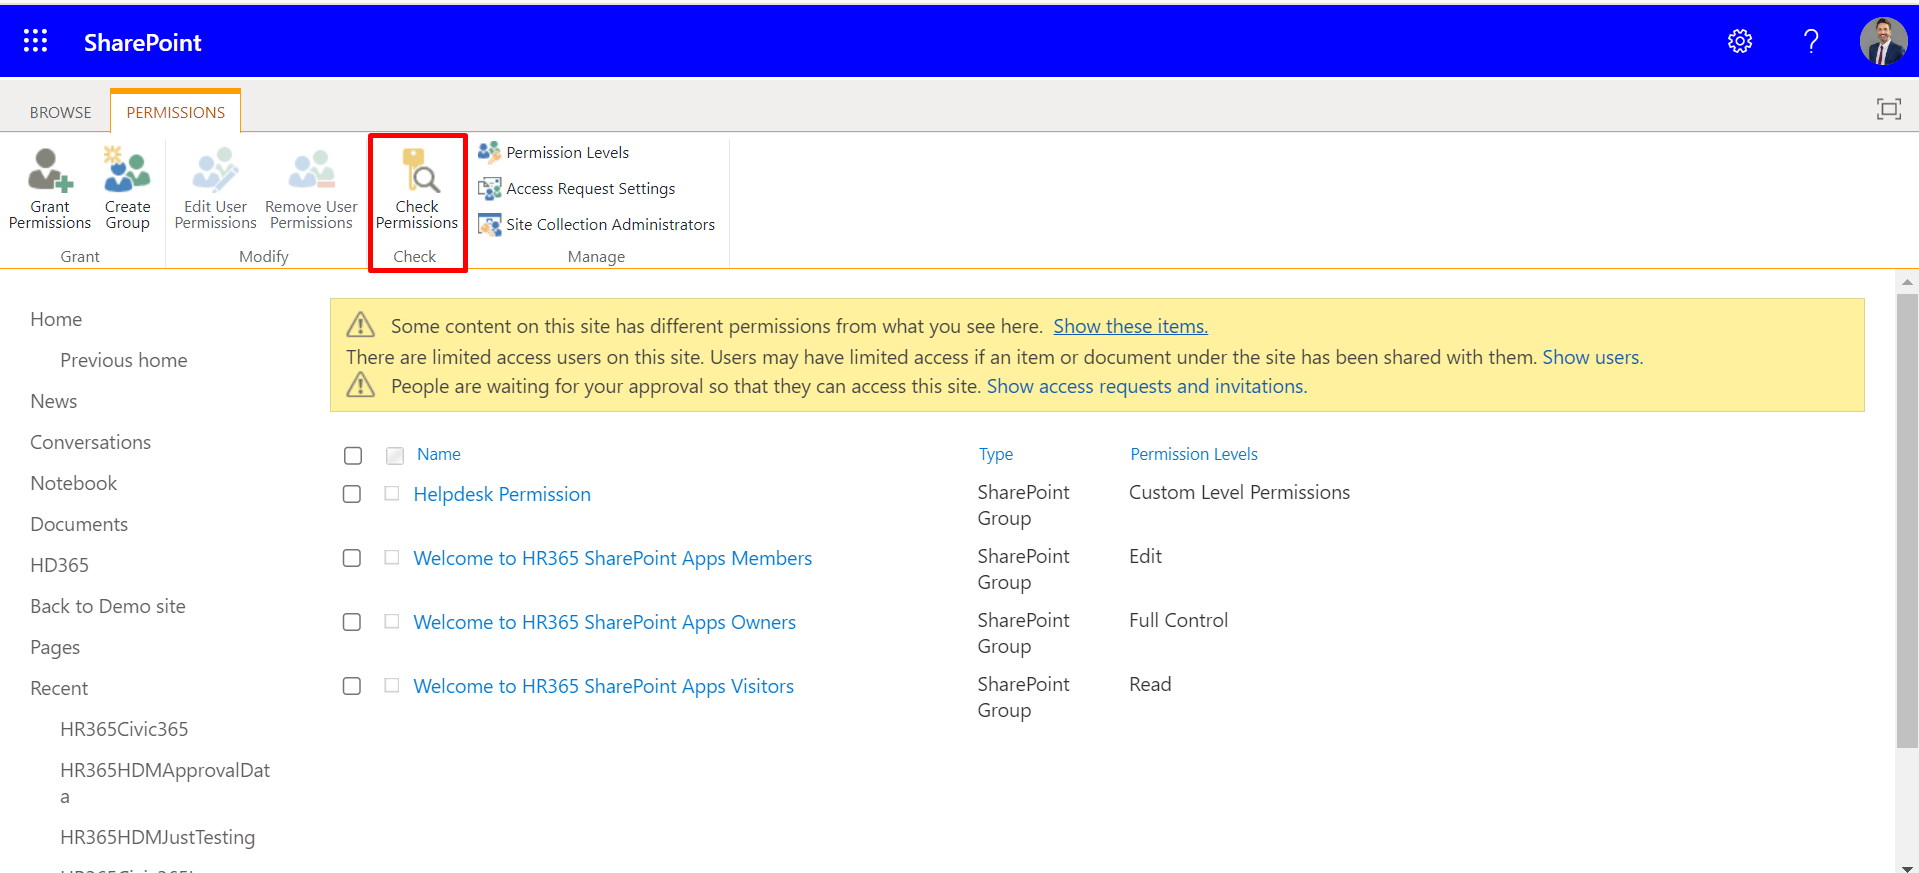
These steps will help you grant custom-level permissions efficiently.
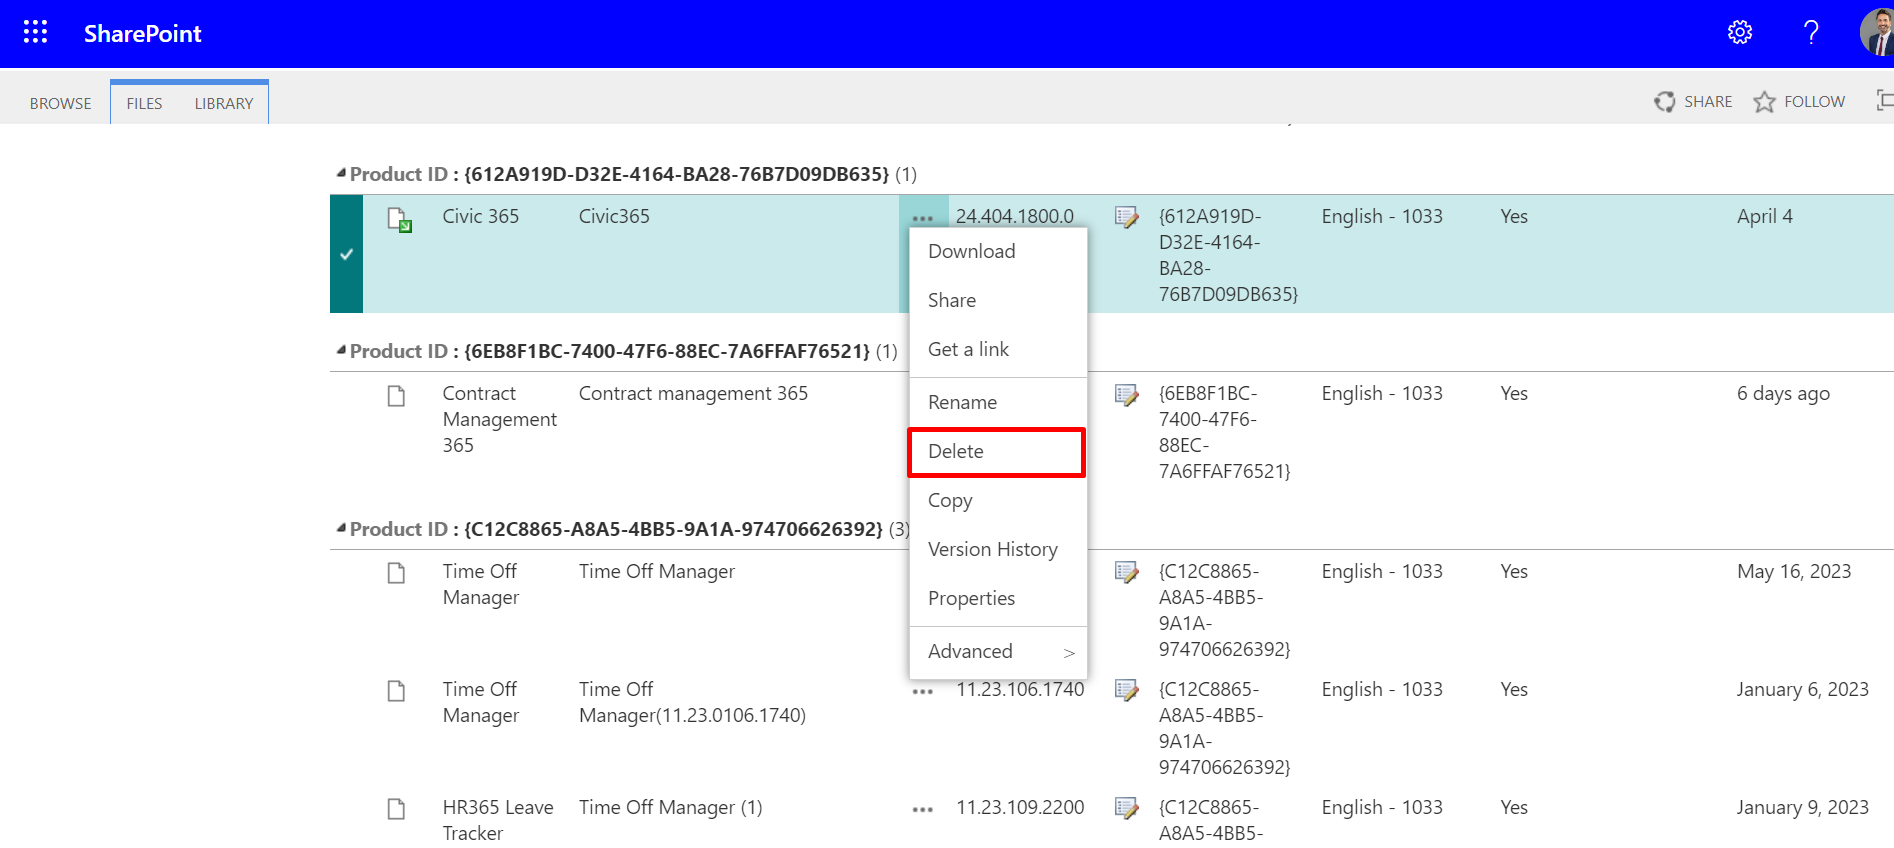
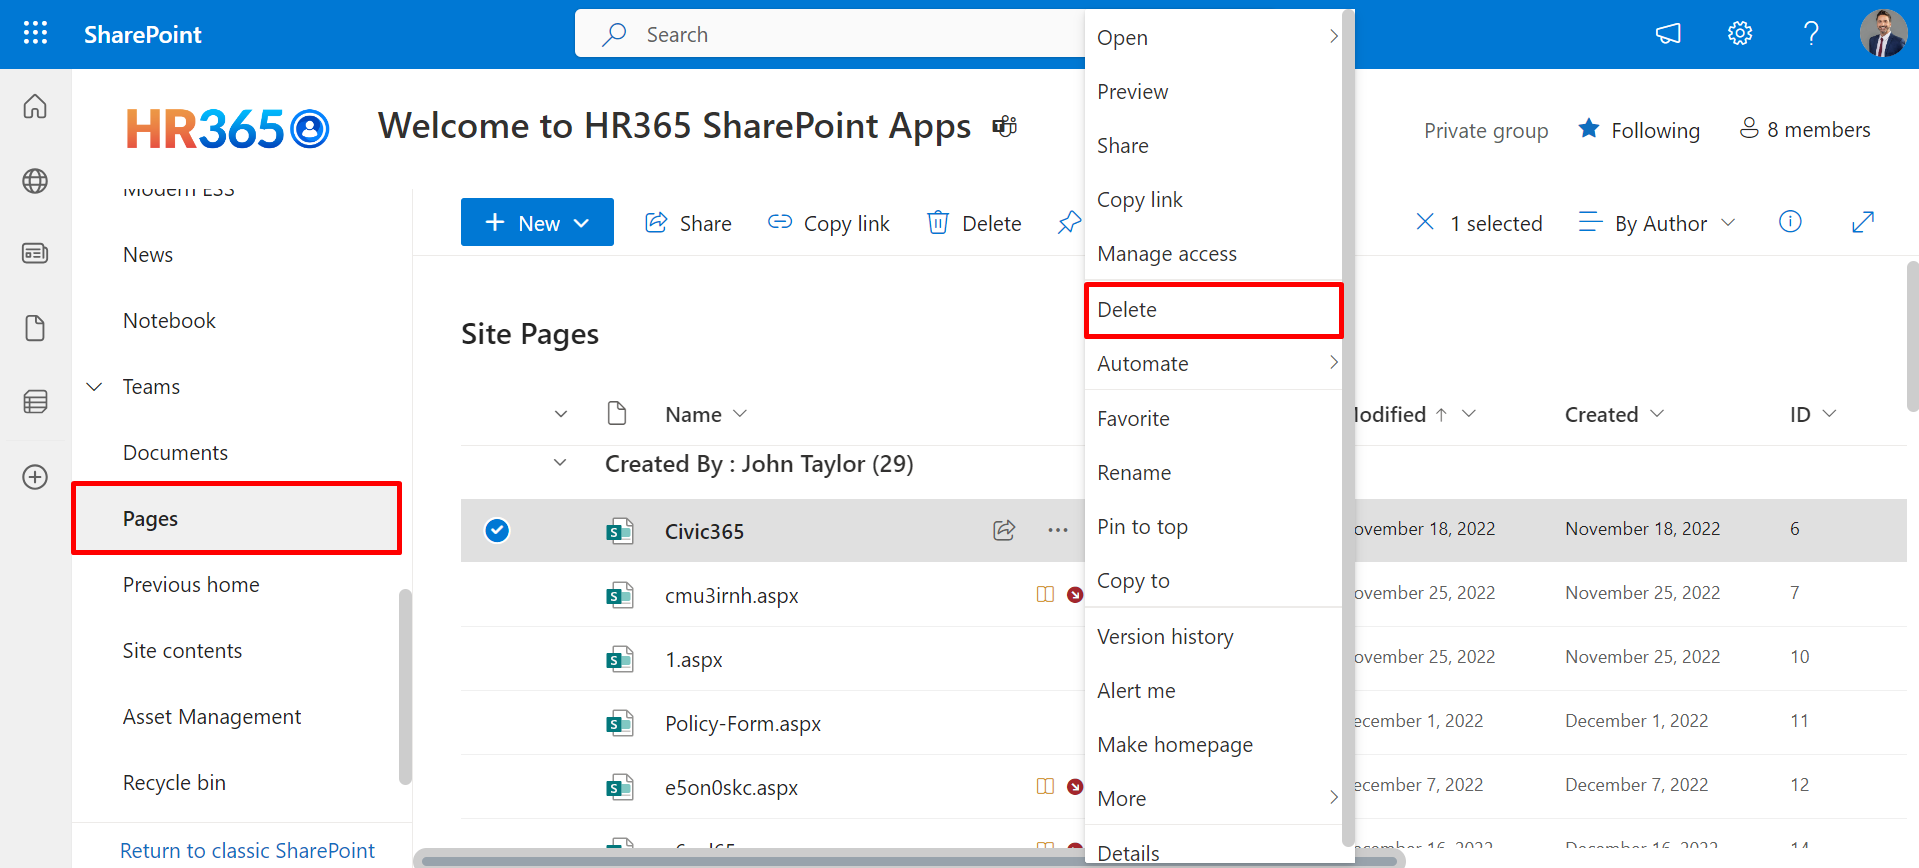
- You can remove the application by following these steps:
To learn how to configure API, see Azure
API Configuration for Civic365.
To add custom fields. You can follow the below
steps:
In the setting, go to the Advance tab.
click on Action button of custom field row.
Click on +Add tab which navigate to add custom field page.
Select AD properties from select SPO/EXO User Profile Properties column, give property name and
select property column type.
Click on Save button.
Enable the display status.
You have five options. you can sync employee
profile images from:
SPO
Outlook
Delve
Azure AD
ED
Due to CORS, images is not appearing in the
Civic365. You have to open outlook or delve into the same browser for one time.
Yes, you can install an Civic365 on
different sites multiple times.
Yes. The application stores the data in special
list.
To add Civic365 plus as a web part. You
can follow the below steps:
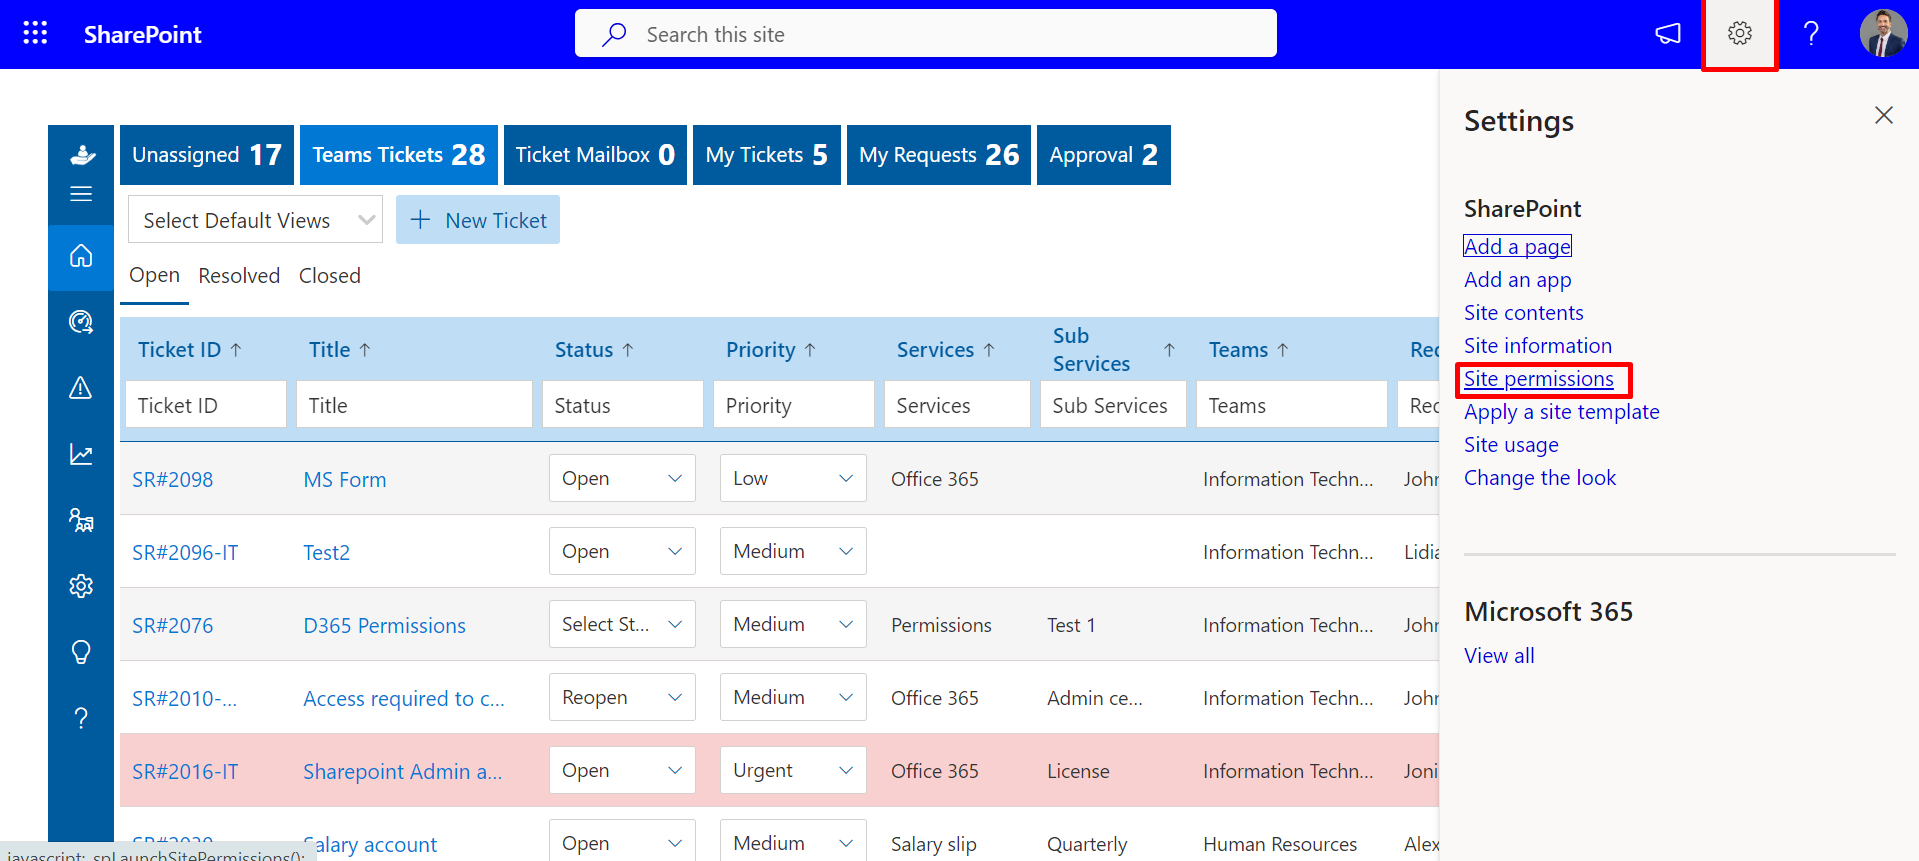
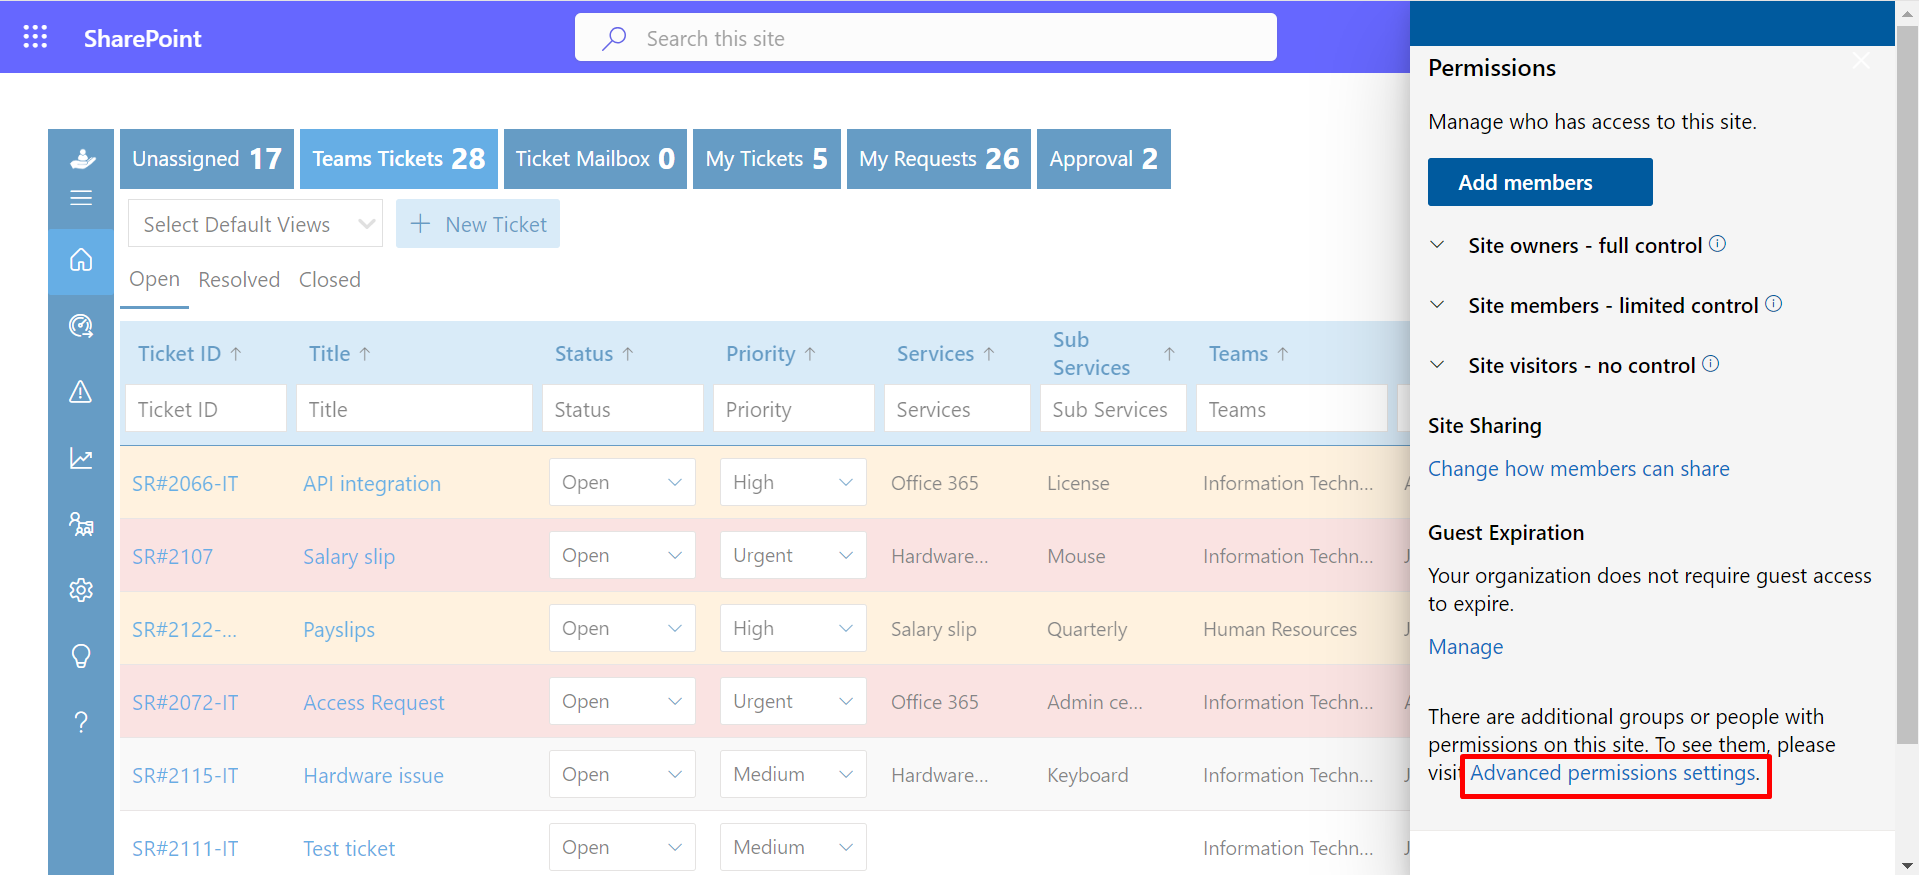
Click on setting gear icon and then Add a page under settings panel.
Choose the Blank page and then click on Create page button.
Add Name, click on round plus icon and then search for Civic365 Plus and click on it.
Click on Publish button.
To add Civic365 plus as a web part. You
can follow the below steps:
Click on setting gear icon and then Add a page under settings panel.
Choose the Blank page and then click on Create page button.
Add Name, click on round plus icon and then search for Civic365 Plus and click on it.
Click on Publish button.
It takes 24 hours to get updated the user’s
profile.
Yes, upto seven level of an organization chart is
visible.
You can add only one custom field in Employee
Directory Plus.
No, we will not have access to any field from your tenant other than the app email id of the person who has installed the app. Incase of troubleshooting, we need to get on screen sharing to know the issue and provide resolution.