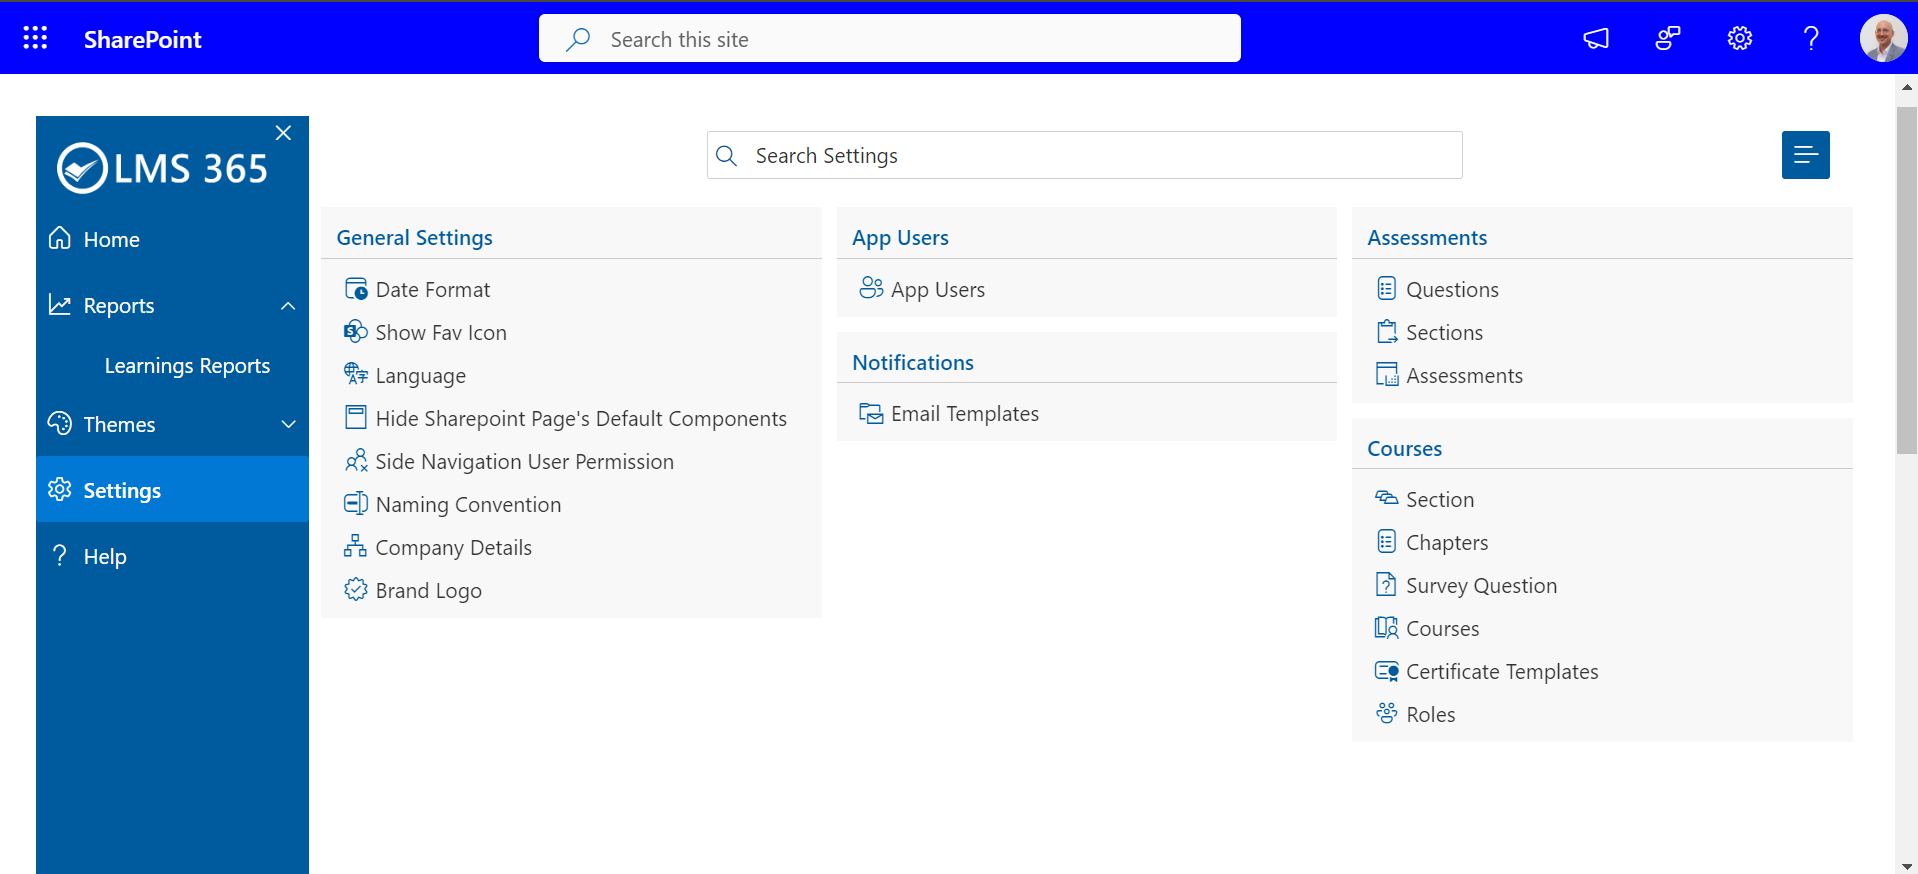
Section
This section allows you to Create your own section according to your preferences.
- Click on Configure to process Further.
- A new screen will be displayed.
- Click on + Section Button to create new Section.
- Complete all the fields in the 'Add Section' , ensuring that all necessary details are filled out accurately. Once done, click 'Save' to store the information.
- You can delete items by clicking on the delete icon in the action column or by using the delete option in the tab above.


Chapters
This section allows you to Create your own chapter according to your preferences.

- Click on Configure to process Further.
- A new screen will be displayed.
- Click on + Chapter Button to create new chapter.
- Complete all the fields in the 'Add Chapter' , ensuring that all necessary details are filled out accurately. Once done, click 'Save' to store the information.
- In this section, you have the option to perform a bulk import. You can also add attachments, including zip folders. Additionally, you can download a sample file and then upload your data by following the provided instructions.
- You can delete items by clicking on the delete icon in the action column or by using the delete option in the tab above.


Survey
This section allows you to Create your own survey according to your preferences.

- Click on Configure to process Further.
- A new screen will be displayed.
- Click on + Survey Button to create new survey.
- Complete all the fields in the 'Add Survey' , ensuring that all necessary details are filled out accurately. Once done, click 'Save' to store the information.
- In this section, you have the option to perform a bulk import. You can also add attachments, including zip folders. Additionally, you can download a sample file and then upload your data by following the provided instructions.
- You can delete items by clicking on the delete icon in the action column or by using the delete option in the tab above.


Courses
This section allows you to Create your own Courses according to your preferences.

- Click on Configure to process Further.
- A new screen will be displayed.
- Click on + Course Button to create new survey.
- After entering the course title, description, activity type, role, and adding a thumbnail and cover image, you can click "Next" to continue.
- Here, you will find tabs for Introduction, Content, Assessment, and Survey. After completing each section accordingly, click "Next" to proceed to the next step.
- In the Content tab, add your section block, save it, and then click "Next" to proceed to the next step.
- In the Assessment tab, add your assessments, save it, and then click "Next" to proceed to the next step.
- In the Survey tab, add your survey questions and then click "Next" to proceed to the next step.
- 1. Skills : This feature allows you to add additional competencies relevant to the course, enriching your learning profile and highlighting your specialized knowledge.
- 2. Tags : This feature enables you to categorize and explore content based on specific topics.
- 3. Enrollment Units : If selected, the admin can set a limit on the number of users who can enroll in this course; otherwise, enrollment will be unlimited.
- 4. Approval Required : If enabled, user enrollment requests will require approval. You can review and manage these requests to grant or deny access.
- 5. Course Complete by : It will display courses based on the selected date, while other options will not be applicable.
- 6. Course Author : Here, you can enter the name of the author of your course.
- 7. Course Certification : Upon successfully completing this course, you will earn a certificate. Use it to demonstrate your skills and knowledge to potential employers and professional networks.
- 8. Course Rating : It will display you the toggle. You can toggle 'Off' if you donot want to give rating to the course.
- 9. Rating upon completion : If enabled, users will be able to submit their ratings after completing the course.
- 10. Updateable Rating and Feedback : If enabled, users can update their provided ratings and feedback.
- Complete all the fields in the 'Add Course' , ensuring that all necessary details are filled out accurately. Once done, click 'Create' to create the course.
- You can delete items by clicking on the delete option in the tab .


Certificate Template
This section allows you to Create your Certificate Template according to your preferences.

- Click on Configure to process Further.
- A new screen will be displayed. Here, you will find Certificate templates and you can select according to your preference.
-


Course Workflow
This section allows you to check your Course Workflow.

- Click on Configure to process Further.
- A new screen will be displayed.
- Click on + Add Button to create new workflow.
- You can delete items by clicking on the delete icon in the 'Action' column .


Roles
This section allows you to Create your own role .

- Click on Configure to process Further.
- A new screen will be displayed.
- Click on + Role Button to create new Role.
- Enter your role and then click the "Save" button to finalize your entry.
- You can delete items by clicking on the delete icon in the action column or by using the delete option in the tab above.


