To set up custom-level permissions, follow these steps:
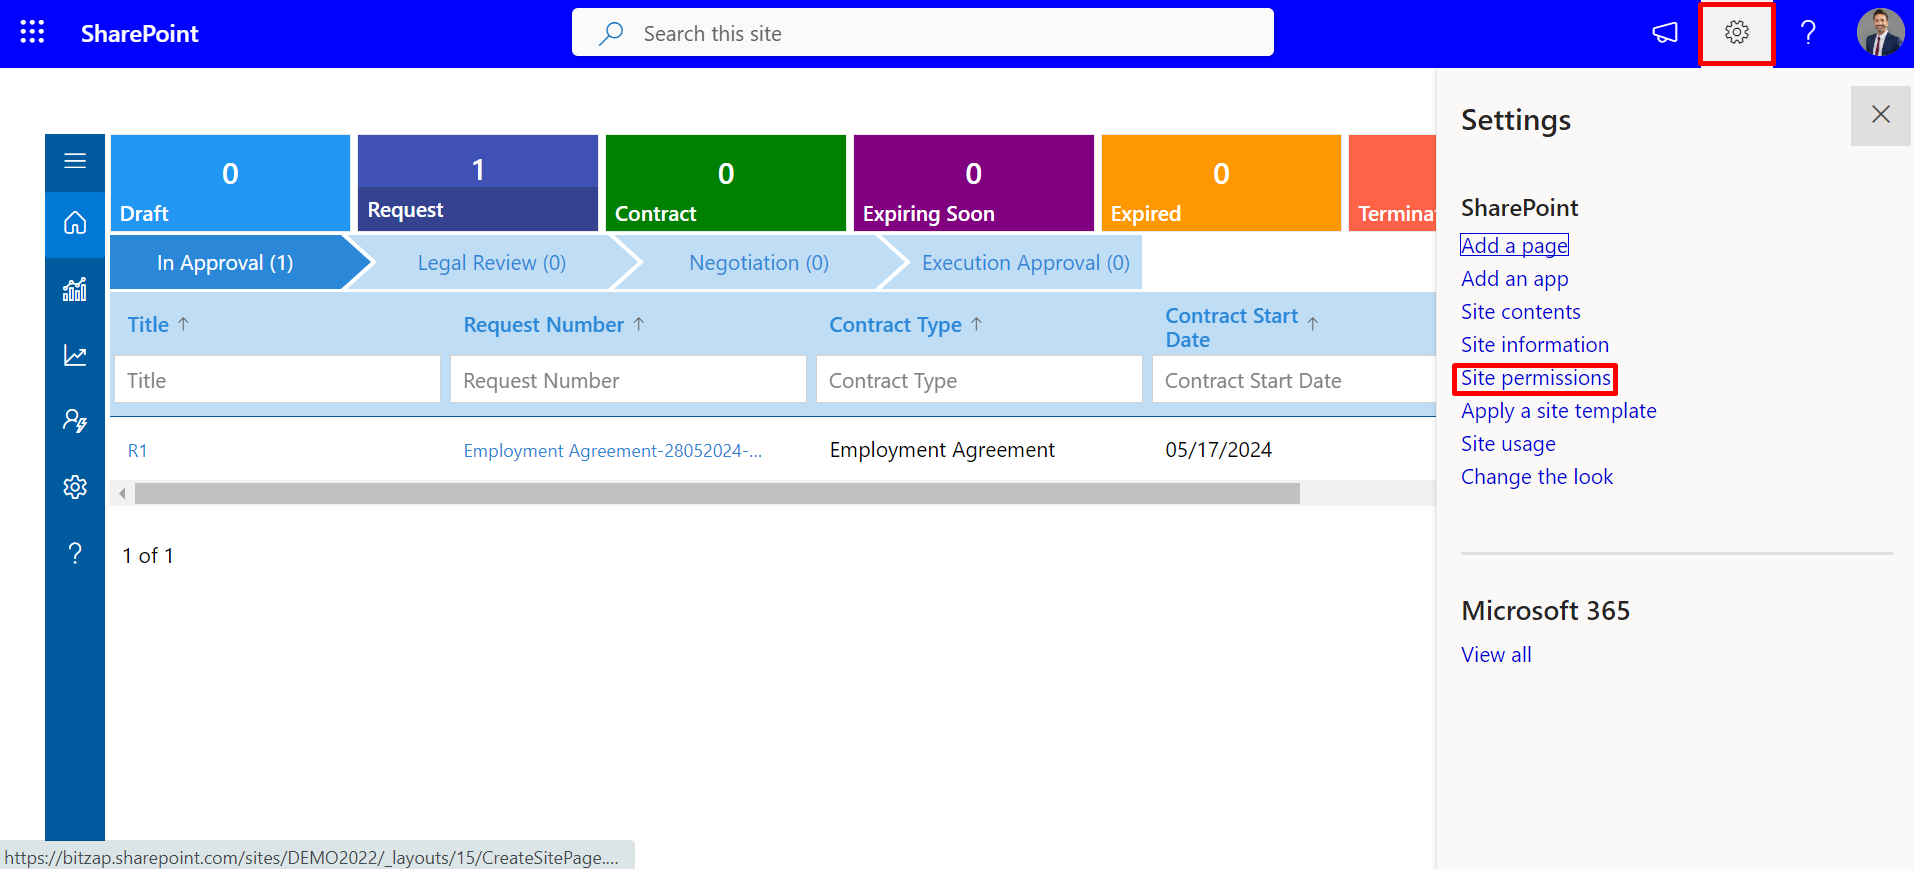
Open the site where the application is deployed and click on the settings icon
located in the top right corner.
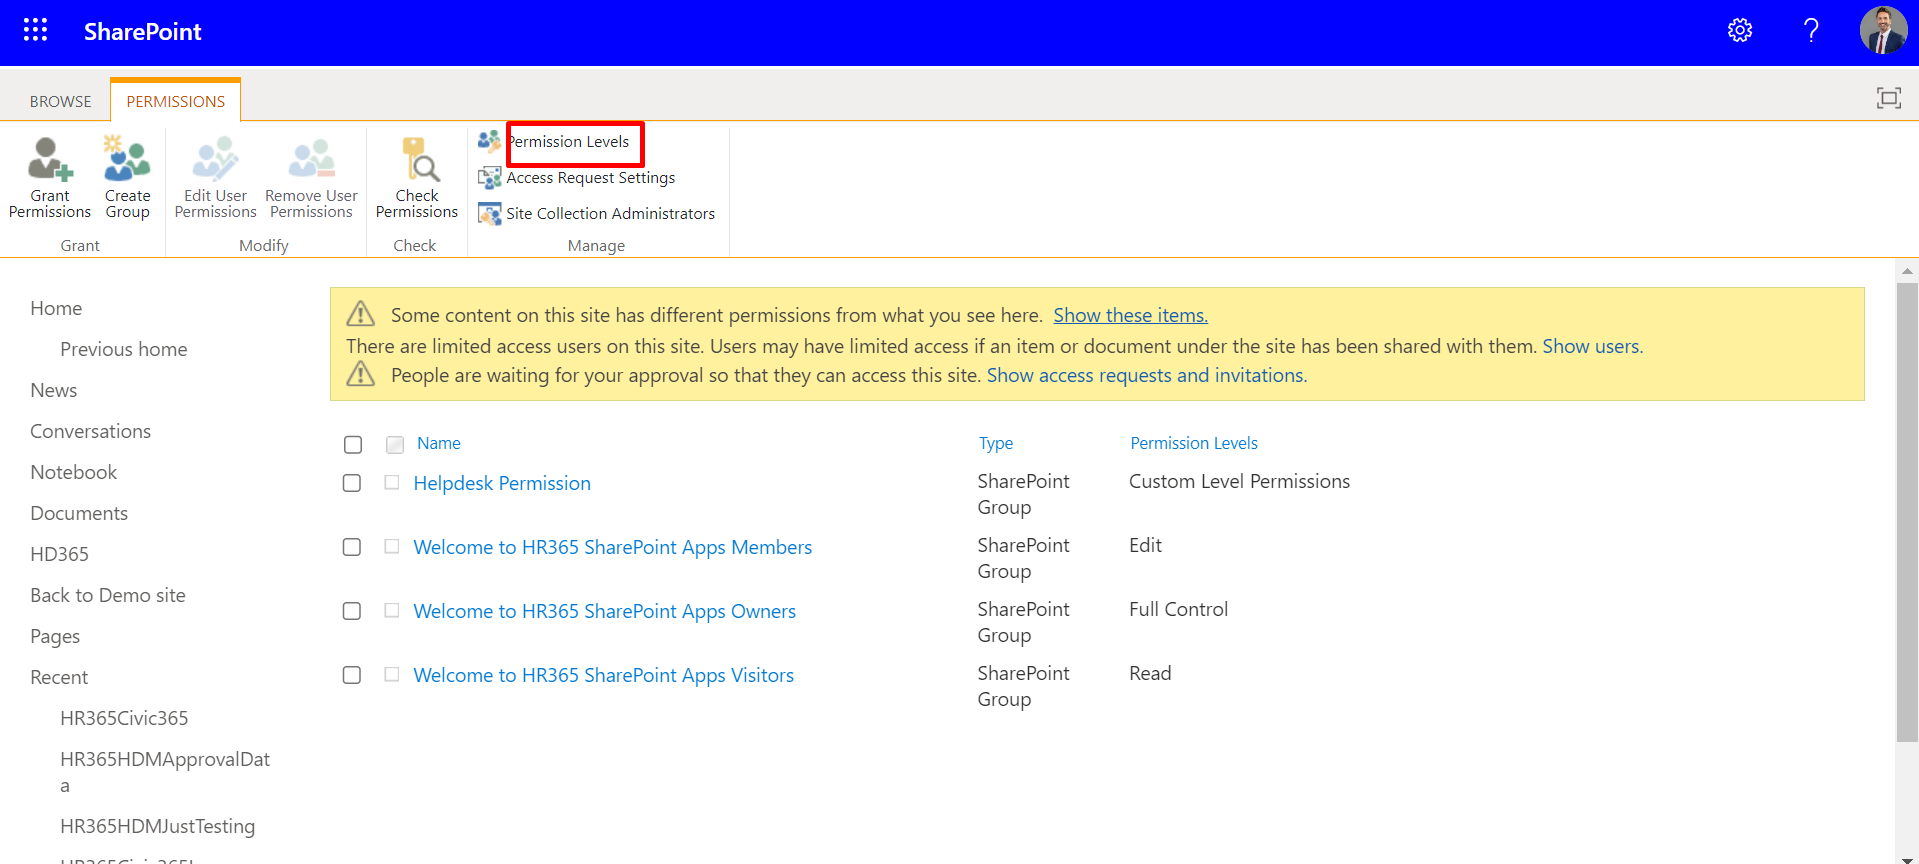
Select "Site permissions" and then click on "Advanced permissions settings."
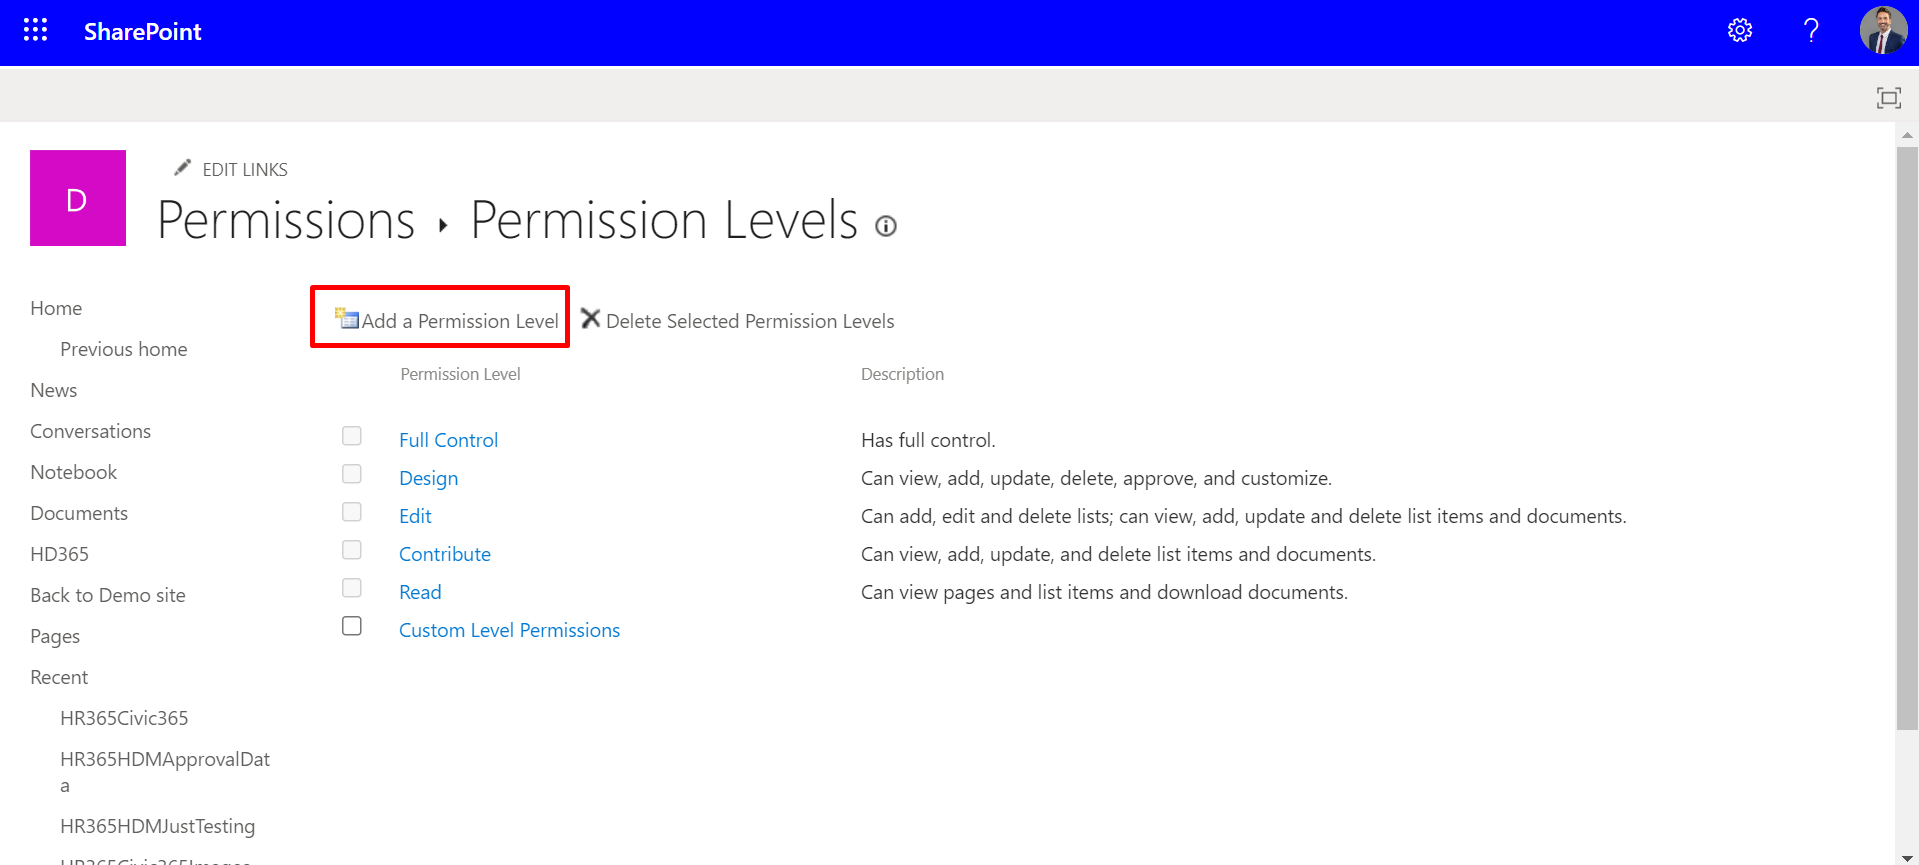
Choose "Permissions Levels" and click on "Add a permission level."
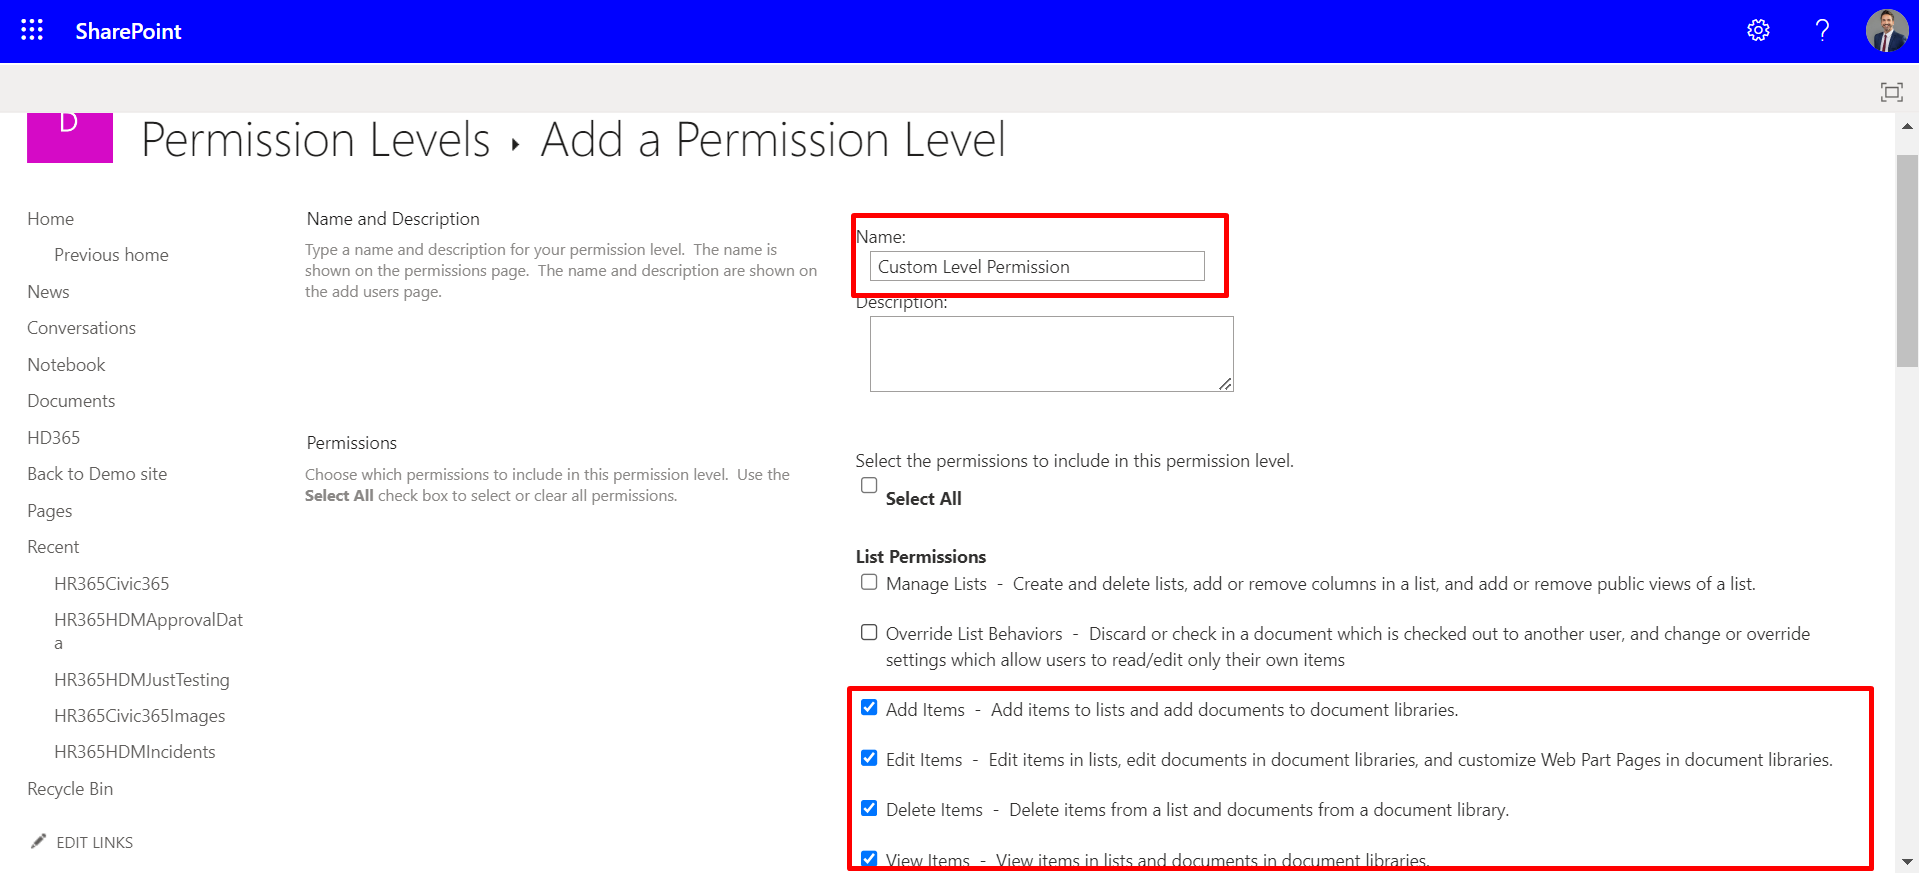
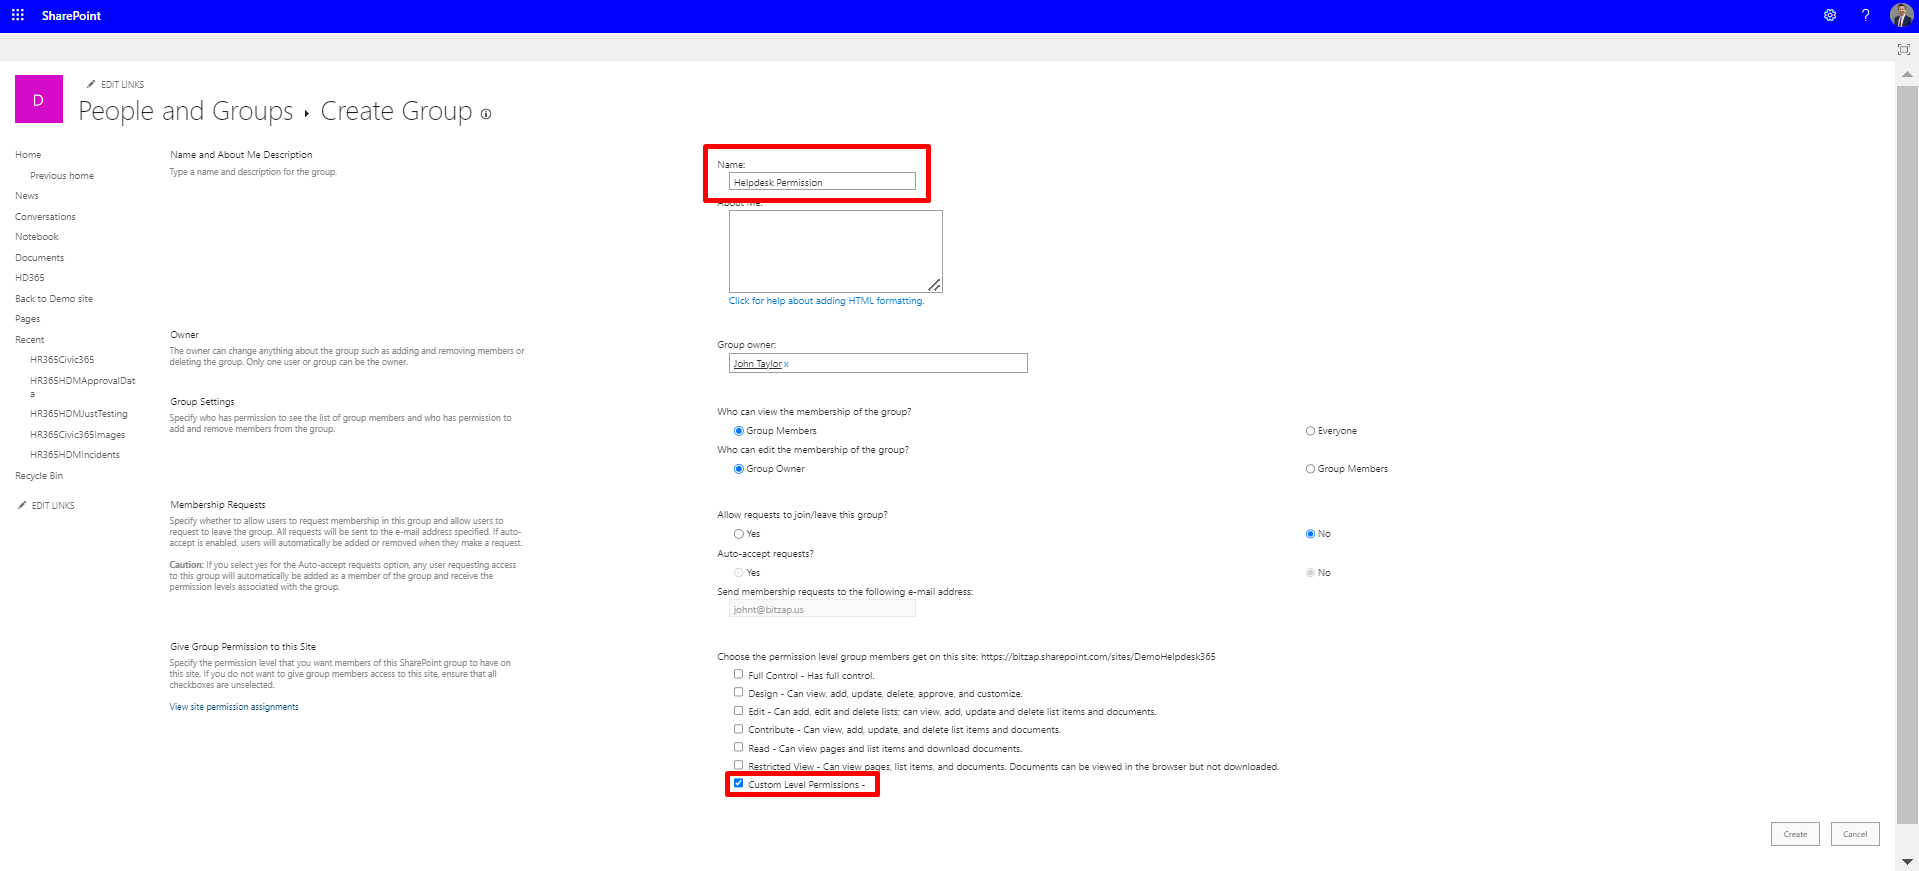
Click on “Add a Permission Level” and provide a name for the custom permissions.
Select "Add items," "Edit items," "Delete items," and "View items." Then, scroll
down and click on "Create."
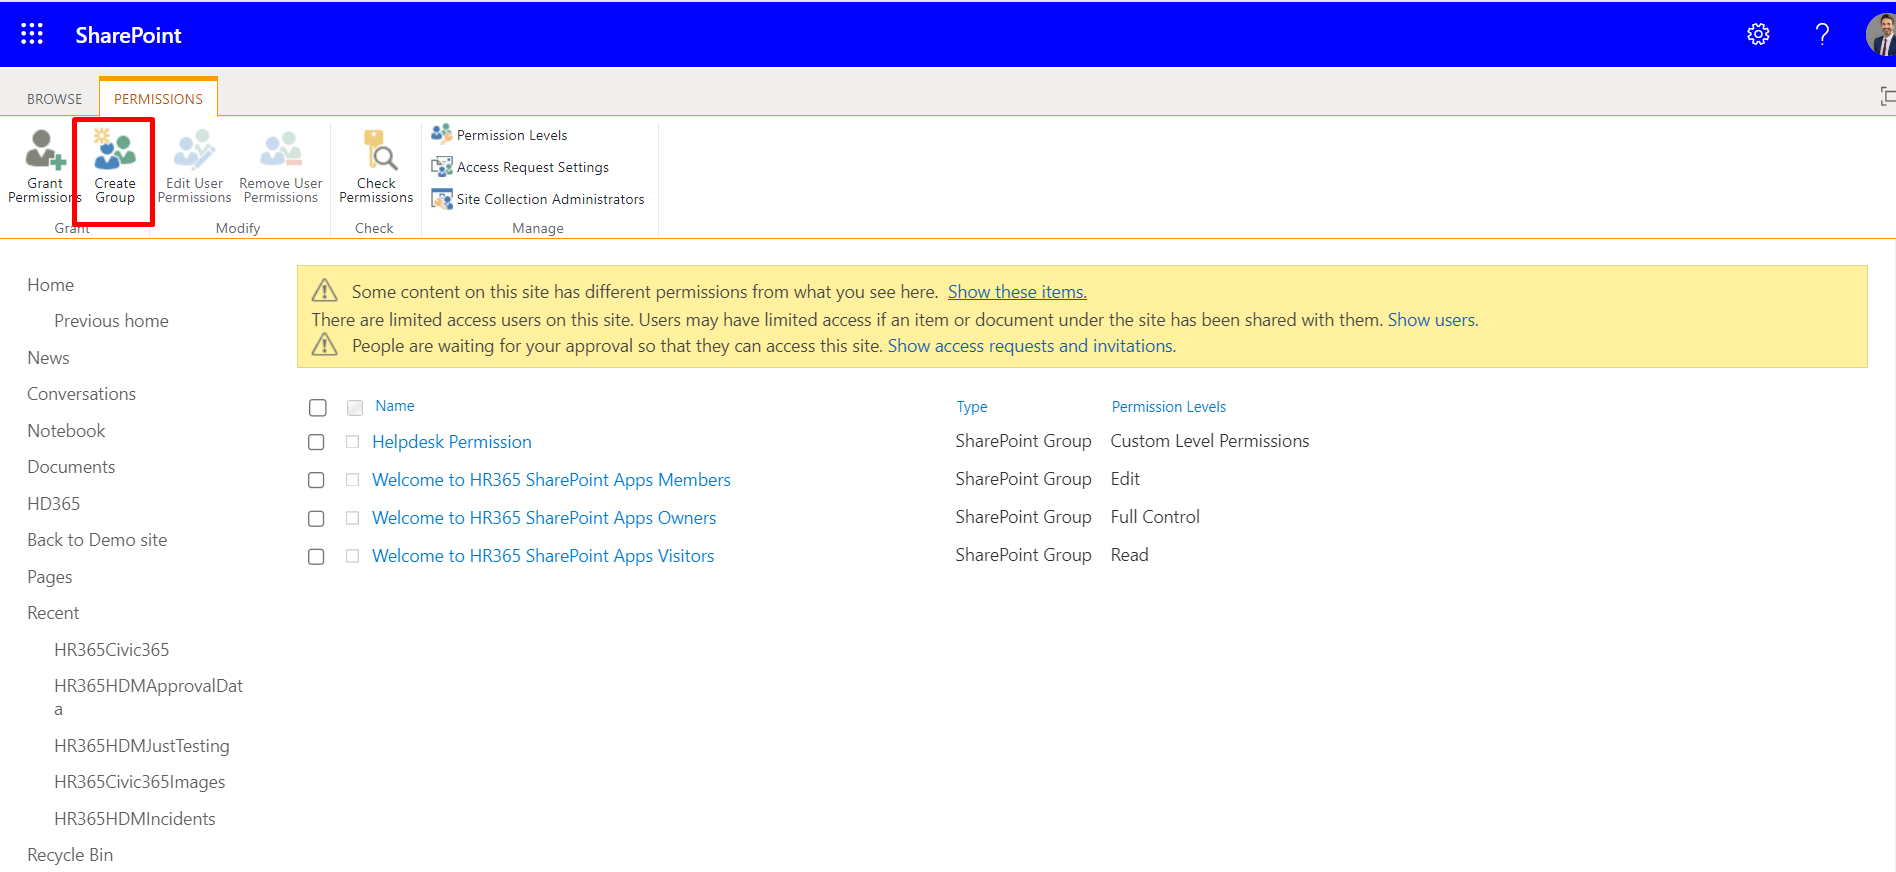
Return to the previous page and create a group.
Enter the group's name and select the custom permission created in step 3. Click "create."
Once the group is created, add users to this group.
Click on "New," and enter the names of the users who will access the application. You can also select "Everyone except external users" to grant access to all users automatically, reducing manual additions and you can also add any SharePoint groups directly if needed.
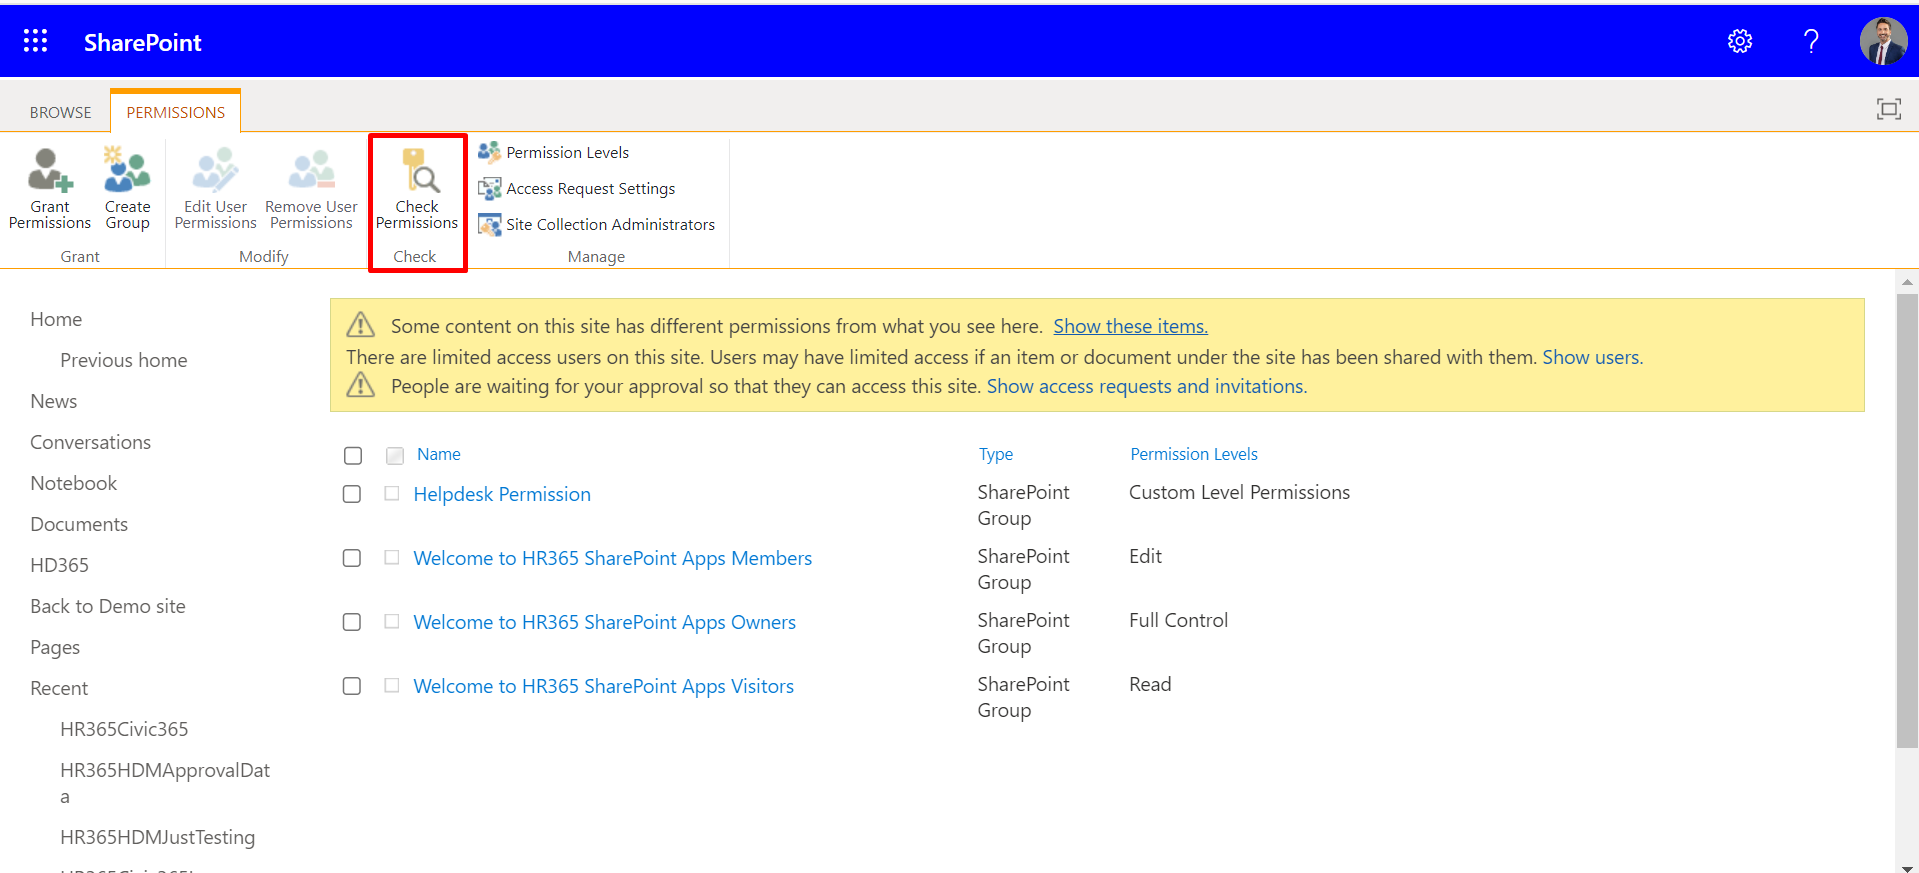
Use the "Check permissions" feature to verify the granted permissions, ensuring only the custom permission created in step 4 is assigned.
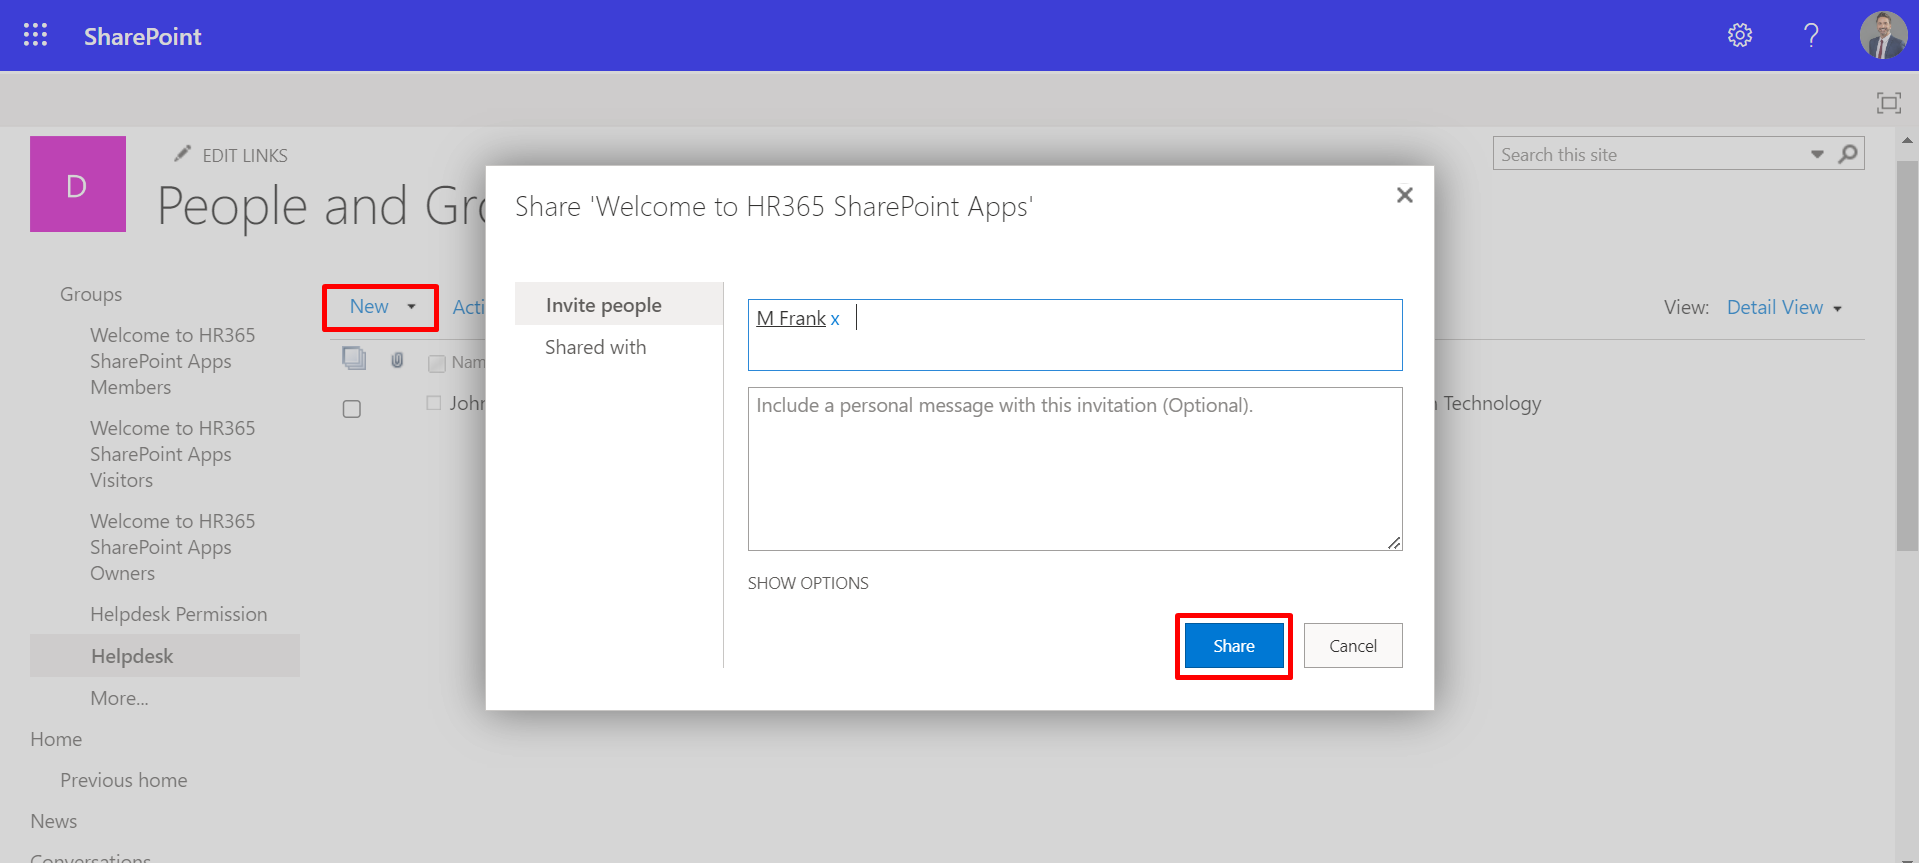
Navigate to the pages, click on the "Share" button, and enter the name of the group created in step 5. Ensure that only view access is granted to the group.
These steps will help you grant custom-level permissions efficiently.