Custom Columns
-
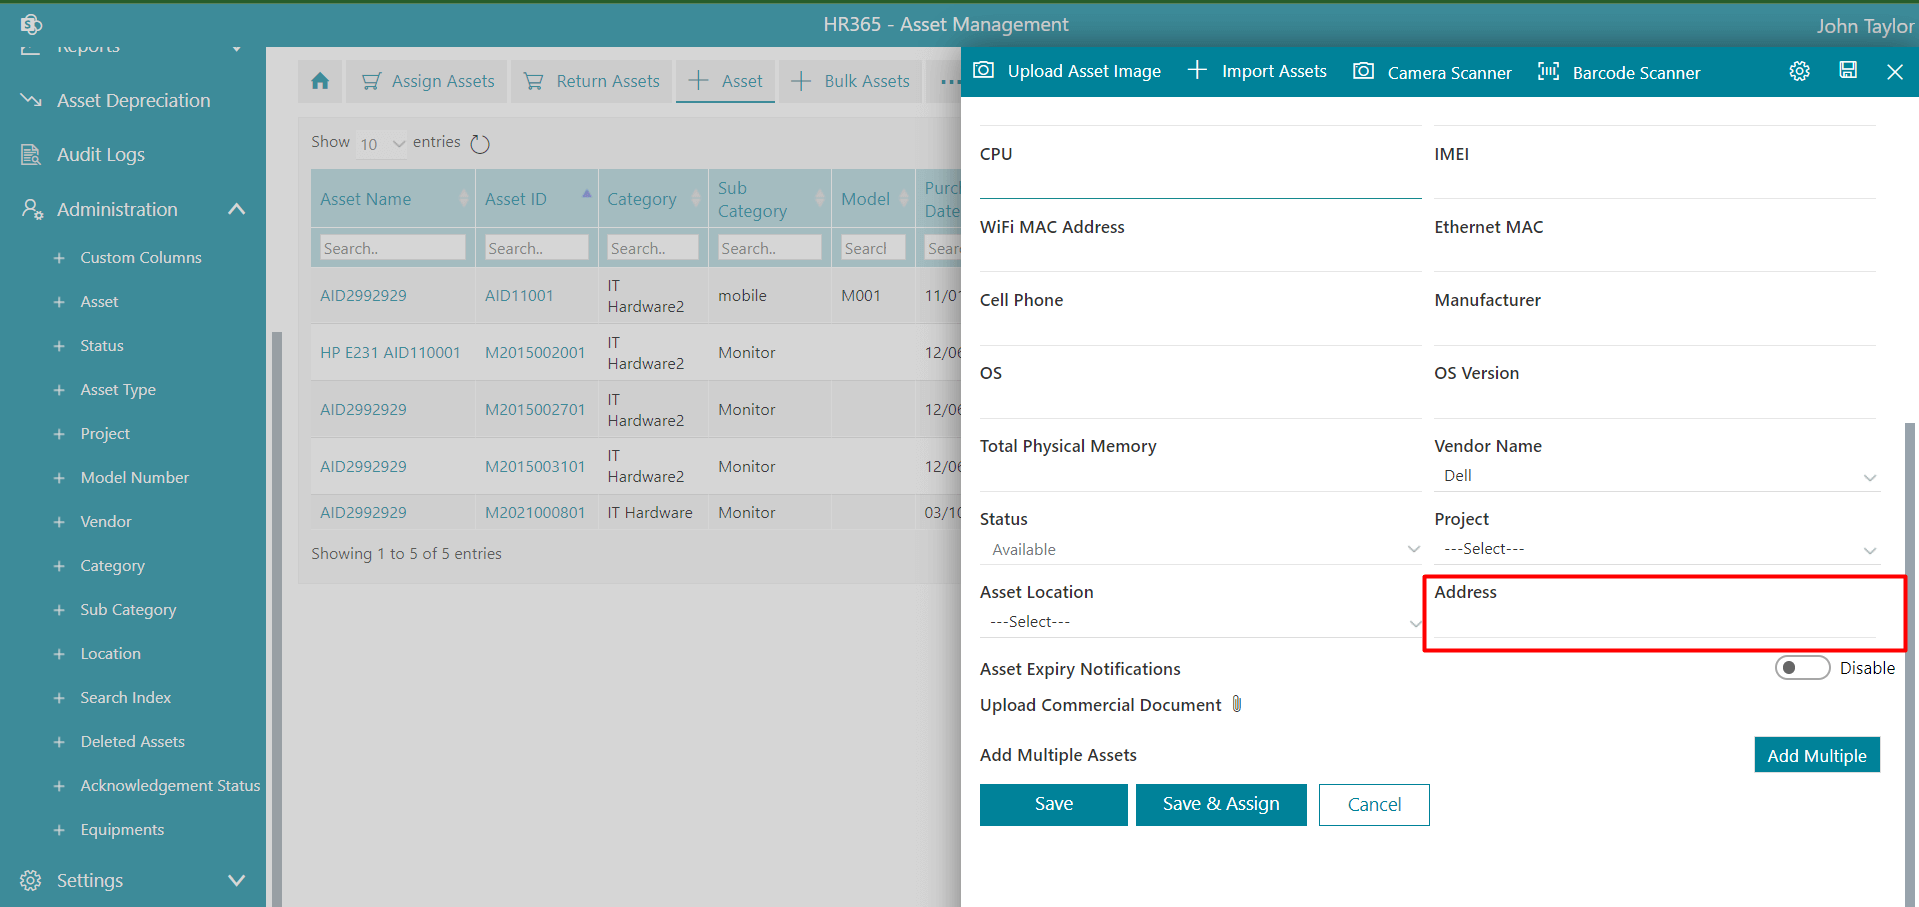
Here you can define custom field for Assets and Users.
-
For Assets – Type the name in the assets property name field and select property column type and select column category as an asset.
No need to select the SPO user properties field.
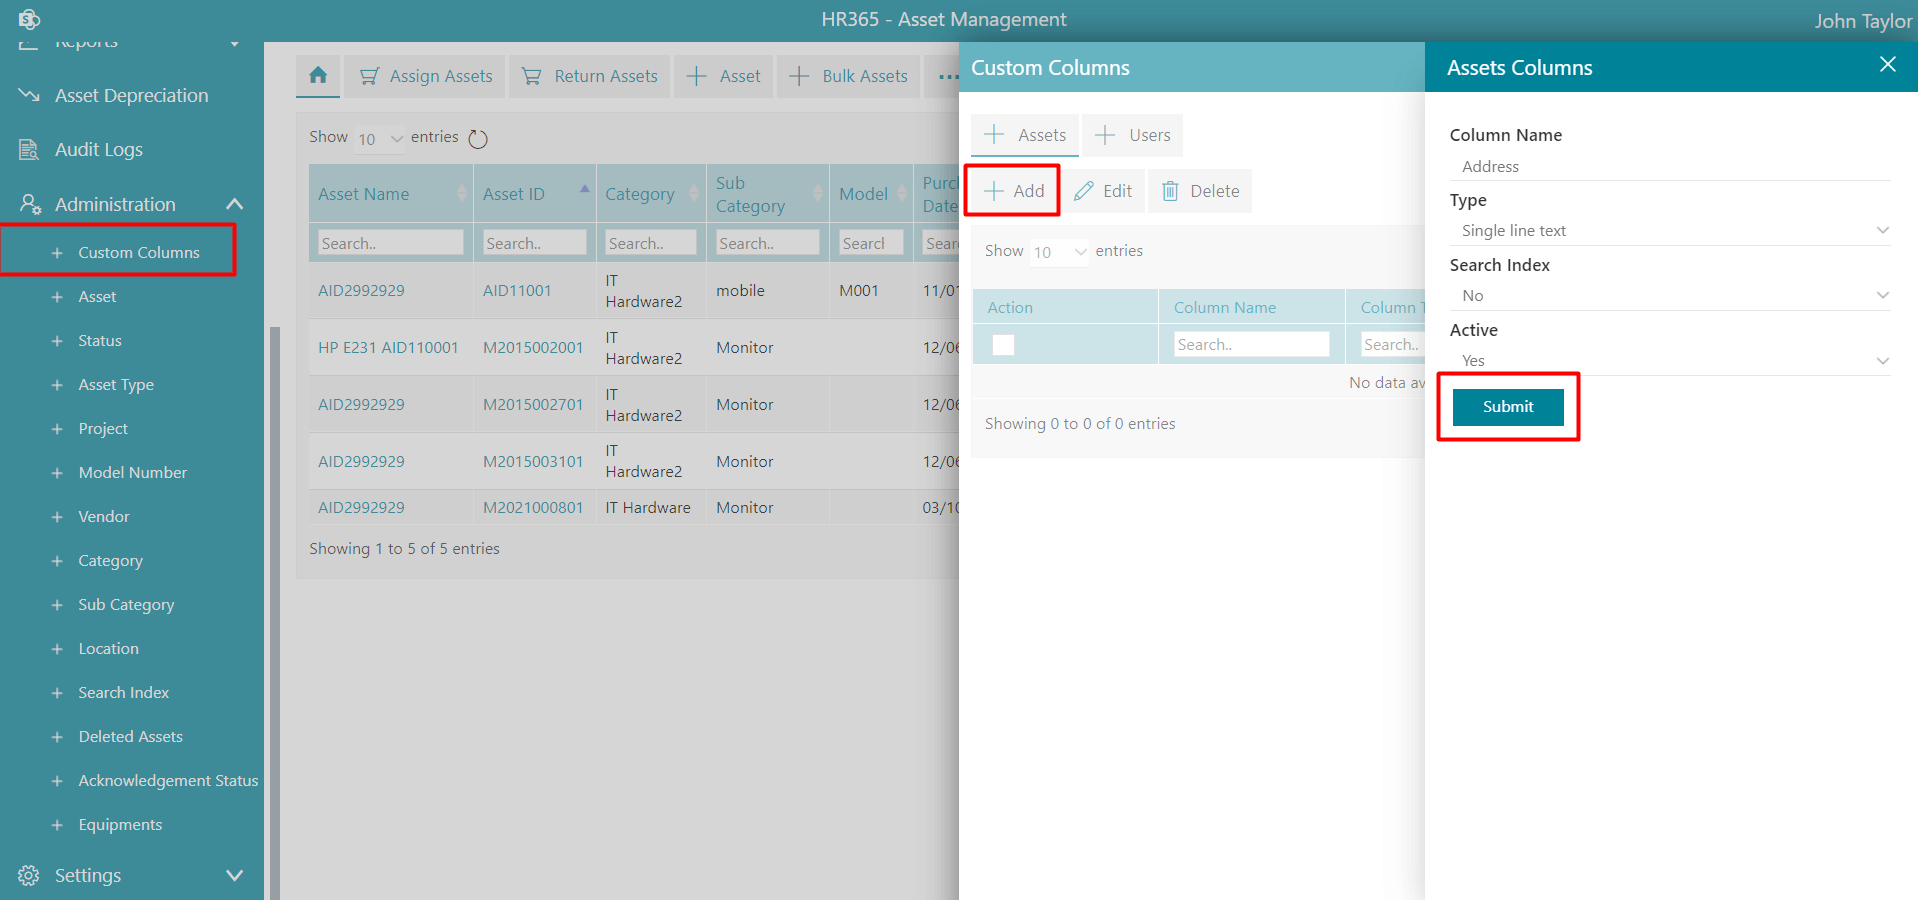
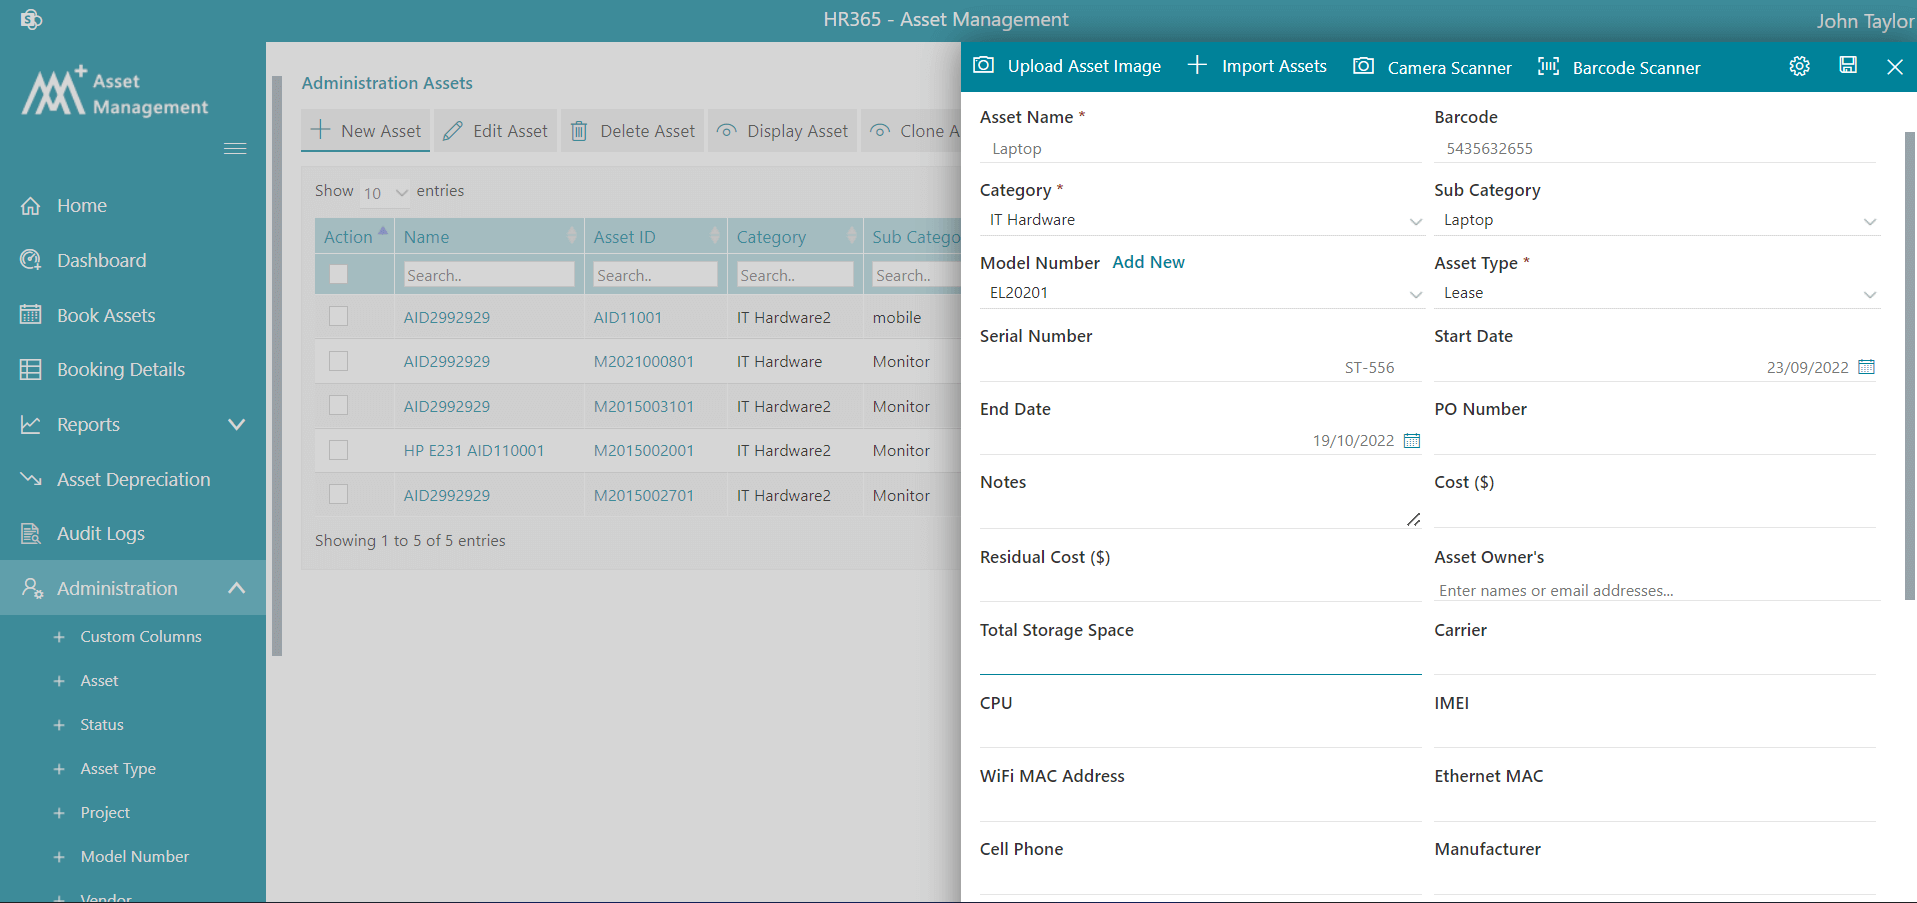
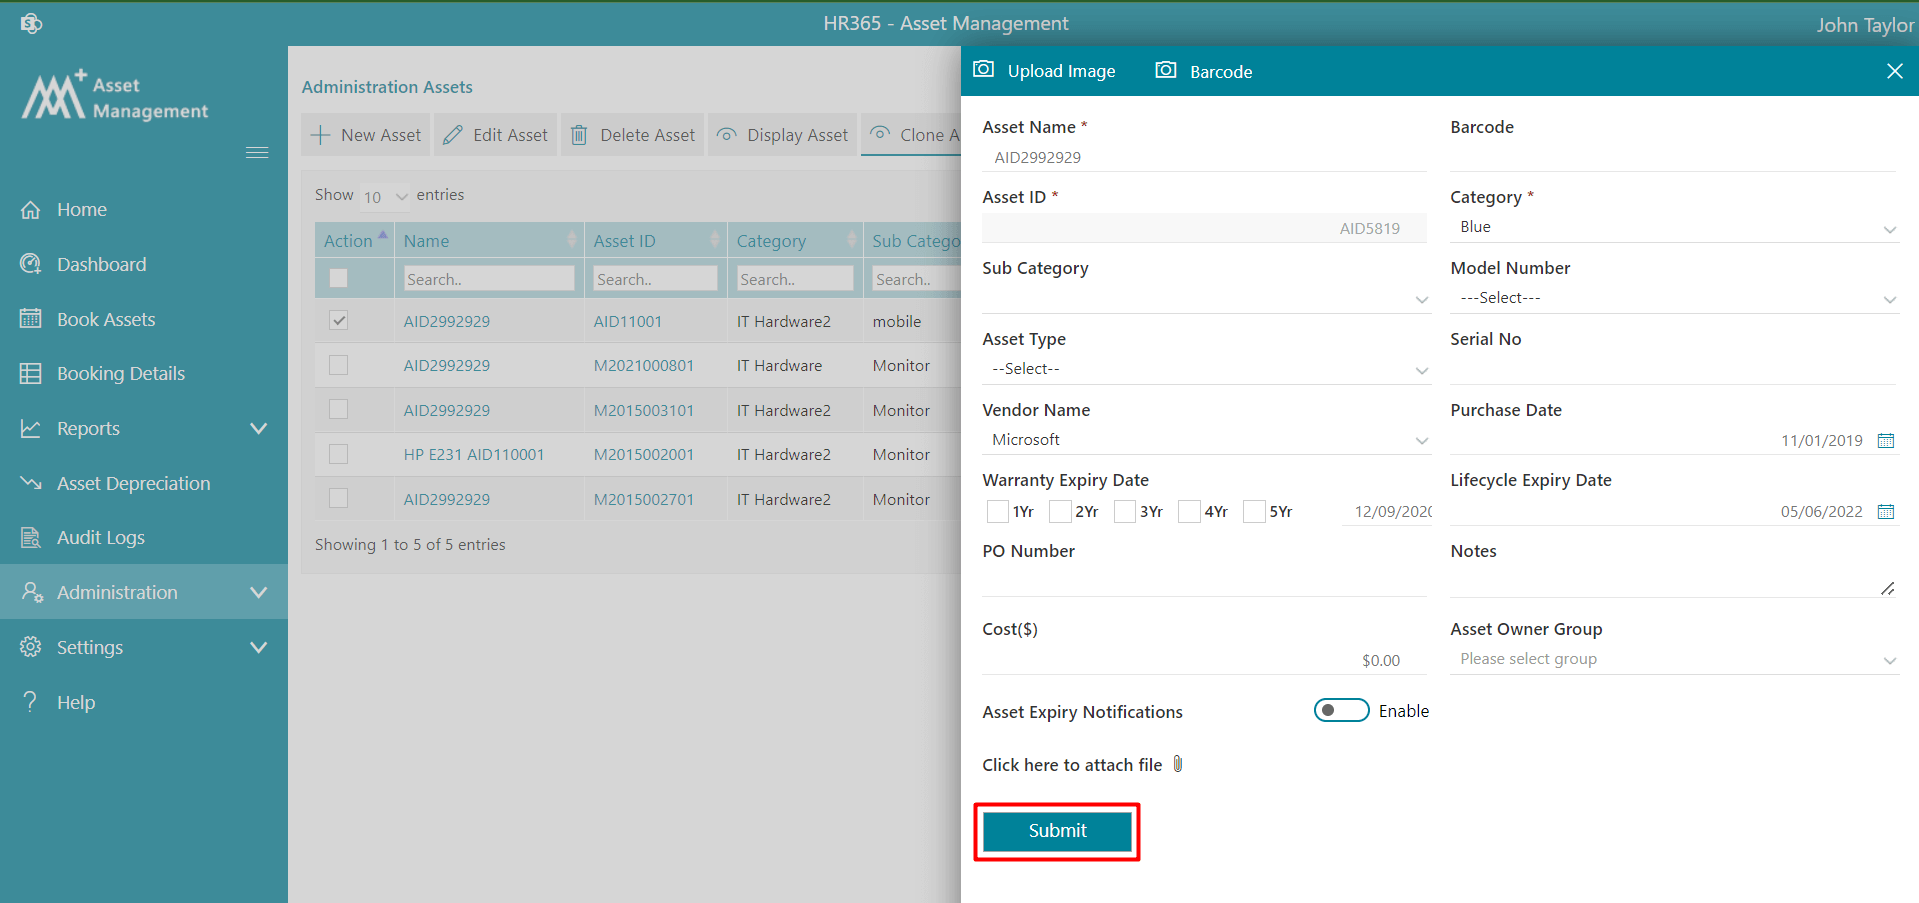
This custom field you can see while adding asset as shown below.
To add created one custom field column for assets in the table, go to Column settings, select the check box of the created custom field and click on submit. - You can control display of custom field in column setting page and in user table. If status of the custom field is disabled for column category type asset such custom field is not visible Column Setting (Column order) page.
- If status of the custom field is disabled for column category type user such custom field is not visible Add user popup page and in user table.
- Delete - Select the check box of custom field and click on Delete button.
- Edit - You can edit only custom field name, just select check box of custom field and click on Edit button, edit popup page will display change name in asset property name field in order to change custom field name and click on Submit button.
Display control on custom field.
By default, display status of custom field is enabled.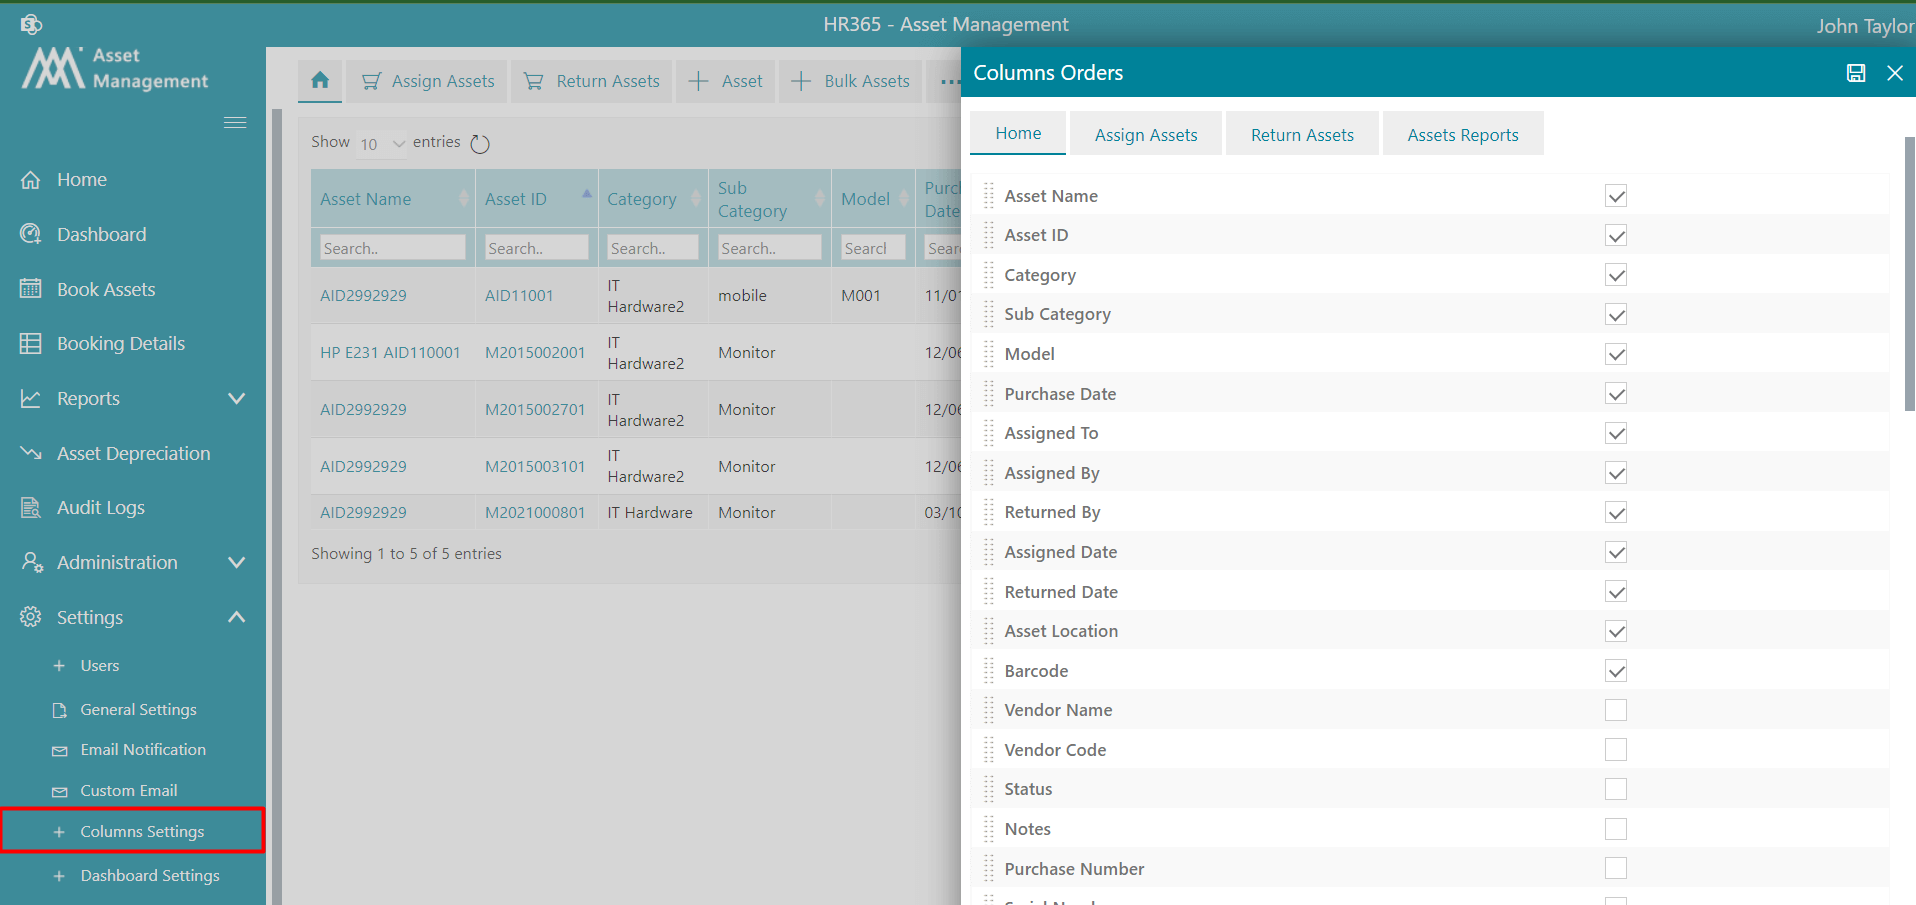
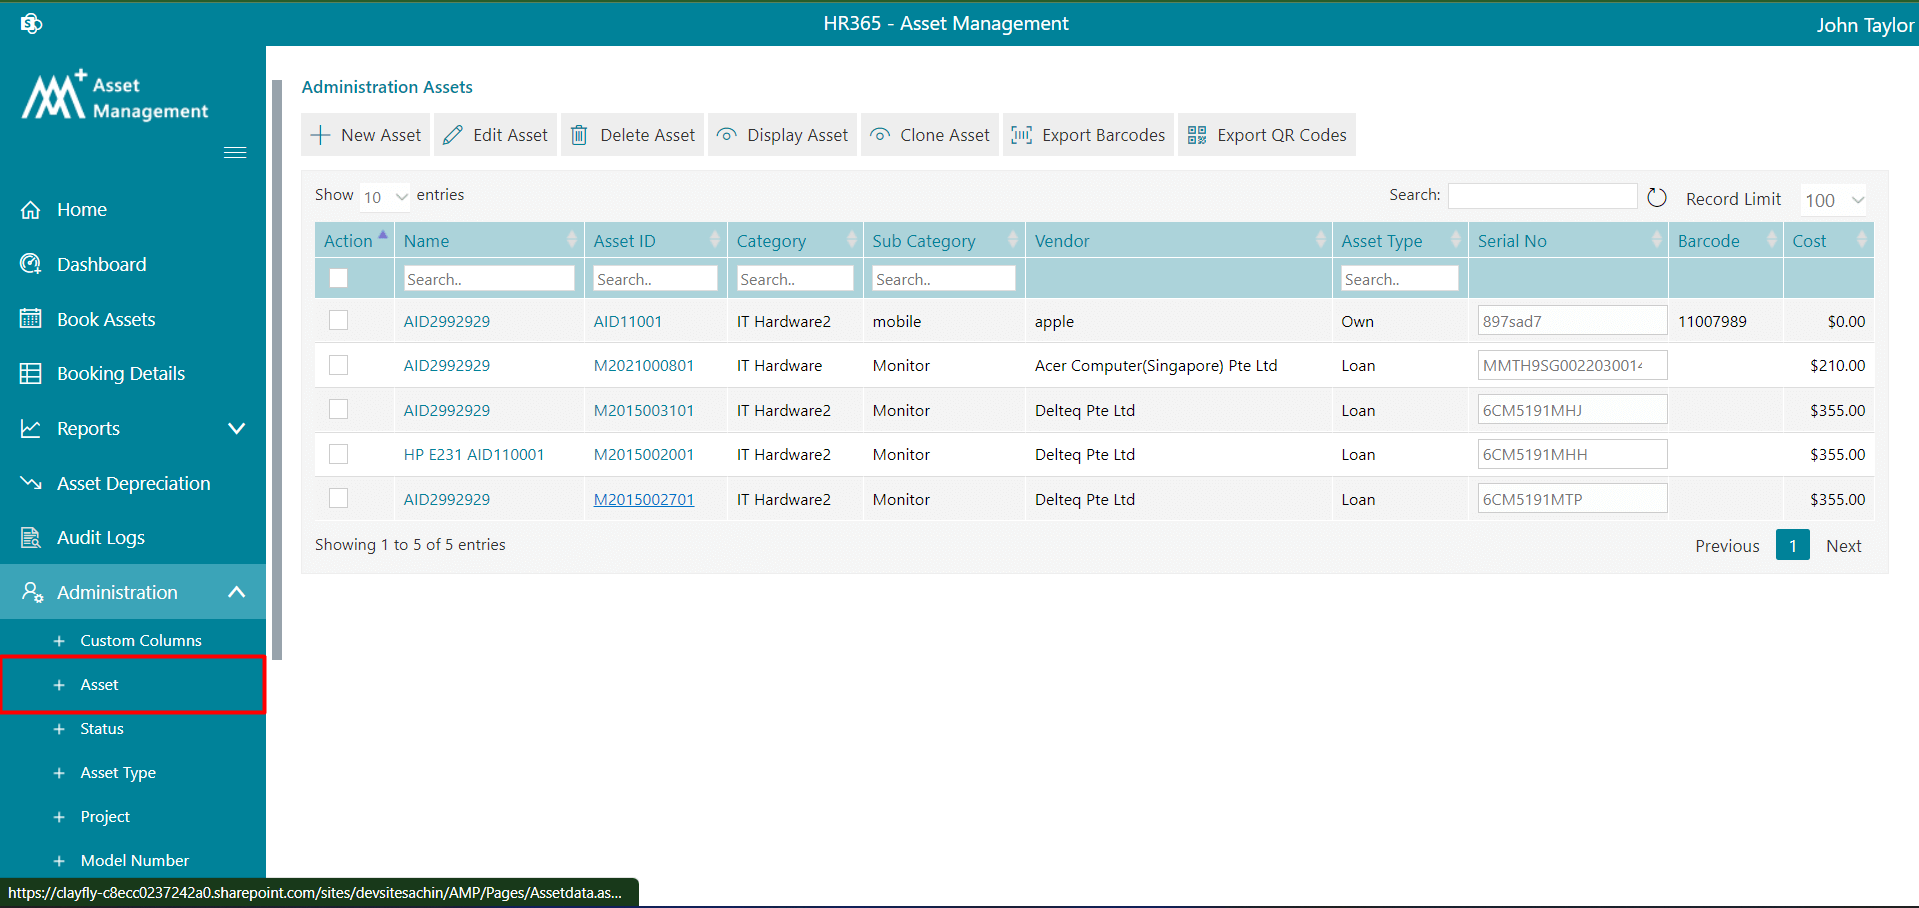
Add Asset
- New Assets - From here admin can add the new assets. To add the assets follow add asset
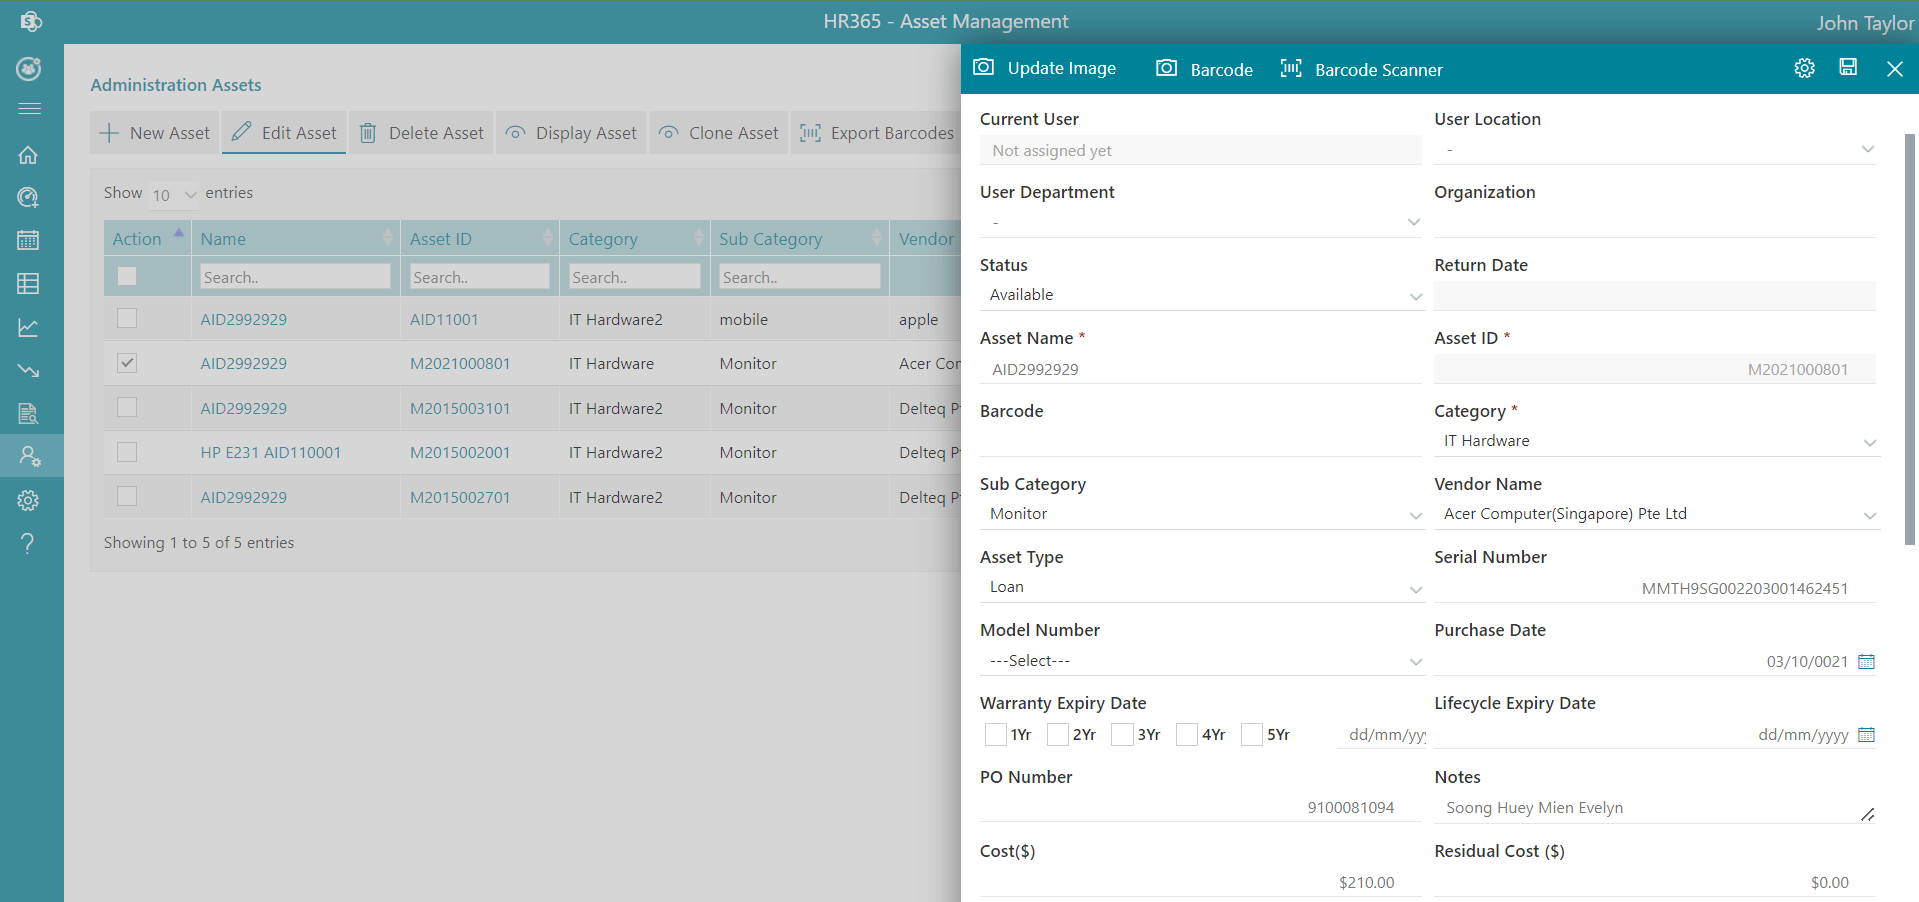
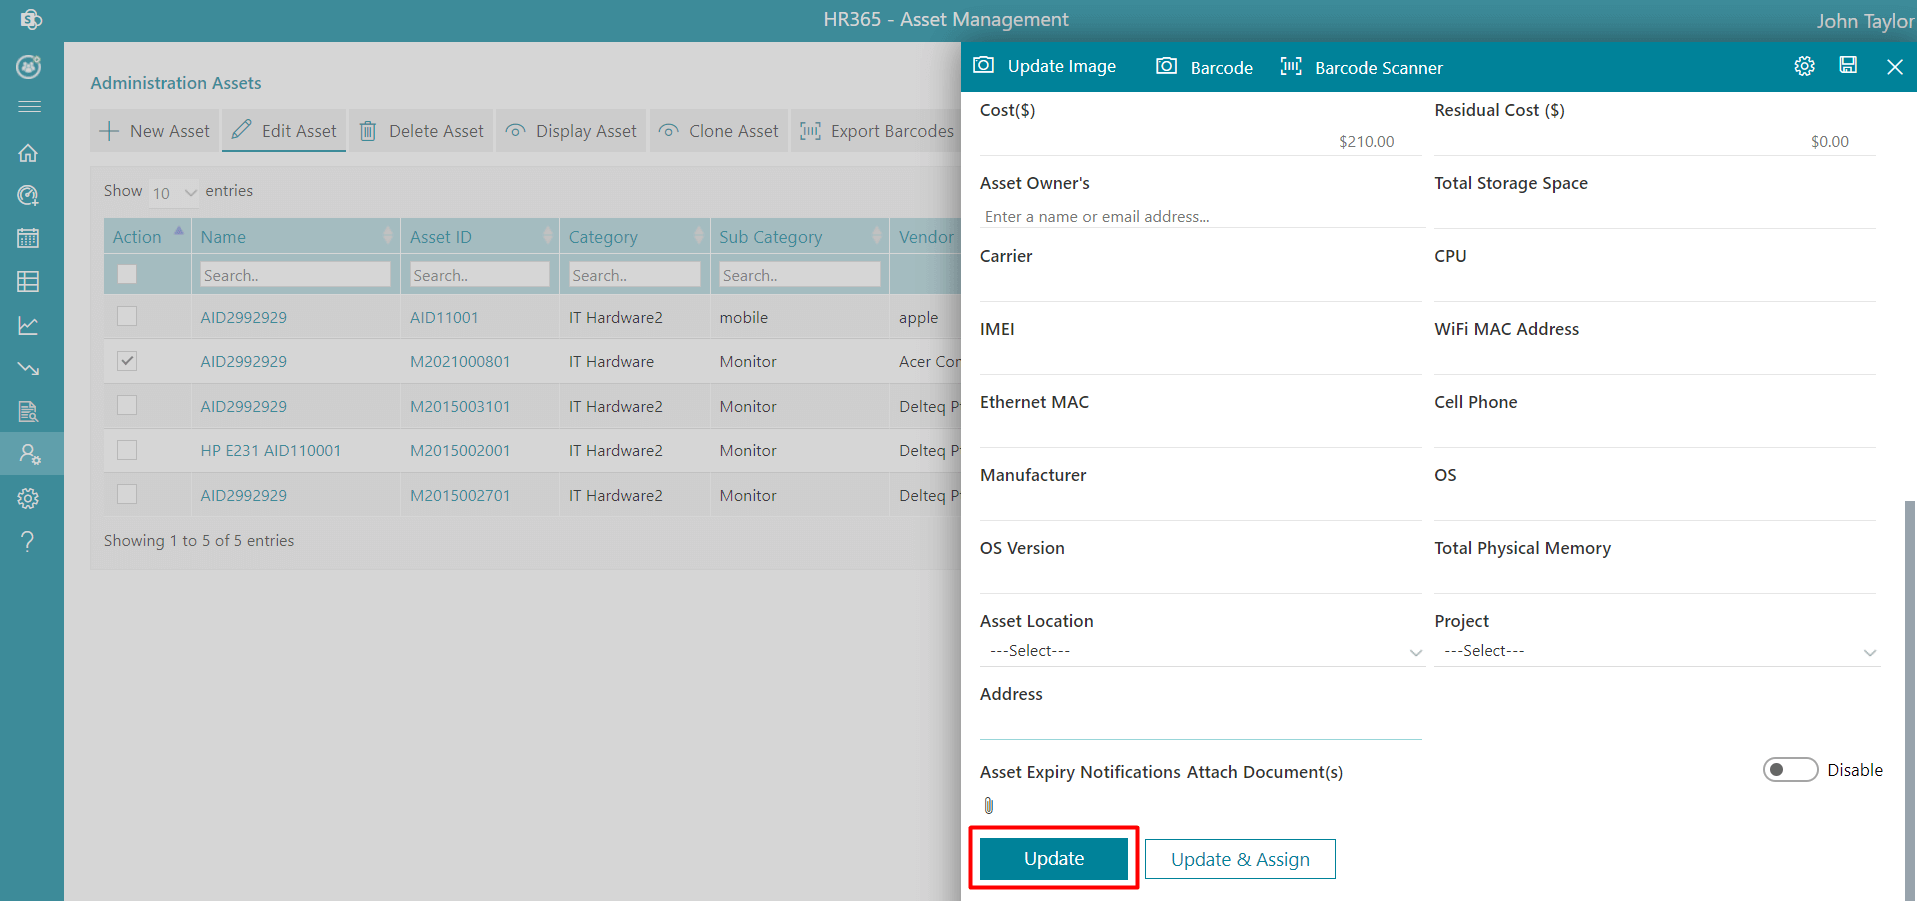
- Edit Assets- If you click the Edit Asset tab, a pop-up edit page will appear. Click the Edit icon to enter edit mode, edit the asset, and then click the Update button. Alternatively, if you click the asset's hyperlink under the Home or Assign Assets table, a pop-up edit page will appear. Click the Edit icon to enter edit mode, edit the asset, and then click the Update button.
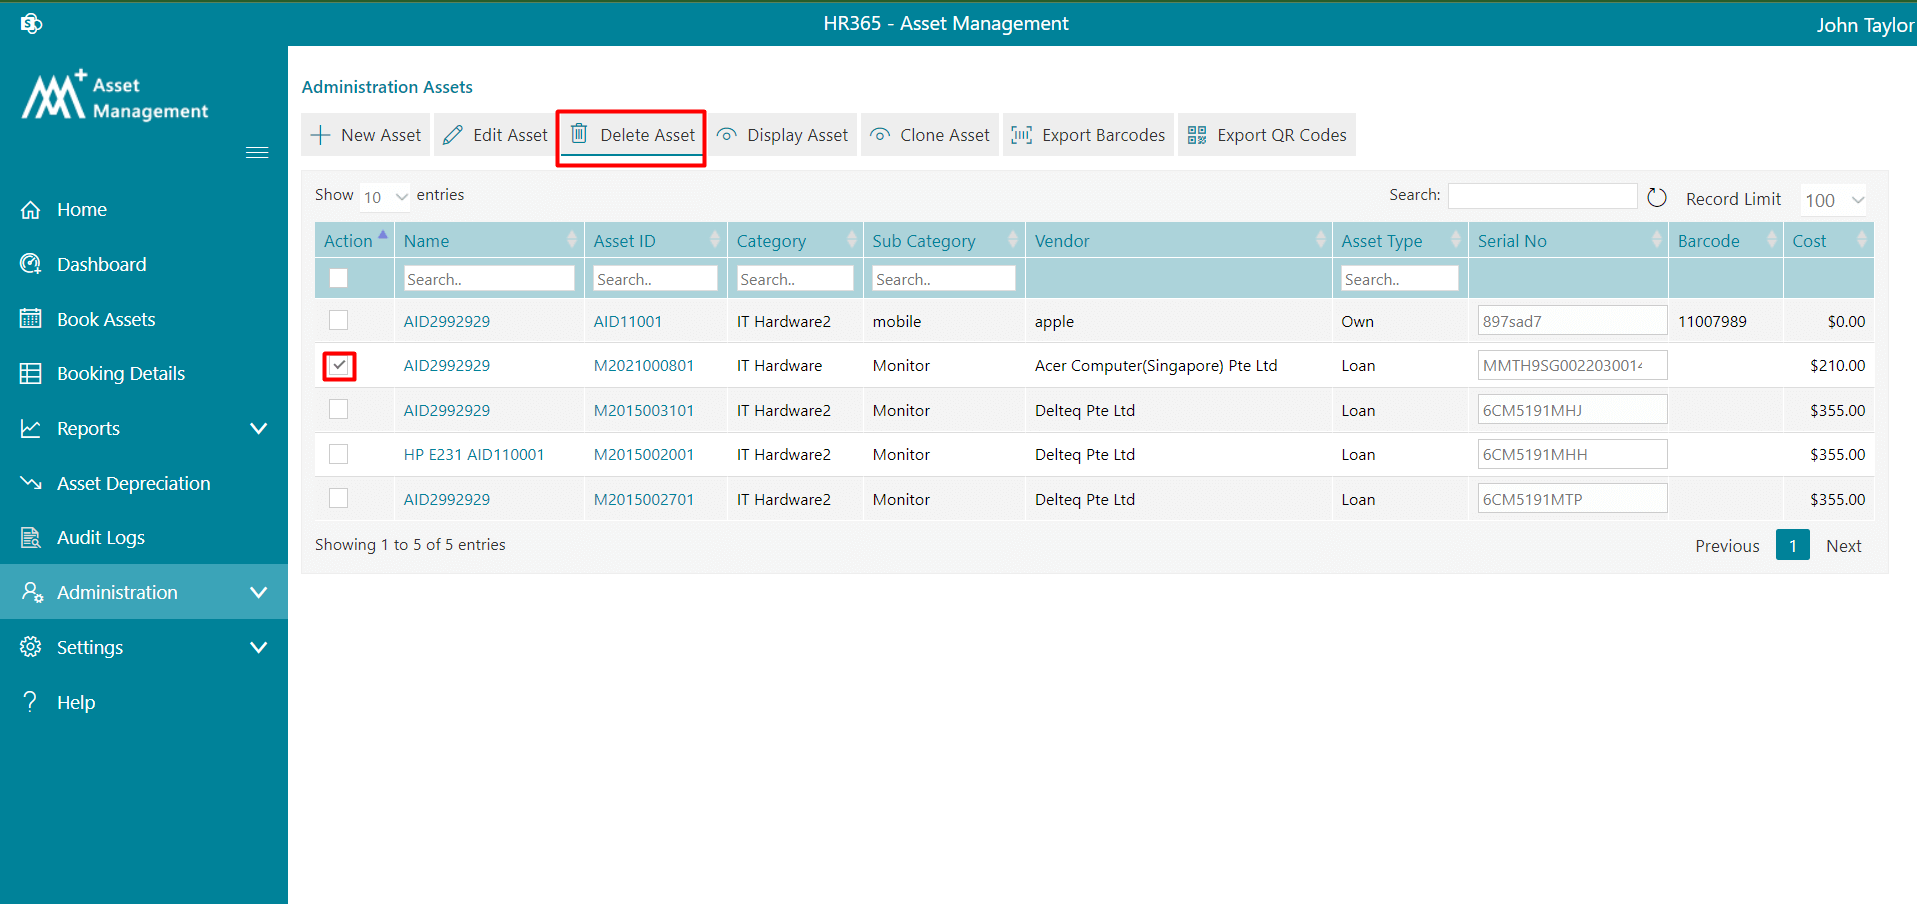
- Delete Assets - From here you can delete the assets. Select the asset and click on Delete Asset tab. You can delete 25 assets at a time.
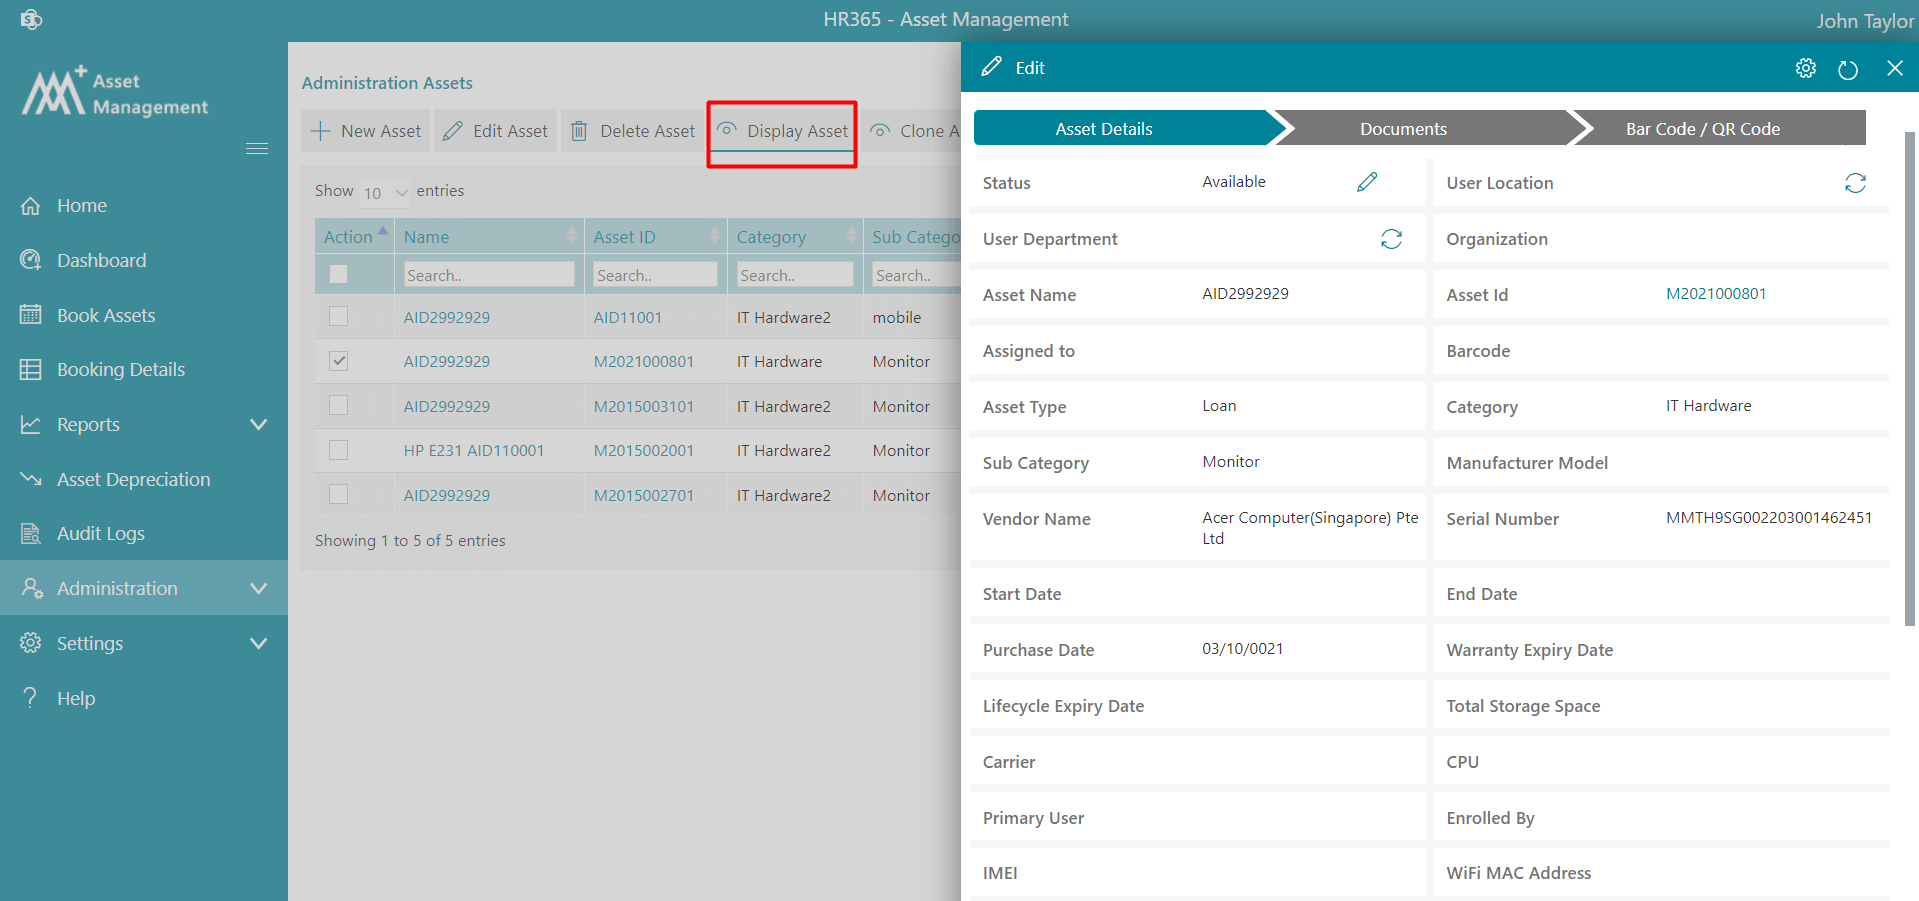
- Display Assets - From here you can view, edit the details of assets, add documents and print QR code.
- Clone Asset - If you want to create new asset with minor change with the existing one or same copy of existing one you can go for clone asset. select the asset and click on Clone Asset tab, either
edit data or remain same as per your requirement and finally click on Submit button.

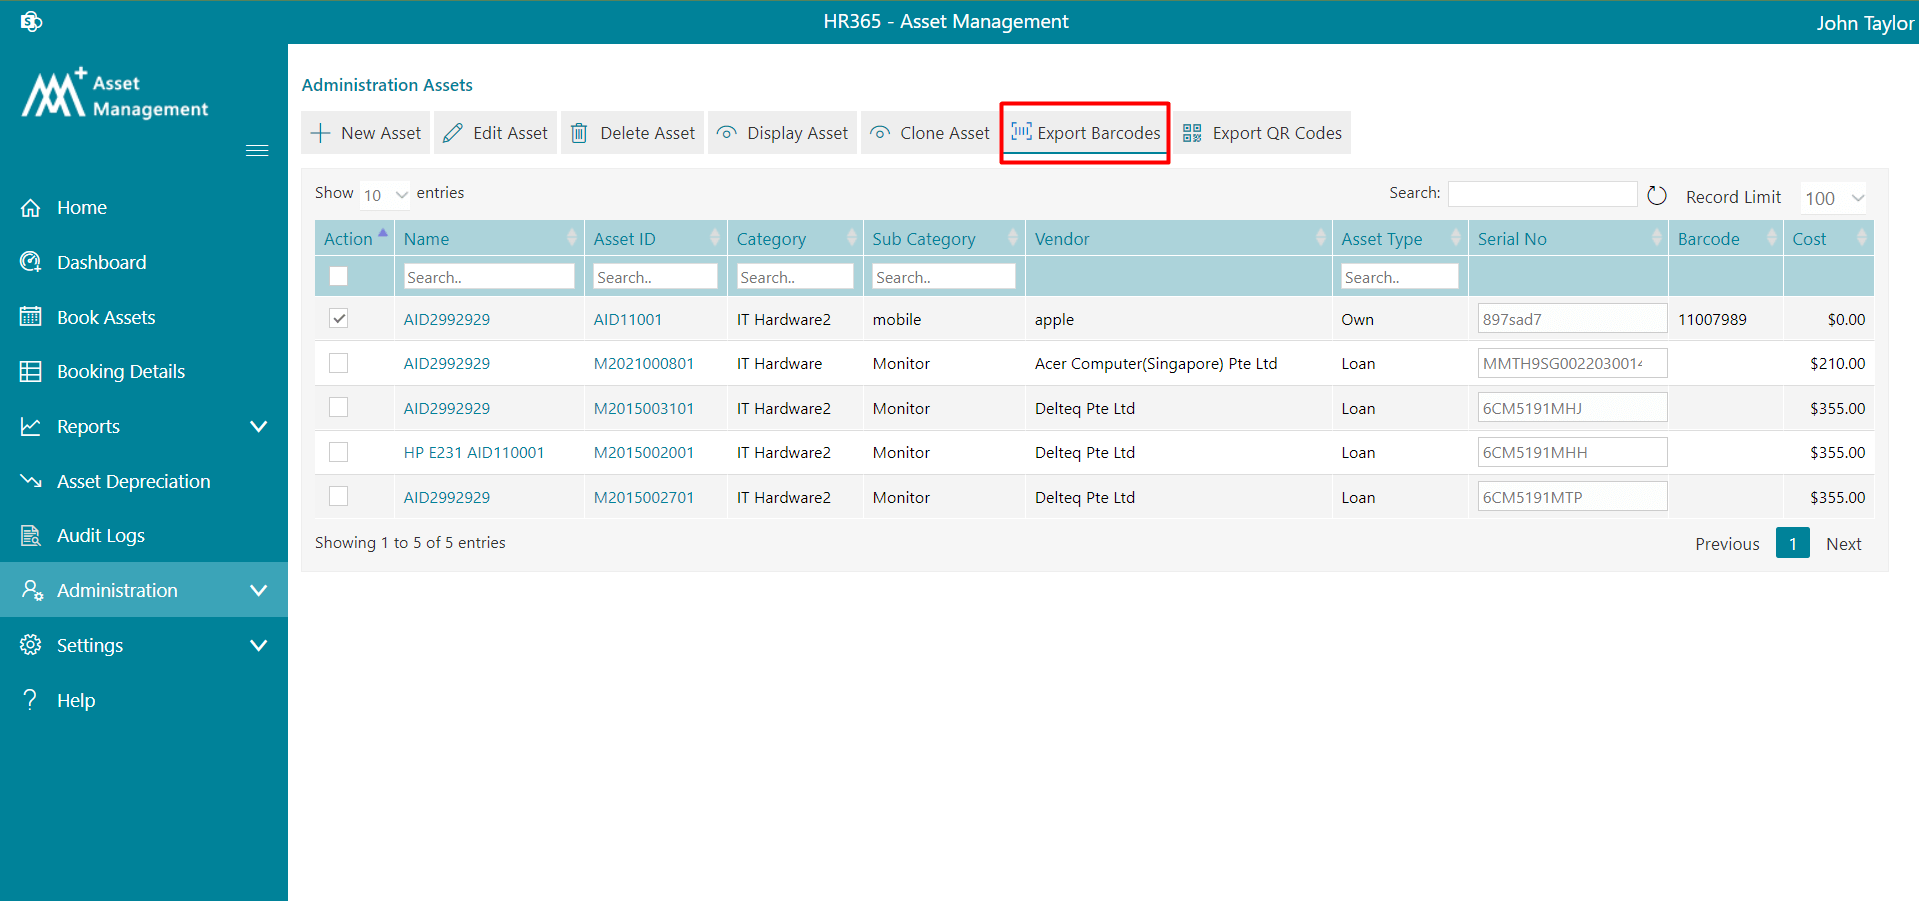
- Export Barcodes - From here you can export Barcodes.
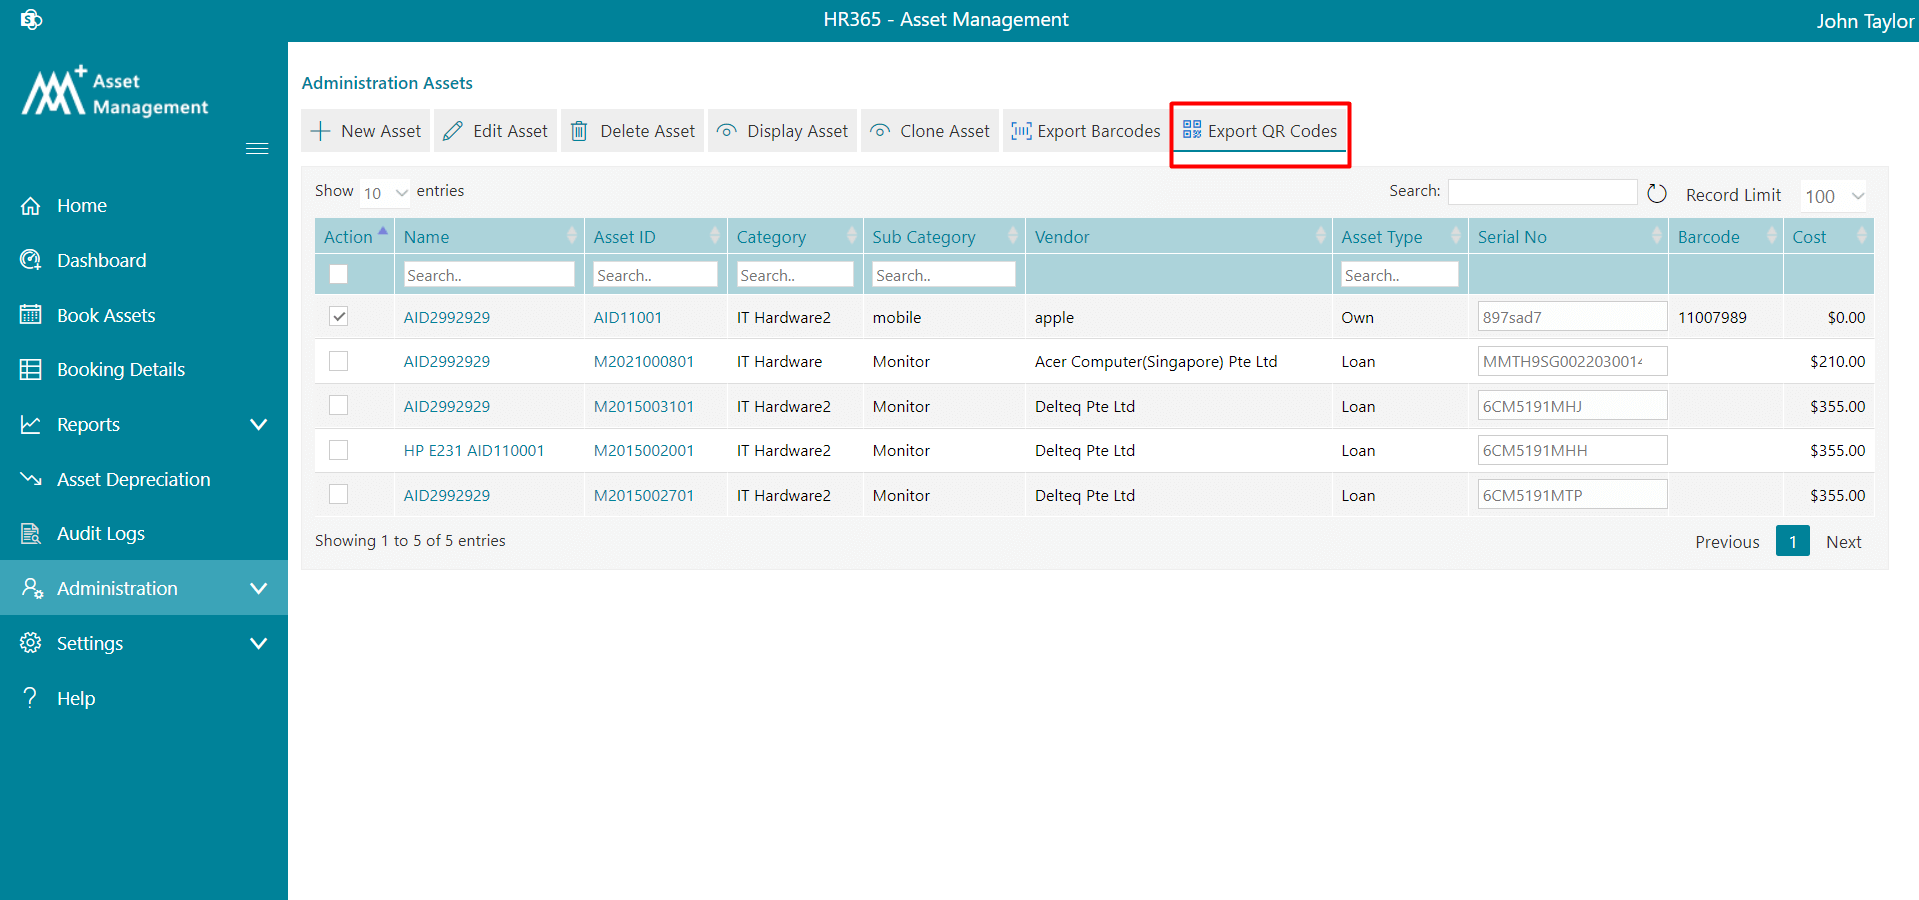
- Export QR codes - From here you can export QR codes.
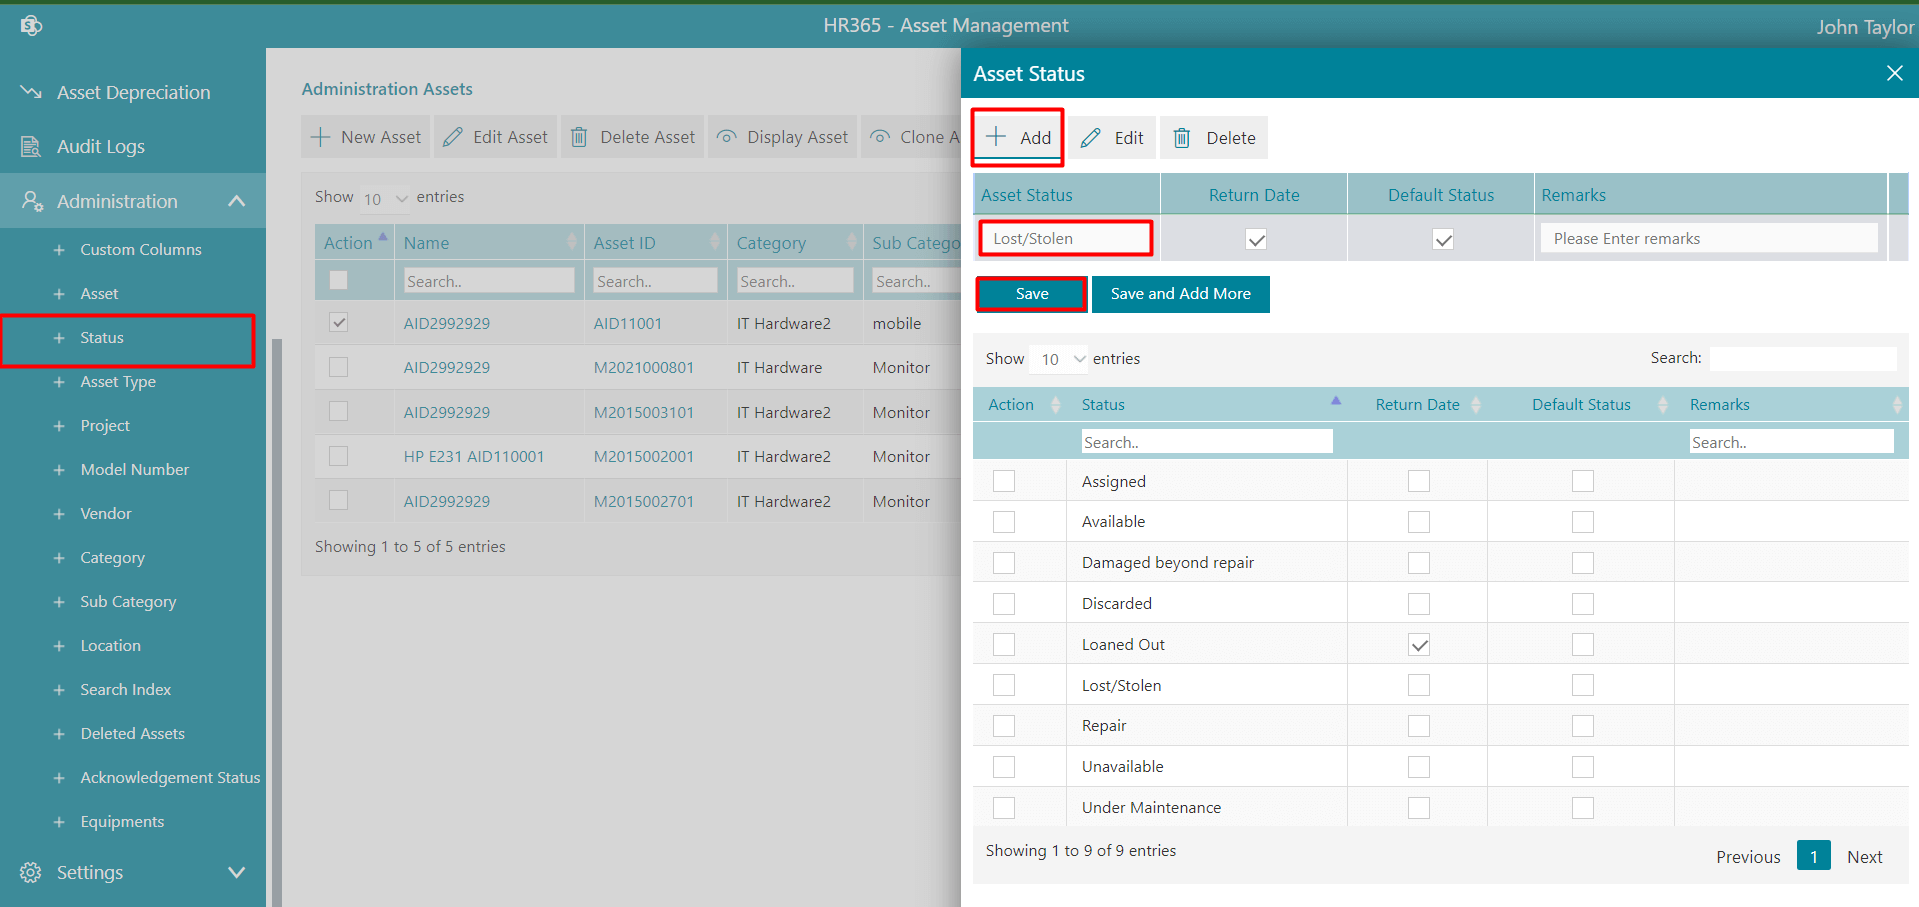
Add Status
- Click on the +Add.
- Enter the Asset Status and select the checkboxes as per your requirement.
- Finally click on the Save button.
- To add multiple status, click on Save and Add more button.
-
The status dropdown will be displayed on the + Asset or +New asset page.
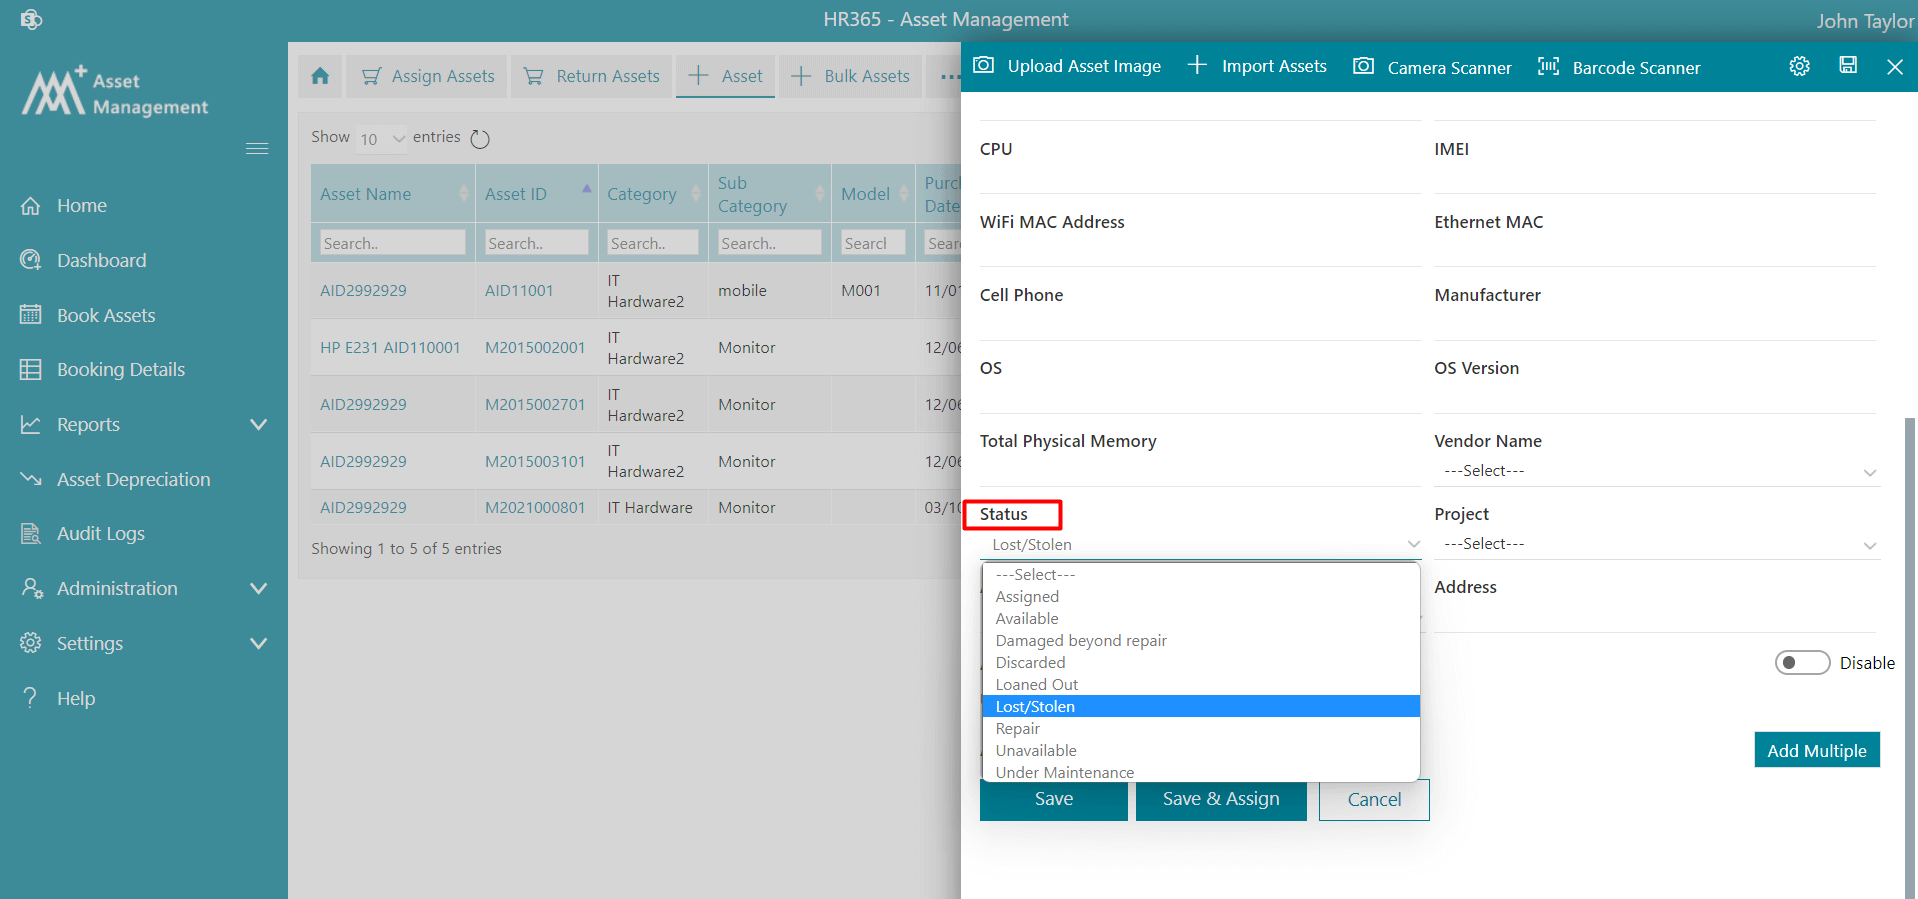
From here you can able to add status.
To add the status, follow the below steps:
Edit: Click the Edit Asset status button, this display Edit Asset Type page. Update the entries and click on Update button.
Delete: Click the delete button, this displays a dialog box. Click on Yes button.
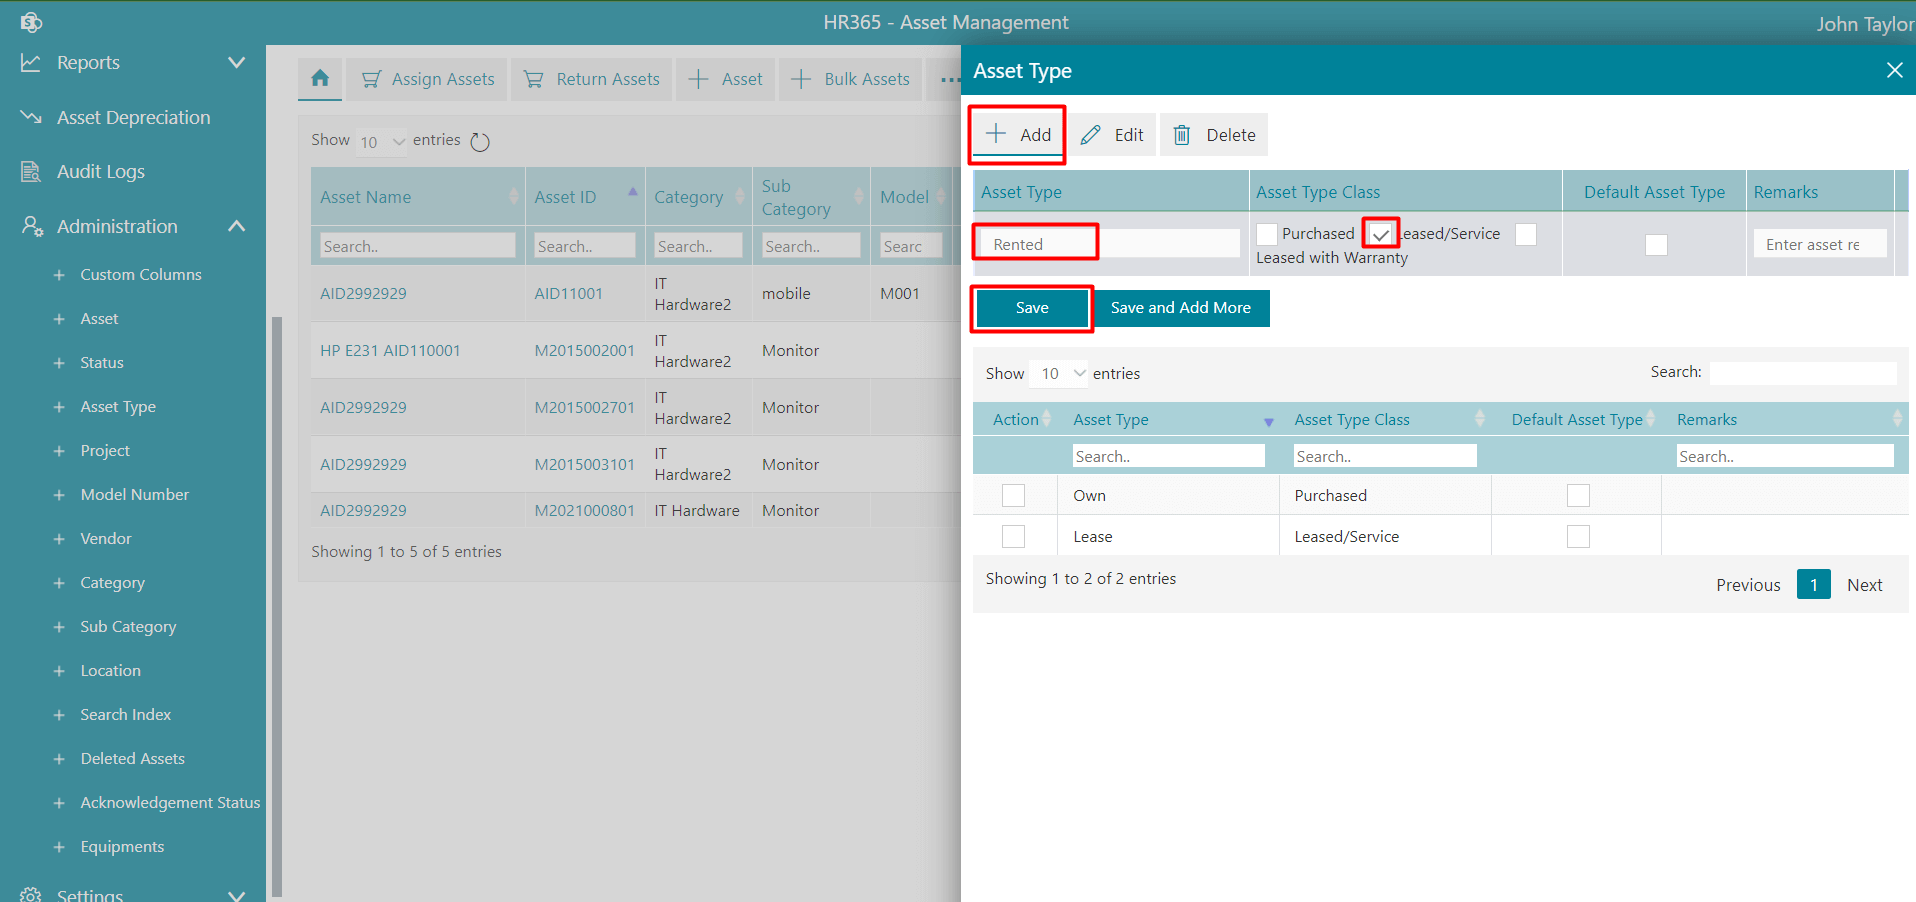
Add Asset Type
- Click on the +Add.
- Enter the Asset Type and select the checkboxes as per your requirement.
- Finally click on the Save button.
- To add multiple status, click on Save and Add more button.
-
The Asset Type dropdown will be displayed on the + Asset or +New asset page.
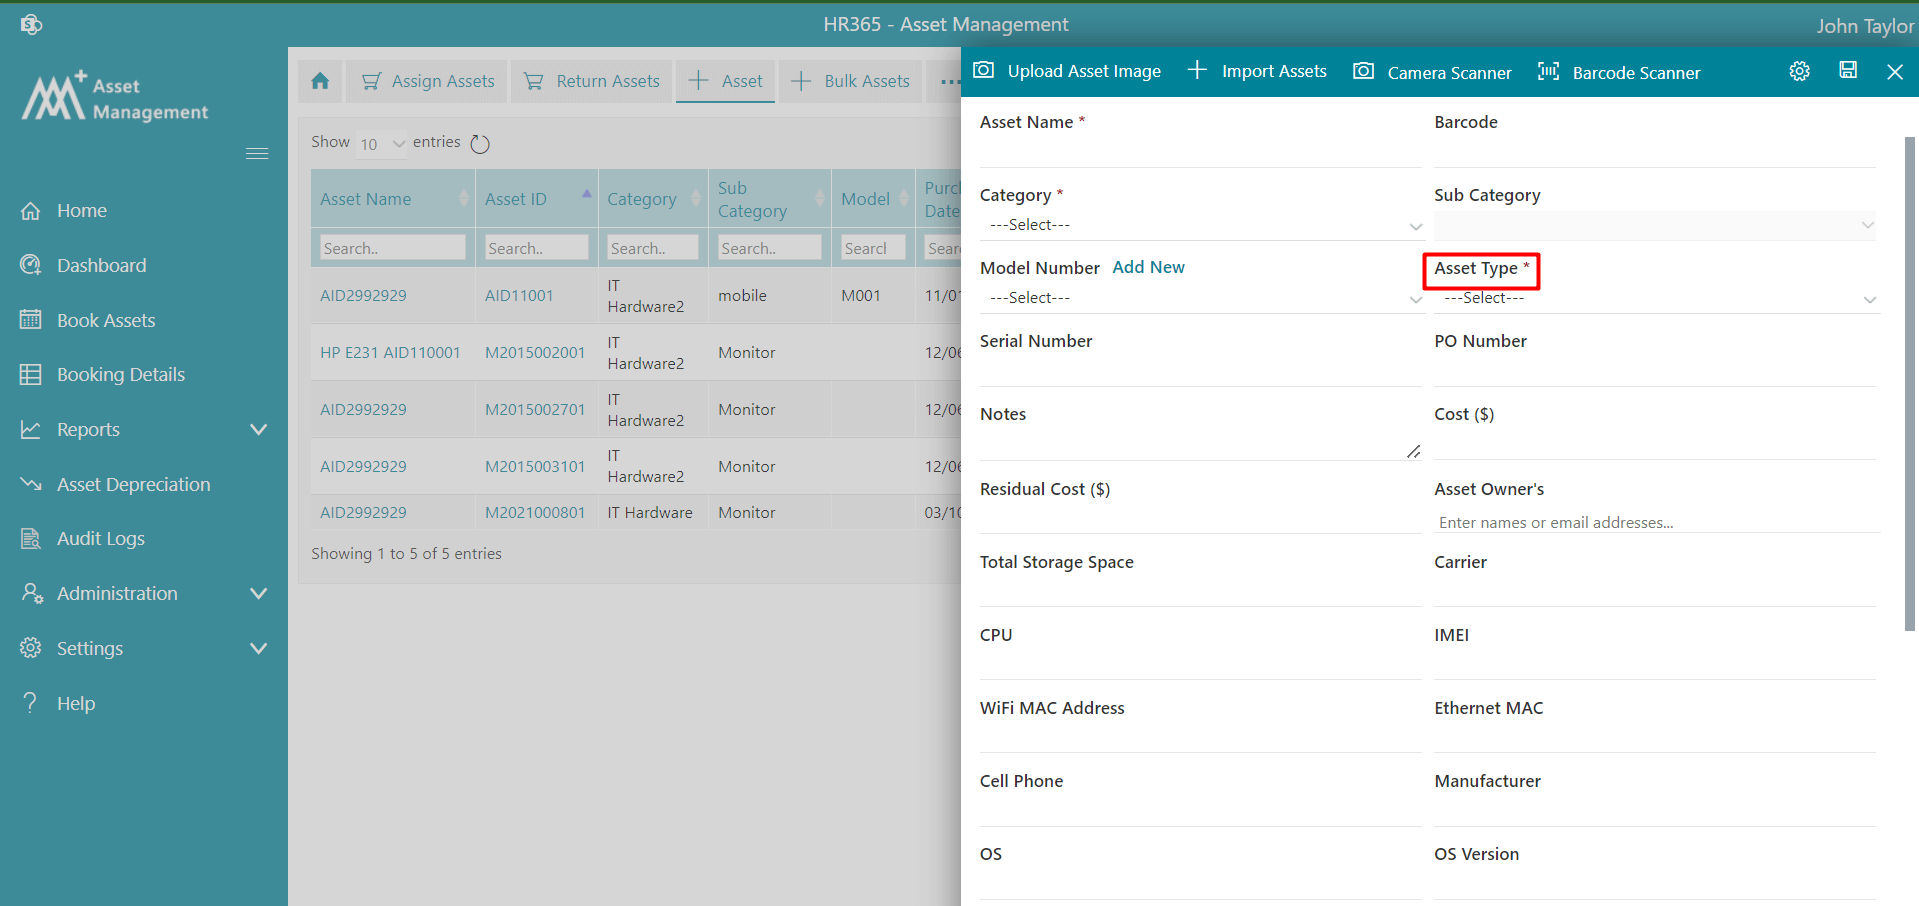
From here you can able to add asset type.
To add the asset type, follow the below steps:
Edit: Click the Edit button, this display Edit Asset Type page. Update the entries and click on Update button.
Delete: Click the delete button, this displays a dialog box. Click on Yes button.
Add Project
- Click on the +Add.
- Enter the Asset Type and select the checkboxes as per your requirement.
- Finally click on the Save button.
- To add multiple status, click on Save and Add more button.
-
The Project dropdown will be displayed while assigning the asset.

From here you can able to add projects.
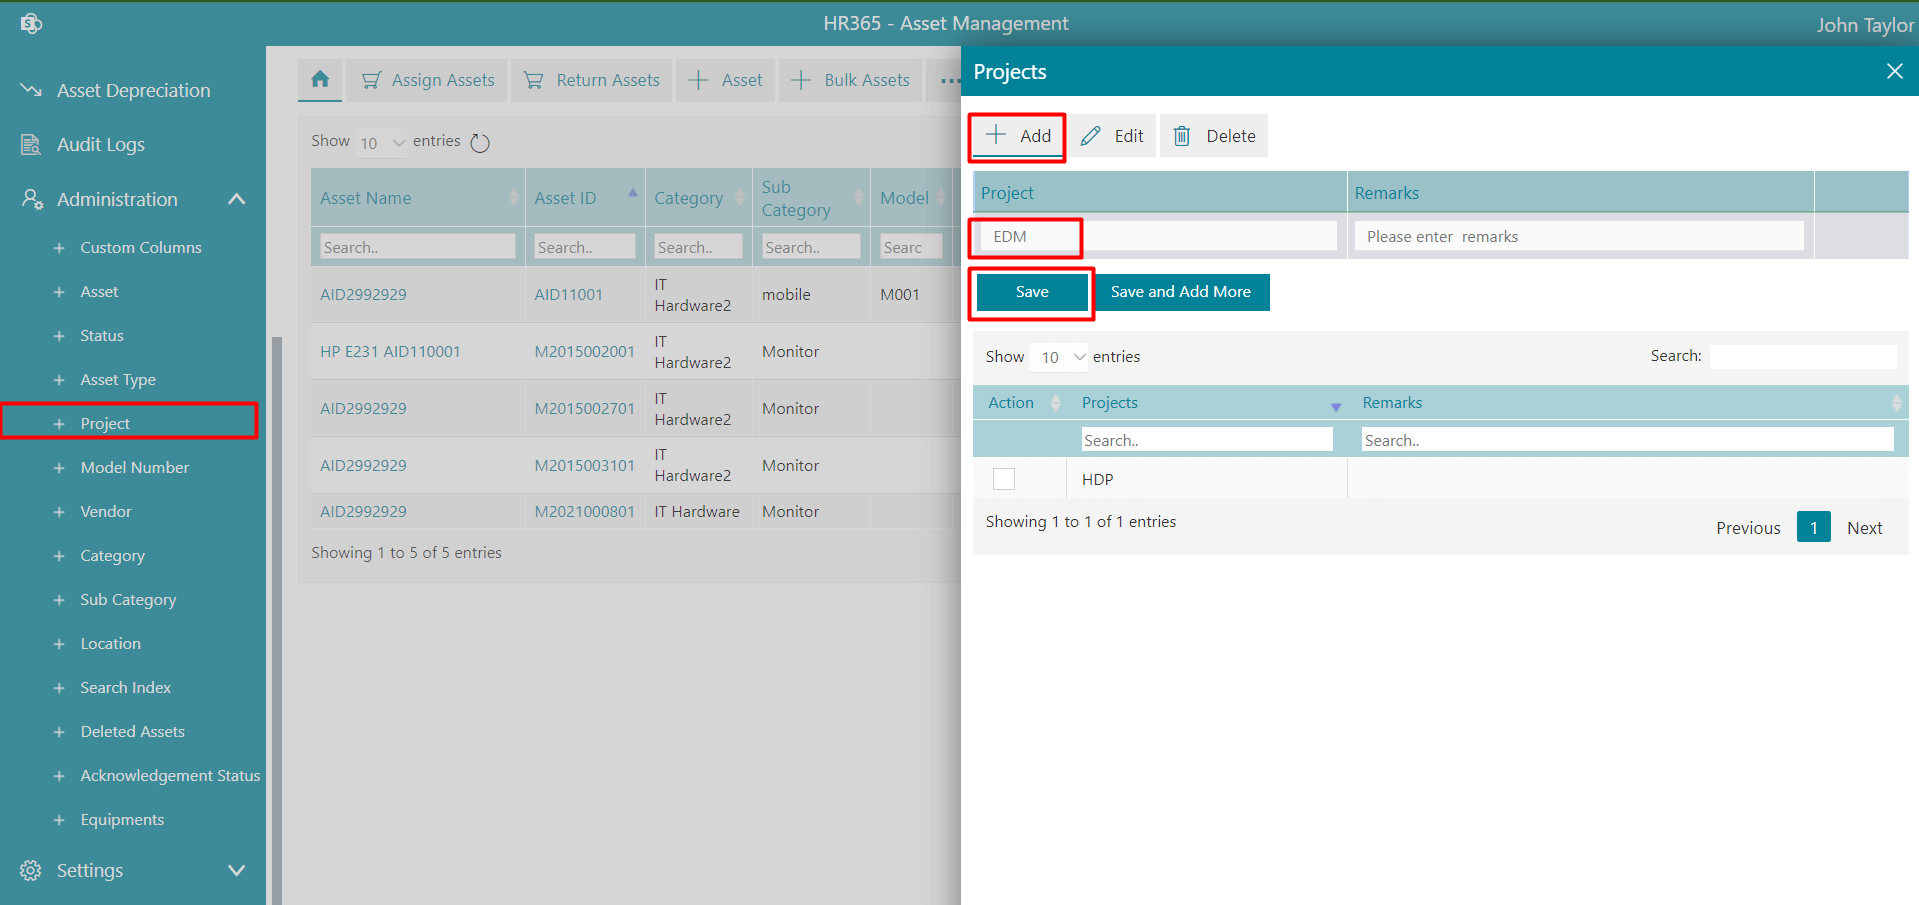
To add the asset type, follow the below steps:
Edit: Click the Edit button, this display Edit Asset Type page. Update the entries and click on Update button.
Delete:Click the delete button, this displays a dialog box. Click on Yes button.
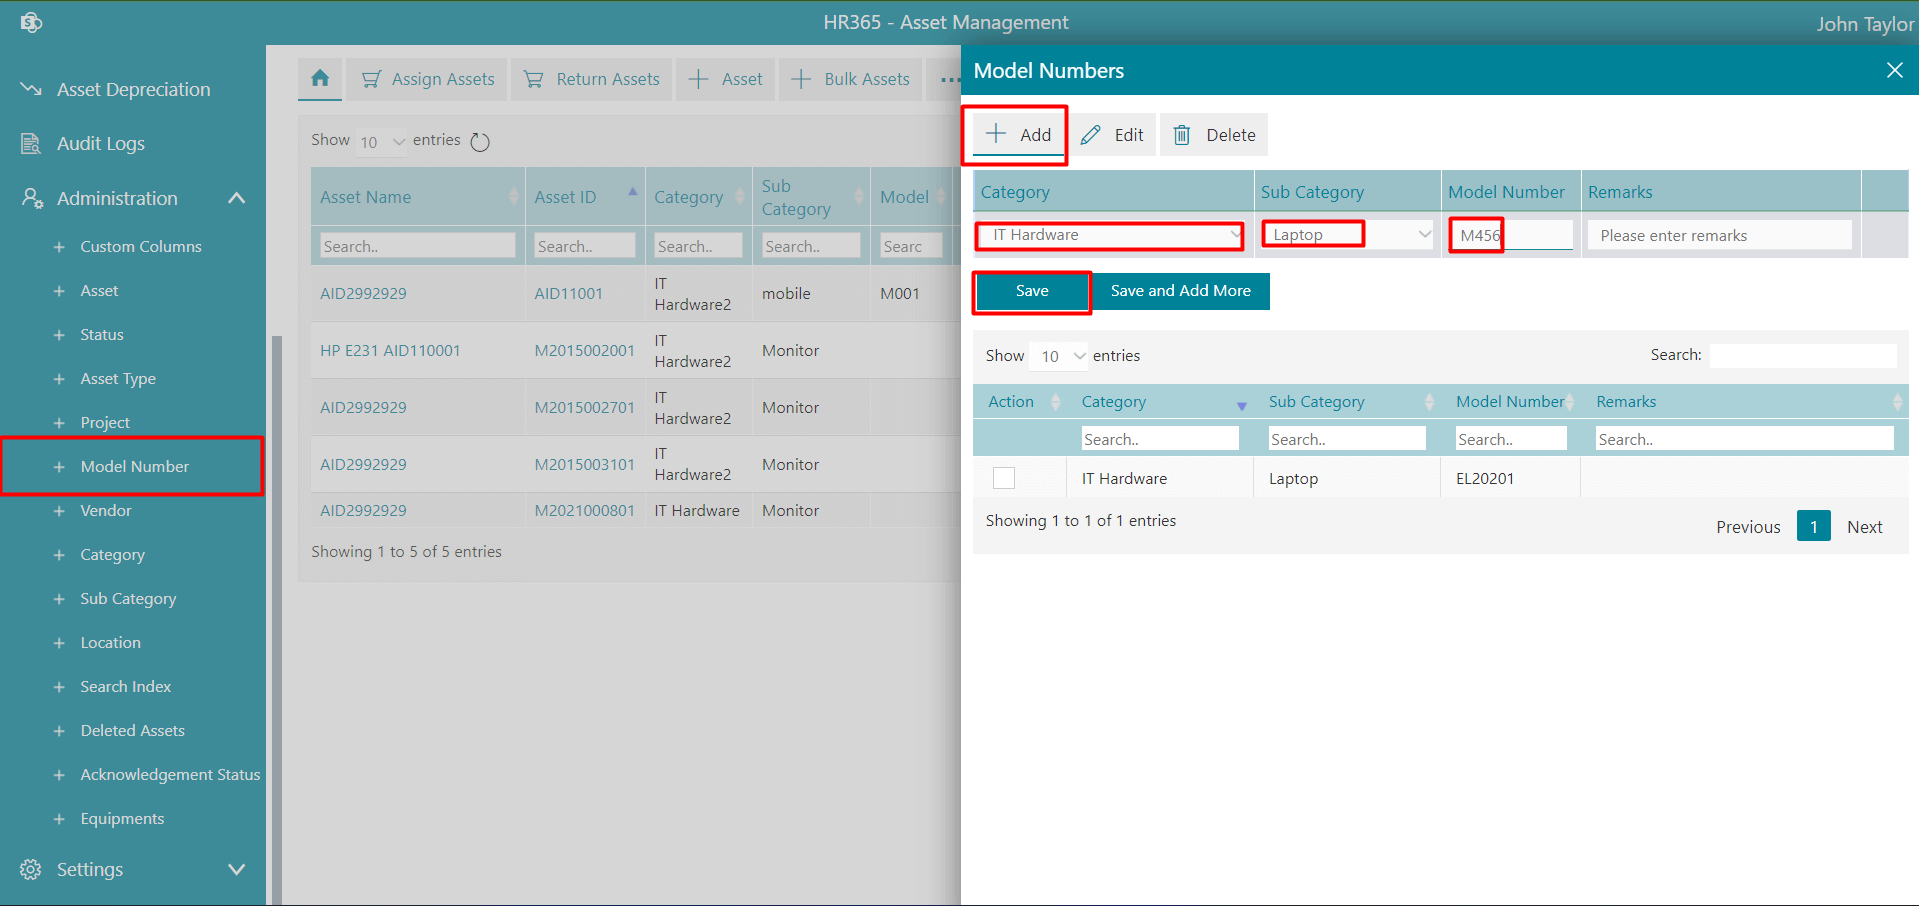
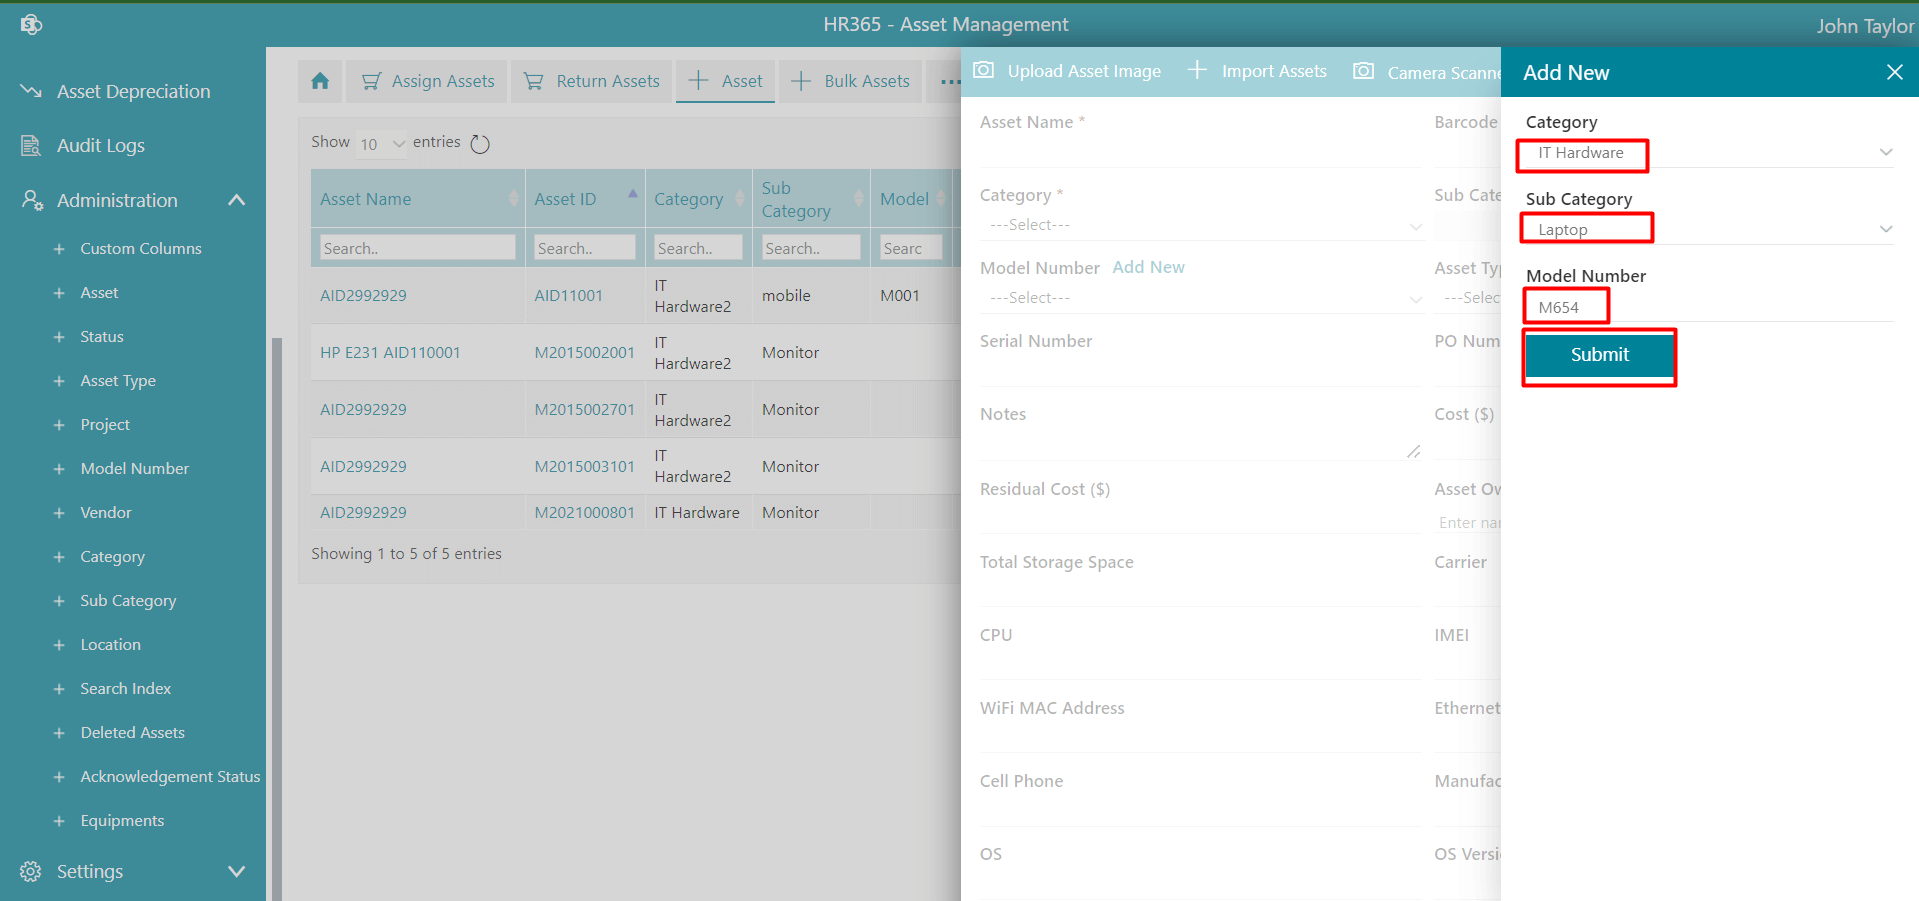
Add Model Number
- Click on the +Add.
- Select the Category, Sub Category, enter Model Numbers and Remarks.
- Finally click on the Save button.
- To add multiple status, click on Save and Add more button.
-
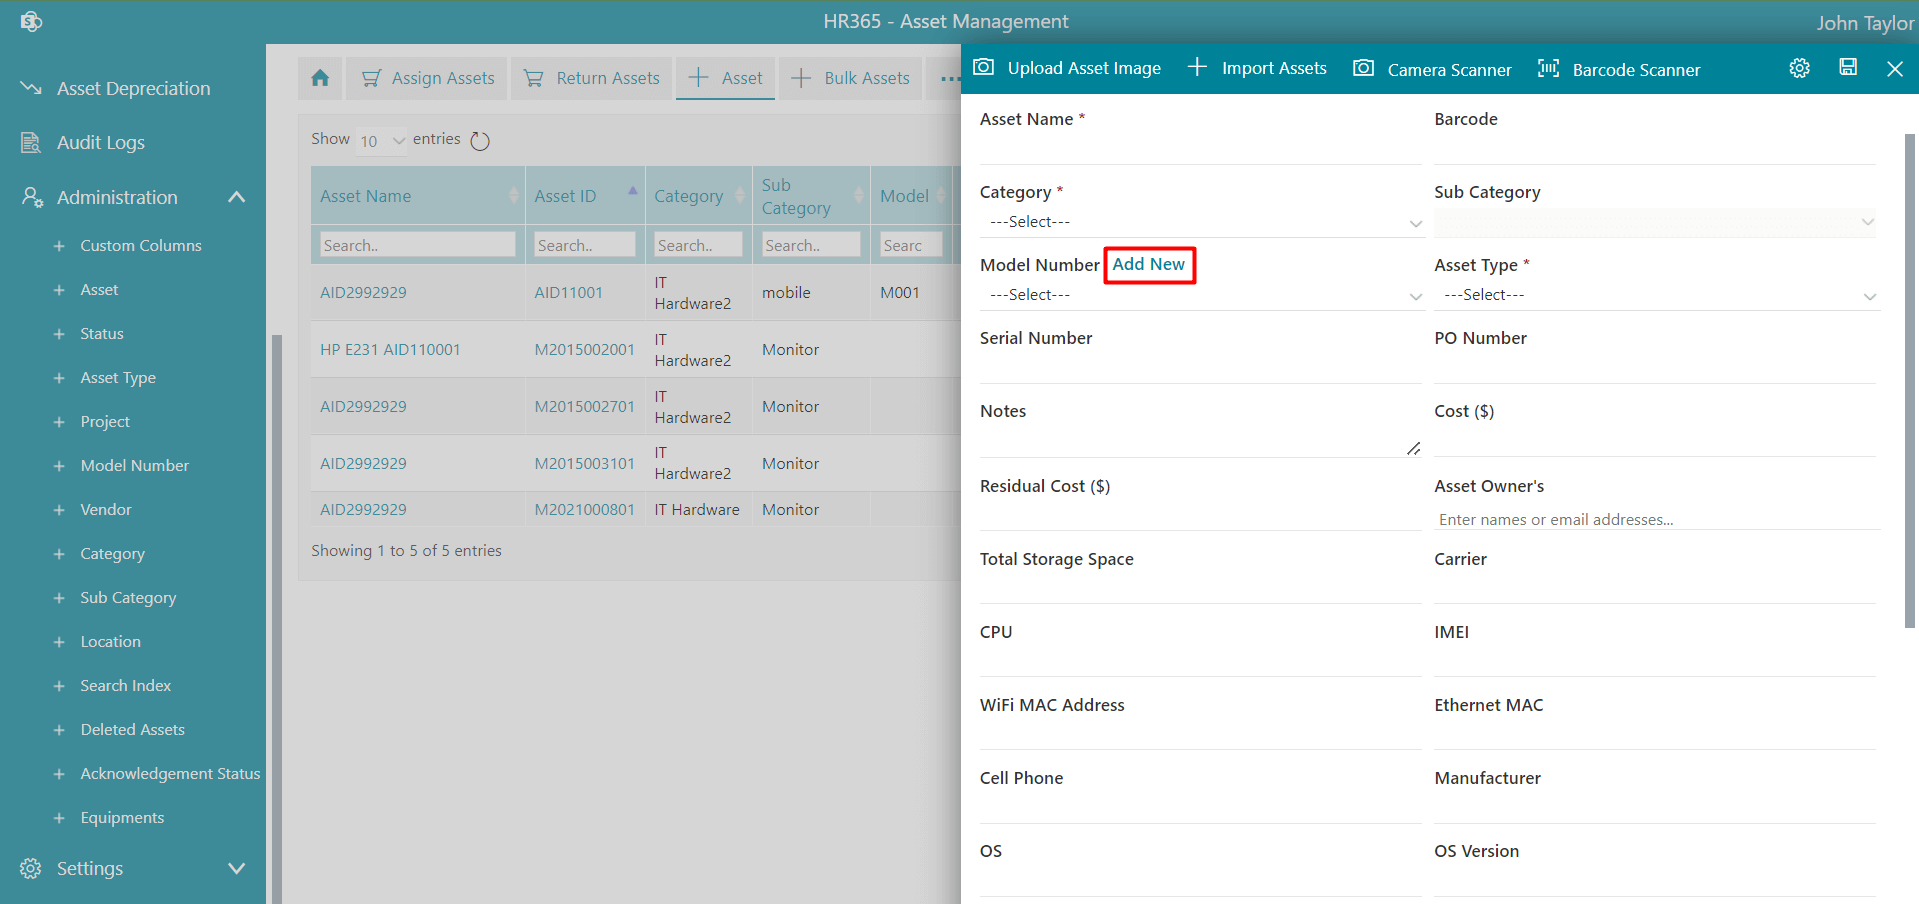
The Model Numbers dropdown will be displayed on the + Asset or +New Asset page.
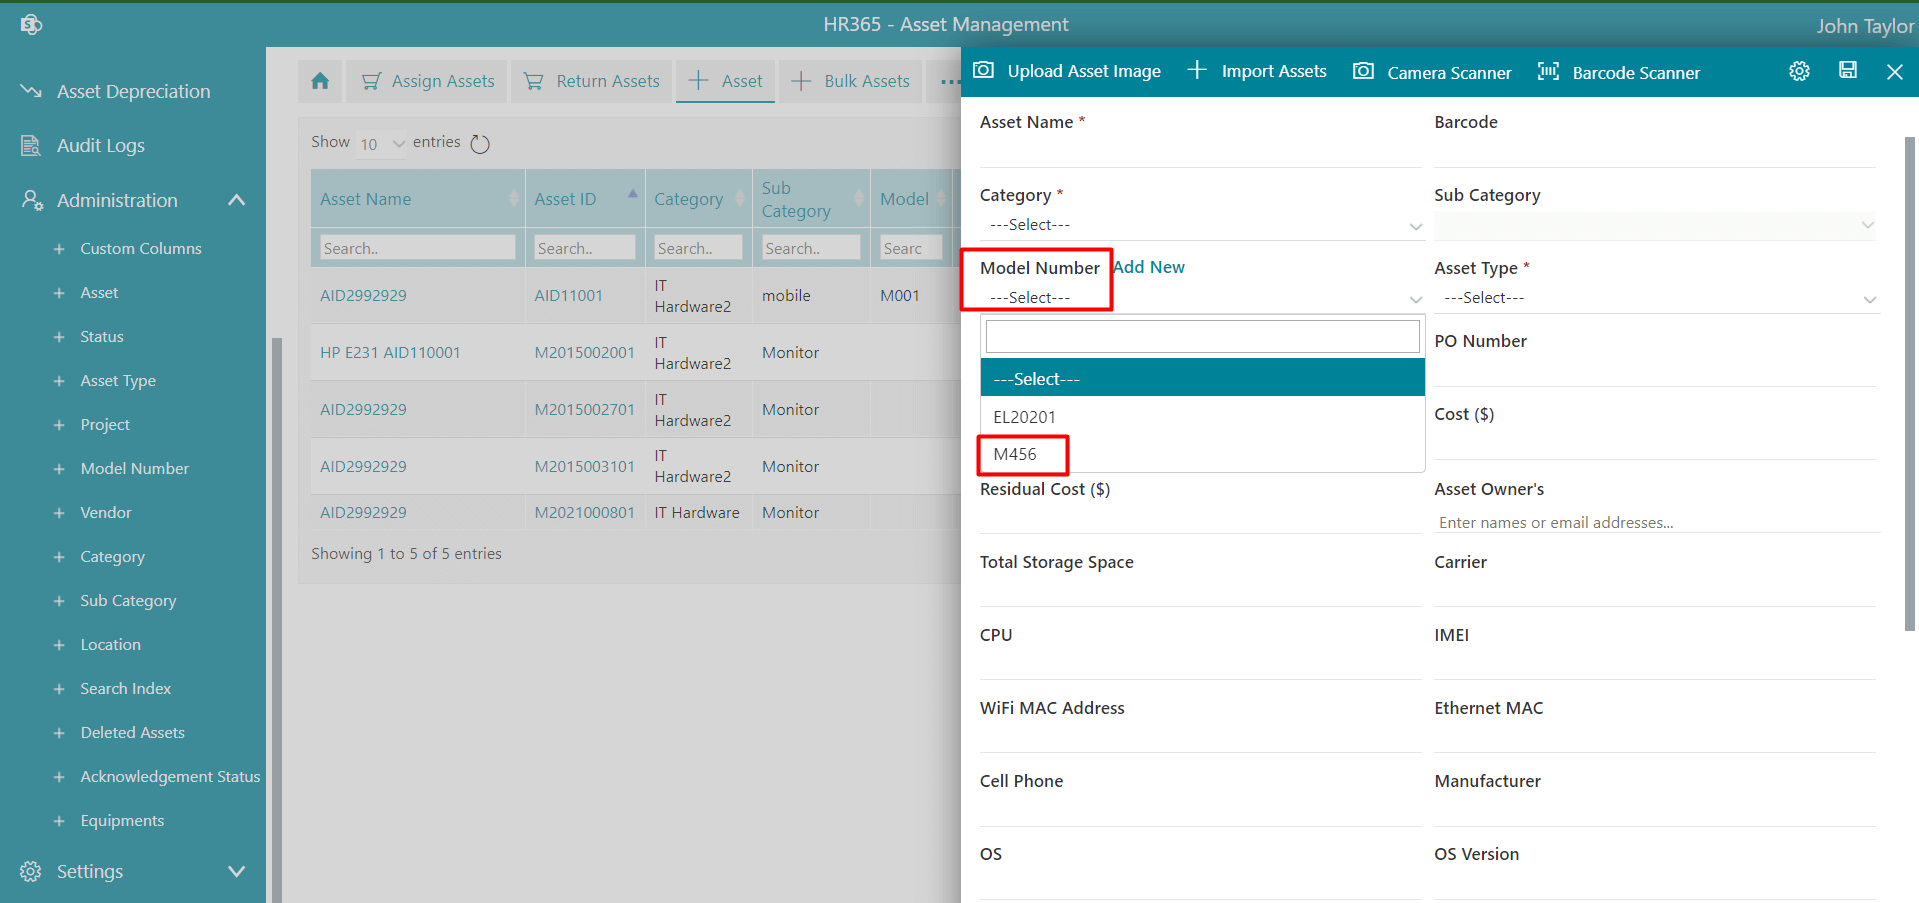
From here you can able to add model numbers.
To add the model number, follow the below steps:
You can add model number by clicking on Add New link on the + Asset or +New Asset page. This displays Add New page. Select the Category, Sub Category and enter Model Numbers. Finally click on the Save button.
Edit: Click the Edit button, this display Edit Asset Type page. Update the entries and click on Update button.
Delete:Click the delete button, this displays a dialog box. Click on Yes button.
Vendor
- Click on the +Add.
- Enter the Vendor, Code and Remarks.
- Finally click on the Save button.
- To add multiple status, click on Save and Add more button.
-
The Vendor dropdown will be displayed on the + Asset or +New asset page.
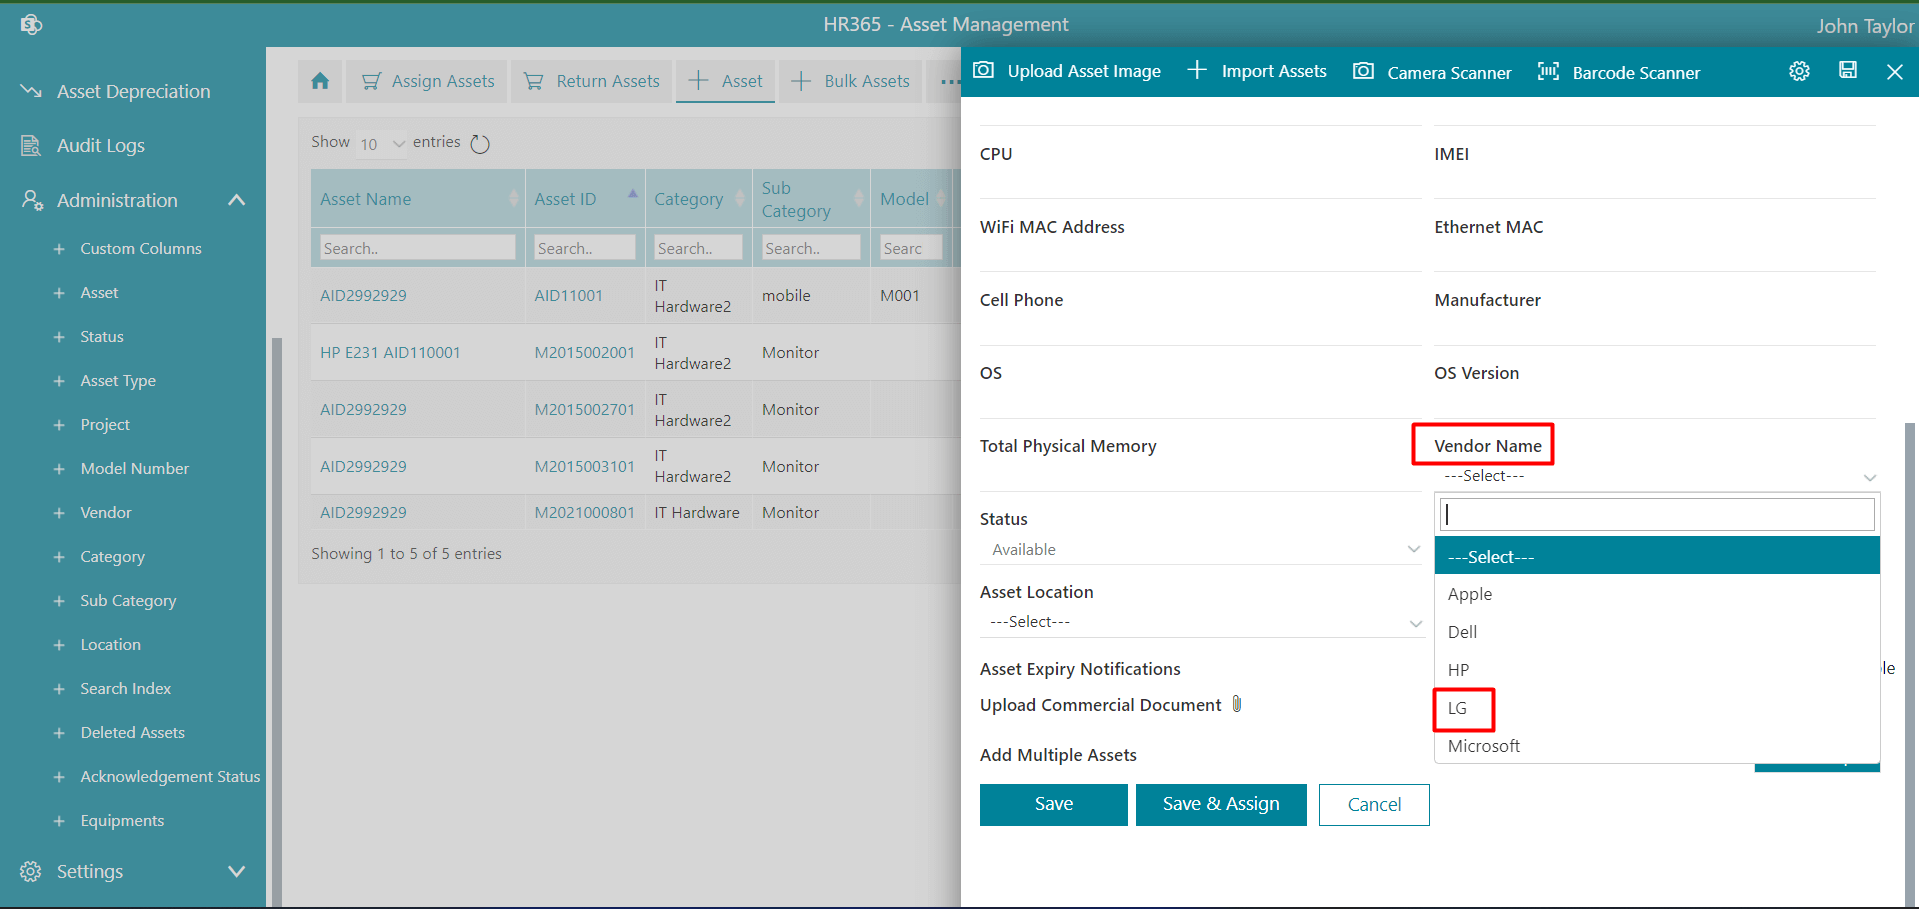
From here you can able to add vendor.
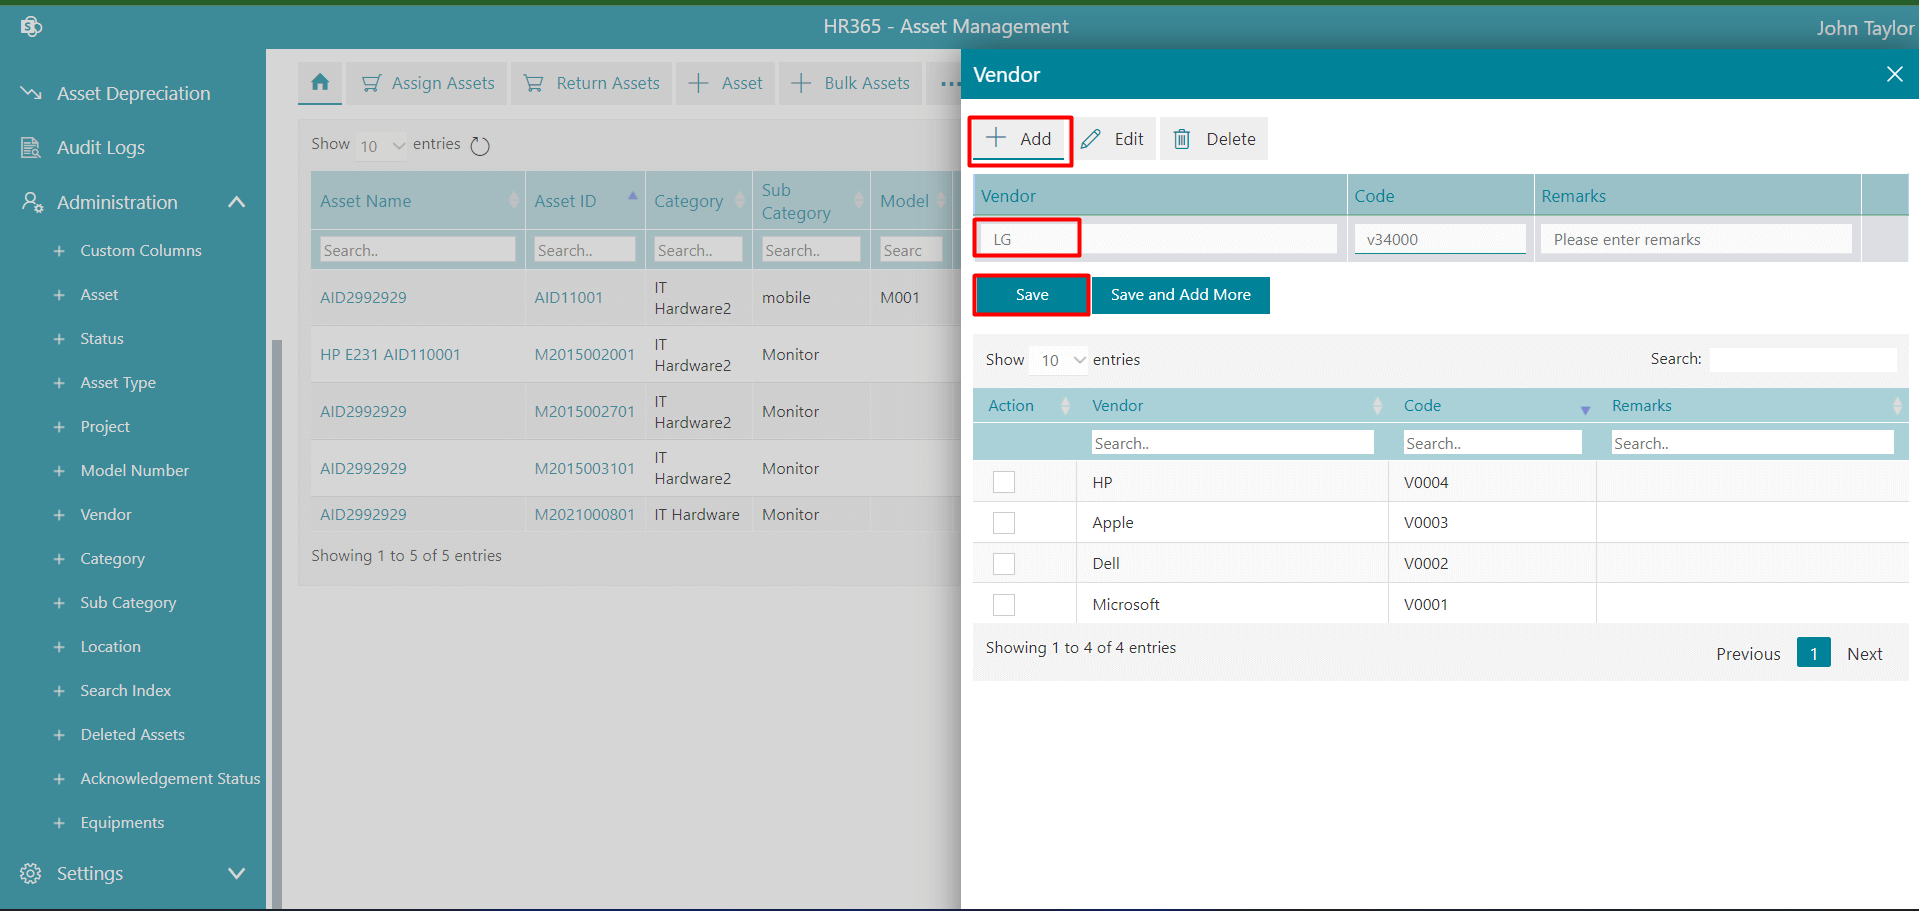
To add the asset type, follow the below steps:
Edit: Click the Edit button, this display Edit Vendor page. Update the entries and click on Update button.
Delete:Click the delete button, this displays a dialog box. Click on Yes button.
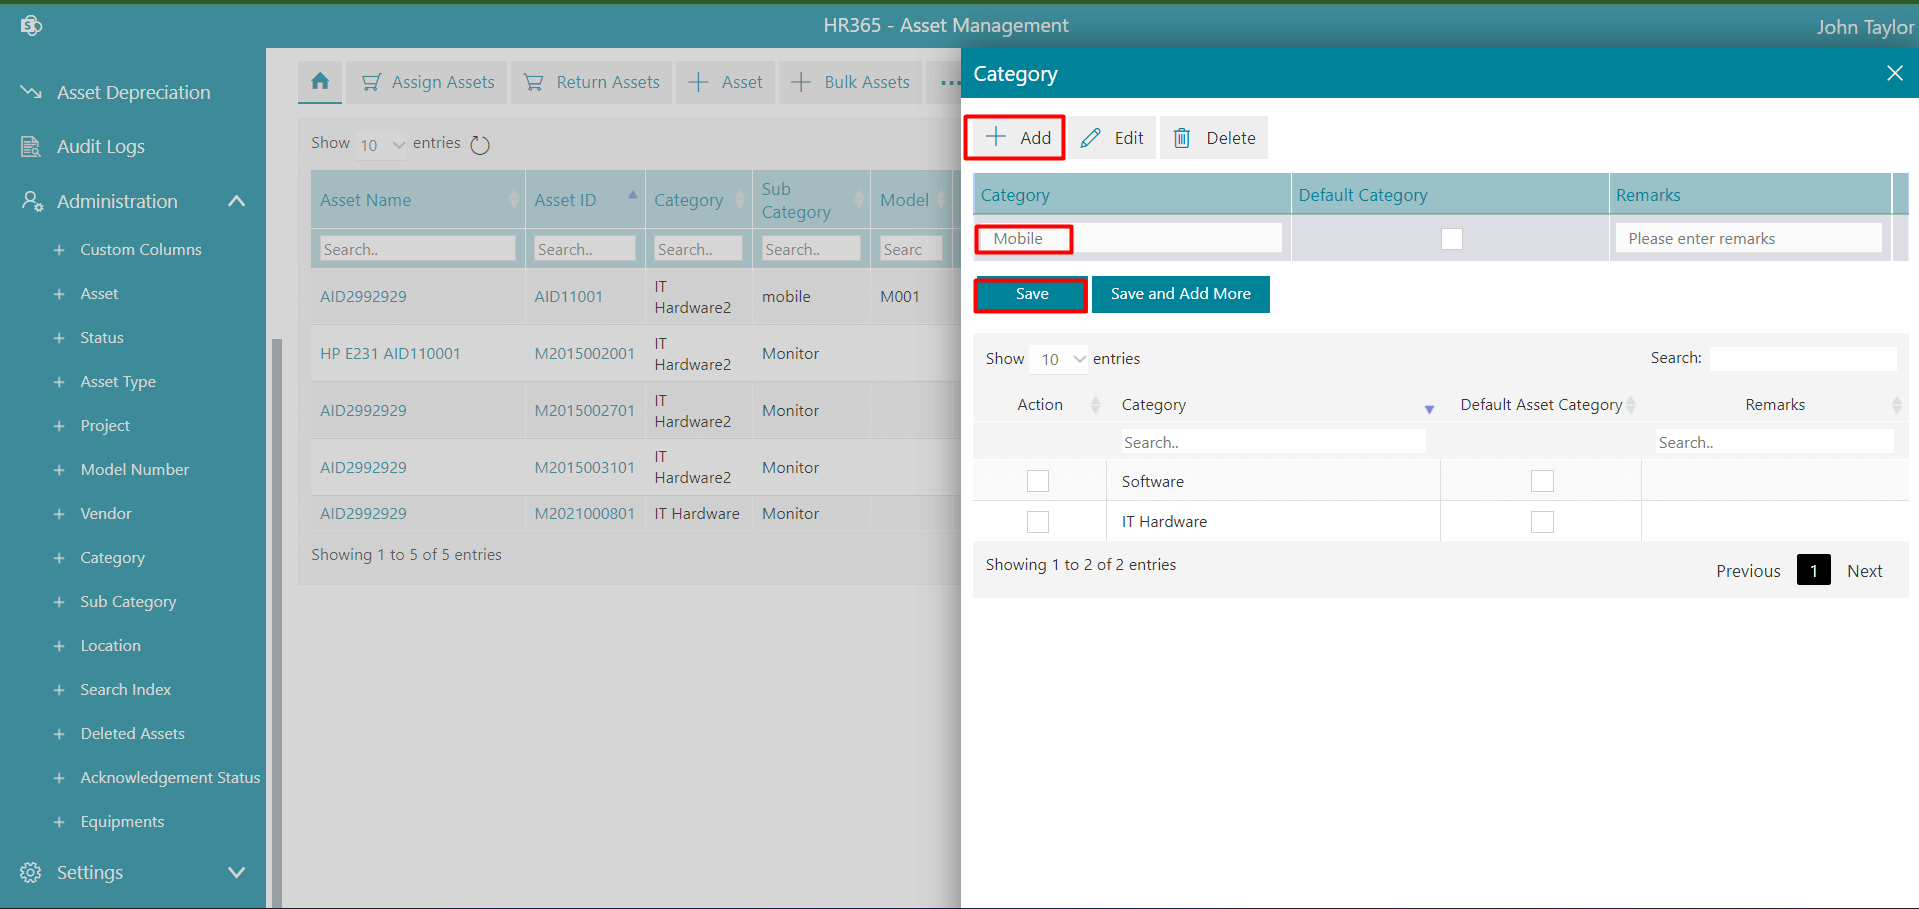
Category
- Click on the +Add.
-
Enter the Categoryand select checkbox as per your requirements.
Default Sub Category can be for one catagory only.
- Finally click on the Save button.
- To add multiple status, click on Save and Add more button.
-
The Category dropdown will be displayed on the + Asset or +New asset page.
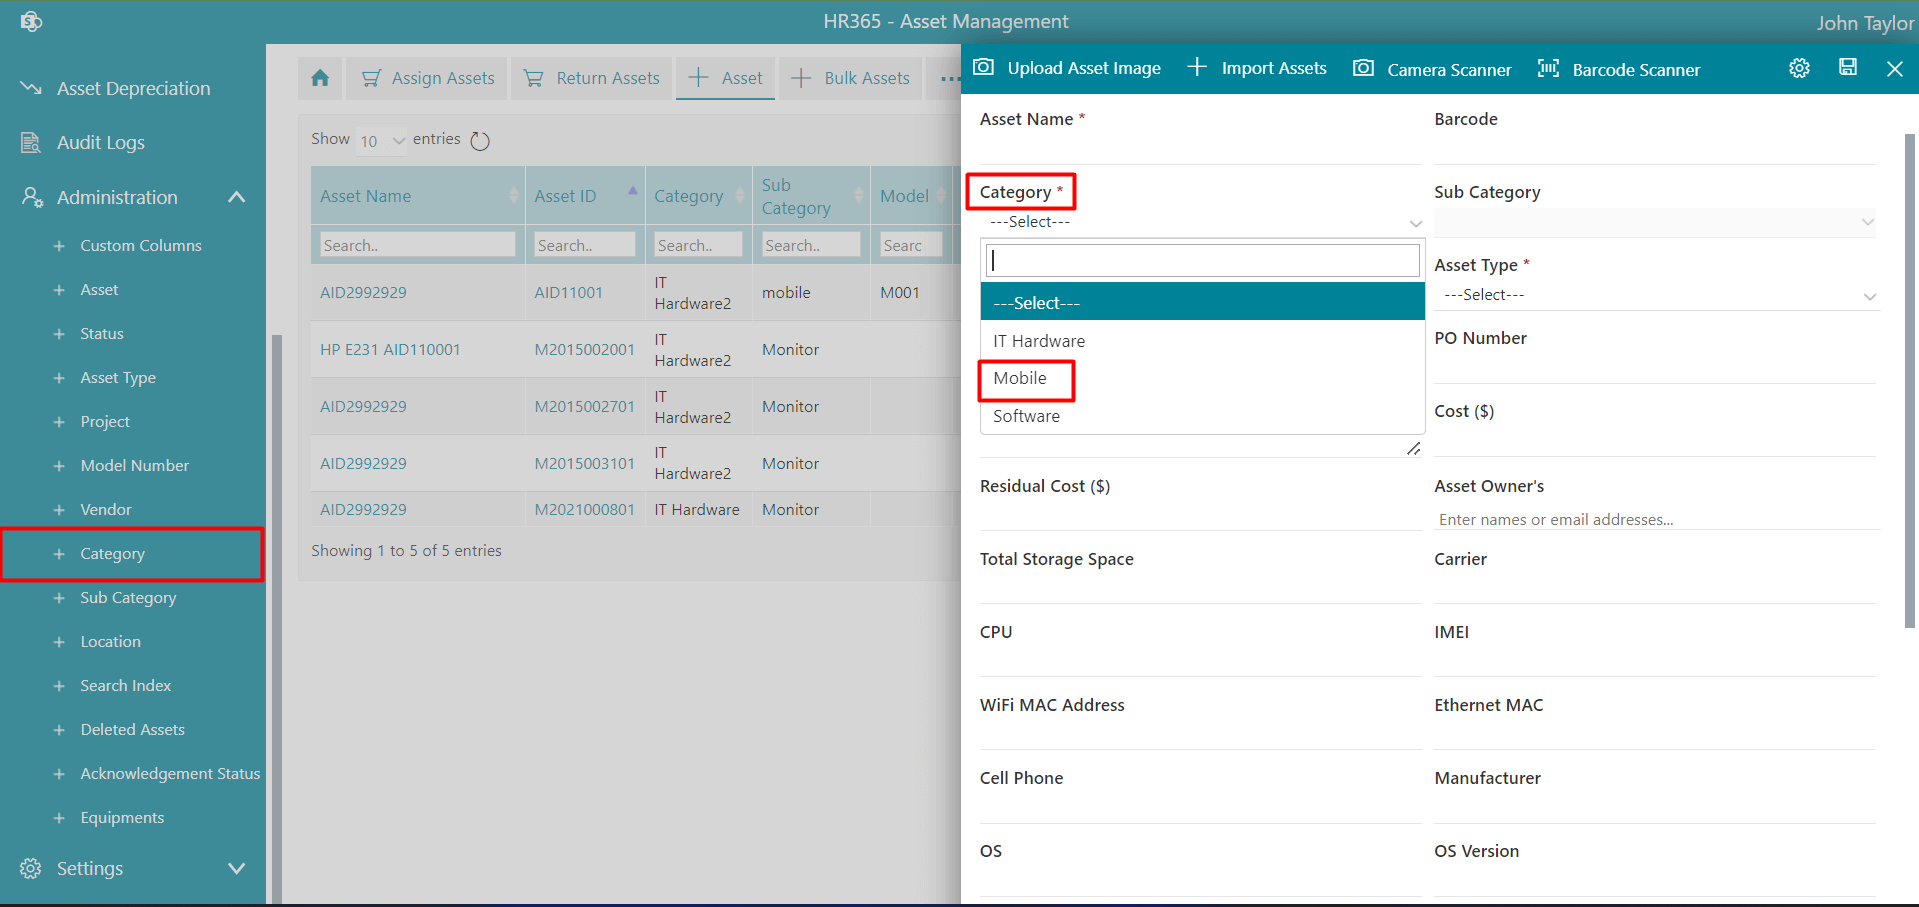
From here you can able to add category. Here you can categorize the assets as Consumable by selecting Consumable Category checkbox.
To add the asset type, follow the below steps:
Edit: Click the Edit button, this display Edit Category page. Update the entries and click on Update button.
Delete:Click the delete button, this displays a dialog box. Click on Yes button.
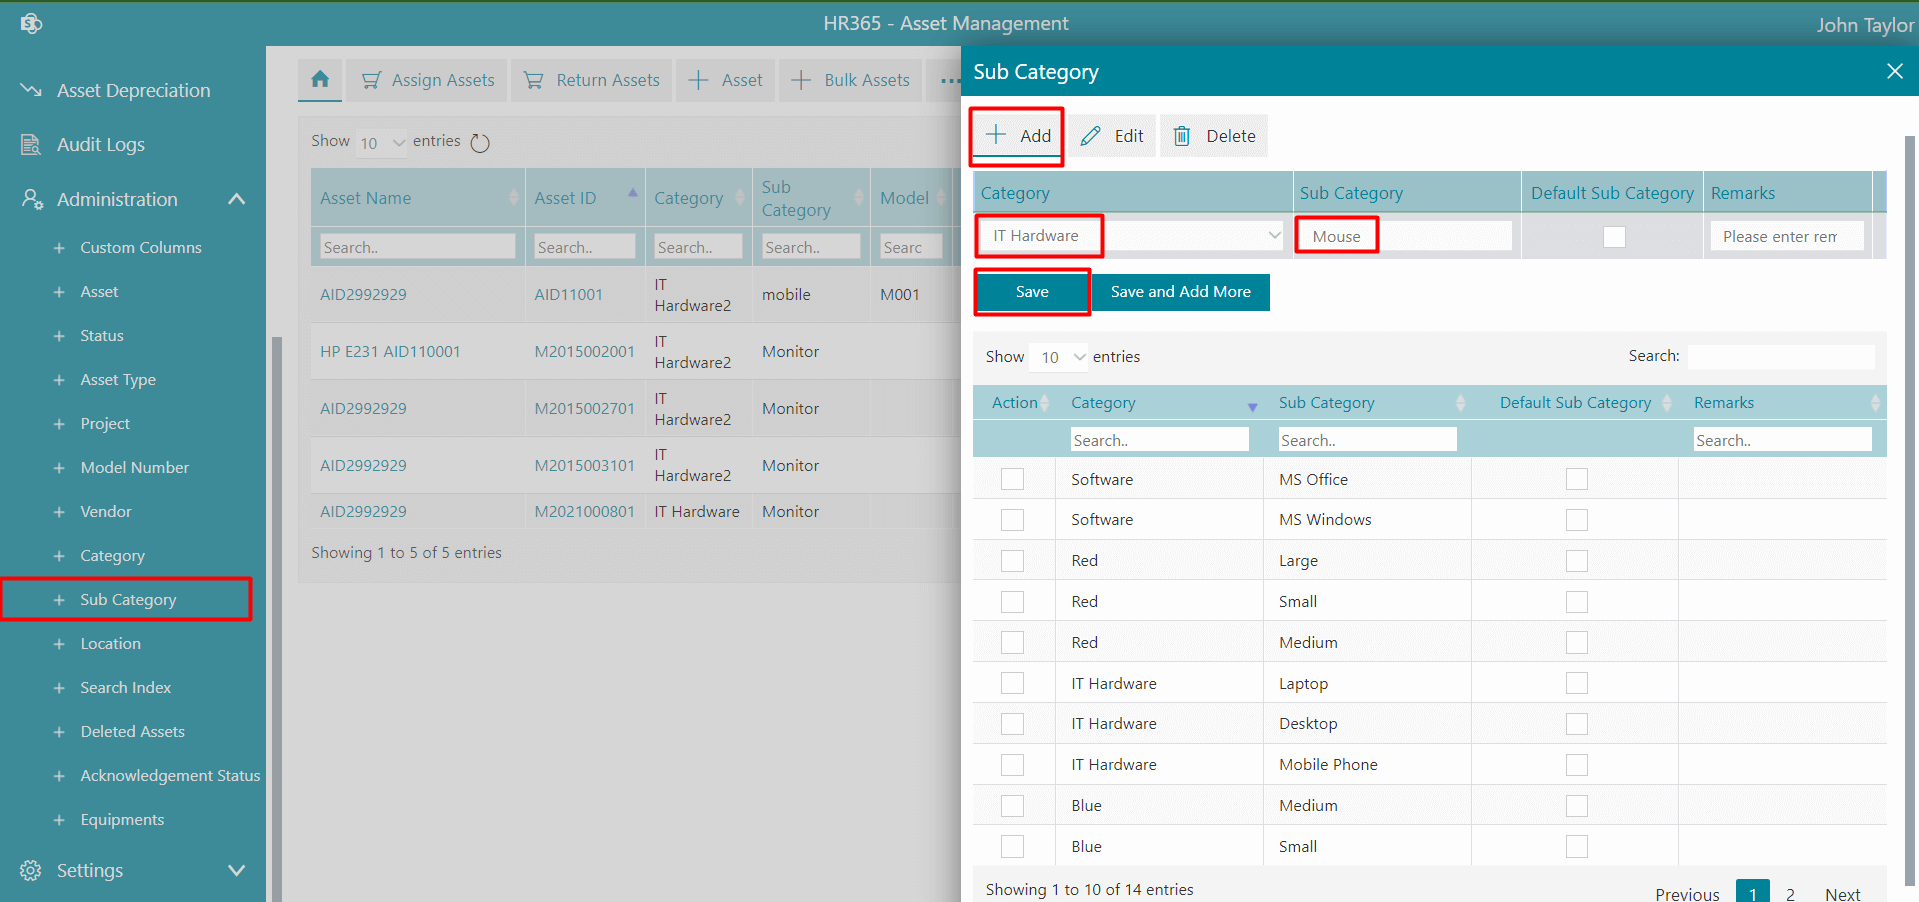
Sub Category
- Click on the +Add.
-
Select the Category, enter Sub Category and Remarks.
Default Sub Category can be for one sub catagory only.
- Finally click on the Save button.
- To add multiple status, click on Save and Add more button.
-
The Category dropdown will be displayed on the + Asset or +New asset page.
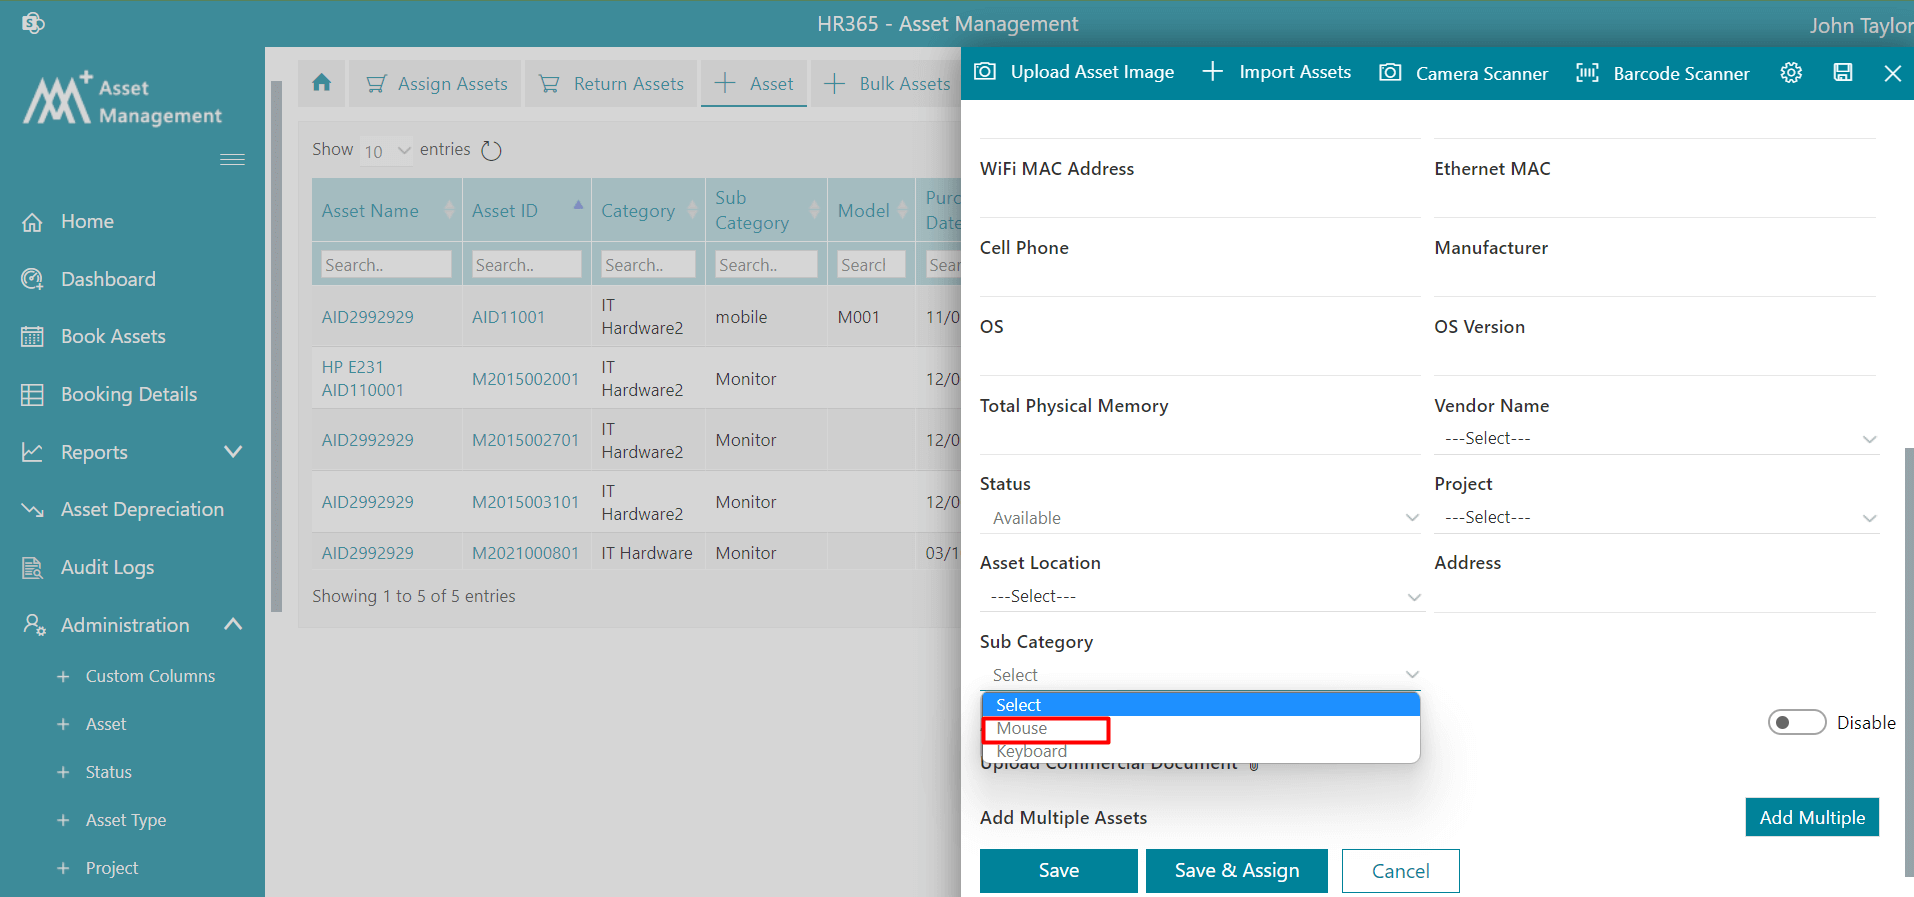
From here you can able to add sub category.
To add the sub category type, follow the below steps:
Edit: Click the Edit button, this display Edit Category page. Update the entries and click on Update button.
Delete:Click the delete button, this displays a dialog box. Click on Yes button.
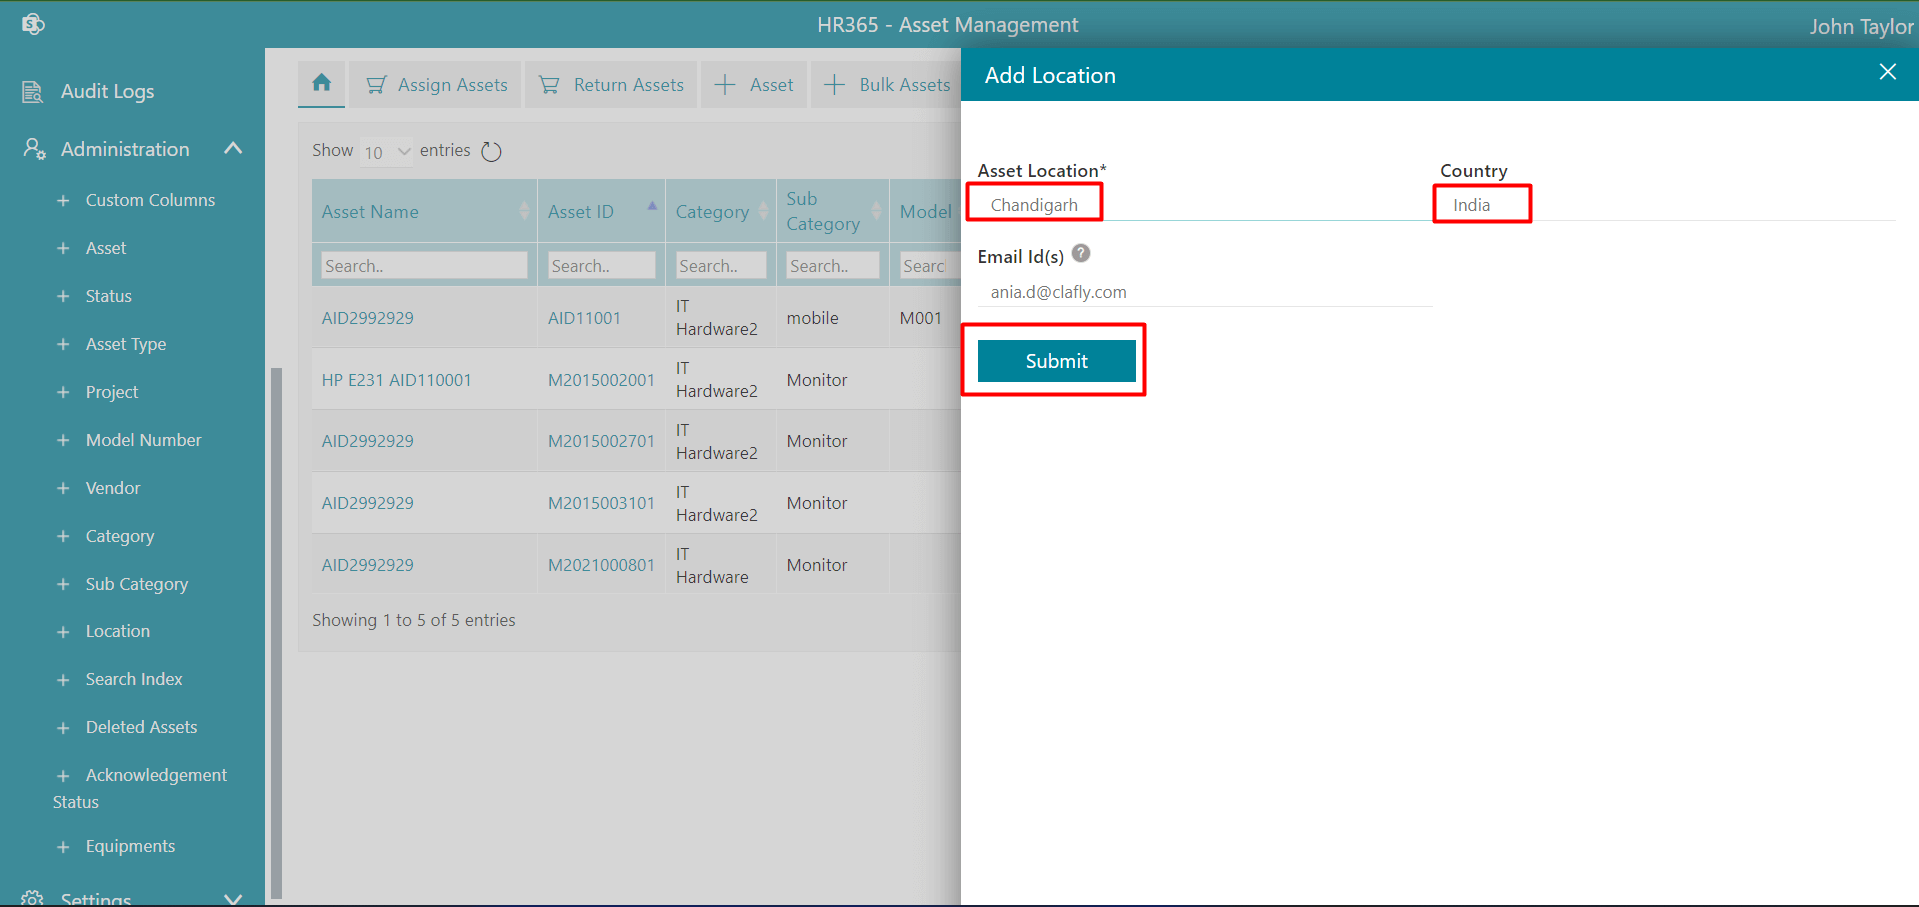
Location
- Click on the +Add.
- Enter the Asset Location, Country and Email Id.
- Finally click on the Save button.
-
The Location dropdown will be displayed on the + Asset or +New asset page.
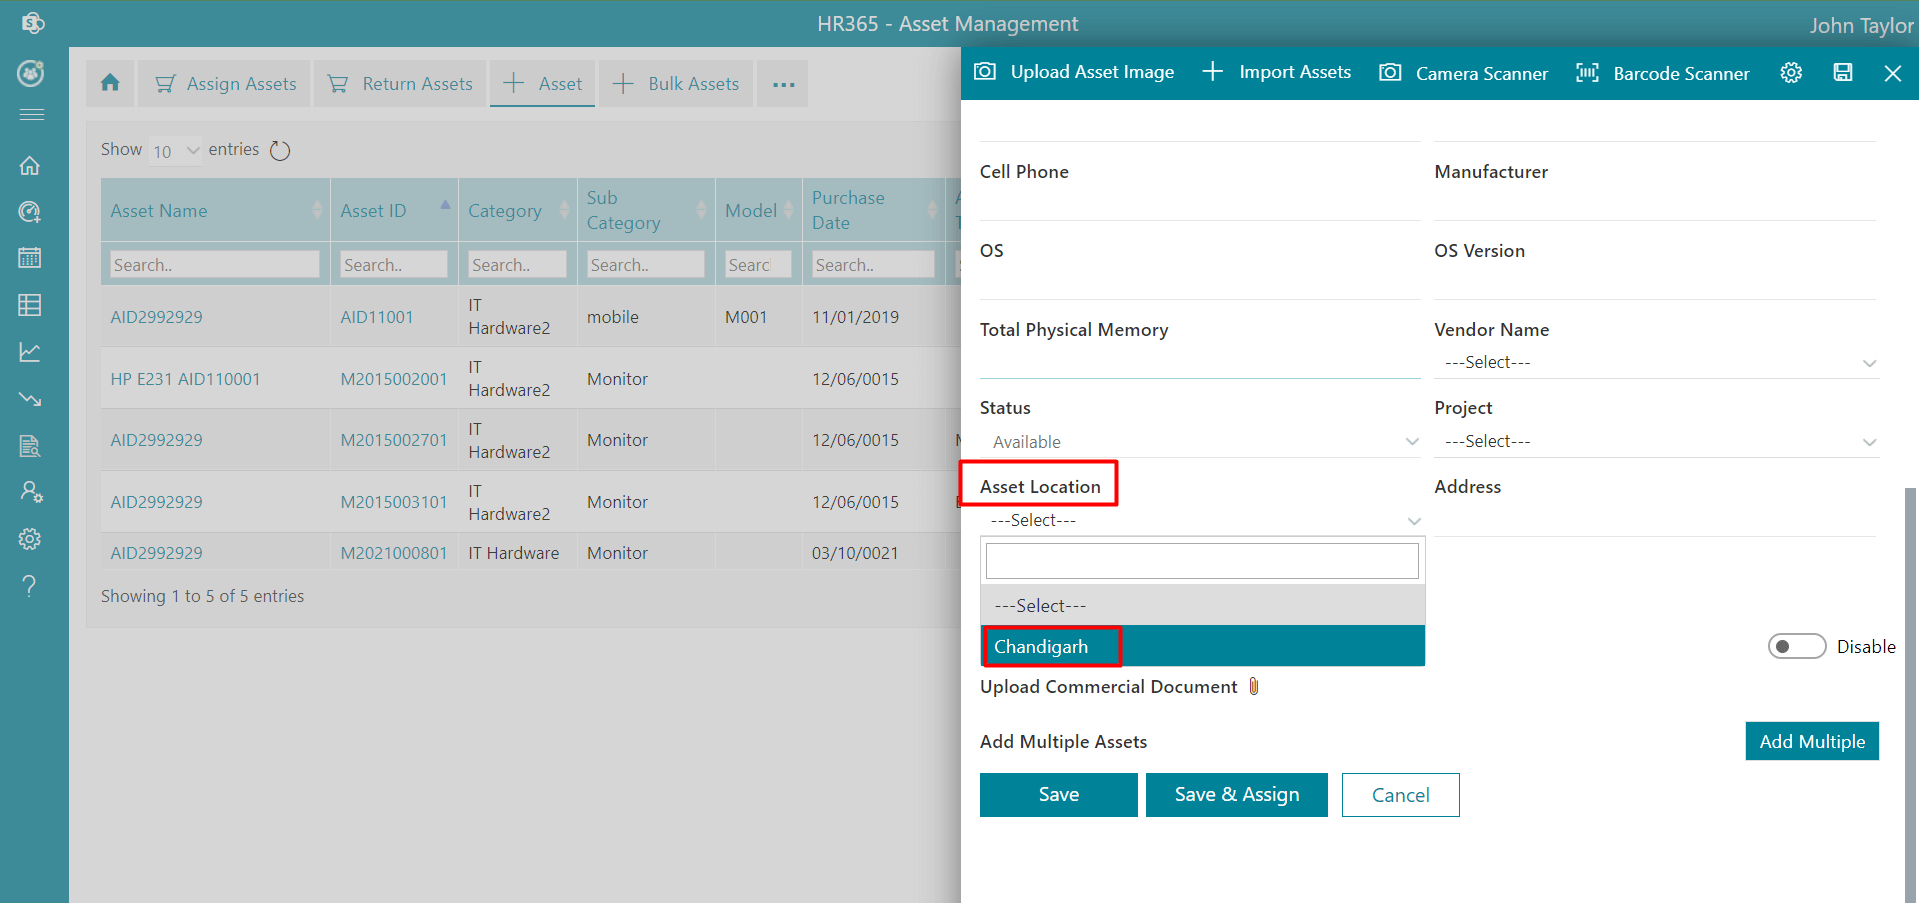
From here you can able to add location.
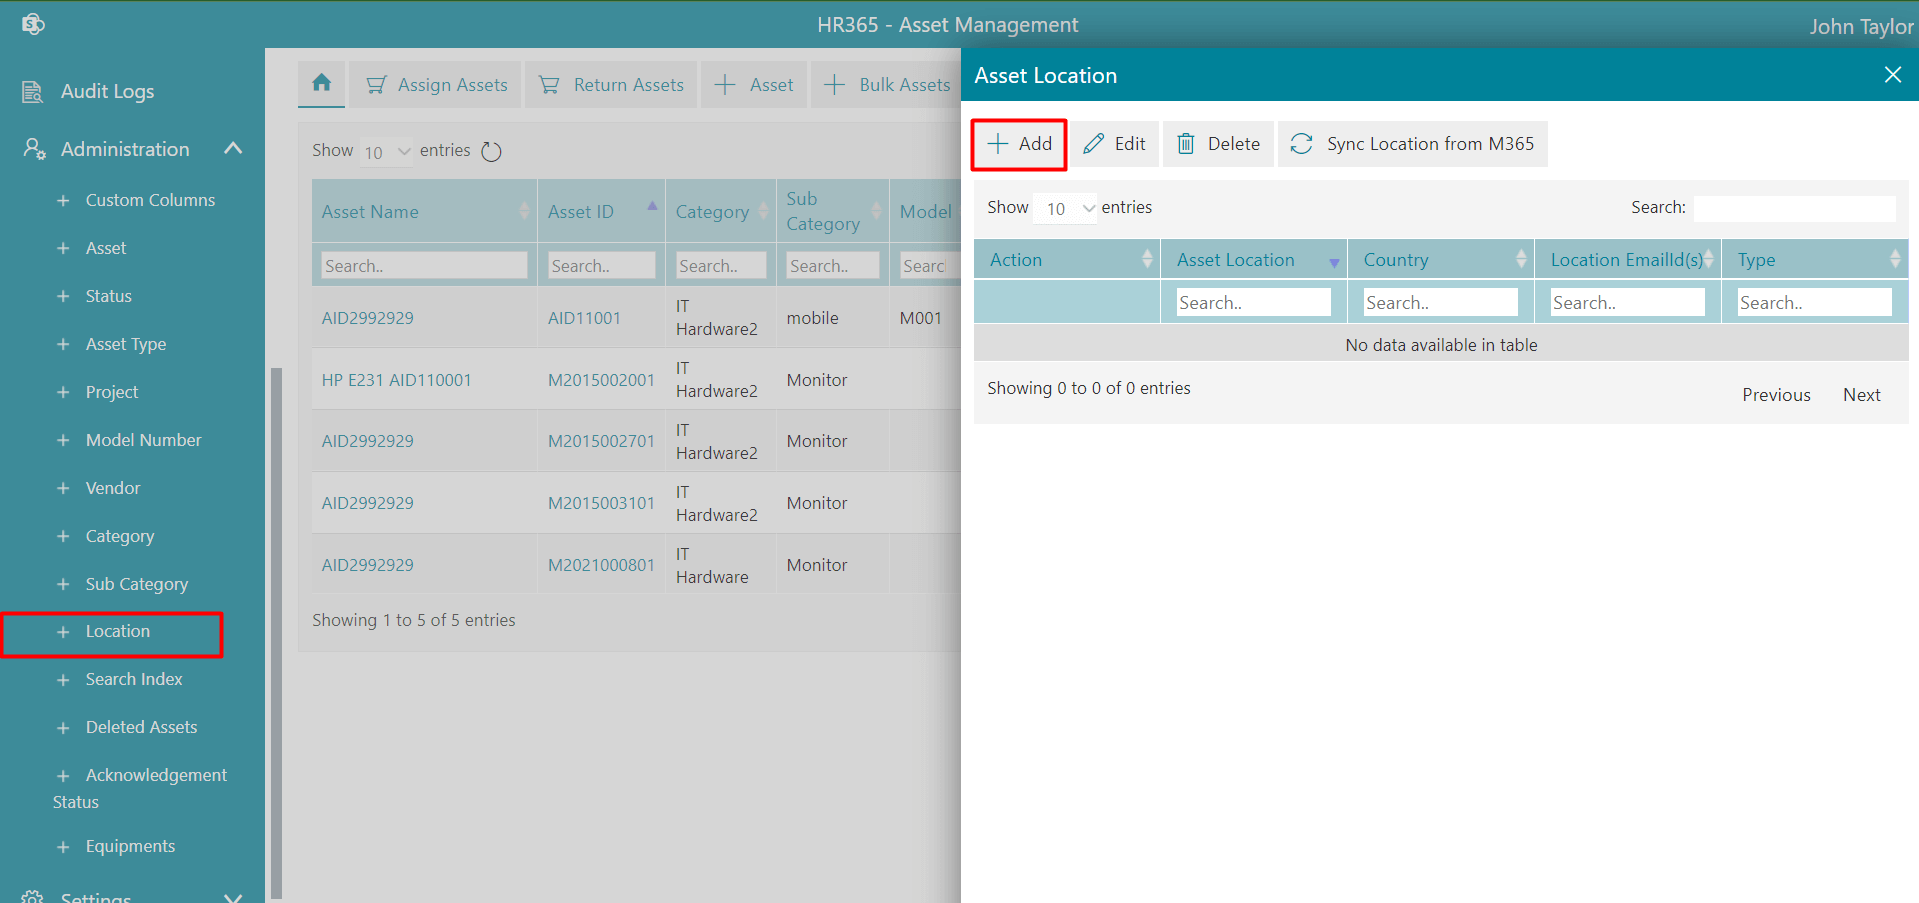
To add the asset type, follow the below steps:
Sync from M365: If you click, it will fetch position available in M365 and push the position names in list.
Edit: Click the Edit button, this display Edit Category page. Update the entries and click on Update button.
Delete:Click the delete button, this displays a dialog box. Click on Yes button.
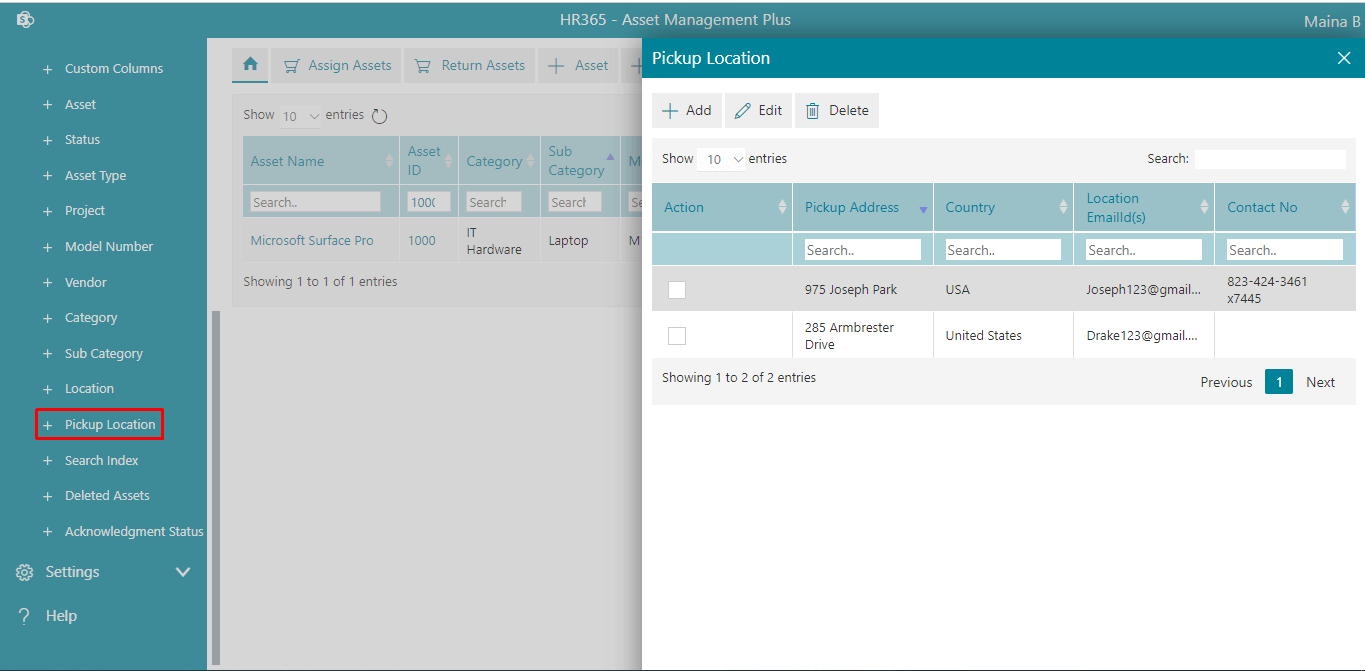
Pickup Location
-
Click on the +Add, this displays Add Location page.
-
Enter the Pickup Address, State,City, Zip Code, Country, Email Id(s) and Mobile Number.
-
Click on the Submit button.
From here, admin can add, edit or delete locations.
To add pickup location, follow the below steps:
To edit, select the Action and click on the Edit button. Update the entires and click on Submit button.
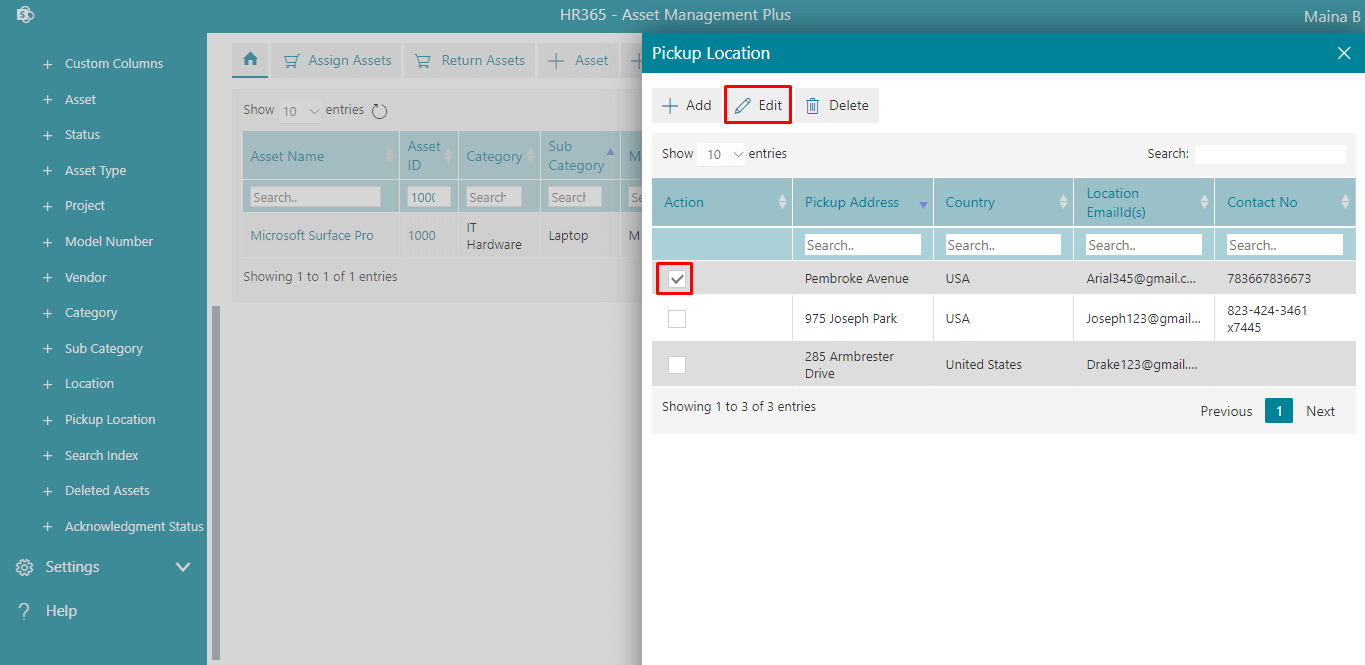
To delete, select the Action and click on the Delete button.
Search Index
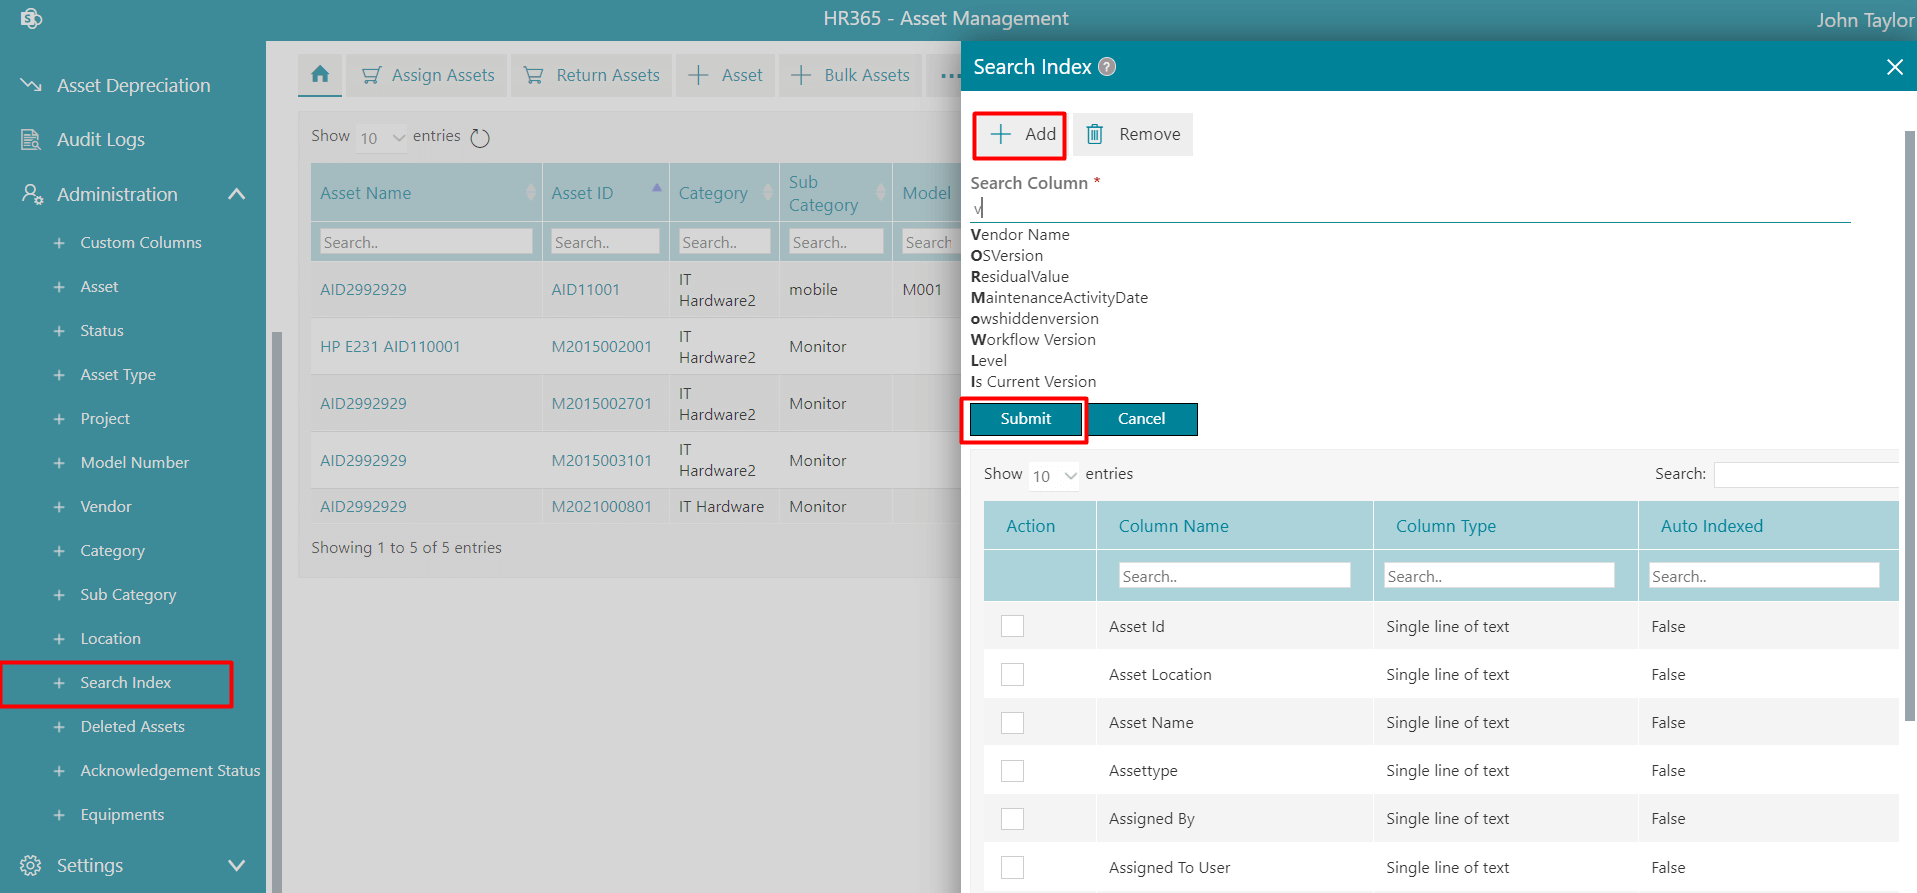
- Click on Search Index under administartion. This displays Search Index page.
- Click on +Add and enter Search Column.
- Click on the Submit button.
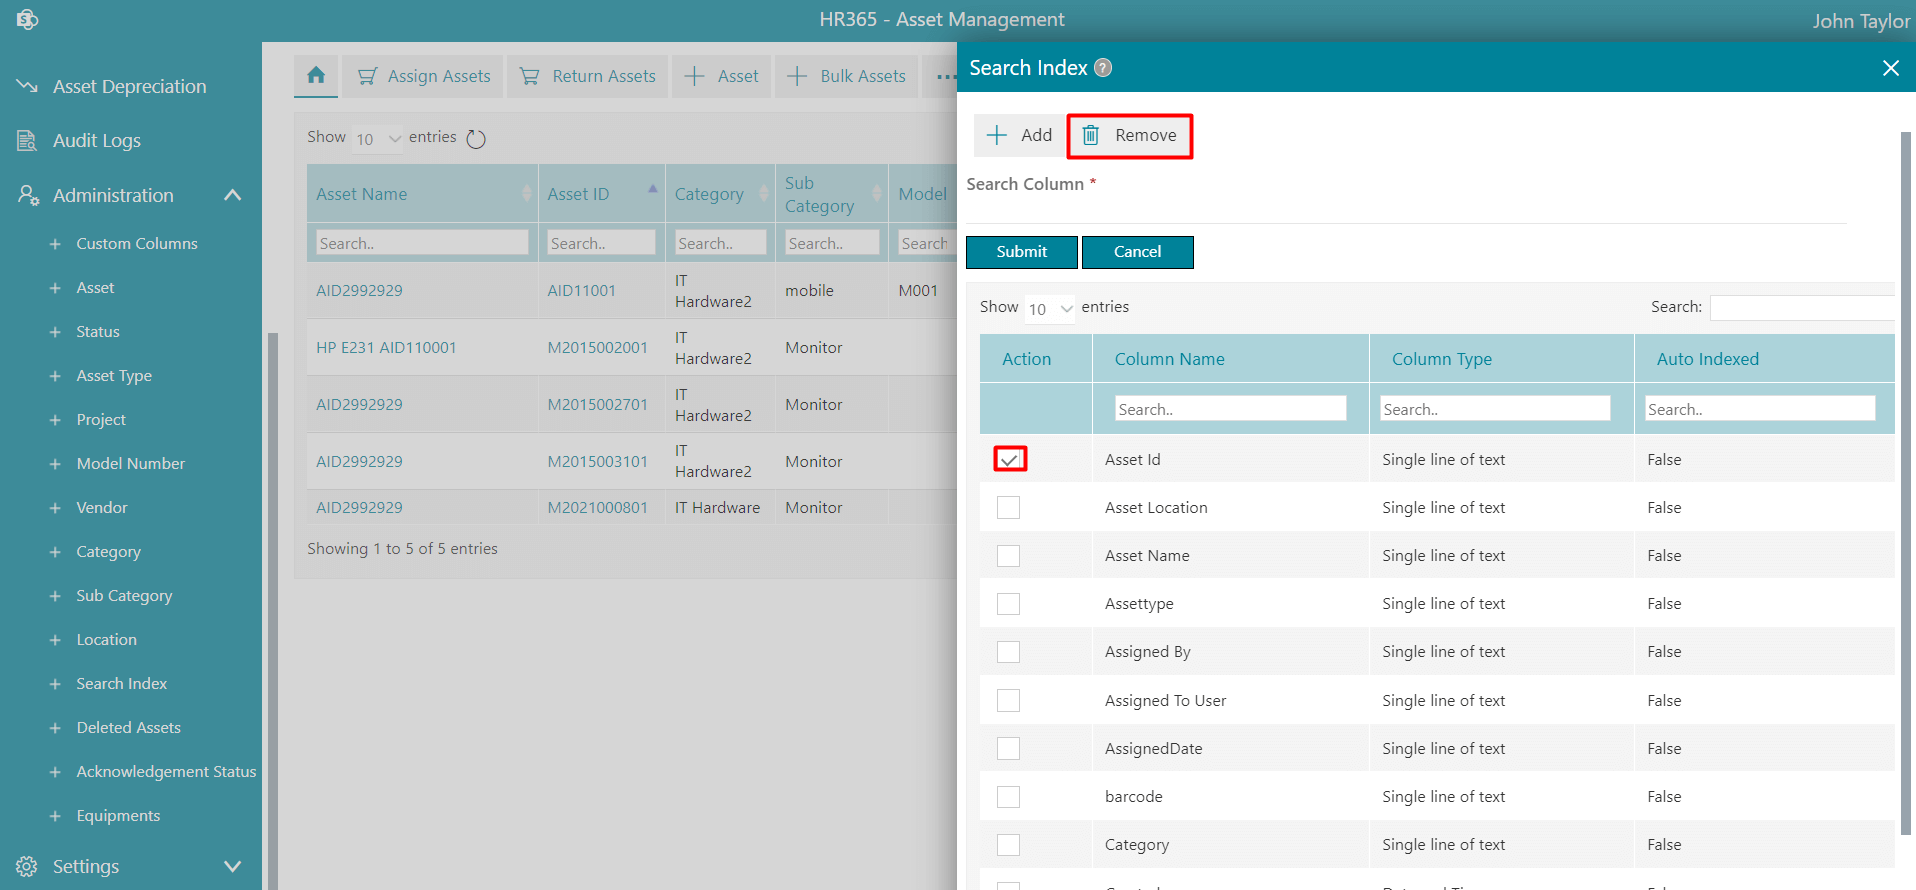
From here, admin can add or remove the search index. The Added search index will display on the home page. Admin/users can find the details from the search index as per added column name.
The maximum allowed search column entries are 18.
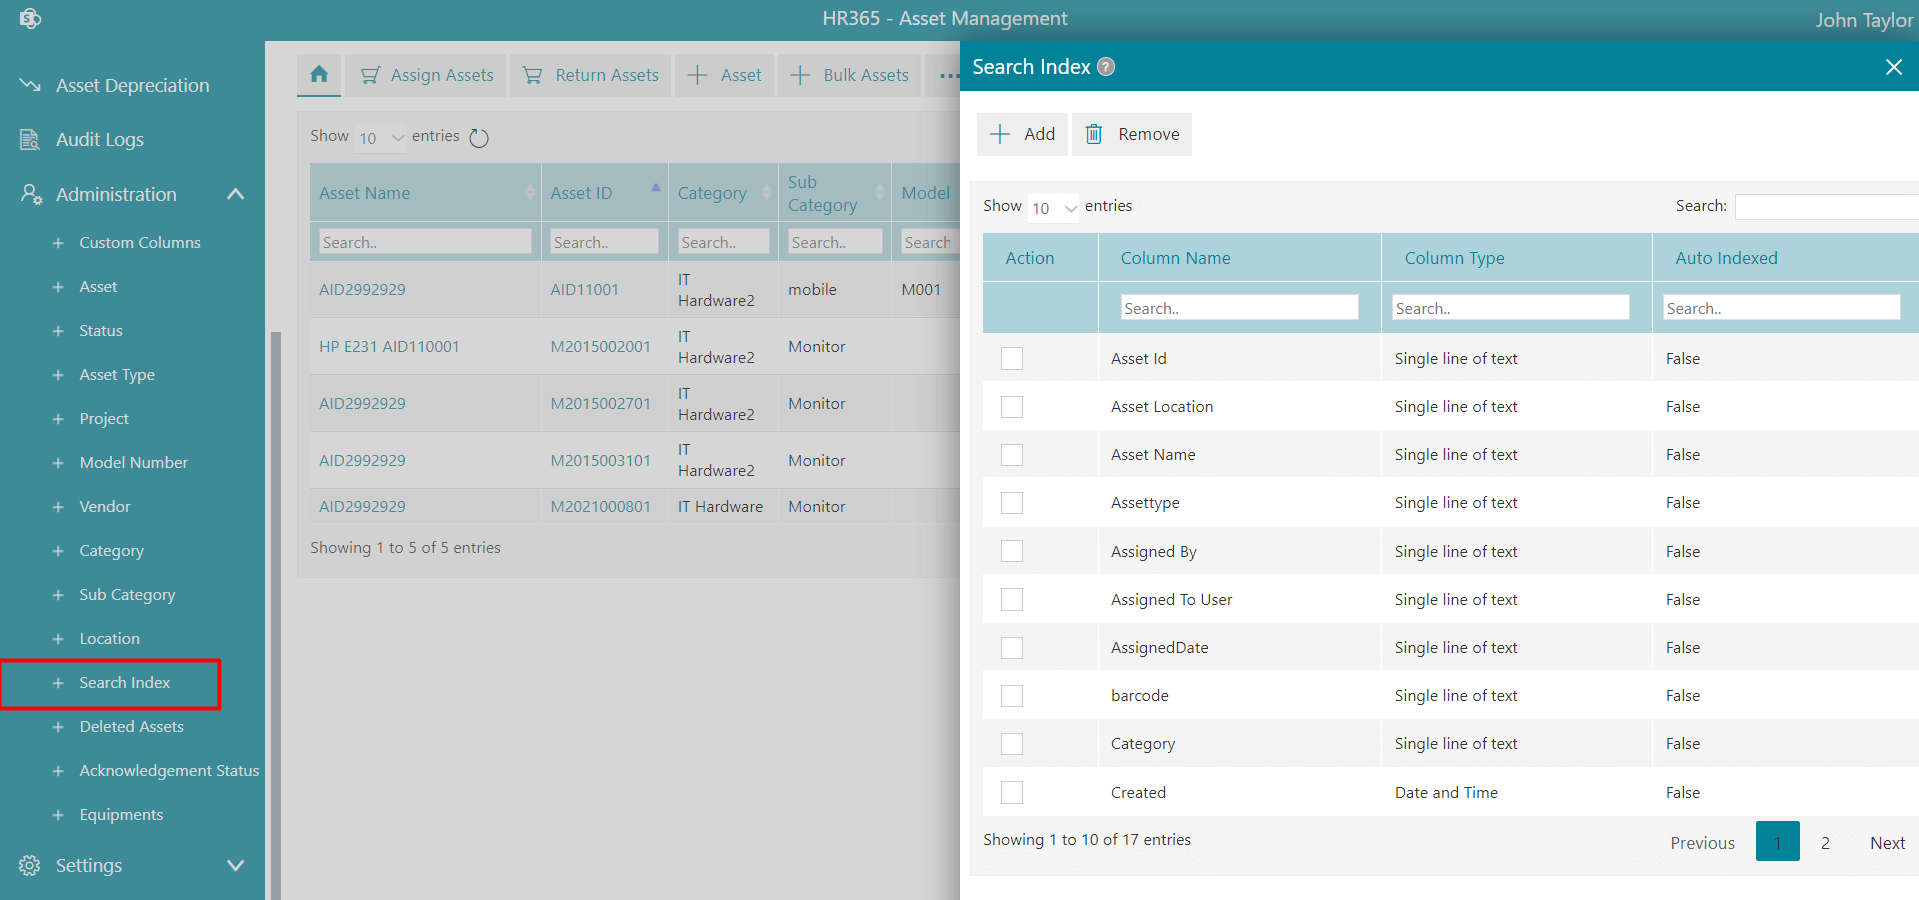
To add the search index, follow the below steps:
To remove, select the Action and click on the Remove button.
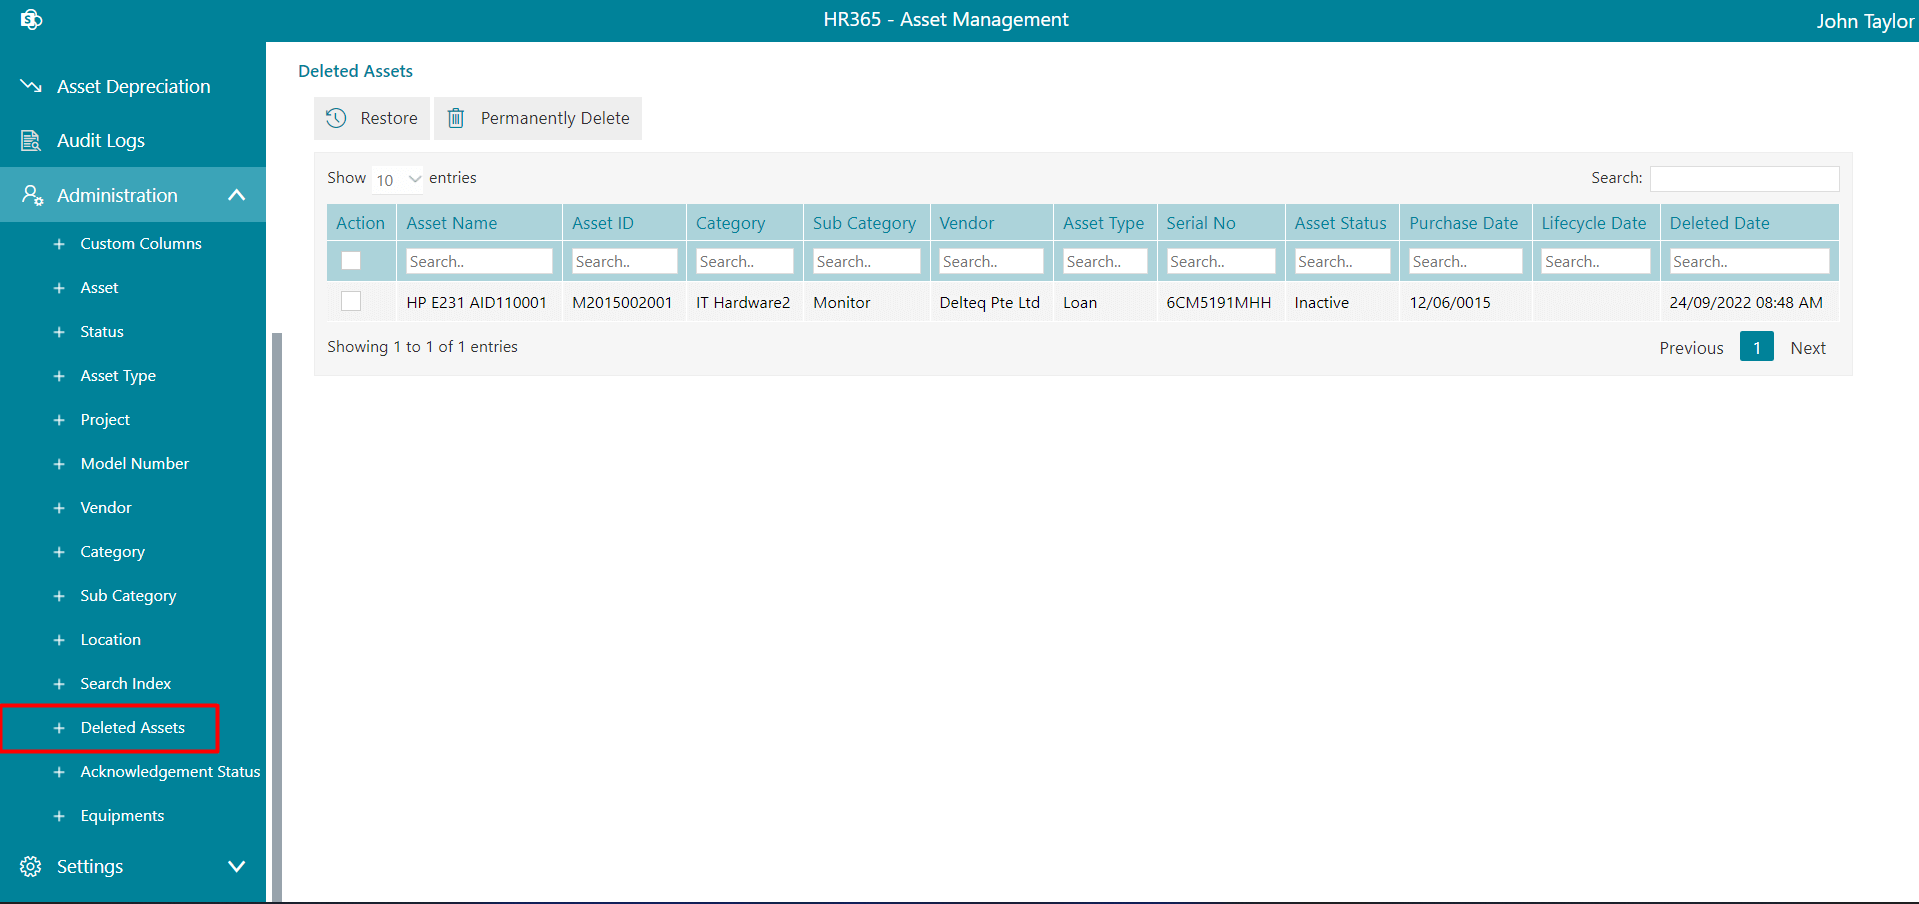
Deleted Asset
Admin and Asset Manager can delete the assets. The deleted assets from the administration page will show in deleted assets, we can either restore it back or can delete them permanently.
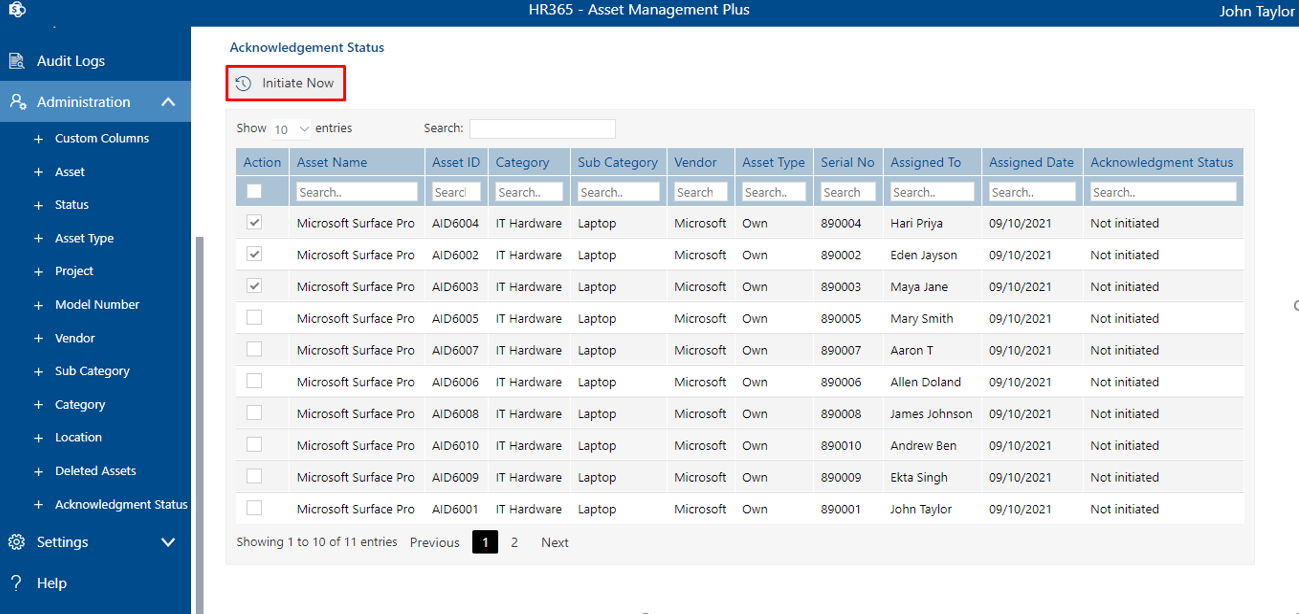
Acknowledgement Status
- When assets are assigned from bulk asset using CSV file,
- If we assign assets when asset accept notification is disabled in general settings.
- Synced Intune assets.
On this page, those assets displayed which are not yet email notified to users about assigned. There we can find assets.
To send assigned asset notification to users select the assets from action column and click on initiate now.
Allow to send notification for 25 assets at a time.
Equipments
-
Click on the +Add Equipment, this displays Add Equipment page.
-
Enter the Unique Id, Item Name,Purchase Date, Quantity, Status and Item Description.
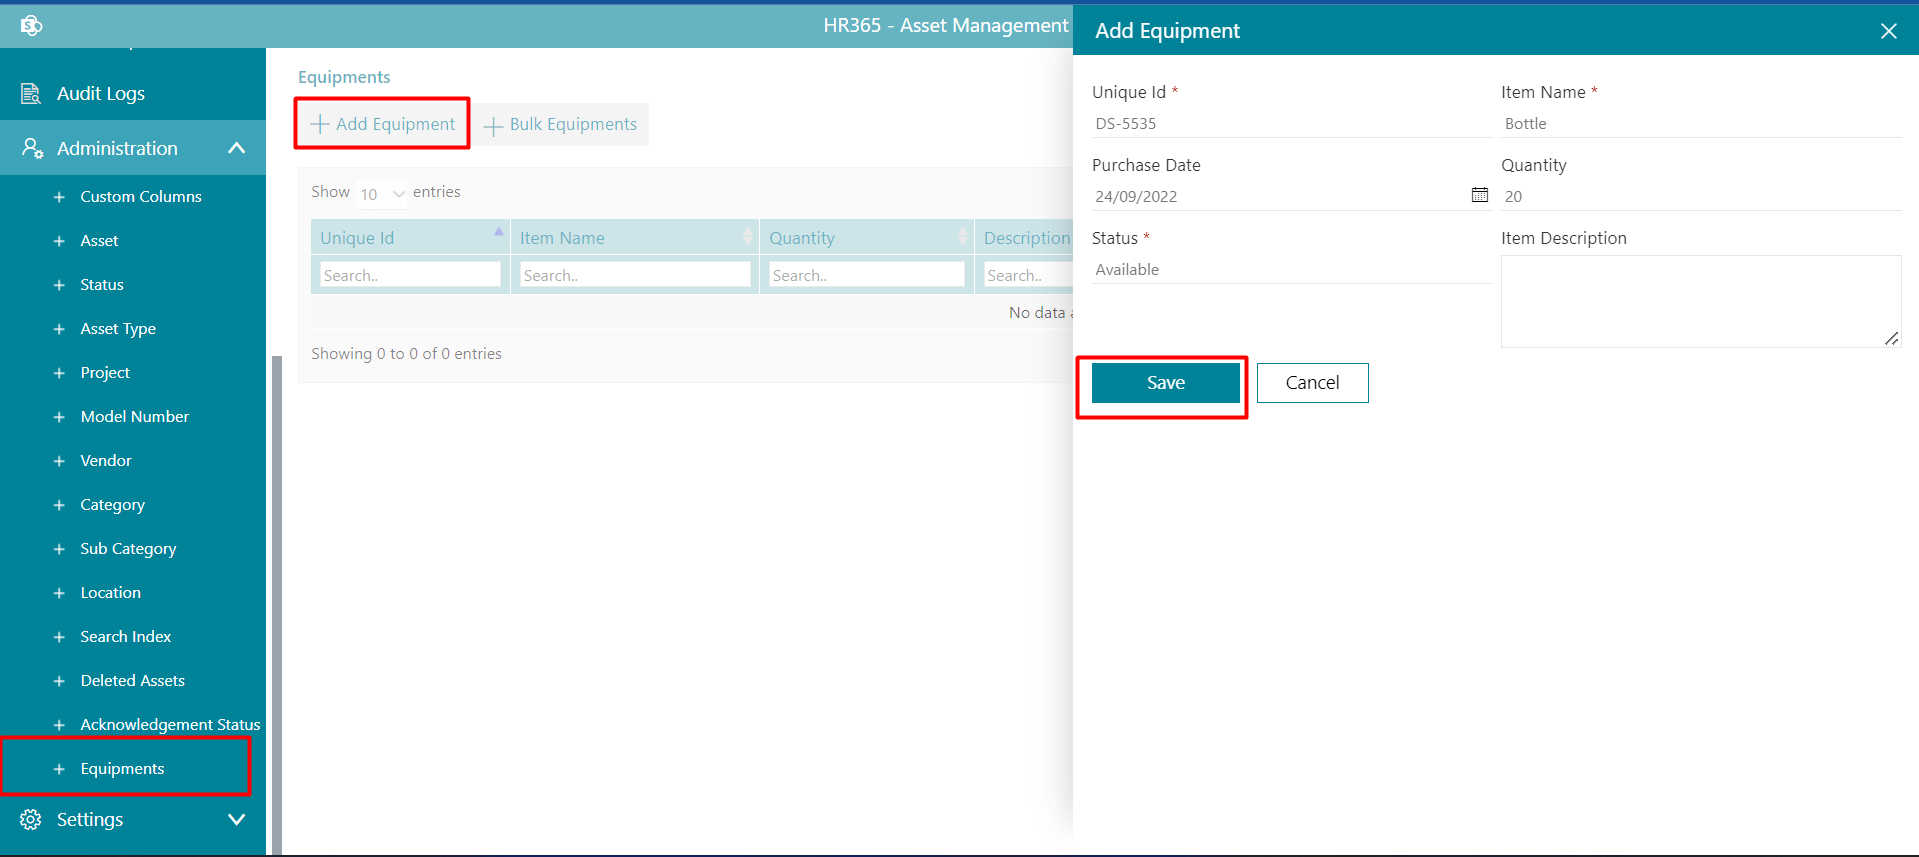
-
Click on the Save button.
-
Click on +Bulk Equipments, this displays Add Multiple Equipments.
-
Choose the data loaded CSV file from system and upload the file.
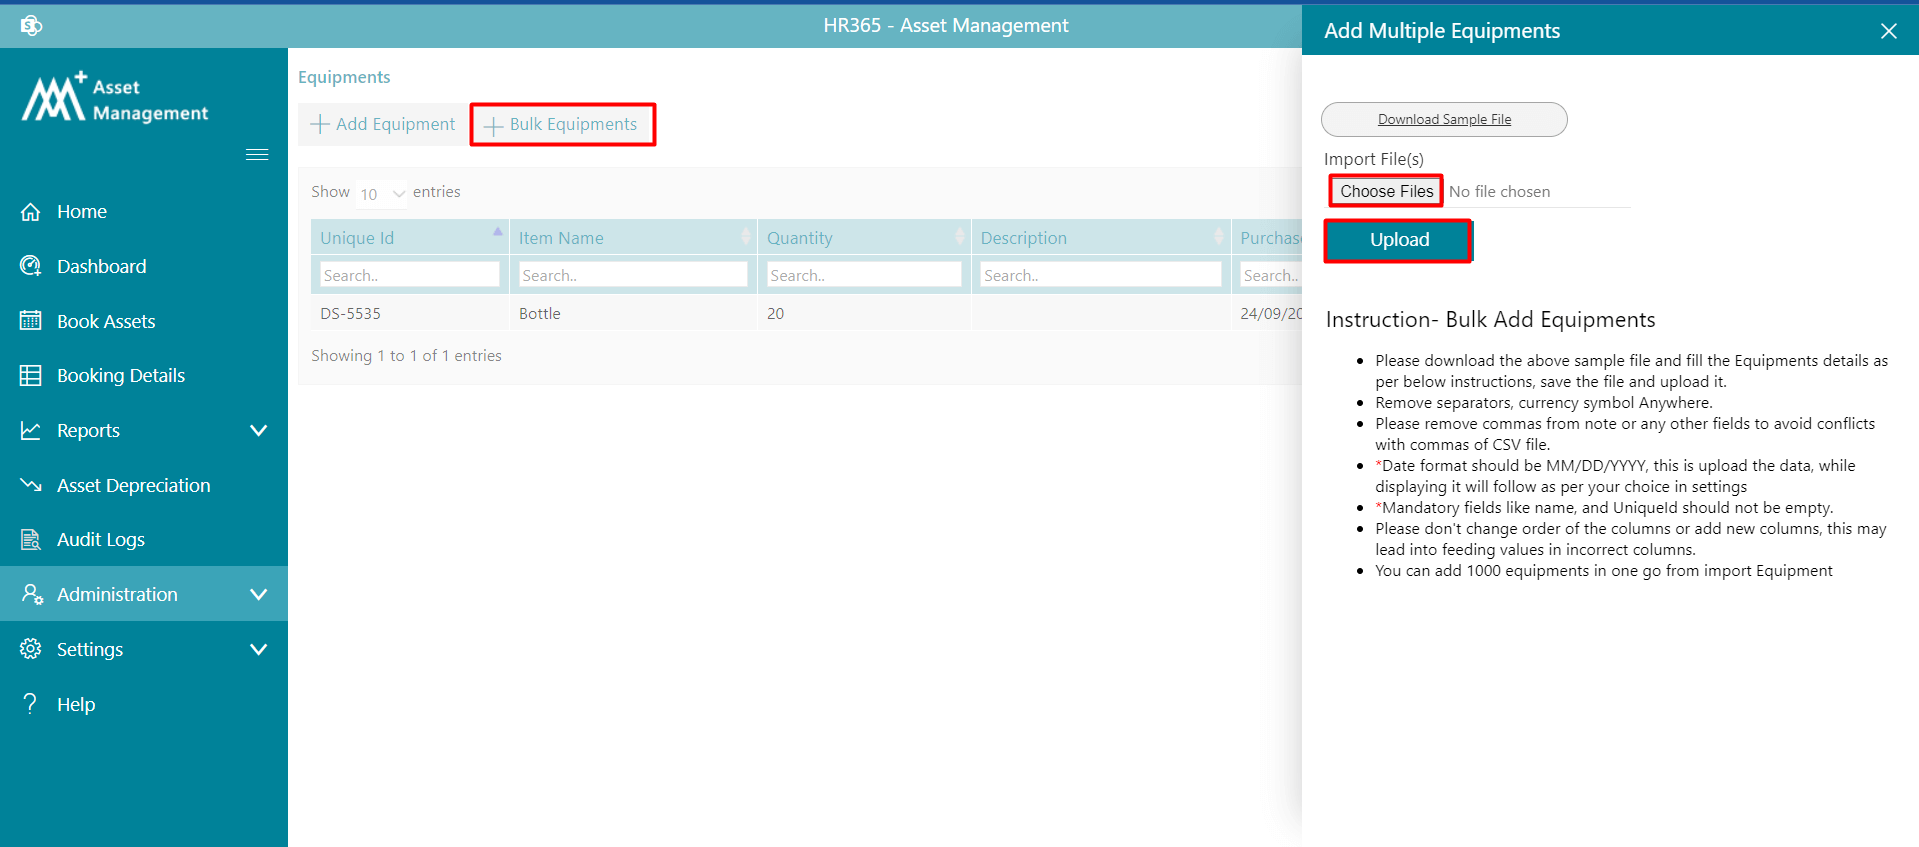
-
Click on the Upload button.
From here, admin can add or edit or delete equipment.
To add equipment, follow the below steps:
Add
Bulk Add
To edit, select the Action and click on the Edit button. Update the entries and click on Submit button.
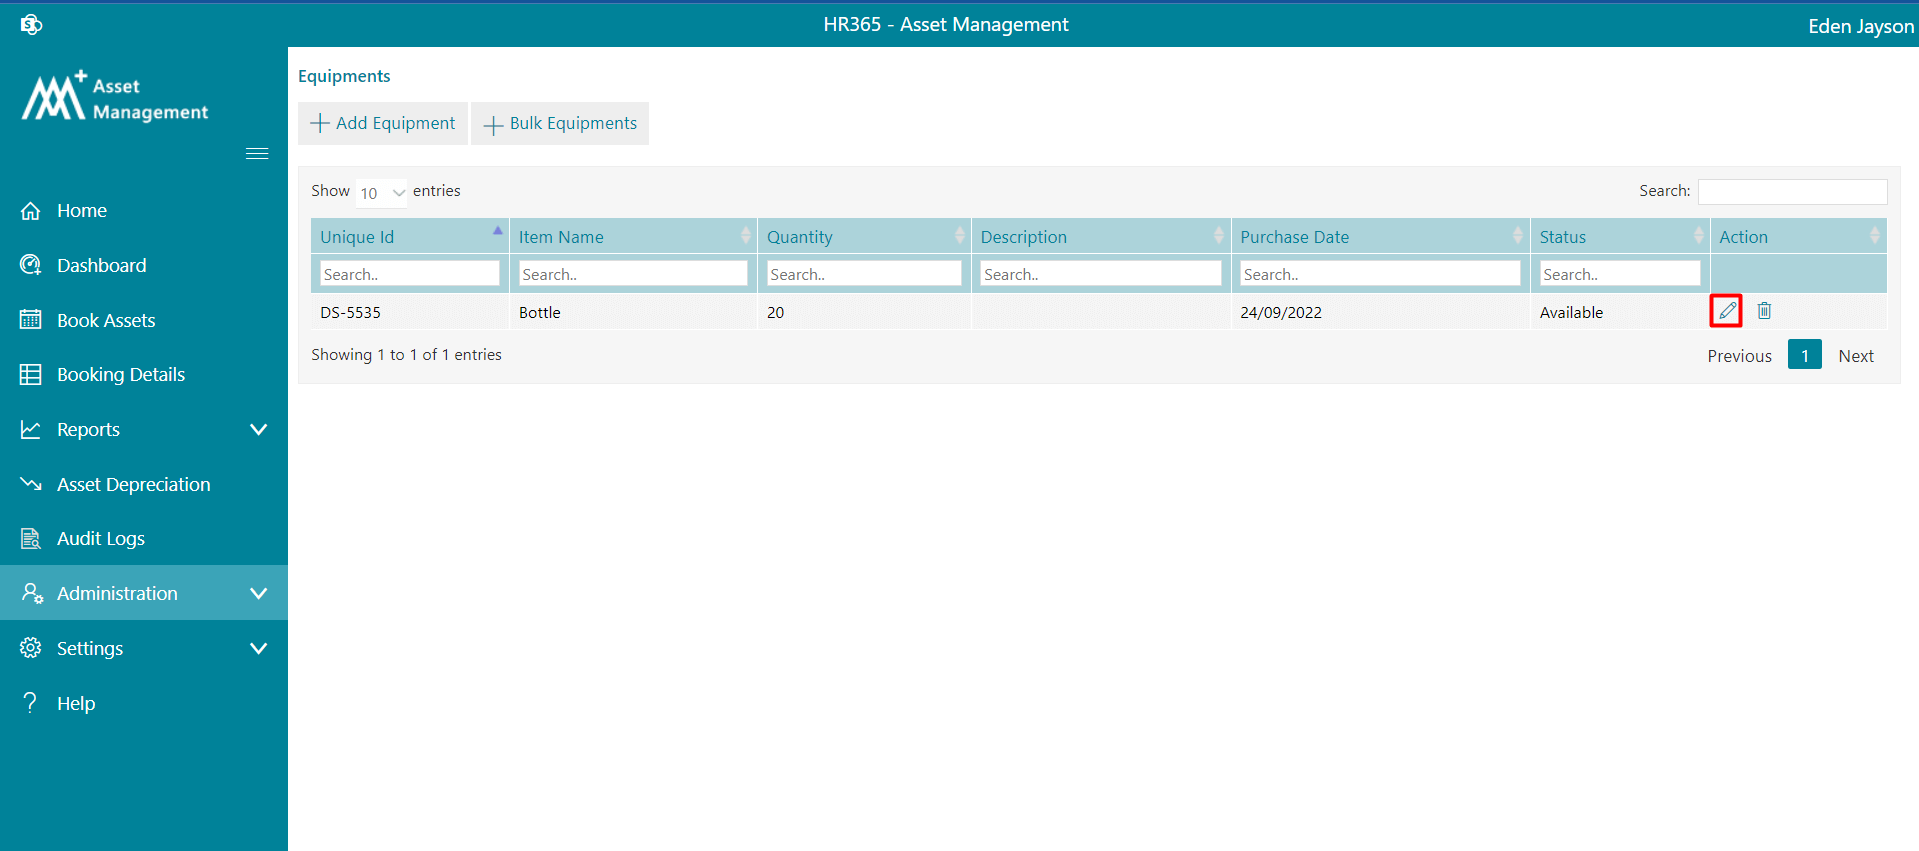
To delete, select the Action and click on the Delete button.
