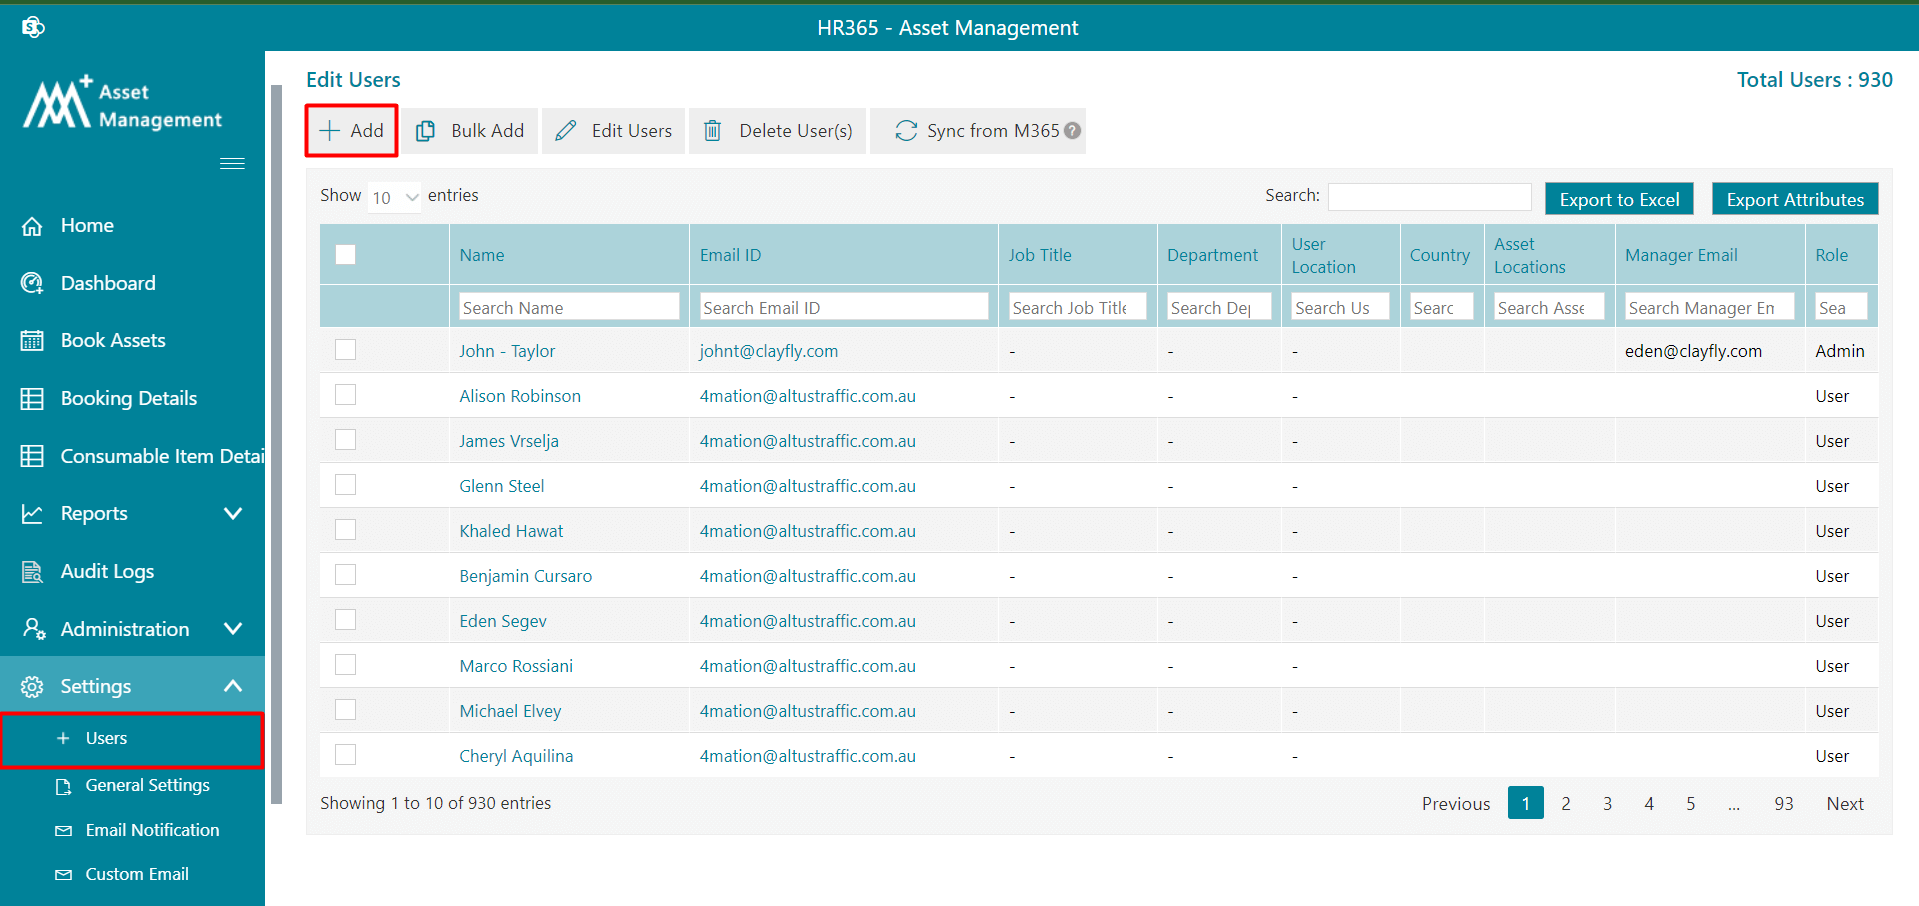
Users
Admin can add users to this application. There are different types of roles like the user, admin, asset manager, supervisor and no access as shown below.
- User: Only able to view assigned assets to them.
- Power user: Able to see all the assets only.
- Asset Manager: Able to add assets, delete assets, assign assets and return assets, audit assets,report assets, book assets, edit or delete book assets and depreciation.
- Supervisor: Able to assign assets, return assets, audit assets, report assets book assets, edit or delete book assets and depreciation.
- No Access: The user cannot access the application.
-
Add
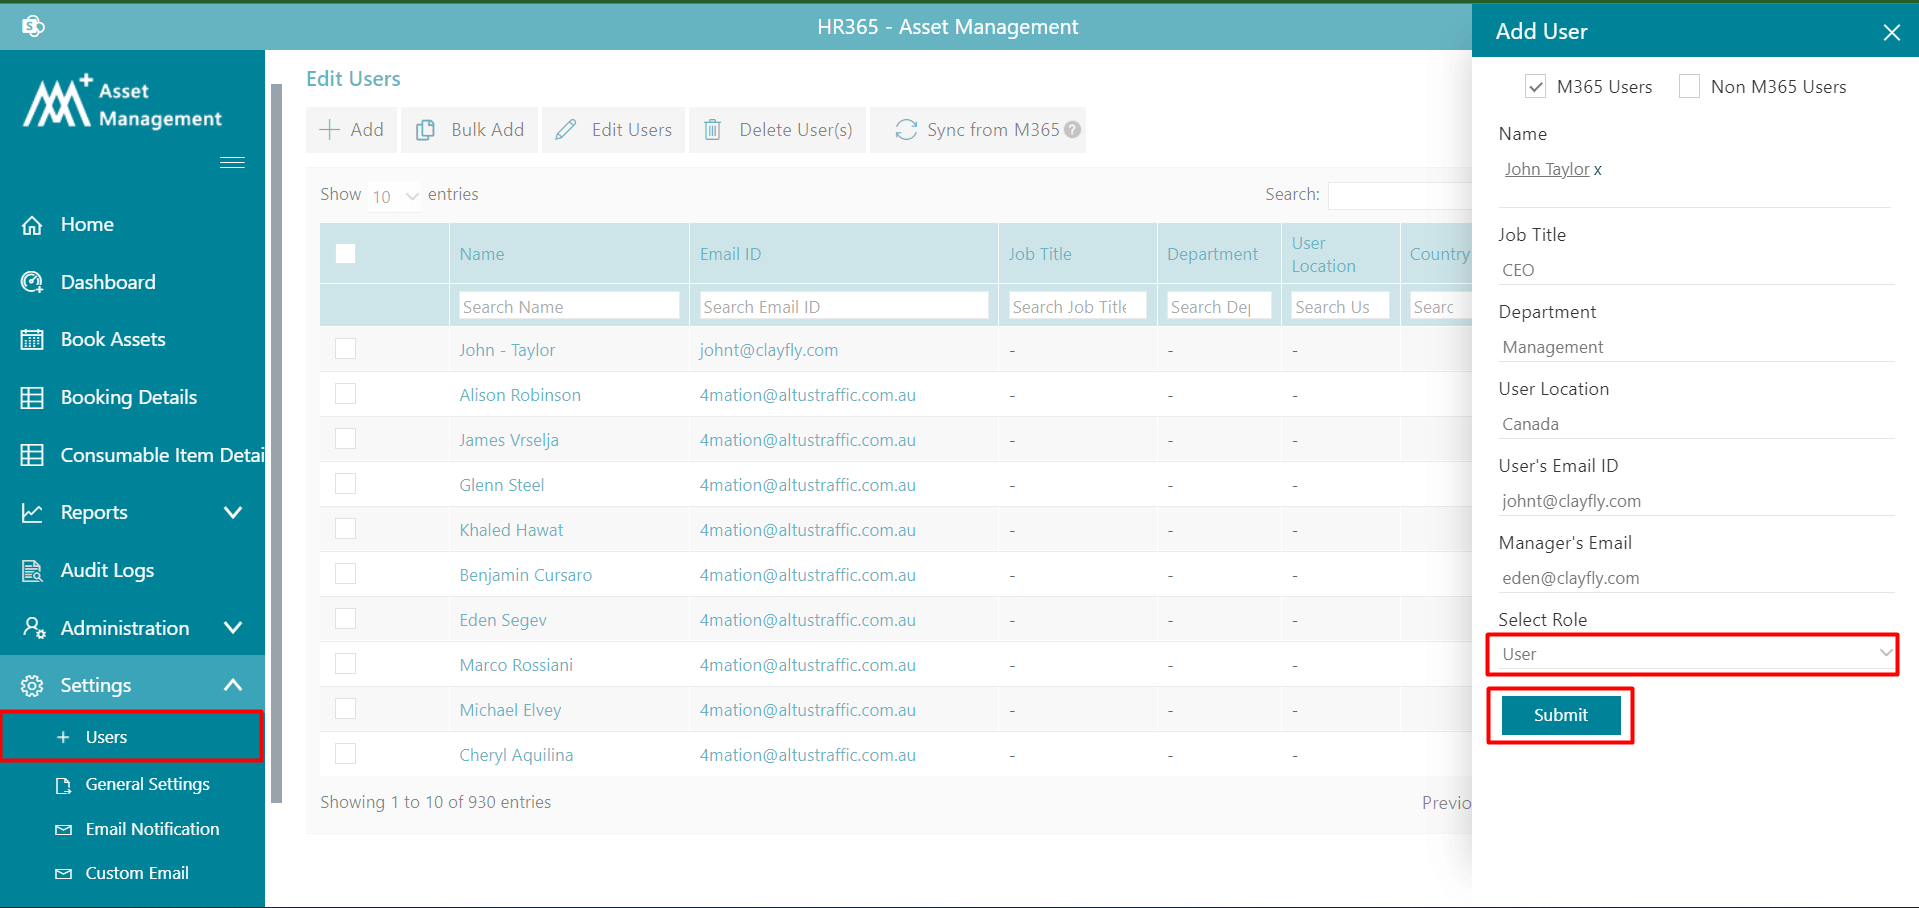
To add users, click on users under settings from the side panel, a page will open, click on add tab, add users page will open, First select the user type (M365 users or Non M365 users). For M365 users details fill fetch from M365 automatically if exist, you can edit the details further and click on submit button. For non M365 users, need to add all details manually.
Note: Assign & return assets notification for non M365 users works on Power Automate setup
-
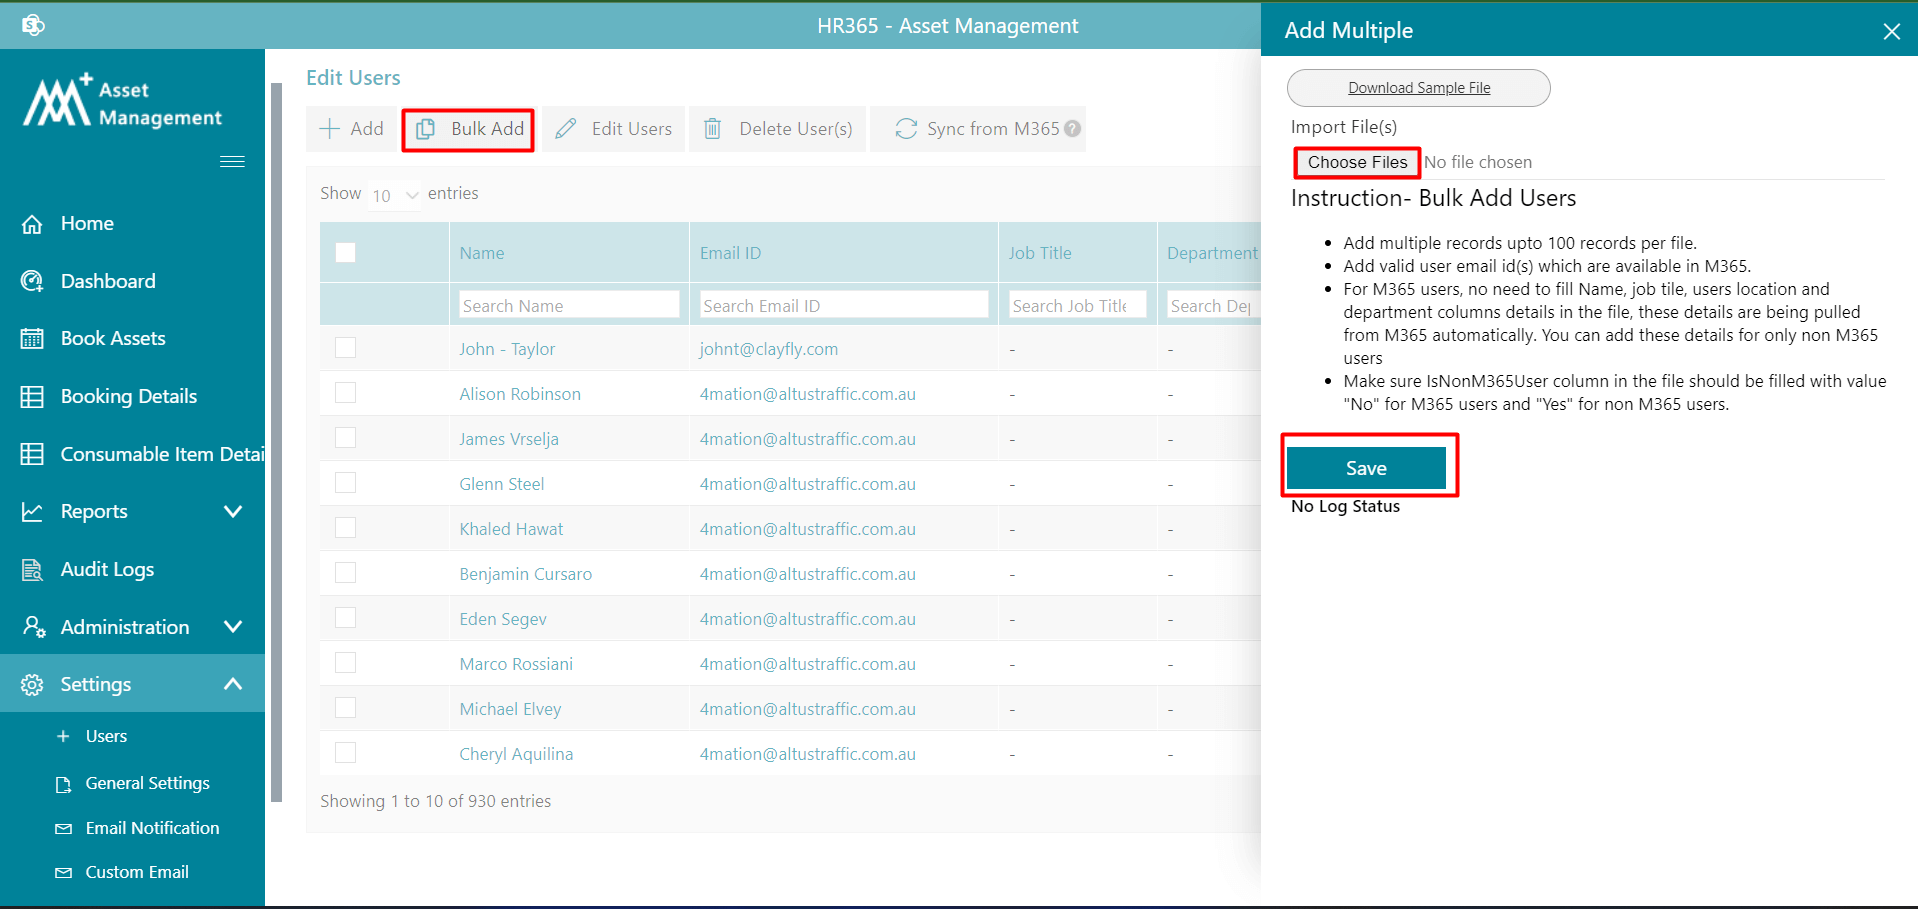
Bulk Add
Download the sample file and fill the email Ids and role as per specified format in the sample and save it. Choose the same file and click on save button
Note: Add only email(s) and role for M365 users, no need to add details if user’s details are available in O365. If user is M365 user, update “No” in IsNonM365User column. You can add both M365 and non M365 users from bulk add.
- Edit User Role
We can edit user roles for either individual or multiple users as shown below in the image. Select multiple users to assign the same role. -
Delete User
Select the users and click on delete users. -
Sync from M365
If you click on sync from M365 tab, the user's detail in the table will update from O365
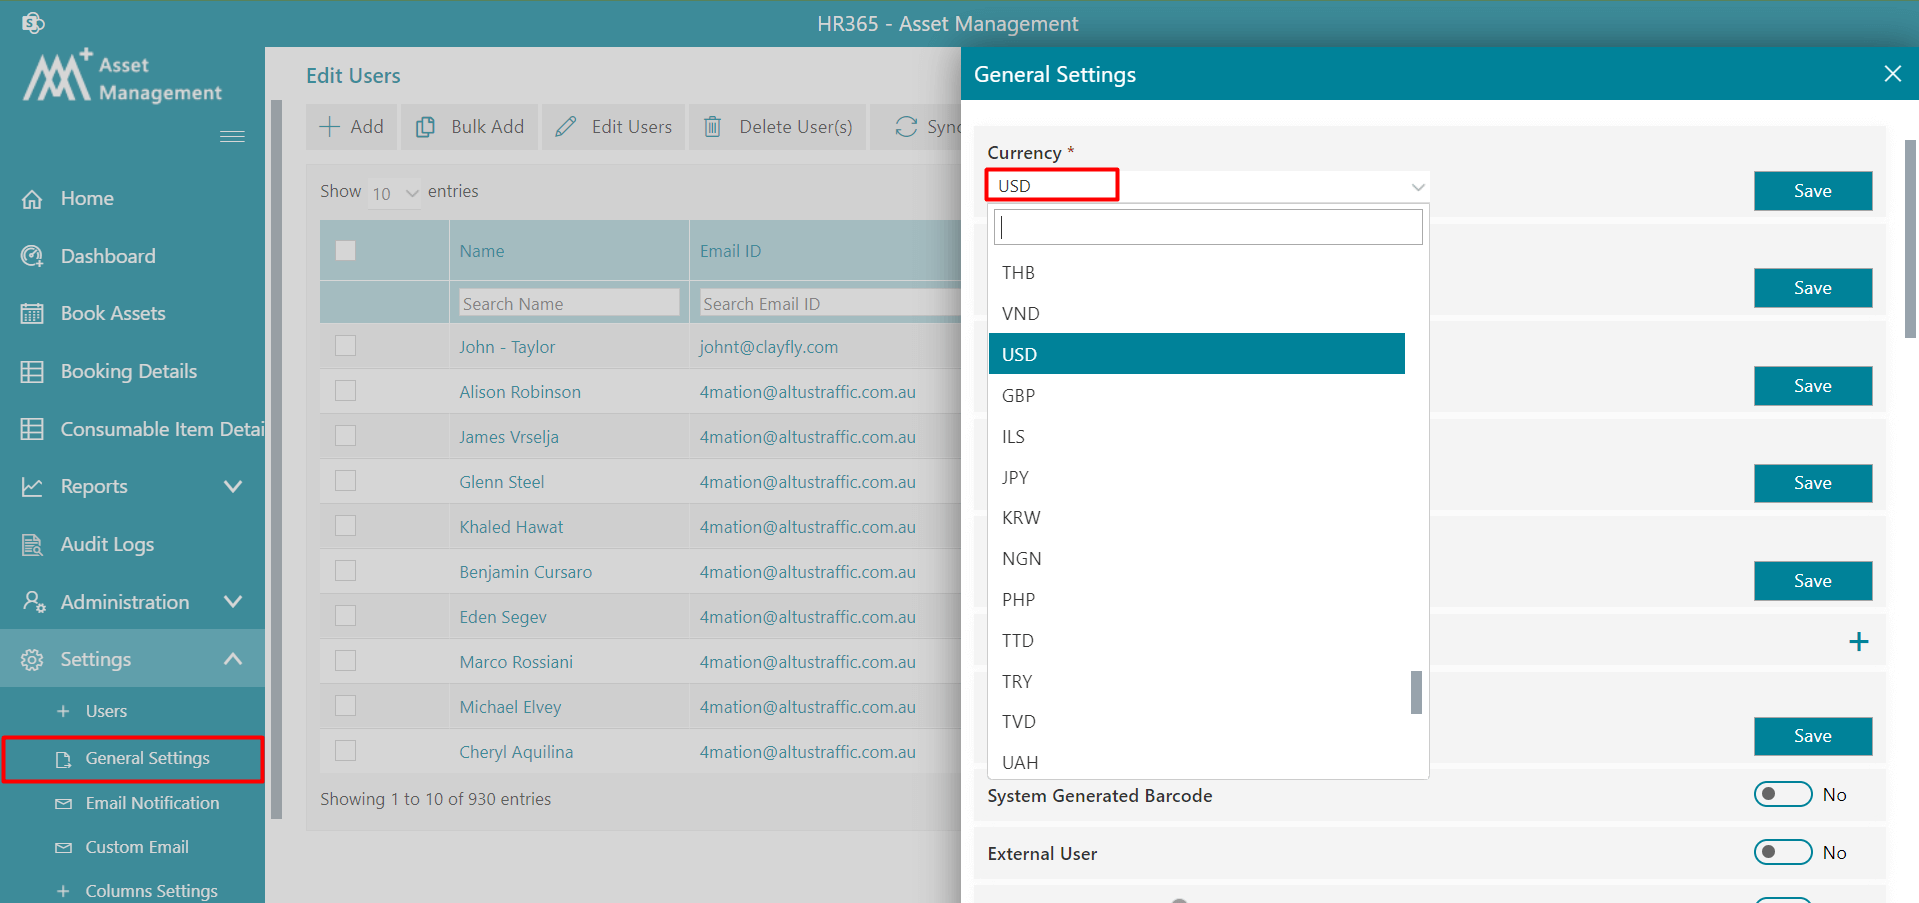
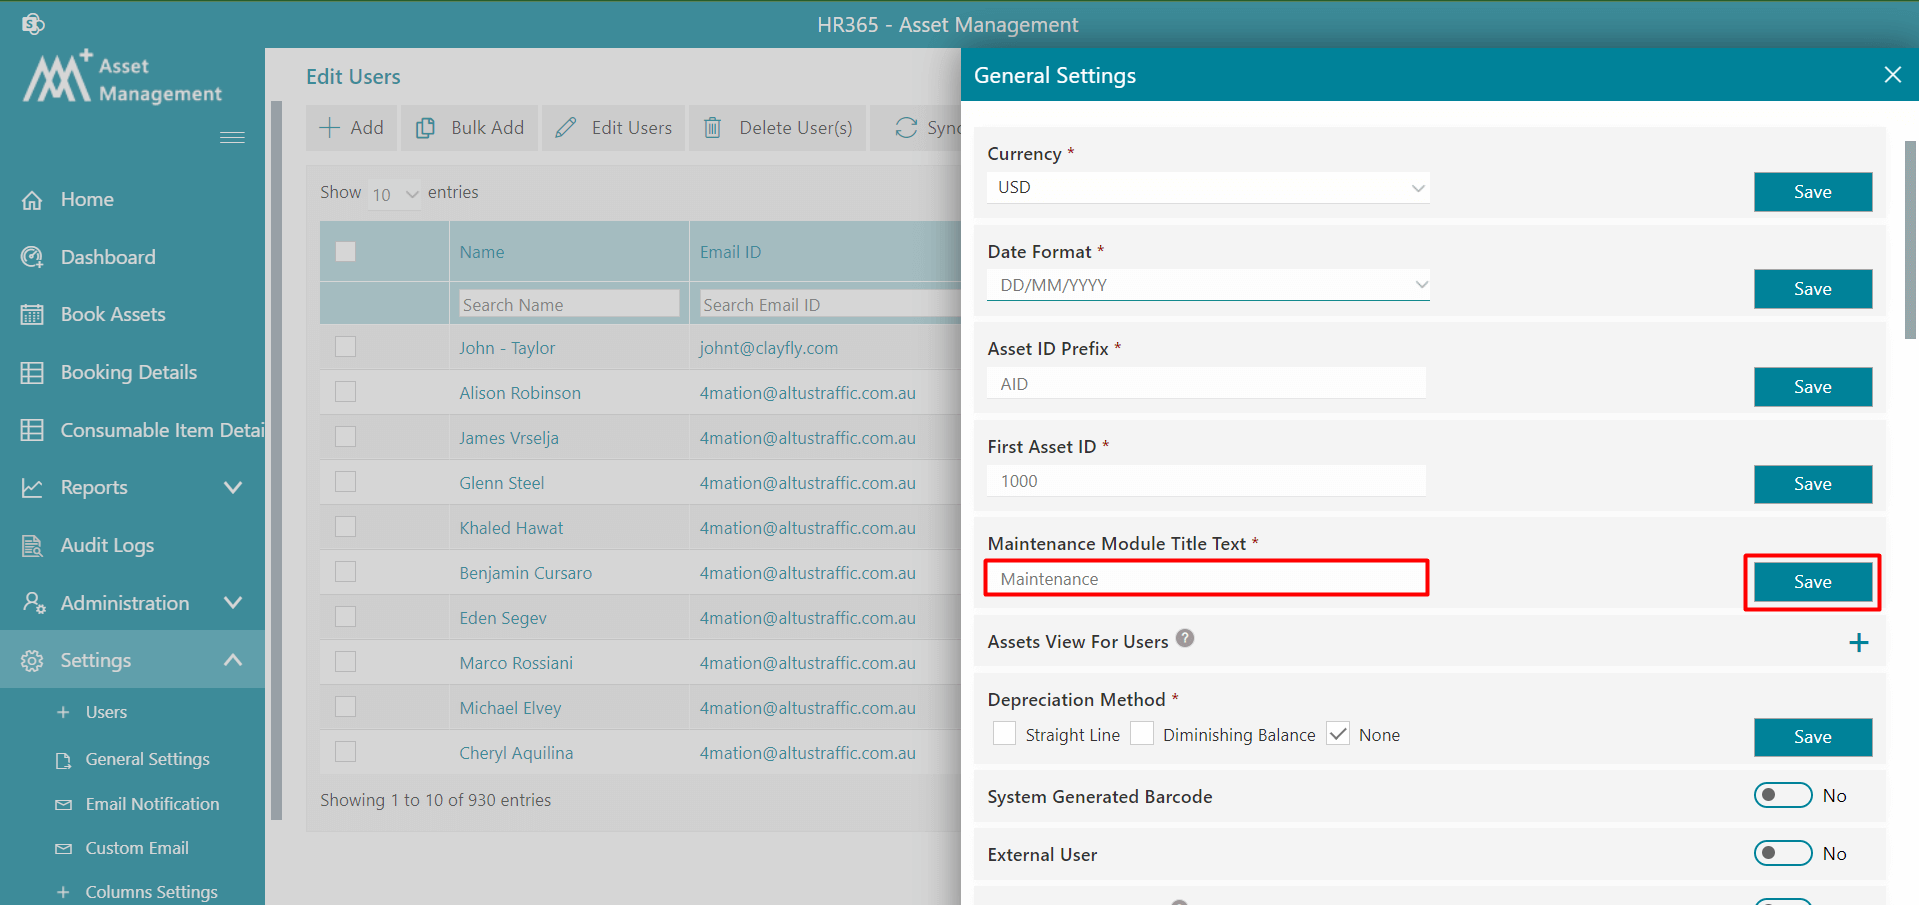
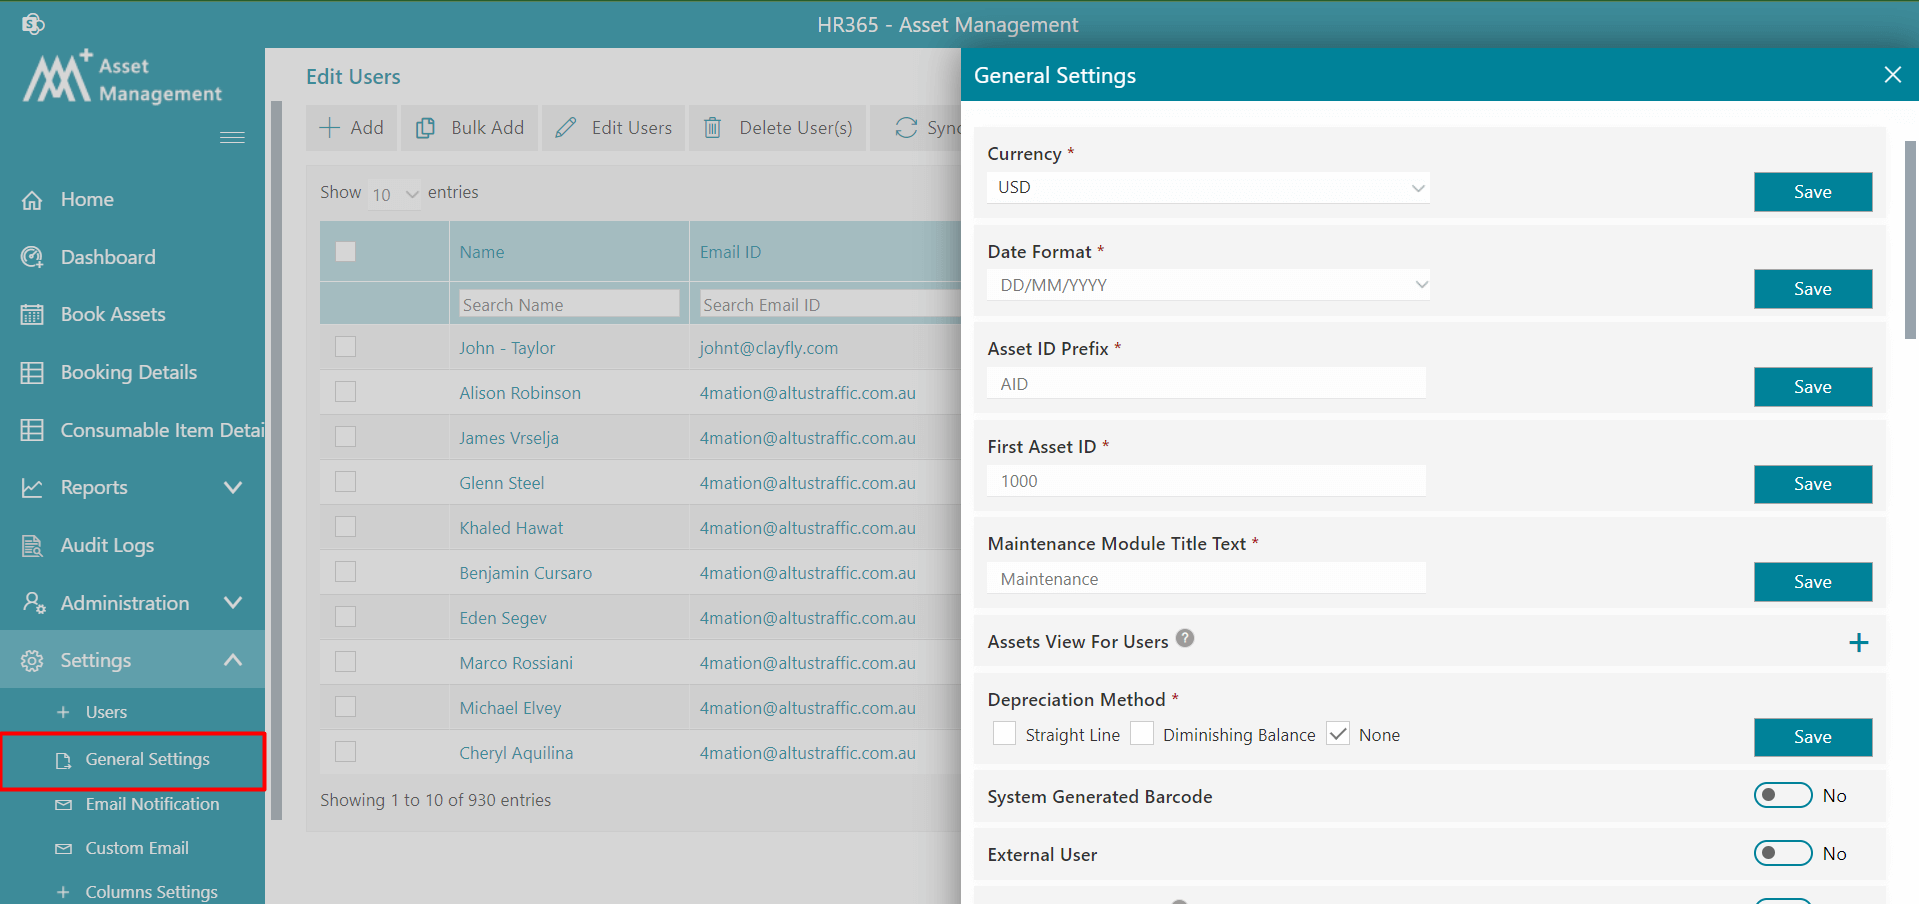
General Settings
-
Currency: From here, you can select the type of currency from the dropdown. Click on the Save button.
-
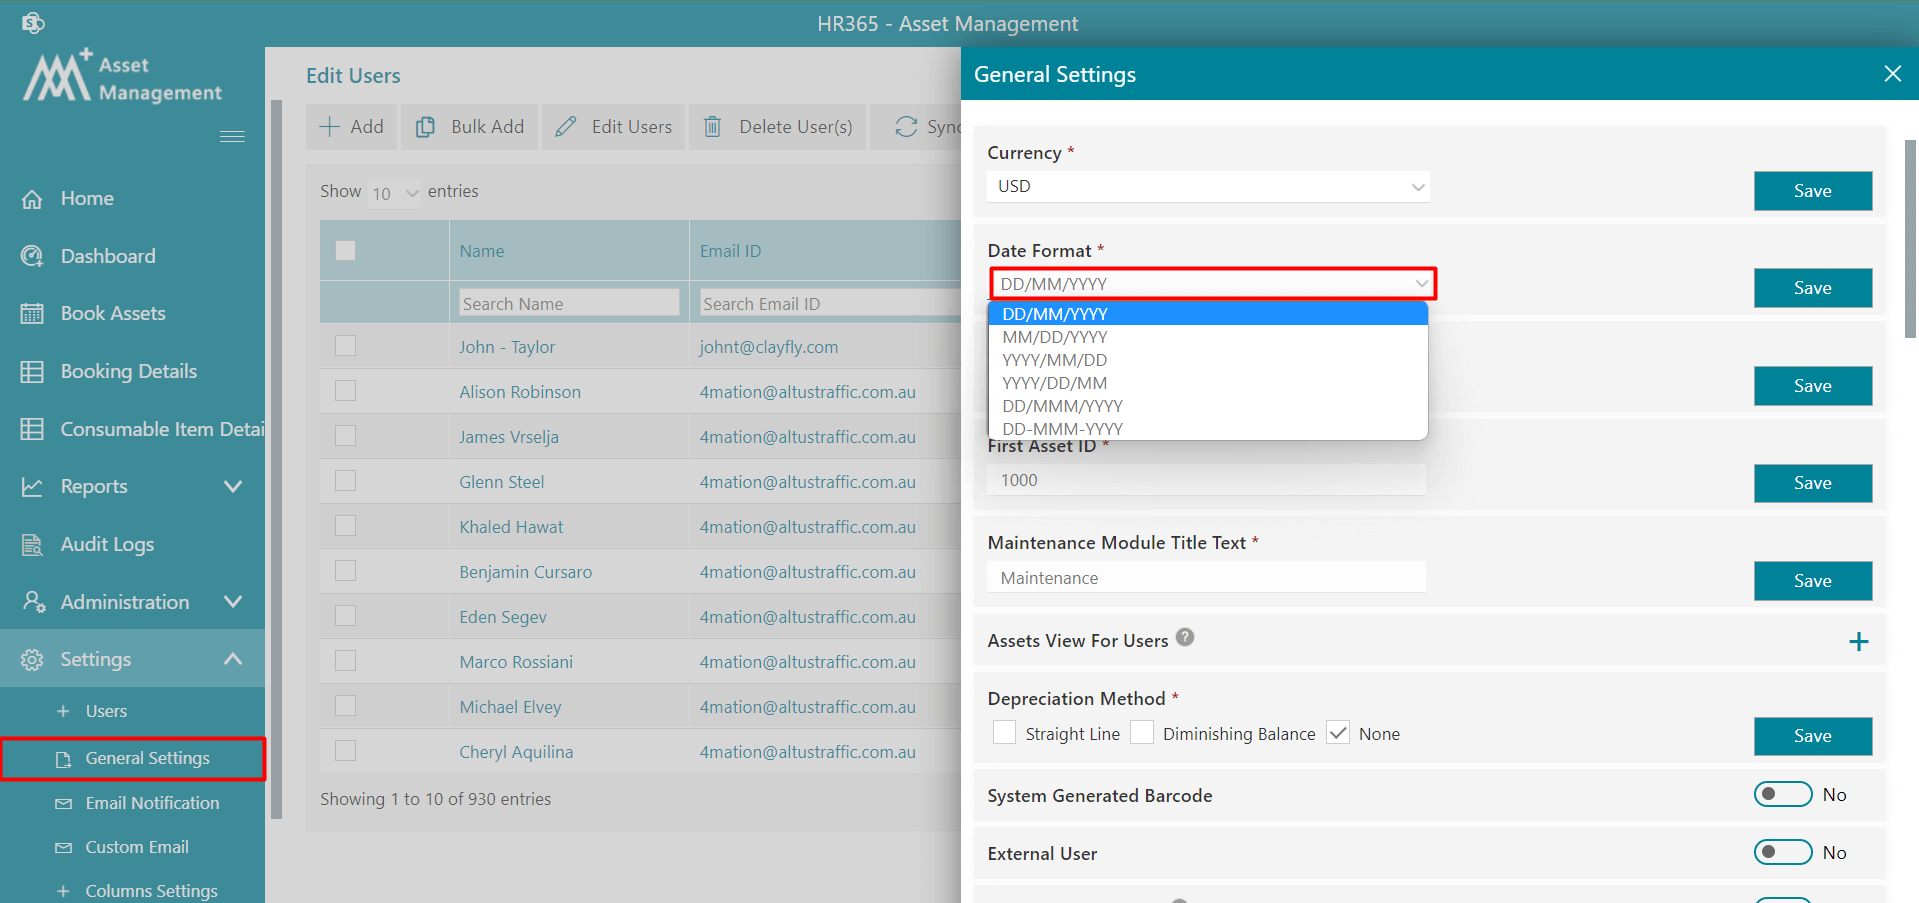
Date Format: From here, you can select the date format from the dropdown. Click on the Save button.
-
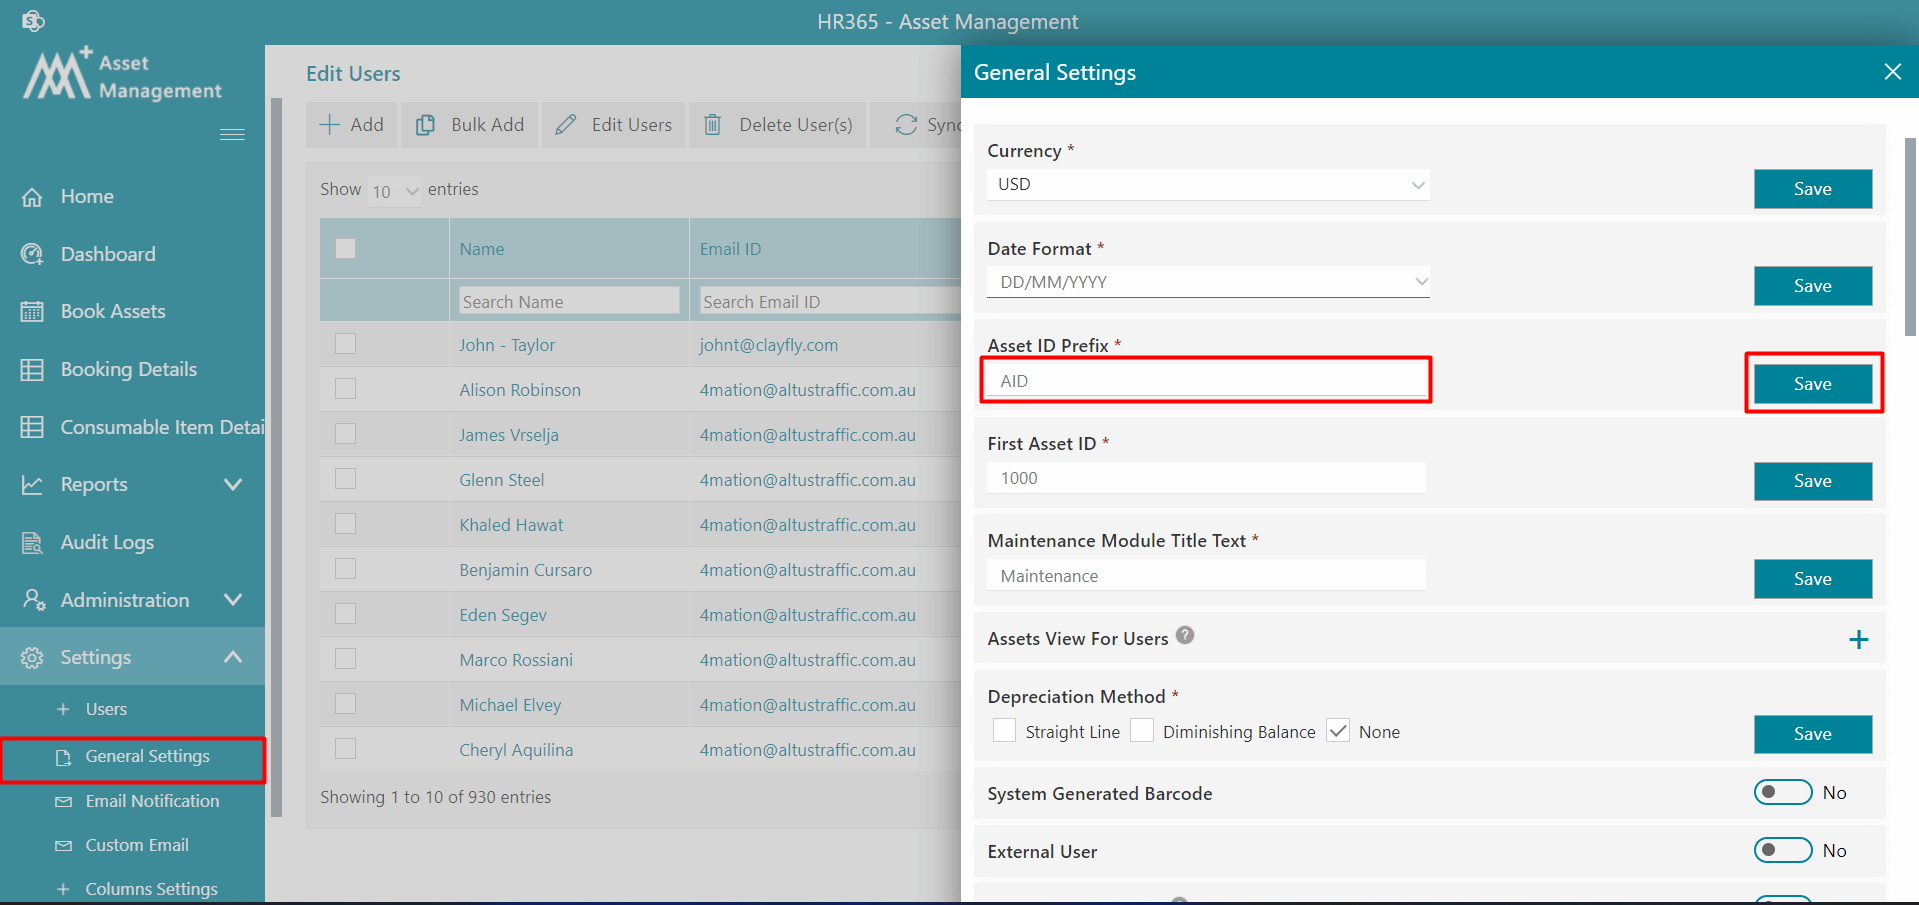
Asset ID Prefix: Asset ID Prefix specifies the letter prefix for the generated Asset ID.
-
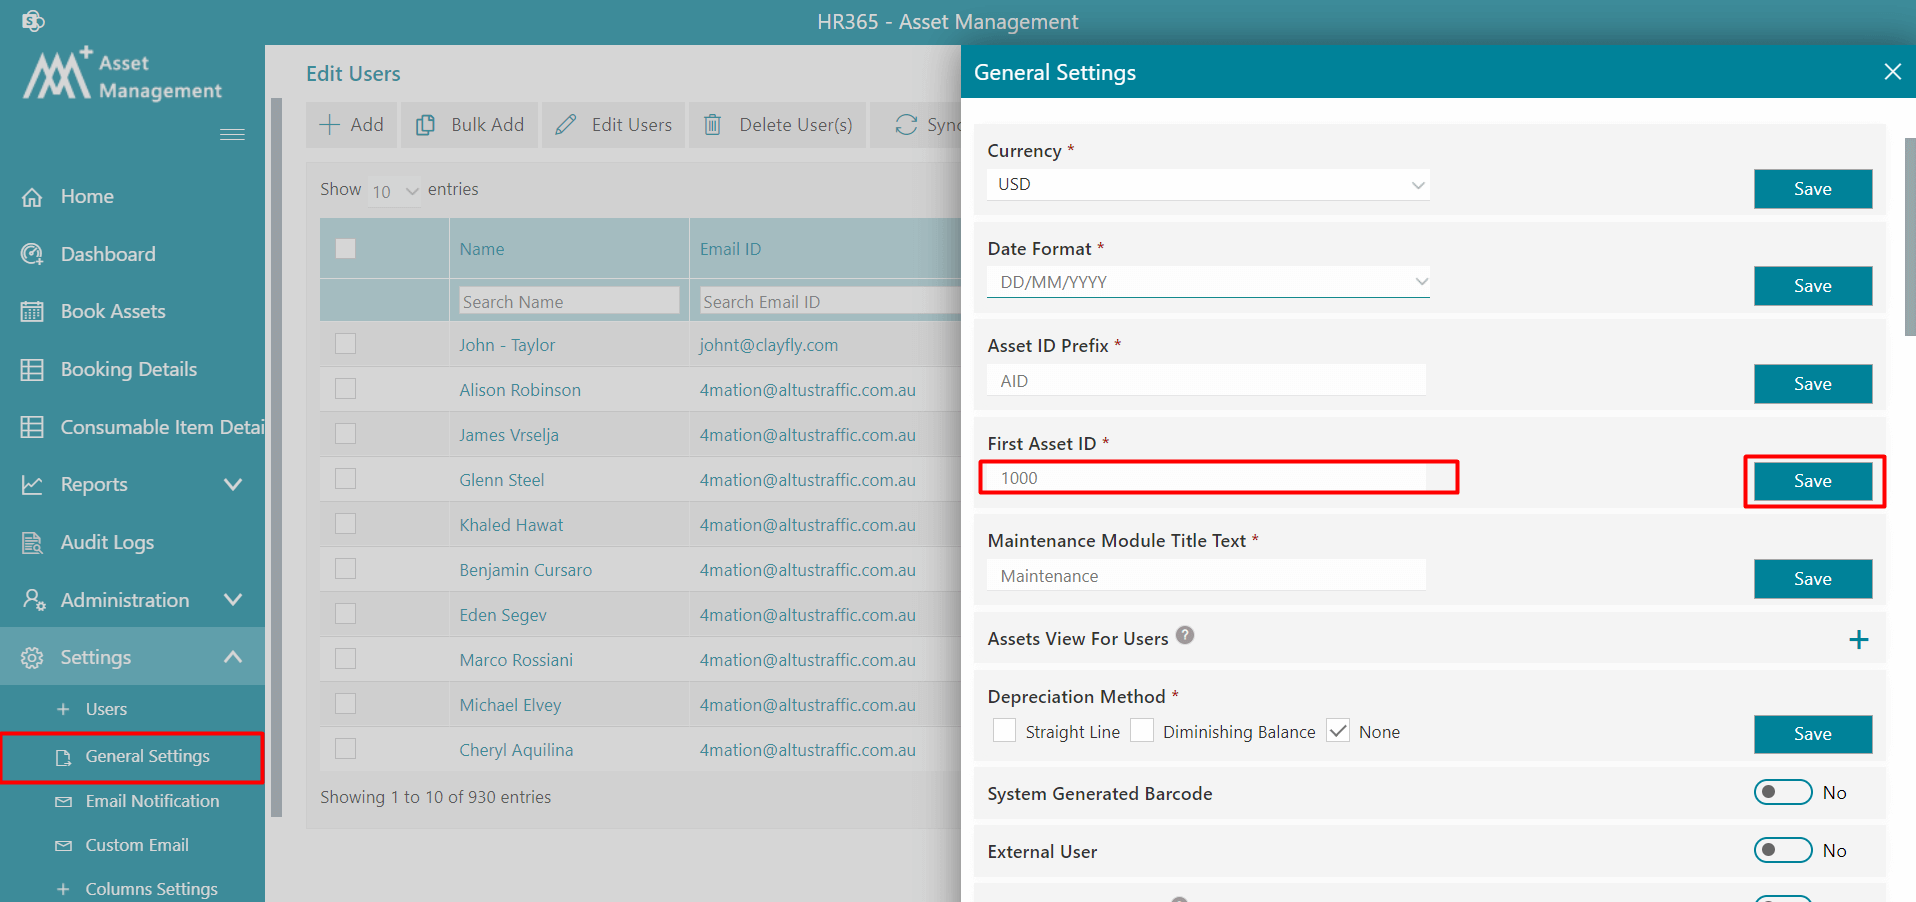
First Asset ID: The asset ID is the unique number that will start after you have entered it. Make sure that you must enter the number with at least 3 digits.
-
Maintenance Module Title Text:
-
Depreciation Method: You can enable depreciation feature, just selecting either Straight Line or Diminishing Balance method as per your requirement and finally click on Save button.

-
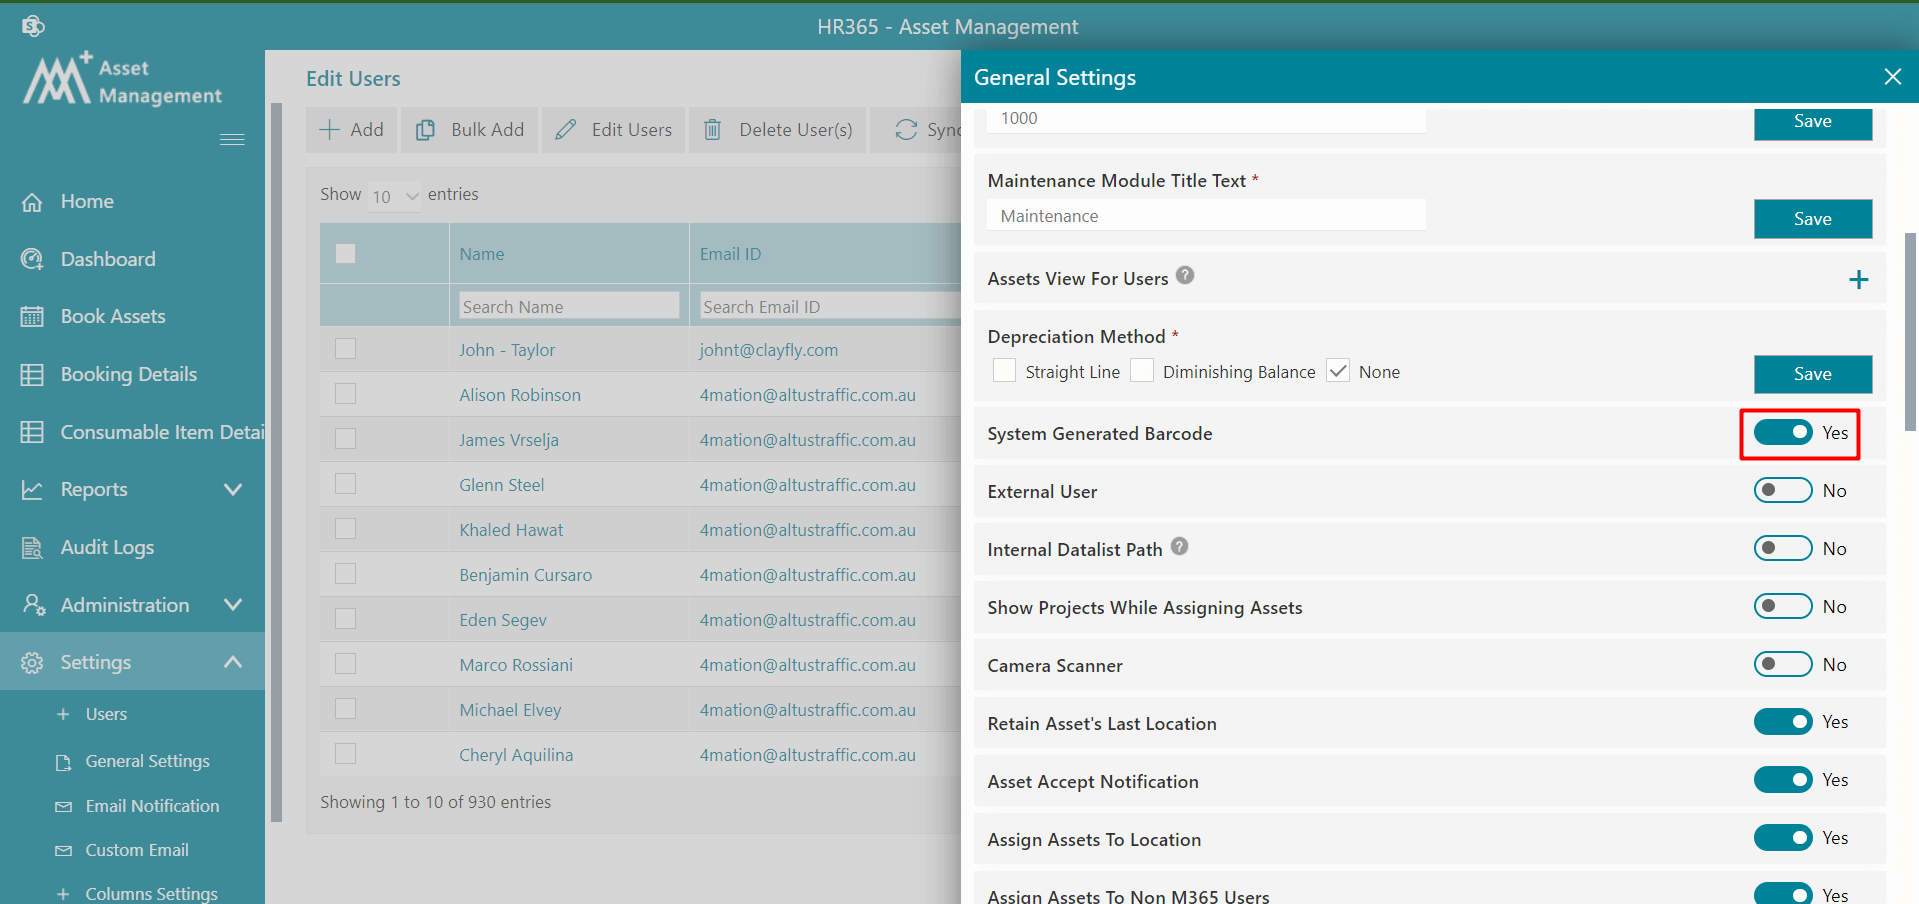
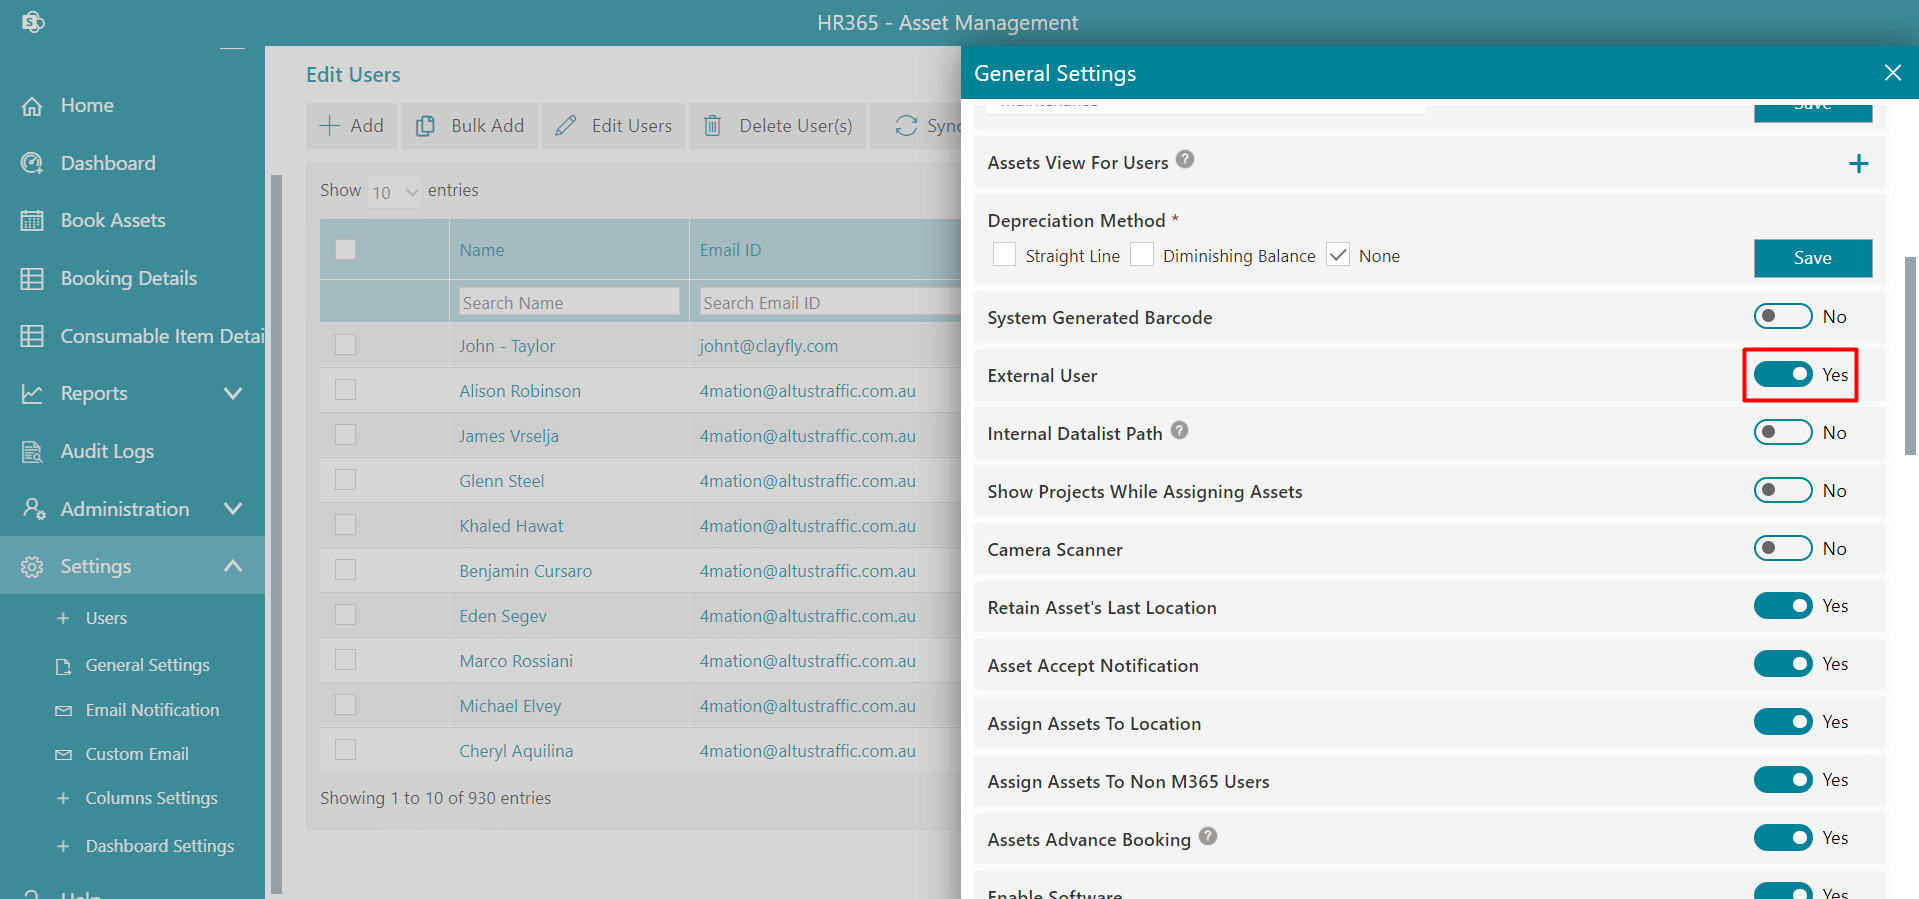
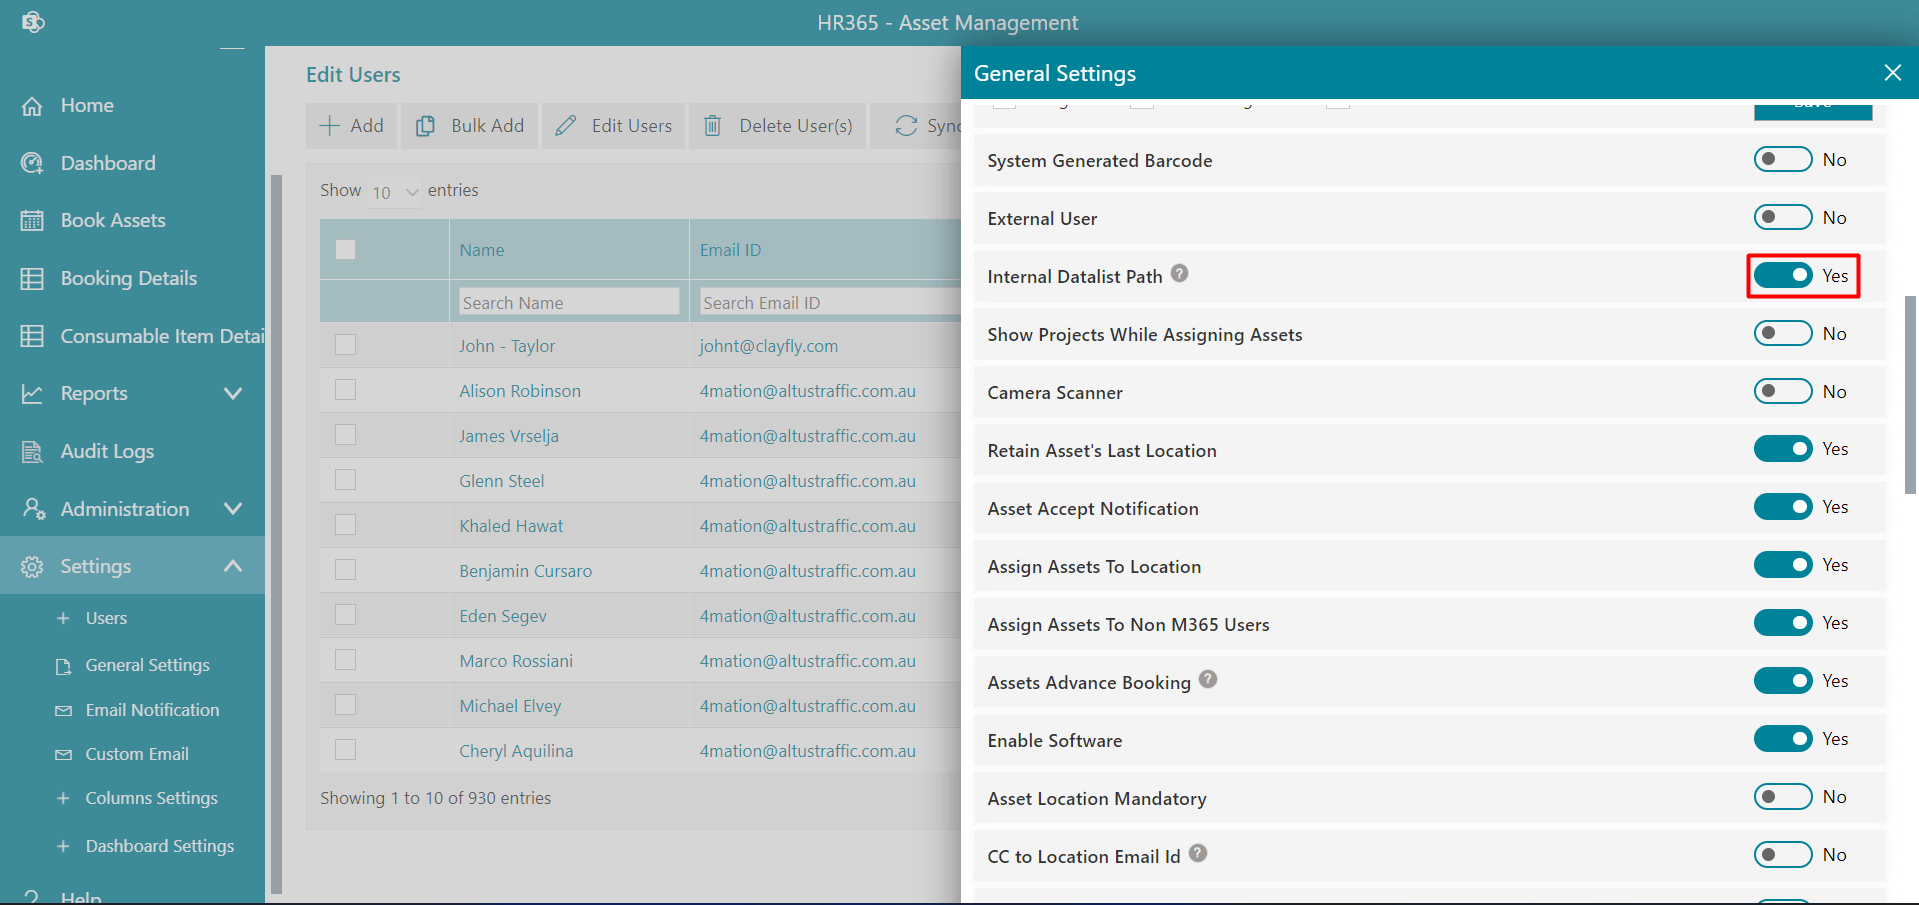
System Generated Barcode: If this is enabled, barcode generate automatically upon adding assets.
-
External User: If you enabled it, you could add external user's or guest user's in the application and can assign assets to them.
Make sure guests or external users SharePoint site permissions should be provided where the Asset management application is hosted.
-
Internal Datalist Path: If this is enabled, App data can be stored in the SharePoint list within the app or externally at the site/subsite collection level where the app is installed.
-
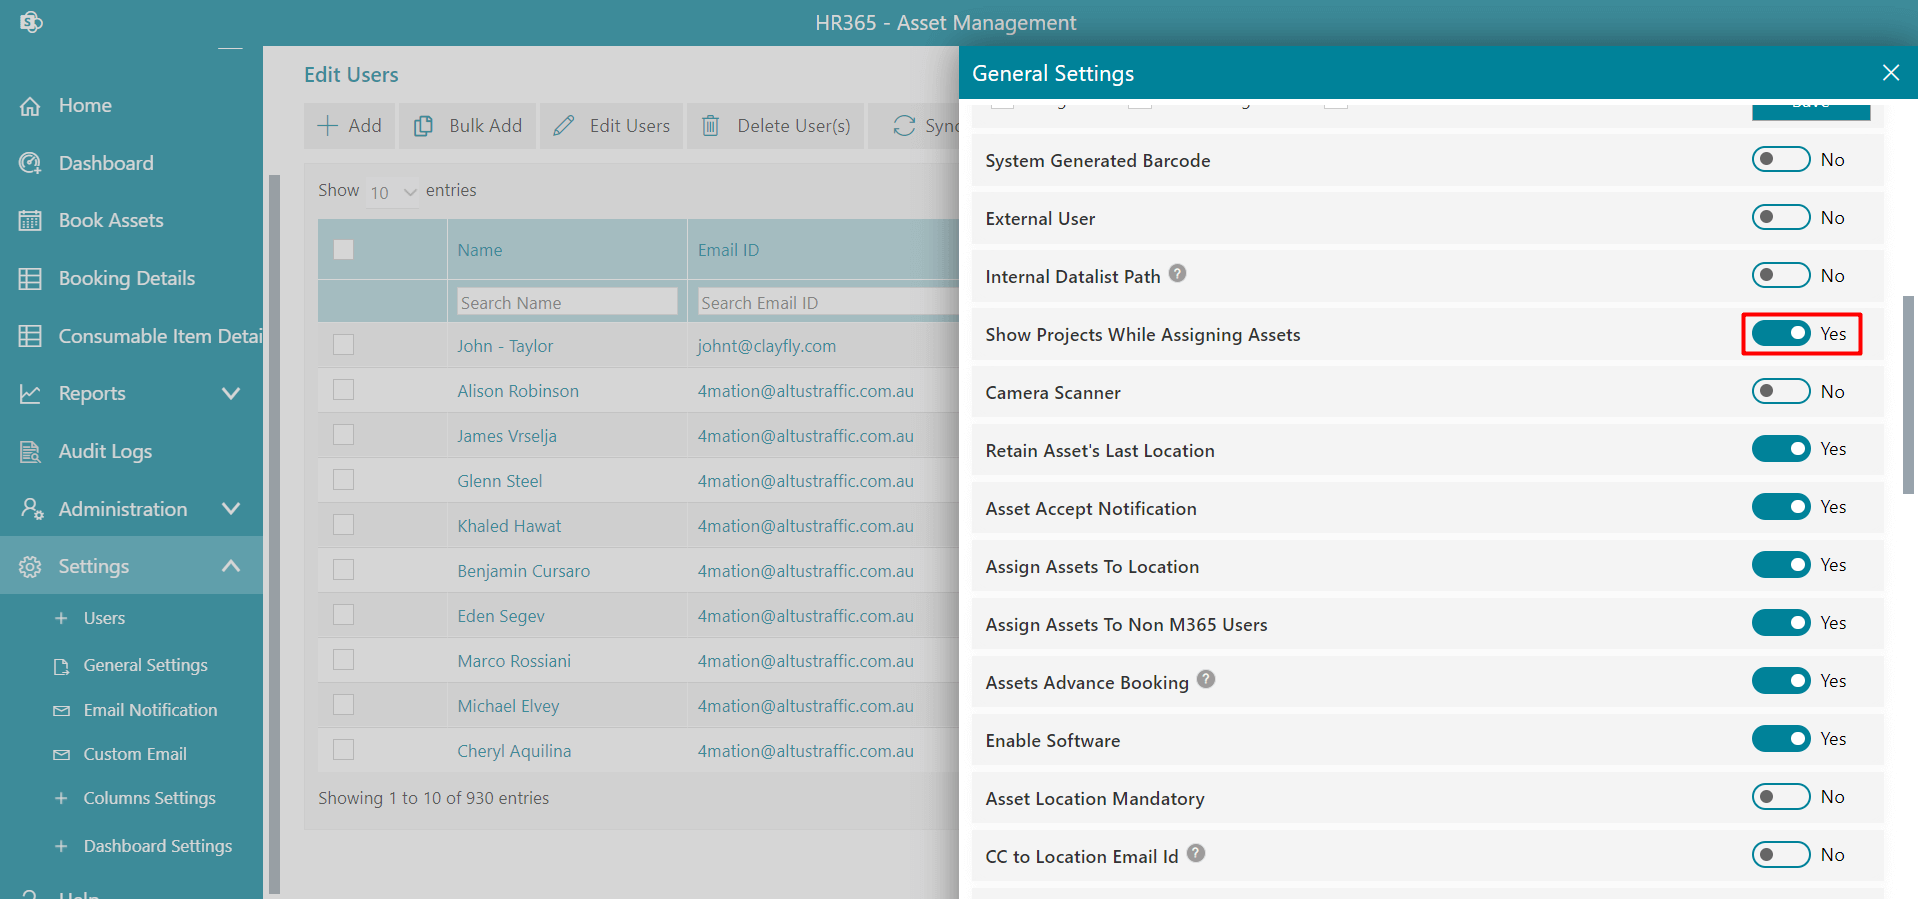
Show projects while assigning assets: If this is enabled, project option will display while assigning assets in pop, you can assign assets to the users along with project.
-
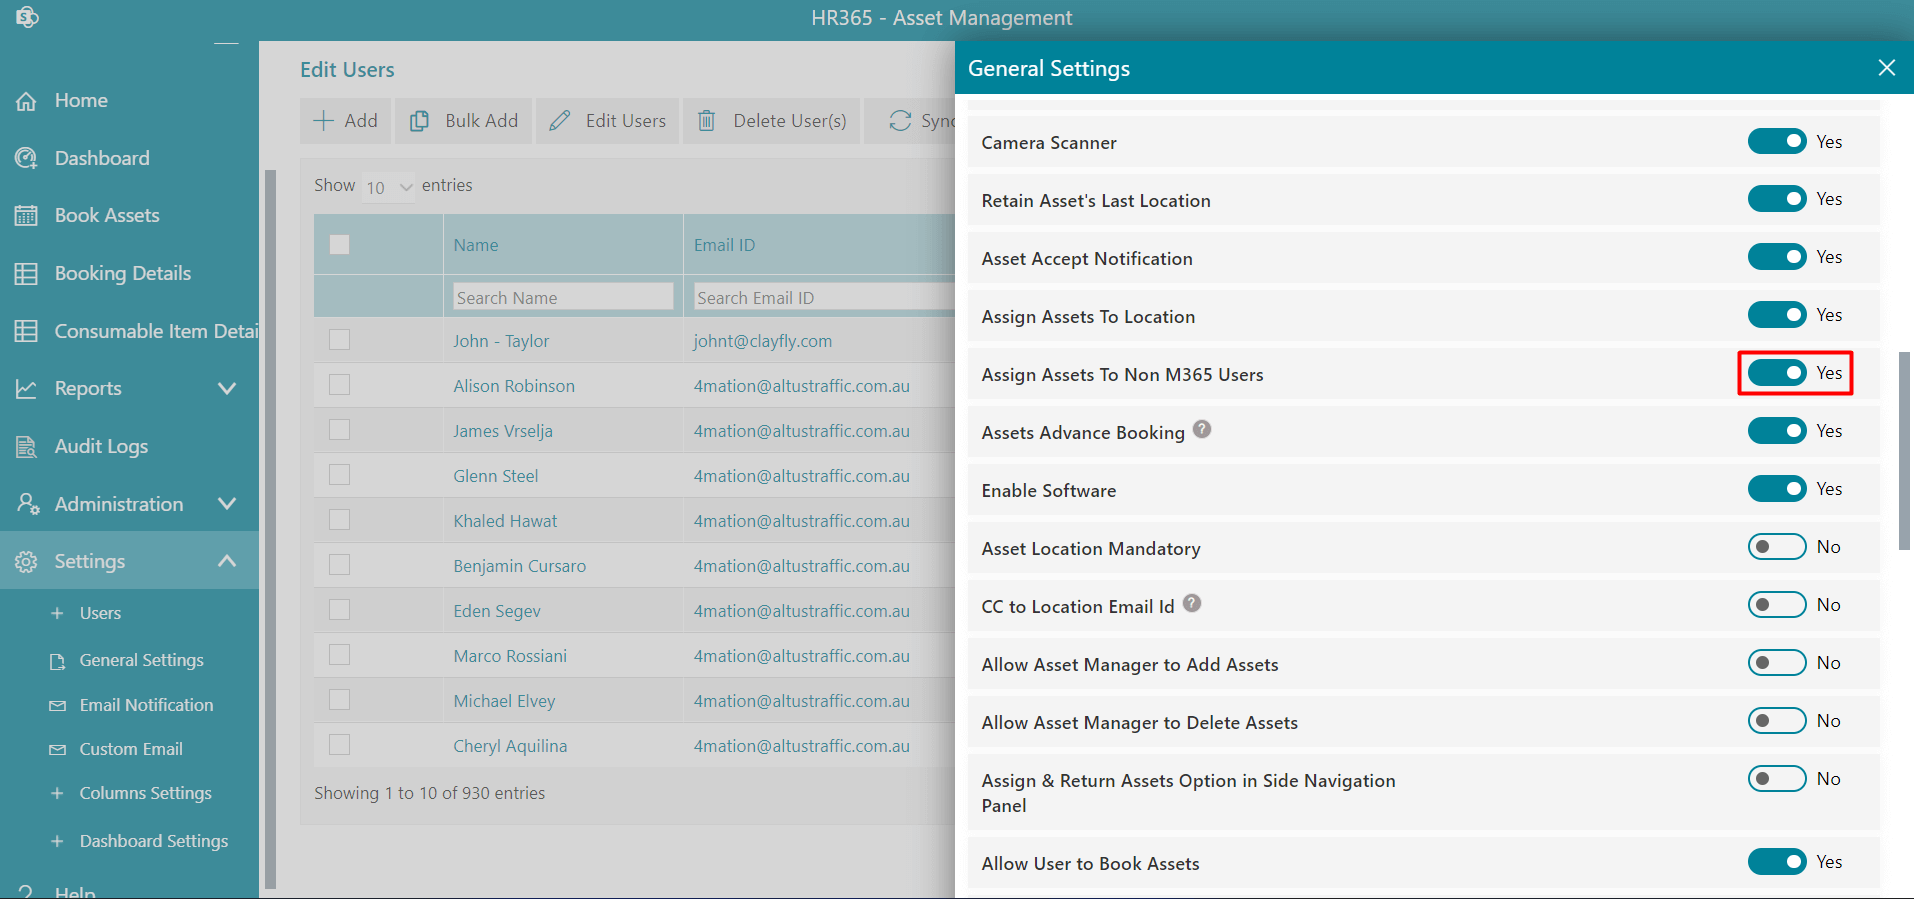
Camera Scanner: If this is enabled, camera scanner tab will display on the home page from where you can scan the barcode of the assets to search the assets.

-
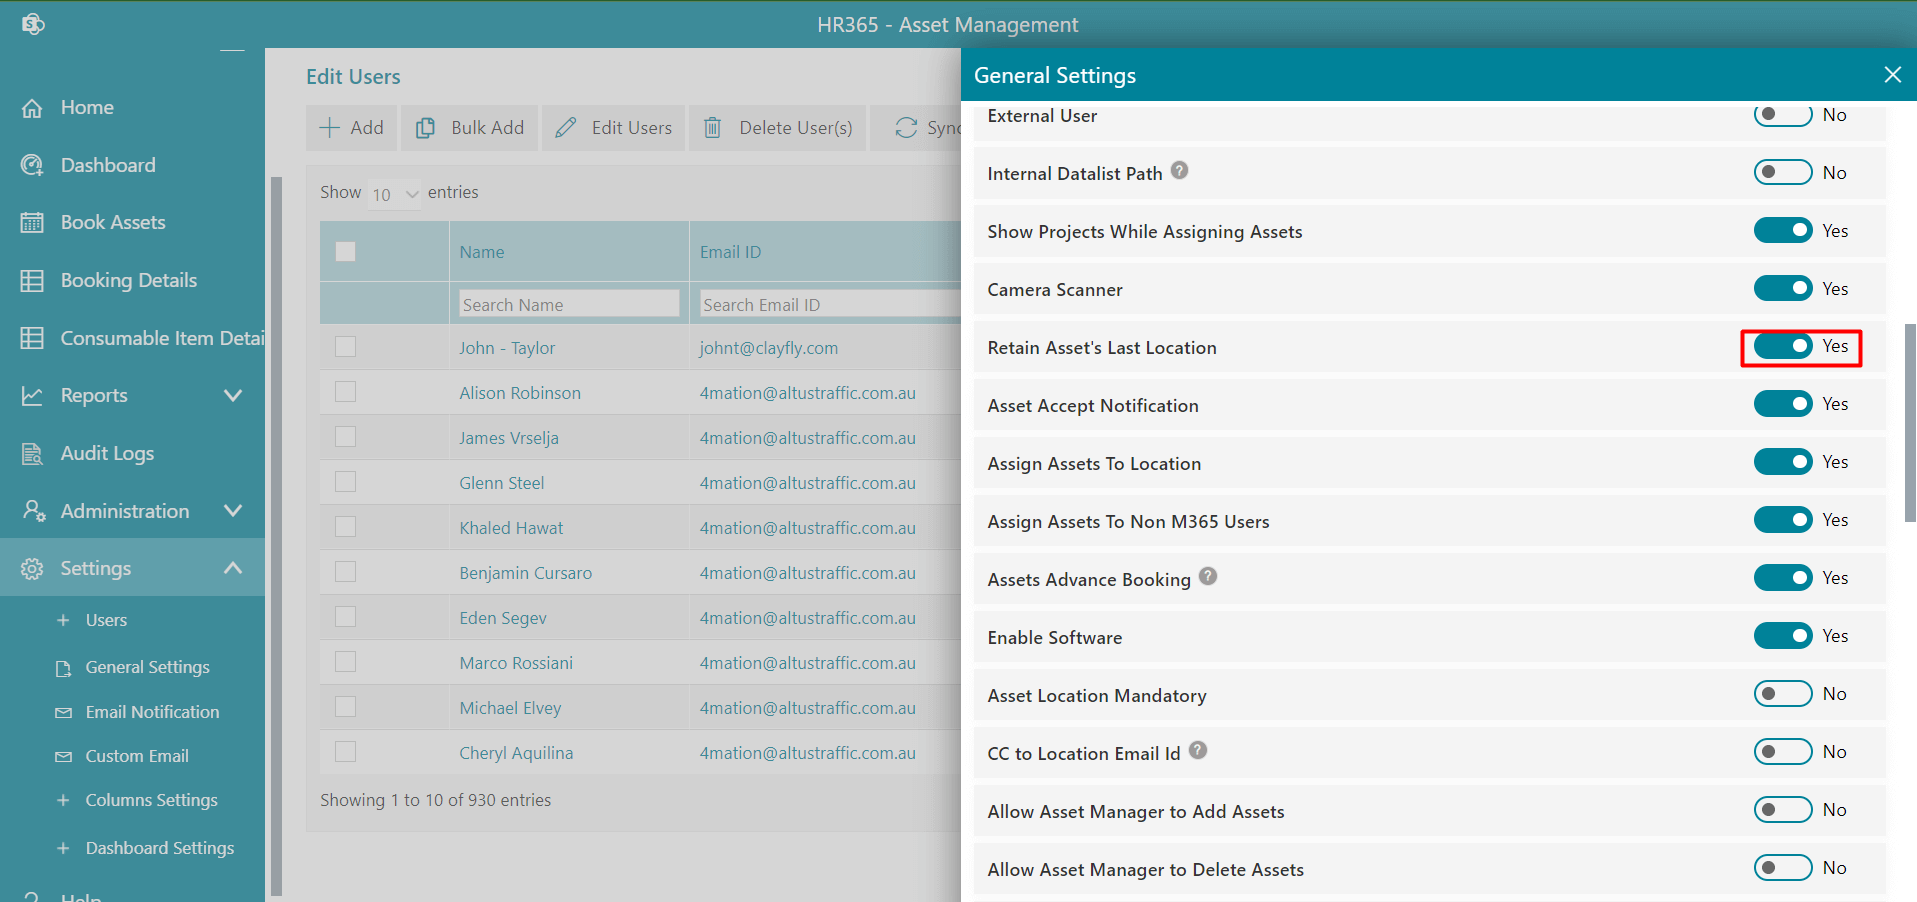
Retain Asset's Last Location: If this feature is enabled, the user’s location will retain on available assets after returning the assets. You can see retained location in user location field of the assets.
-
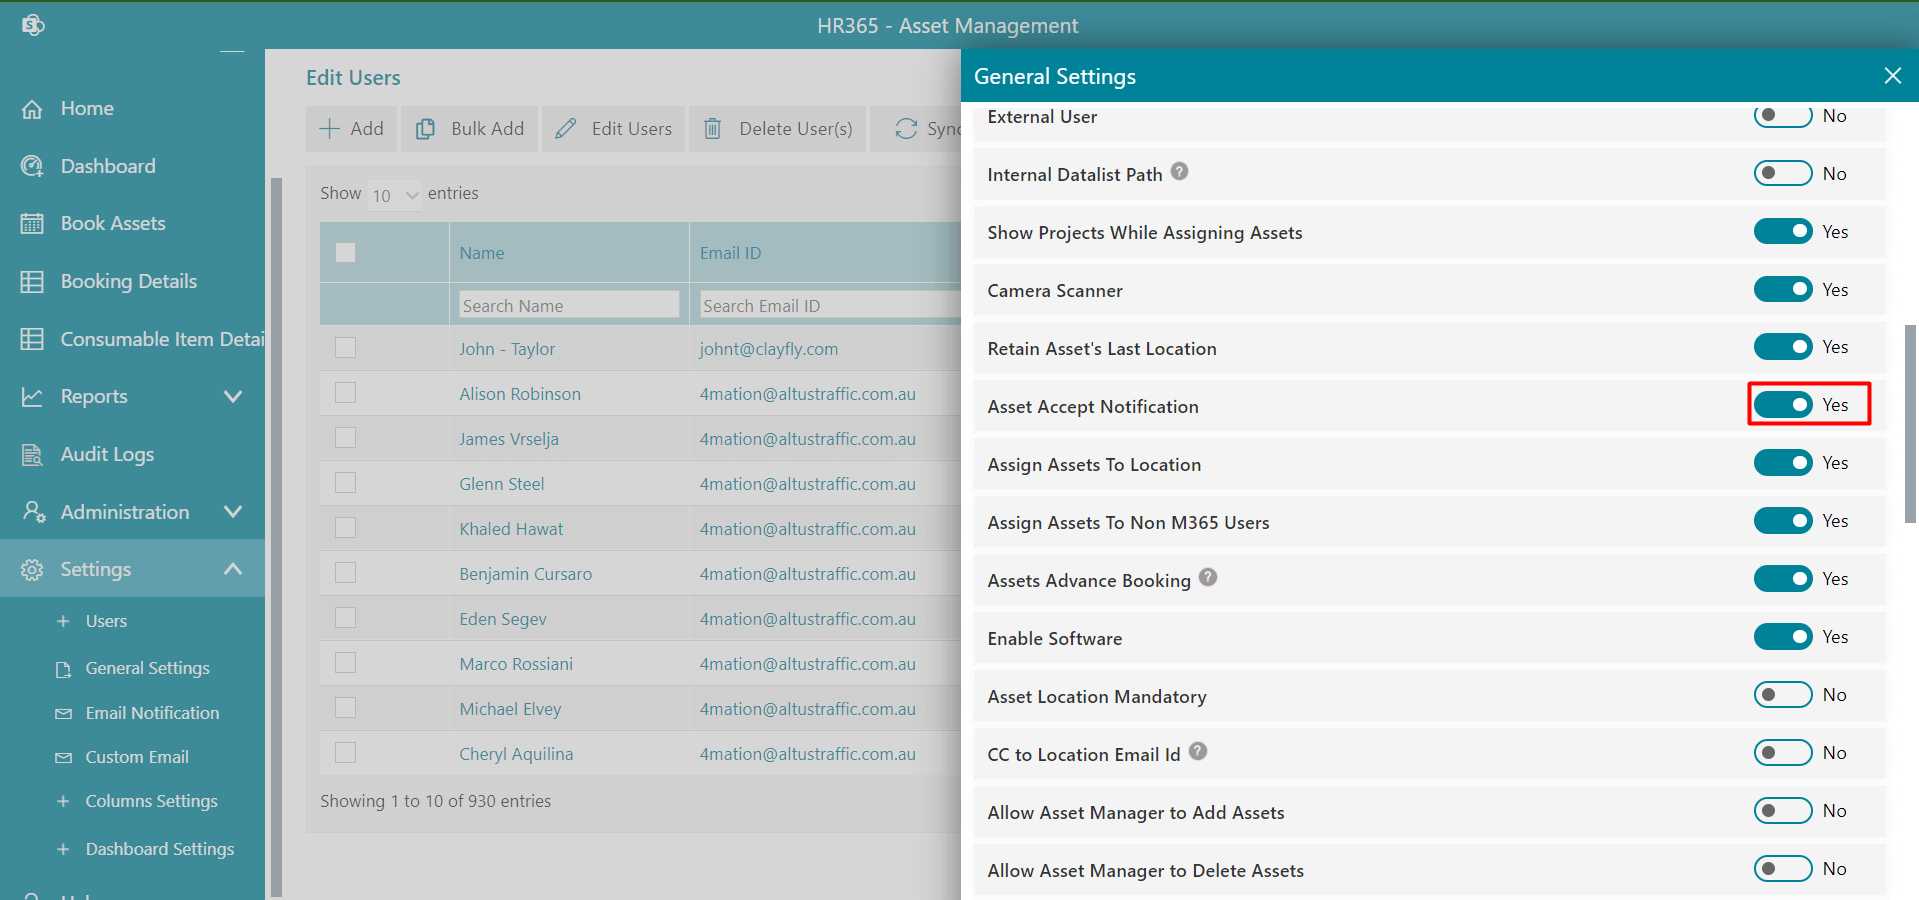
Assets accept notification: If it is enabled, when an asset is assigned to users, they will receive an email notification from where users can accept/reject assets. If it is disabled when assets are assigned to users, email notifications we not sent and those assets will show on the acknowledgment status page later we can initiate.
-
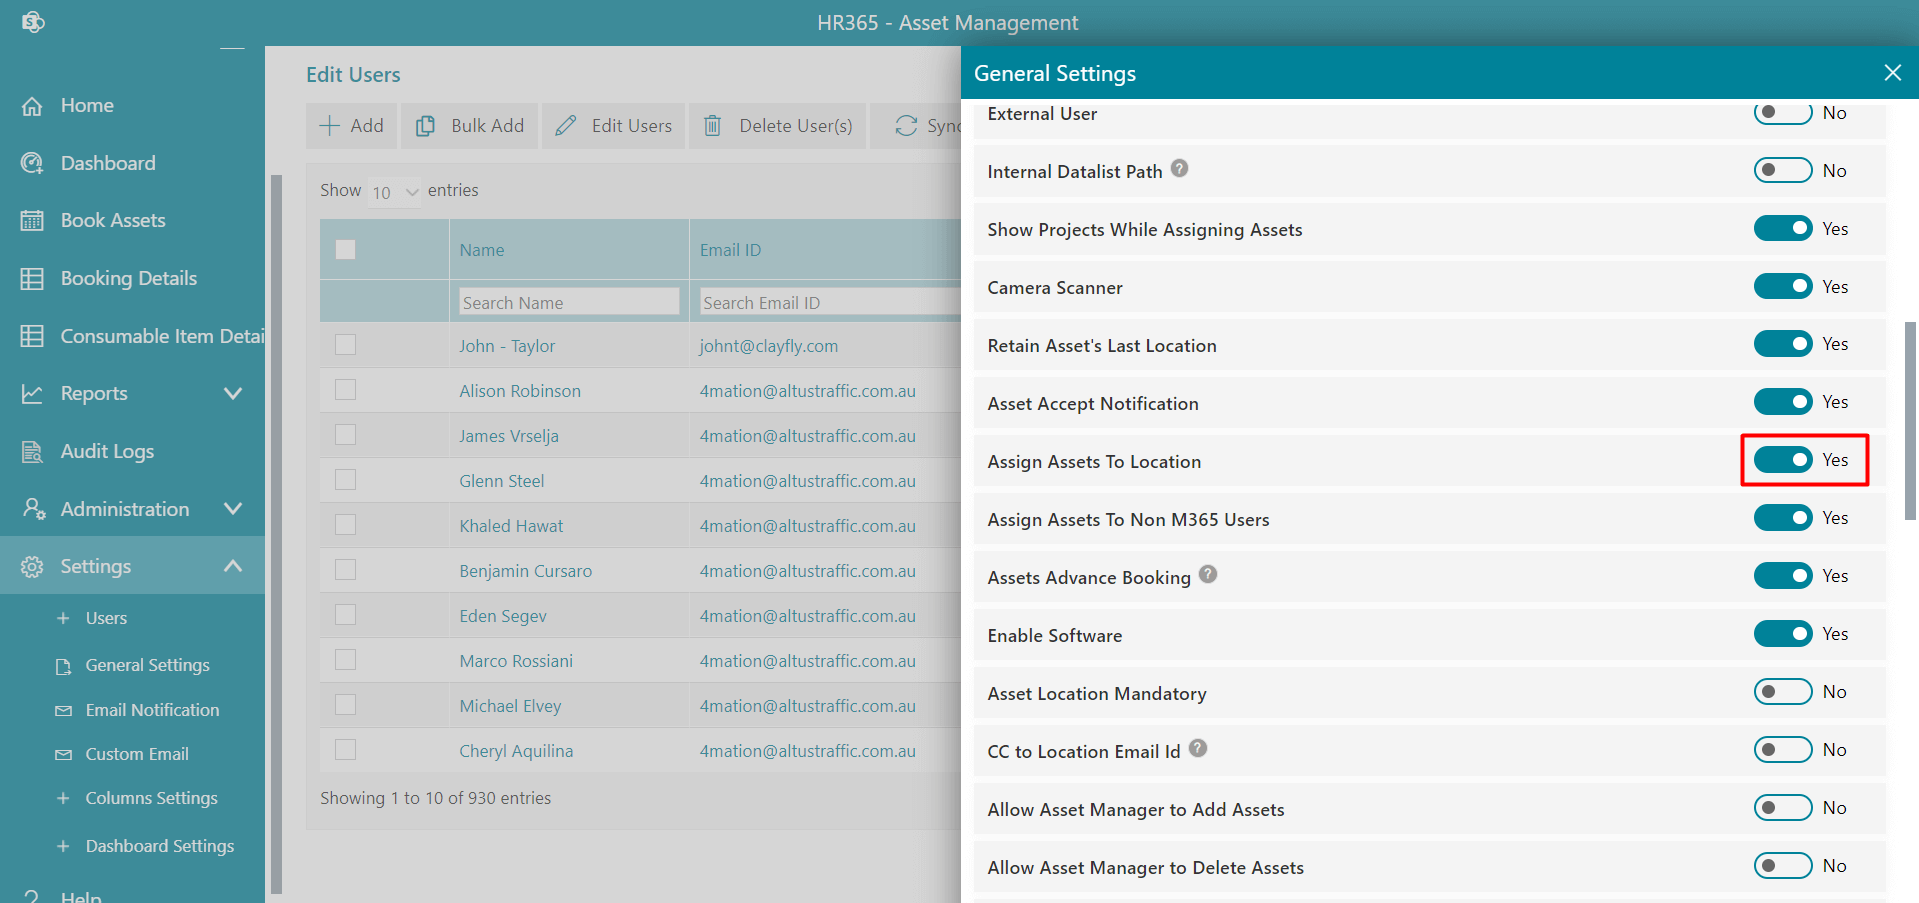
Assign Assets to Location: If this is enabled, location option will display while assigning assets in pop, from where you can assign assets to the location.
-
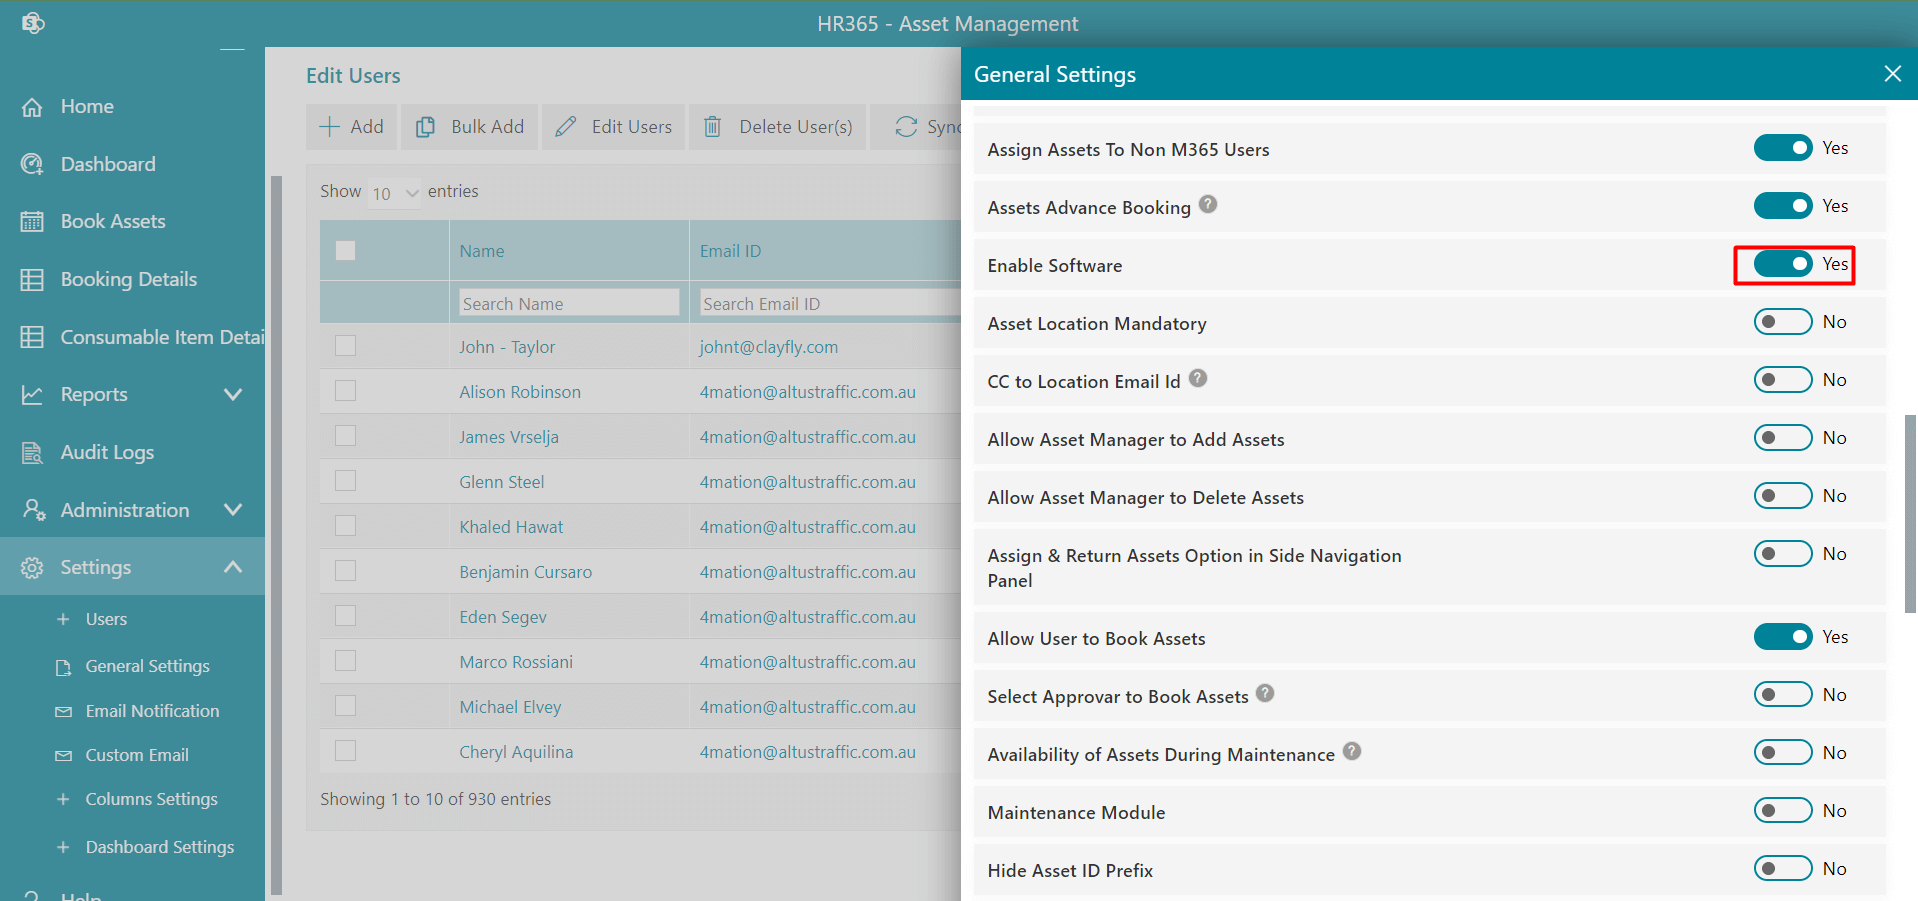
Assign Assets to Non M365 Users: If this is enabled, assign assets to non M365user's option will display while assigning assets in pop, from where you can assign assets to non O365.
-
Assets Advance Booking: If you disable this Assets Advance Booking feature it will be disabled from the application.

-
Enable Software: If this is enabled, software tabs on home page will display, one tab is used to sync O365 license another is used to add software manually and can assign to users.
-
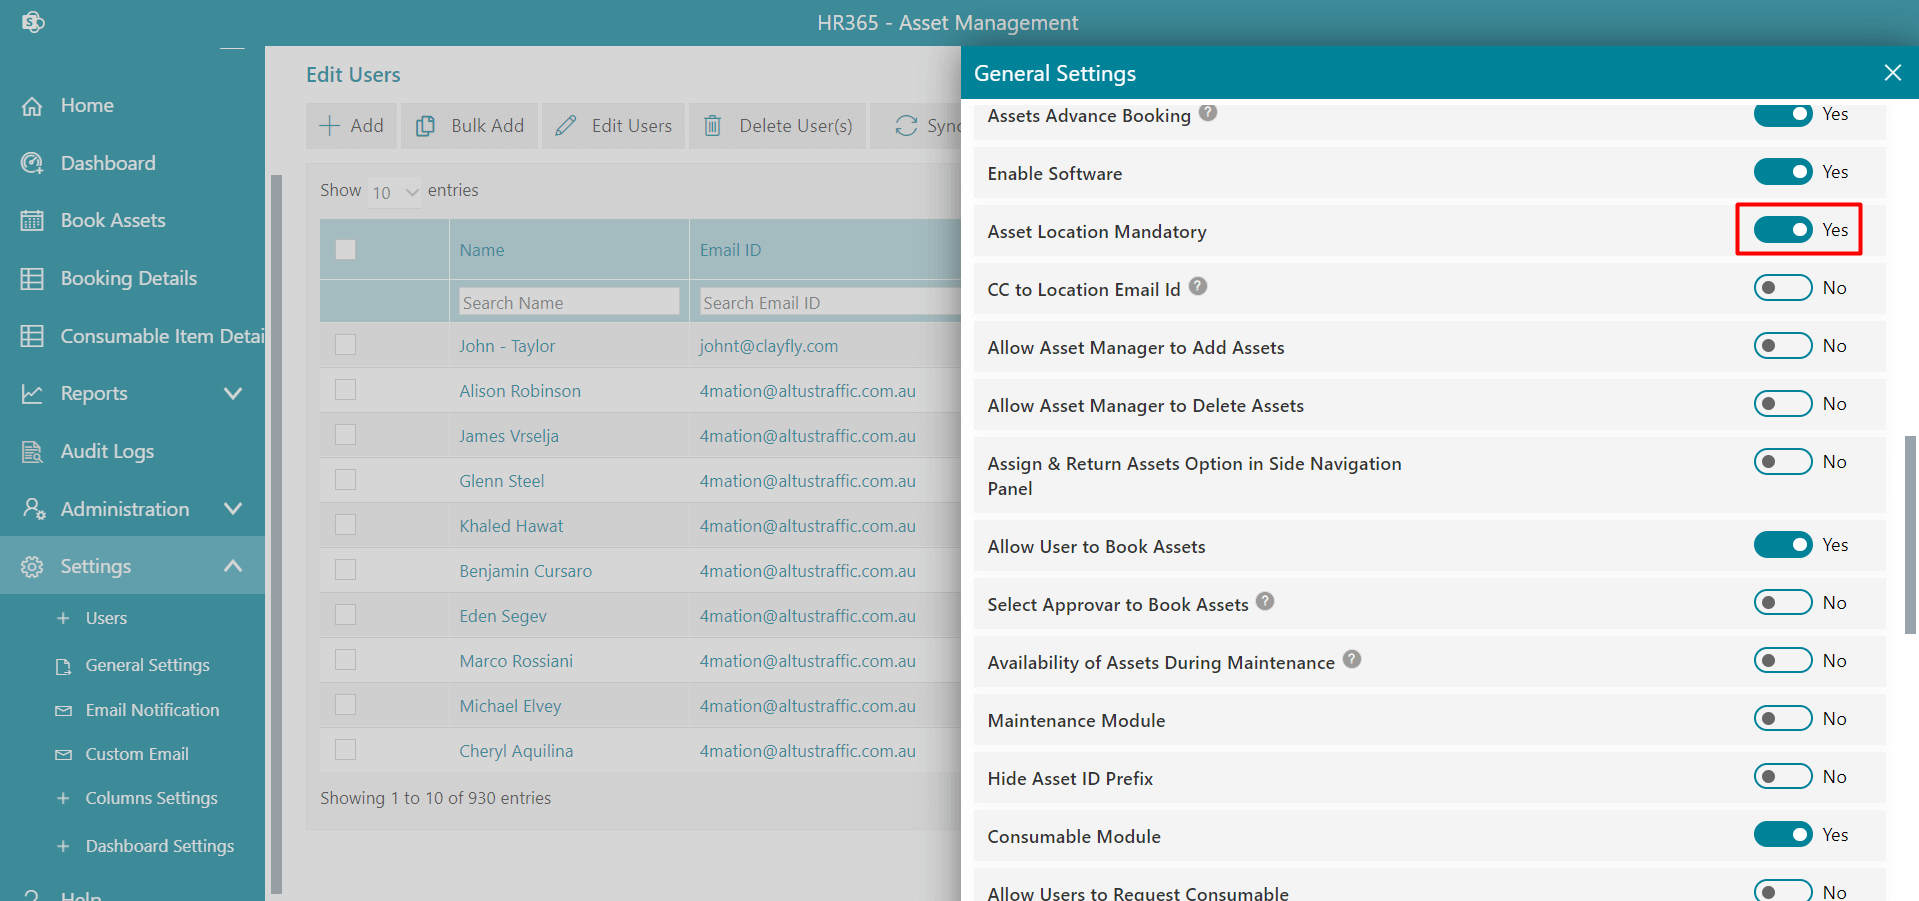
Asset Location Mandatory: If this is enabled, you can get the asset location.
-
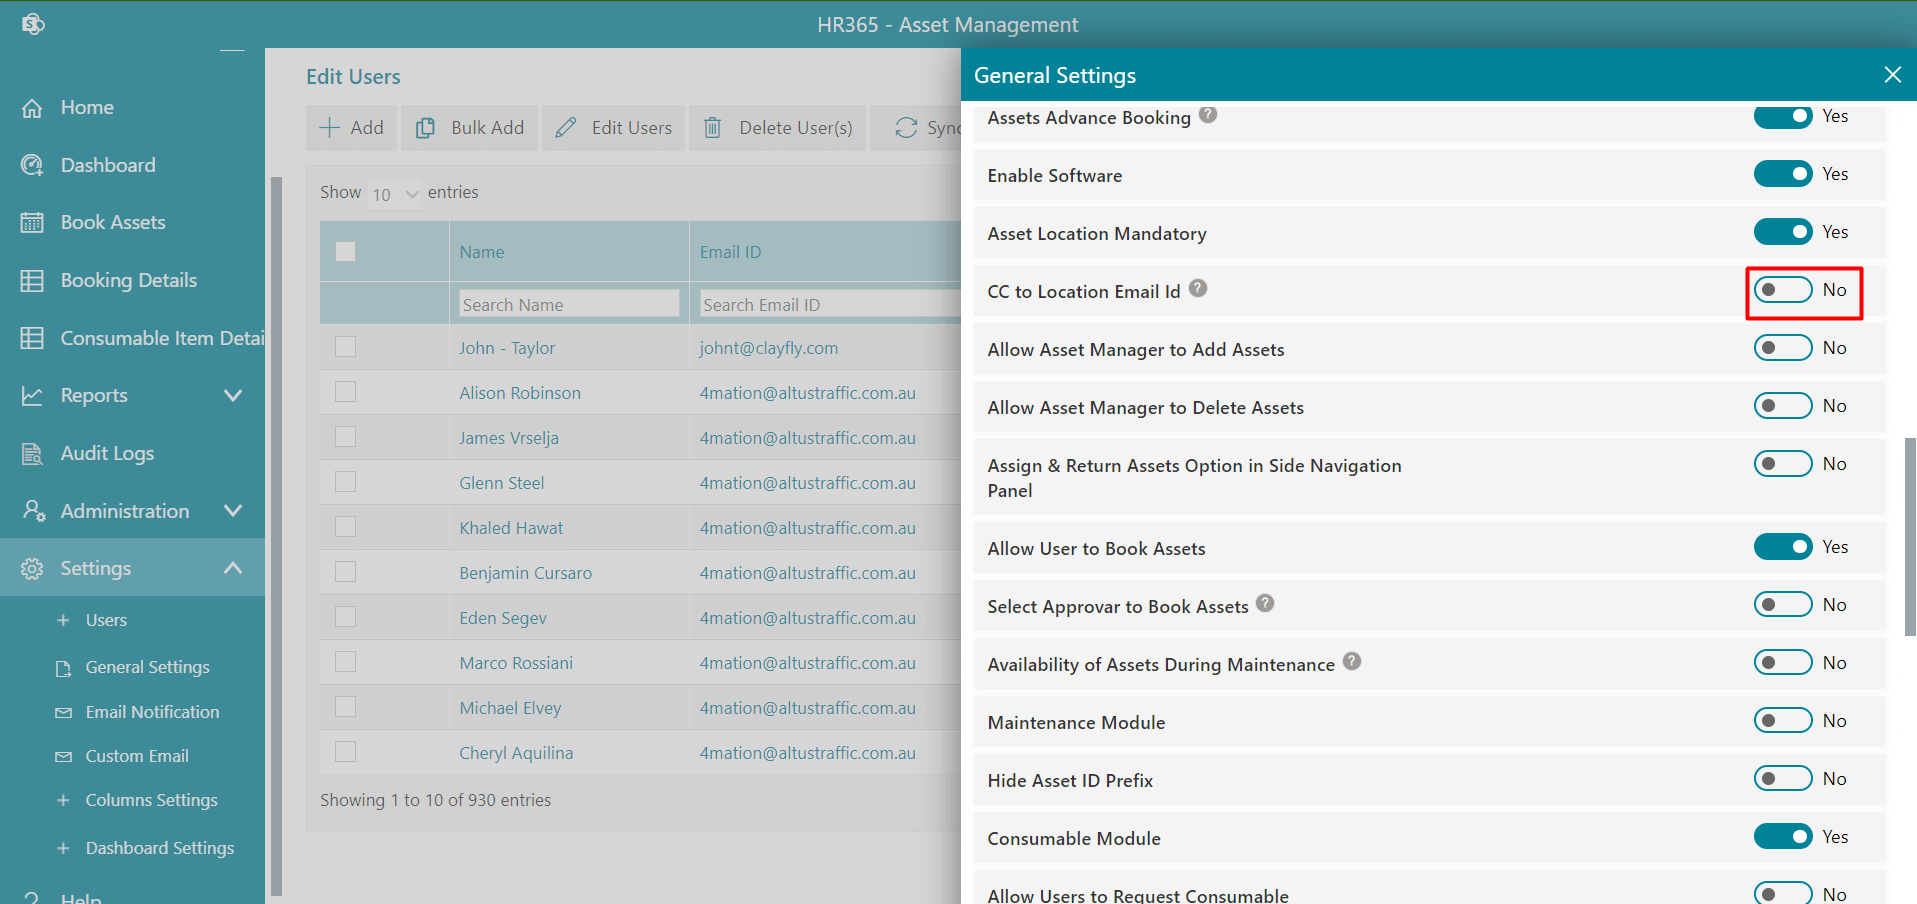
CC to Location Email Id: If this is enabled, email notification will be sent to location.
-
Allow Asset Manager to Add Assets: If this is enabled, Manager can add Assets.
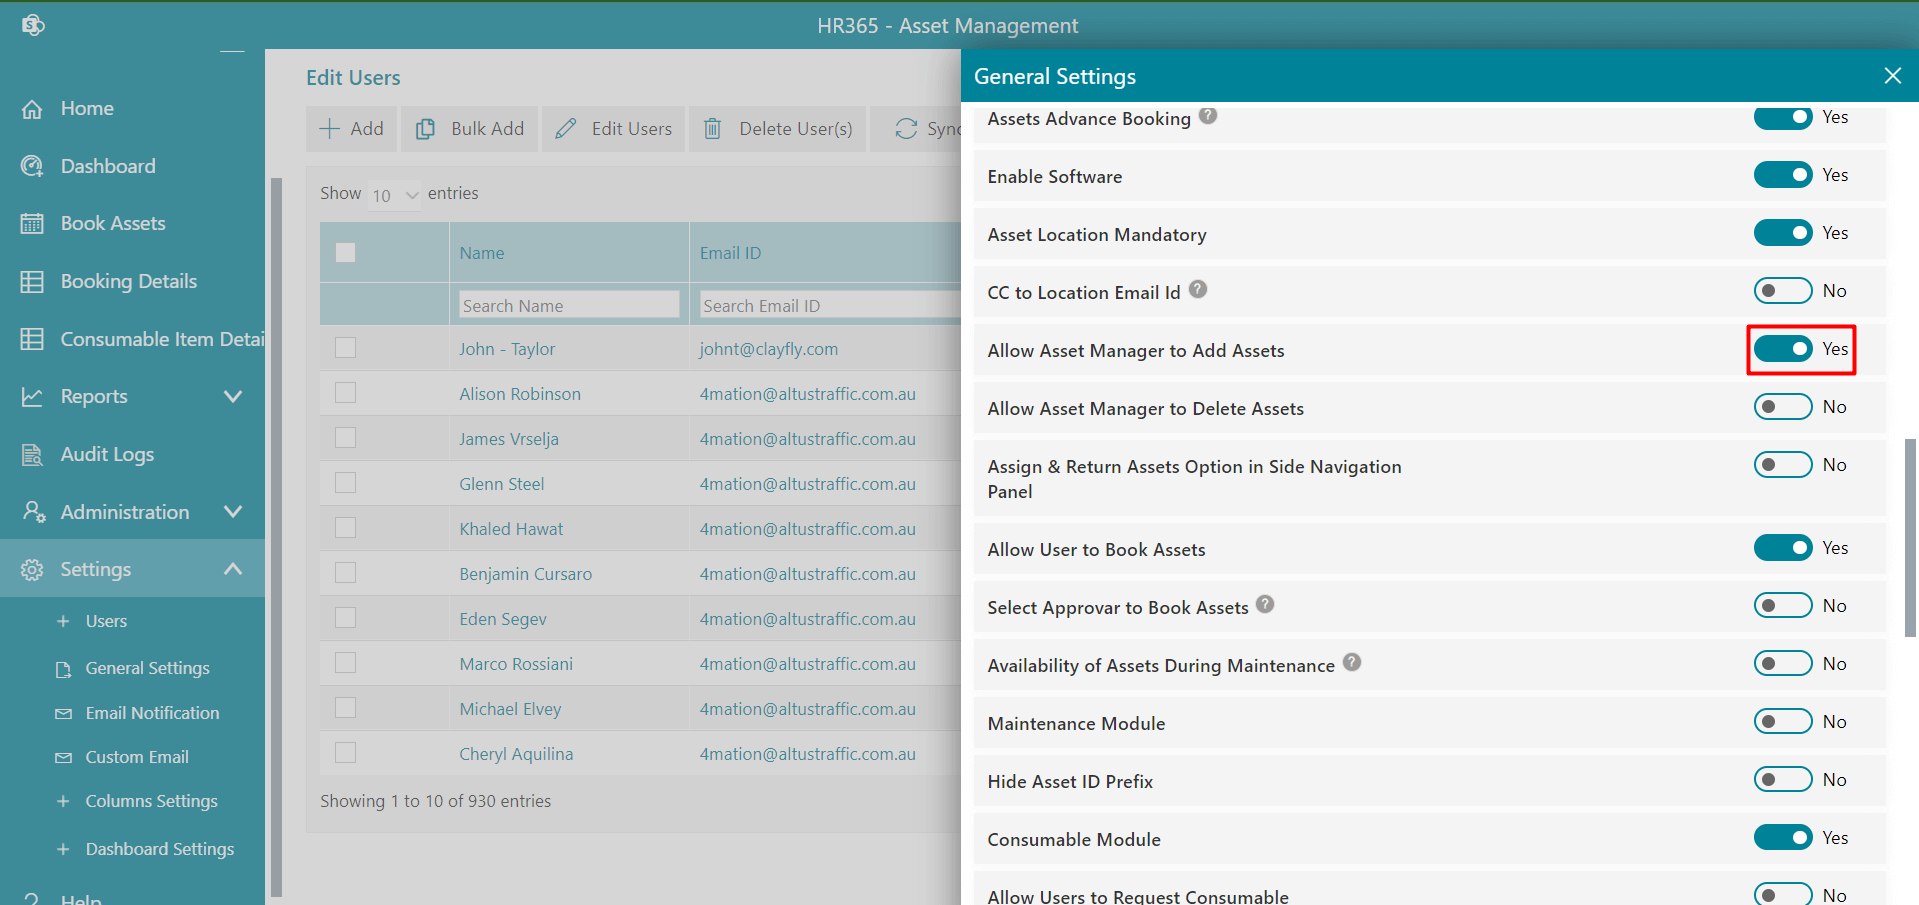
-
Allow Asset Manager to Delete Assets: If this is enabled, Manager can delete Assets.
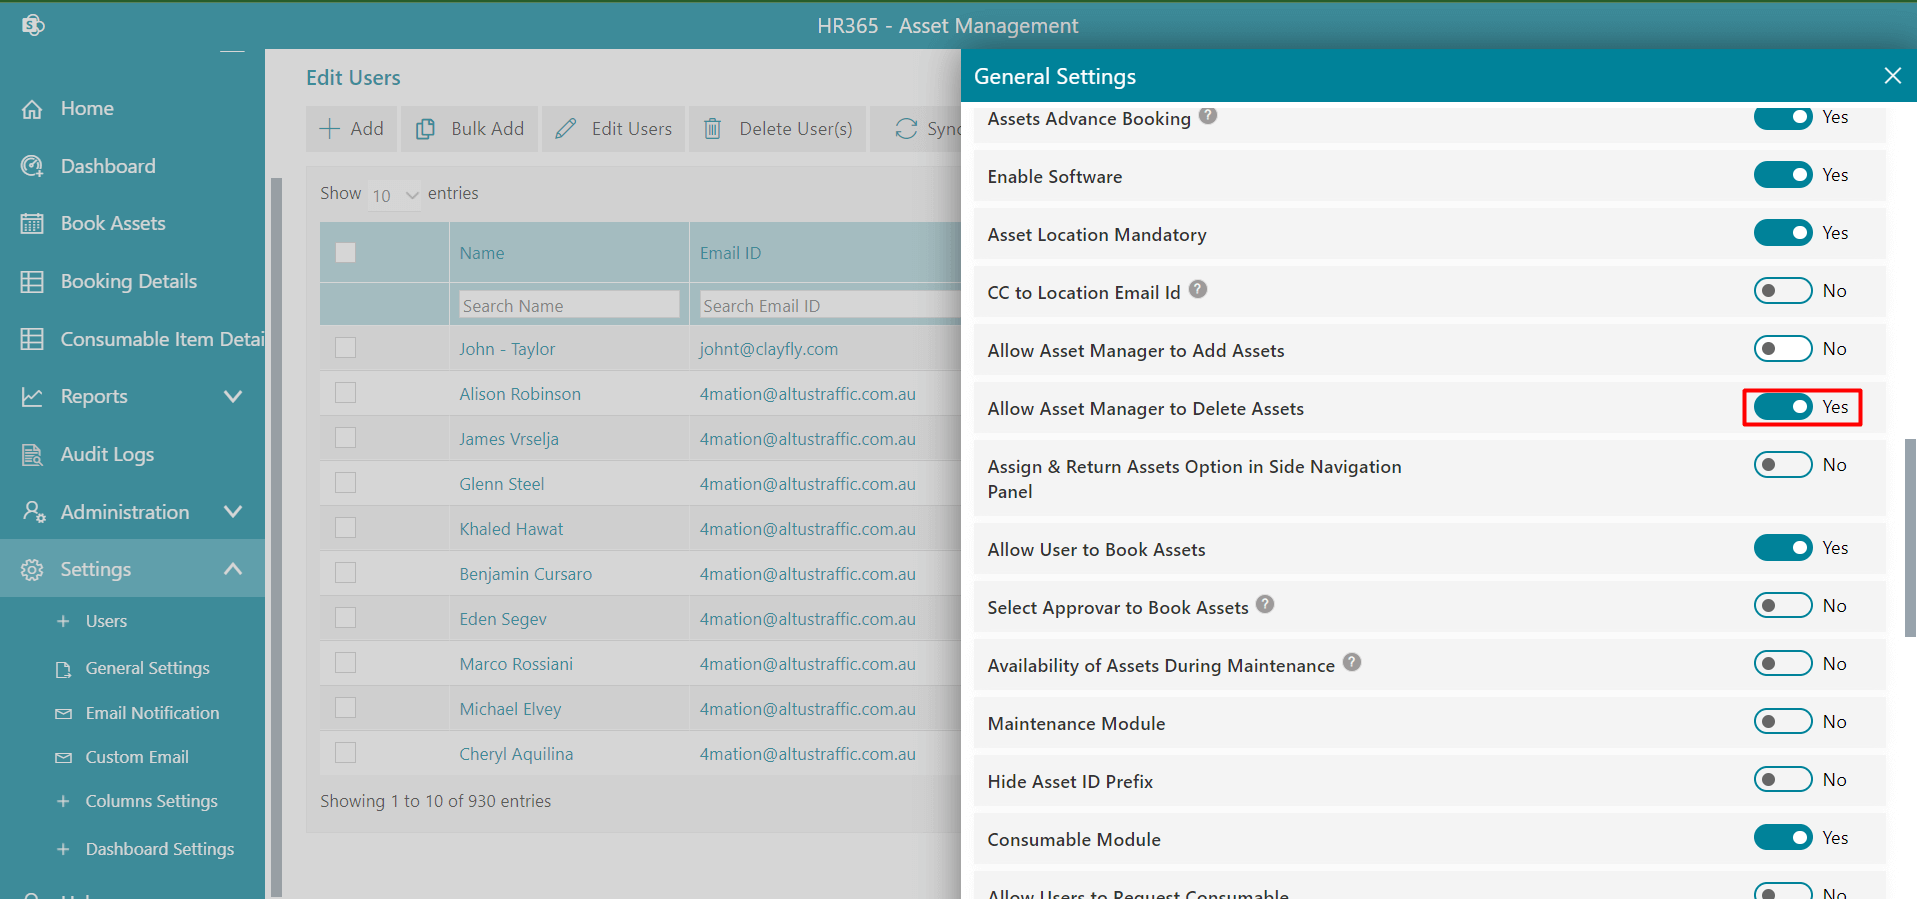
-
Assign & Return Assets Option in Side Navigation Panel: You can hide assigned and return assets in navigation panel just disabling it.
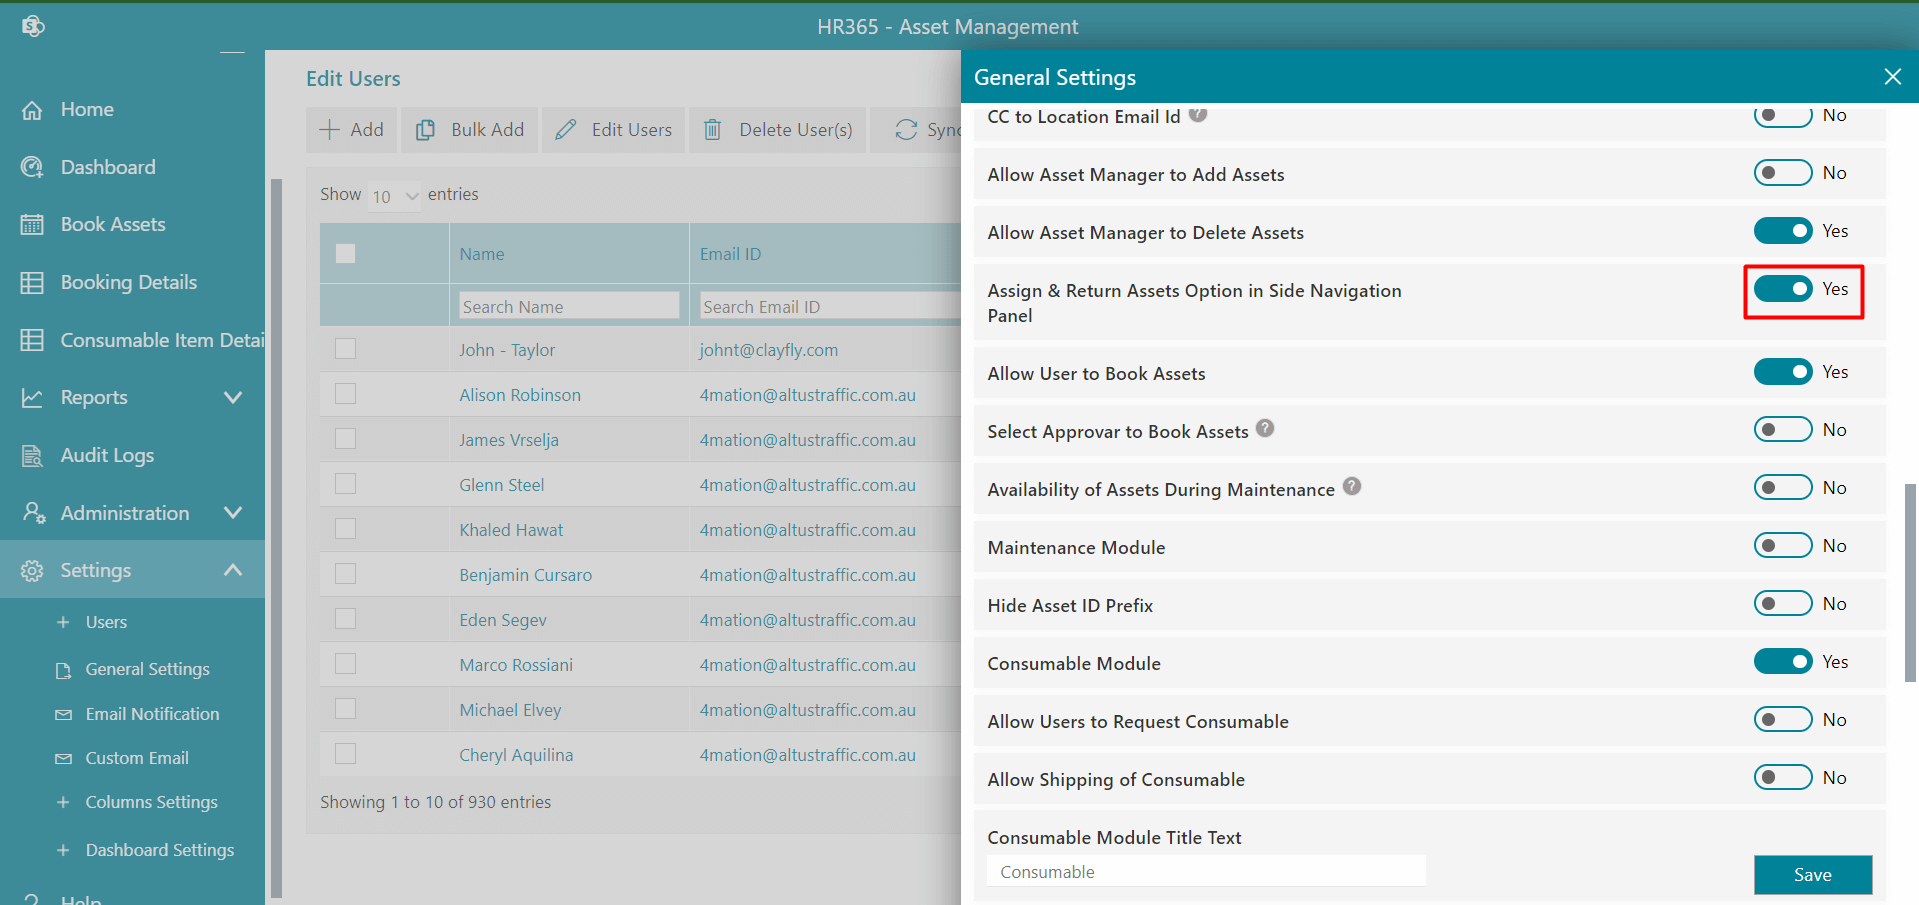
-
Allow User to Book Assets: If this is enabled, Users can Book Assets.

-
Select Approver to Book Assets: If this is enabled, Users can select approver.
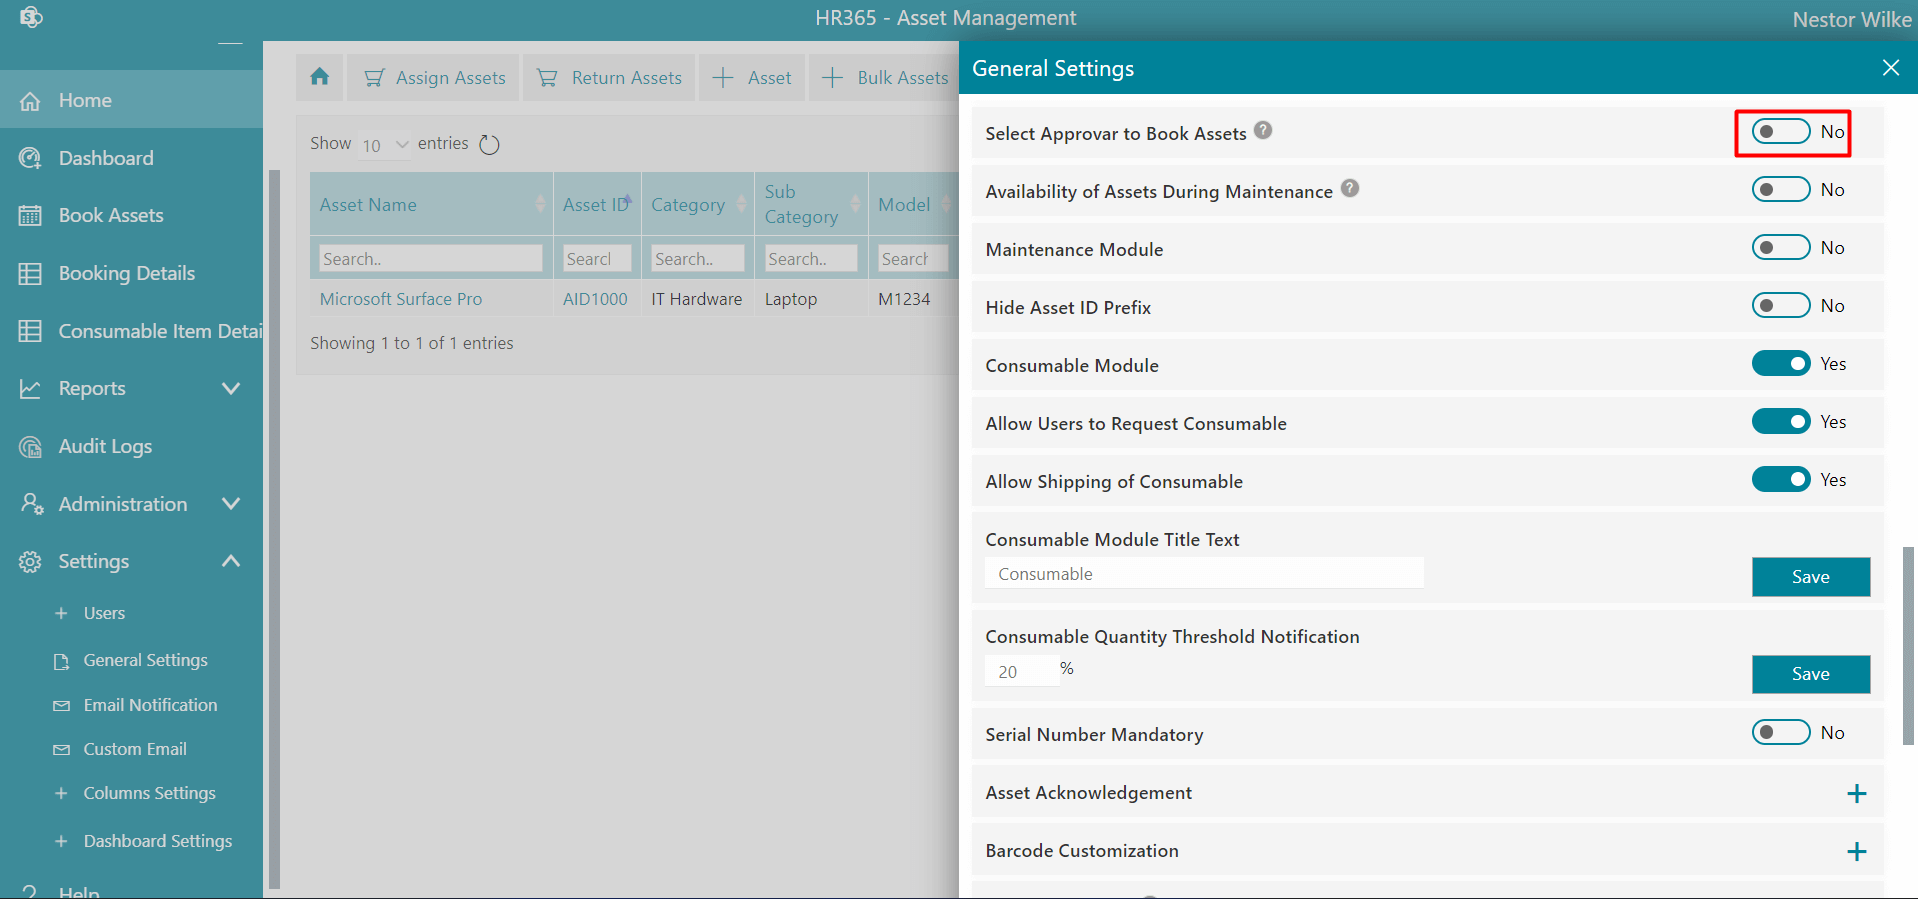
-
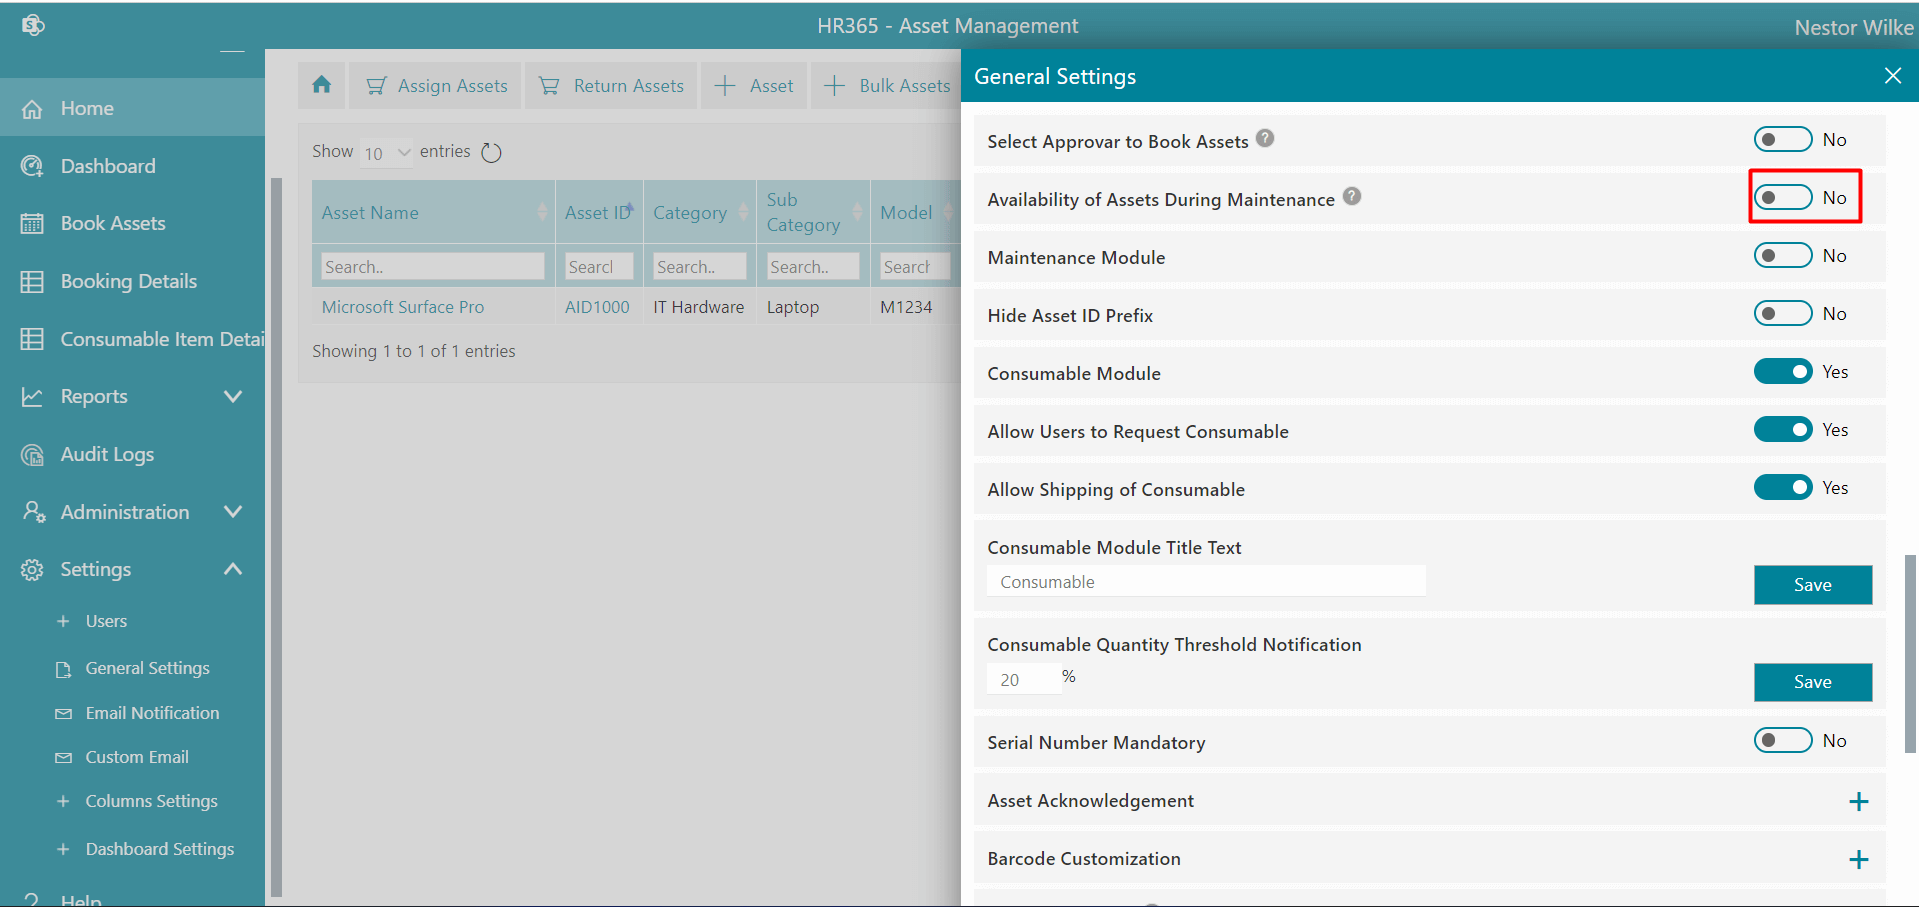
Availability of Assets During Maintenance: If this is enabled, Users can book asset which is in maintenance.
-
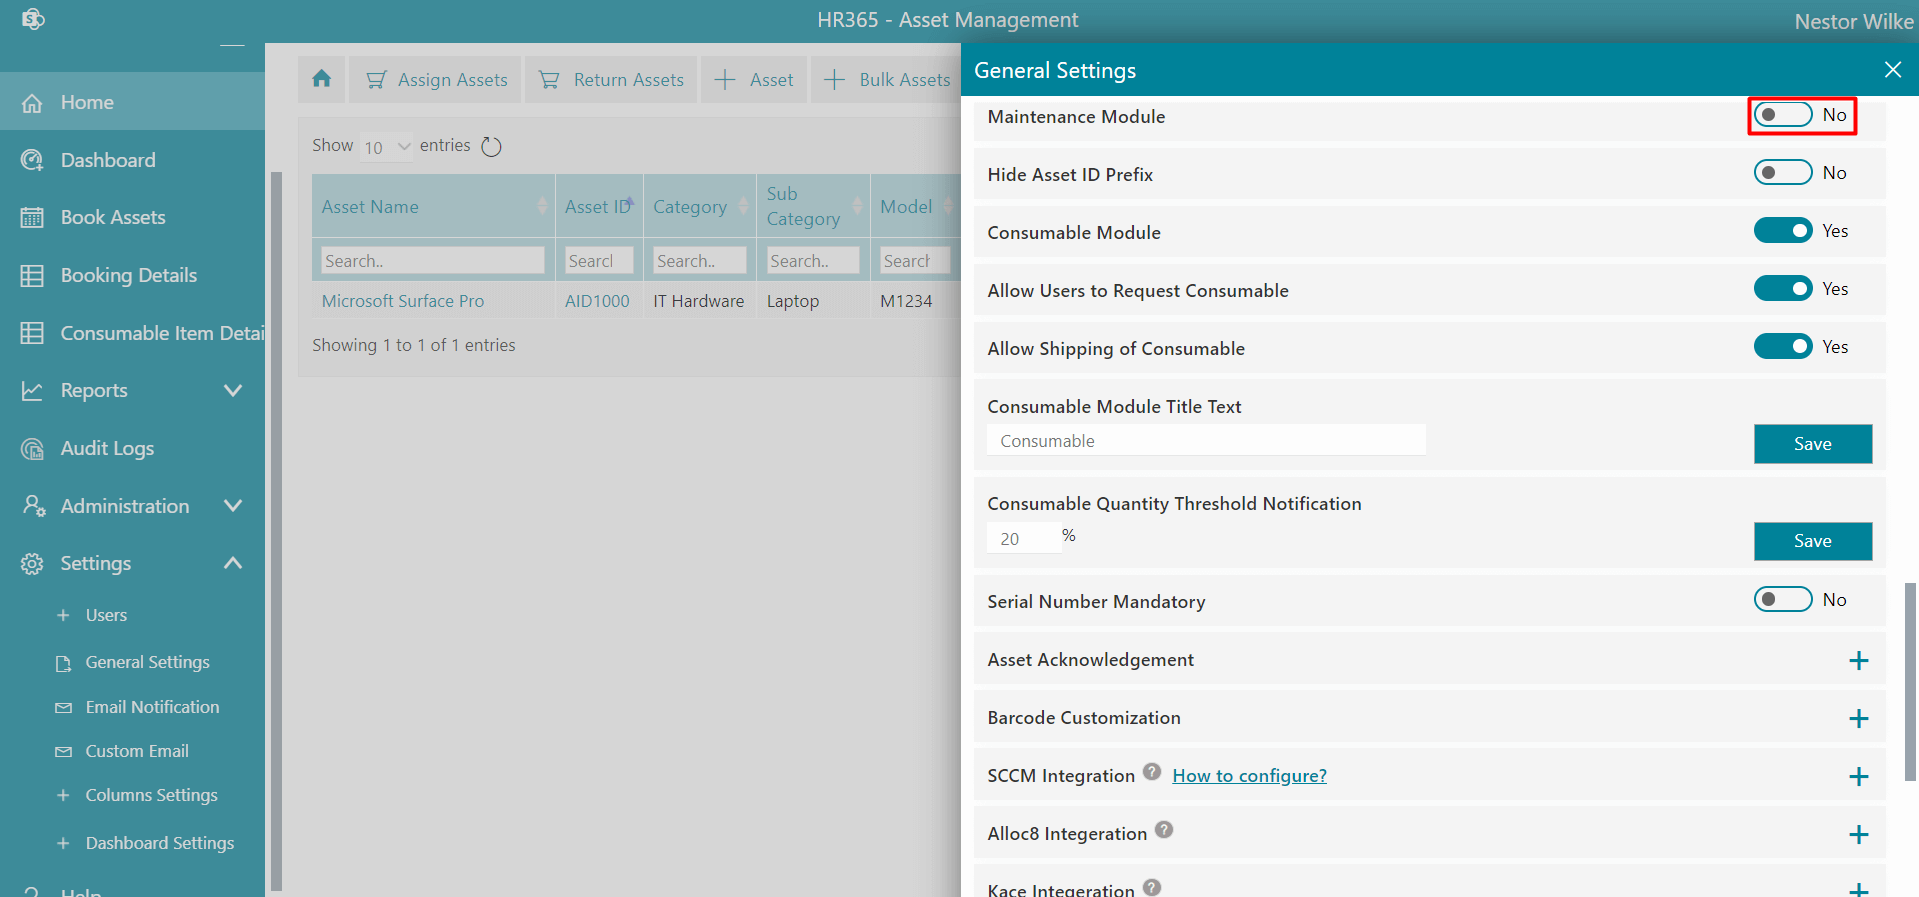
Maintenance Module: If this is enabled, you can add Maintenance Frequency and Maintenance Due Date while adding assets.
-
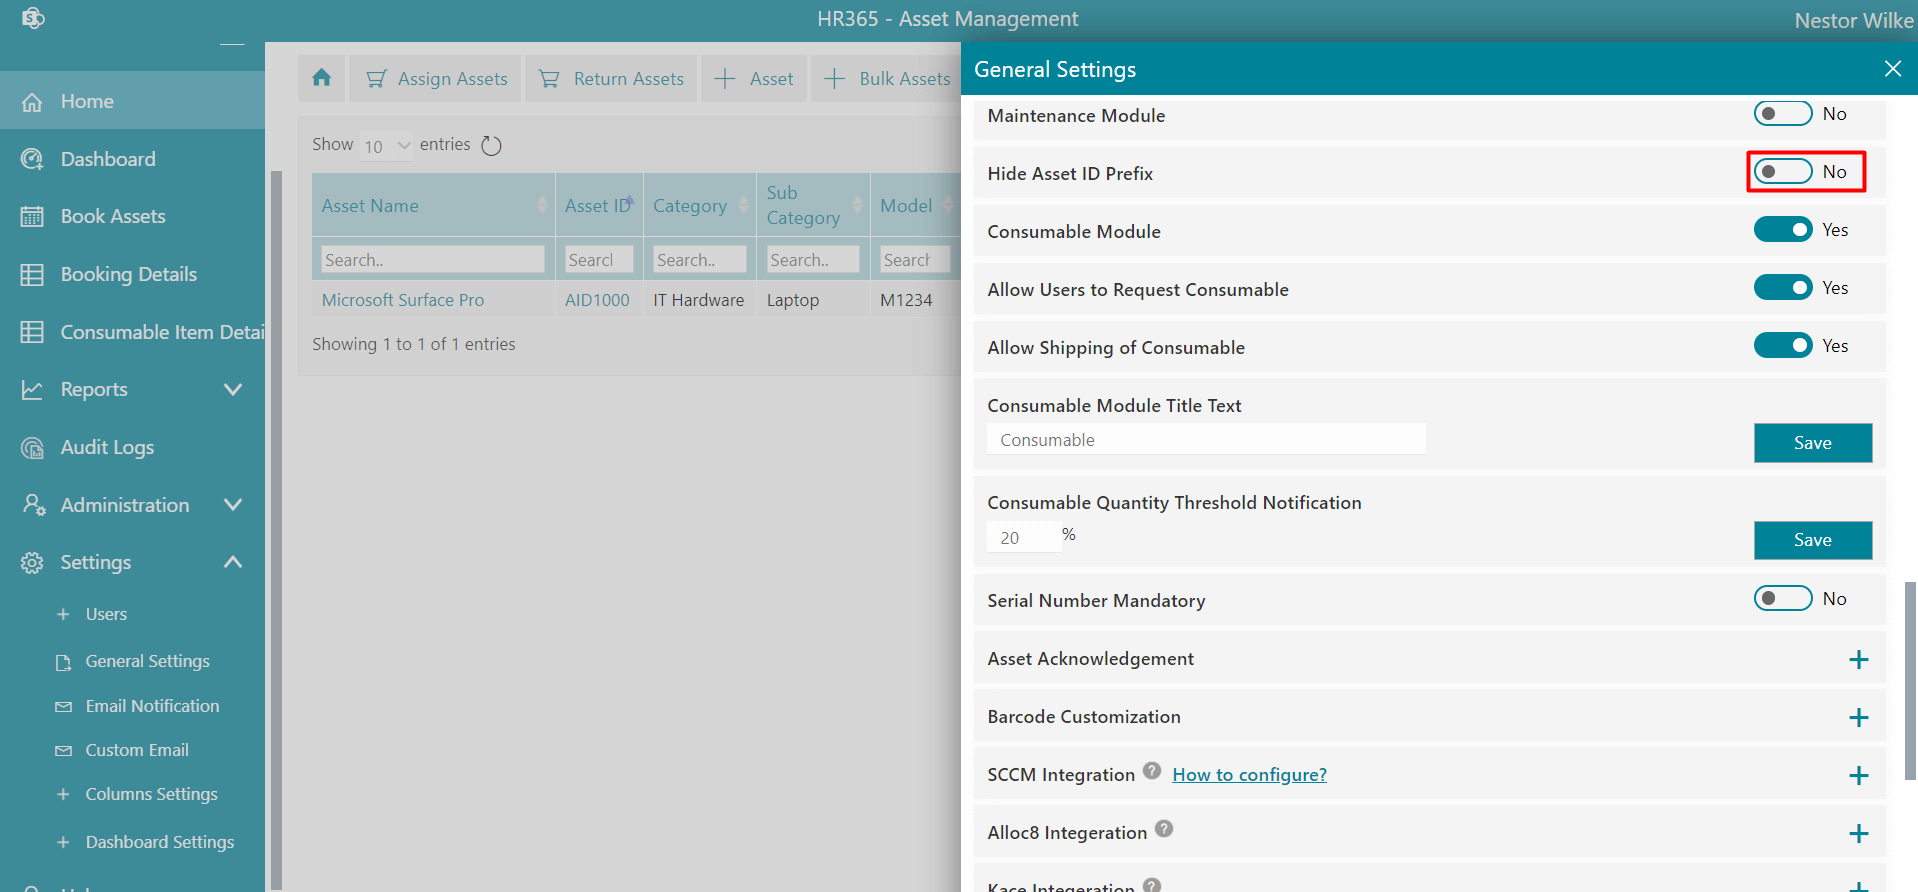
Hide Asset ID Prefix: If this is enabled, You can hide Asset ID prefix.
-
Consumable Module: If this is enabled, consumable tabs will displays on the home page.

-
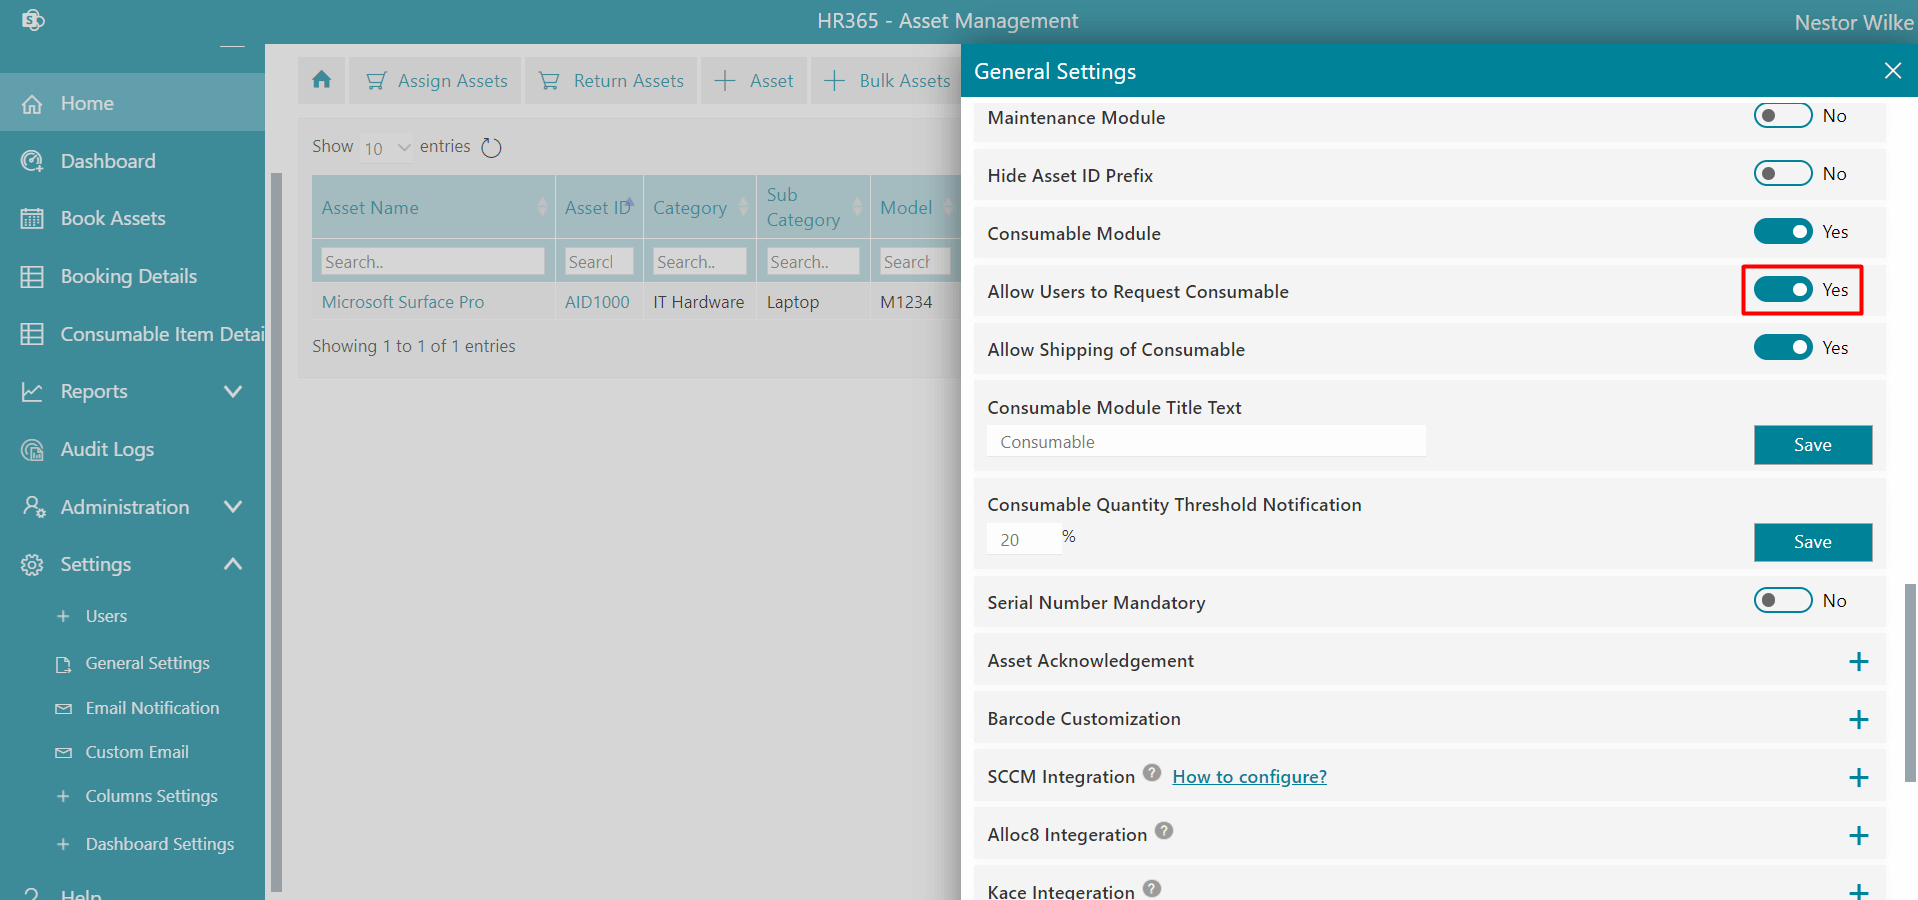
Allow Users to Request Consumable: If this is enabled, users can raise requests for consumable items.
-
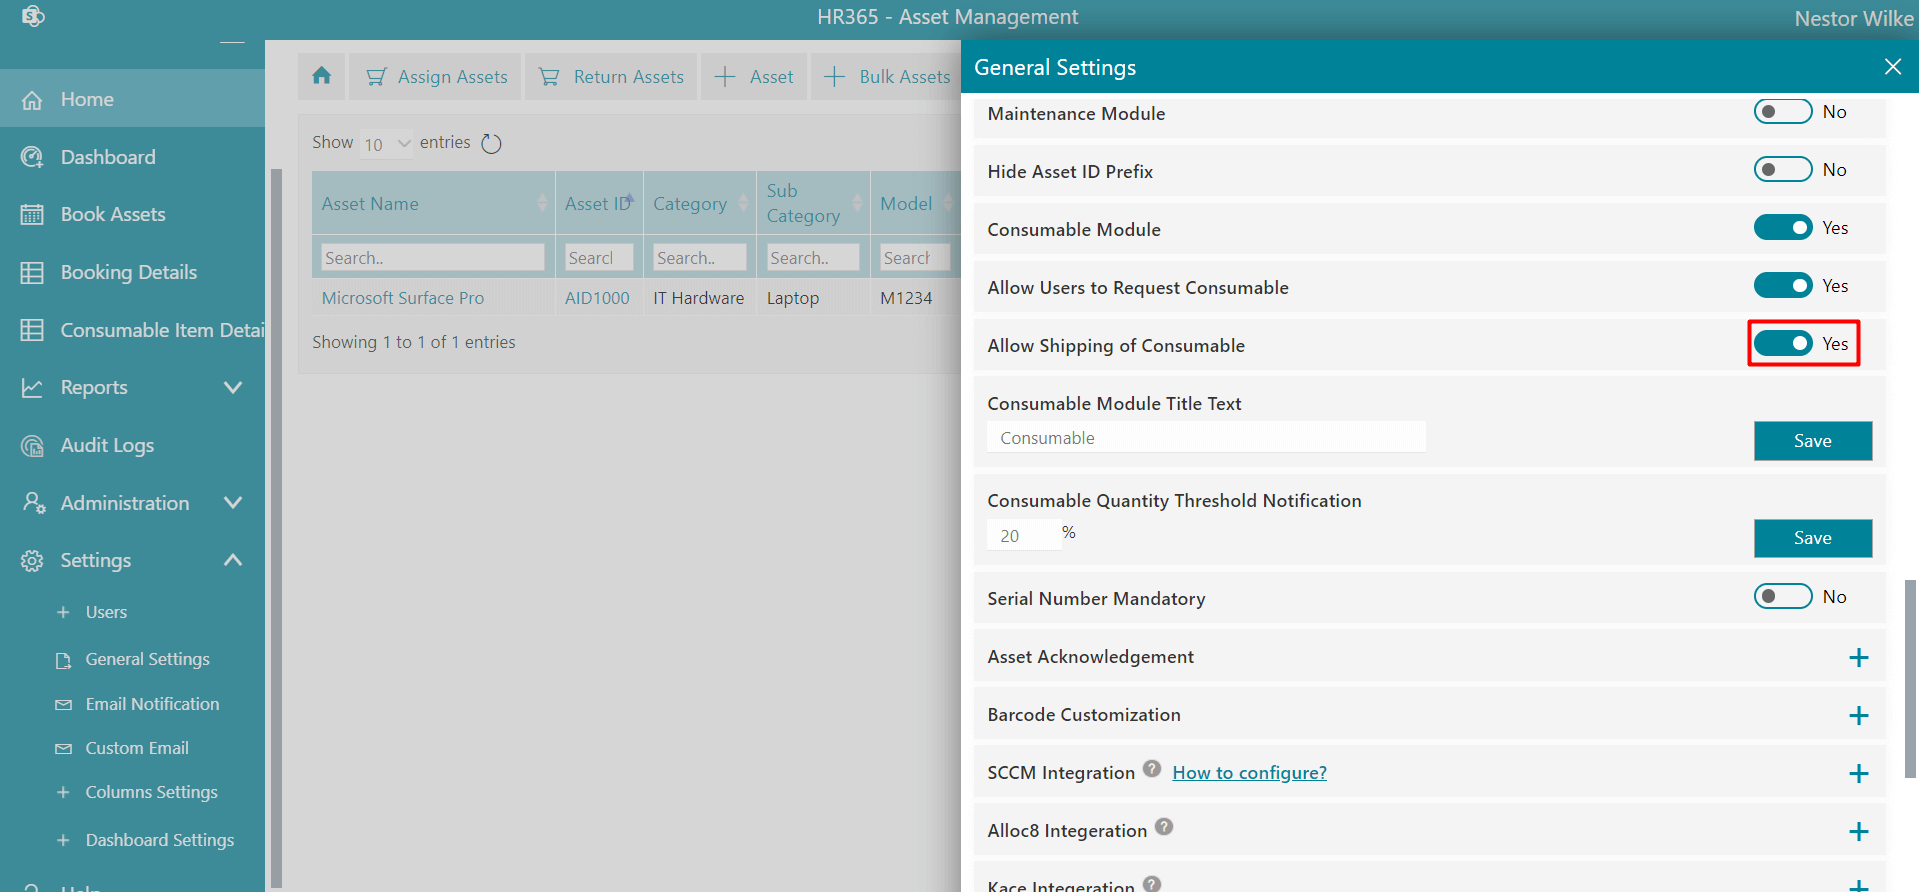
Allow Shipping of Consumable: If this is enabled, users can request shipping of the consumable item.
-
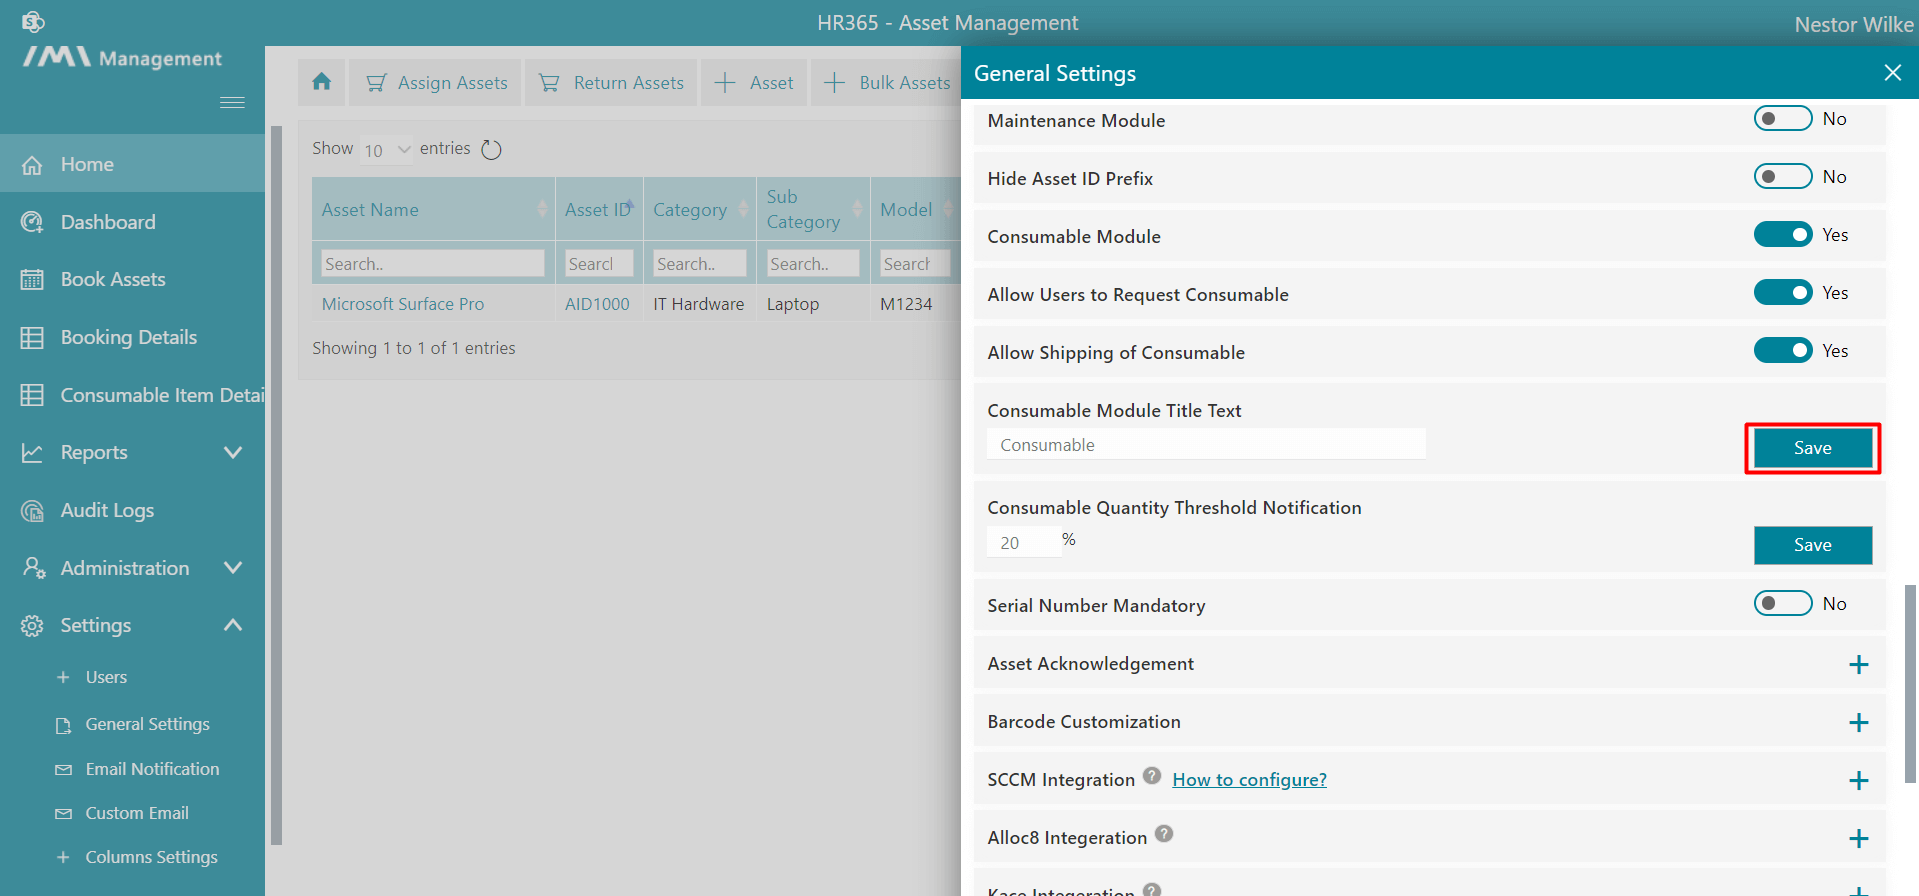
Consumable Module Title Text:From here you can rename module title.
-
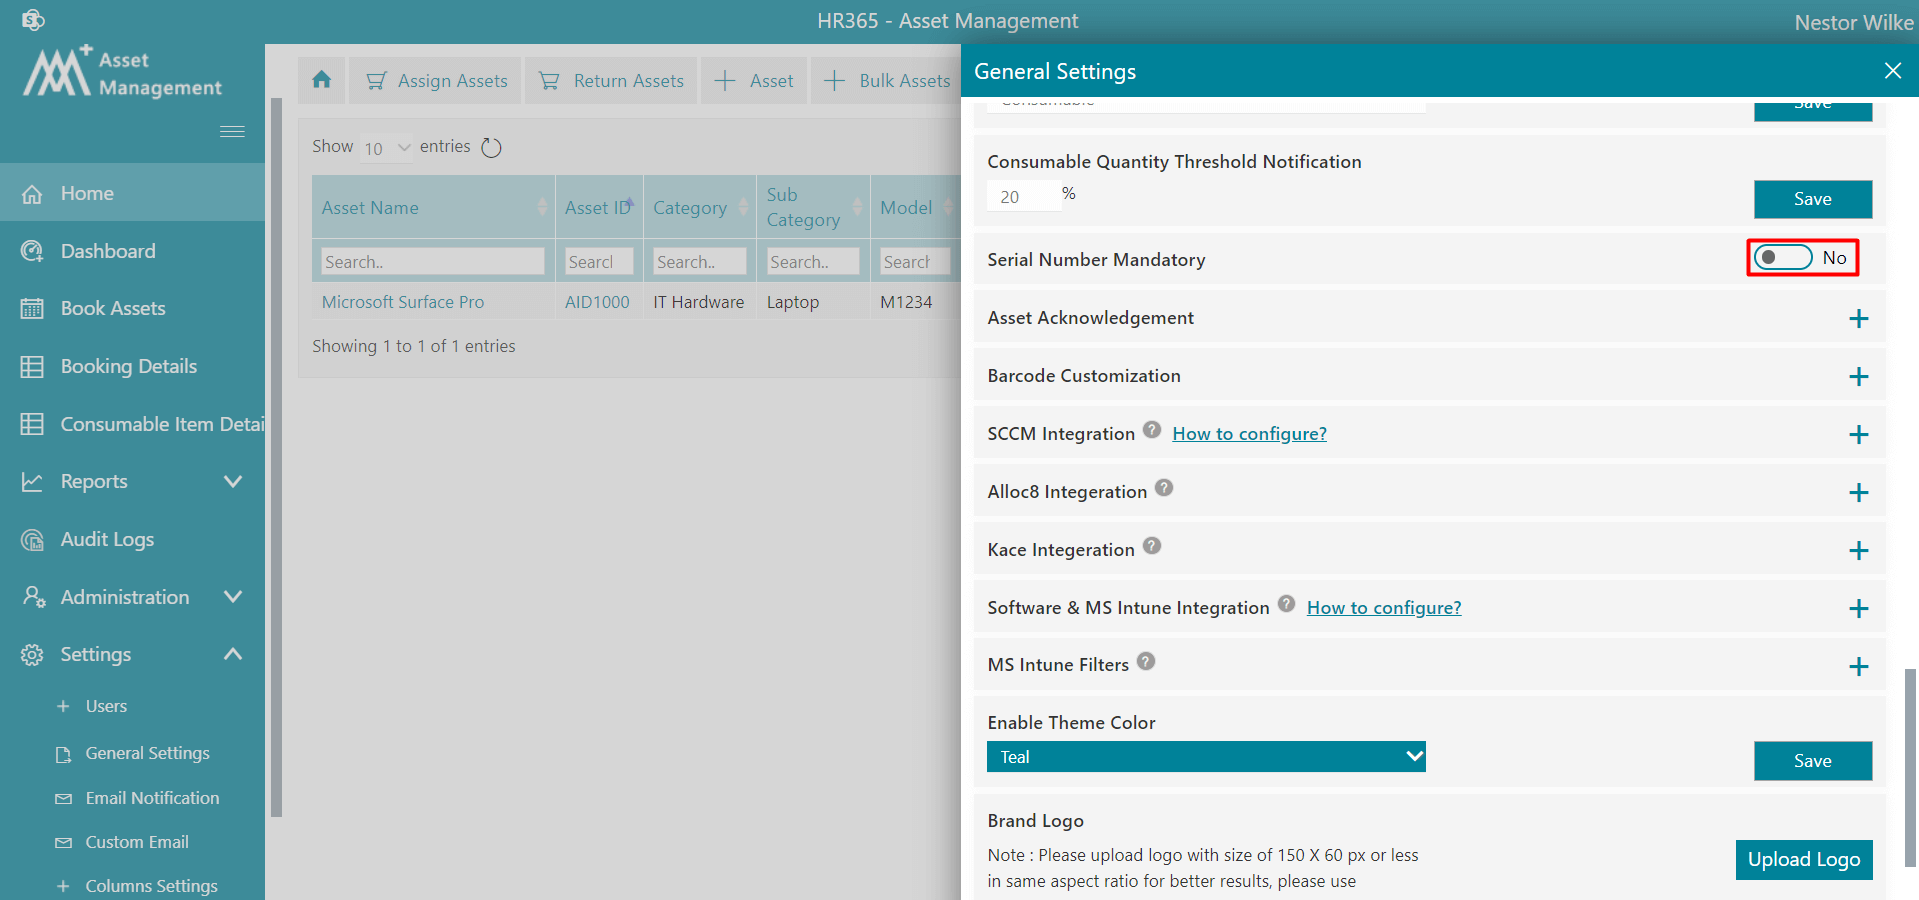
Serial Number Mandatory: If this is enabled, entry of serial number is mandatory.
-
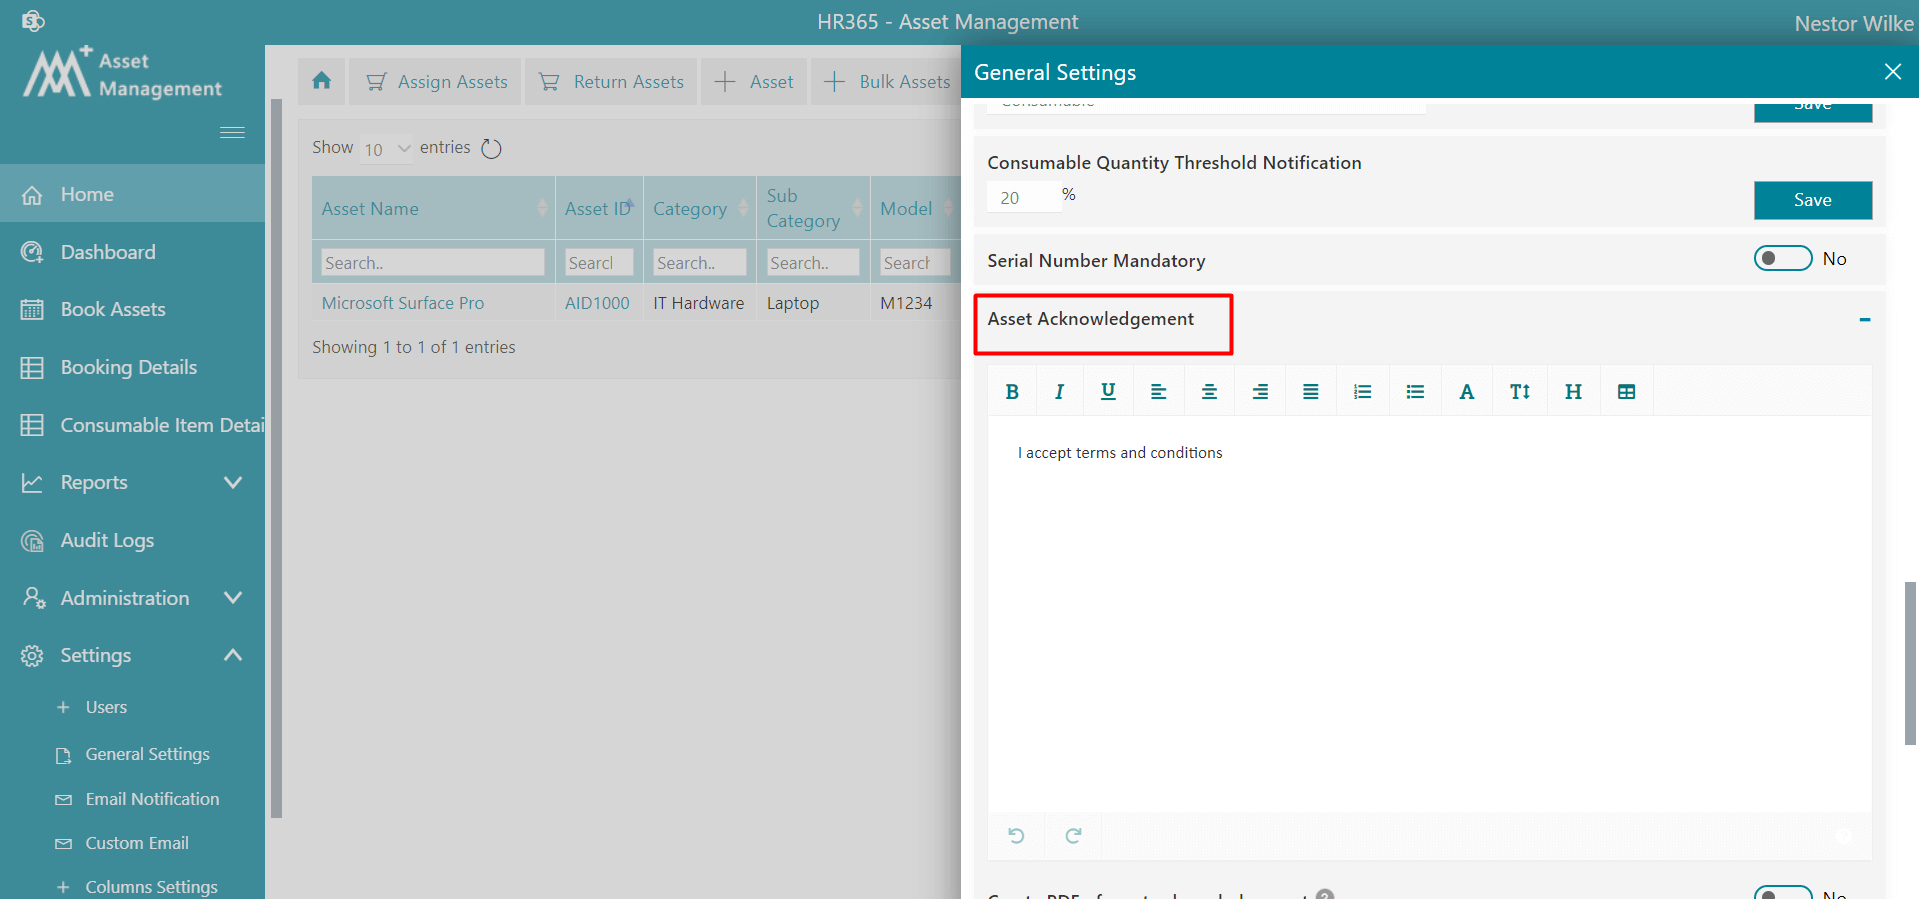
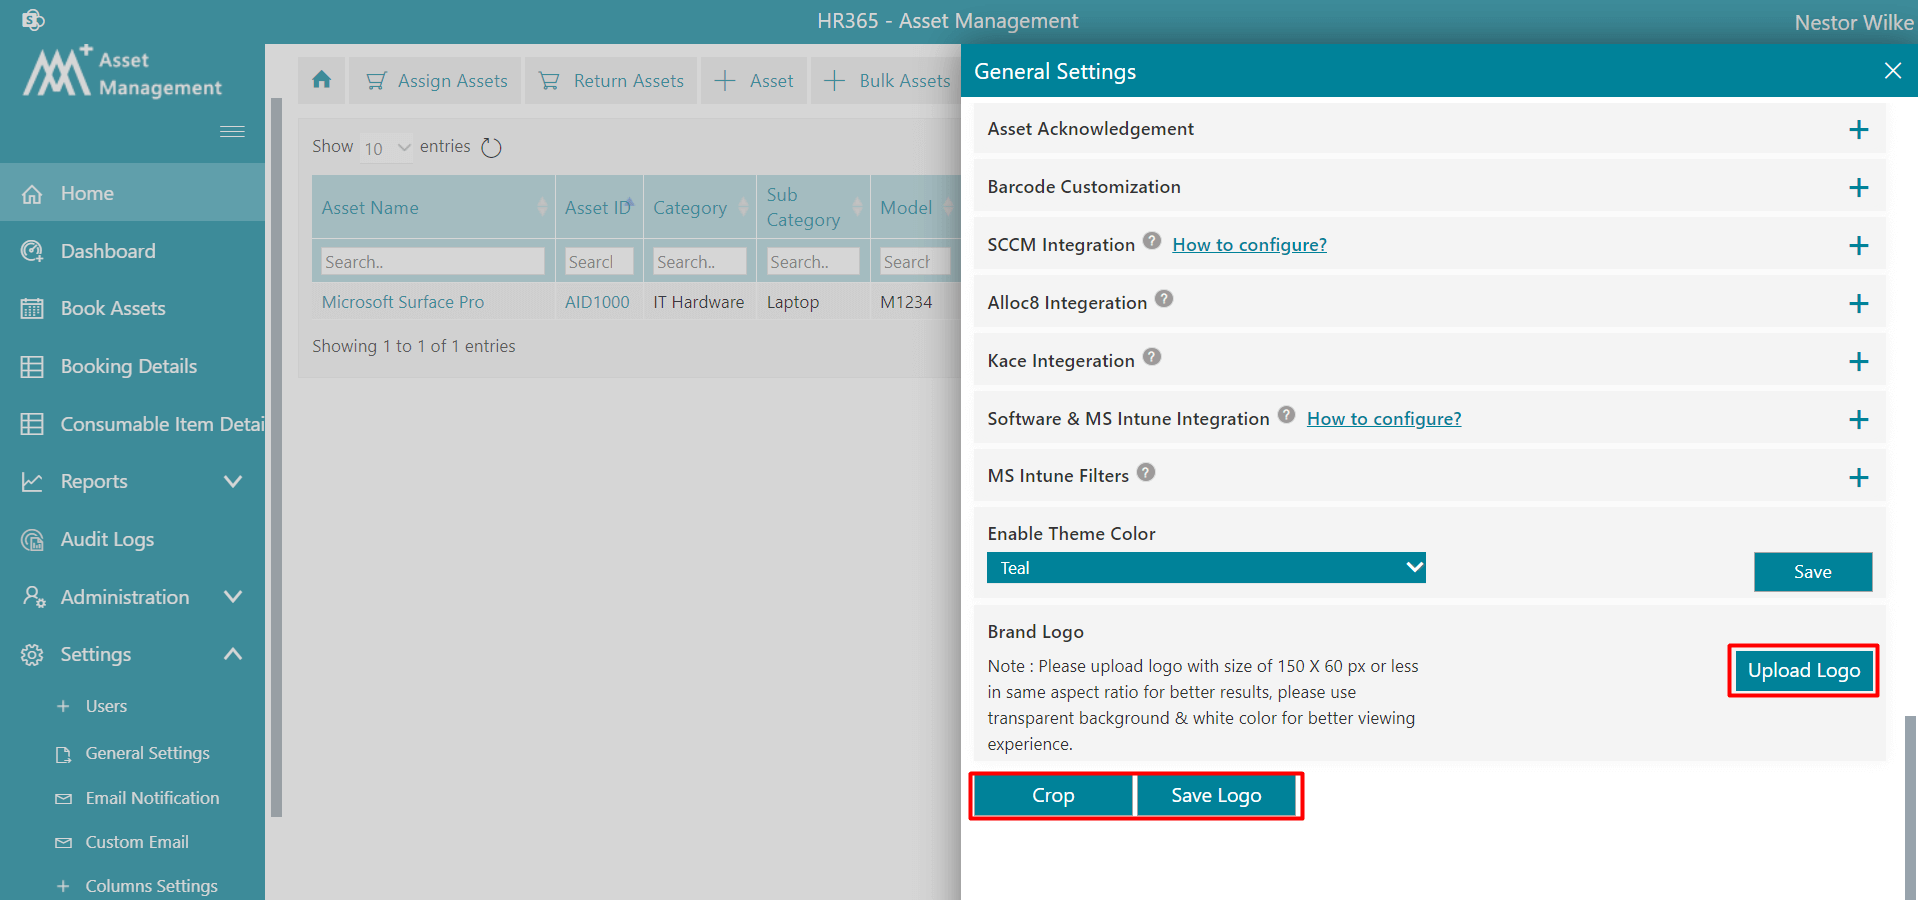
Asset Acknowledgement: If you type the acknowledgement text, user can see the acknowledgement page (the acknowledgement page link is available in the assigned email notification of the user).
Create PDF of asset acknowledgment: When you enable this and set up Power Automate, pdf file will create and stored in SP library and sent to user who has acknowledged the assets.
-
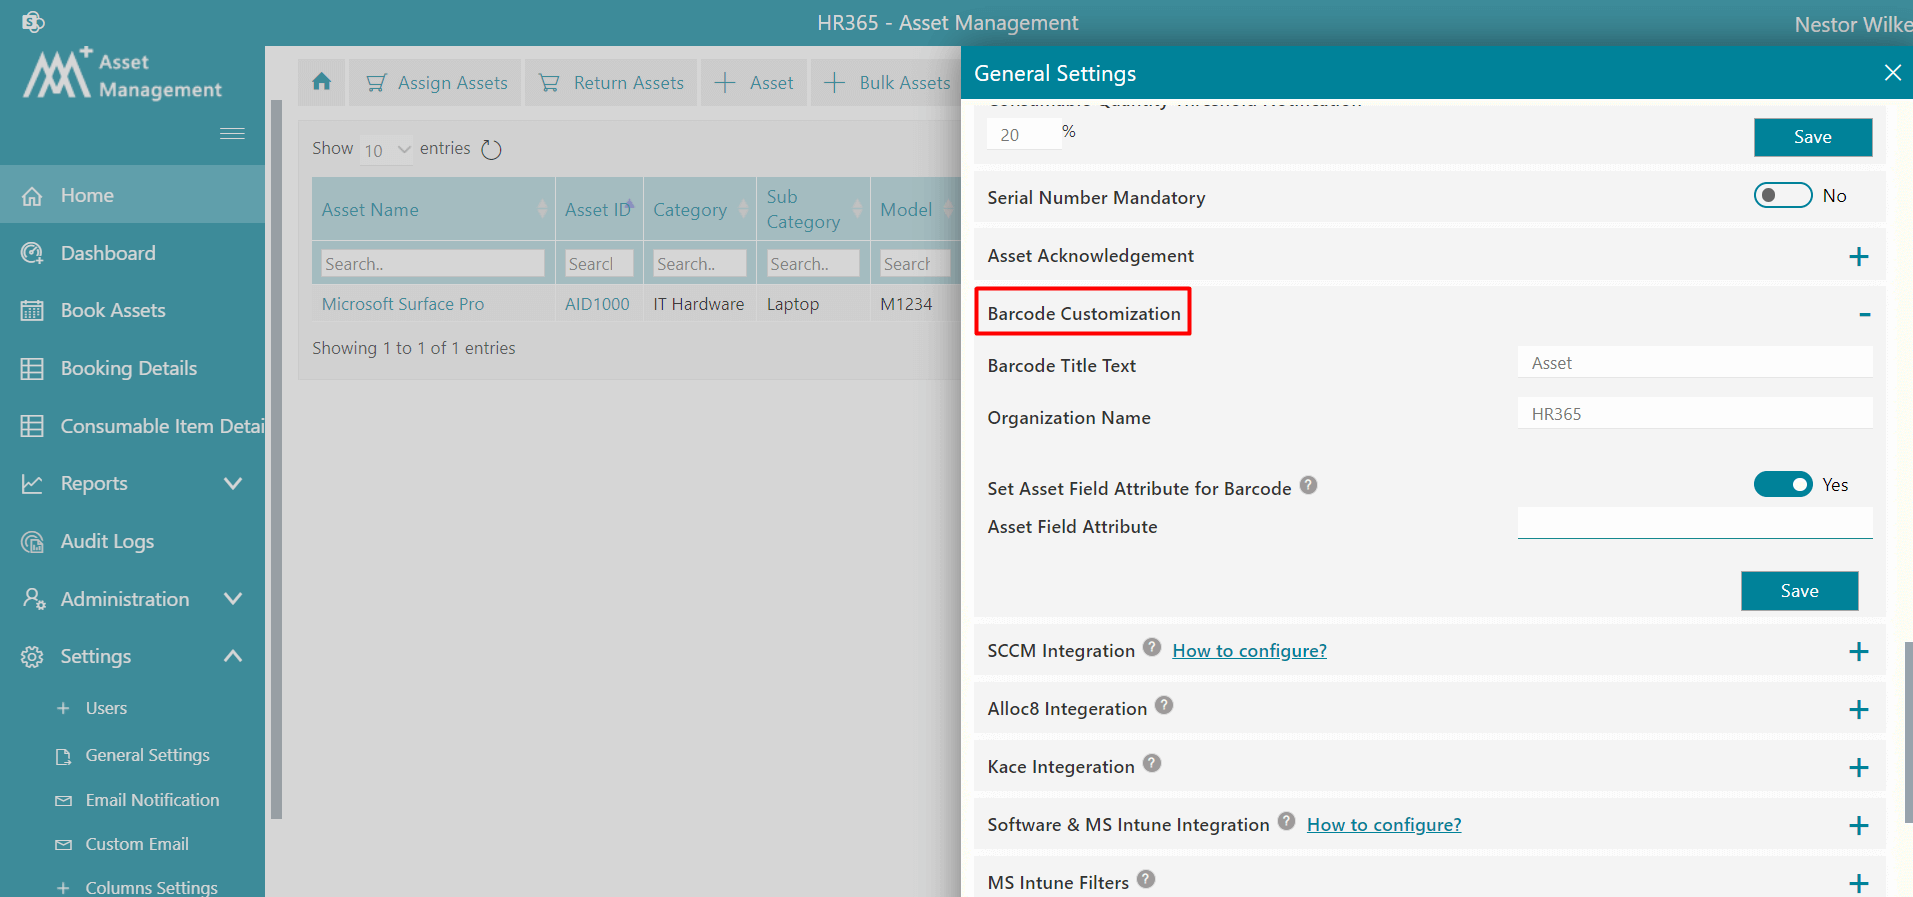
Barcode Customization: From here you can customize barcode by adding Barcode Title Text, Organization Name, Asset Field Attribute and enabling Set Asset Field Attribute for Barcode.
-
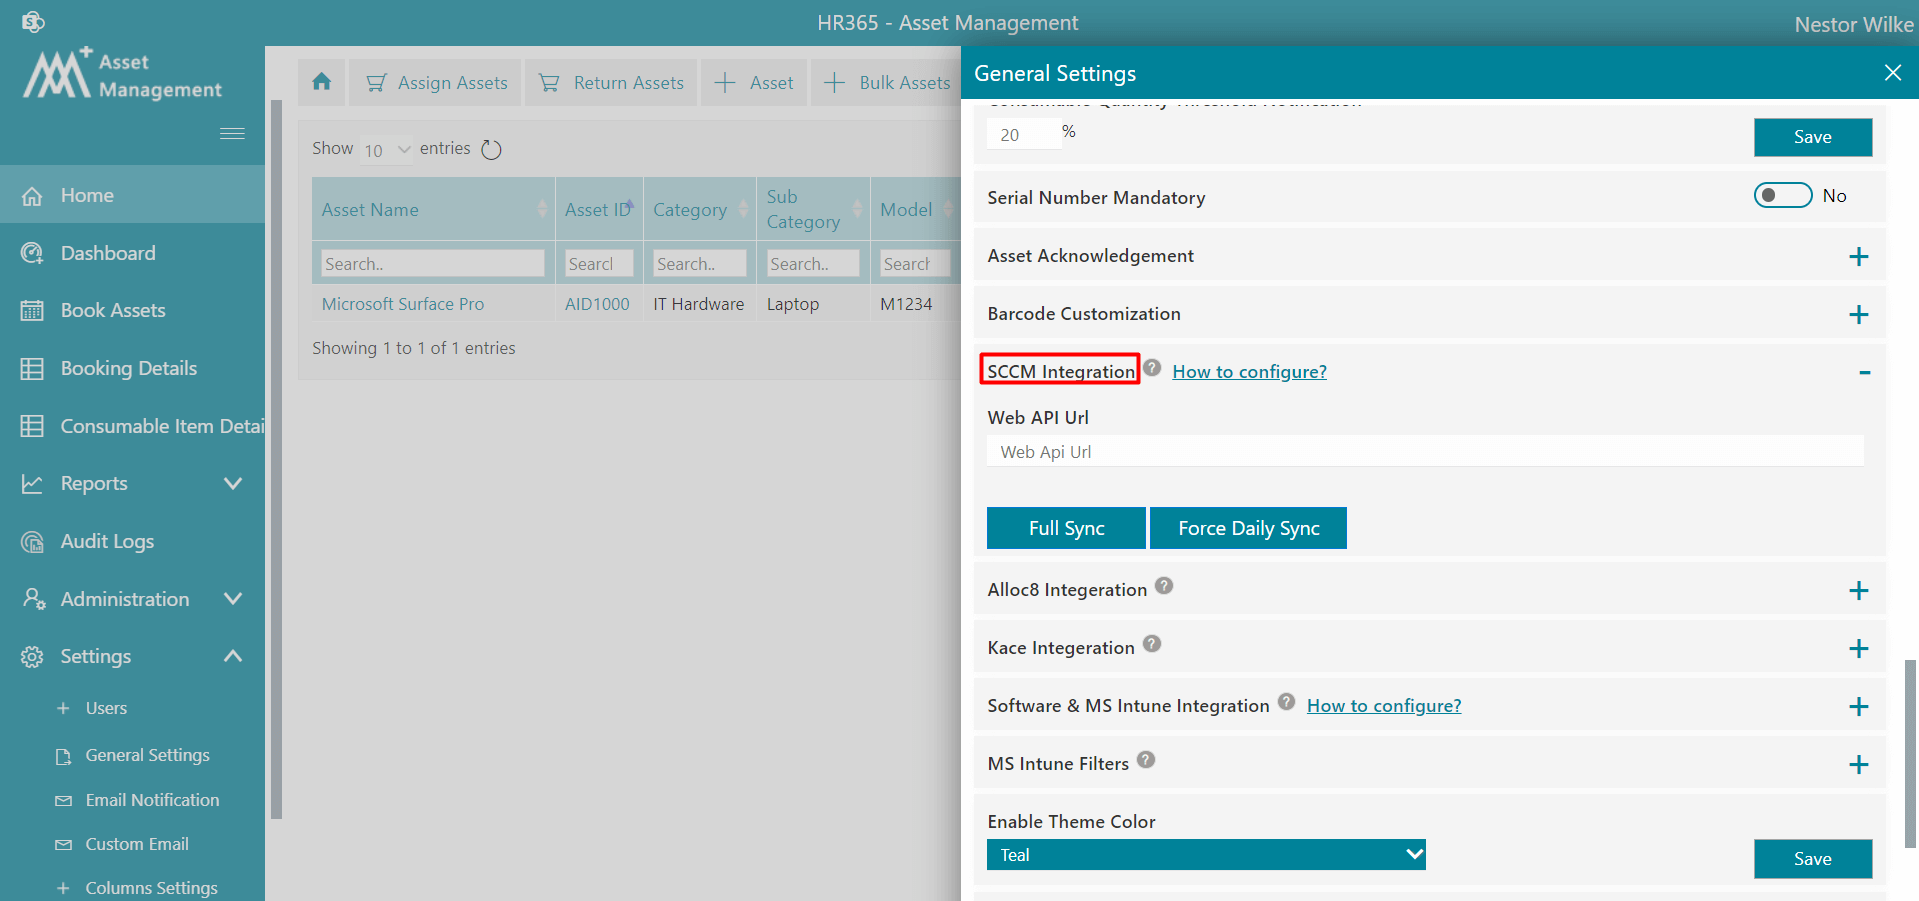
SCCM Integration: From here you can Integrate SCCM. Enter Web API Url.
-
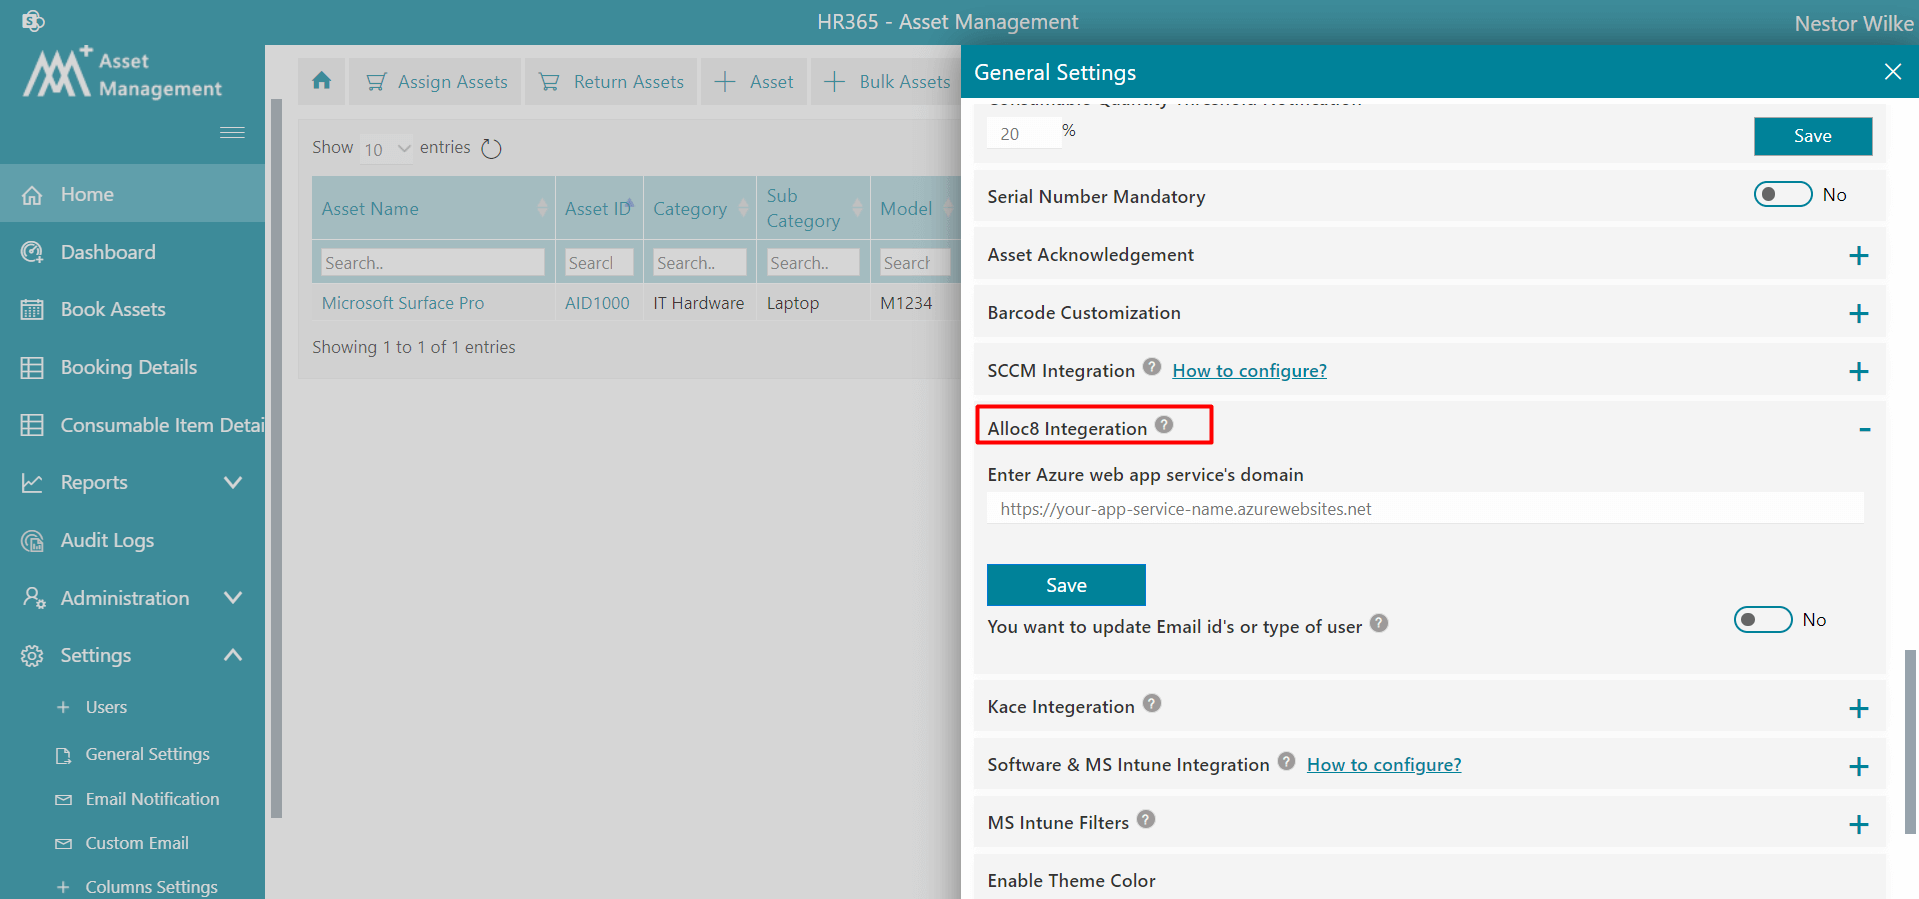
Alloc8 Integeration: From here you can Integrate Alloc8. Enter the Azure web app service's domain.
-
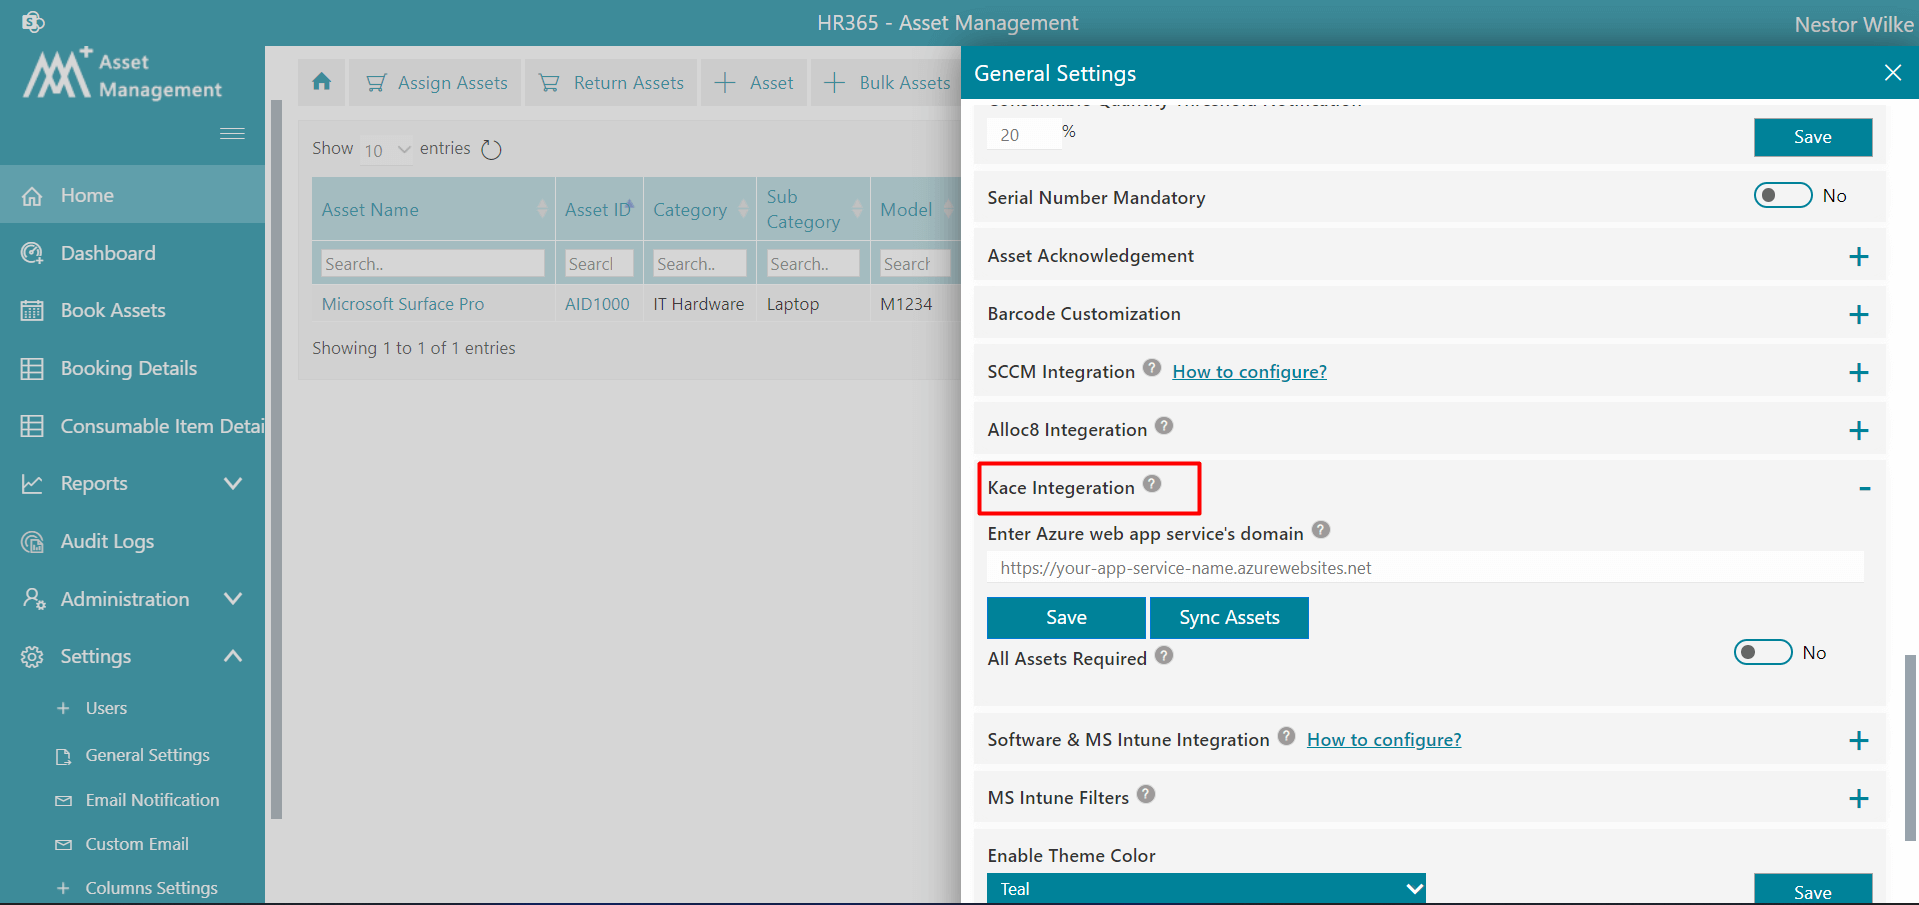
Kace Integeration: From here you can Integrate Alloc8. Enter the Azure web app service's domain.
-
MS Intune Filters:By using these filters only filtered data will be pulled from MS-intunes, filter by platform , filter compliance by status, filter ownership by type, also exclude VM's by enabling the toogle.
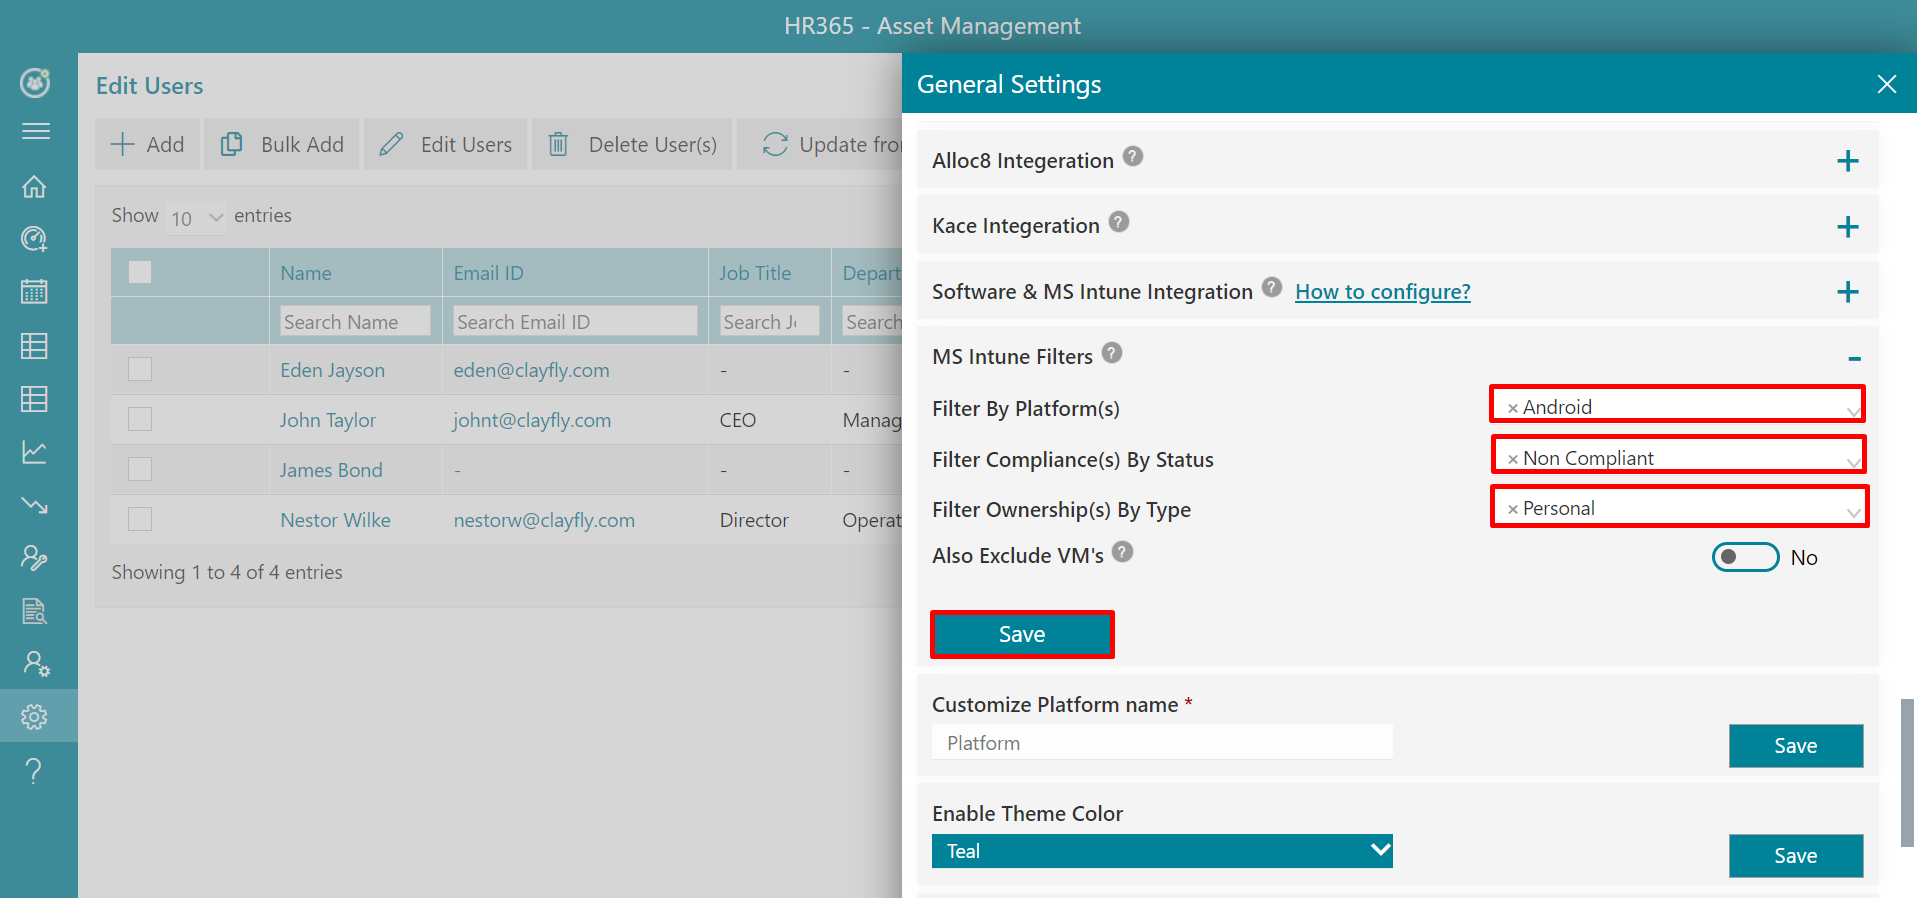
-
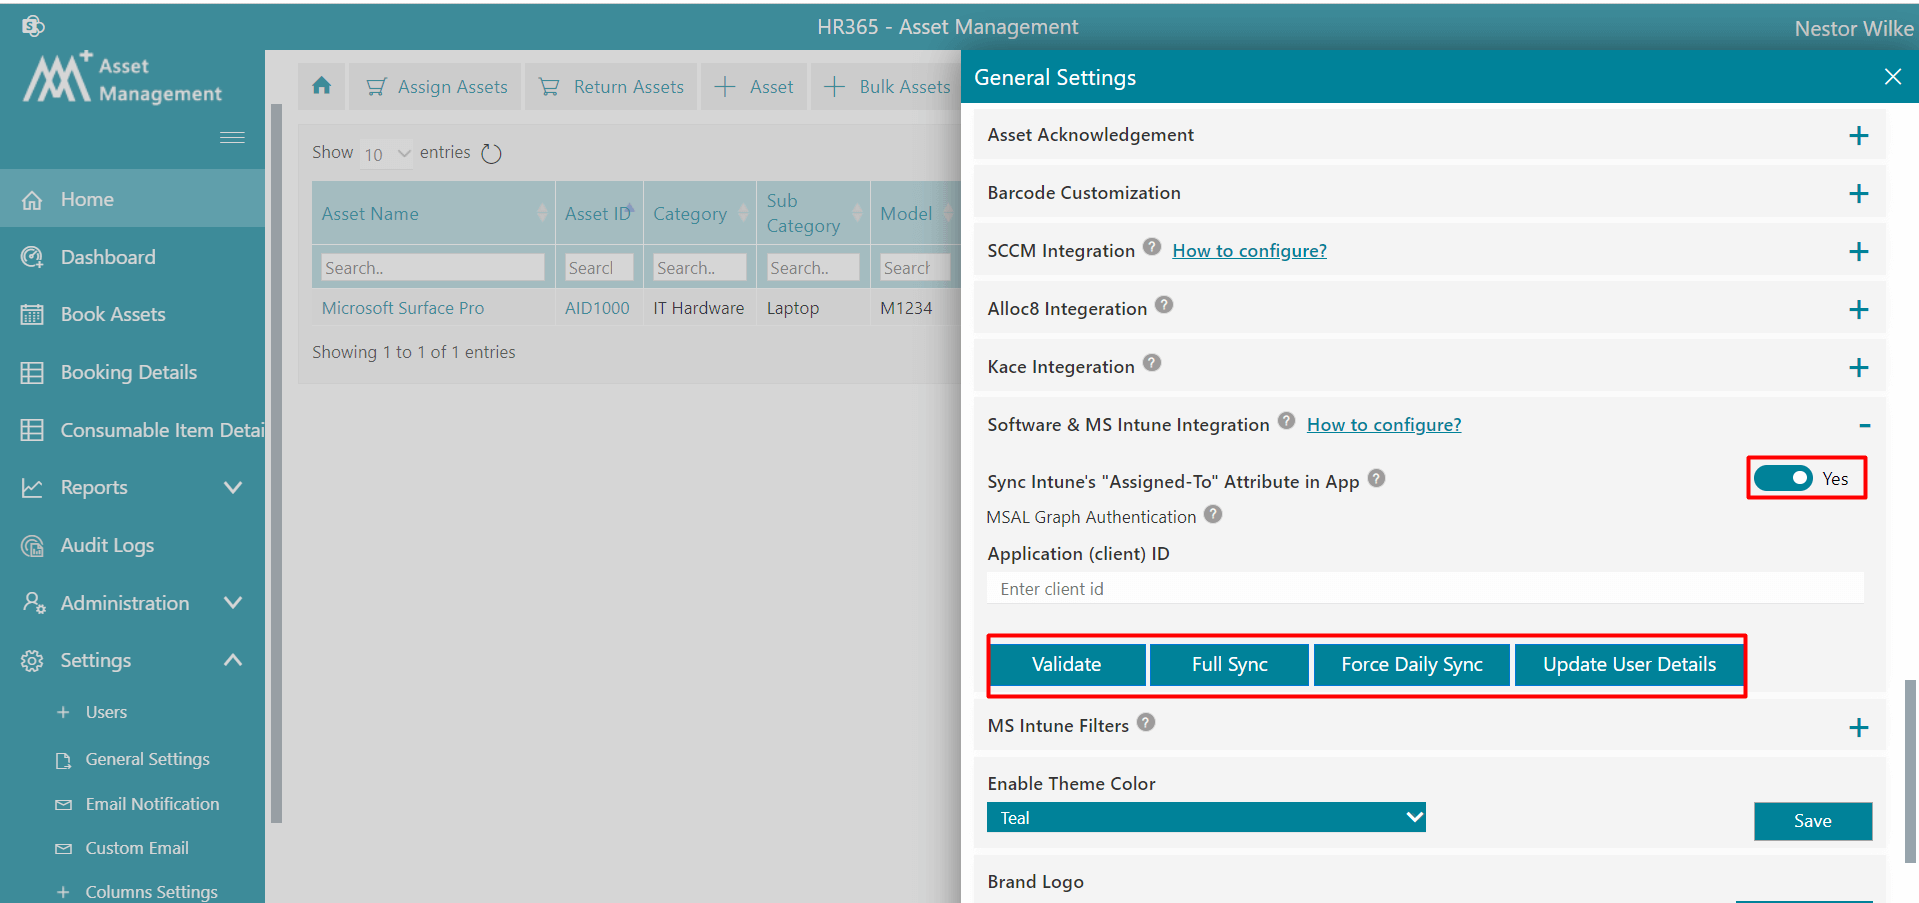
Software & MS Intune Integration: If you integrate it, Intune assets will sync in the application.
-
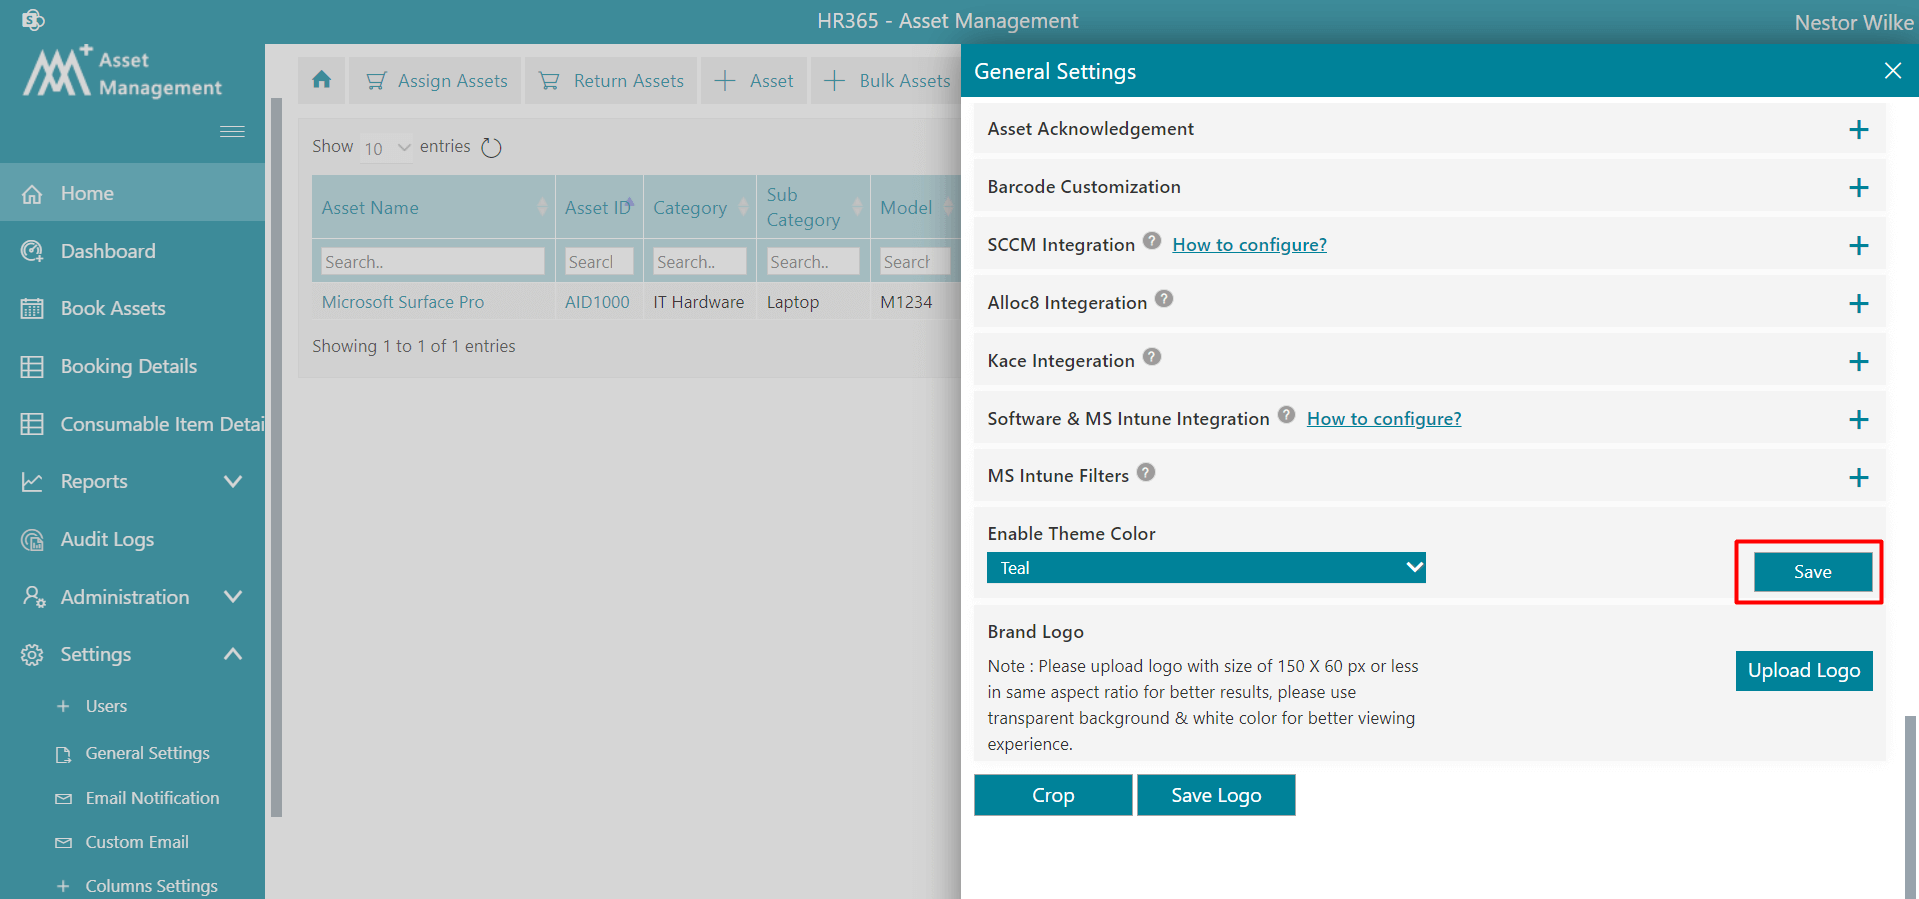
Enable Theme Color: You can select color as per your requirement and click on Save button.
-
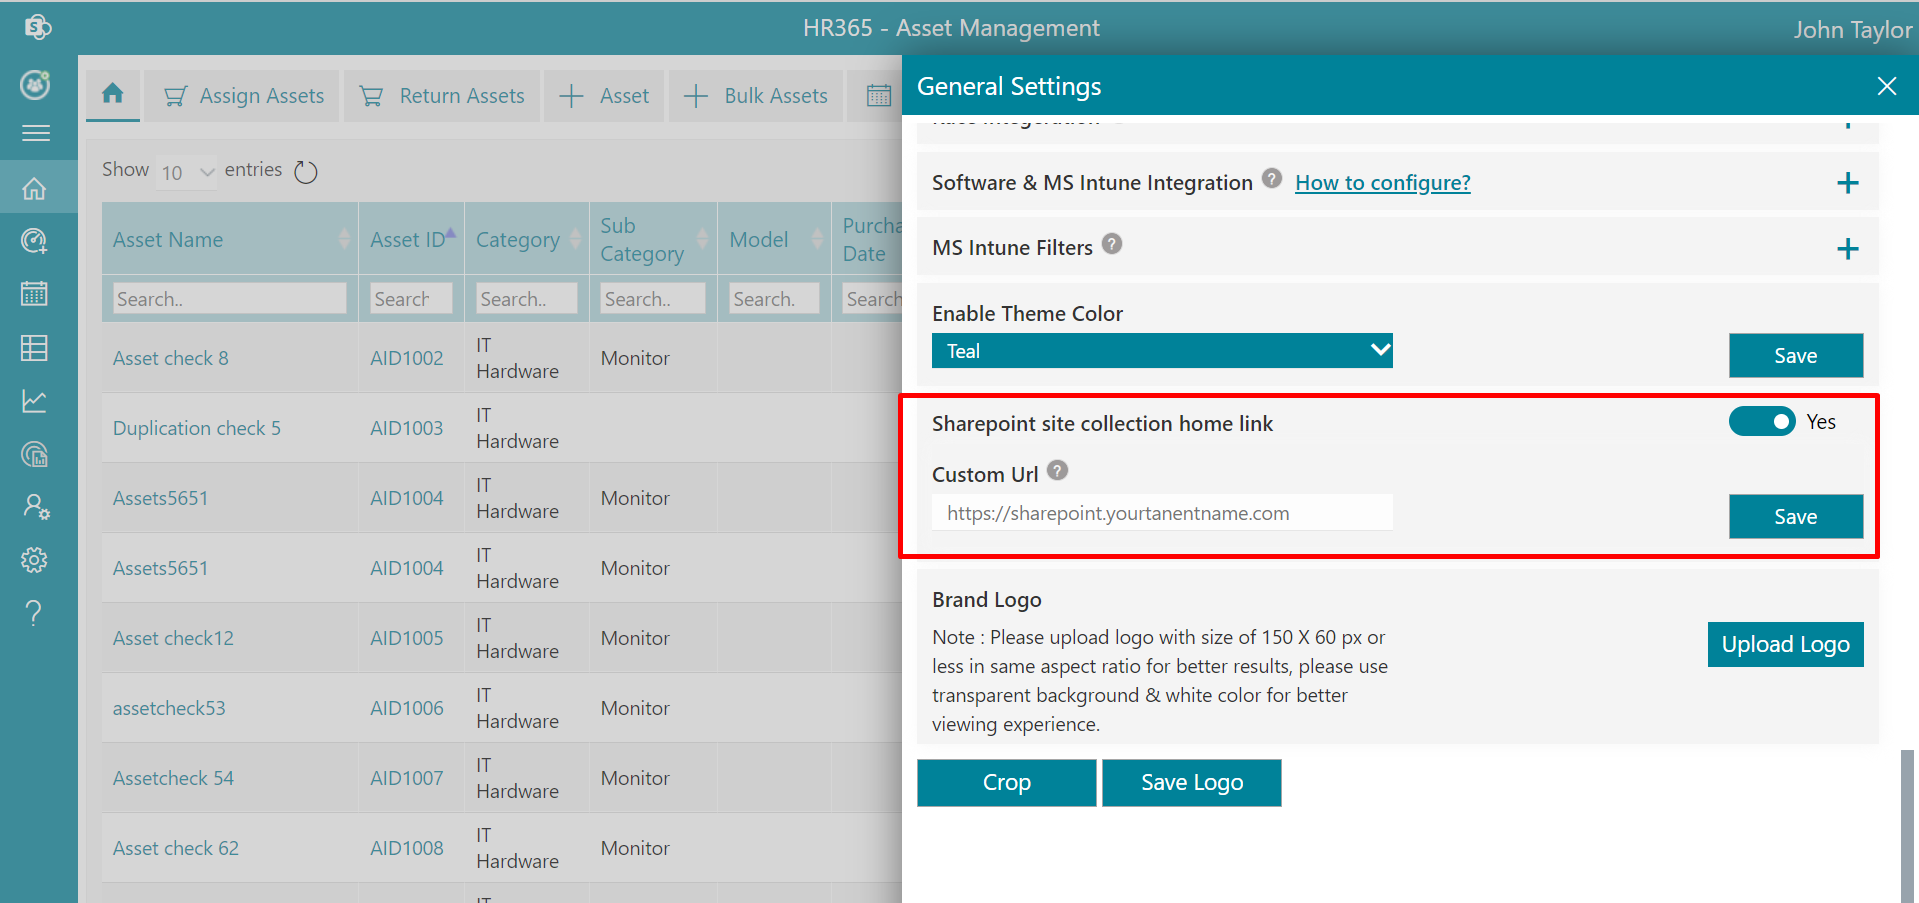
Sharepoint site collection home link: You can enable this from the general settings, you can see the SharePoint link option on the side navigation panel.
-
Brand Logo: You can upload logo by clicking on Upload logo. You can crop the logo and finally click on Save Logo button.
-
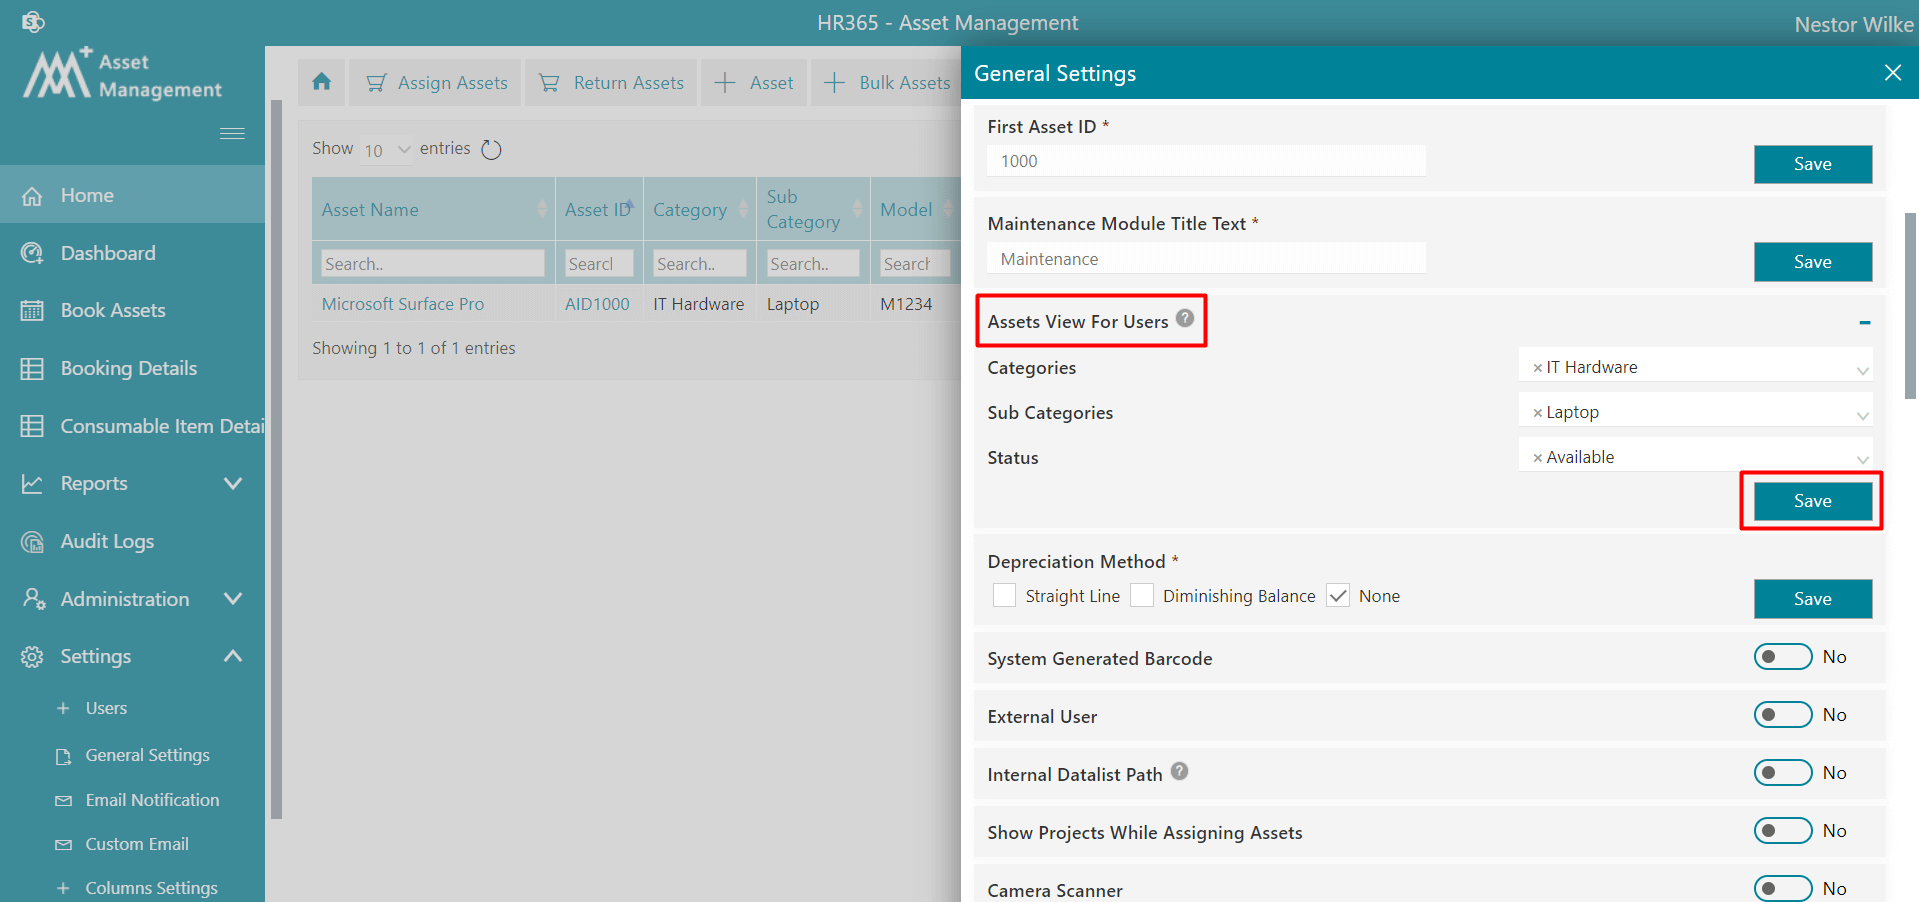
Assets View For Users: You can select the categories and subcategories of assets, only those will be available to the users for booking.
Here you can set date format, currency, asset accept notification, system generated barcode, theme color, brand logo etc.
Below mentioned is the URL where you can find pdf files
https://YourTenantName.sharepoint.com/sites/SiteName/HR365AMPAssetdoc
Email Notification
- By default, “To users on assigning assets“ is enabled and receives the email notification. if you enter the email ID and click on submit both the admin and the entered email IDs receive an email notification on assigning assets to the users.
- By default, “To users on returning assets“ is enabled and admin receives the email notification. if you enter the email ID and click on submit button, both admin and the entered email IDs receive email notification on returning assets from the users.
- By default, “To groups on assigning assets“ is enabled and admin receives the email notification. if you enter email ID and click on submit button, both admin and the entered email IDs receive email notification on returning assets from the group.
- By default, “To groups on returning assets“ is enabled and admin receives the email notification. if you enter the email ID and click on submit button, both admin and the entered email IDs receive email notification on returning assets from the group.
Here you can set up email notifications for assigned or on return assets. You can also setup reminders through email notifications for asset expiry and return date of the assets.
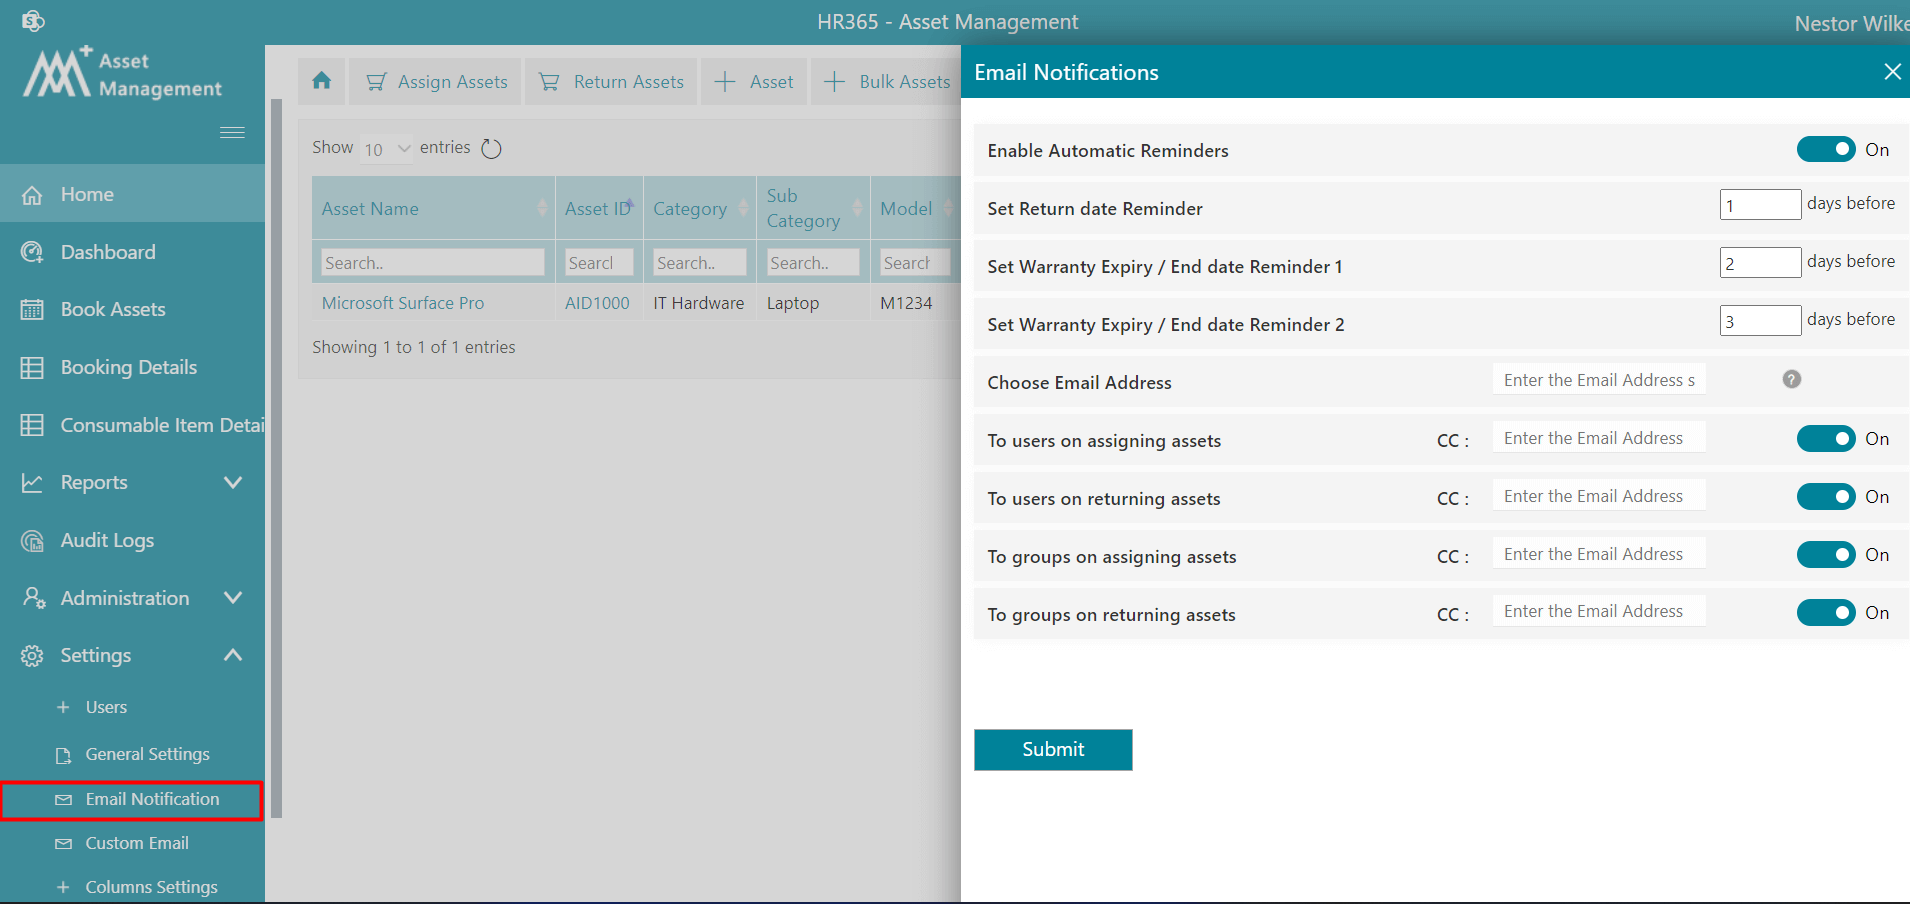
Email Reminder or Enable Automatic Reminders
By default, “Enable Automatic Reminders” is enabled, admin will receive email notification regarding the asset expiry date and returning assets of the users based on days entered in settings.
Here the person will receive an email notification whose email ID(s) are entered in the “Choose Email Address” box. You can add up to 4 emails (IDs) in choose email ids separated by “;” without space.
When you enter the number as day for “Set Return date Reminder” and click on submit, email notification will receive before the number of days entered to the return date When you enter number as day for “Set Expiry
/ End date Reminder 1” and click on submit, email notification will receive before the number of days entered to the expiry date of the assets
In same way “Set Expiry / End date Reminder 2” will works.
The person who install the application, by default is an admin, such person will receive email notifications and email reminders.
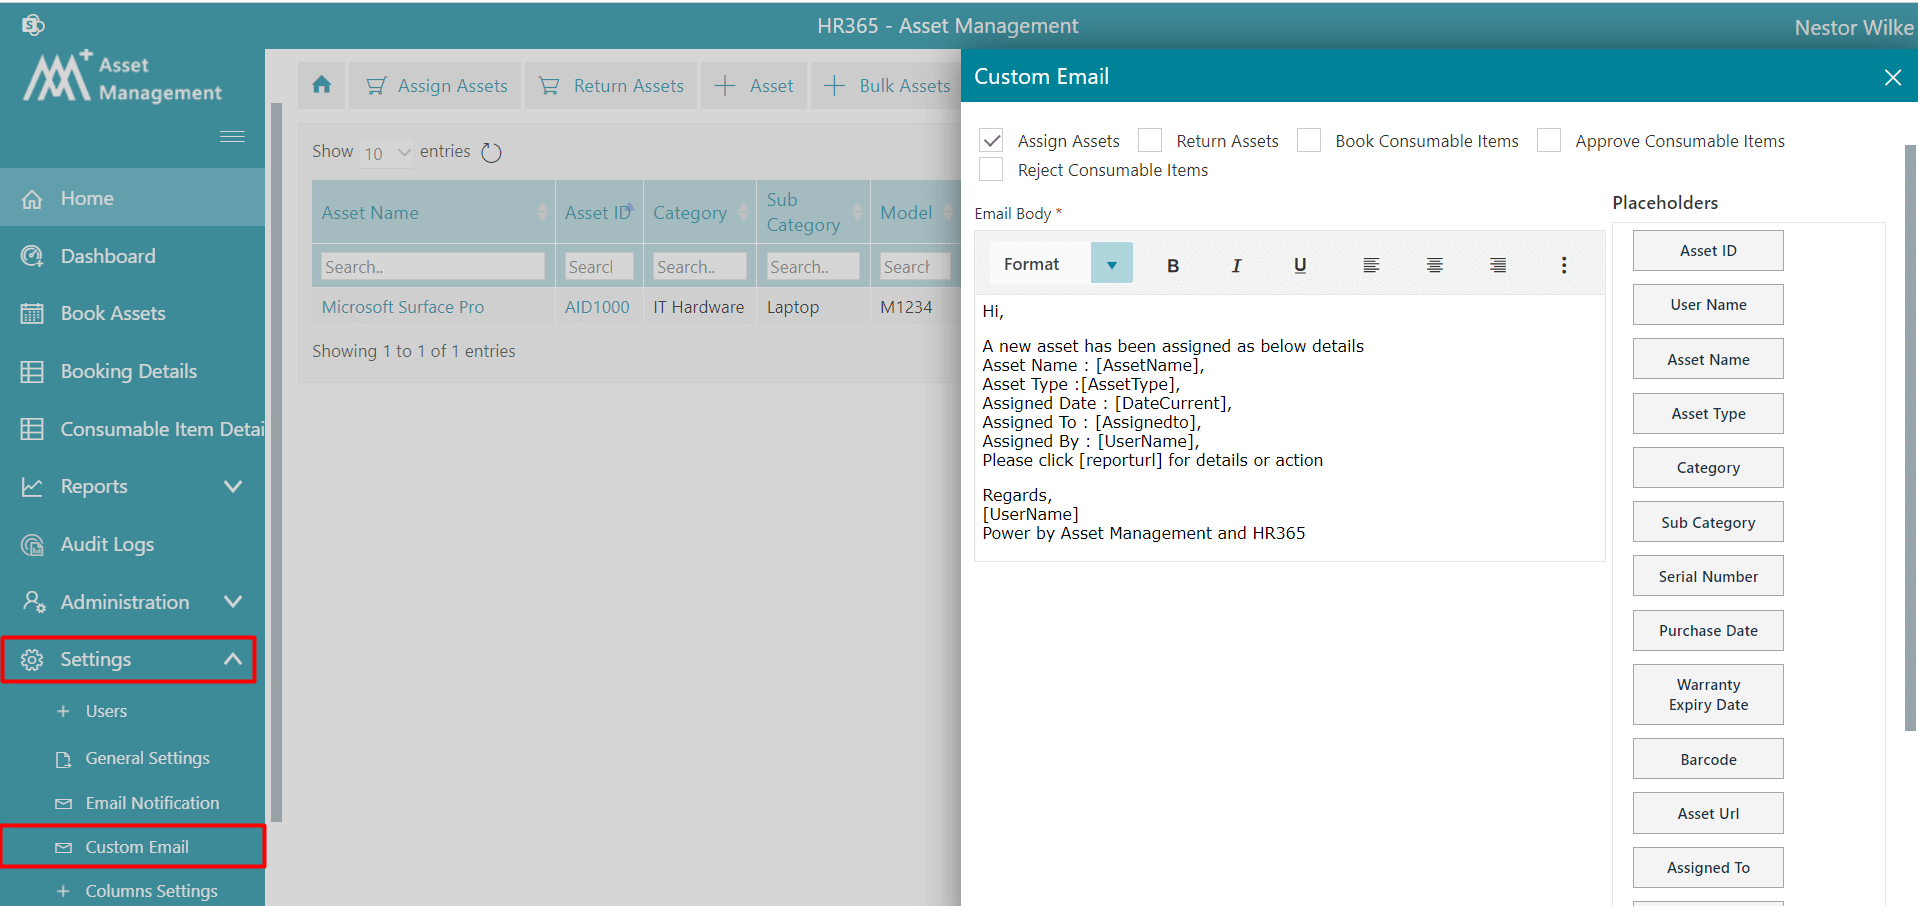
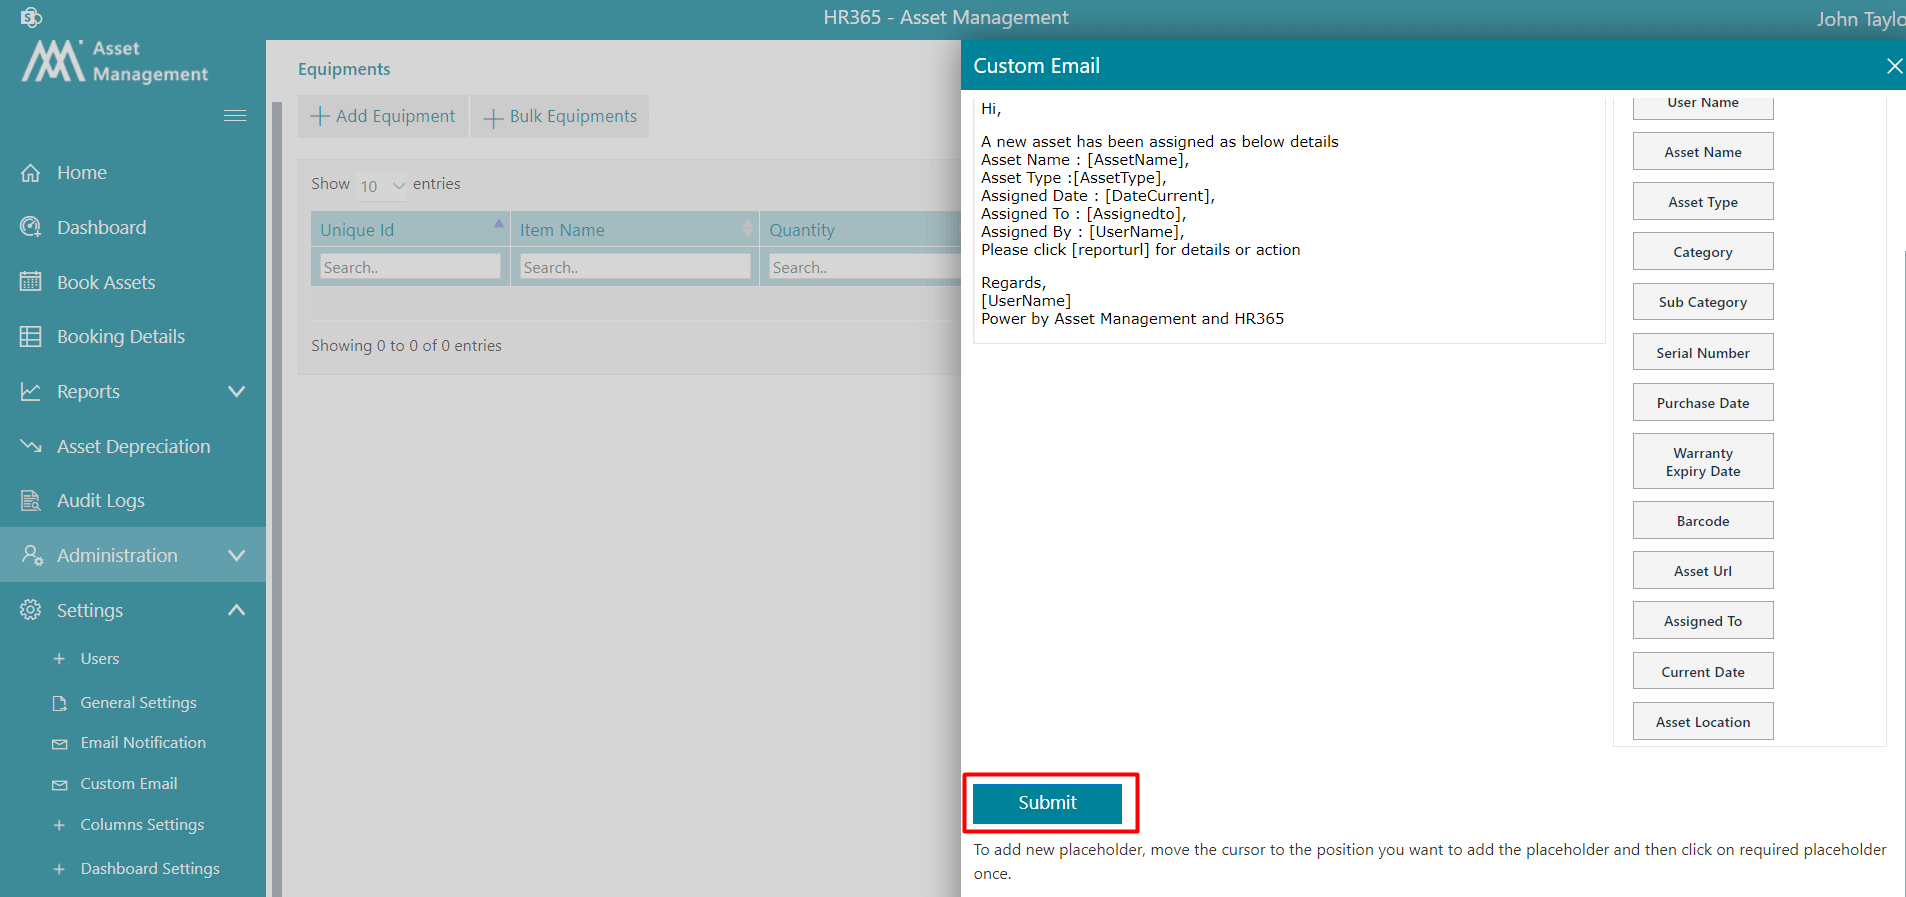
Custom Emails
Here you can change the email notification body format for assigned and returned assets email notifications. Click on Custom Email under Settings from side panel/ custom email page opens from where you can customize
the email.
Select the check box of Assign Assets, Return Assets, Book Assets, Approve Assets or Approve Assets. If you want to add extra placeholder in email body, just click on the placeholder
under placeholder section, placeholder get added in email body and finally click on Submit button as shown in below. If you want to edit text do same as you do in MS word.
Column setting
- Displaying Column to the Table - just select the check boxes of fields based on your requirement and click on submit as shown in the below image.
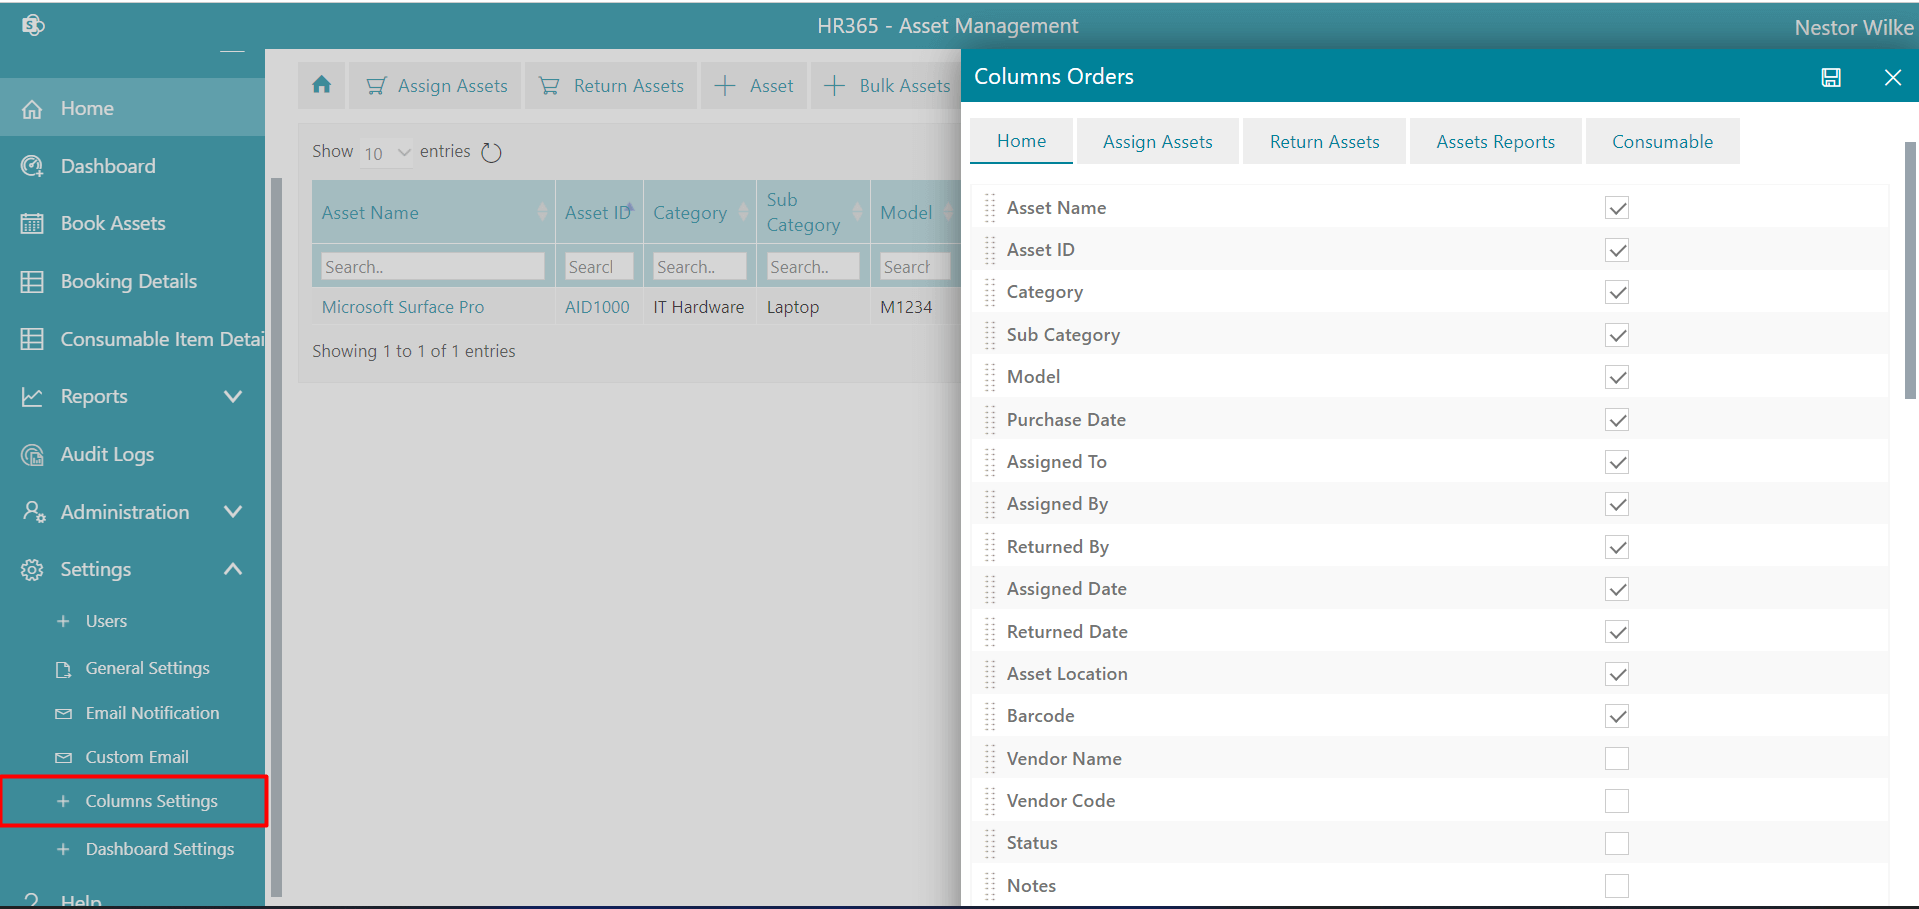
- Arrangement of Column Orders - Drag the single field and drop it to arrange the order of columns as per your requirement, do the same for other fields and finally click on submit as shown below.
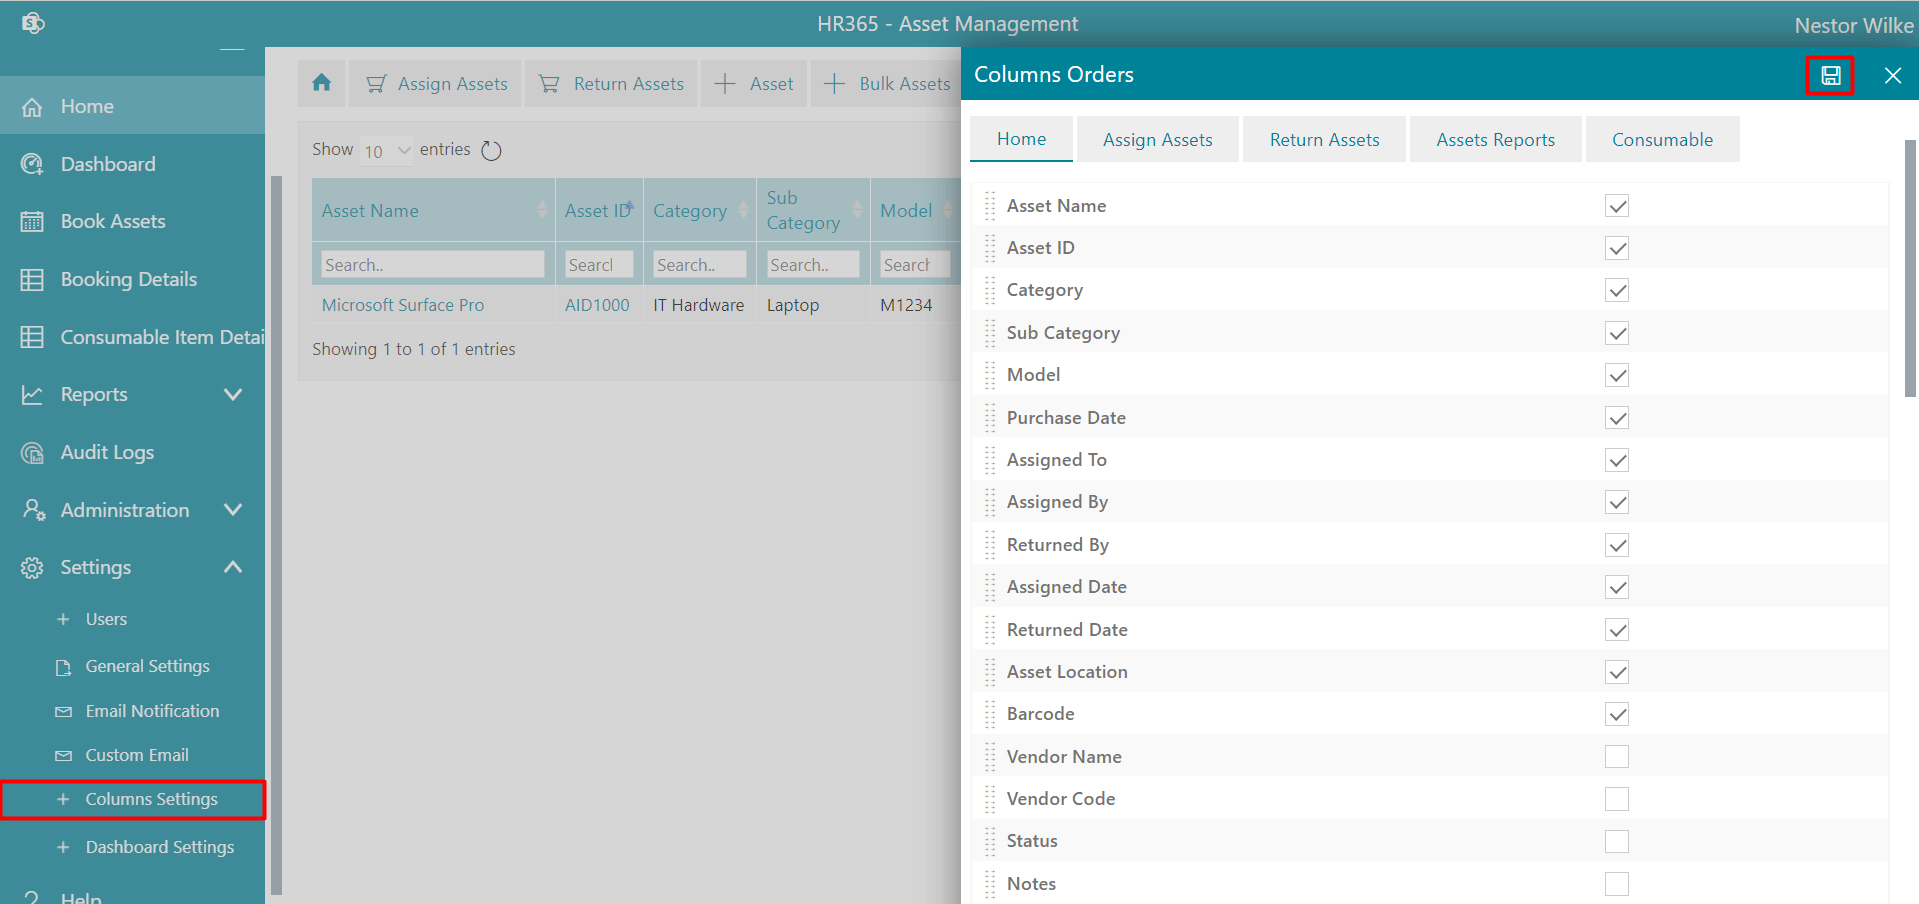
Here you can add columns and arrange the order in the table for Home, Assign Assets, Return Assets and Report Assets.
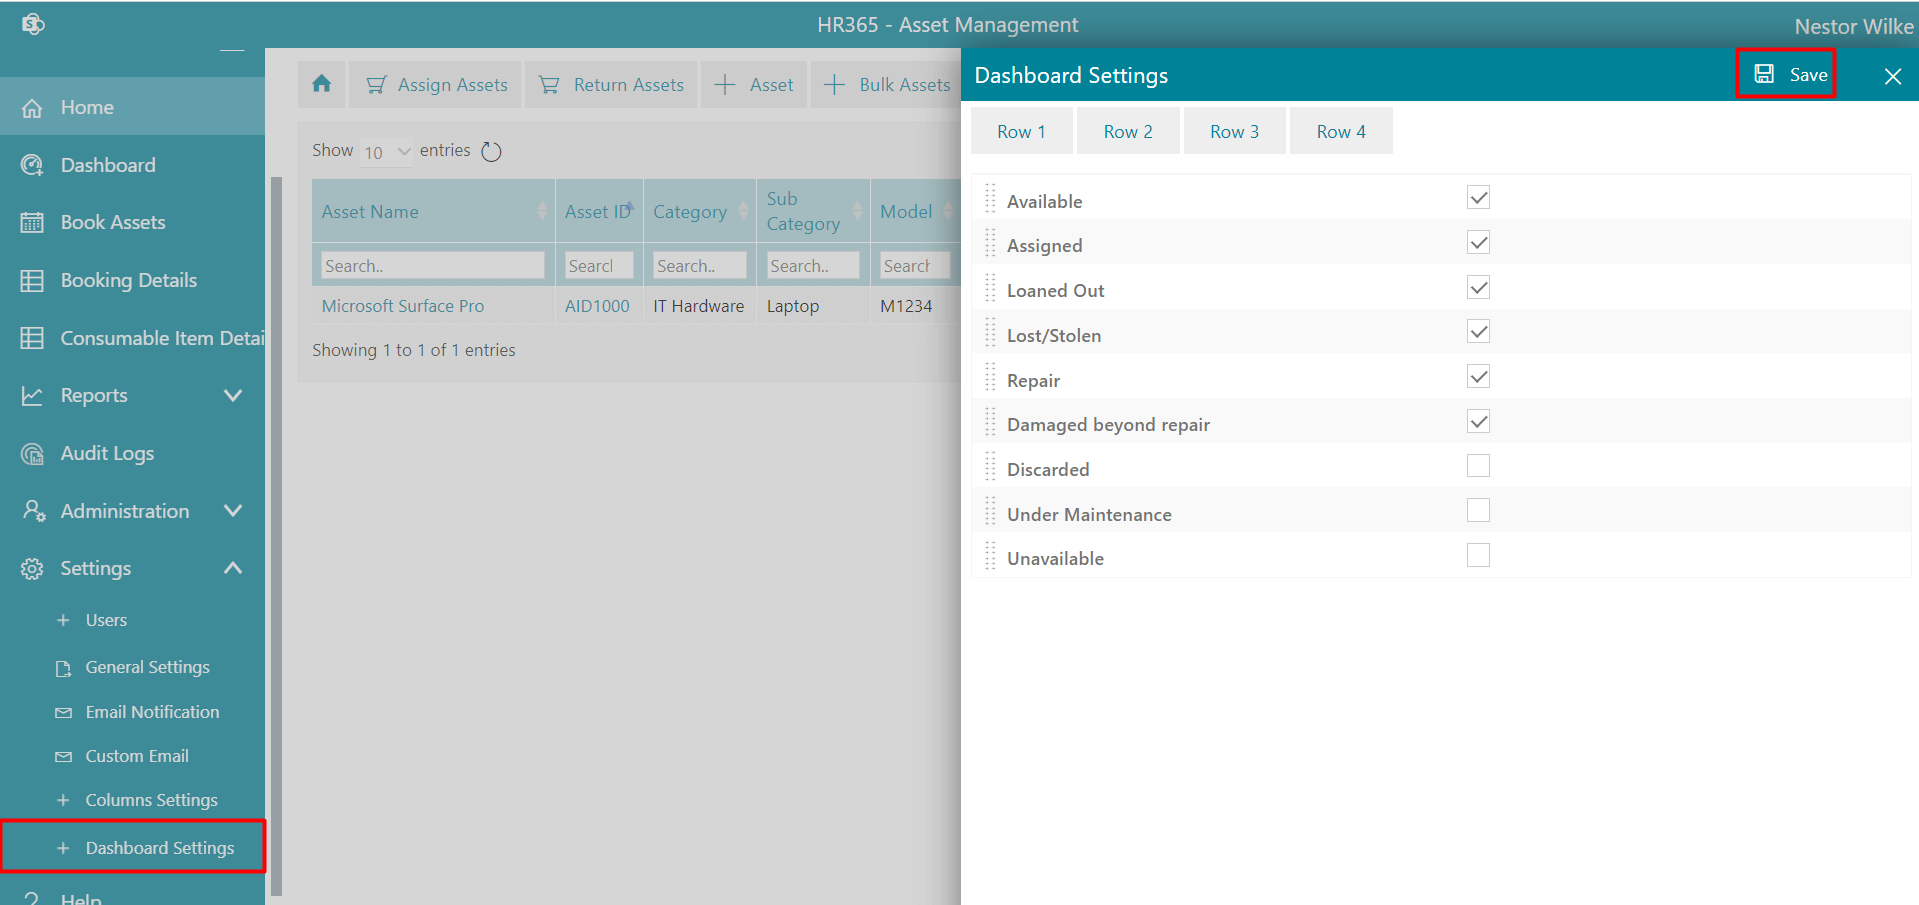
Dashboard Setting
Here you can display or hide fields of the dashboard for rows. Click on Dashboard Setting under Settings from side panel dashboard settings page will open.
Select the checkboxes of fields that should display in the row of the dashboard and uncheck those that are not required and click on submit icon as shown below.