Add Assets
-
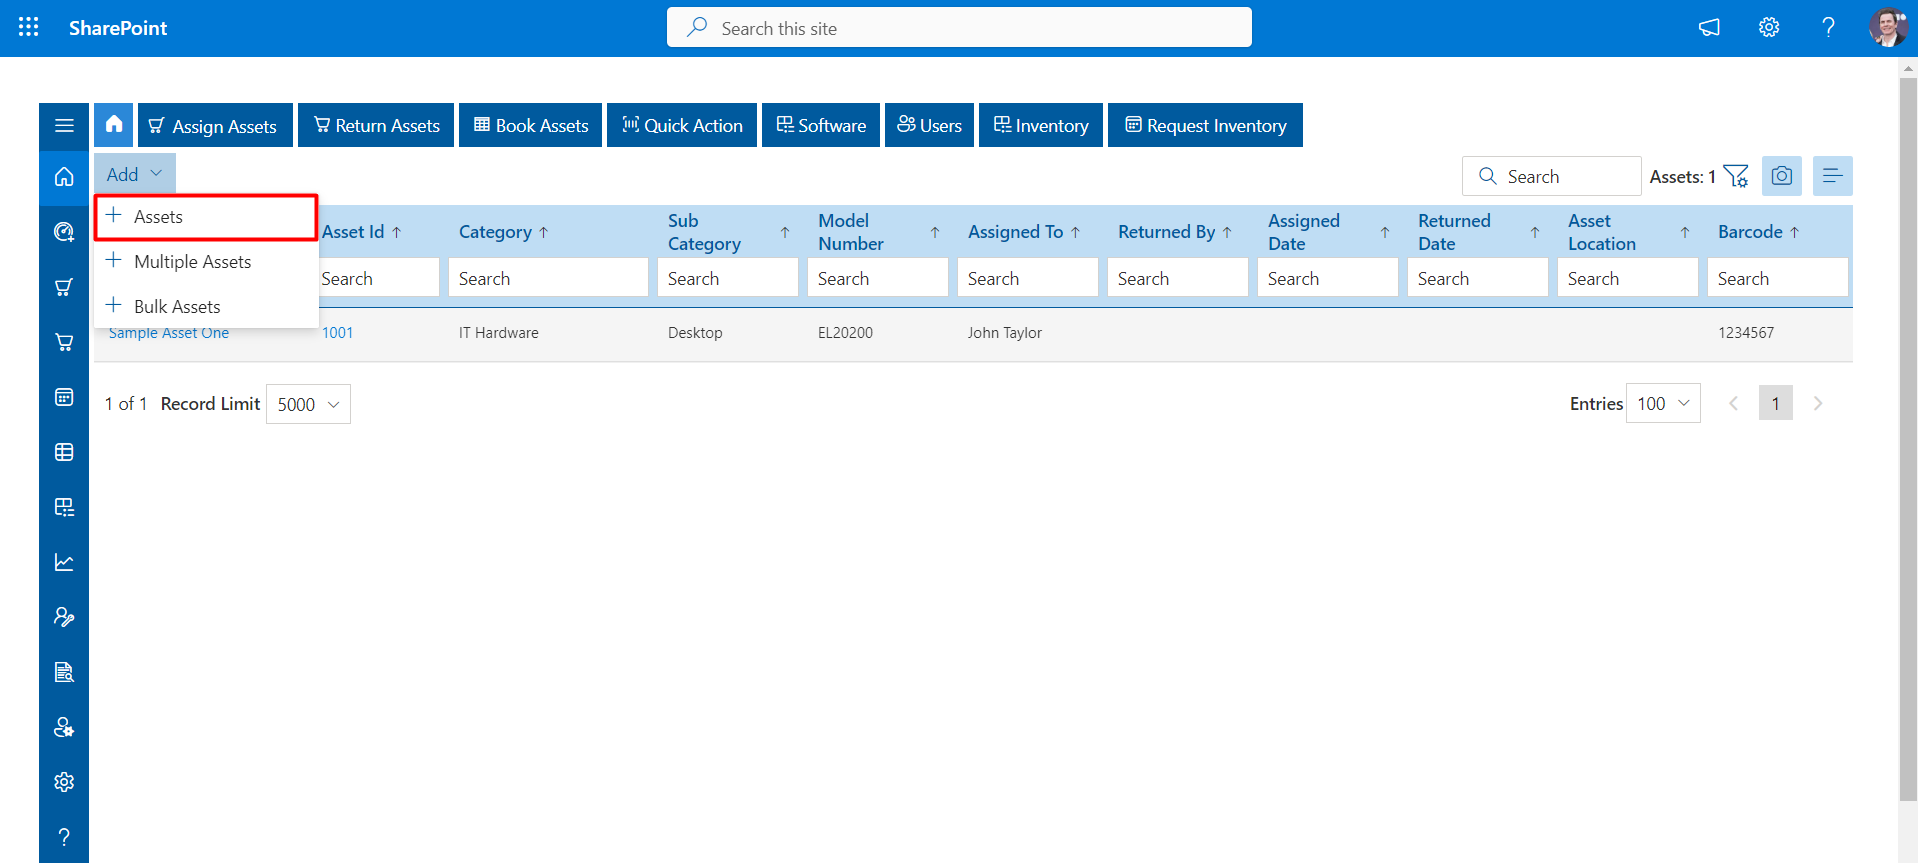
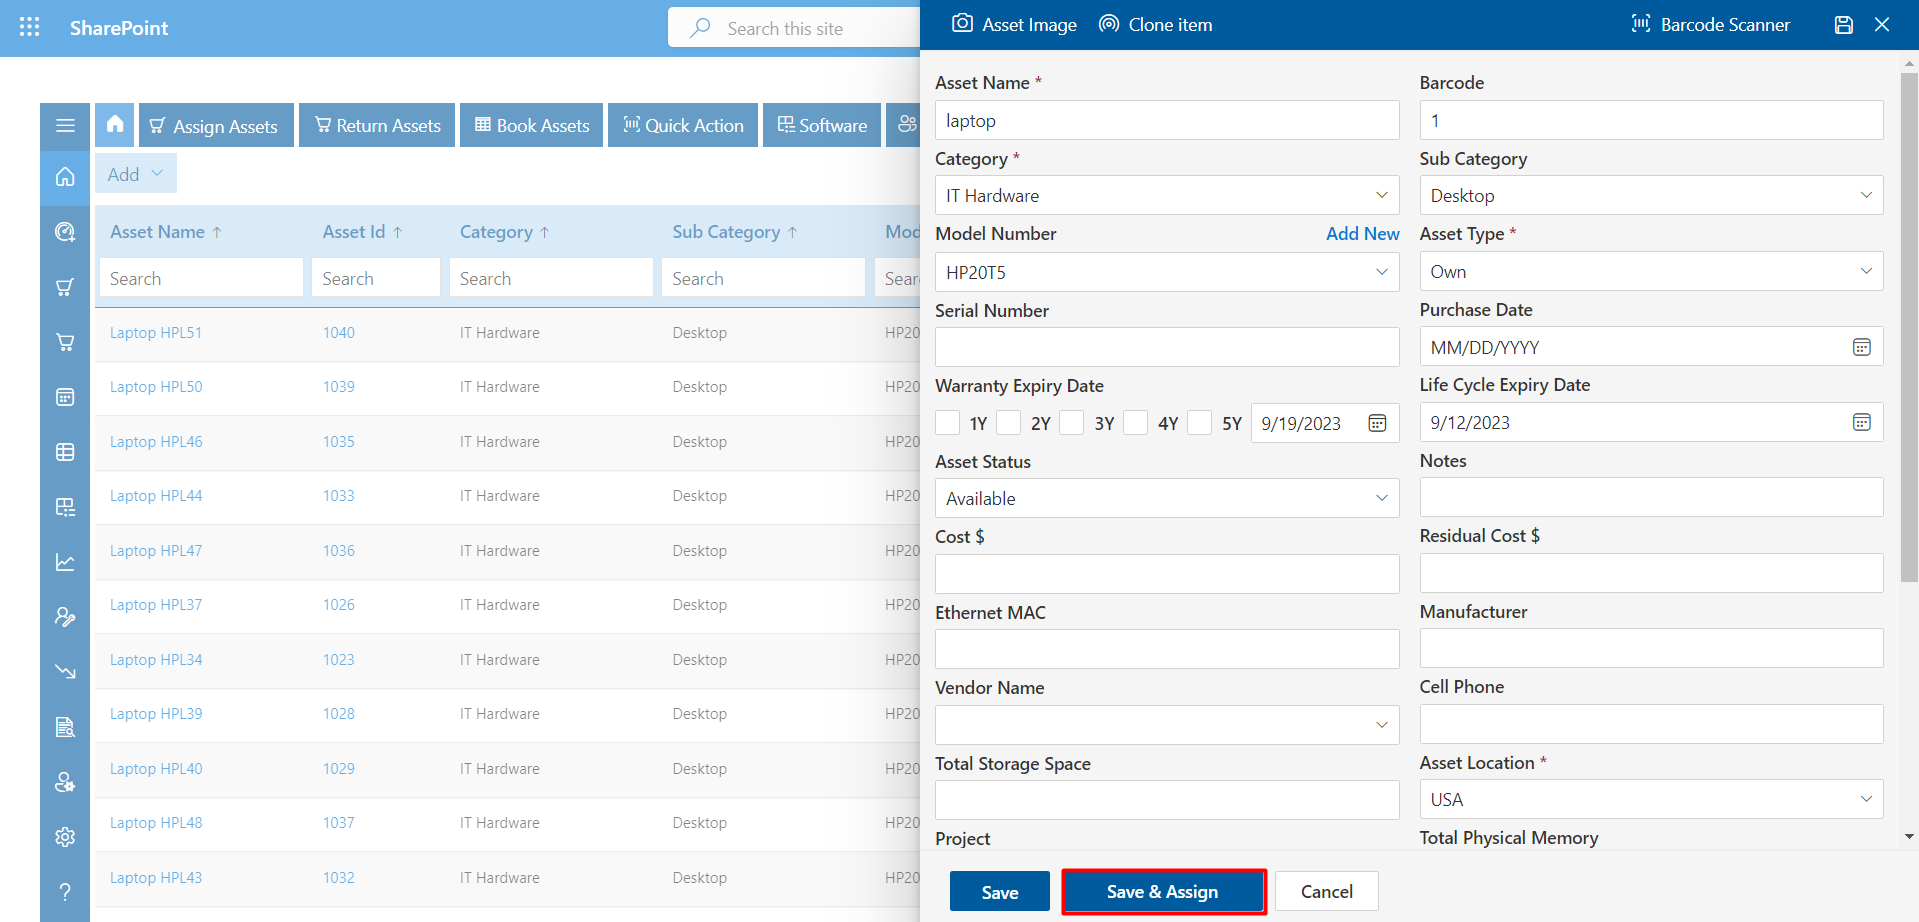
Click on the +Asset.
-
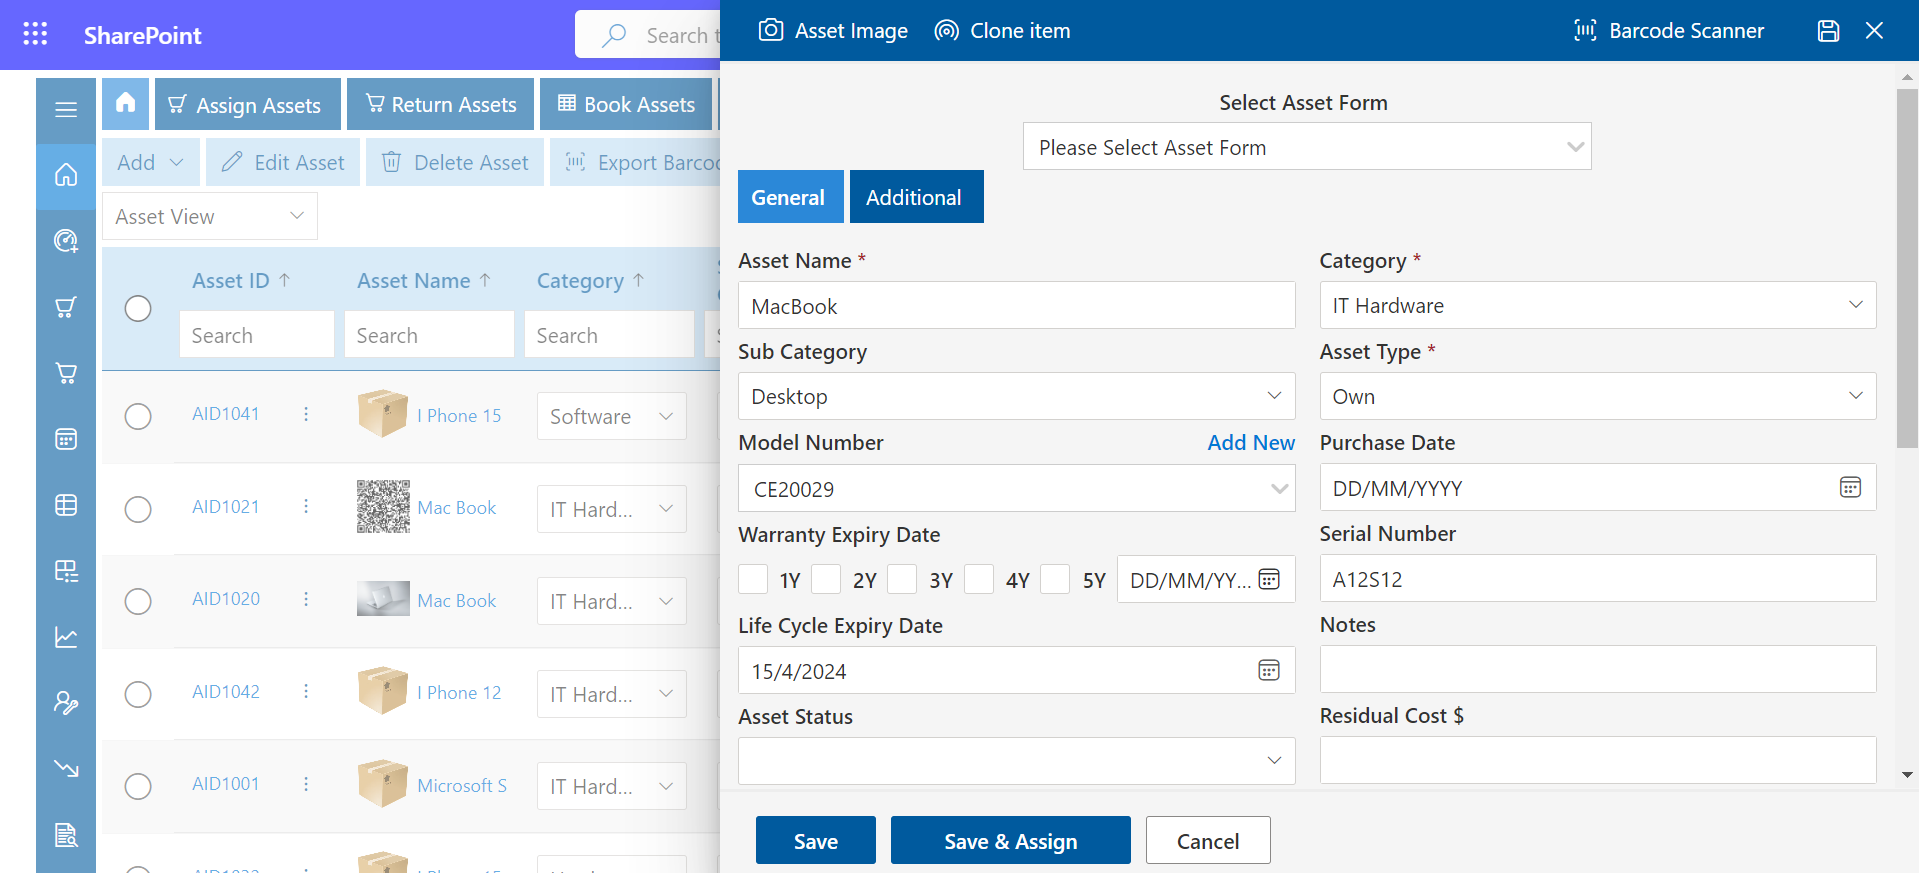
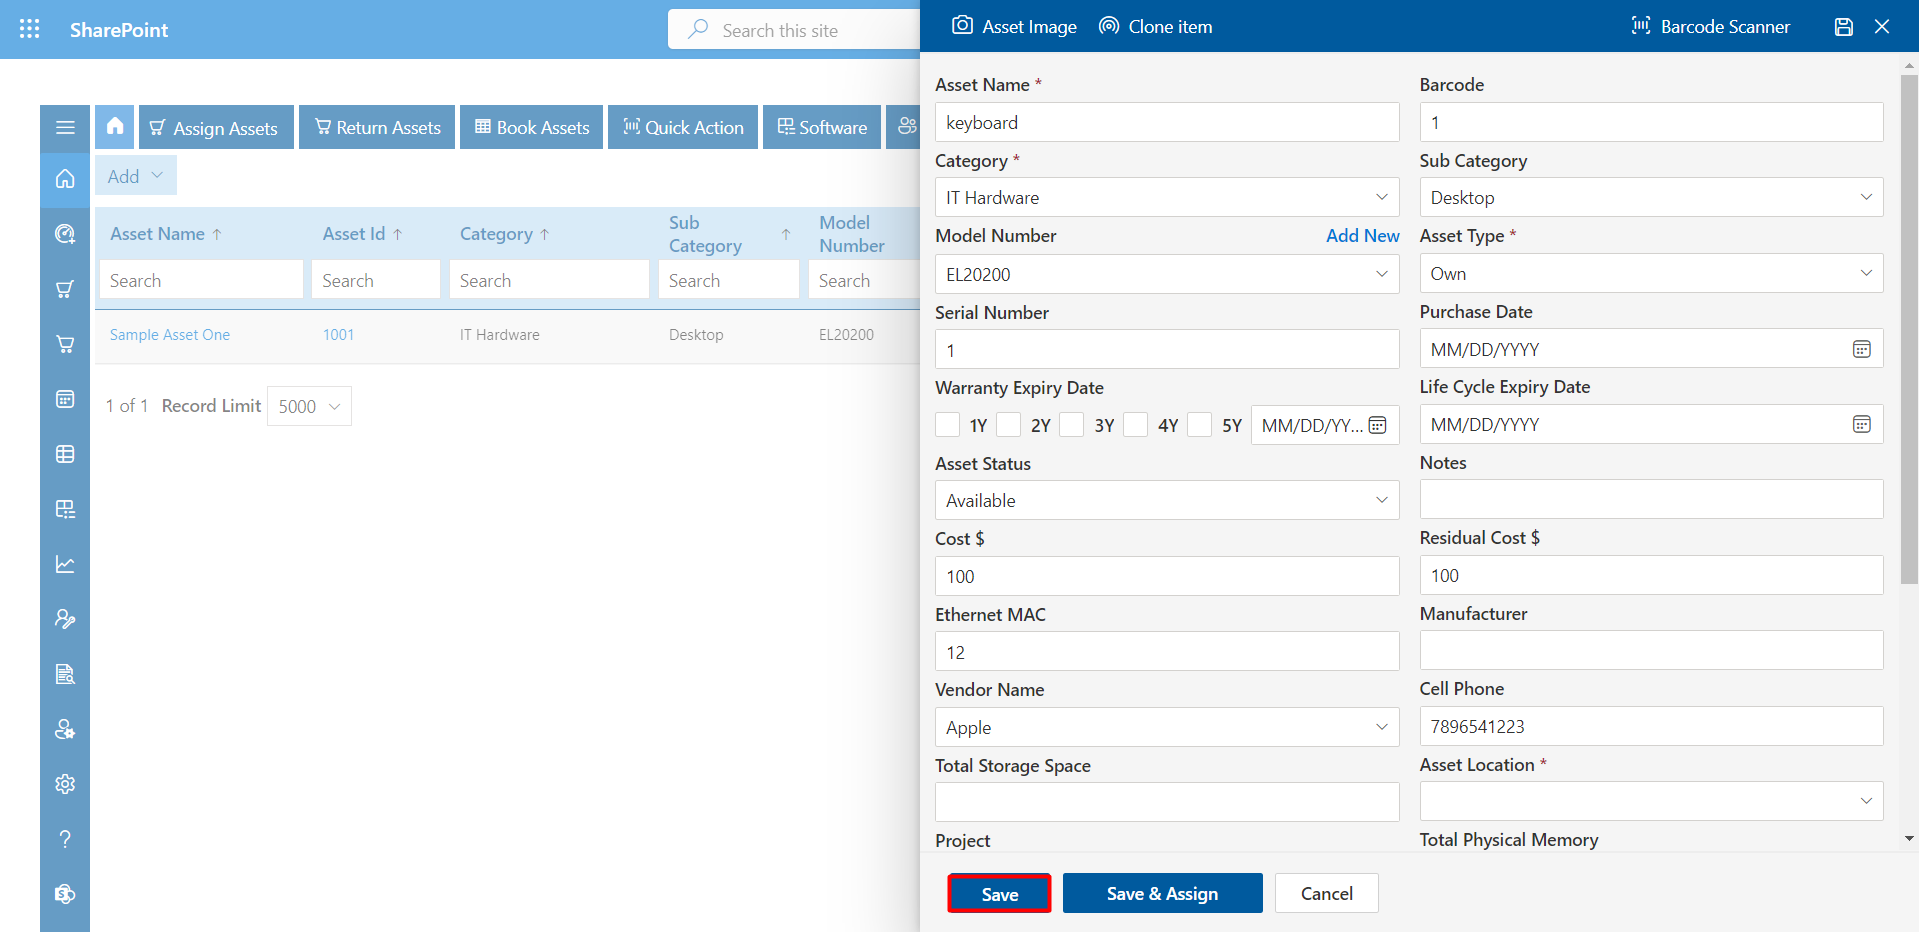
Fill in mandatory fields like Asset name, Category, Asset type, and others are optional fields, upload an image or add the document. Enable the toggle switch to set Asset Expiry Notifications for assets.
Mandatory fields like Asset name, Asset type, and Category would not be able to be disabled.
-
Cloning-Item Click on ok button.

-
Click on the Save button.
-
By Clicking on Save and Assign Button We can Assign the Asset Immediately.
-
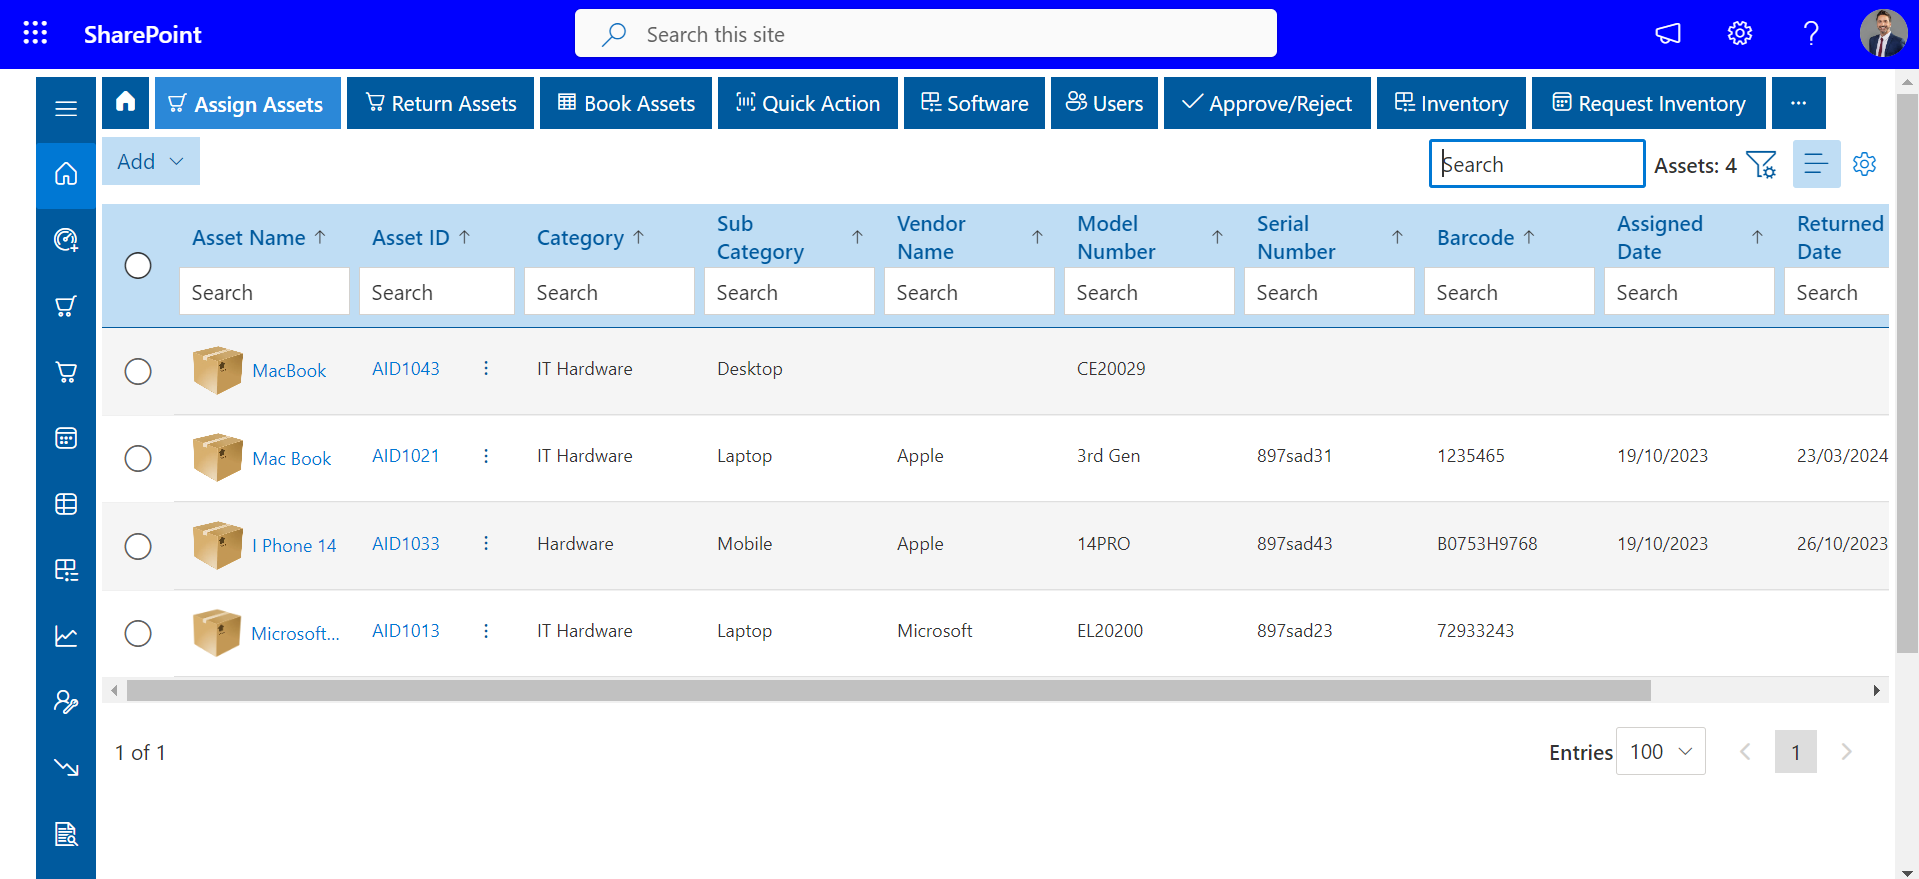
The created asset will be displayed on the Home Page and assigned asset table.
Here assets could be added. Enabling the fields that are required or disabling those that are not required in the add assets page.
To add the asset type, follow the below steps:
To generate a system barcode please enable “System Generated Barcode” from the general setting.
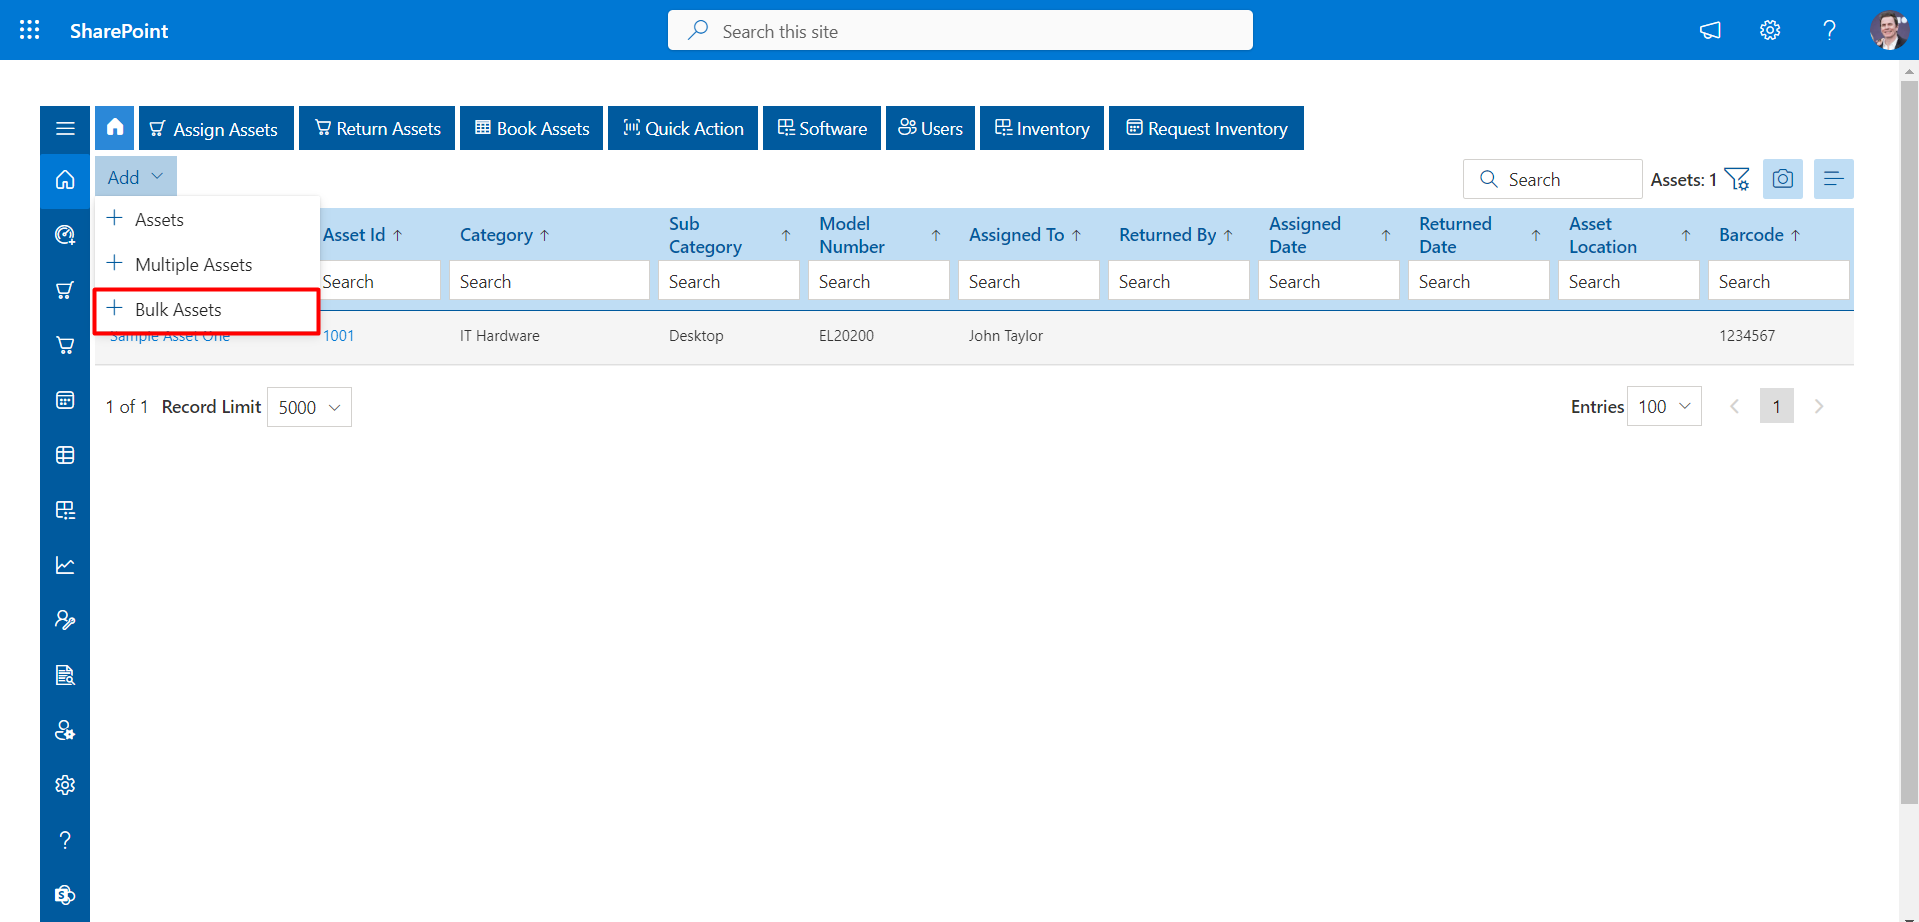
Multiple Assets
User could add Duplicate Assets with this Module.

Import asset or Bulk Assets
- Please download the sample file and fill in the assets details as per the below instructions, save the file to upload.
- Please add a category, subcategory, asset type, model number, and vendor through administration before uploading the bulk asset file.
- Remove separators and currency symbols from the cost/value.
- Please remove commas from notes or any other fields to avoid conflicts with commas in CSV file.
- Date format should be MM/DD/YYYY, this is only during upload the data, while displaying it will follow as per your choice in settings.
- Mandatory fields like asset name, asset id, asset type, and category should not be empty.
- Please don't change the order of the columns or add new columns, this may lead to feeding values in incorrect columns.
- You can add 1000 assets in one go from import assets.
Clients could add 1000 records in one go using CSV file. Download the sample file and add data in the specified format.
Follow the below instructions before adding bulk assets:
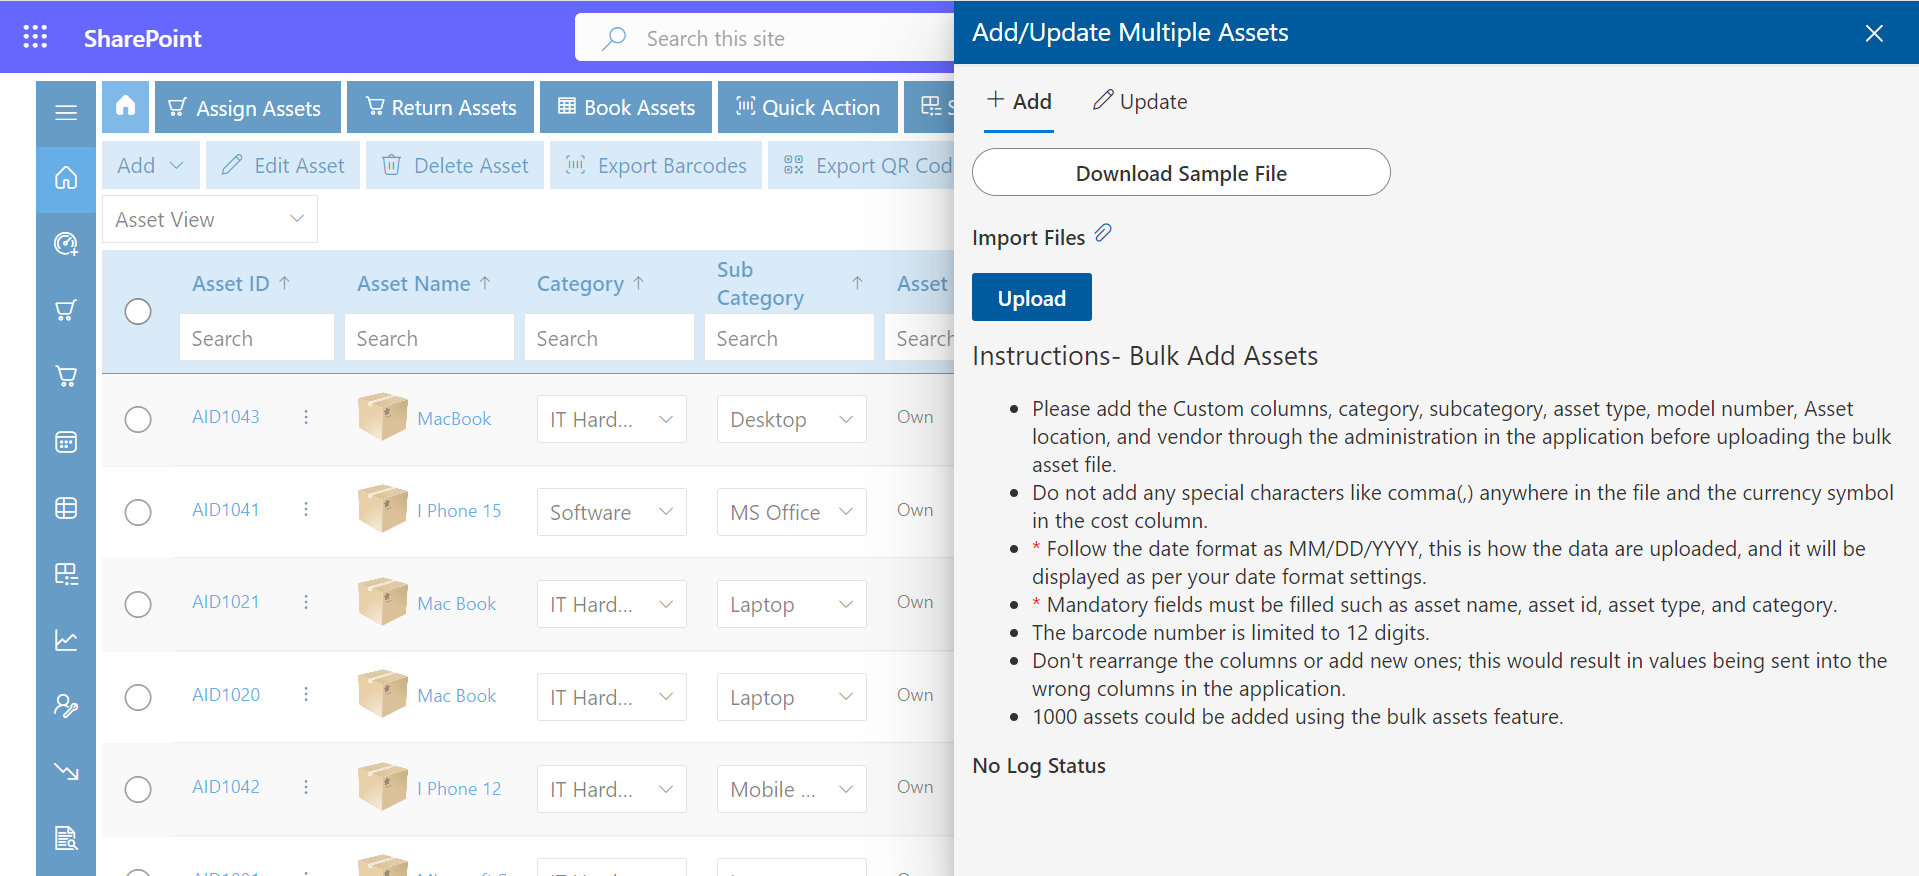
From here you can update the bulk asset details.
Assign Assets
-
Click on the Assign Assets from the top navigation panel.

-
Click on the link under the action column. The panel would be displayed
-
Enter the Username, select Project, and Return date.
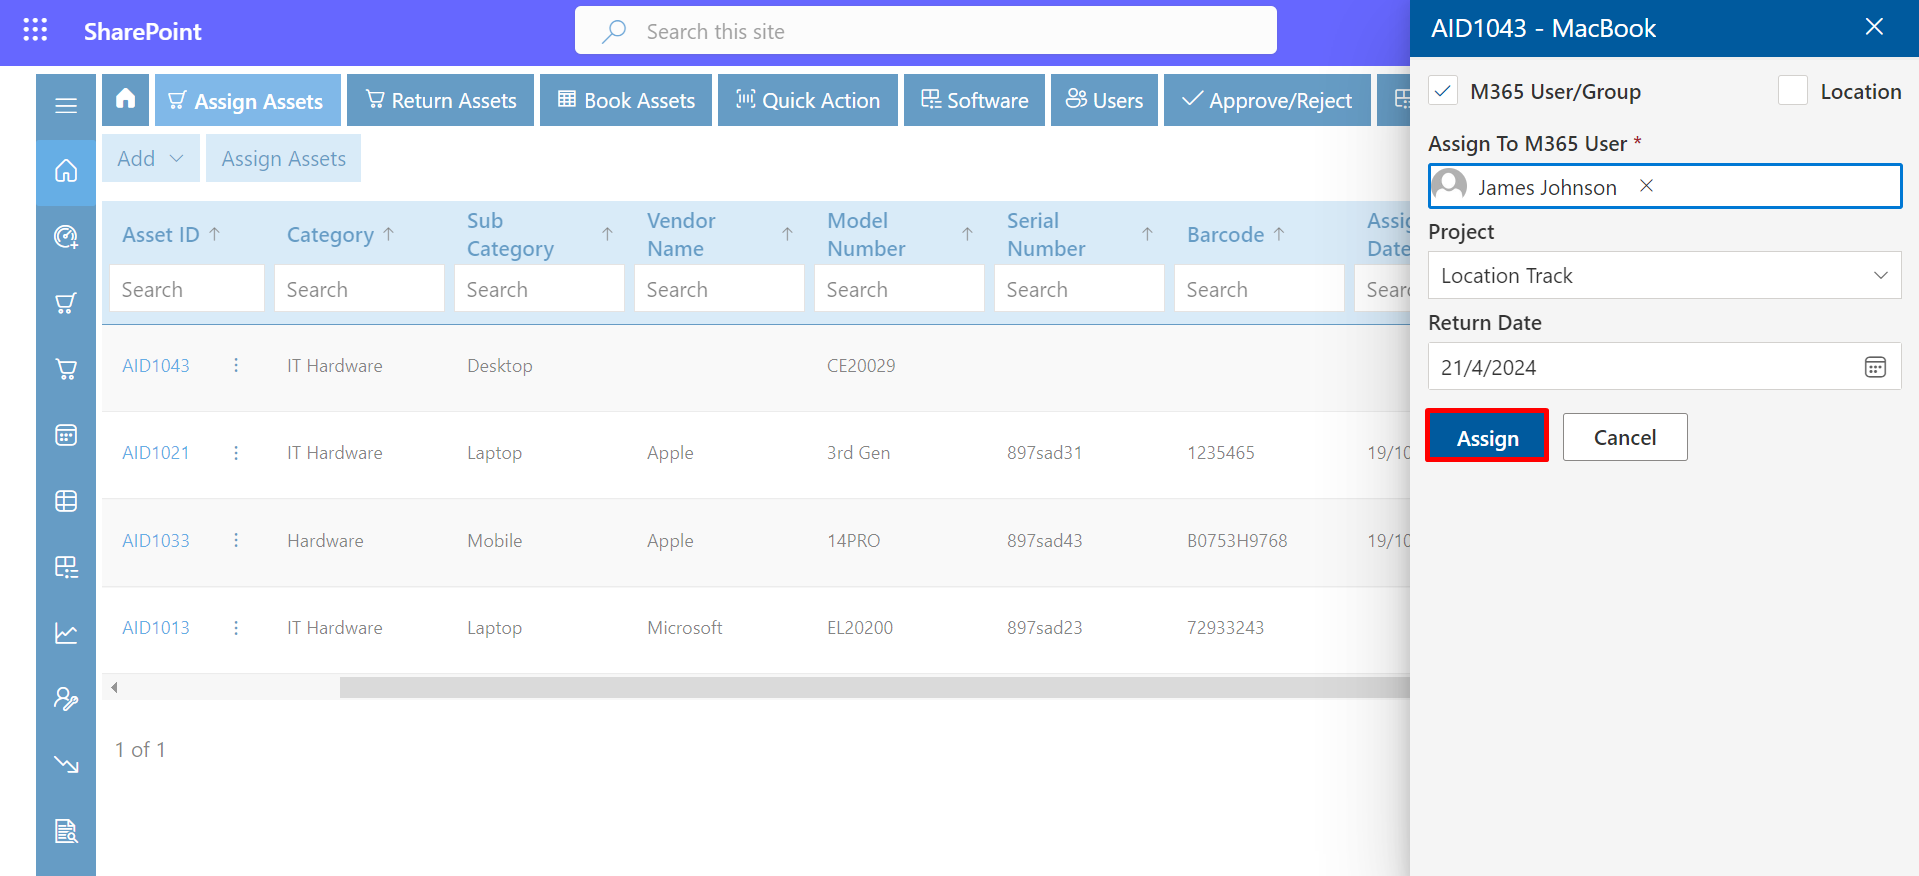
- Finally, click on the Assign button.
-
The assigned assent will be displayed on the Return Assets page.
Here you could assign assets. To add the asset type, follow the below steps:
Return Assets
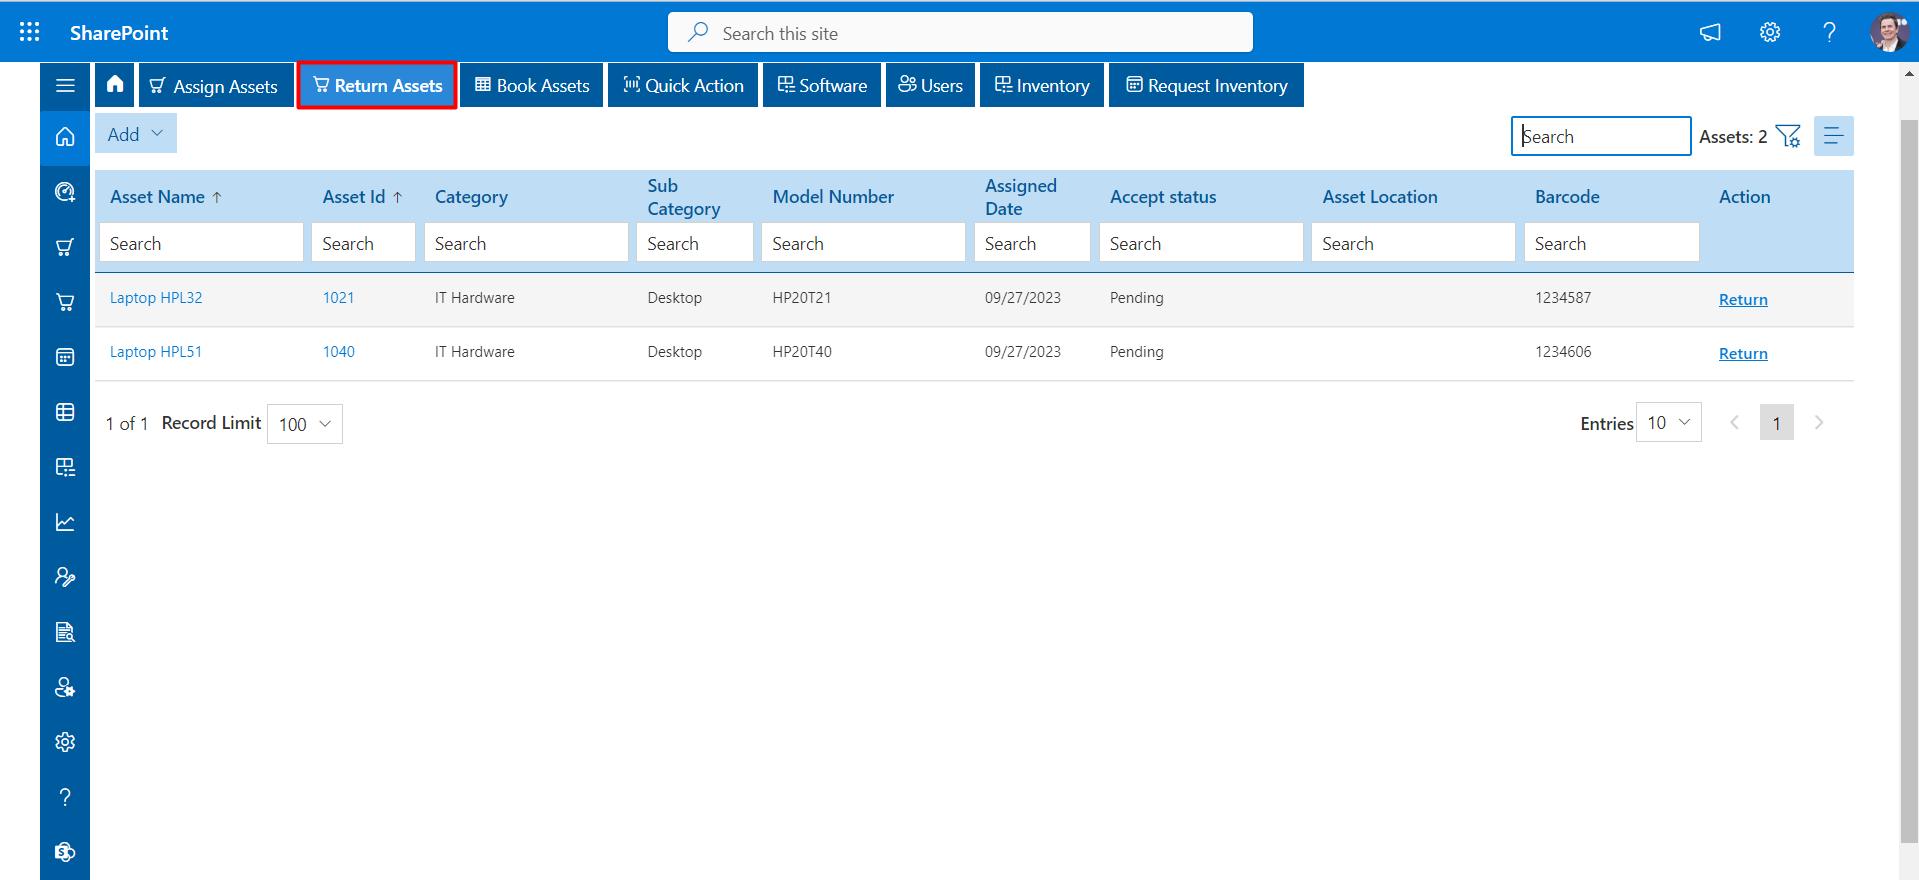
-
Click on the Return Assets from the top navigation panel.
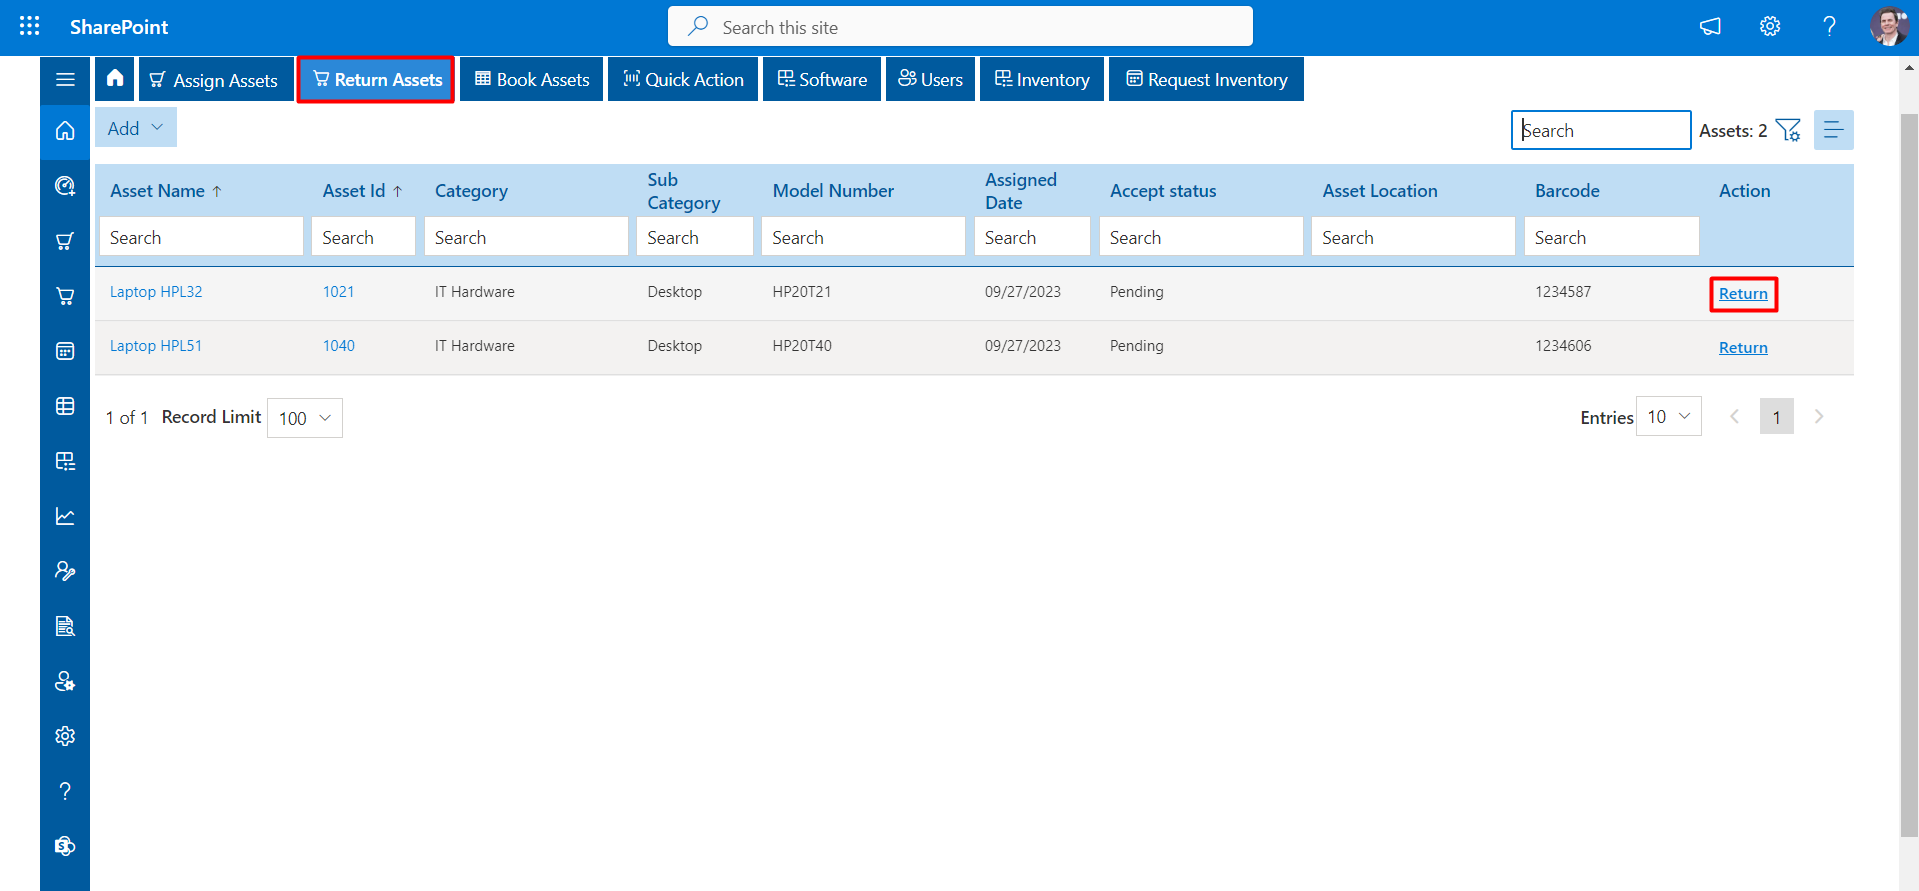
-
Click on the link under the action column. This would display a panel.
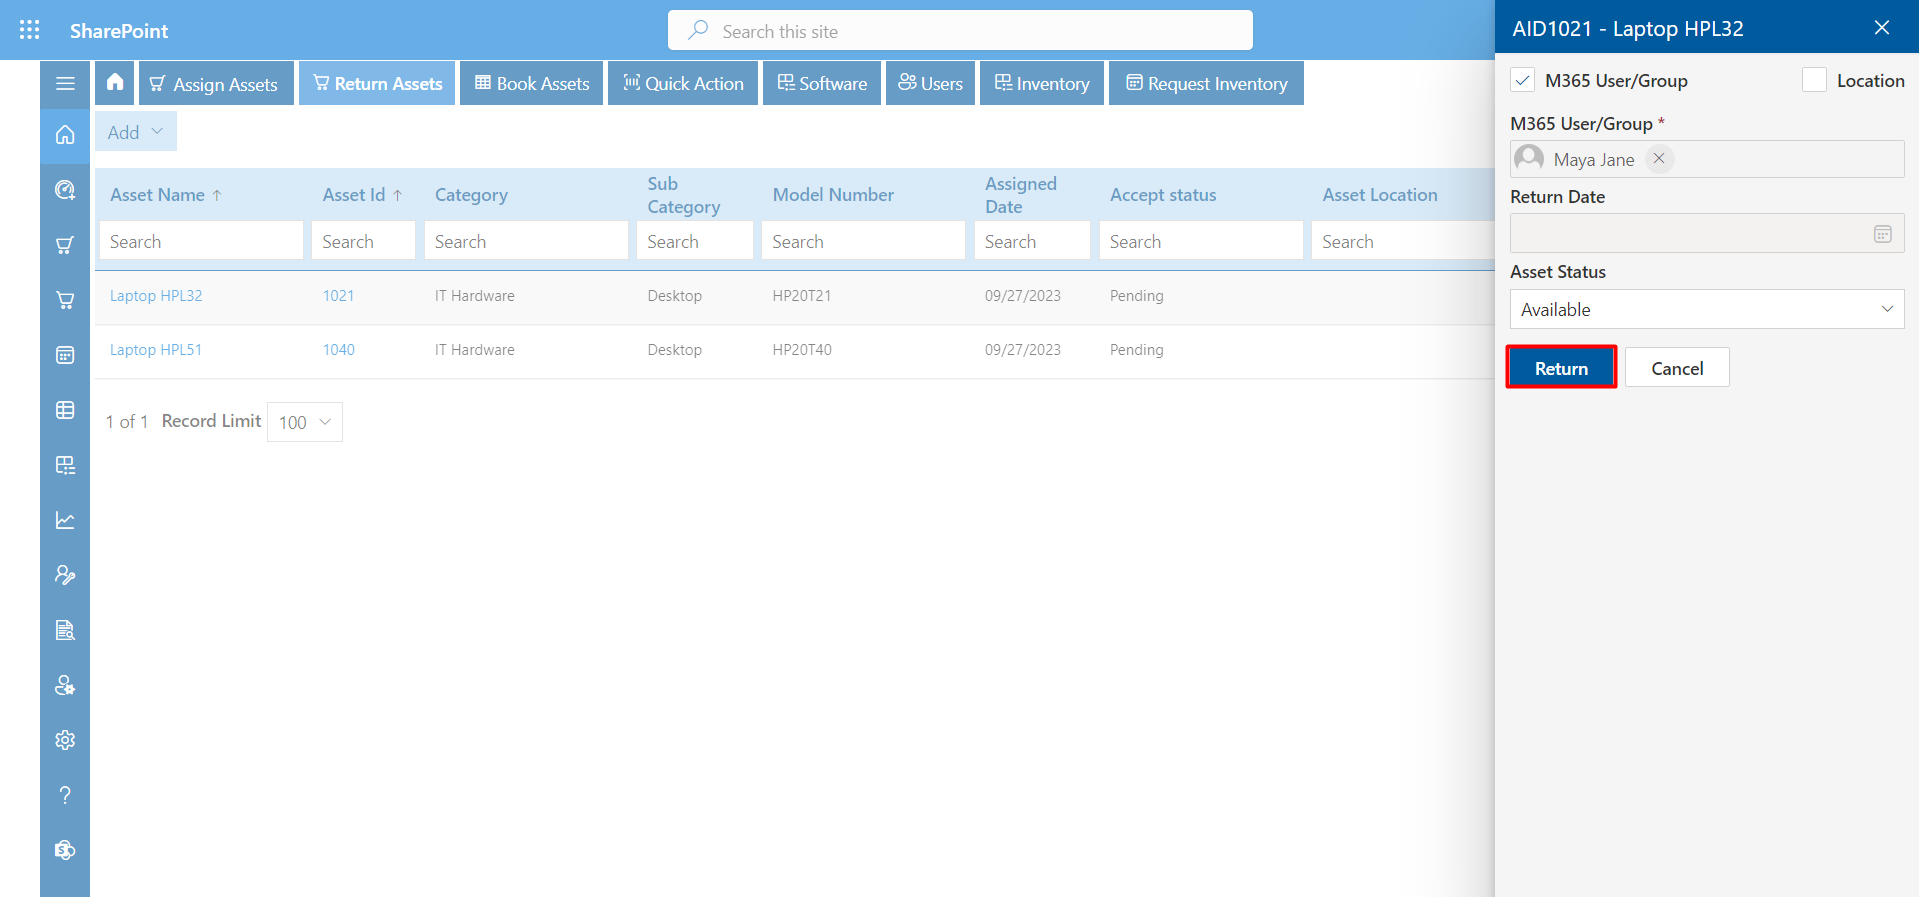
- Finally, click on the Return button.
From here you can able to return assets. To add the asset type, follow the below steps:
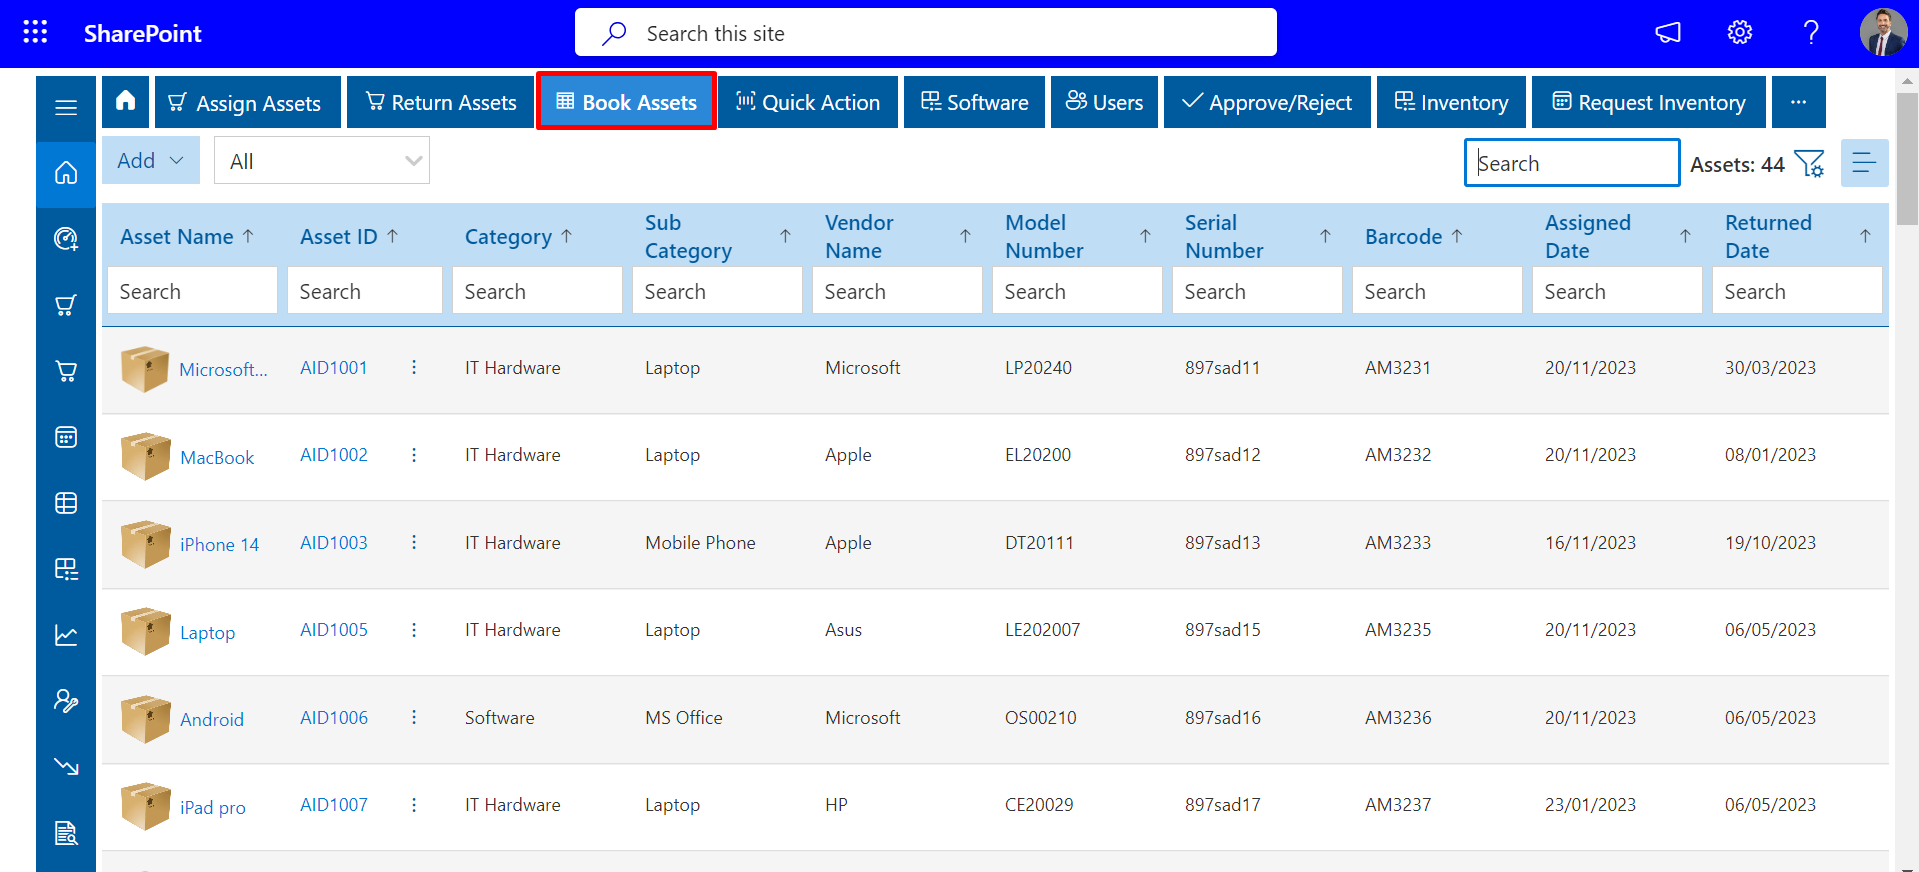
Book-Assets
From here you can able to Book assets. To add the Book type, follow the below steps:
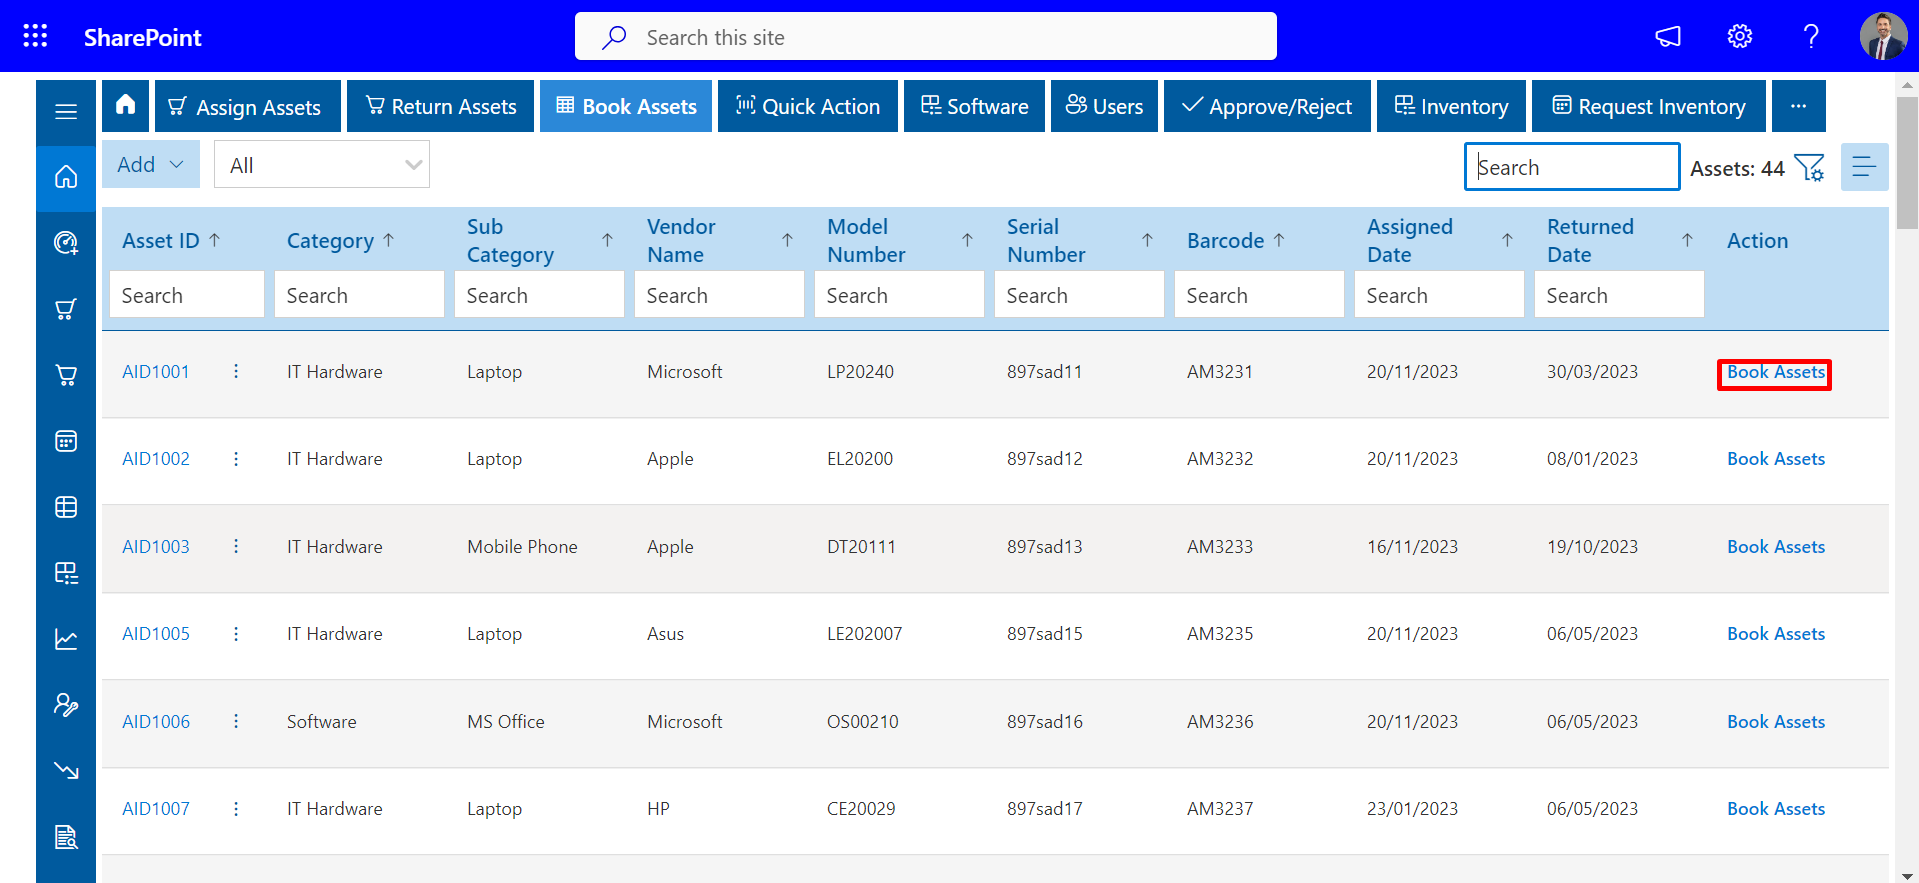
- Click on the Book Assets from the top navigation panel.
- Click on the link under the action column. This would display a panel.
Booking Details
On the Booking Details page, you can find all the booked assets.

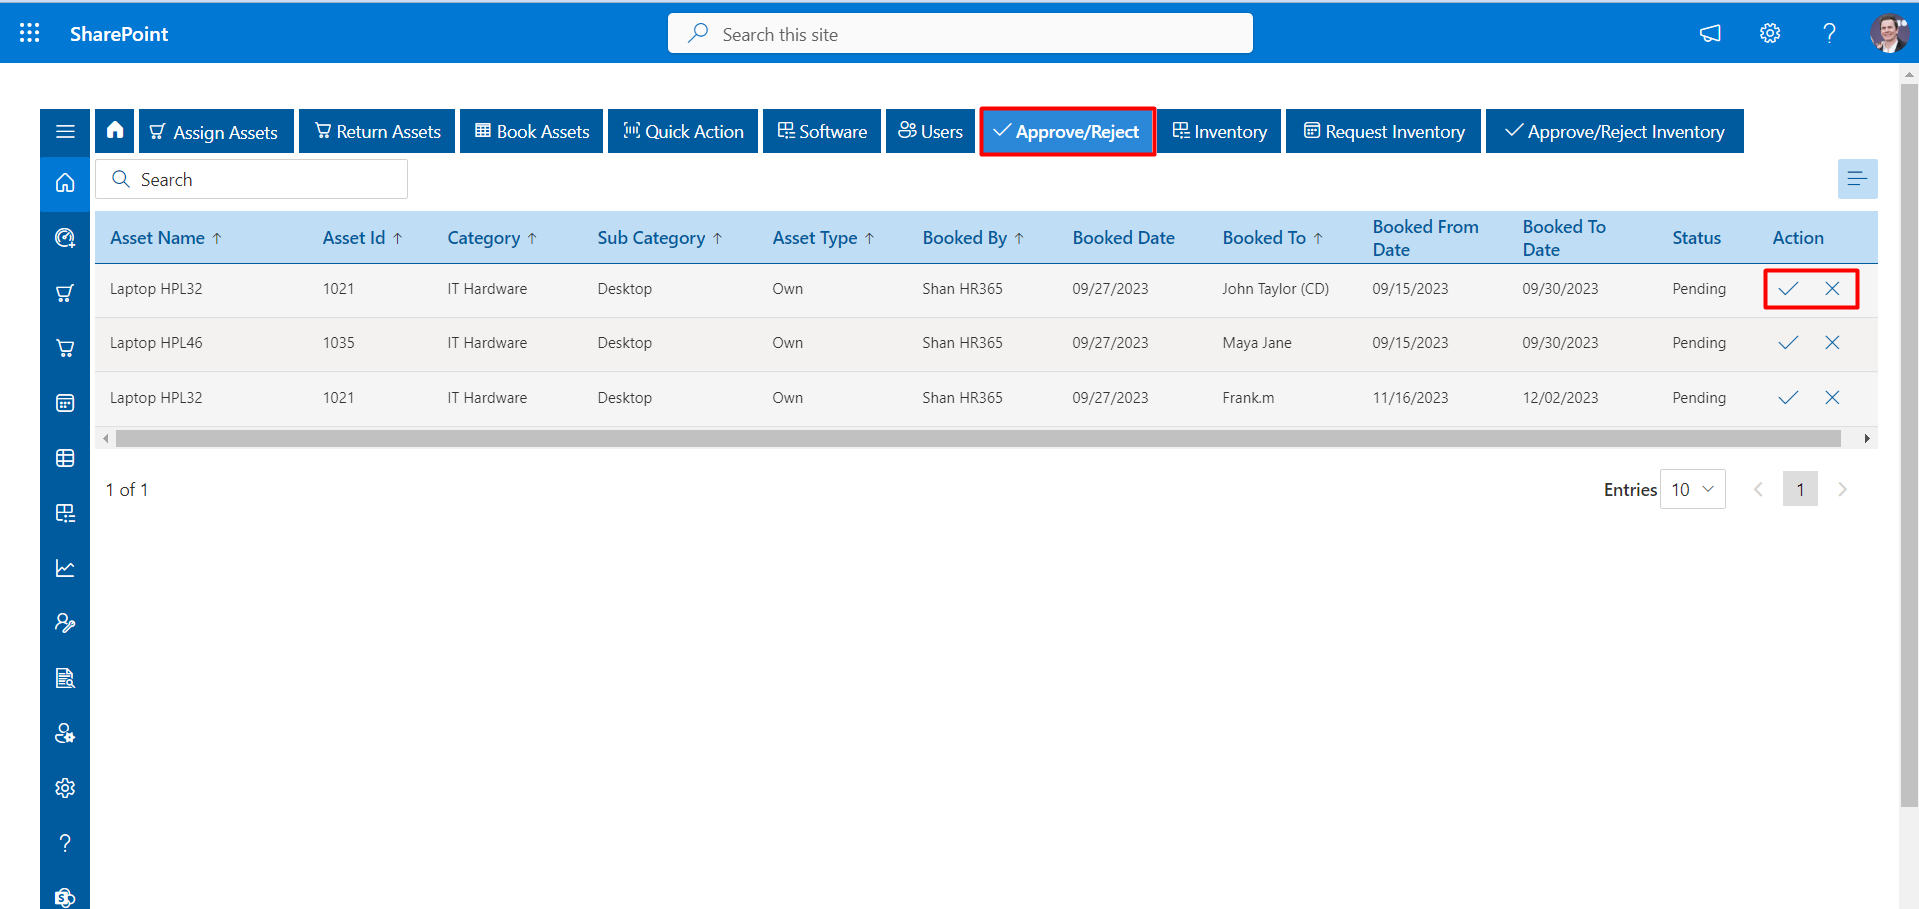
Approve/Reject Asset
By default, Approve/Reject Asset feature is not enabled, the admin could enable it from the Users tab by navigating through the side panel under settings.
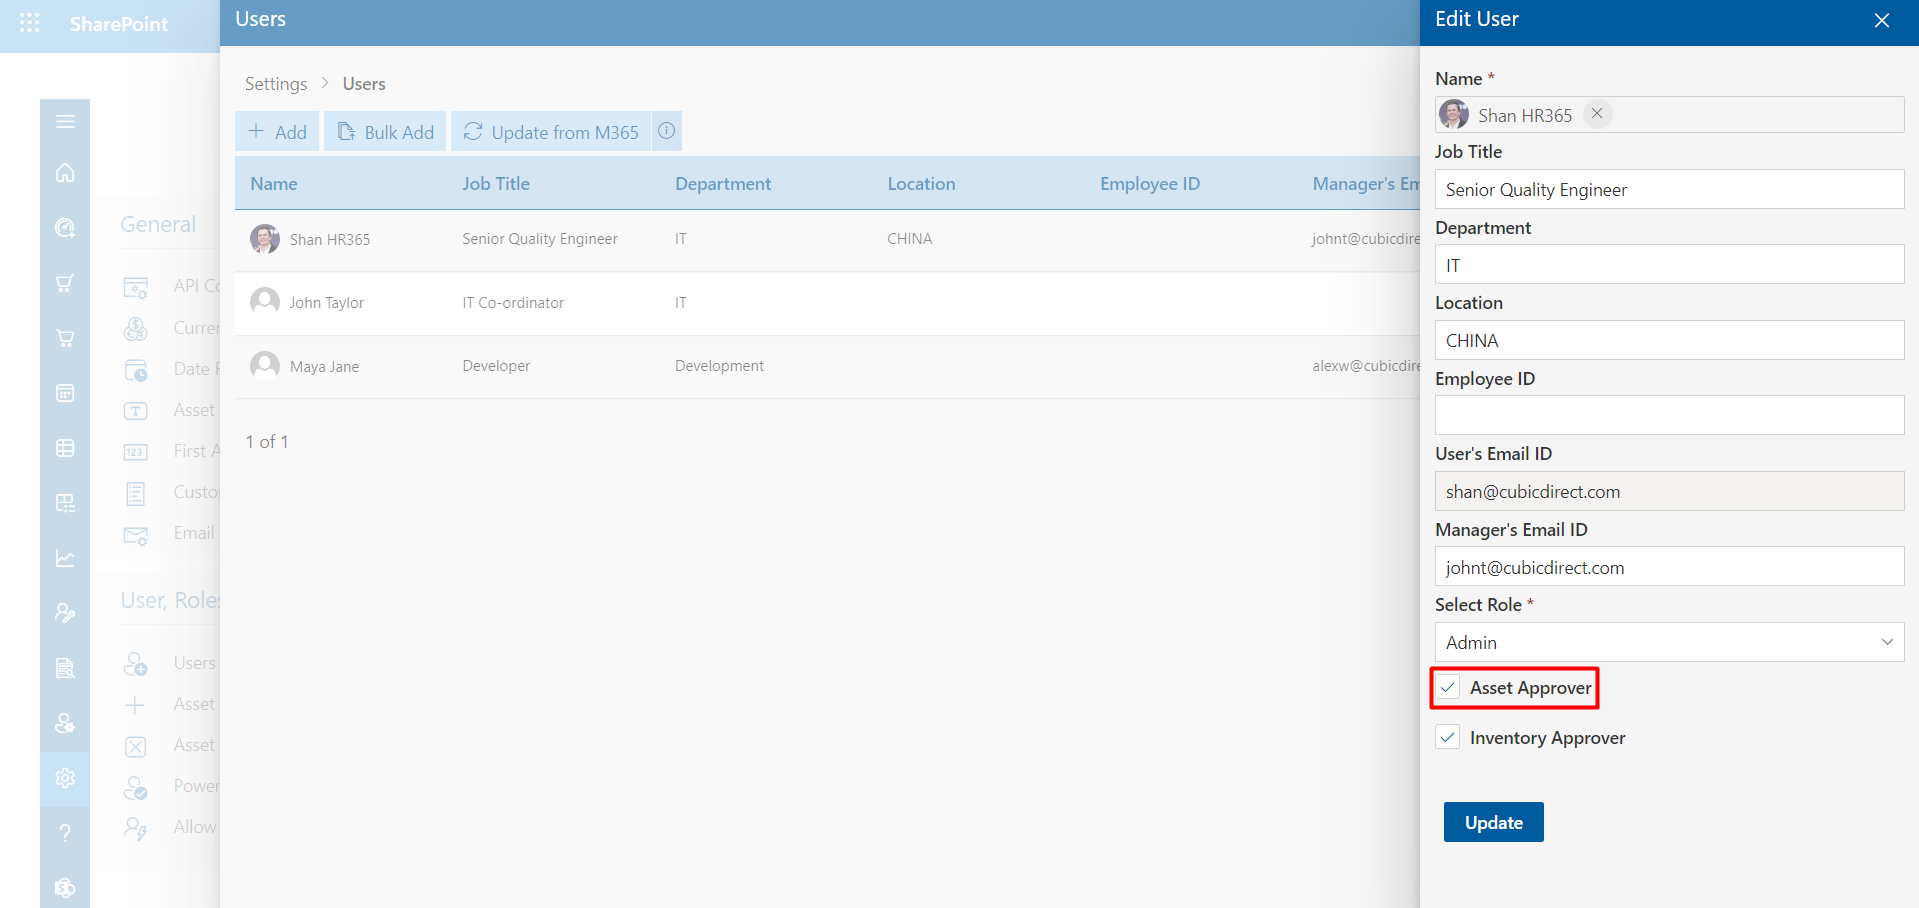
Approve/Reject of assets could be done. Click on the Approve and Reject symbol to approve and reject the assets.