Settings
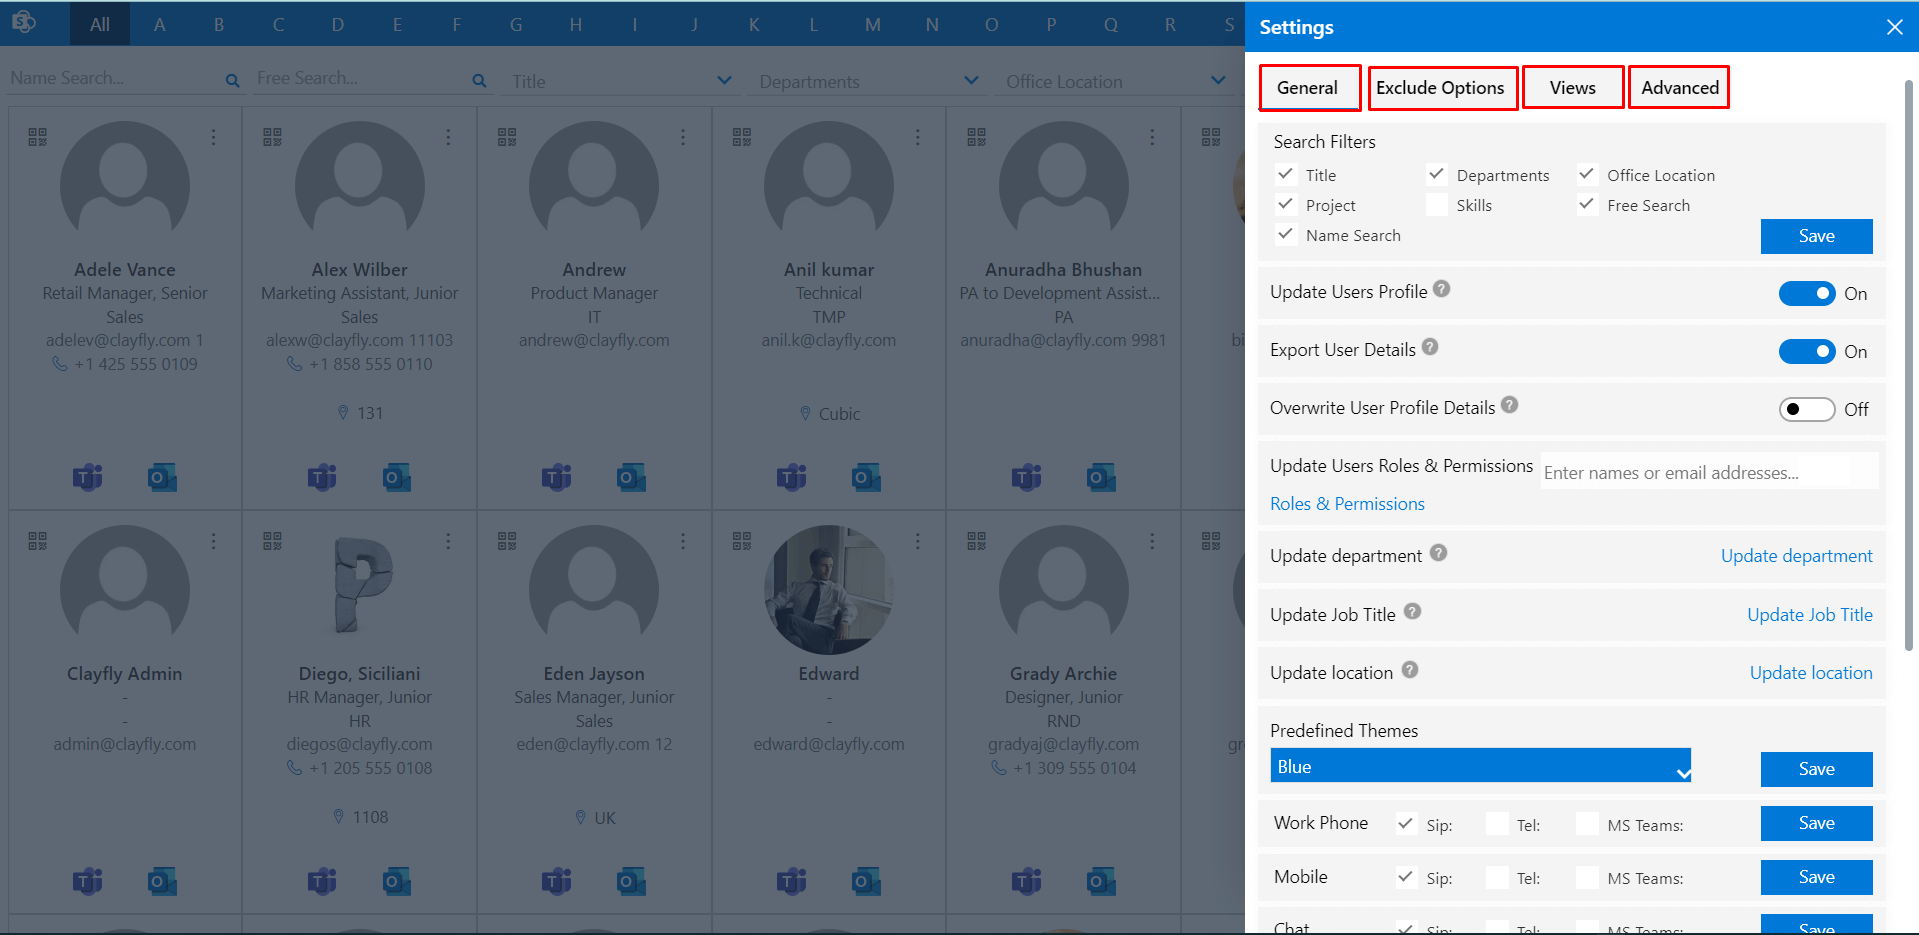
In settings there are four options namely General, Exclude Options, Views and Advanced.
You must have admin role to access settings. Regular users have access to their own user account details.
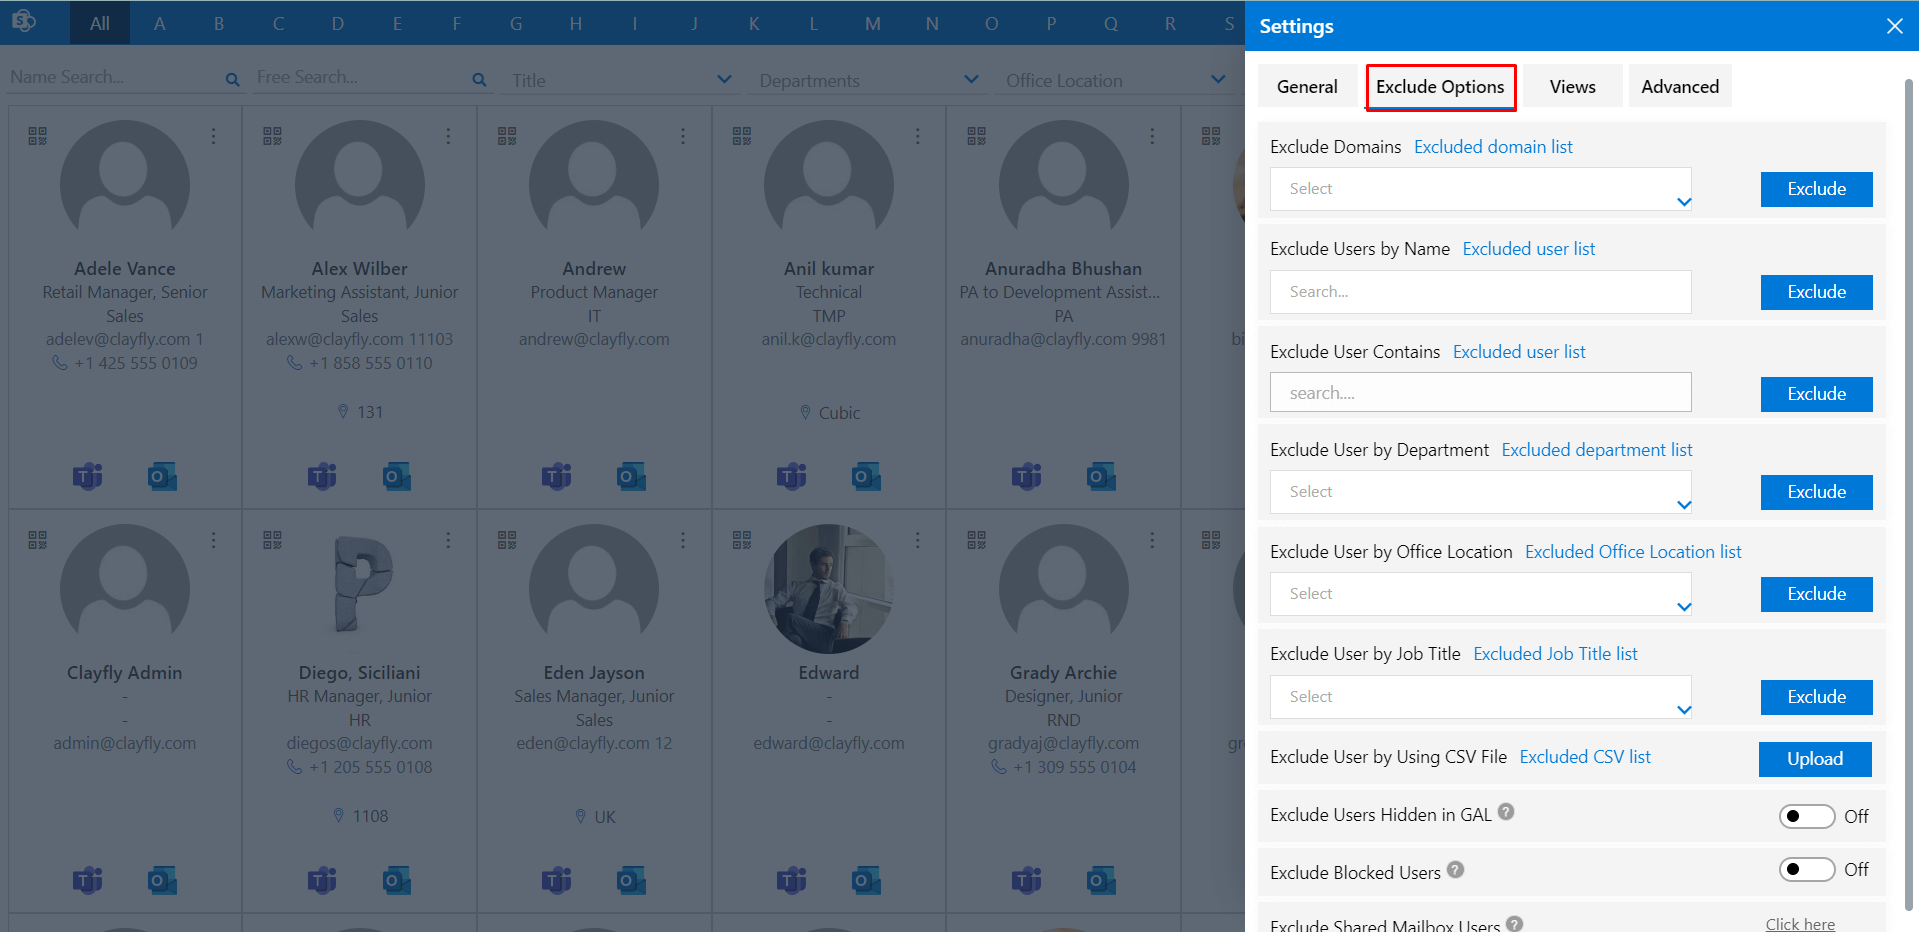
- For individual users, use exclude users by name.
- For group of users you can use exclude user by domains, exclude user by department, exclude users by job title, exclude user by office location, exclude user by using csv file.
- In profile cards we can hide or display skills, hobbies, about me, work phone, manager, date of birth and date of joining just by disabling the toggle switch in views of setting page.
- If you hide or disable work phone, it will also hide in grid views.
- You can hide display email in grid view.
- Daily Auto Sync New Users From M365:From here you can sync new users daily.
- Sync user from M365: From here you can sync user profile.
- Add non microsoft 365 users: From here you can add users which is not able in non microsoft 365.
- Import non microsoft 365 users: From here you can import users which is not able in non microsoft 365.
- Here we have 5 option to sync the images namely SPO, outlook, delve, azure AD and ED.
- In case if you select outlook or ED options, if image is not available for outlook or ED, image from SharePoint user profile if exist.
- ED: Change the source of profile images, you can use custom images by placing images in image library. Click on click here, redirect to image library upload the images. Format of image is -username@domain.com.jpg
- Register app in azure portal with below link: https://portal.azure.com/#blade/Microsoft_AAD_IAM/ActiveDirectoryMenuBlade/RegisteredApps
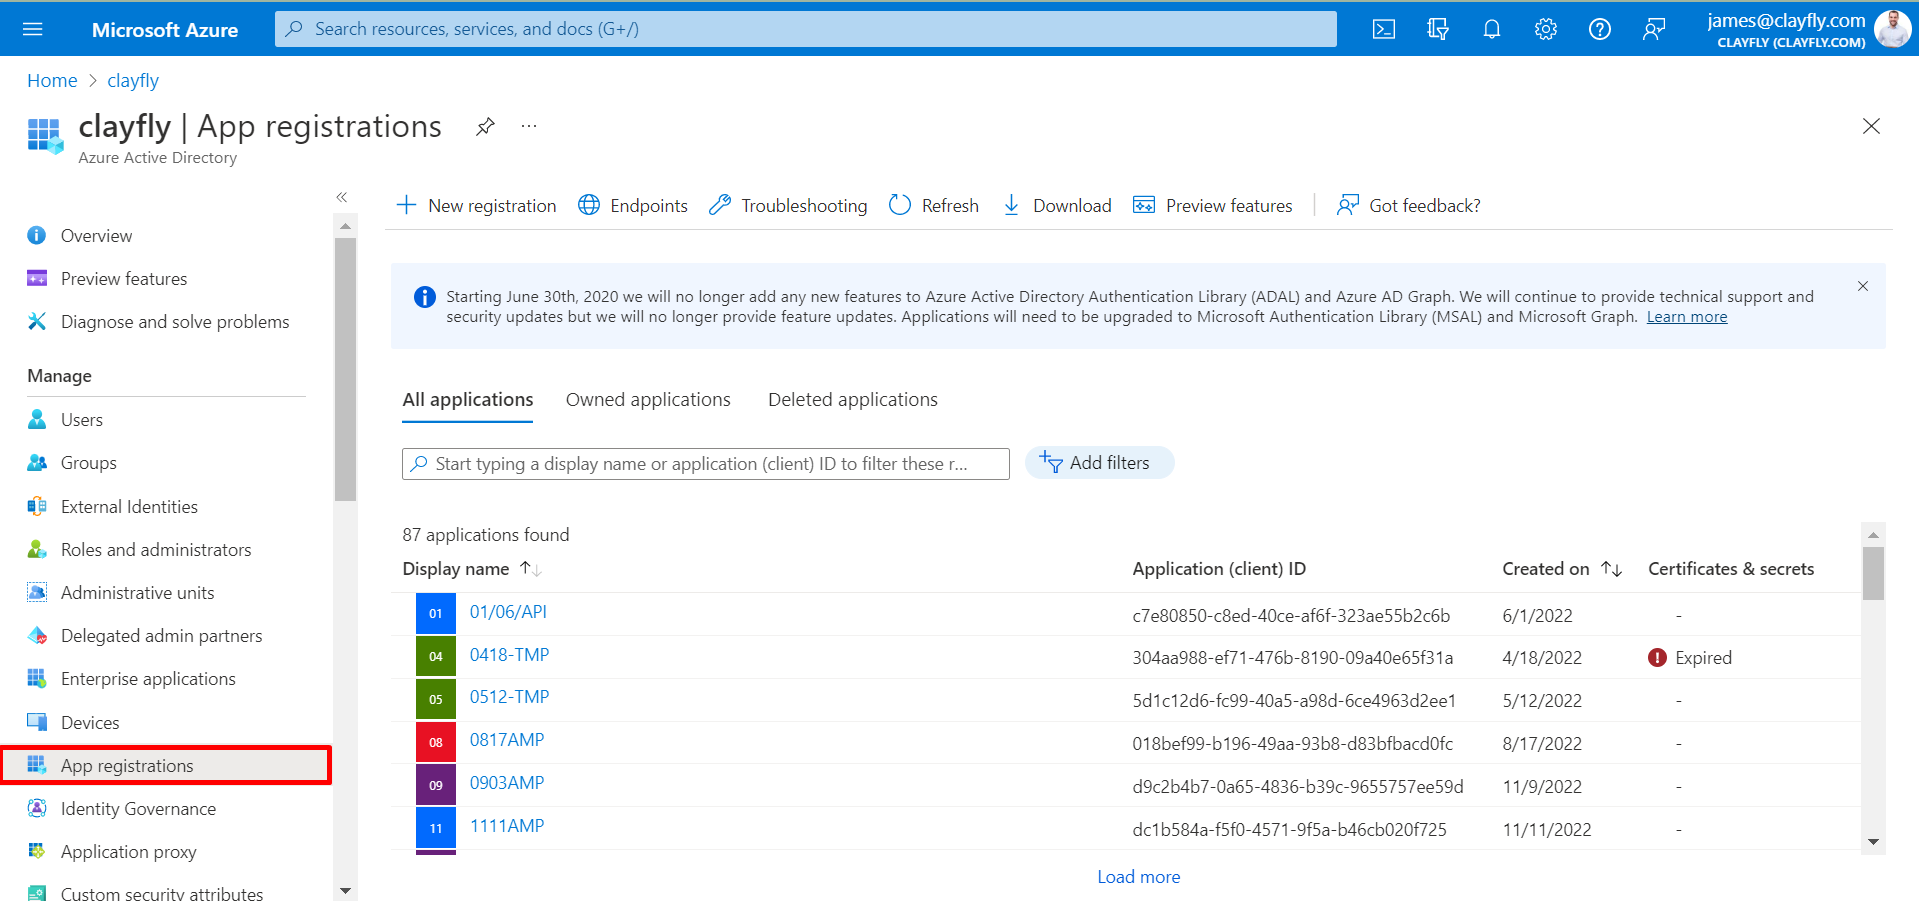
- Select App registrations.
- Click on New registration.
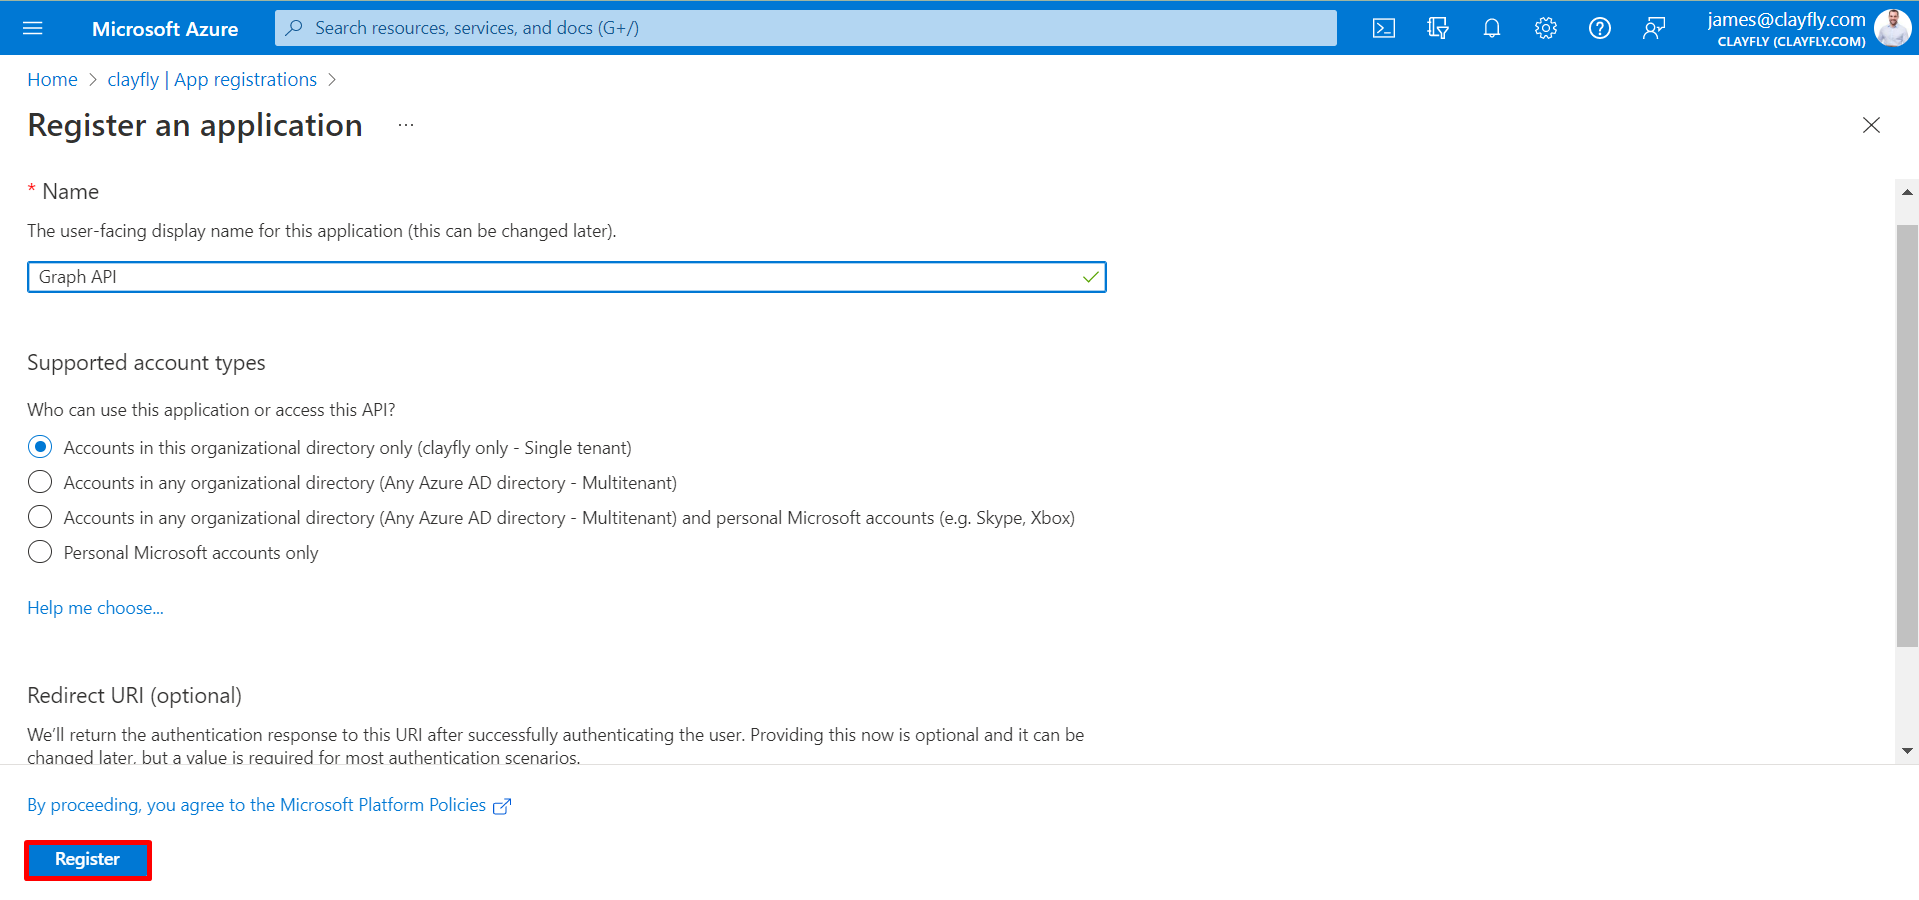
- Provide any name and finally click on Register button. You have created your Azure AD application.
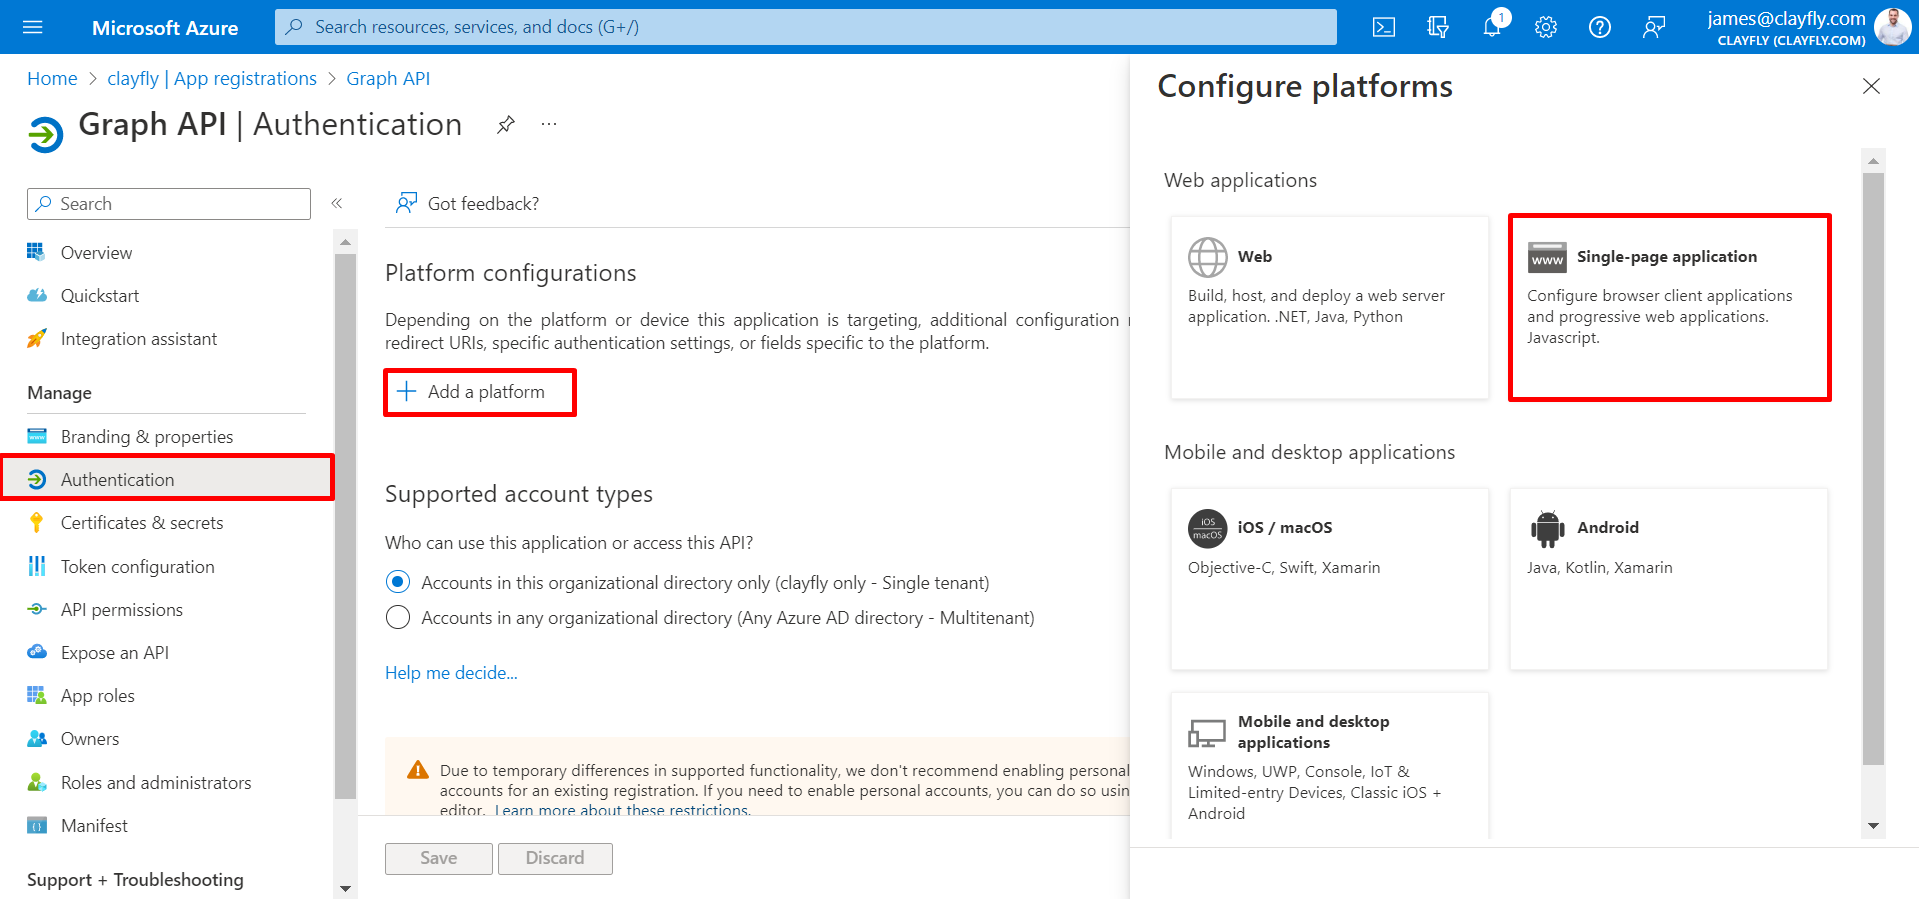
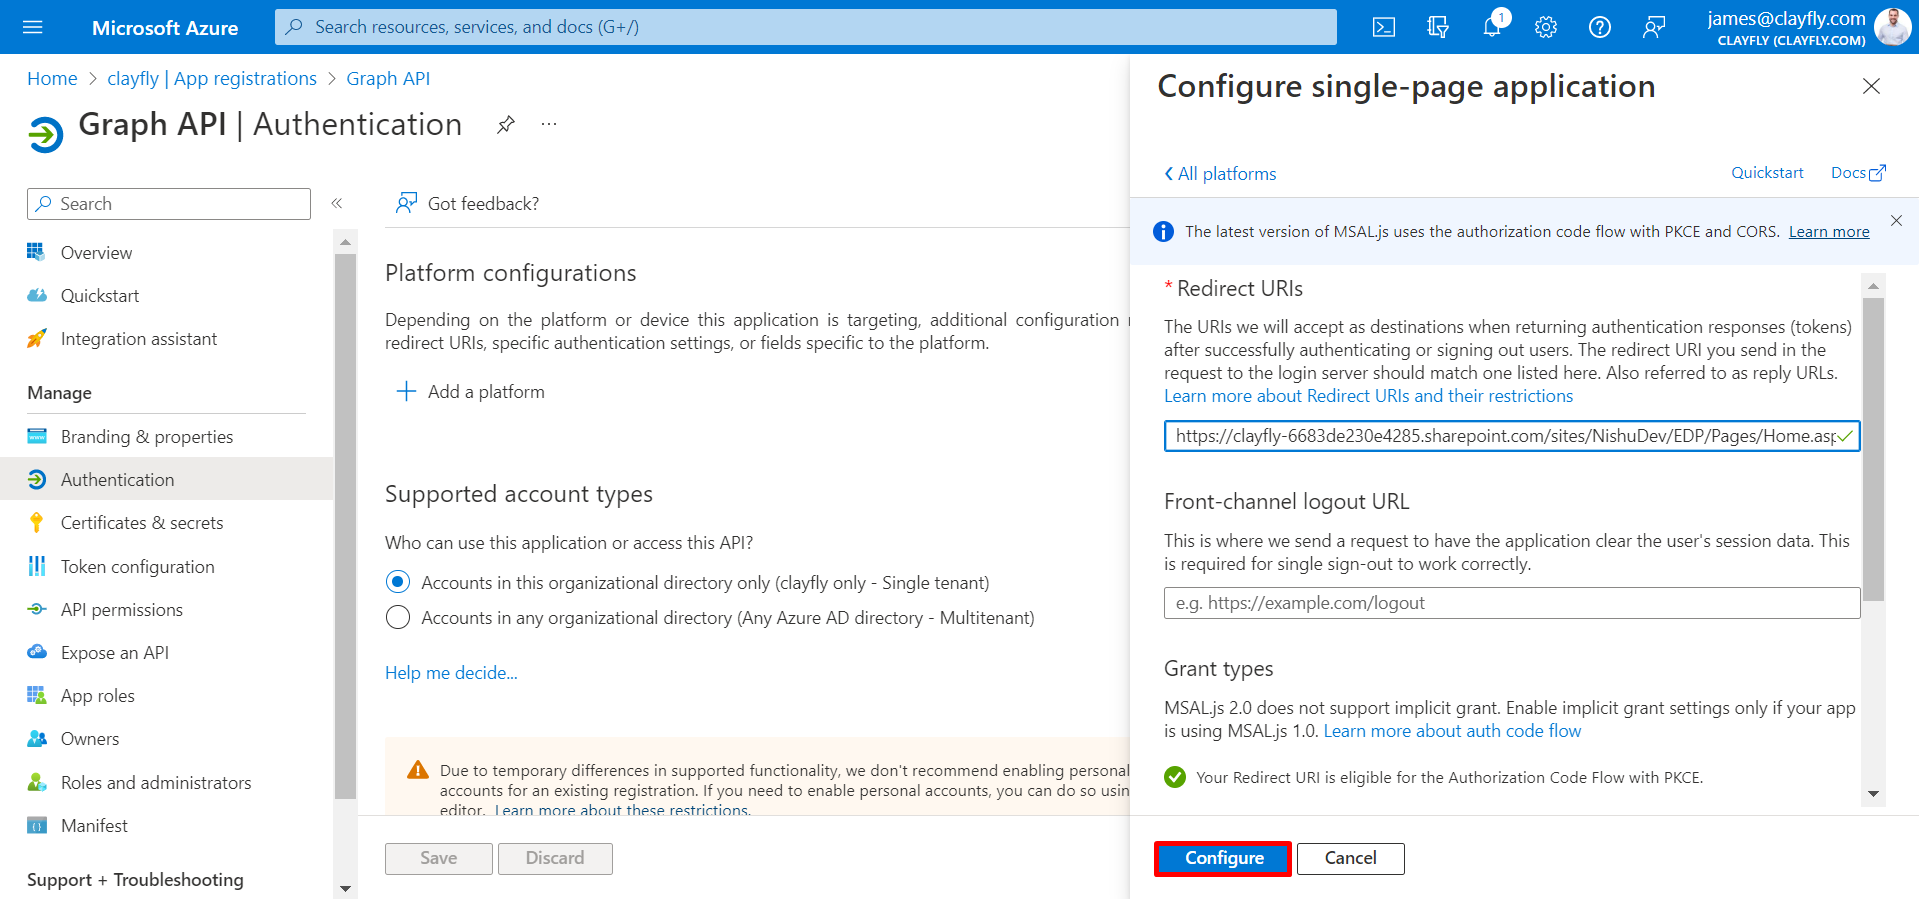
- Click on Authentication from side panel, then on Add a platform button, Configuration platforms opens and select the single page application. Provide employee directory application URL up to Home.aspx from browser URL box and click on configure button.
https://Contoso-5aa2f9508511c7.sharepoint.com/sites/Sitename/EDP/Pages/Home.aspx
https://your tenant name-9adbe392.sharepoint.com/sites/Sitename/AMP/Pages/Authenticating.aspx
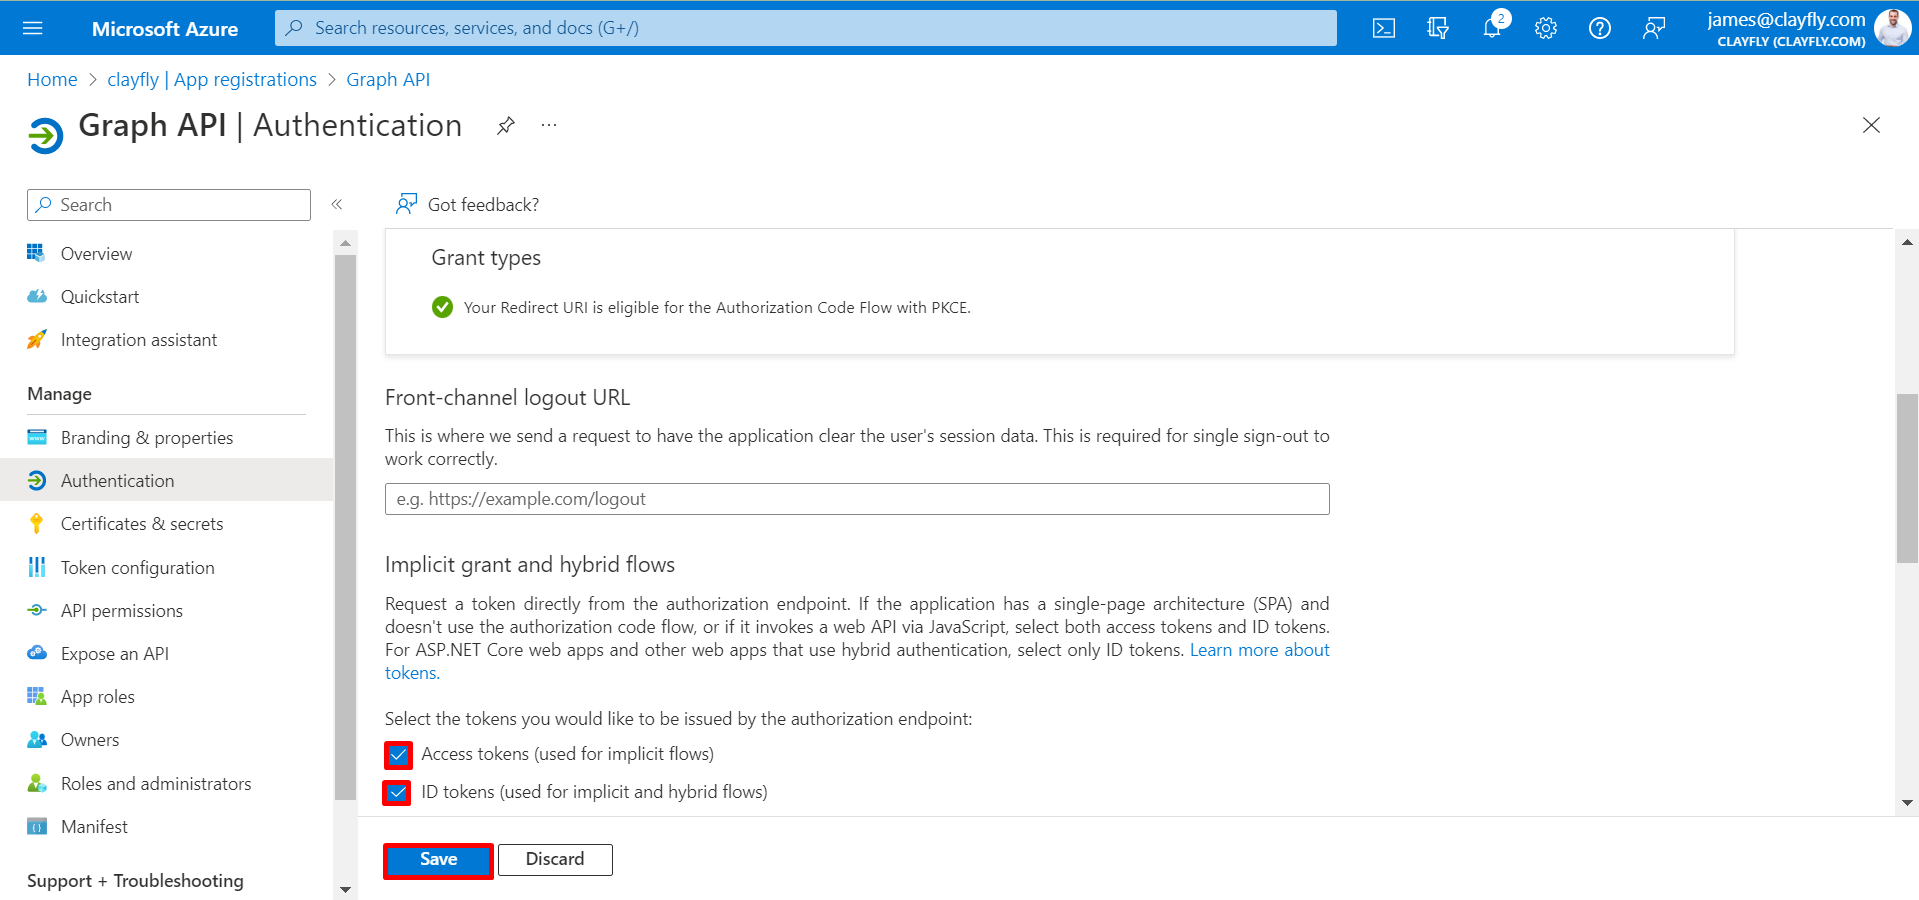
- Select the Access tokens & ID tokens and click on save button.
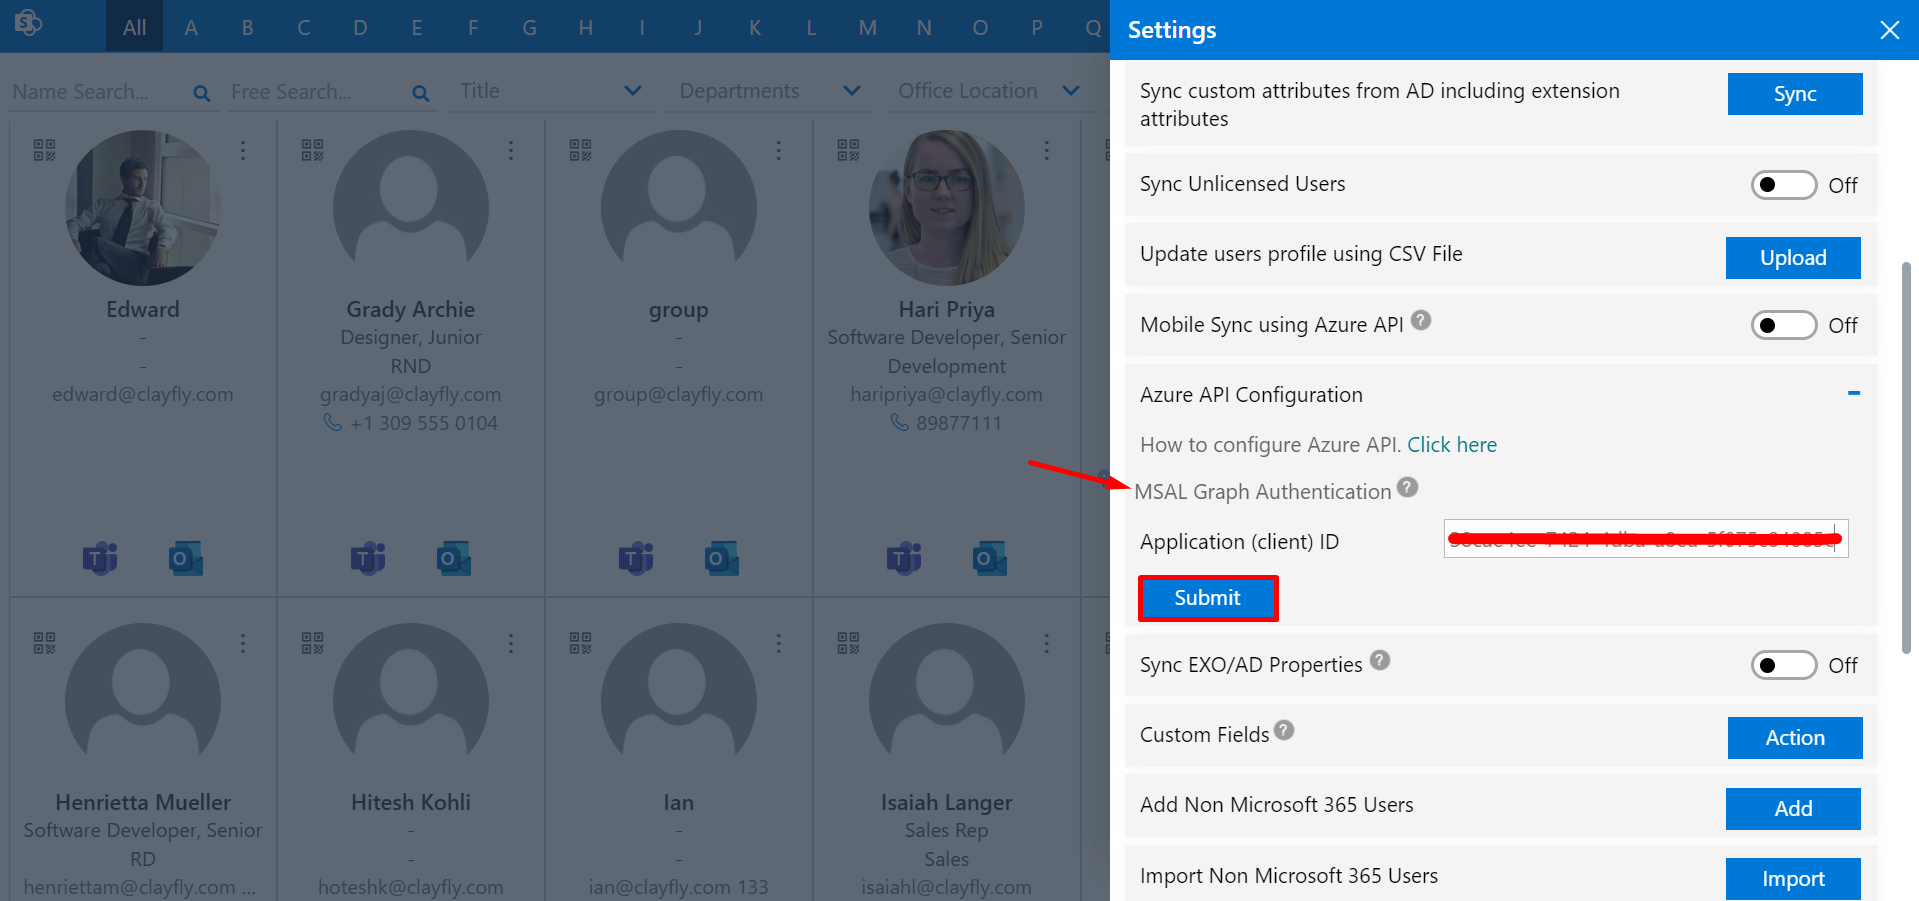
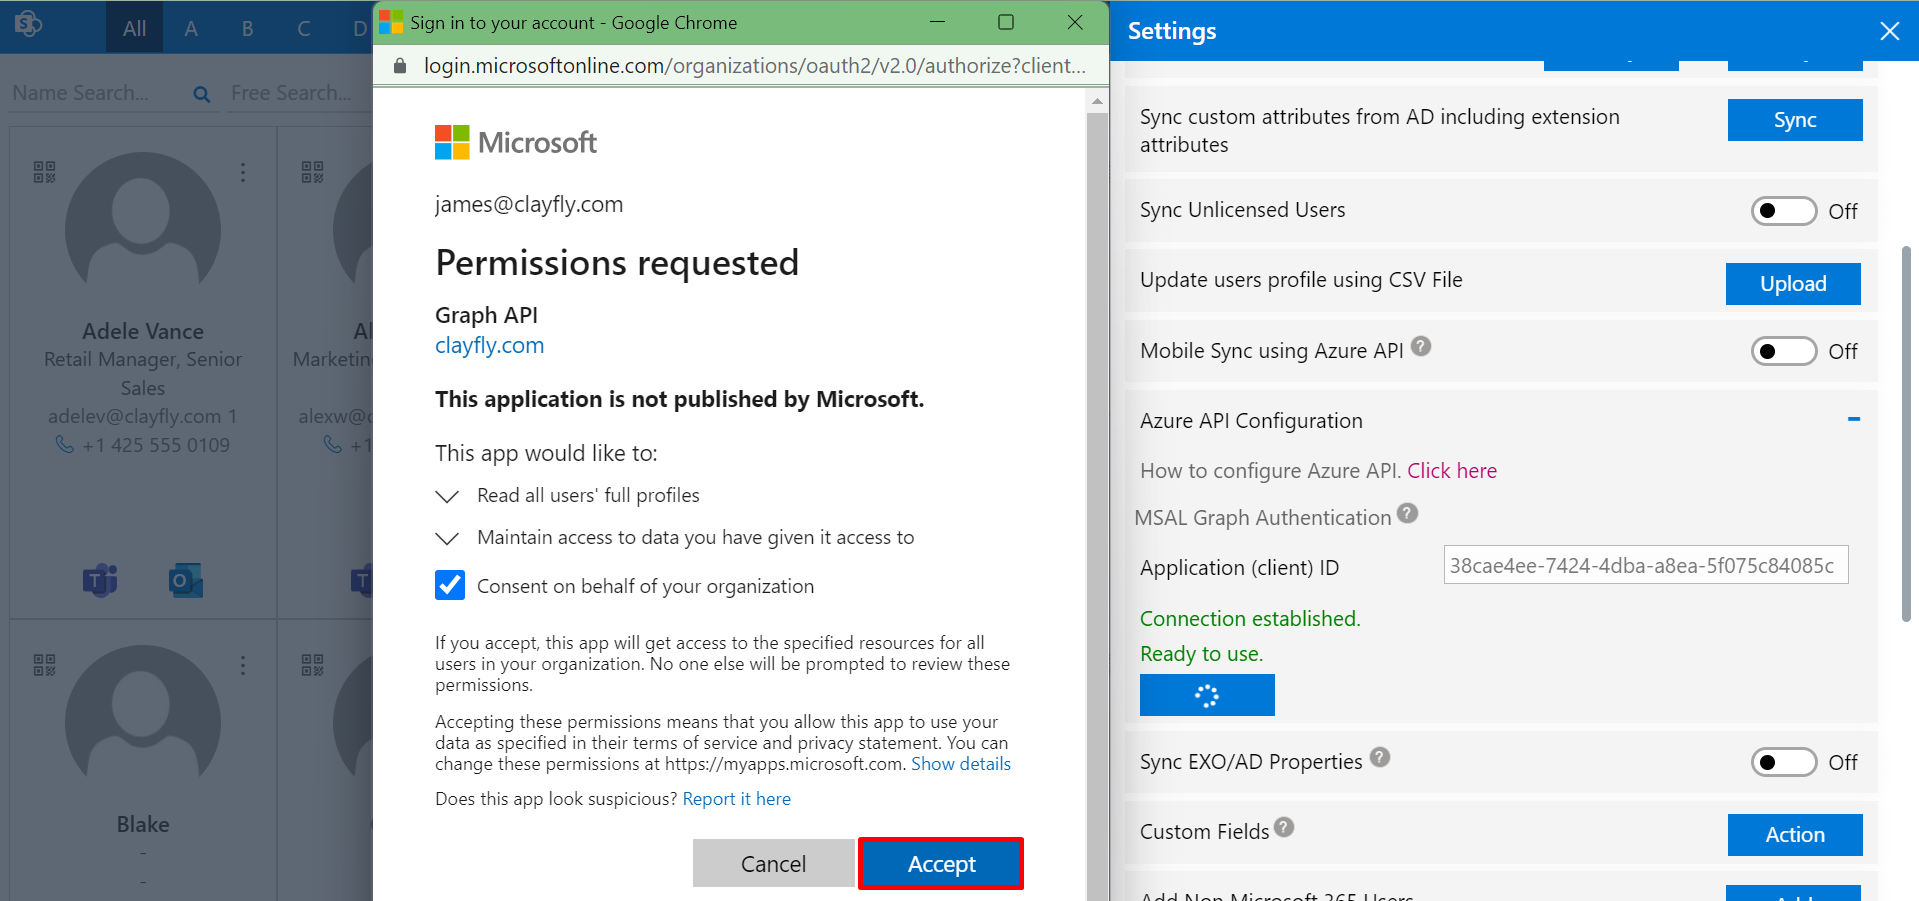
Now click on overview from side navigation panel and copy the Application ID.Copy ‘Application (client)ID’ and paste it in client ID field of MSAL in Employee directory settings and finally click on submit button, permission requested window opens, select the check box and click on Accept button as shown in below images.
Note: In case if fails to connect, please refresh the browser and try again.
General Settings
In this, you can hide search filter in home page, update user profile, export user details, overwrite user profile details, grant admin role to user, update themes, uploading your company logo and display logo in user profile popup.
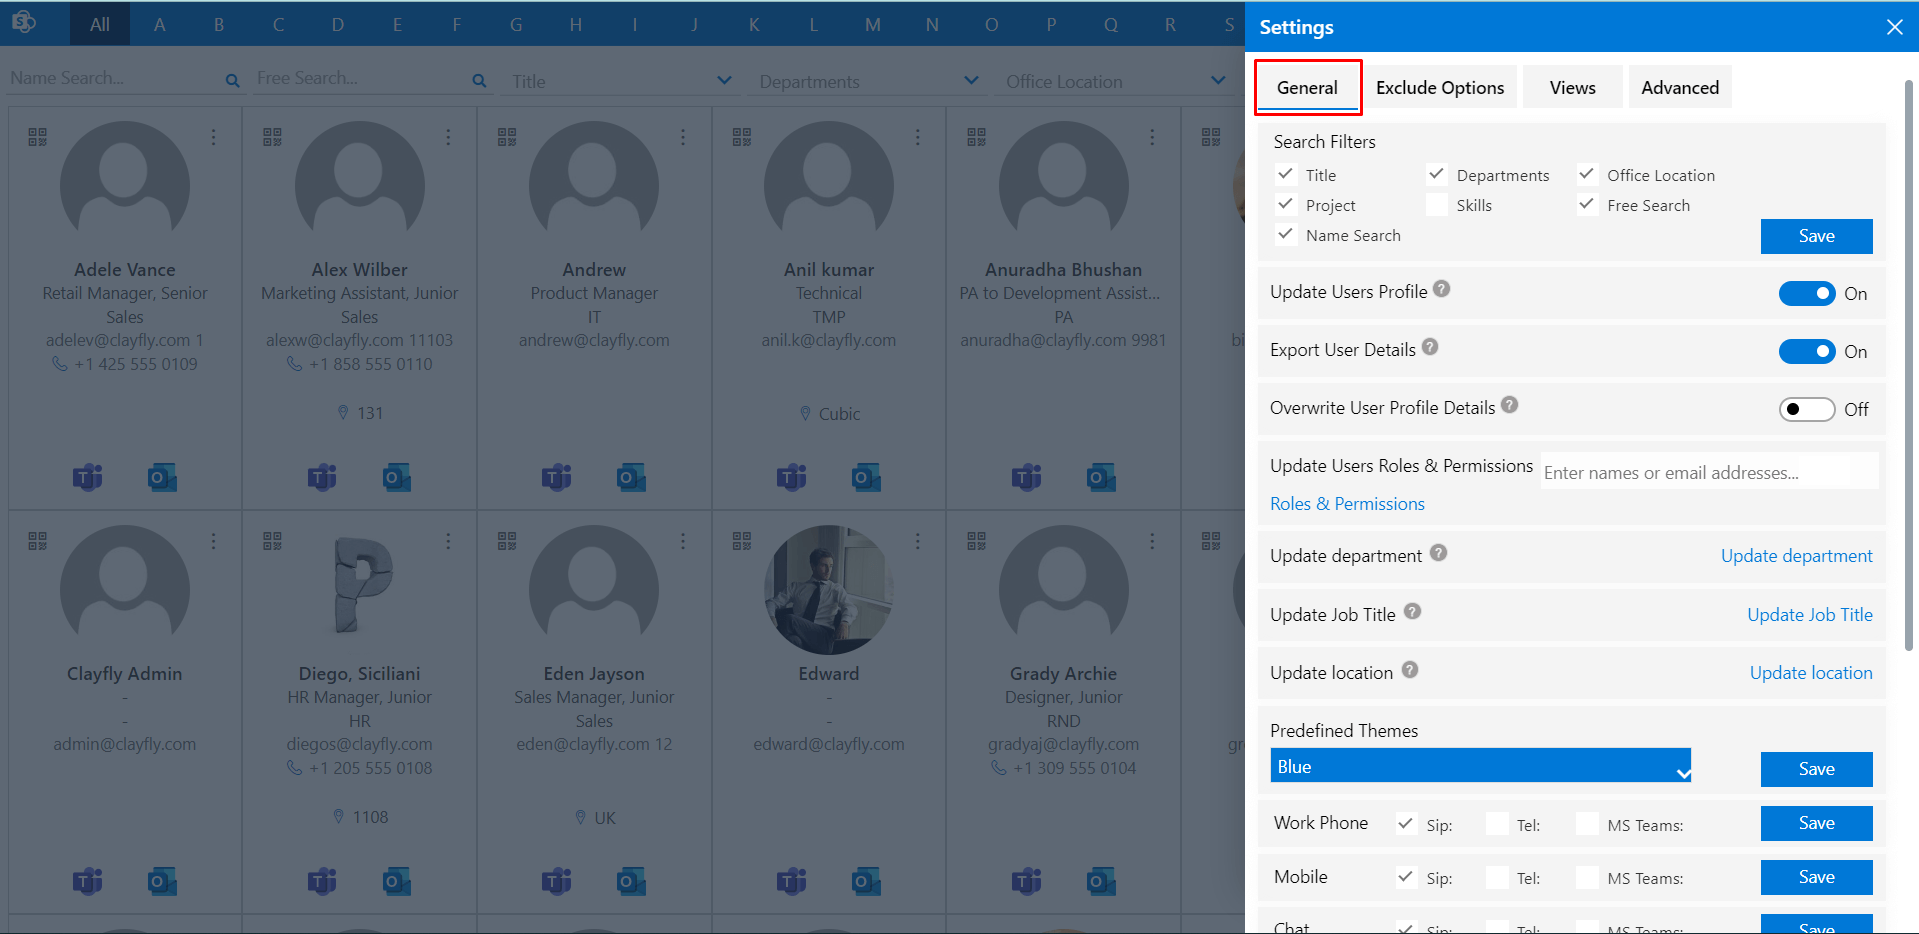
Search filters: Here you can hide search filter in home page. You cannot hide all the filters; one filter is you mandatory.
Update user profile: From here you can provide profile update aceess to users.
Export user details: From here you can export the details of users.
Overwrite user profile details: From here you can update profile update of users.
Update user’s role and permissions: From here you can provide admin access to users. Just add users here to provide access. If you want to change the permission from admin to users just delete the user. Only Admin can see the setting icons in home page from where he/she can do the settings
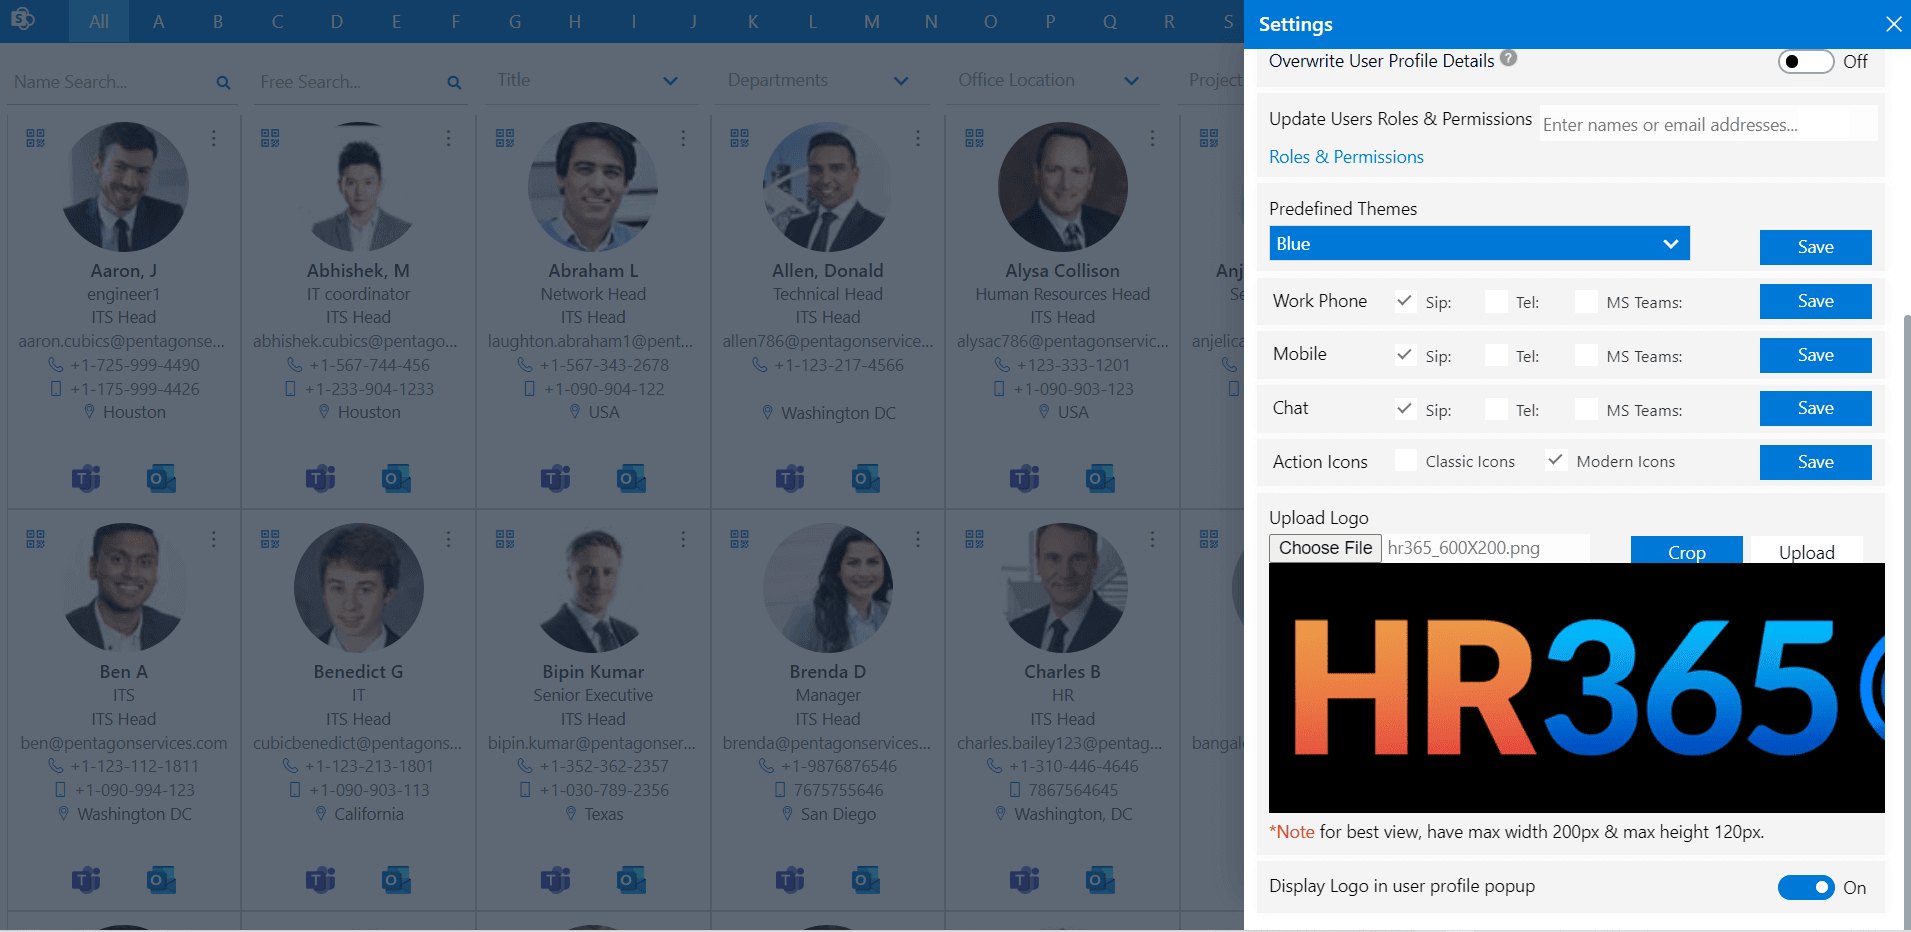
Collaborations: SIP and Tel works based on protocol system settings in your machine.
Actions: You can setup icons that displays on profile grids in home page.
Upload logo:You upload the logo, it will be visible on profile card. You can crop the logo.
For best view logo size must be width 200px and height 120px
Exclude Options
Here you can exclude individual users based on selection or group of users.
Views
In Employee Directory you will be presented with various views. These views are structured to present you with key information.
Sort by: In home page users can be sorted or displayed based on their first name or last name or display name. By default, users are sorted by their first name.
Hide or displays fields in profile card
Use work email id instead account login id: If it is enabled work email ID, it will display in both profile card and in grid views instead of login id
Advanced
Here you can auto sync user from M365, add non microsoft 365 users, import non microsoft 365 users, sync employee profile image, show organisation chart, display delbe profile based on selection.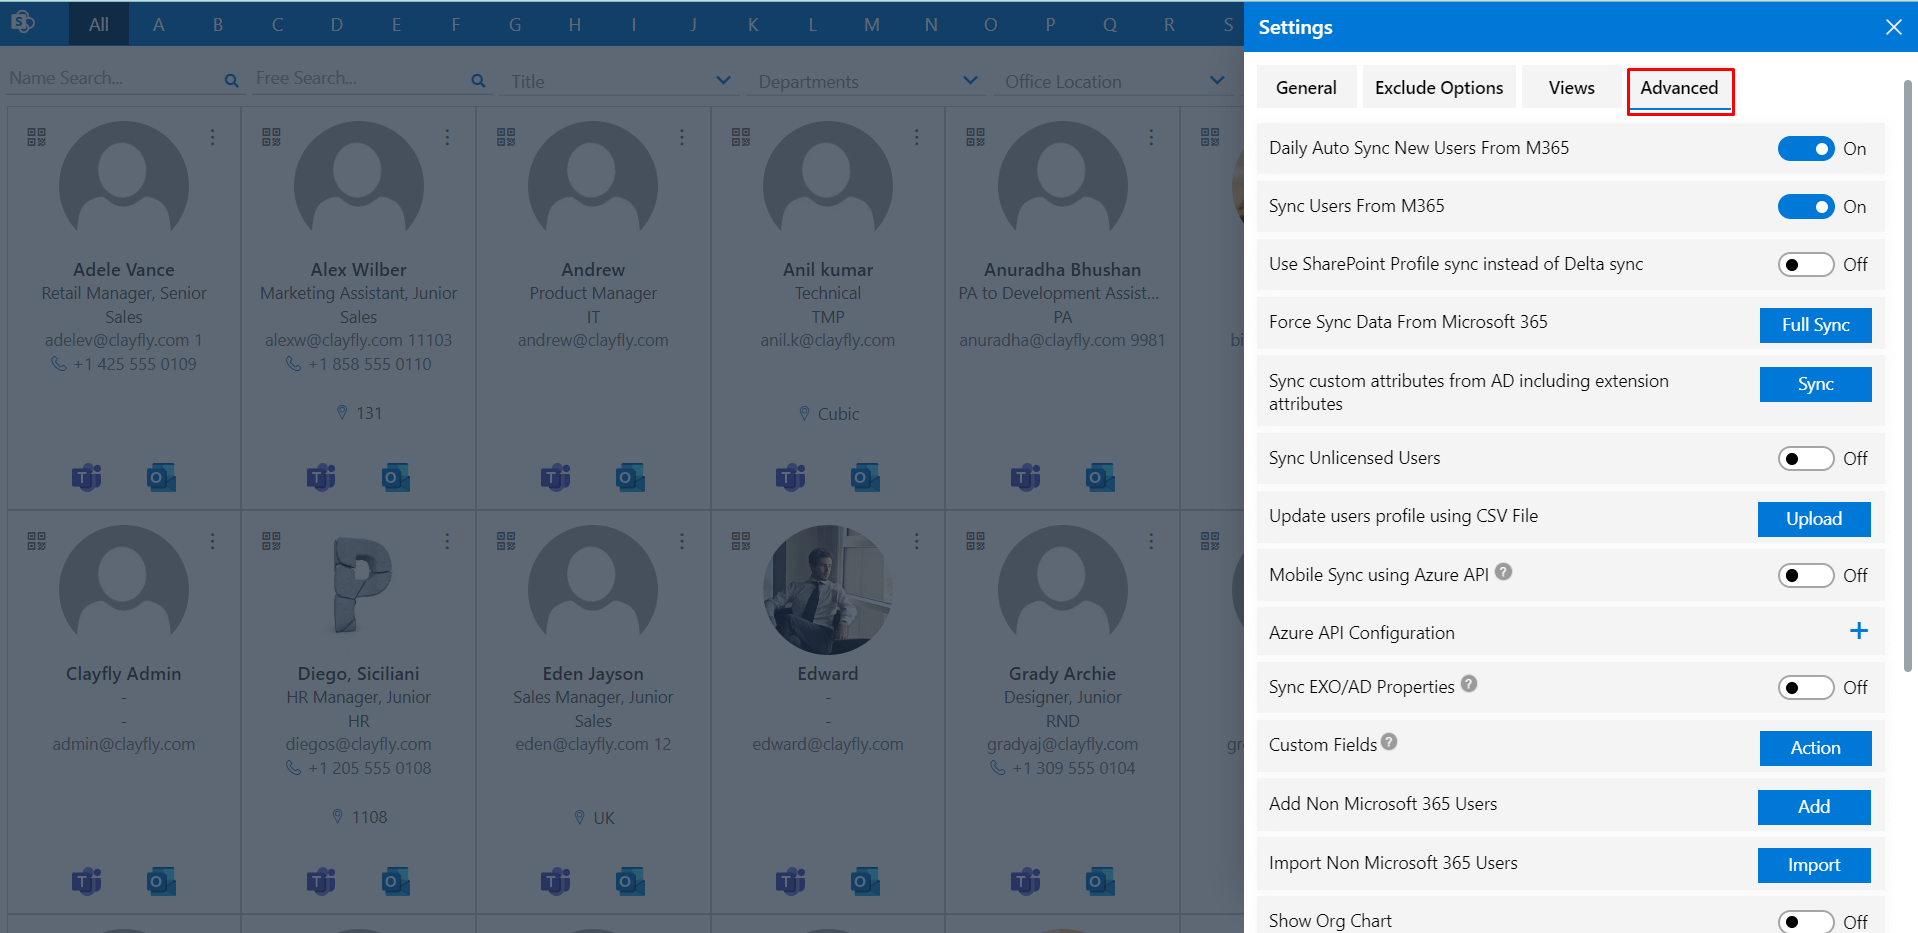
Sync employee profile image
Azure API Configuration
In Employee Directory application graph API is used to exclude block users, exclude users hidden in GAL, in syncing Azure images, in syncing mobile numbers from Active Directory and in syncing AD properties.Global Admin access is required to configure Azure API.