- Admin has full control.
- Able to do all settings.
- Able to raise tickets on behalf of another person.
- Can generate reports of all teams.
- Can view dashboard.
- Able to assign the tickets of all teams.
- Can view all the teams in side navigation.
- Able to raise tickets on behalf of another person.
- Receives only raised tickets to their department.
- Able to assign the tickets based on ticket scopes.
- Can generate reports of their teams.
- Can view dashboard.
- Can view only those teams in side navigation if they are supervisors of those teams (teams specific).
- Able to raise tickets on behalf of another person.
- They can be able to change the status of their assigned tickets and can be able to re-assign to others.
- Able to assign the tickets based on ticket scopes.
Roles
From here, admin can assign roles to users and teams.
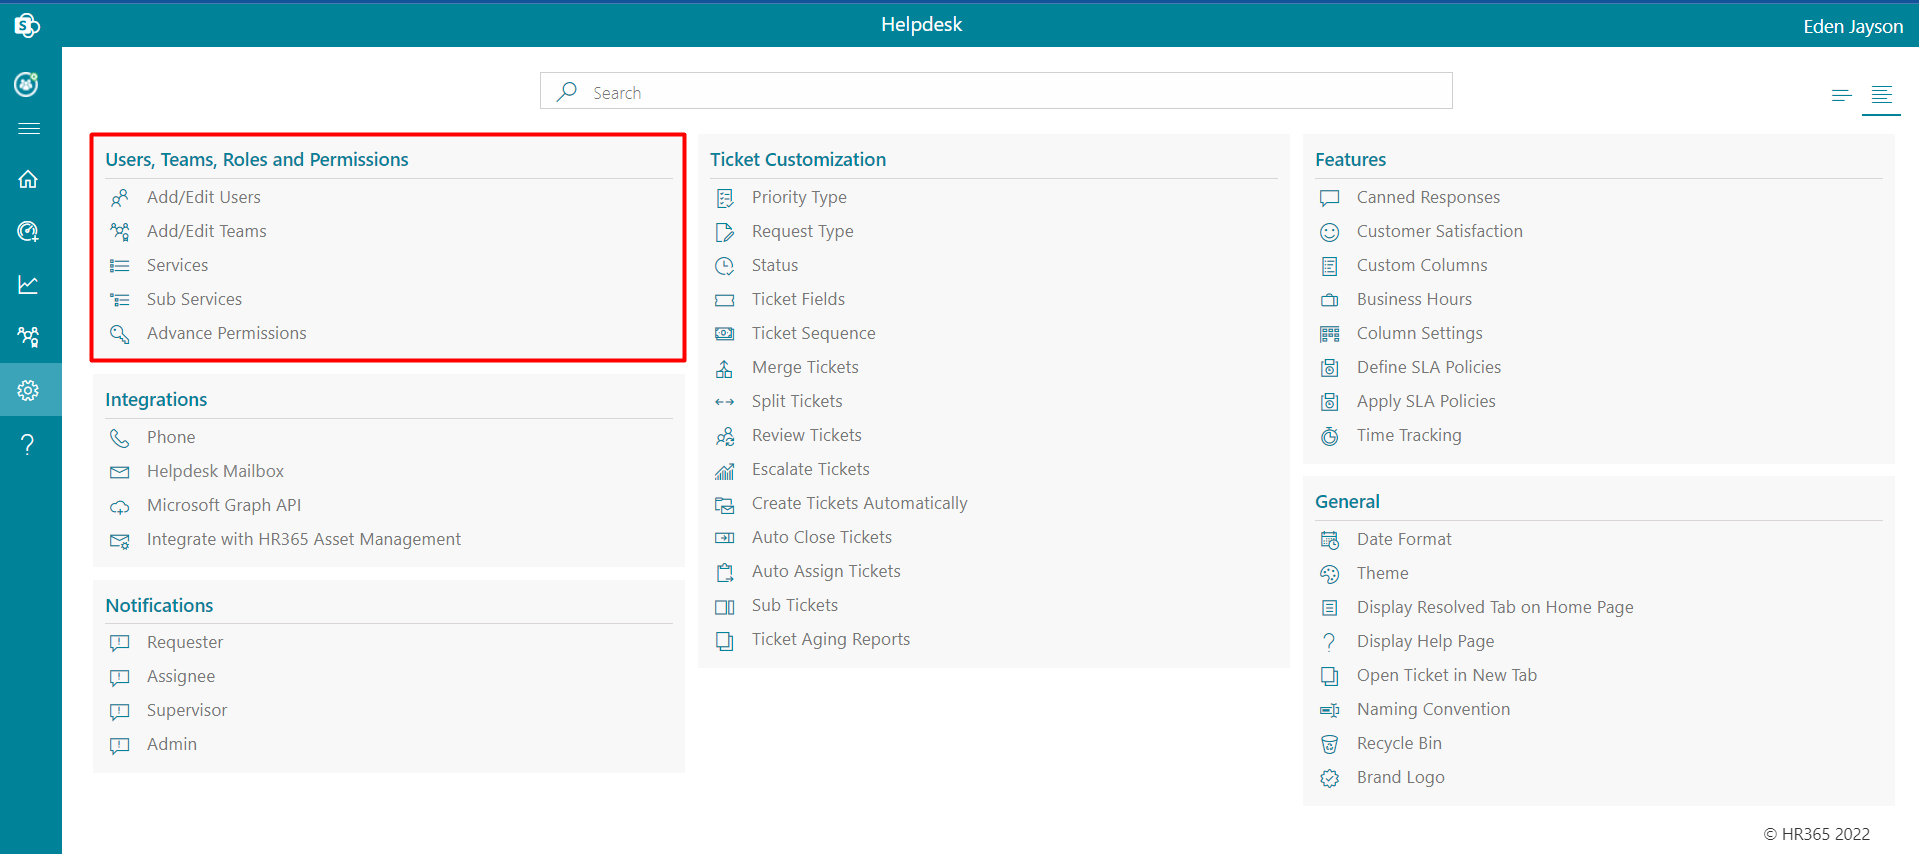
Importance of Roles:
Admin:
Supervisor:
Agents:
Based on custom settings, the admin, supervisor, and agents can delete the tickets.
- Can view all team's unassigned tickets in the Helpdesk.
- Can assign tickets for all teams.
- Can edit or update a ticket of all teams from the comment page only.
- Can view all team's unassigned tickets in the Helpdesk.
- Can assign tickets for all teams.
- Can view all team's unassigned tickets.
- Can assign tickets for their teams.
- Can only view their team's assigned tickets.
- Team tickets detailed view will not be available.
- Can update only tickets assigned to him/her.
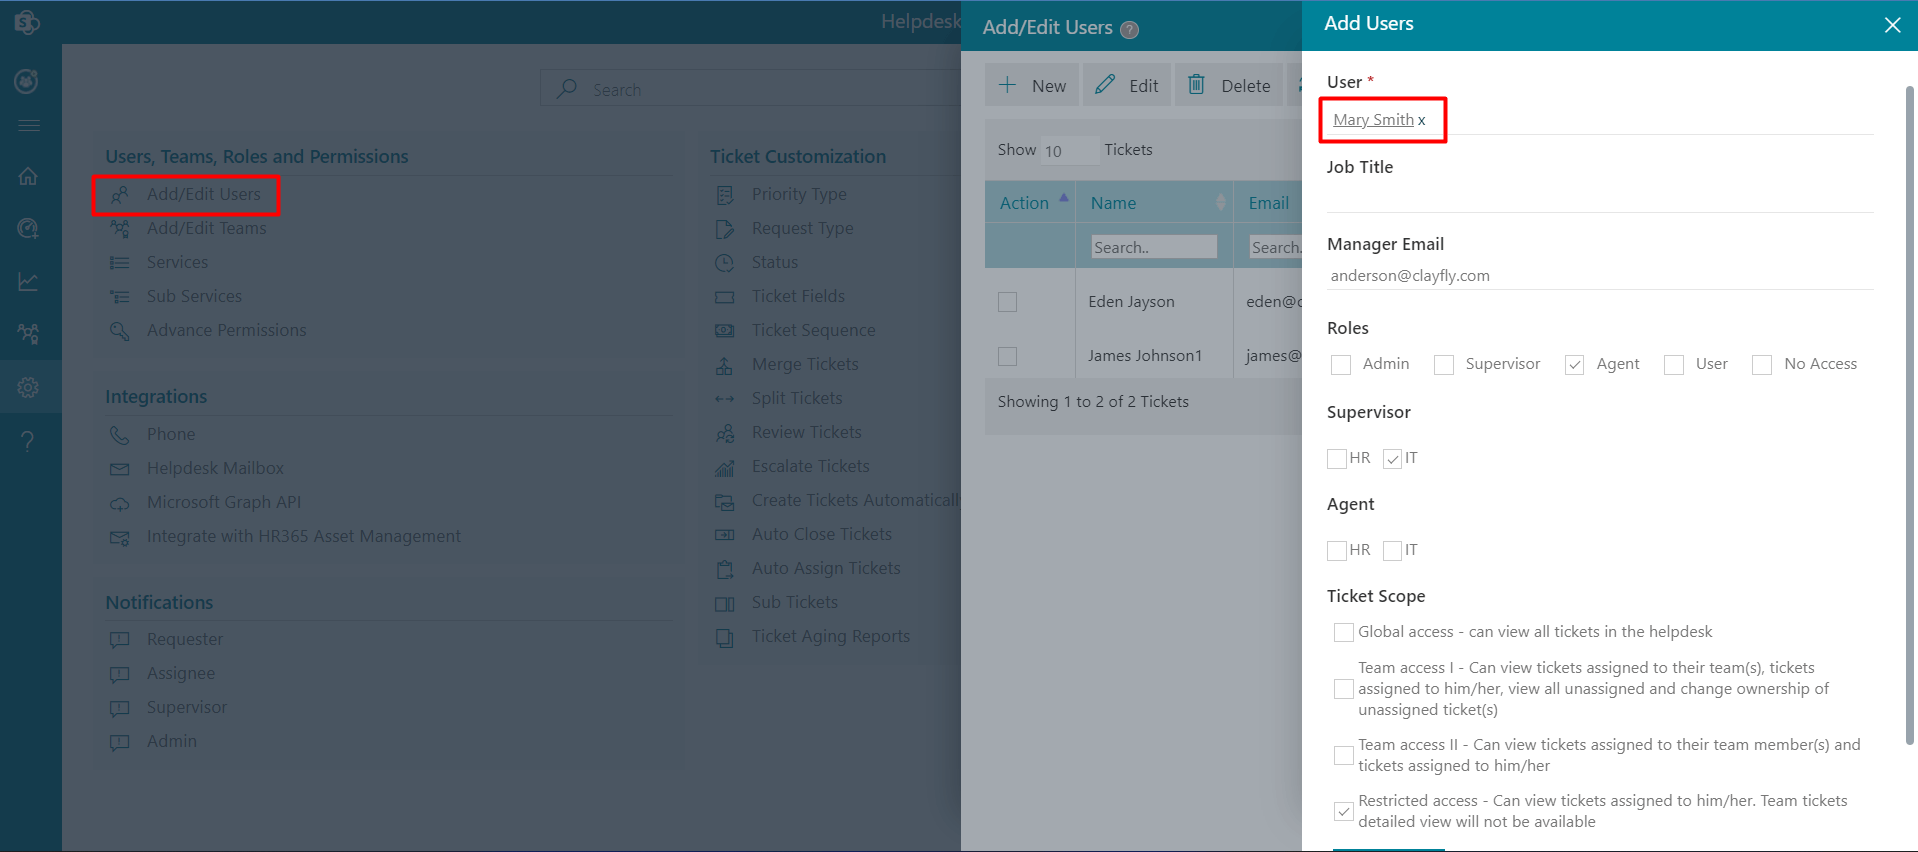
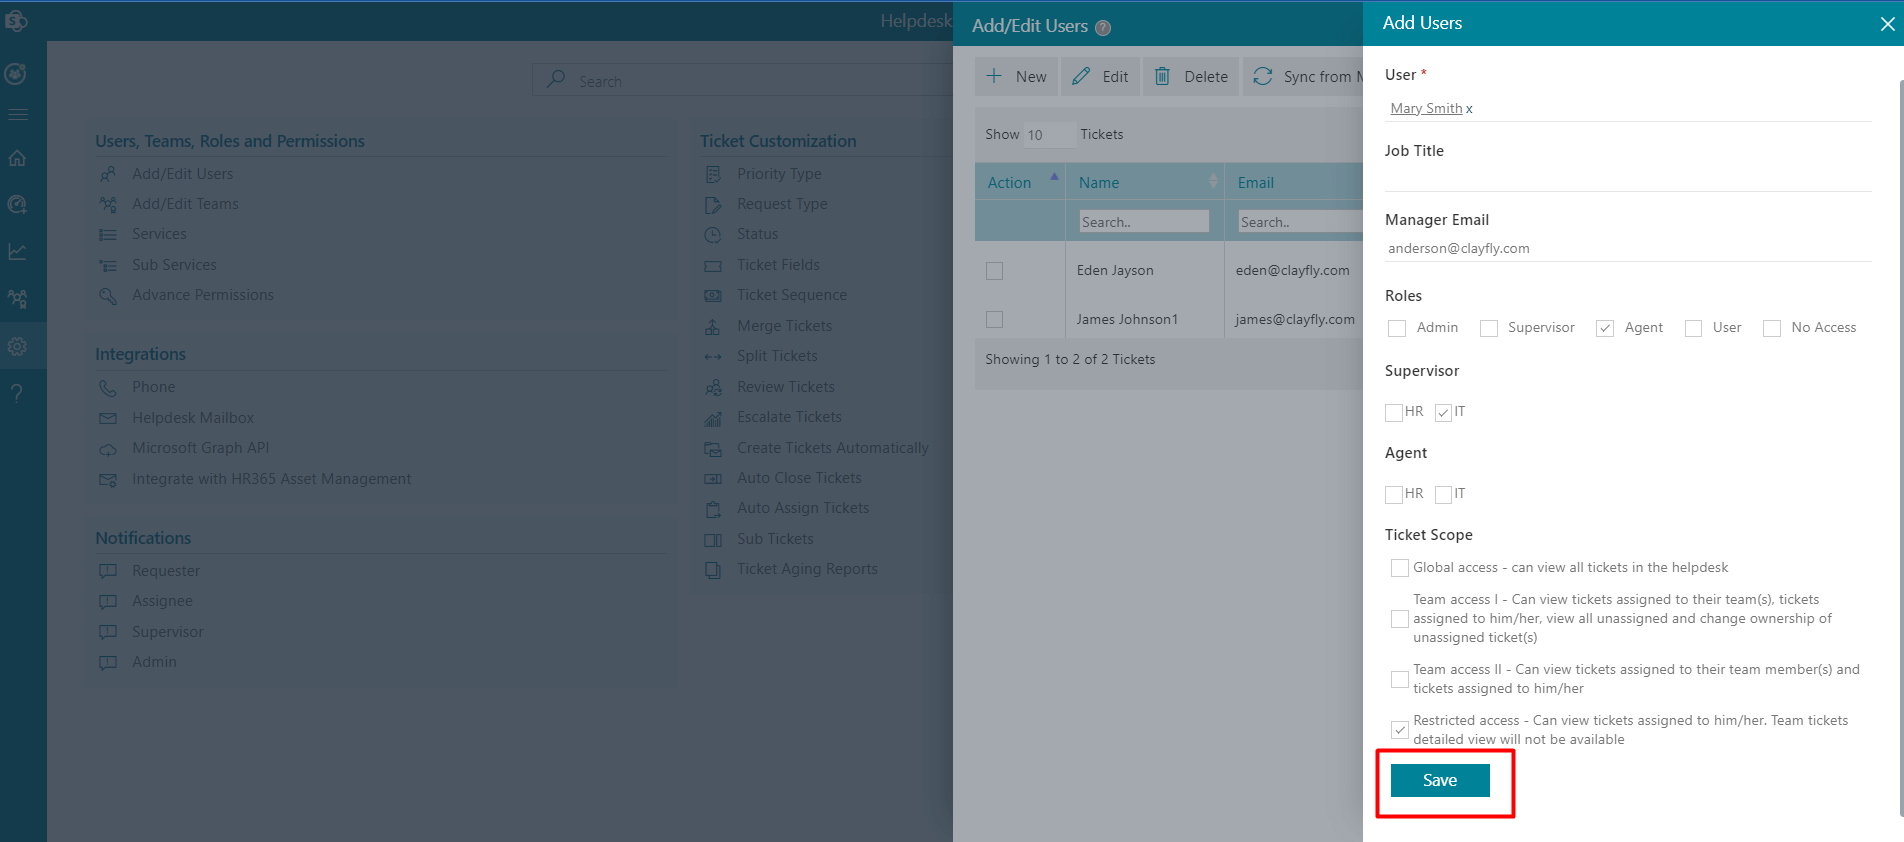
- Click on Users, this displays Users page.
- Click on +New button, this displays New Users page.
- Enter the Users, Job Title, add Manager Email and add select the Roles and the Ticket scope.
- Finally click the Save button.
Users
Admin can assign roles to O365 users with ticket scope as per requirement in the Helpdesk application. You can select both supervisor and agents for multiple teams but ticket scope will remain the same and roles one.
Different types of tickets scopeGlobal access:
Team access I:
Team access II:
Restricted access:
To add the users, follow the below steps:
- Click on teams, this displays Add/Edit Teams page.
-
Click on +New Team button, this displays New page.
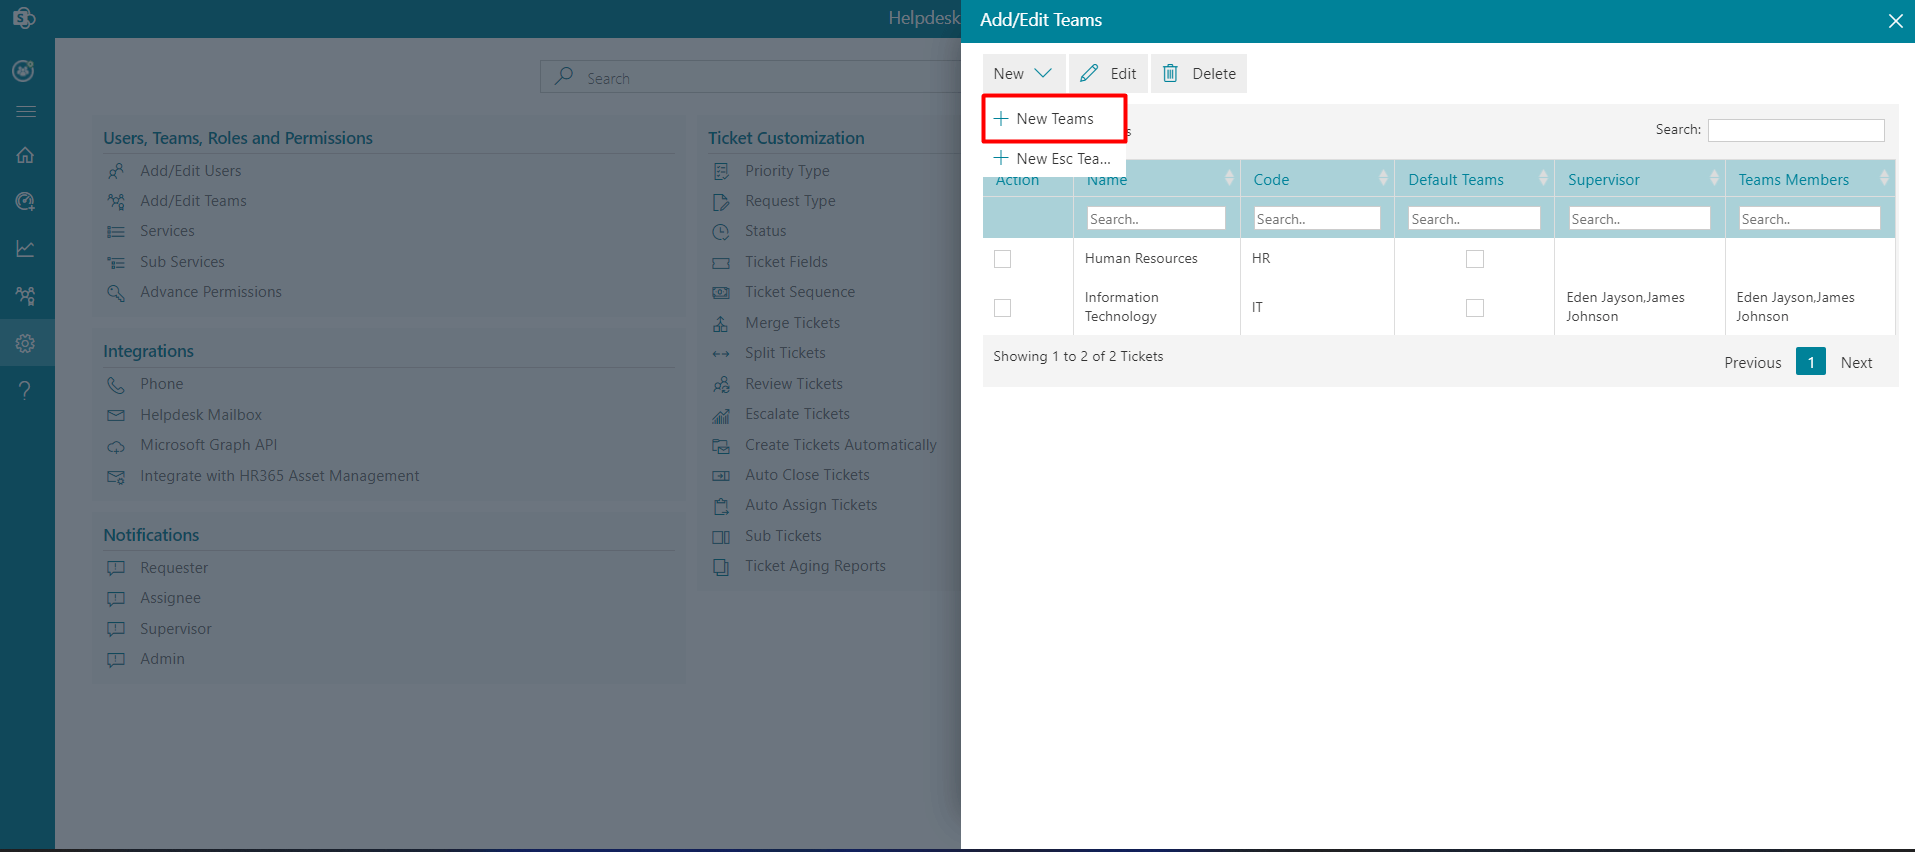
- Enter the Name, give Code, add Supervisor and add the Team Members.
- Finally click the Save button.
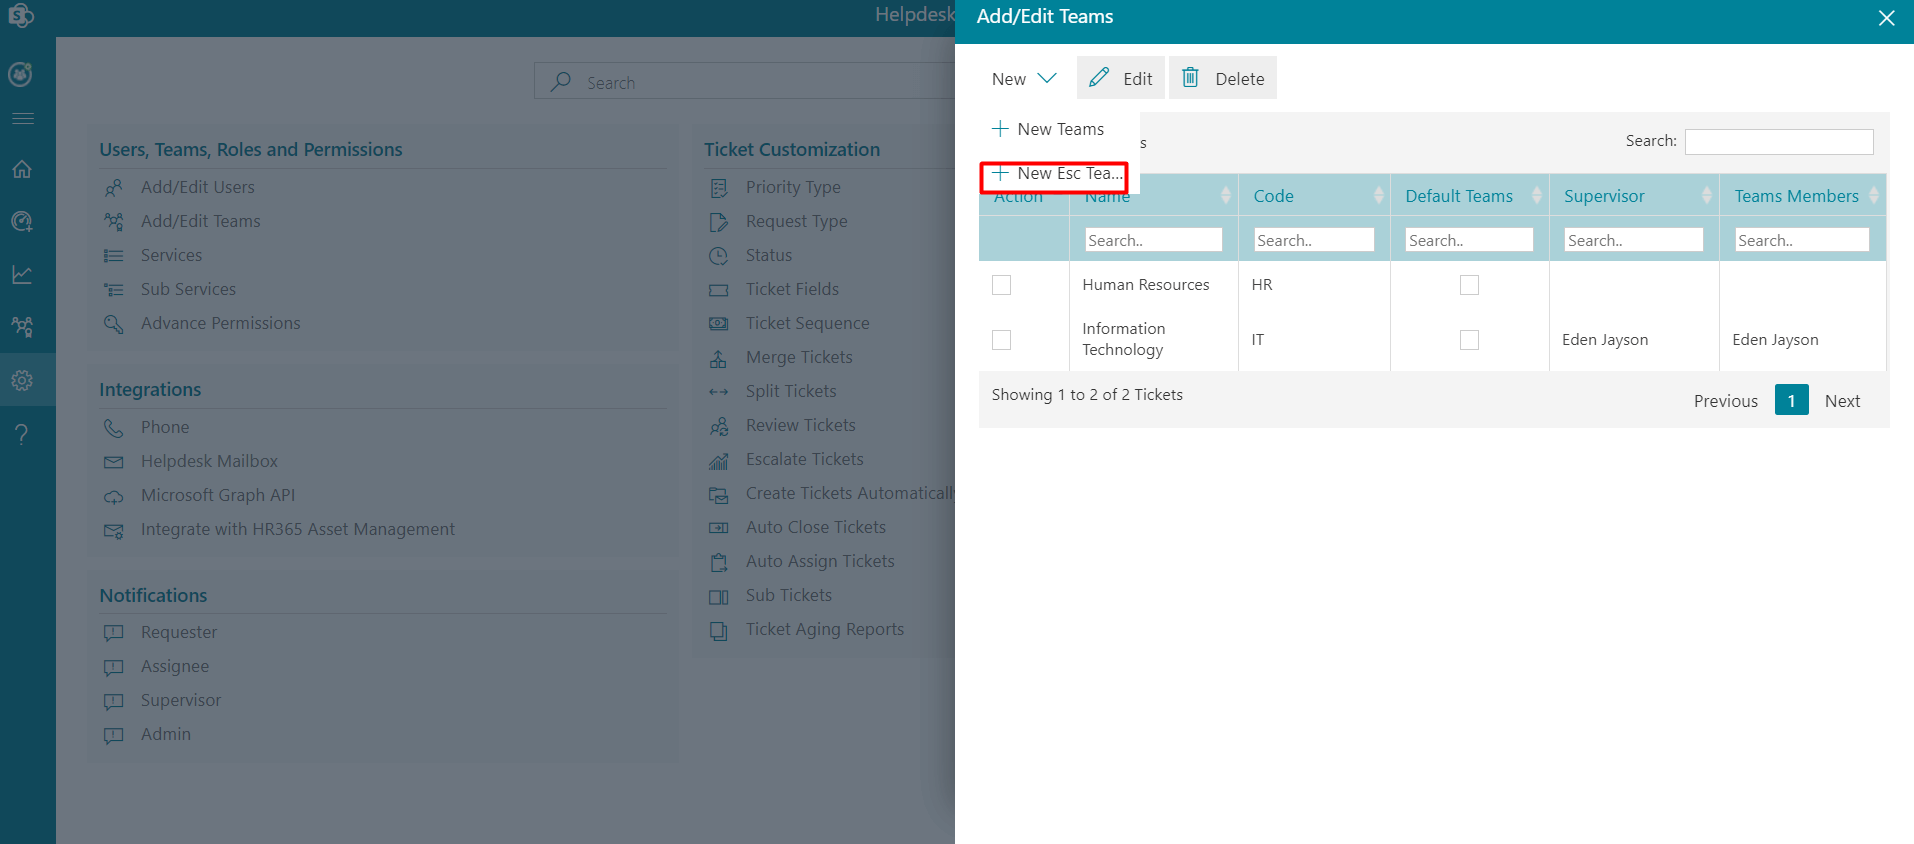
- Click on teams, this displays Add/Edit Teams page.
-
Click on +New Esc Team button, this displays New Esc Team page.
-
Select the team from the dropdown, and select the check box to define the level of SLA Escalation.
The code is predefined for SLA Escalation. For first-level, code is XX L1 And for Second-level, the code is XX L2.(XX is based on code added )
-
Enter the Supervisor and add the Team Members.
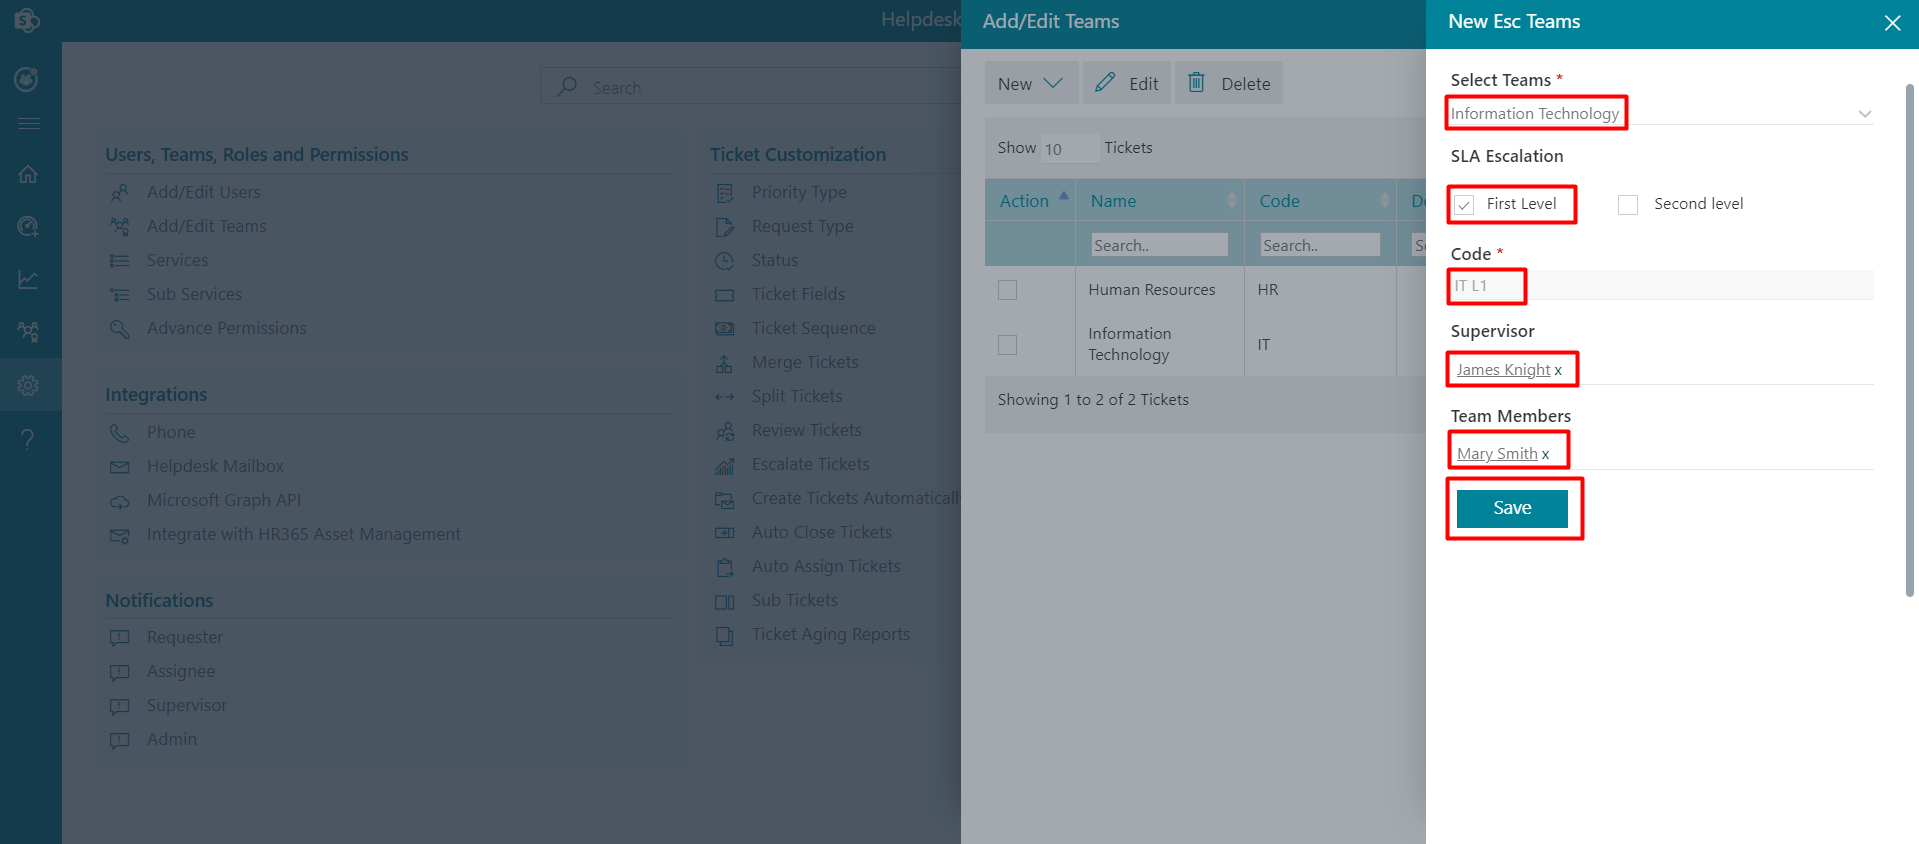
- Finally click the Save button.
Add/Edit Teams
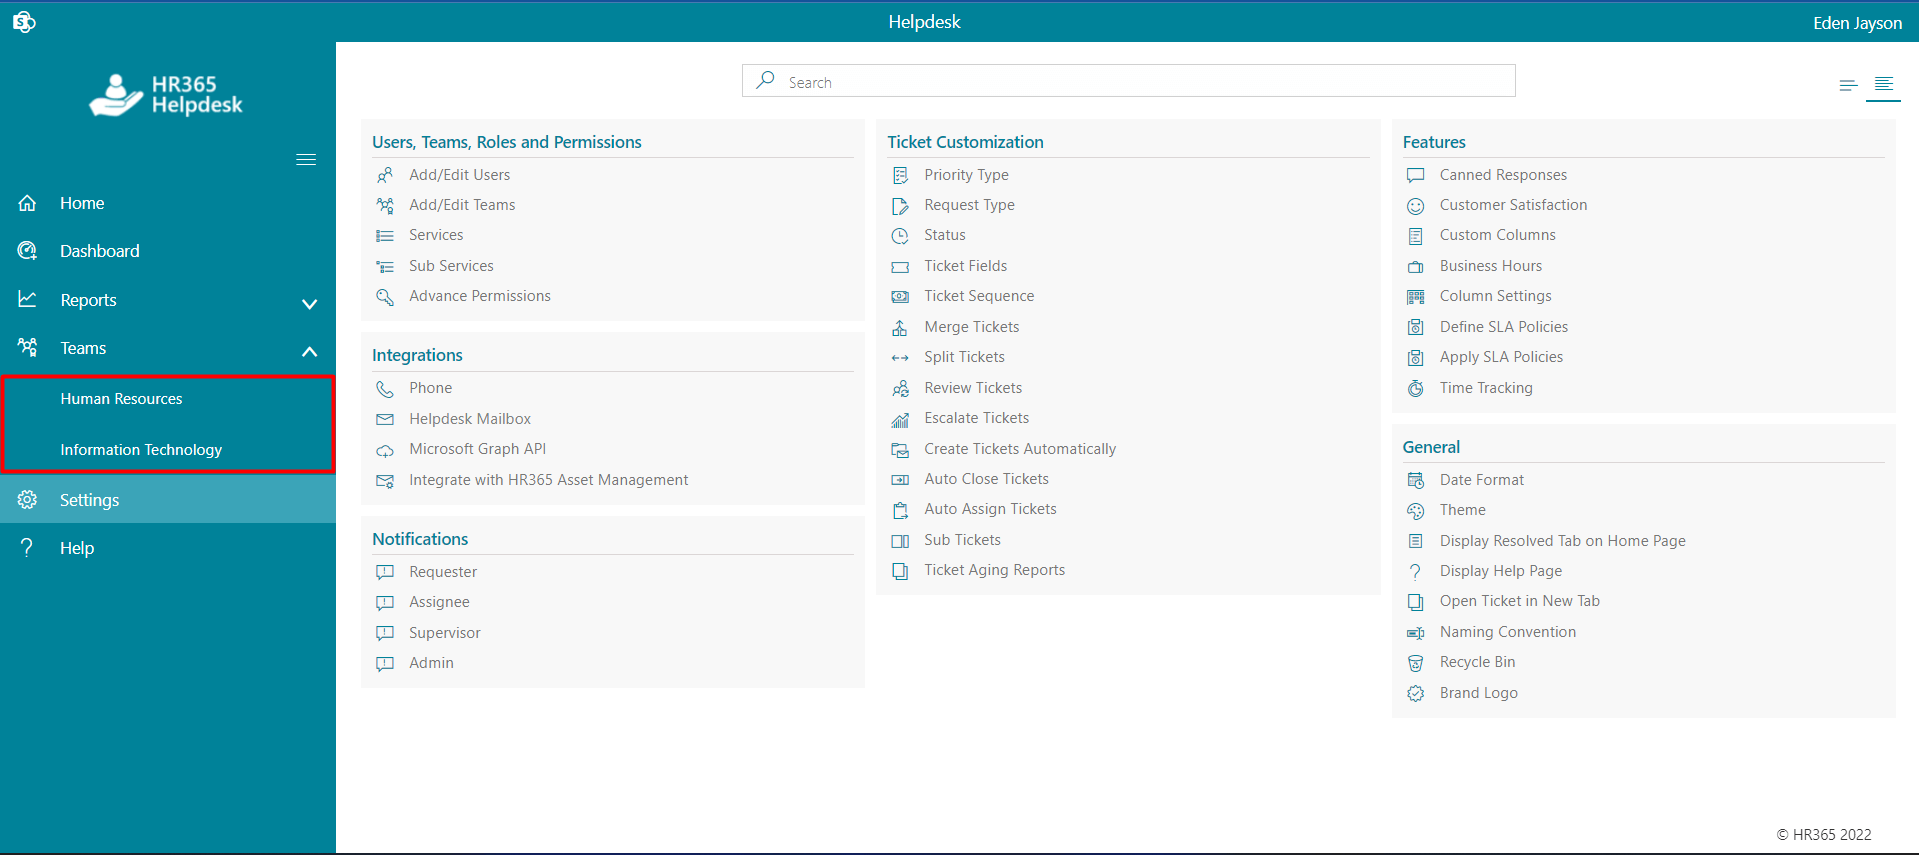
Admin can create multiple teams as per your requirement. Admin and supervisor can view all the teams in the side navigation panel.
Admin can create teams from the settings. To create follow the below steps:
Escalation Teams
Admin can create multiple escalation teams as per your requirement. You can view escalation teams on comment page.
Admin can create escalation teams from the settings. To create follow the below steps:
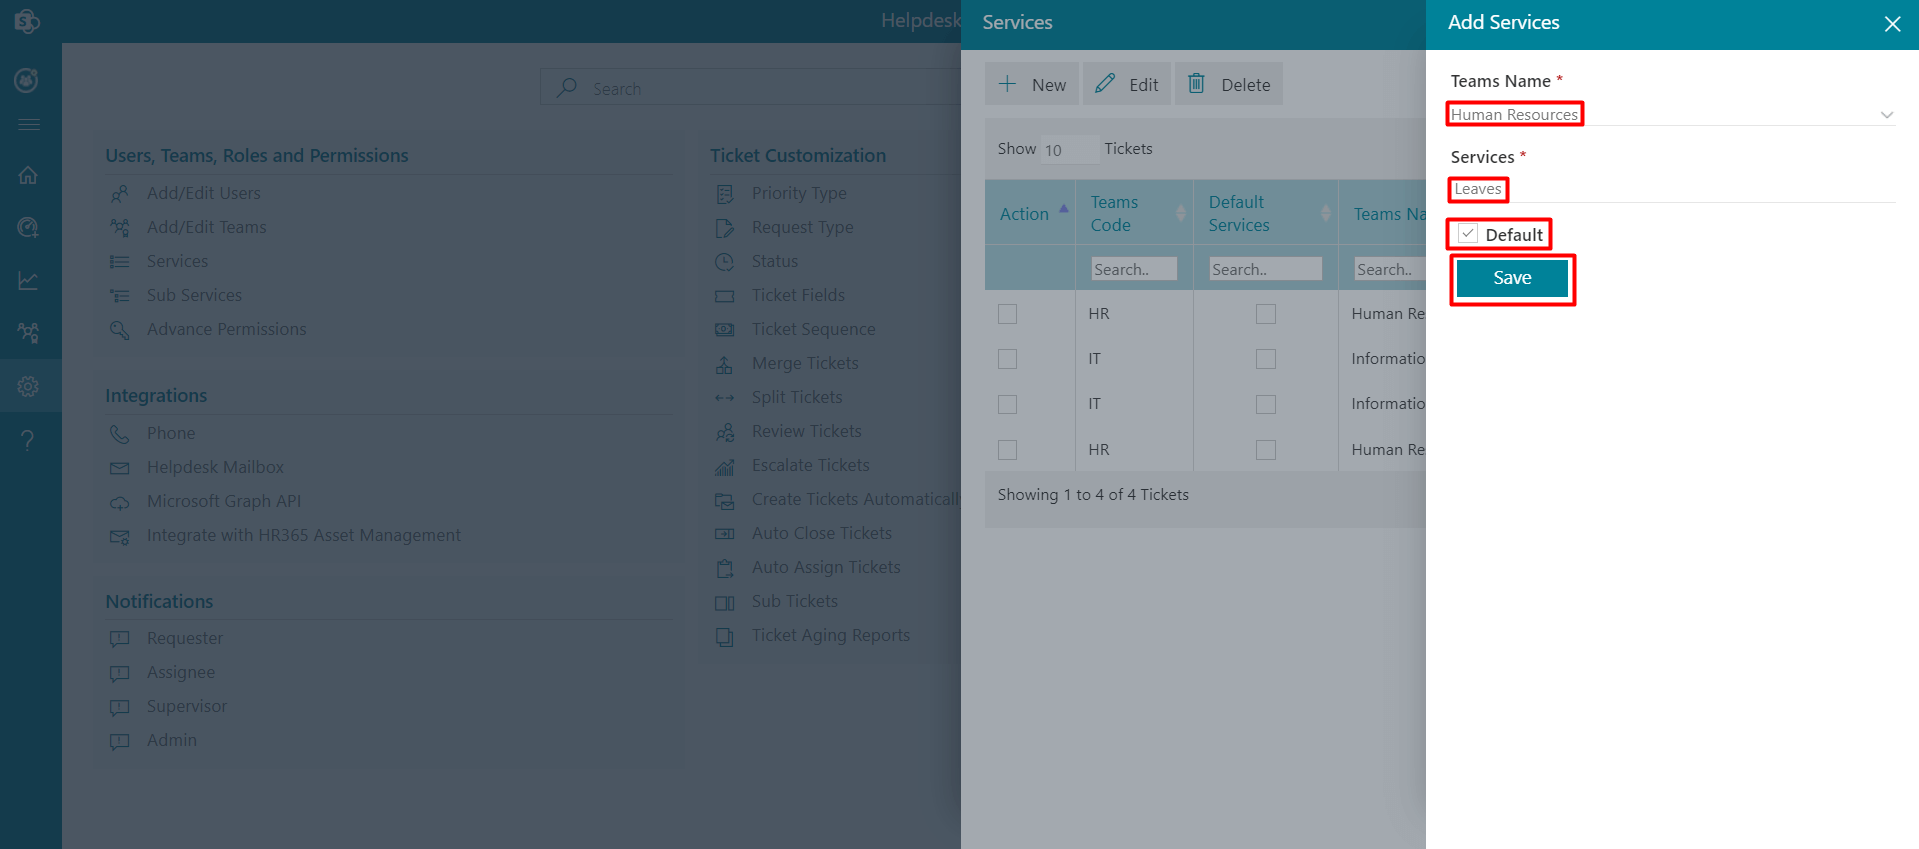
Services
Once you create teams, admin can add various services for individual department from settings as shown in below.
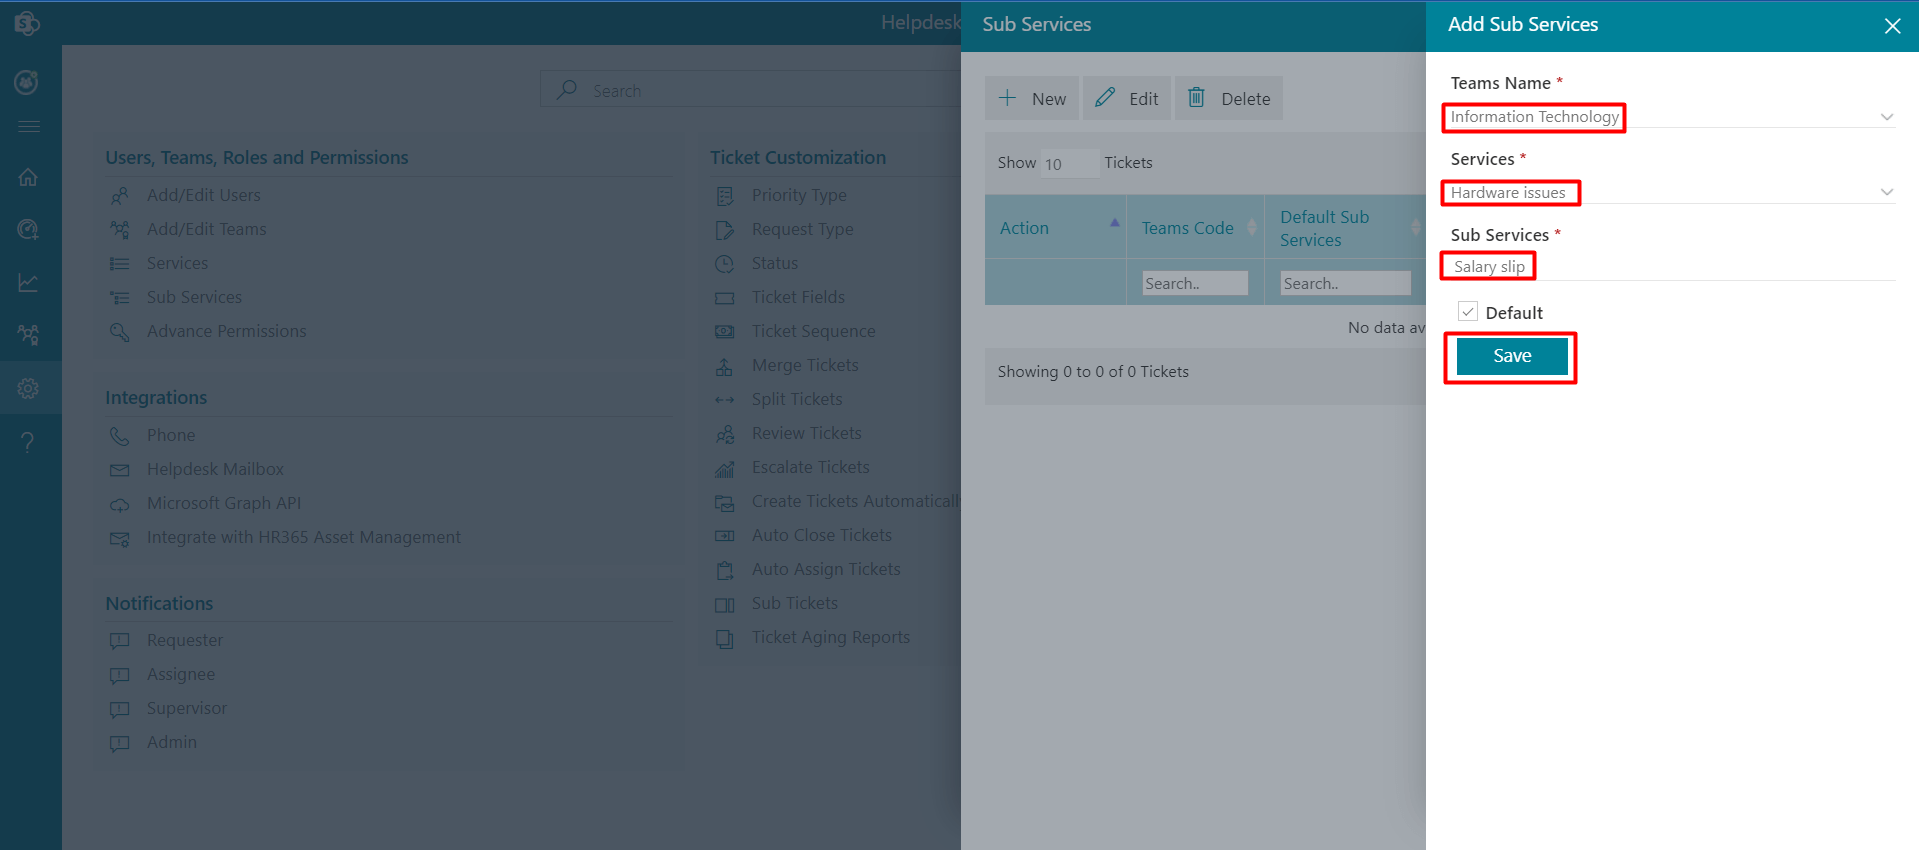
Sub Service
From here you can create, edit and delete sub services. You can create the sub service based on service ticket.
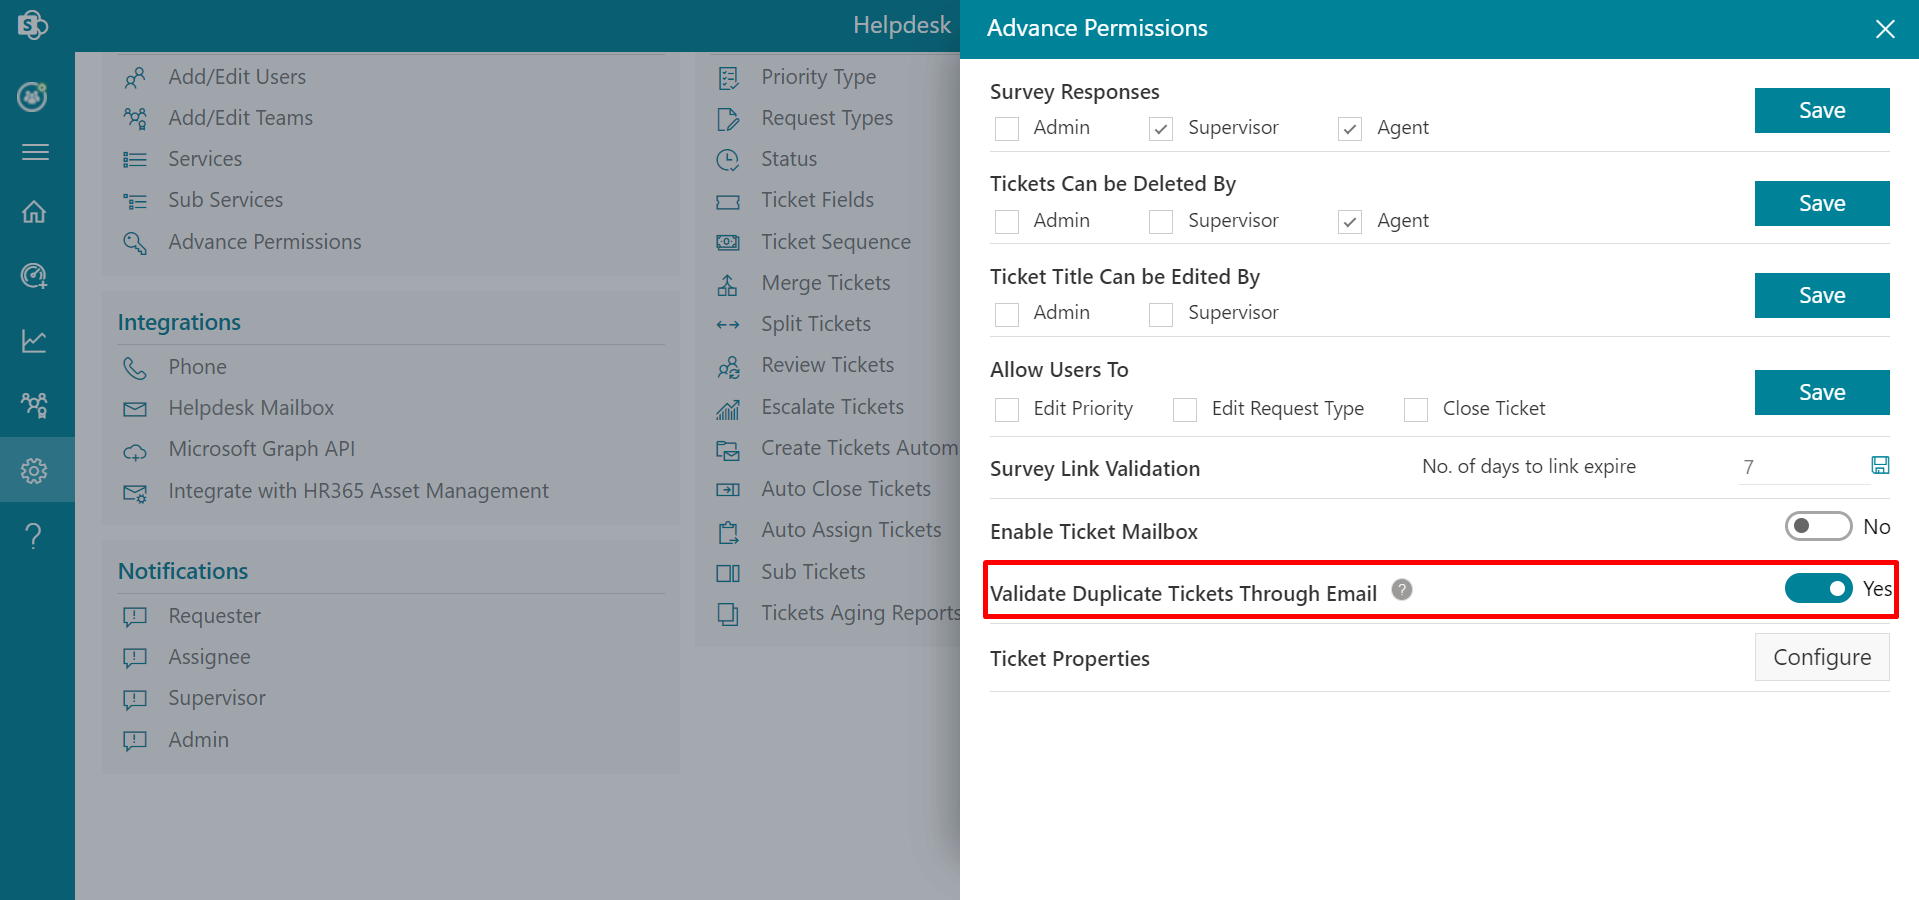
Advance Permissions
From here you can give various permissions to admin, supervisior, agent. You can allow users to edit priority, request type and close ticket.

Validate Duplicate Tickets Through Email
This setting will avoid duplicate ticket creation through email when any user replies to the first email or any thread which doesn't have the ticket number in the subject.
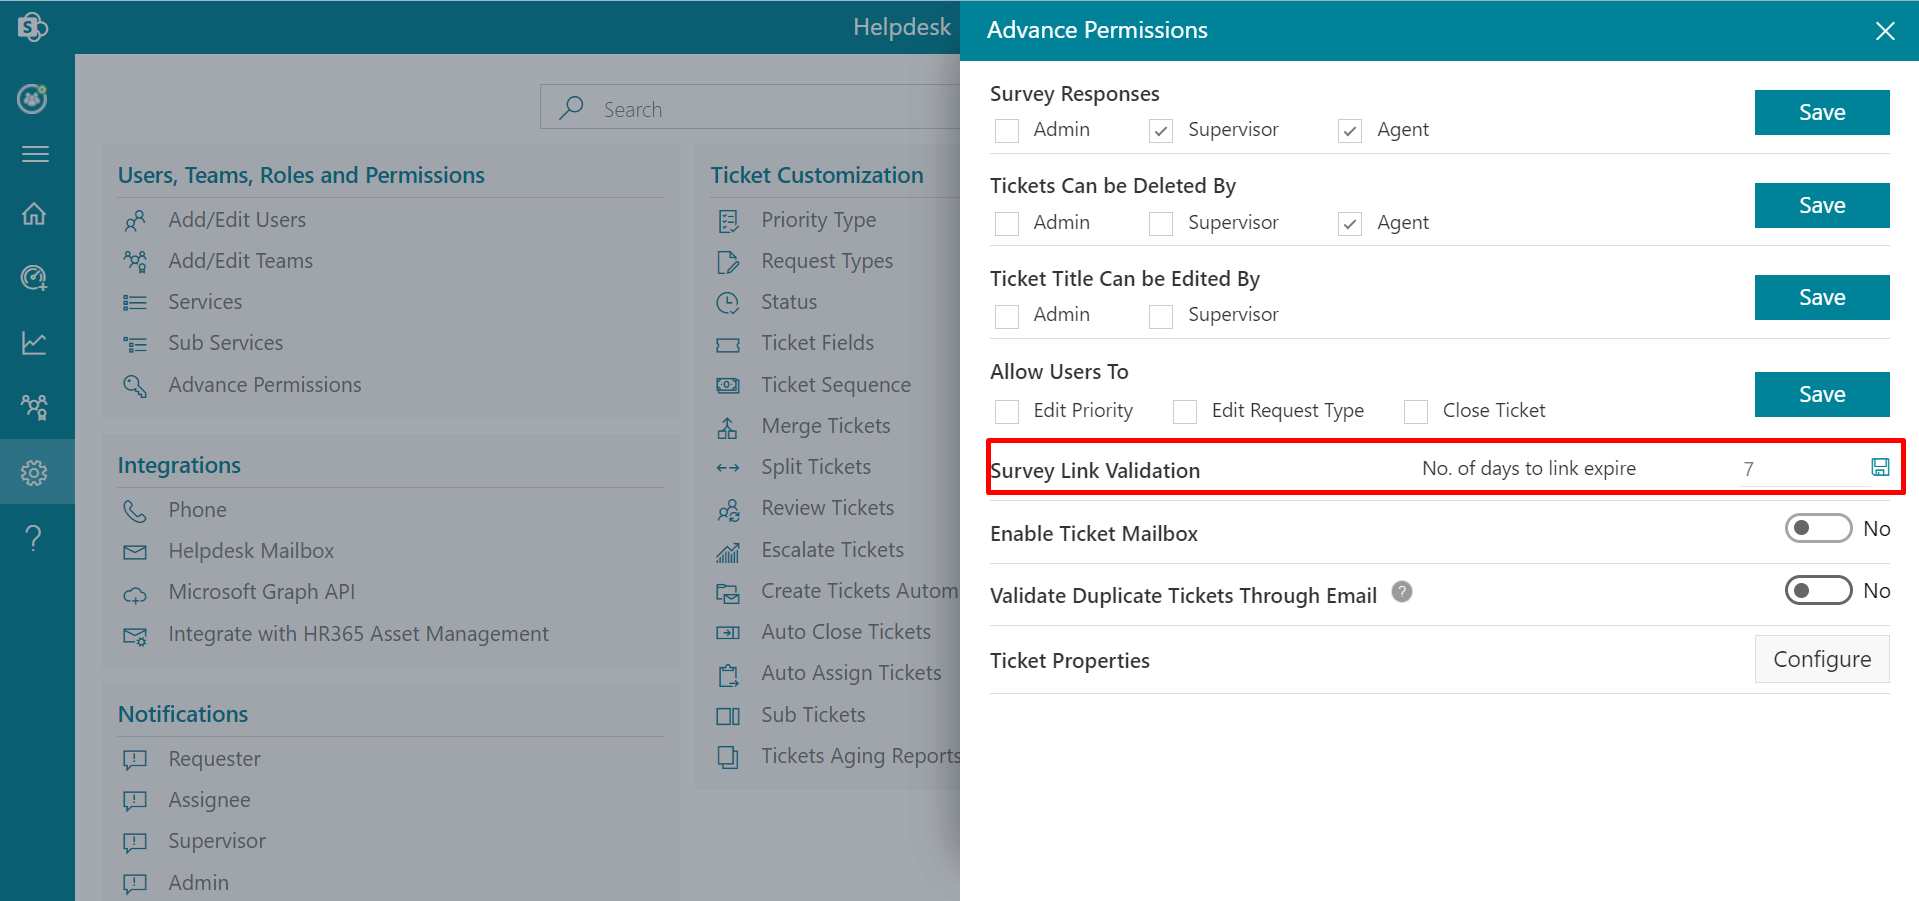
Survey Link Validation
From here you can add the number of the days to the survey link expire.
Enable Ticket Mailbox
From here you can raise the tickets through mail with the help of power automate.
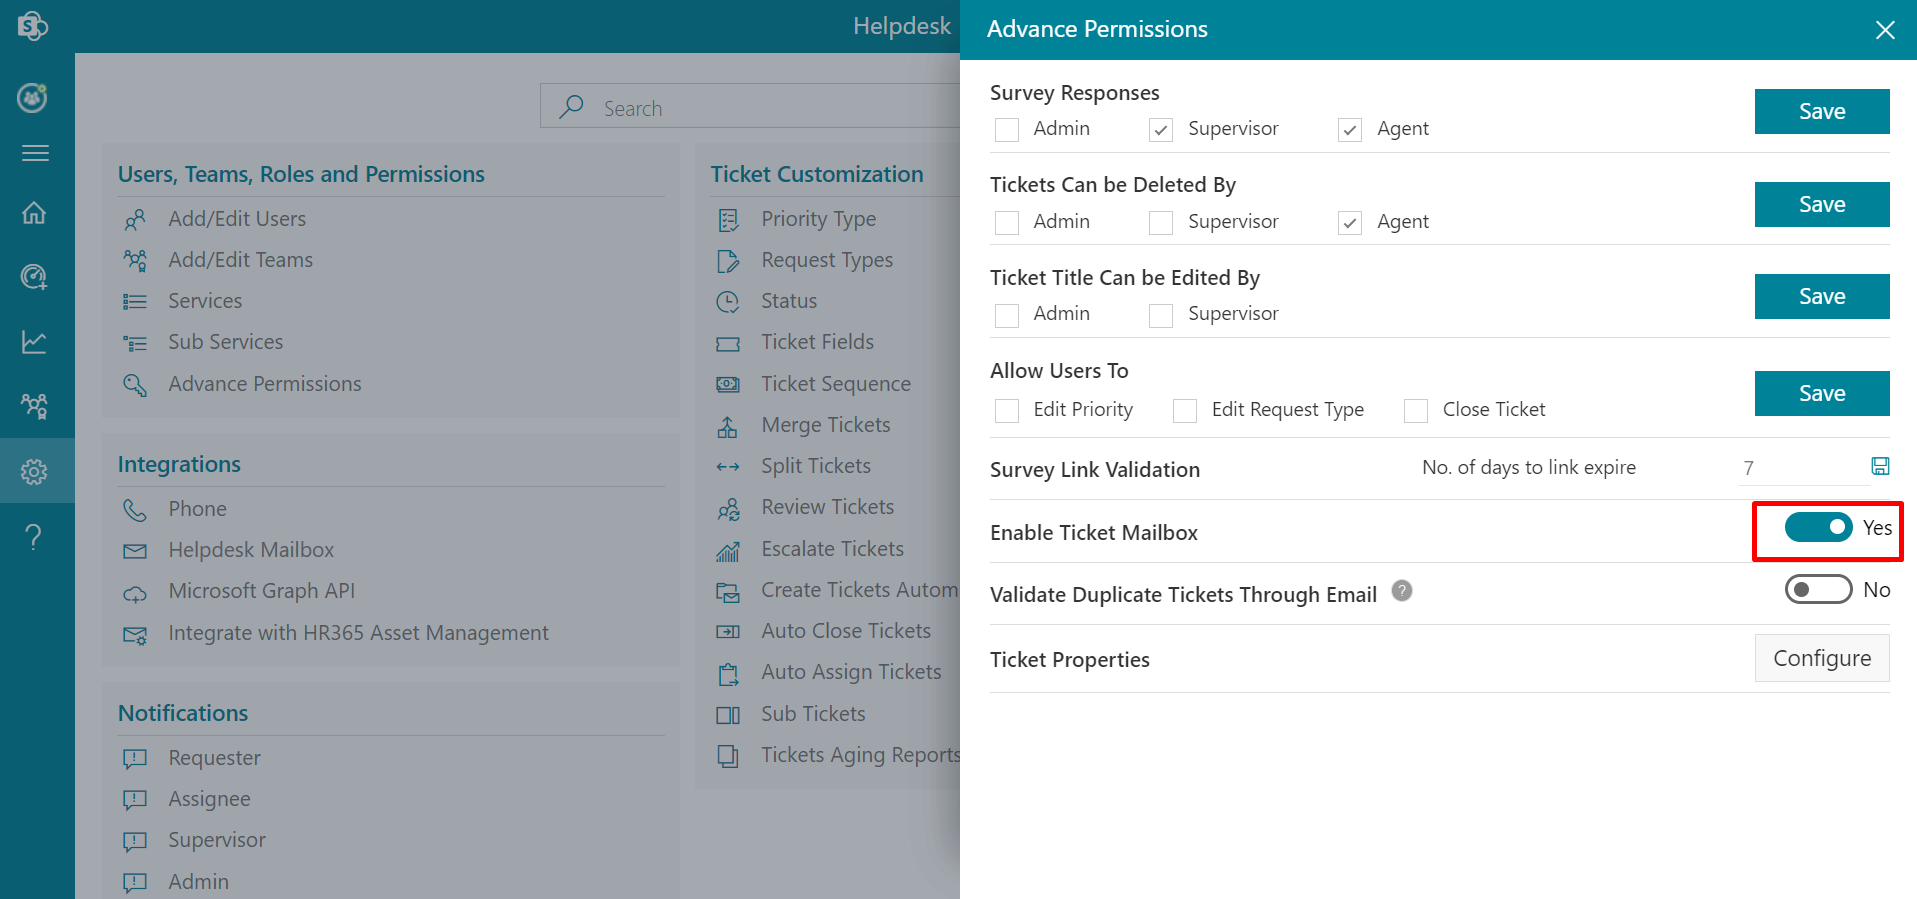
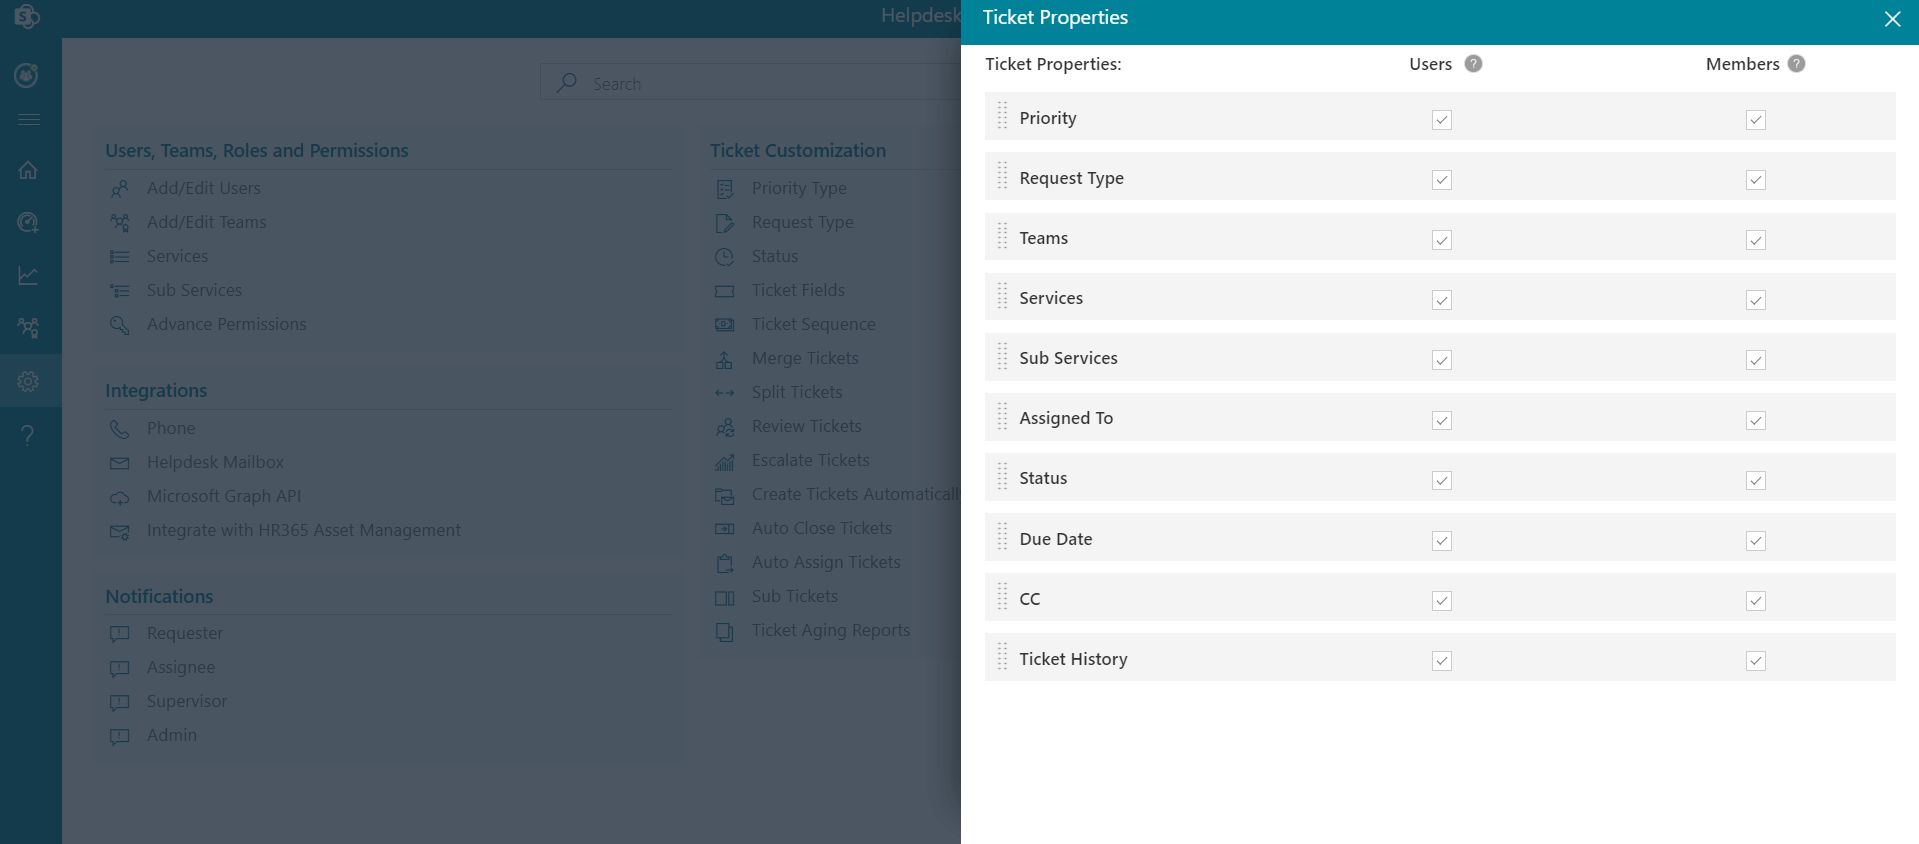
Ticket Properties
From here you can hide or show the ticket fields in ticket form.