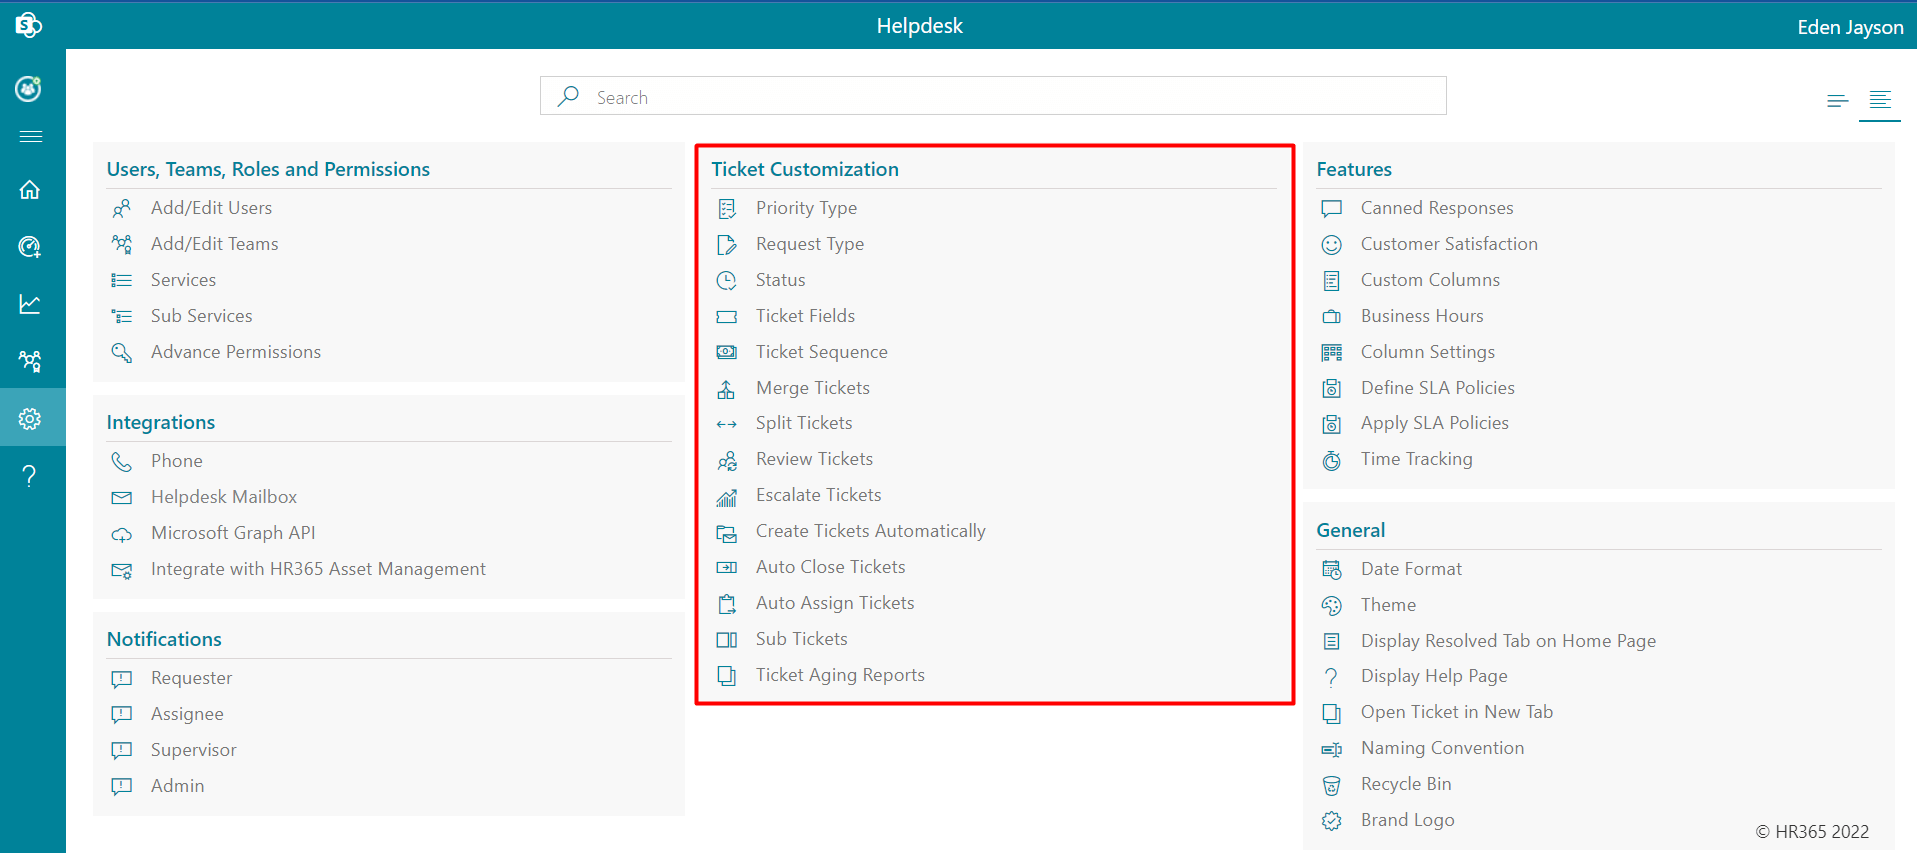
Ticket Customization
From here, you can customize the tickets.
-
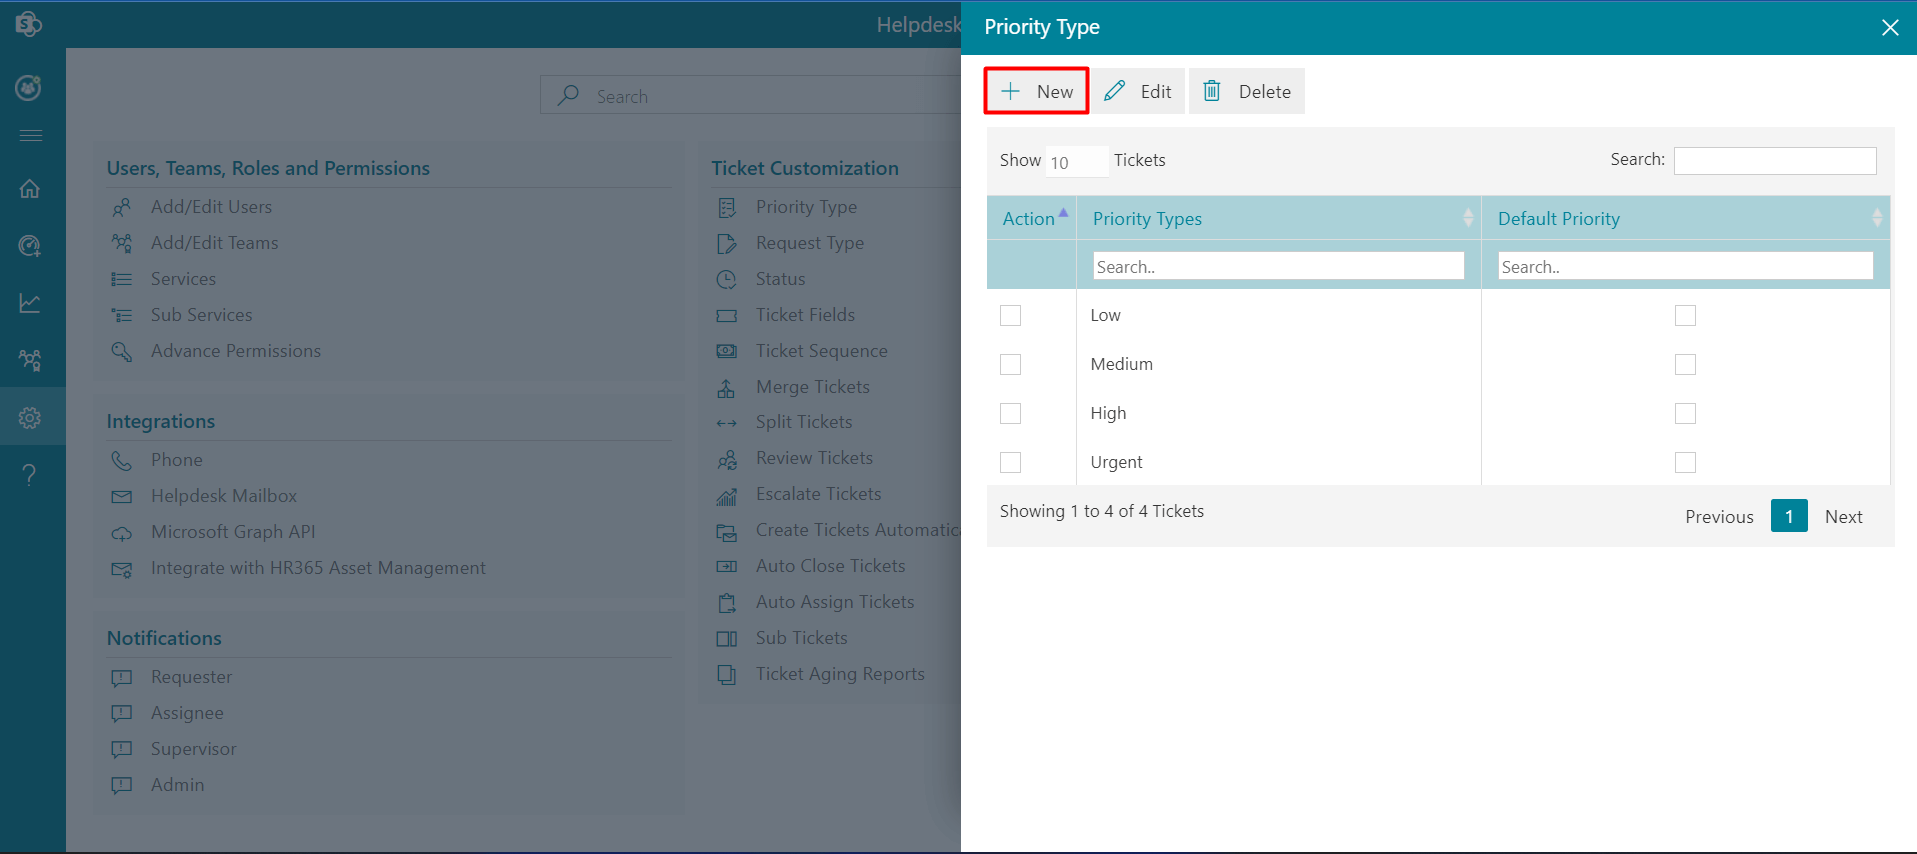
Click on +New, this displays Add Priority page.
-
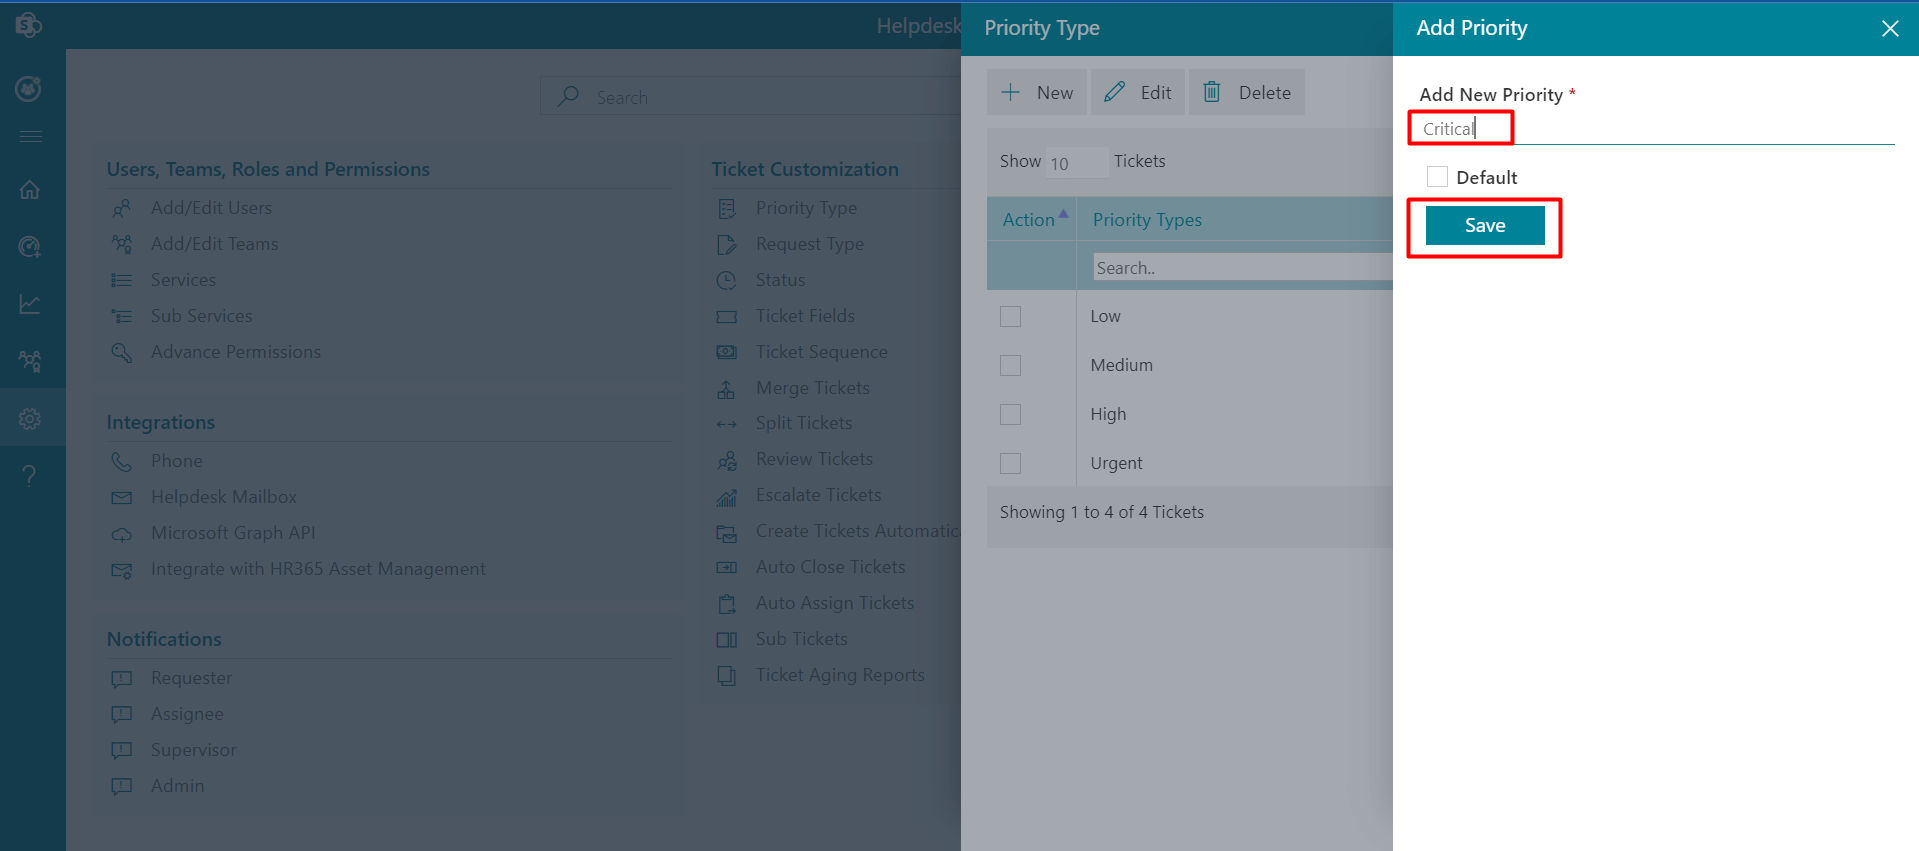
Enter Add New Priority and click on Submit button.
Priority Type
From here you can add, edit or delete the priority types. These priorities are displayed in the new request panel from where the requester can select the priorities for their ticket.
To create priority type, follow the below steps:
Delete: Click the delete icon, this displays a dialog box. Click Yes button.
Edit: You can edit the Edit Request Type. Click the edit icon, this displays Edit Request Type. Update the Edit Request Type and click on Submit button.
-
Click on +New, this displays Add Request Type page.

-
Enter Add Request Type and click on Submit button.

Request Type
Admin can add request types from settings such request type will display in new ticket panel.
To create request type, follow the below steps:
Delete: Click the delete icon, this displays a dialog box. Click Yes button.
Edit: You can edit Edit Request Type. Click the edit icon, this displays Edit Request Type. Update the Edit Request Type and click on Submit button.

-
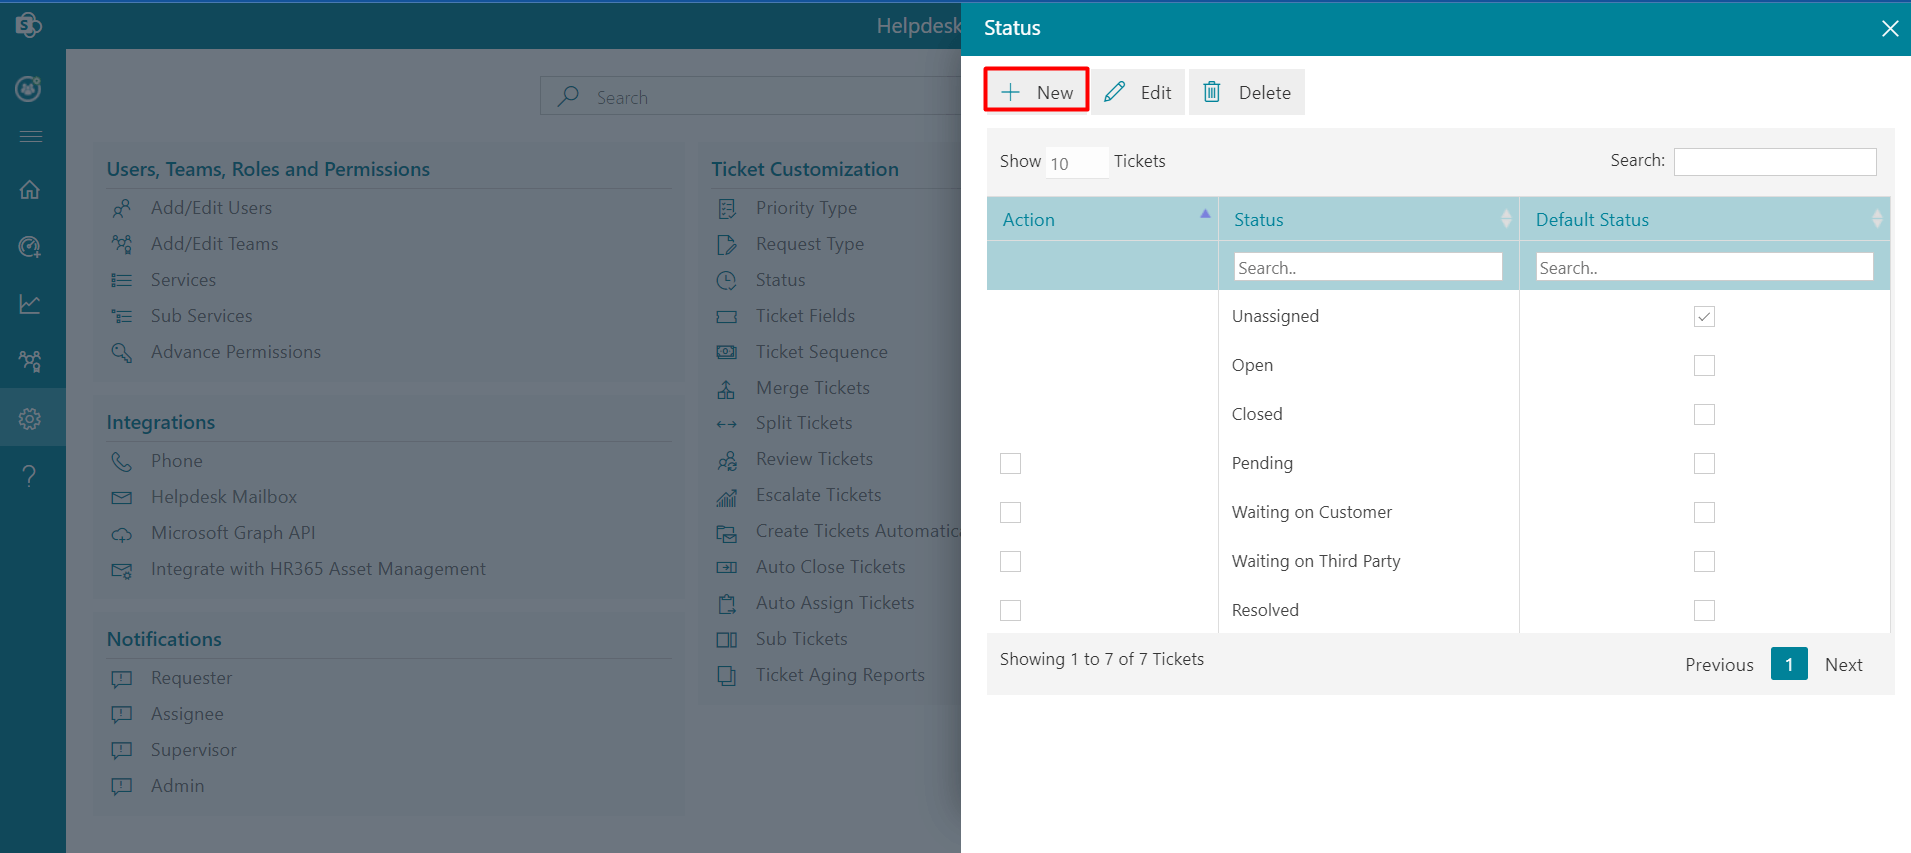
Click on +New, this displays Add Status page.
-
For adding multiple statuses, enter the status title and click on the Save and Add button.
-
Enter Status Title and click on Submit button.
Status
From here admin can add, edit or delete the status. This status displays on the home page from where requester can view the status for their ticket.
To create status, follow the below steps:
Delete: Click the delete icon, this displays a dialog box. Click Yes button.
Edit: You can edit Edit Status. Click the edit icon, this displays Edit Status. Update the Edit Status Title and click on Submit button.
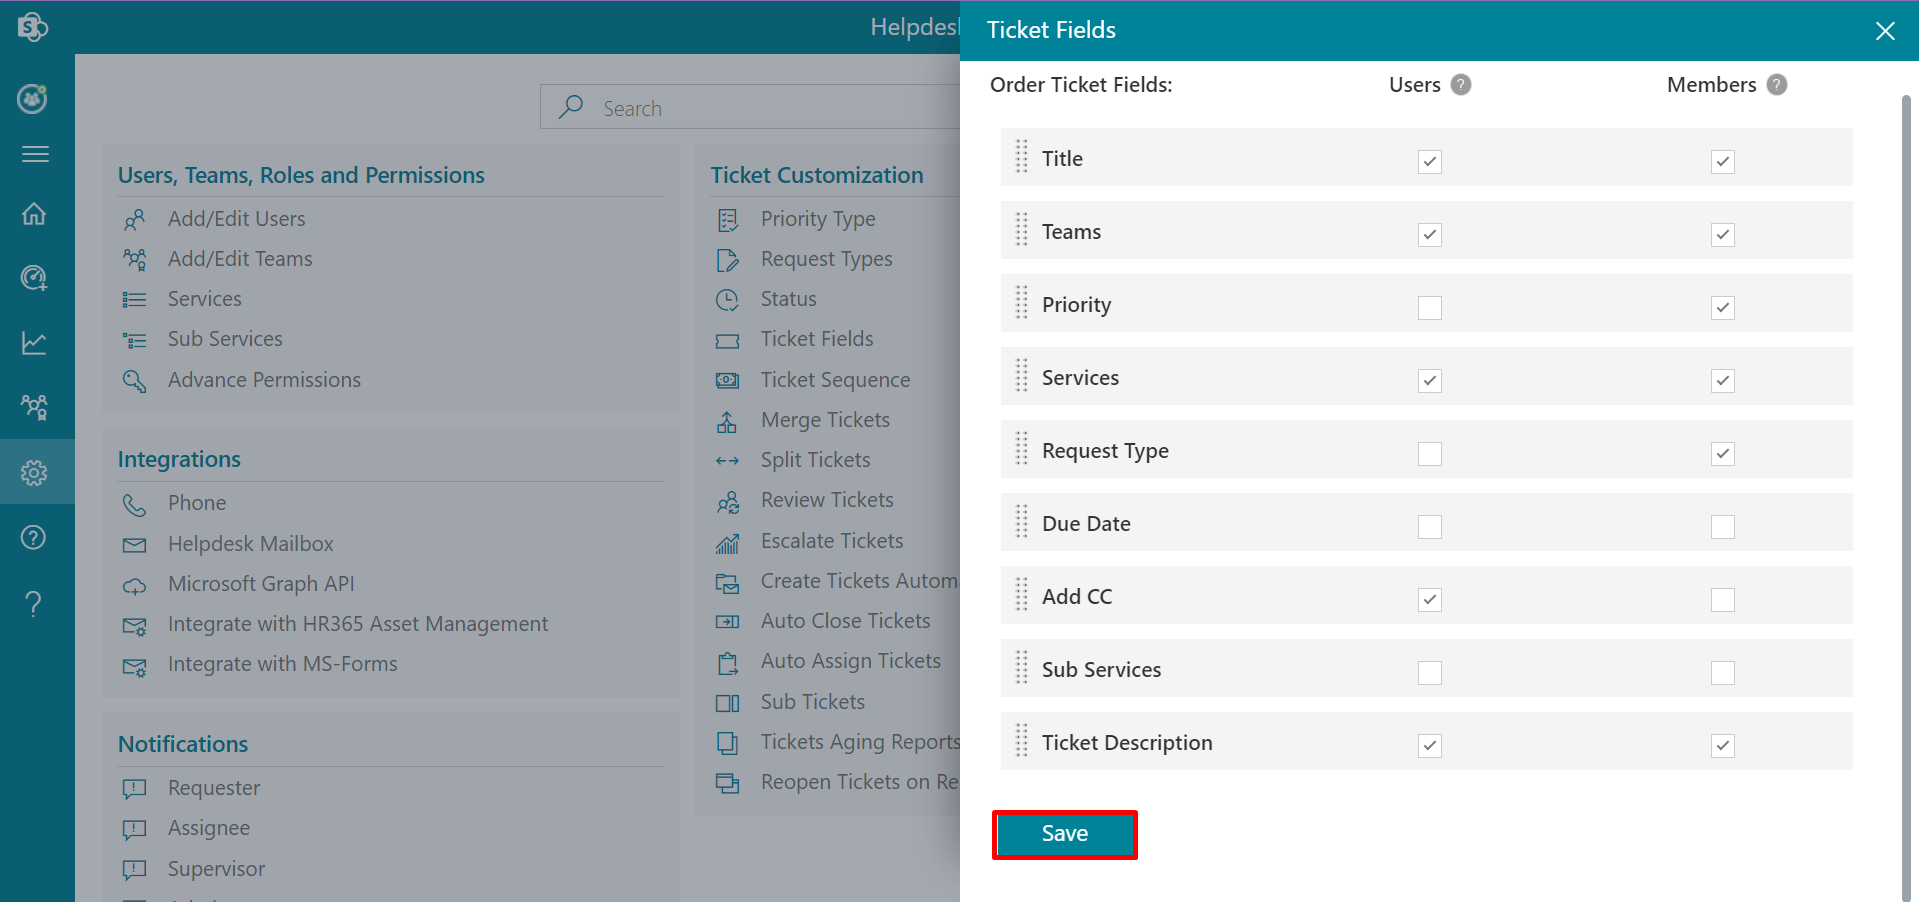
Ticket Field
The new Ticket panel (ticket form) can be controlled from here.
To order the fields simply drag and drop and click on Submit button. To hide the fields, disable the toggles and to show the fields, enable the toggles and finally click on Submit button.
Ticket field settings reflect in ticket form only for the user role person.
Ticket Sequence
From here you can provide Ticket Name and Ticket Prefix.
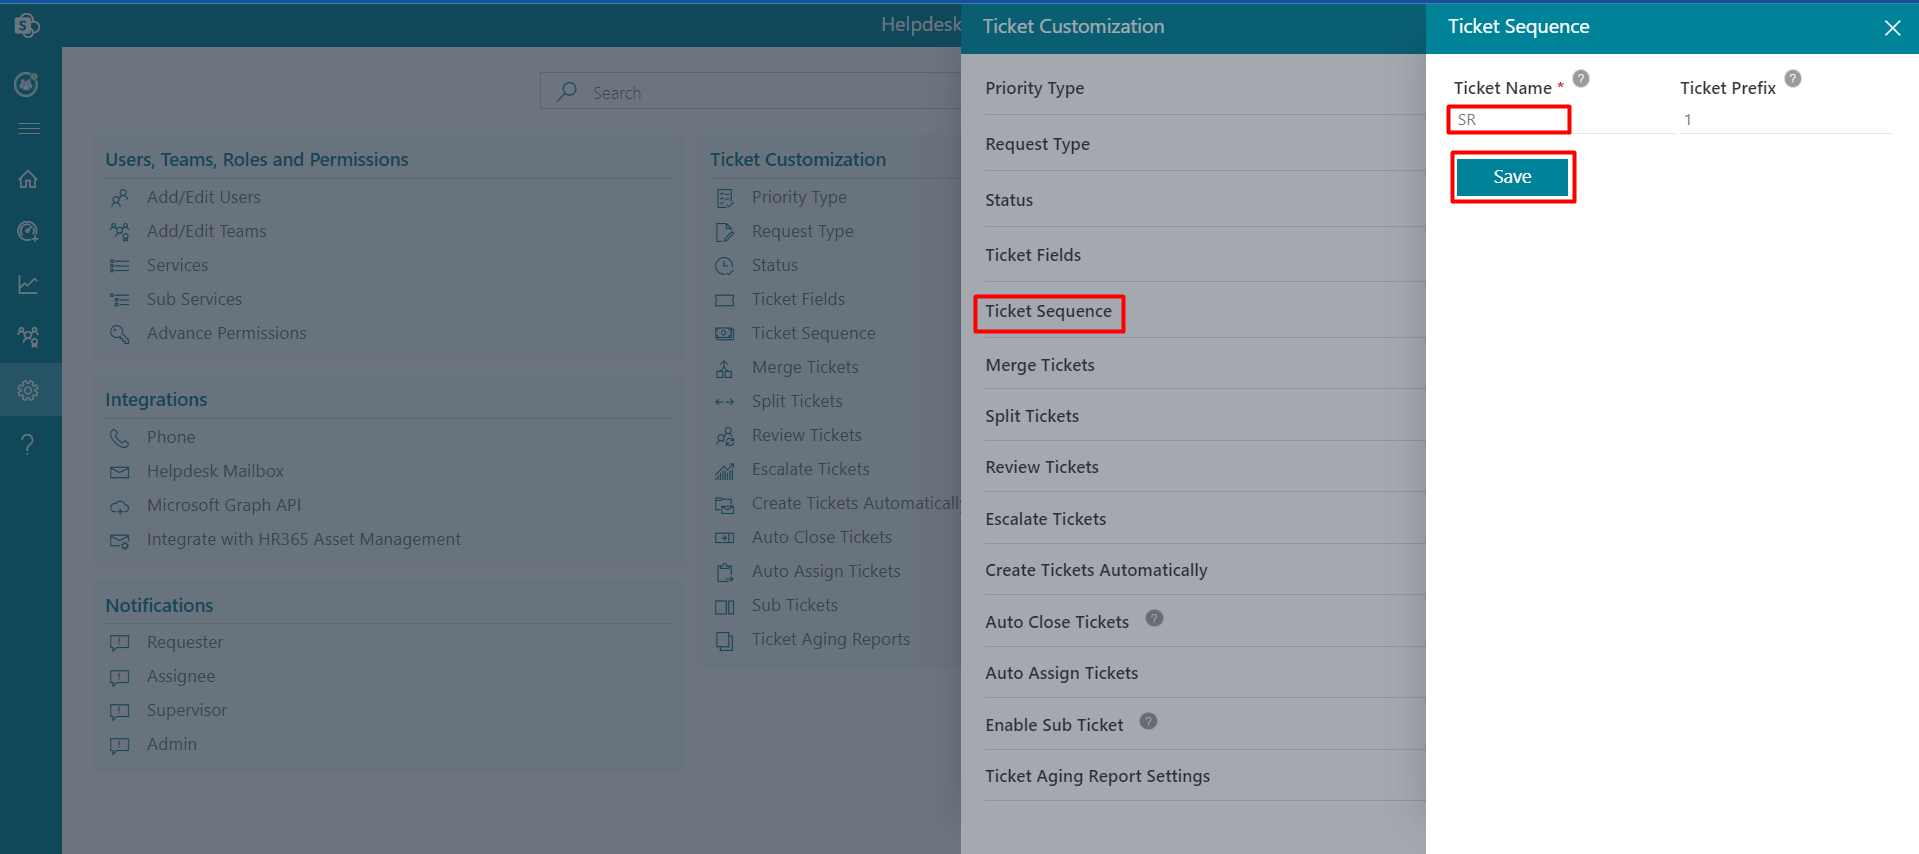
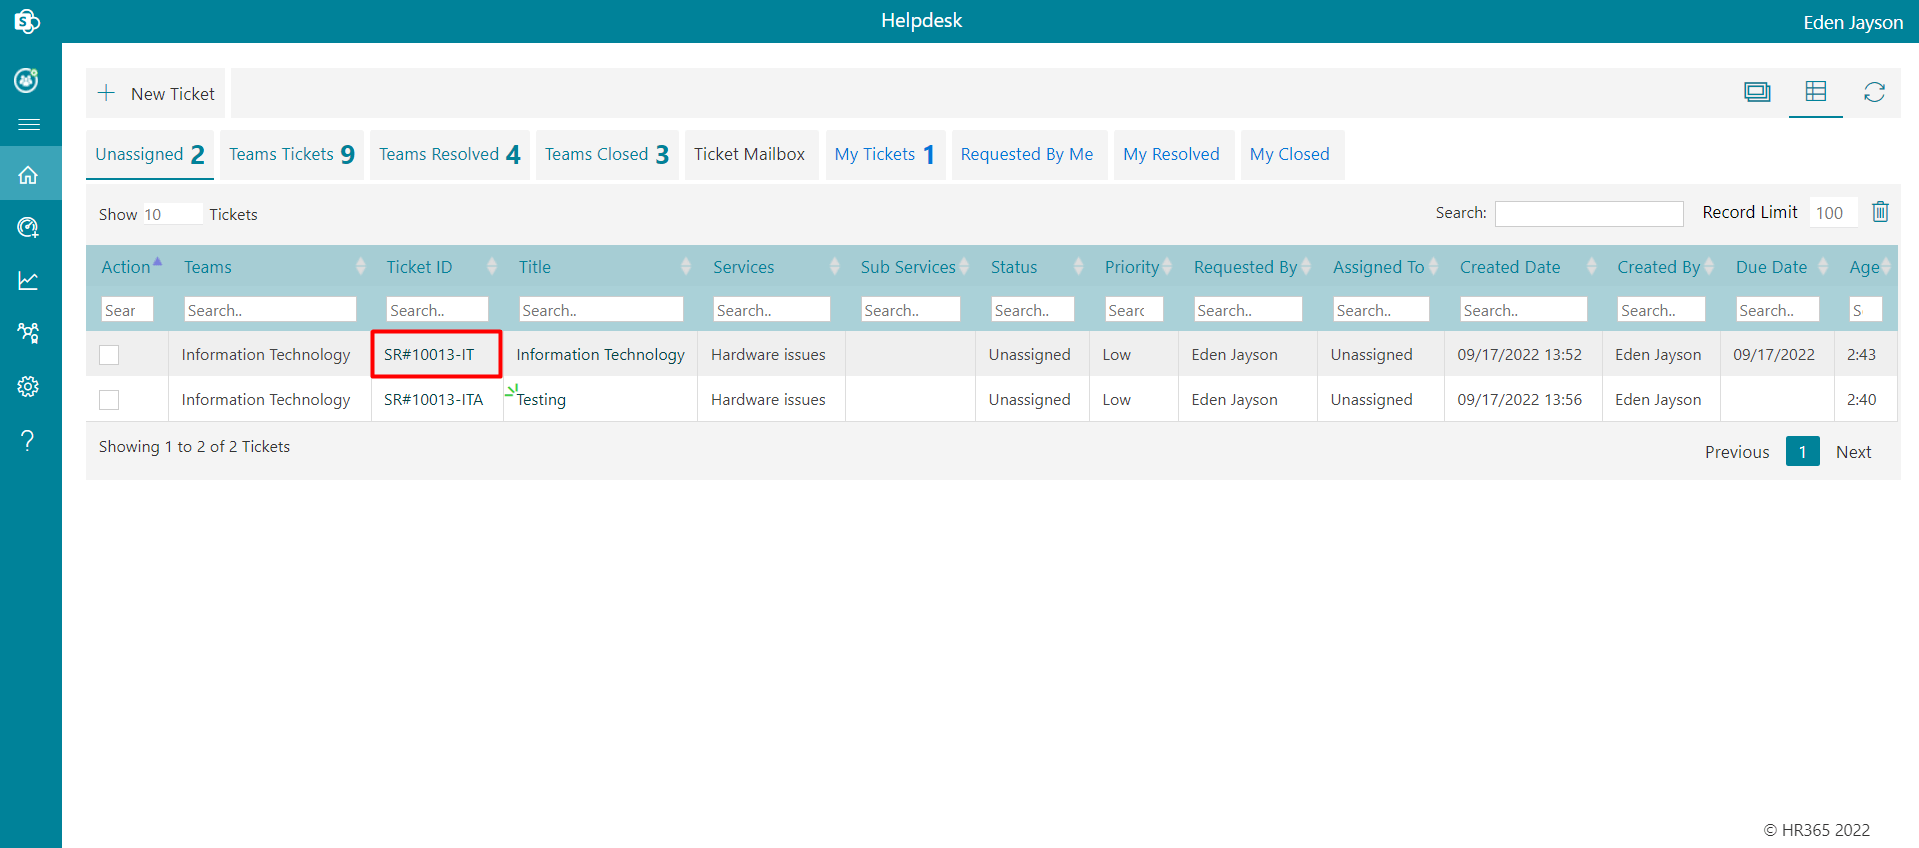
If ticket name is SR and ticket prefix is 1, the ticket ID would be SR#100XXXX.
Note: You can also use teams code as ticket’s suffix, if you enable the toggle switch form custom settings then it will works.
-
Go to home page and click the Ticket ID to open the comment page.
-
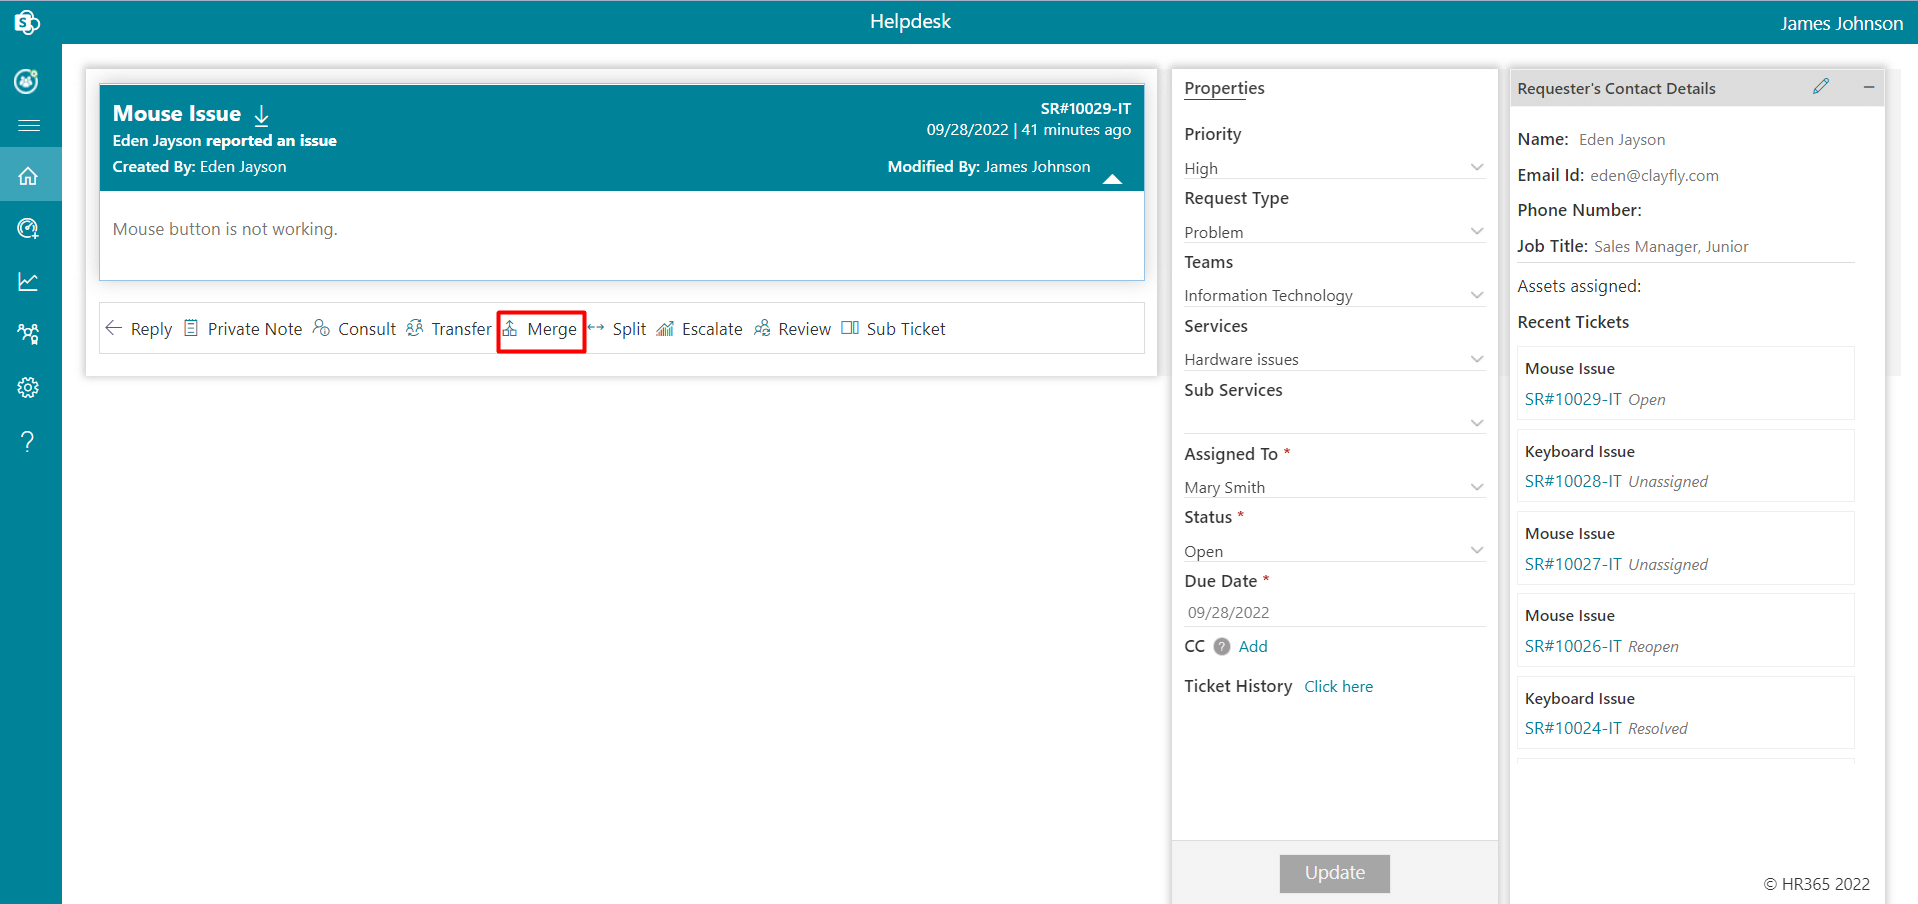
On the comment page, click the Merge button, which displays a pop-up.
-
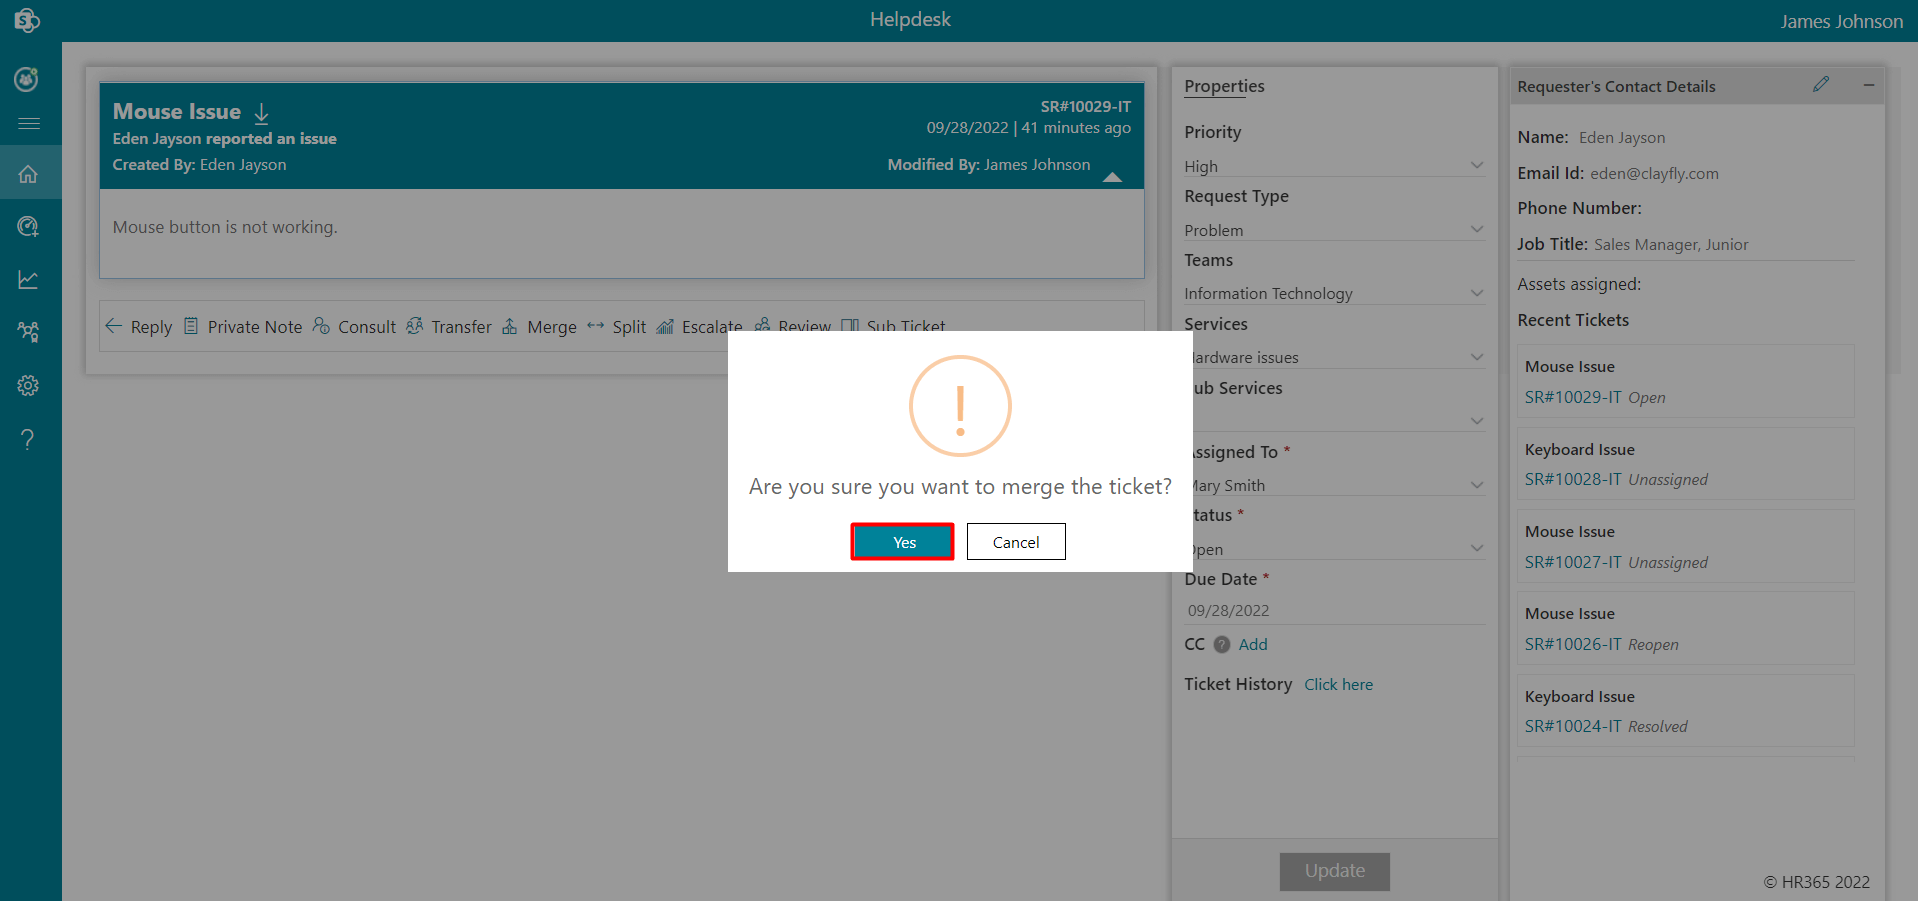
Click the Yes button, which displays merge to pop-up.
-
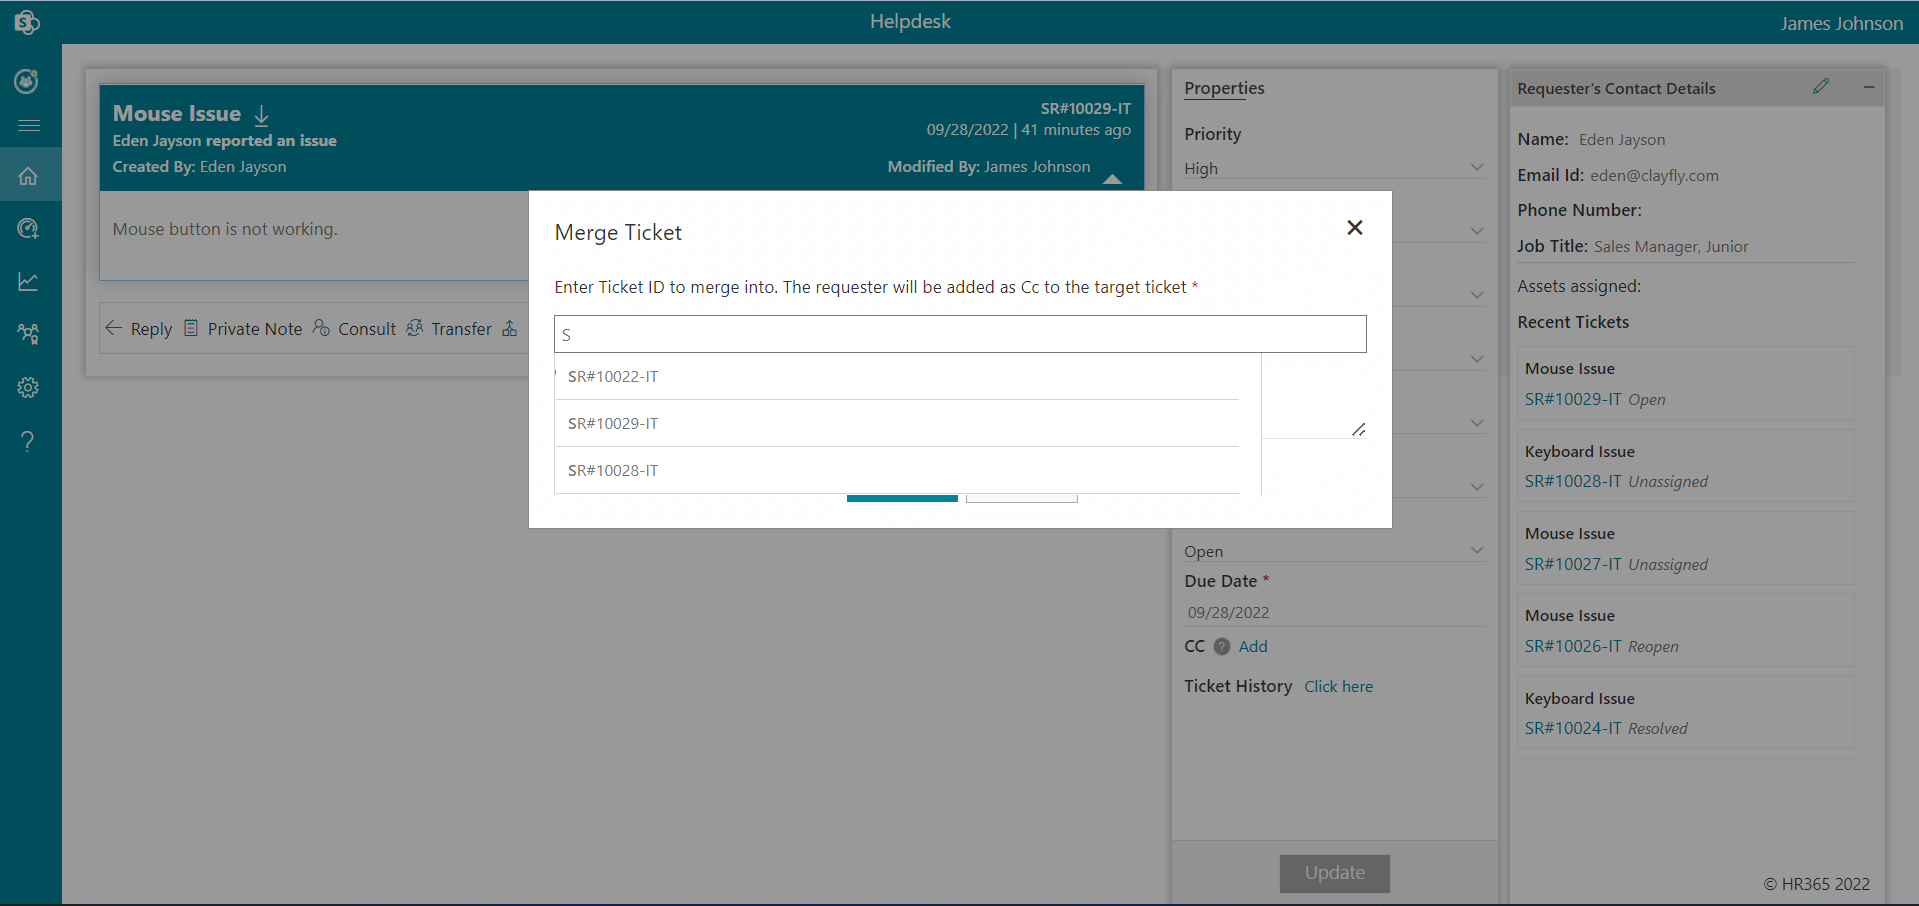
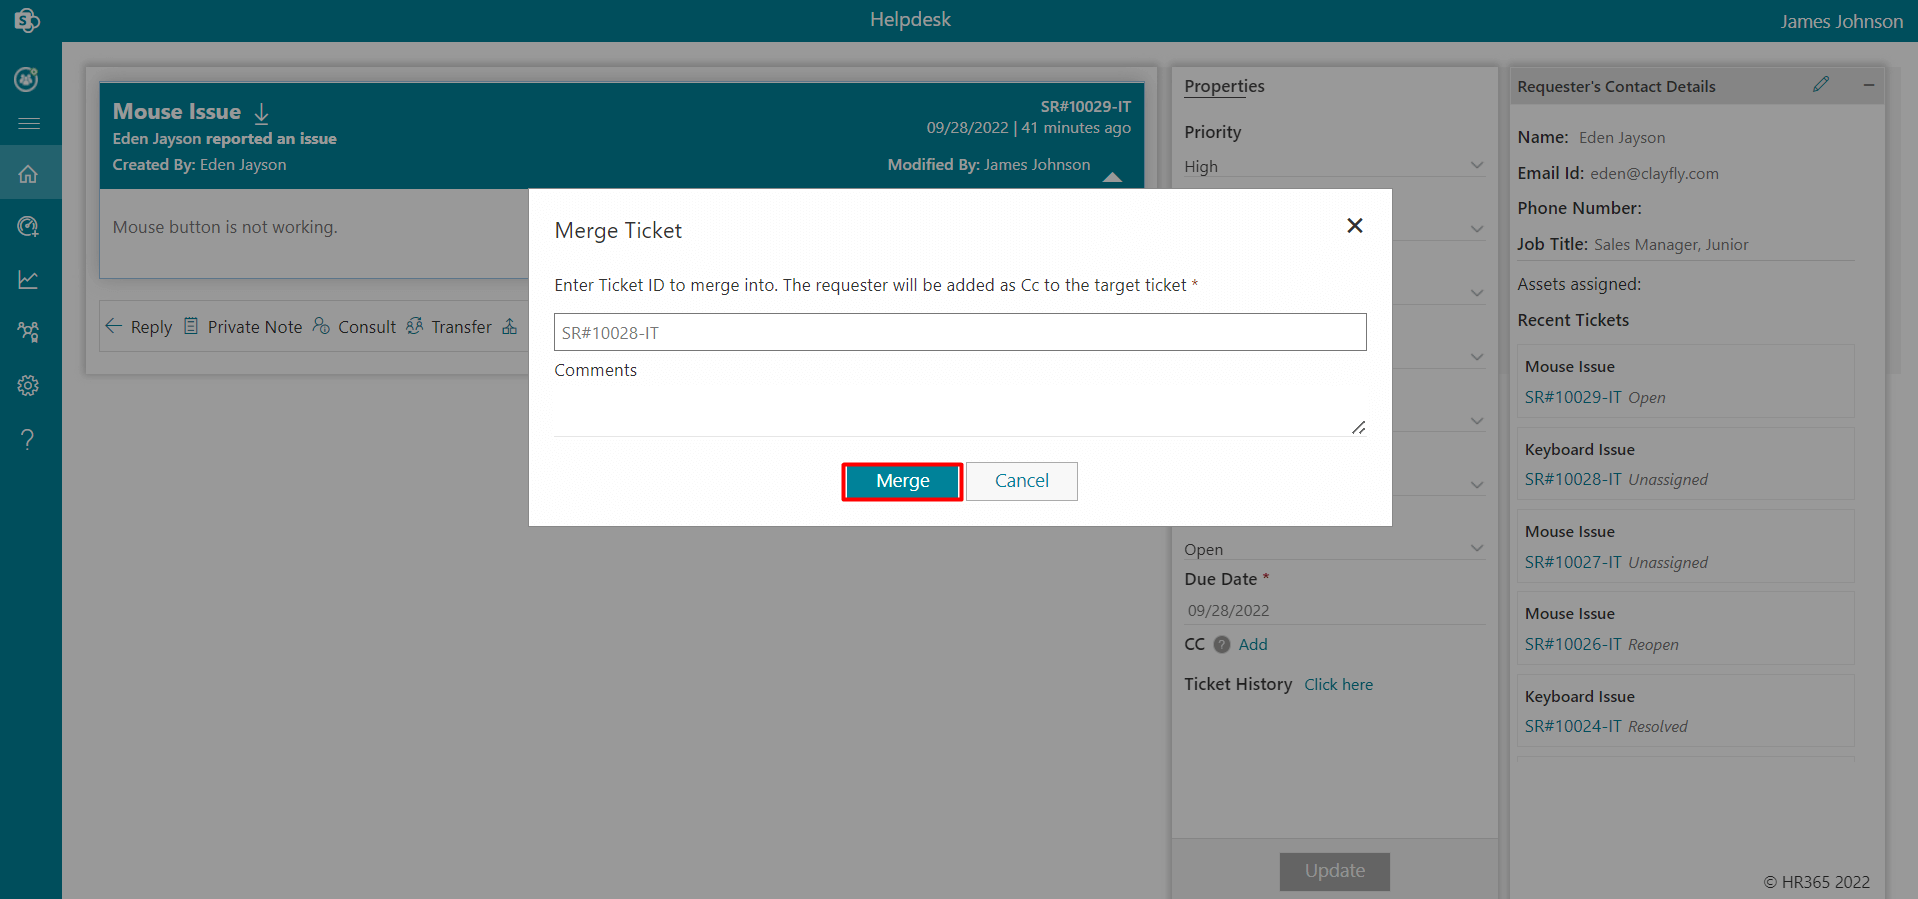
Enter the Ticket ID to merge into.
-
Click the Merge button.
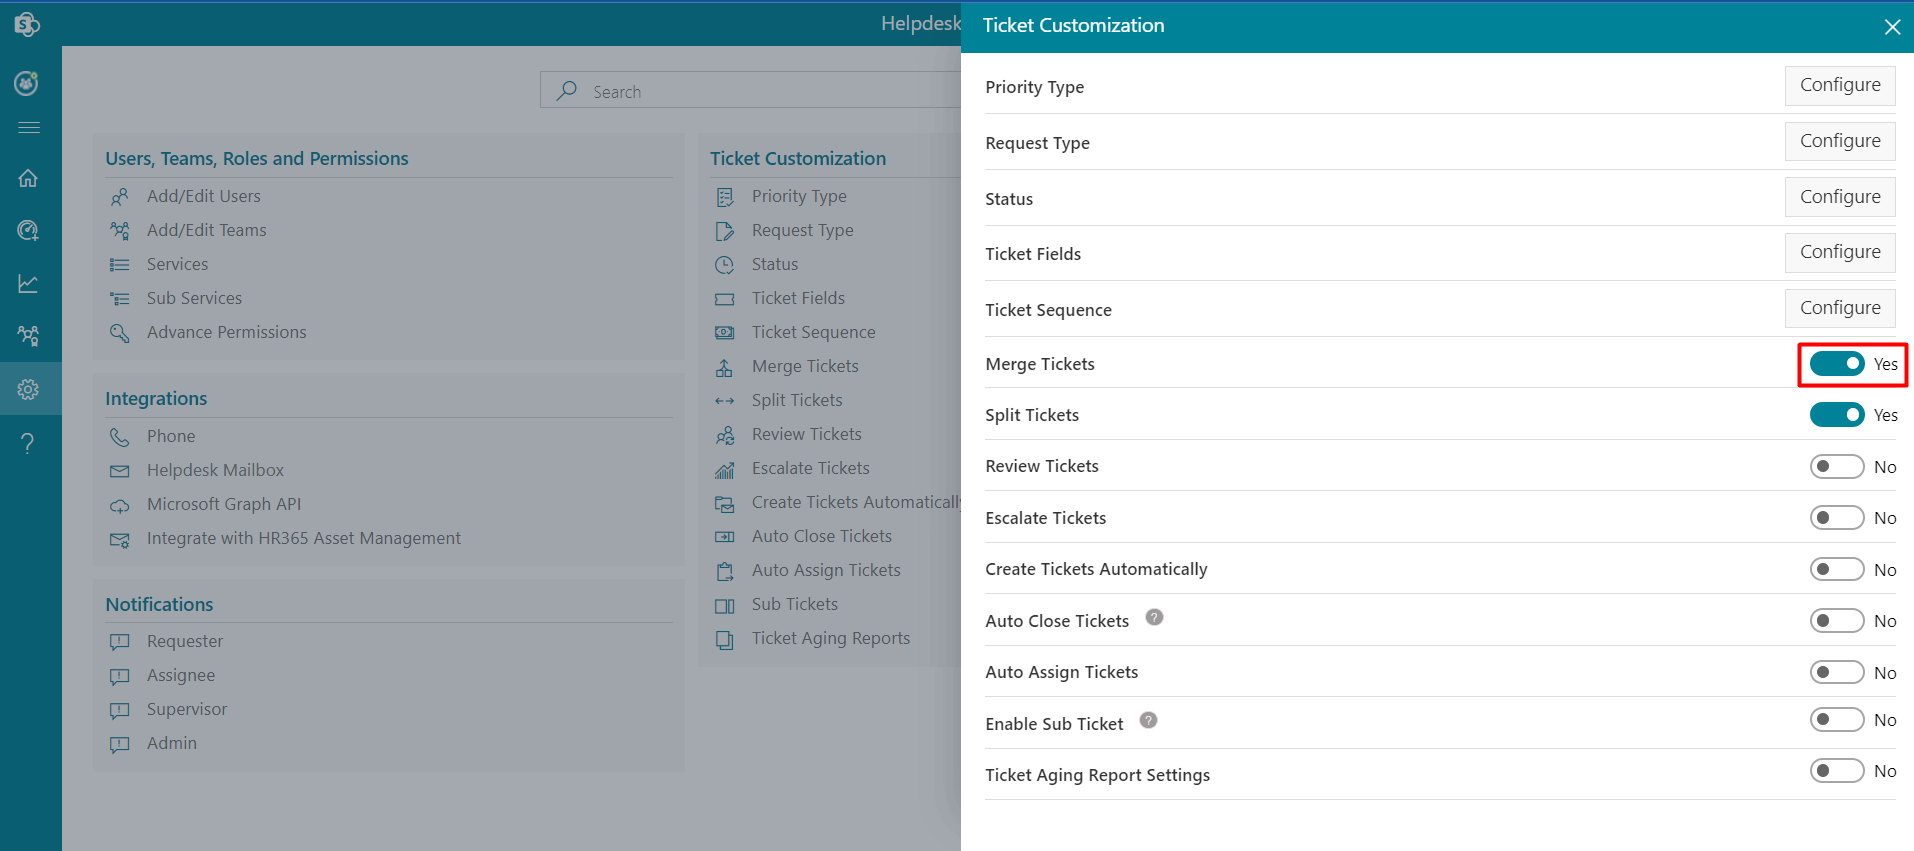
Merge Tickets
Once the admin enables the merge ticket option from the settings, it displays on the ticket comment page from where the admin or ticket assignee can merge the ticket with another ticket using the ticket ID.
The ticket on which you would like to merge with other tickets with ticket ID will get closed and the ticket assigned and ticket requester will get notified about the ticket merge. In this way ticket merging work.
To merge the tickets, follow the steps:
-
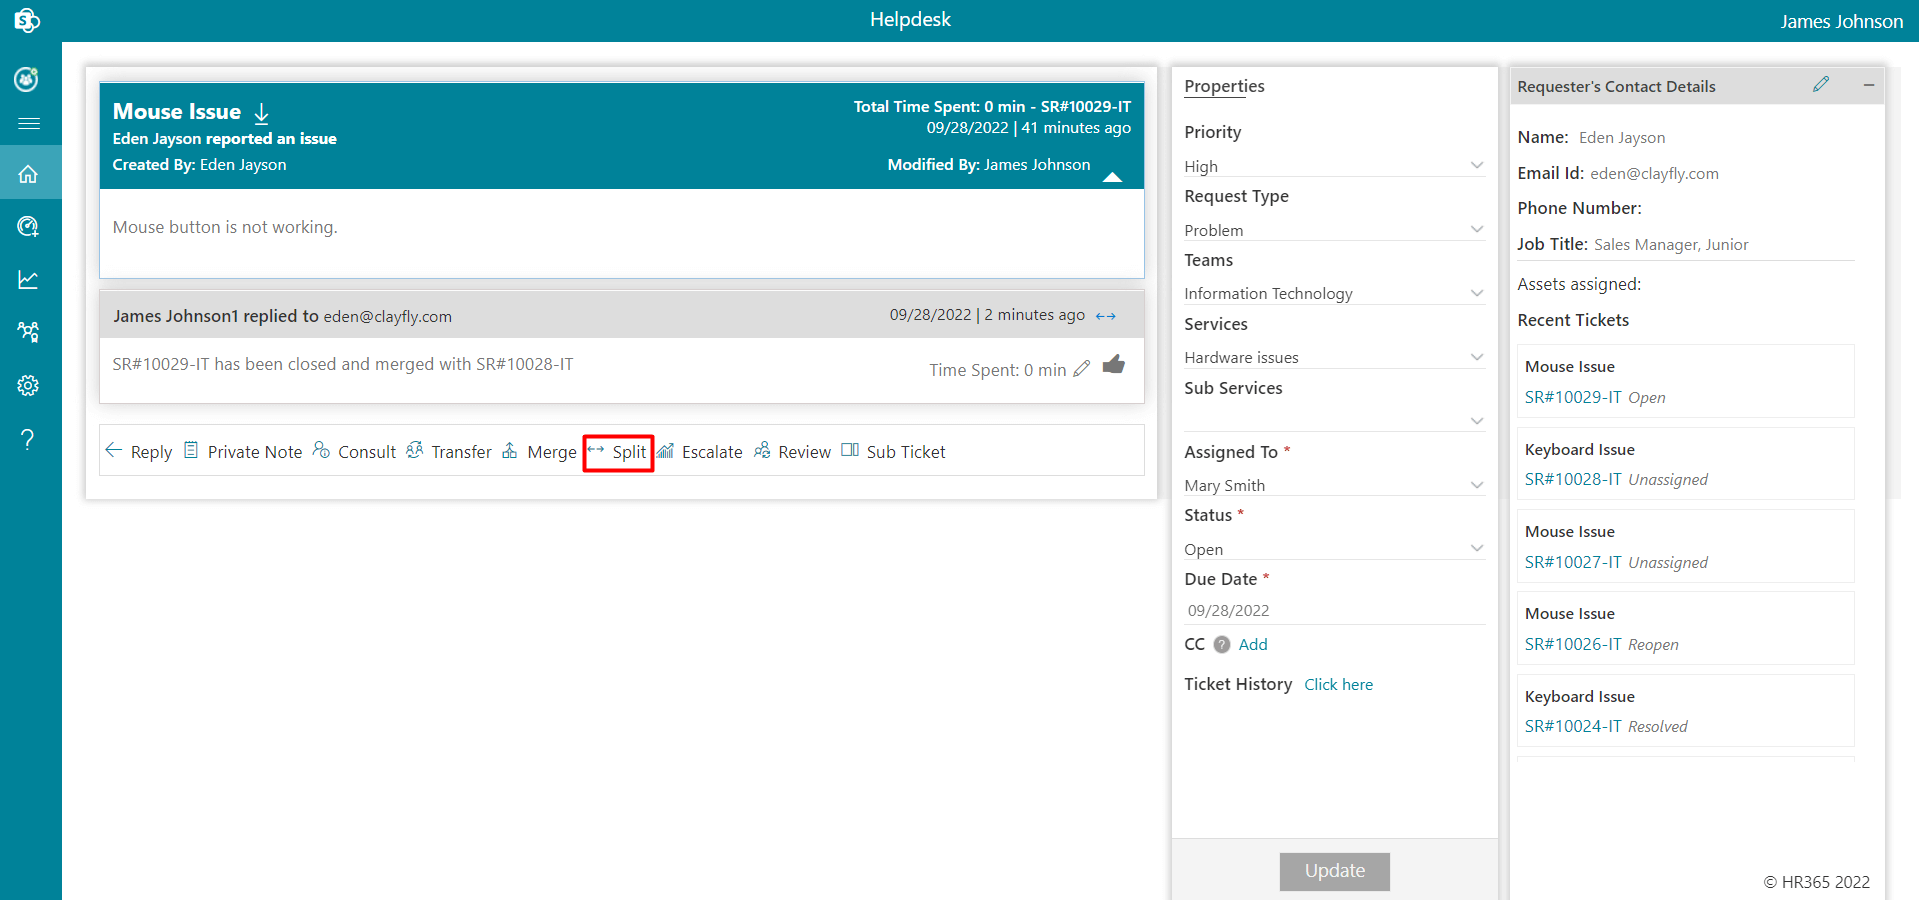
Go to home page and click the Ticket ID to open the comment page.
-
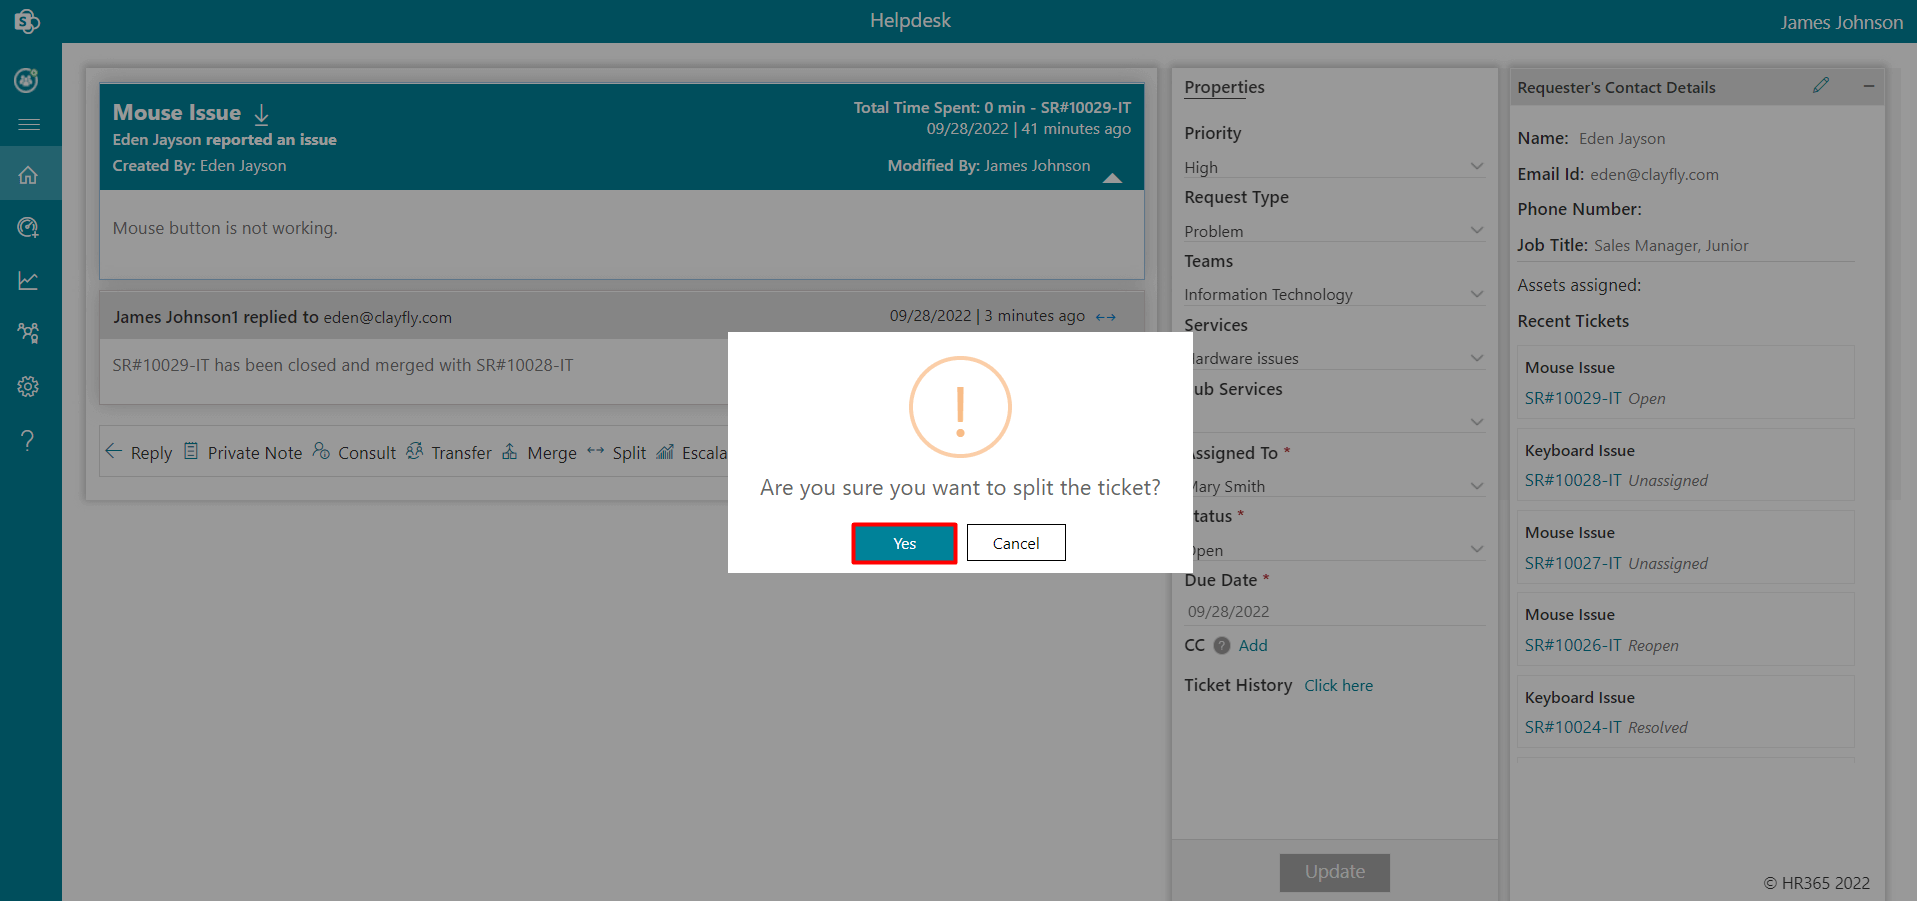
On the comment page, click the Split button, which displays a pop-up.
-
Click the Yes button, which displays Ticket Split to pop-up.
-
Enter New Ticket Title and comments, select Teams and Services to merge into.
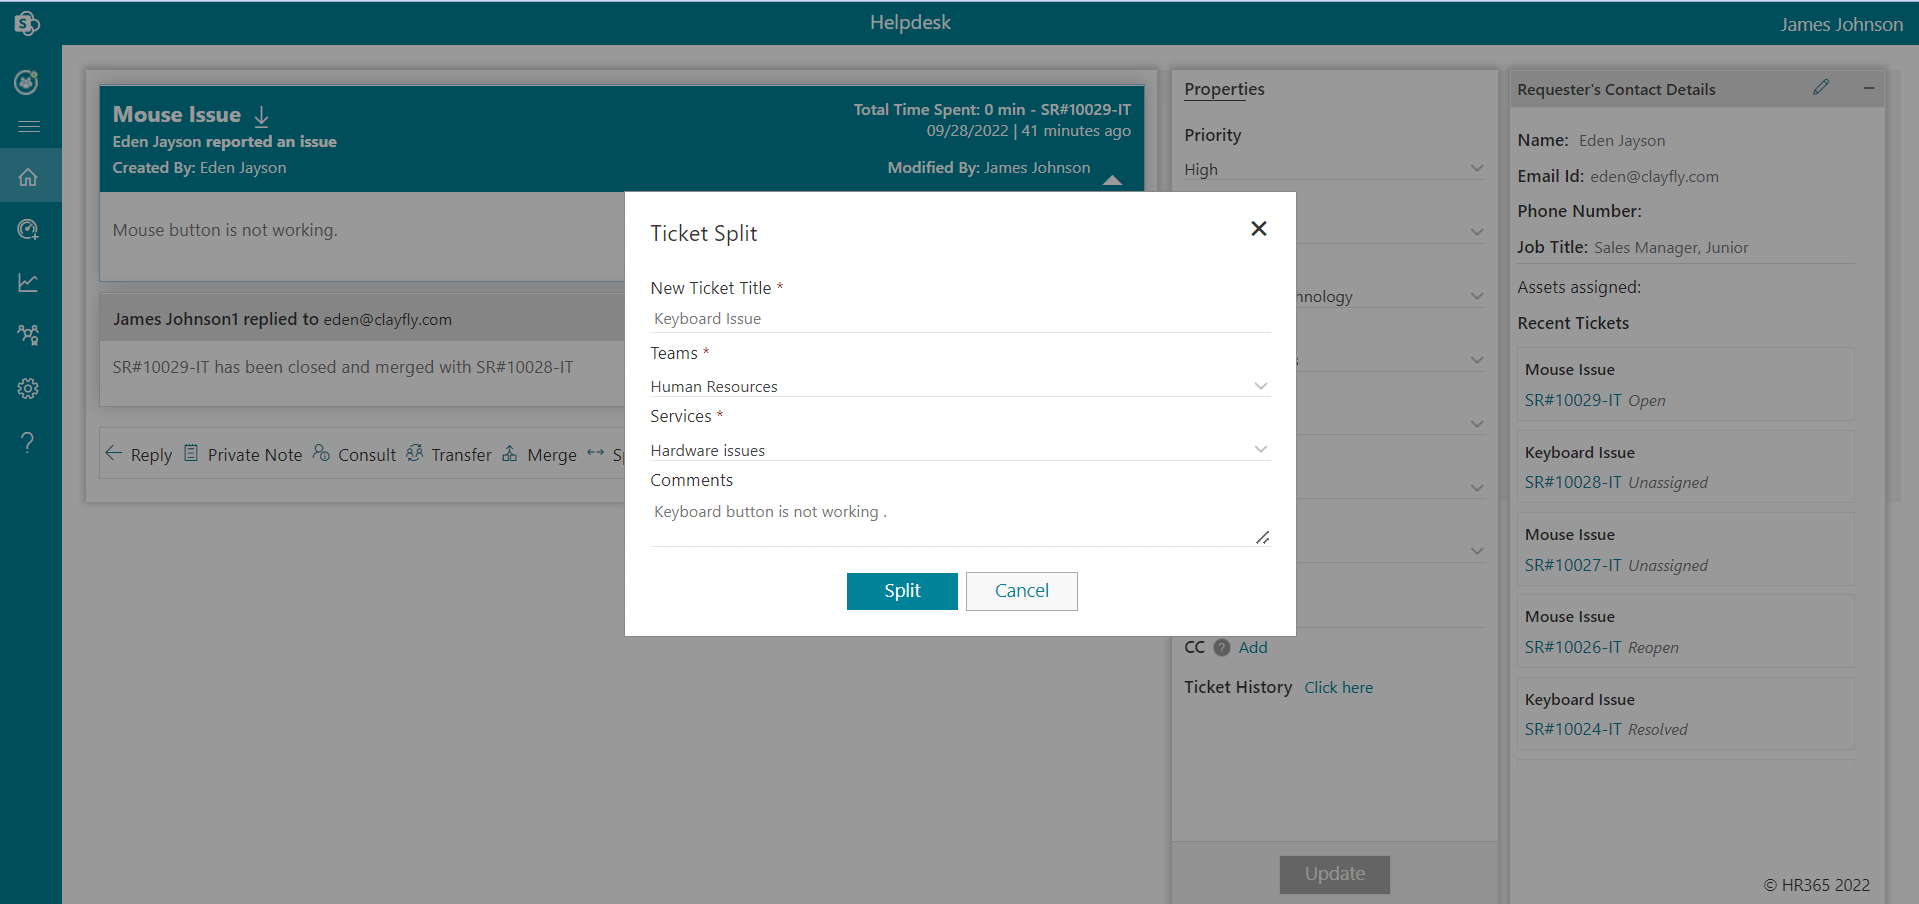
-
Click the Split button.
Split Tickets
Admin can enable the toggle switch for split tickets.
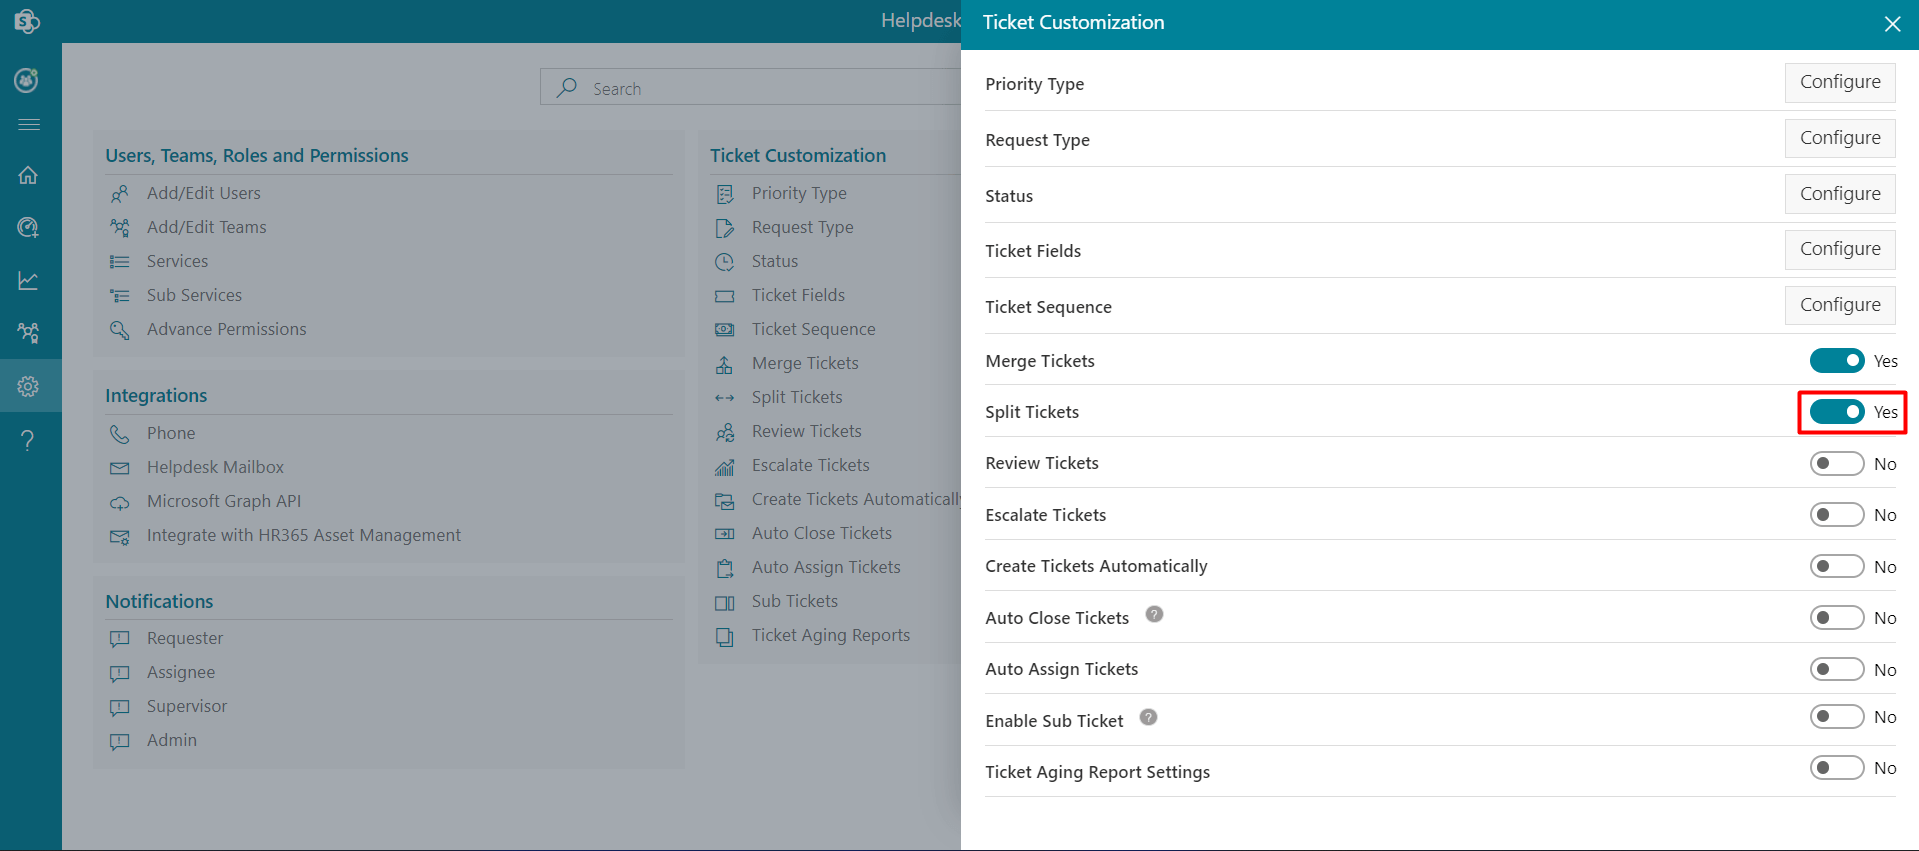
To split the ticket, follow the steps:
-
Go to home page and click the Ticket ID to open the comment page.
-
On comment page, click the Review button, this displays comment box to write the comments.

-
Select Teams Members with whom you want the share the review.
-
Click the Review button.
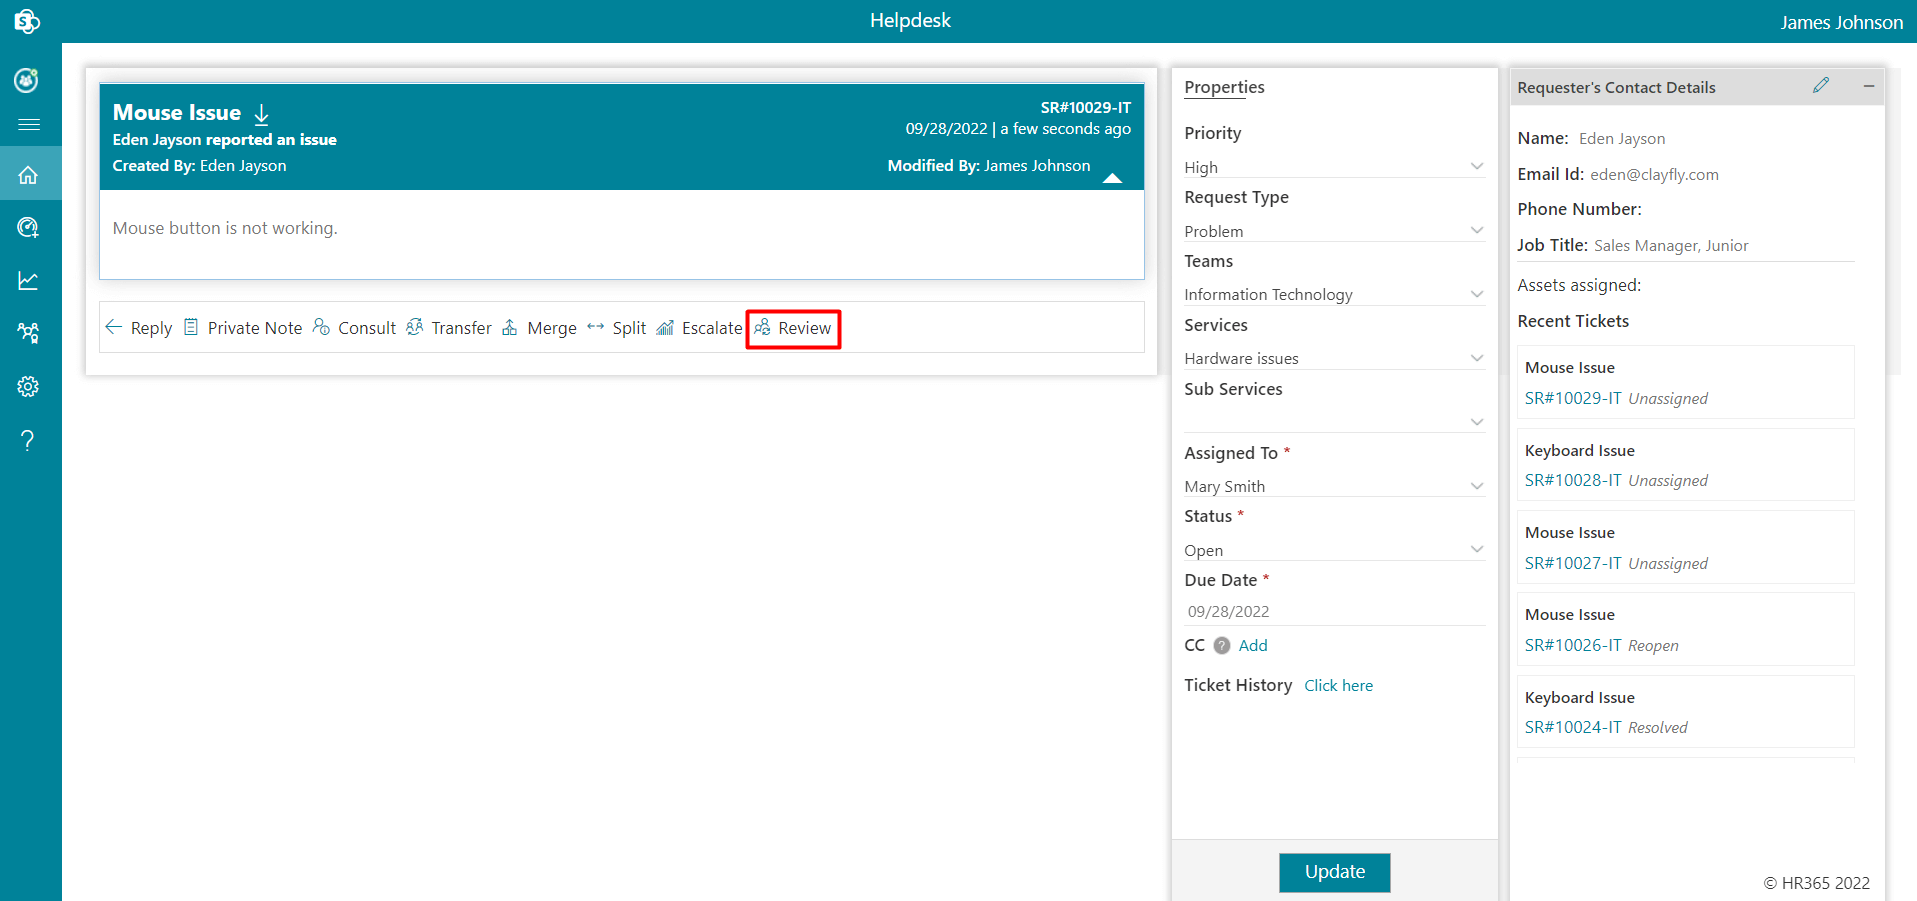
Review Tickets
Admin can enable the toggle switch for review ticket.
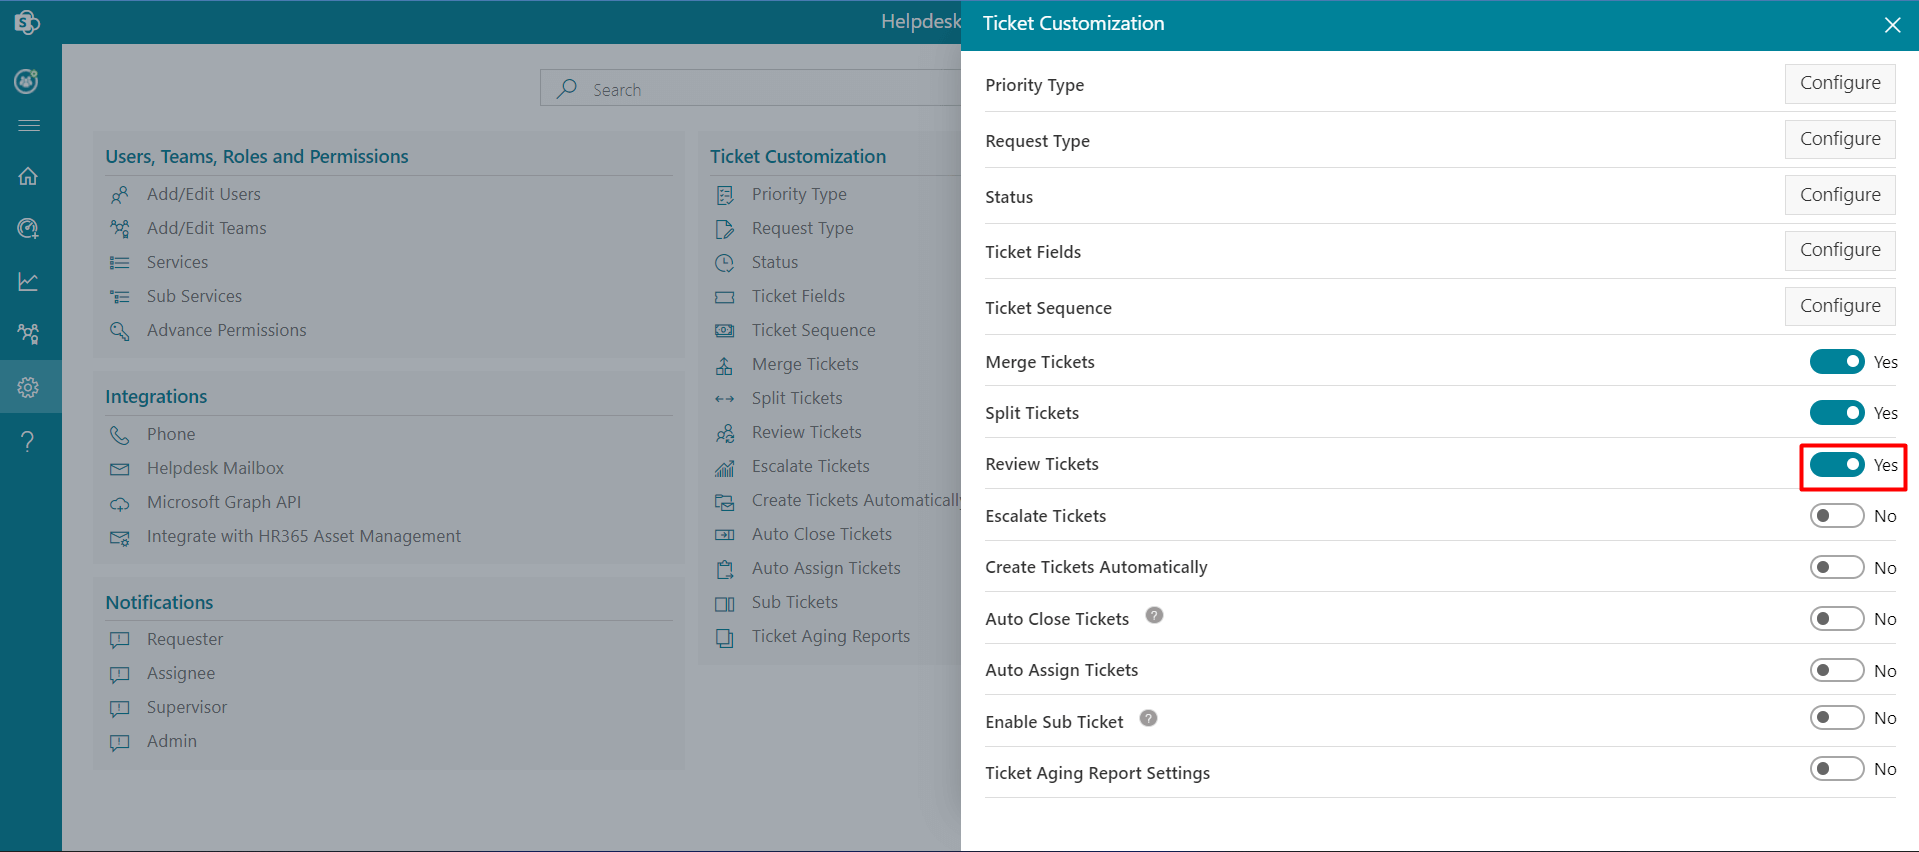
To review the tickets, follow the steps:
-
Go to home page and click the Ticket ID to open the comment page.
-
On comment page, click the Escalate button, this displays comment box to write the comments.
-
Select Escalation Teams and Escalation Teams Members.
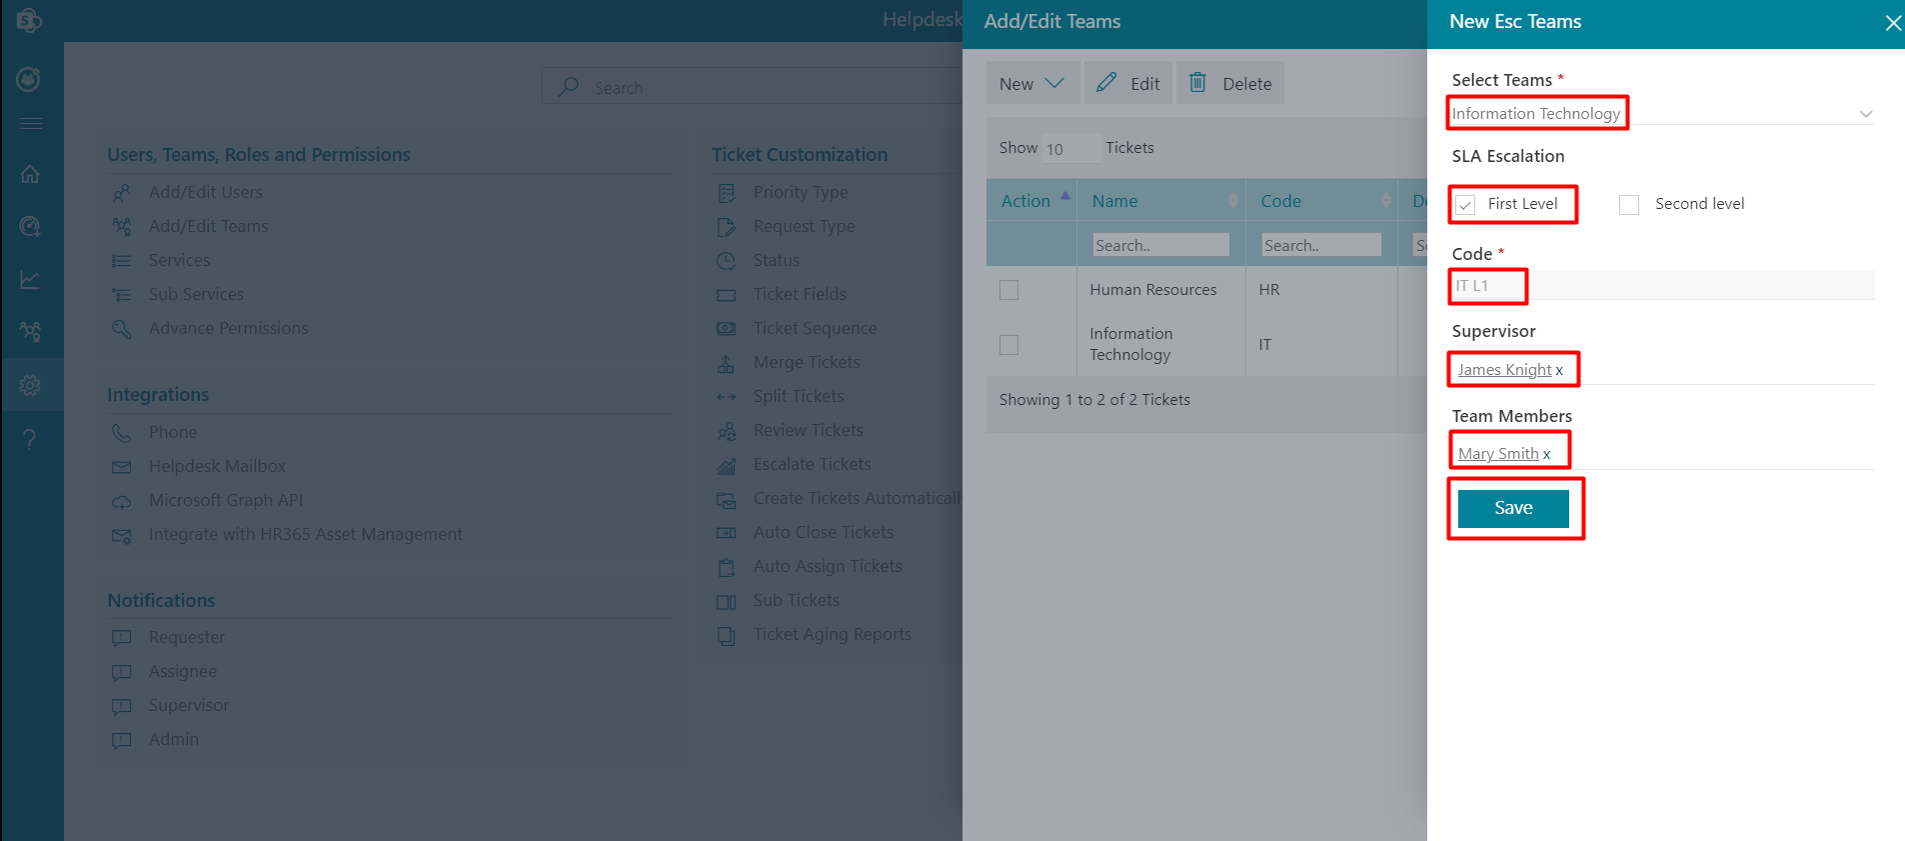
-
Click the Escalate button.
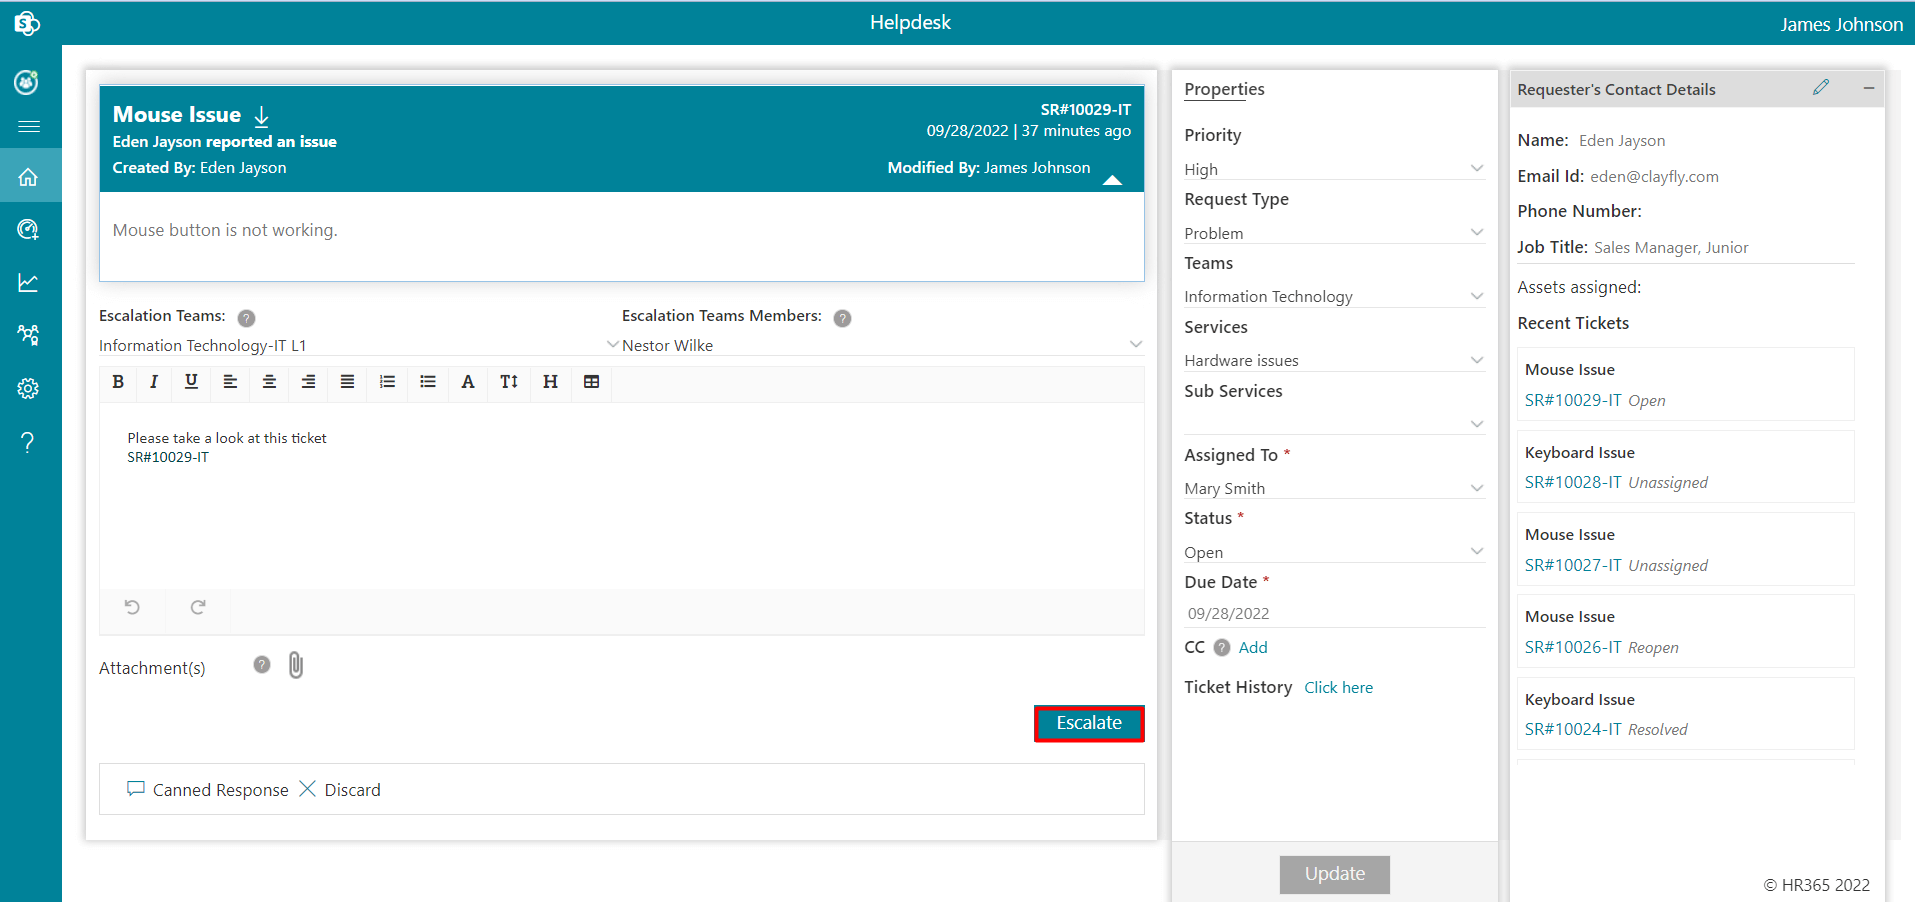
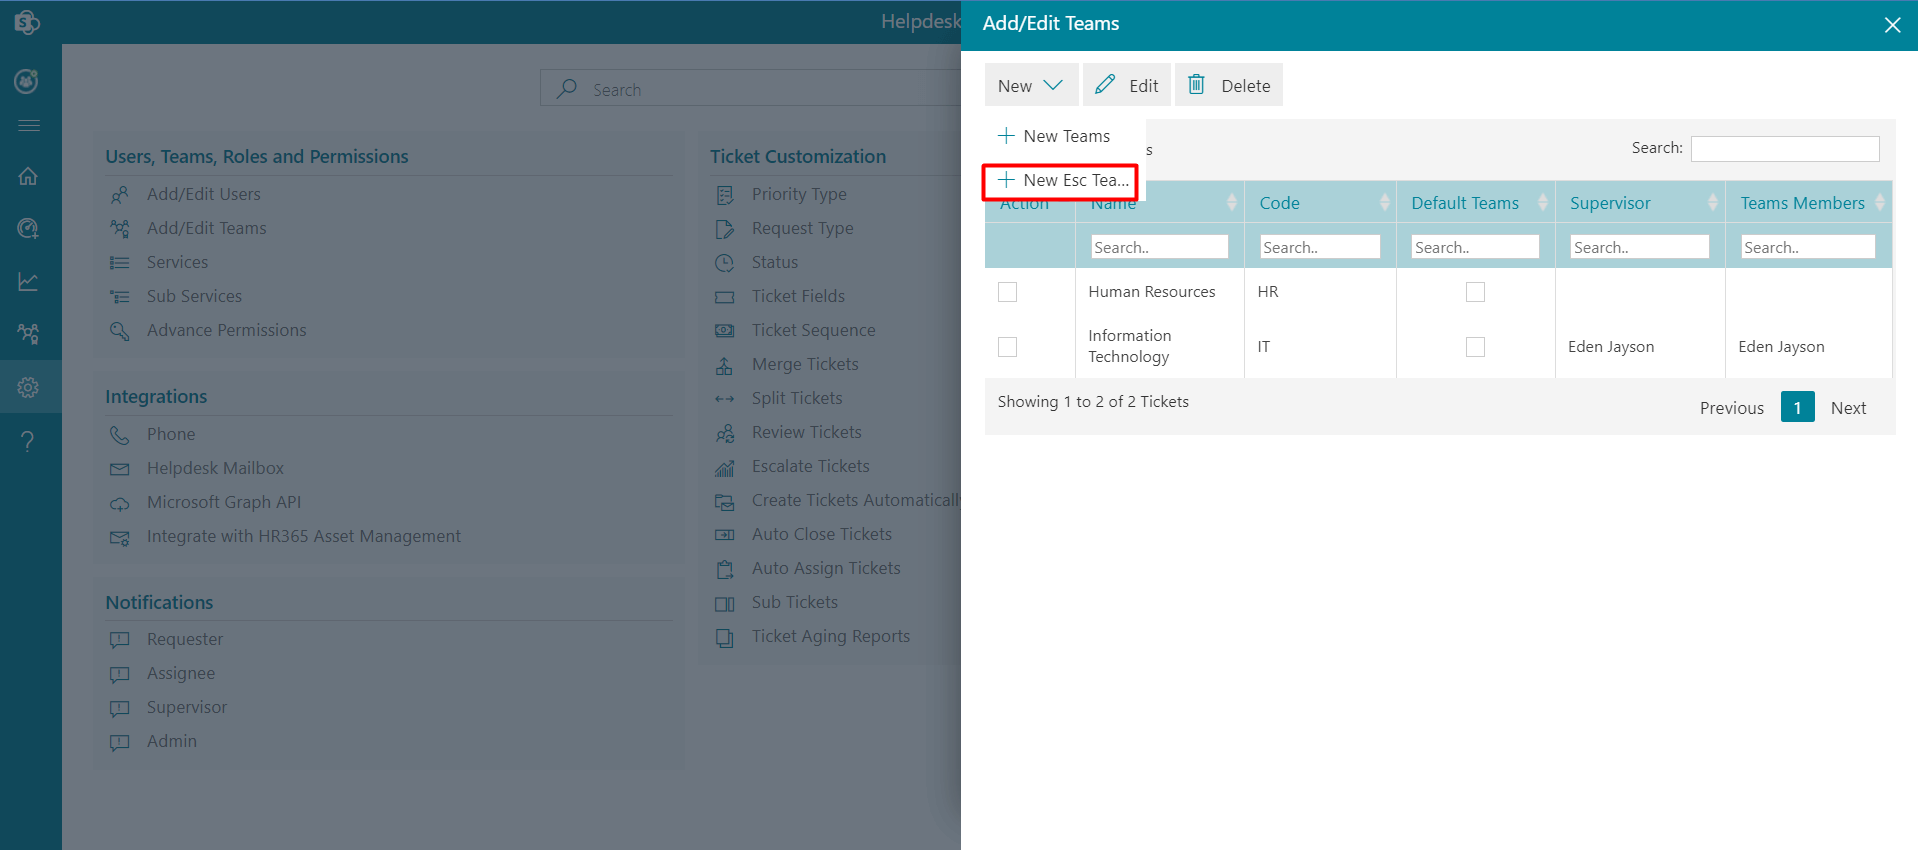
Escalate Tickets
From here, you can escalate any issue if the ticket is not resolved within a specific time interval.
To esalate the issue, follow the steps:
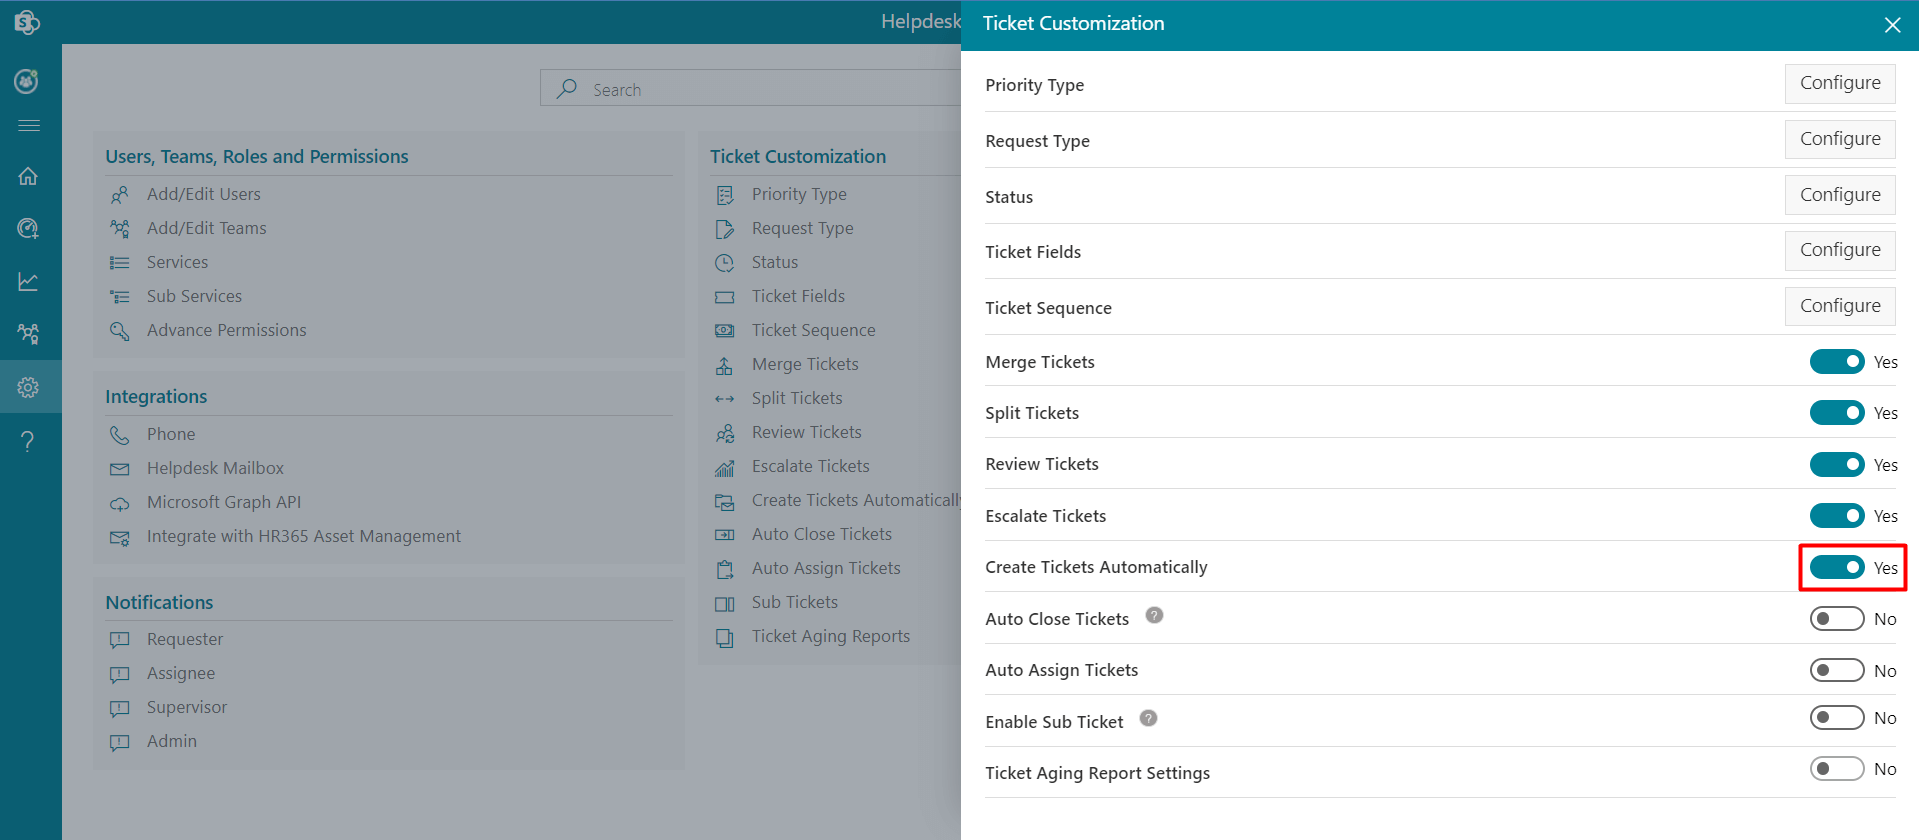
Create Ticket Automatically
If this is enabled the request sent by users from the helpdesk email ID will be directly considered as a ticket and will display in the unassigned tab of the home page. If this is disabled, the raised request will display in Ticket Mailbox from where you can create or can delete it.
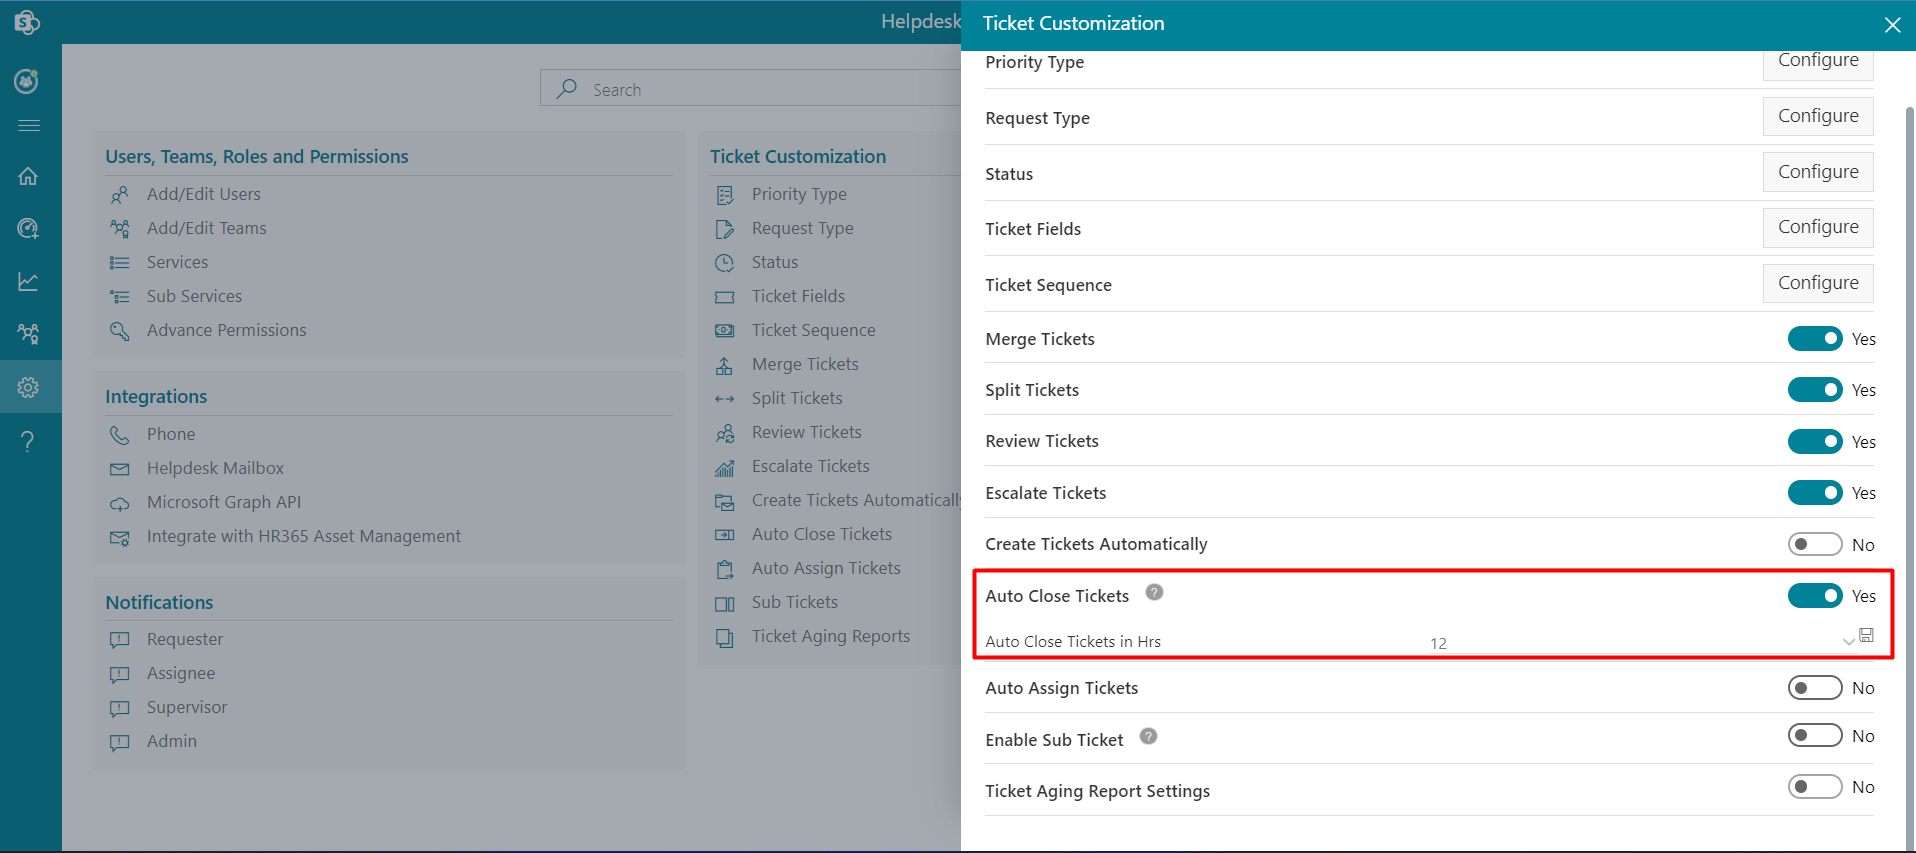
Auto Close Tickets
If you enable this feature, resolved tickets close automatically at a specified time (ticket status changes from resolved to closed). Once the ticket is resolved and there is no action on the ticket (no comments or modification) within the specified time, the ticket closes automatically else the ticket remains resolved. This feature works on power automate, please contact HR365 to configure it.
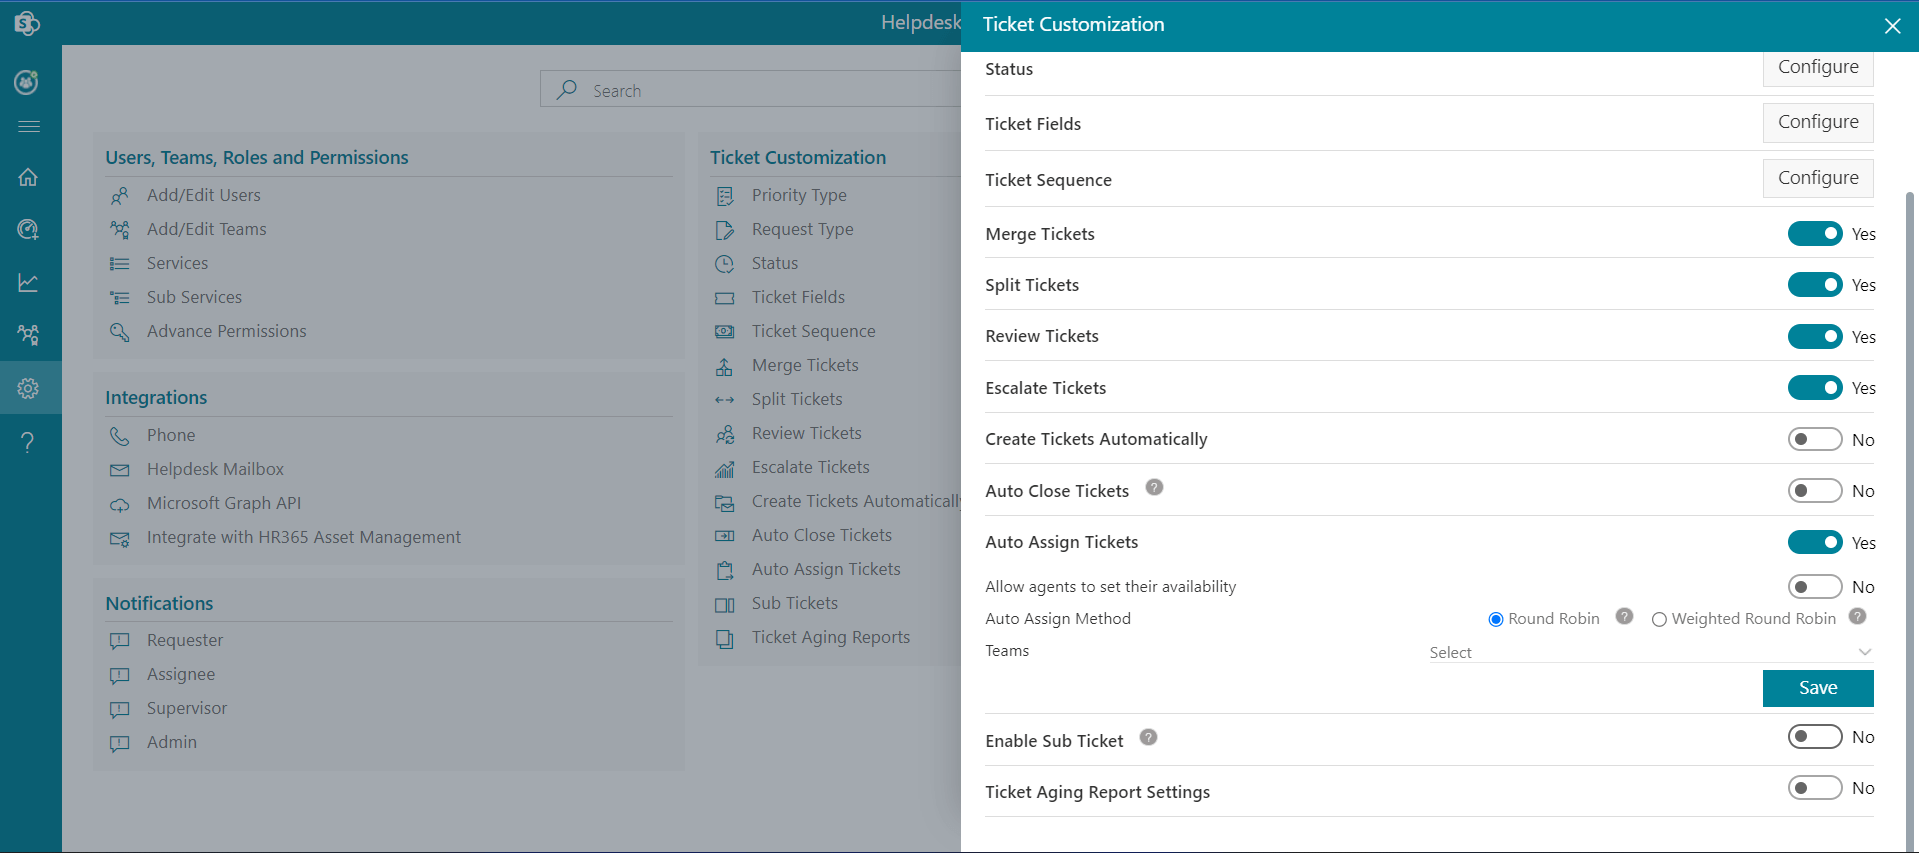
Auto Assign Tickets
Auto Assign Tickets: If you enable this feature ticket gets assigned to the agents automatically.
Allow agents to set their availability: If this is enabled the control will visible in the settings to the agents from which they can diable it. Tickets will not get assigned to that agent until they enable it.
There are two types of auto assign tickets method, you can select either one.
Round Robin: Assign tickets to the agent in a circular fashion.
Weighted Round Robin: Assign the tickets to the agents who have the least tickets. Further, select the next agent with the least ticket, also it won't assign simultaneously two tickets to the same person.
-
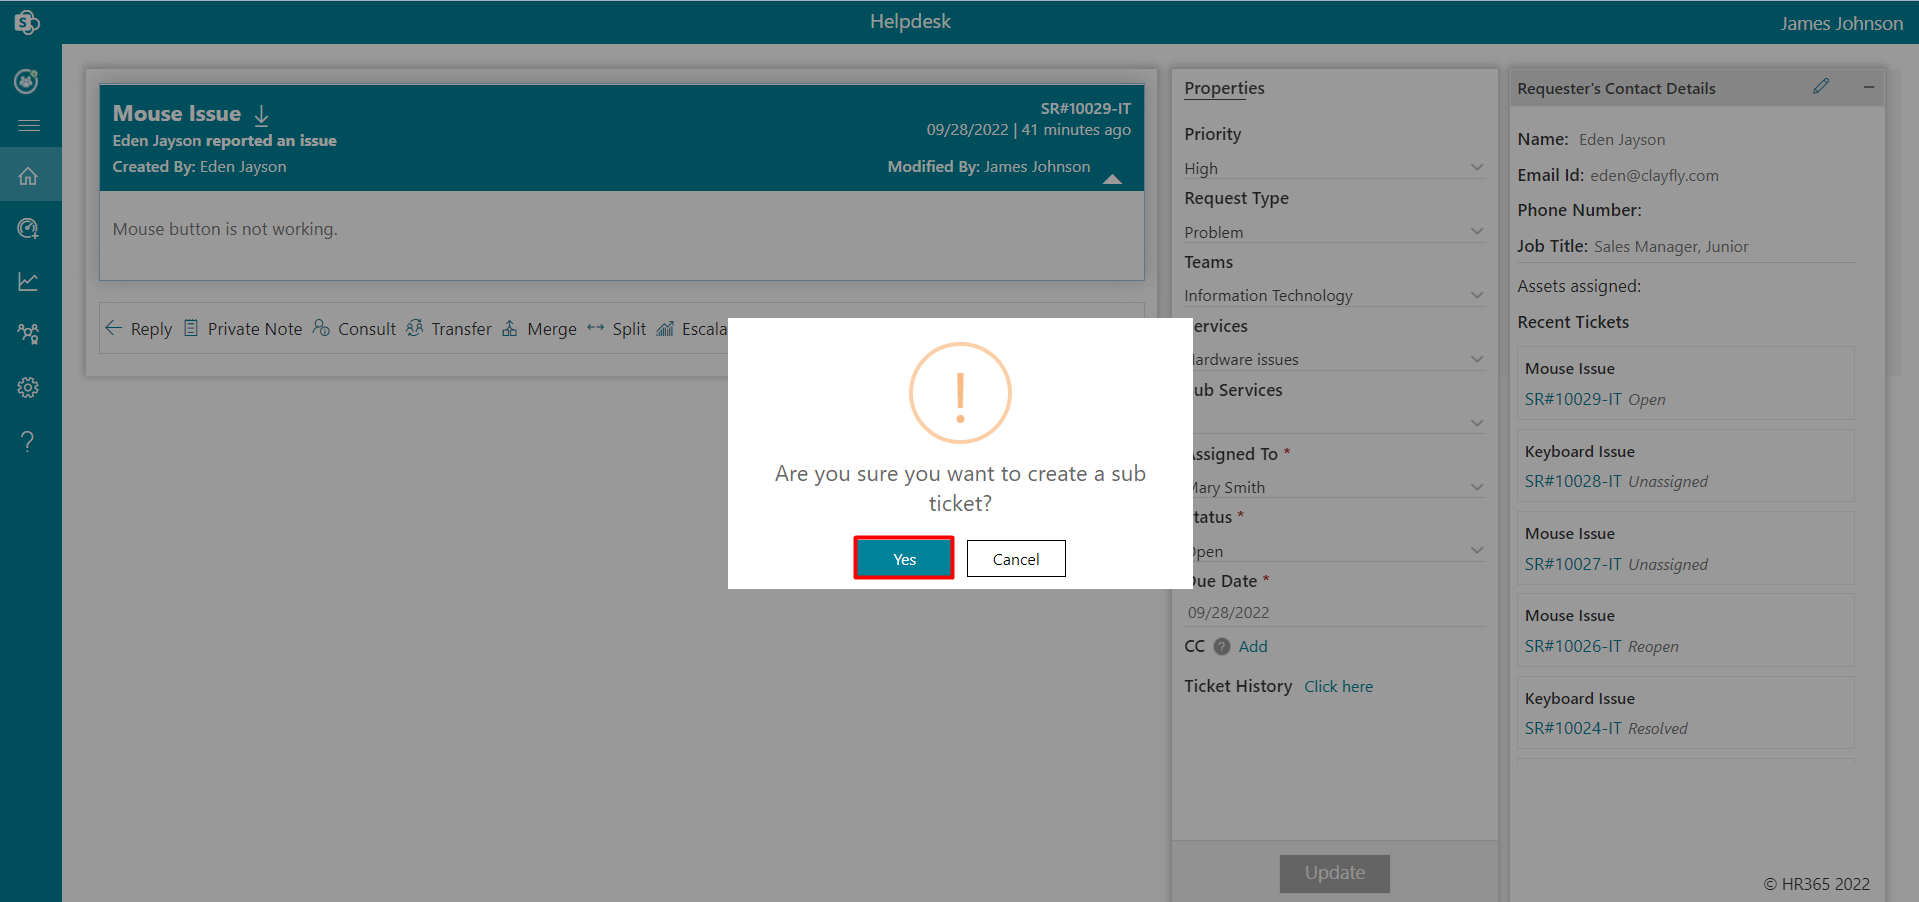
Go to the comment page, click the Sub Ticket option.
-
Select Yes in a dialog box, this displays the Sub Ticket page.
-
Enter Sub Ticket Title and Comments.
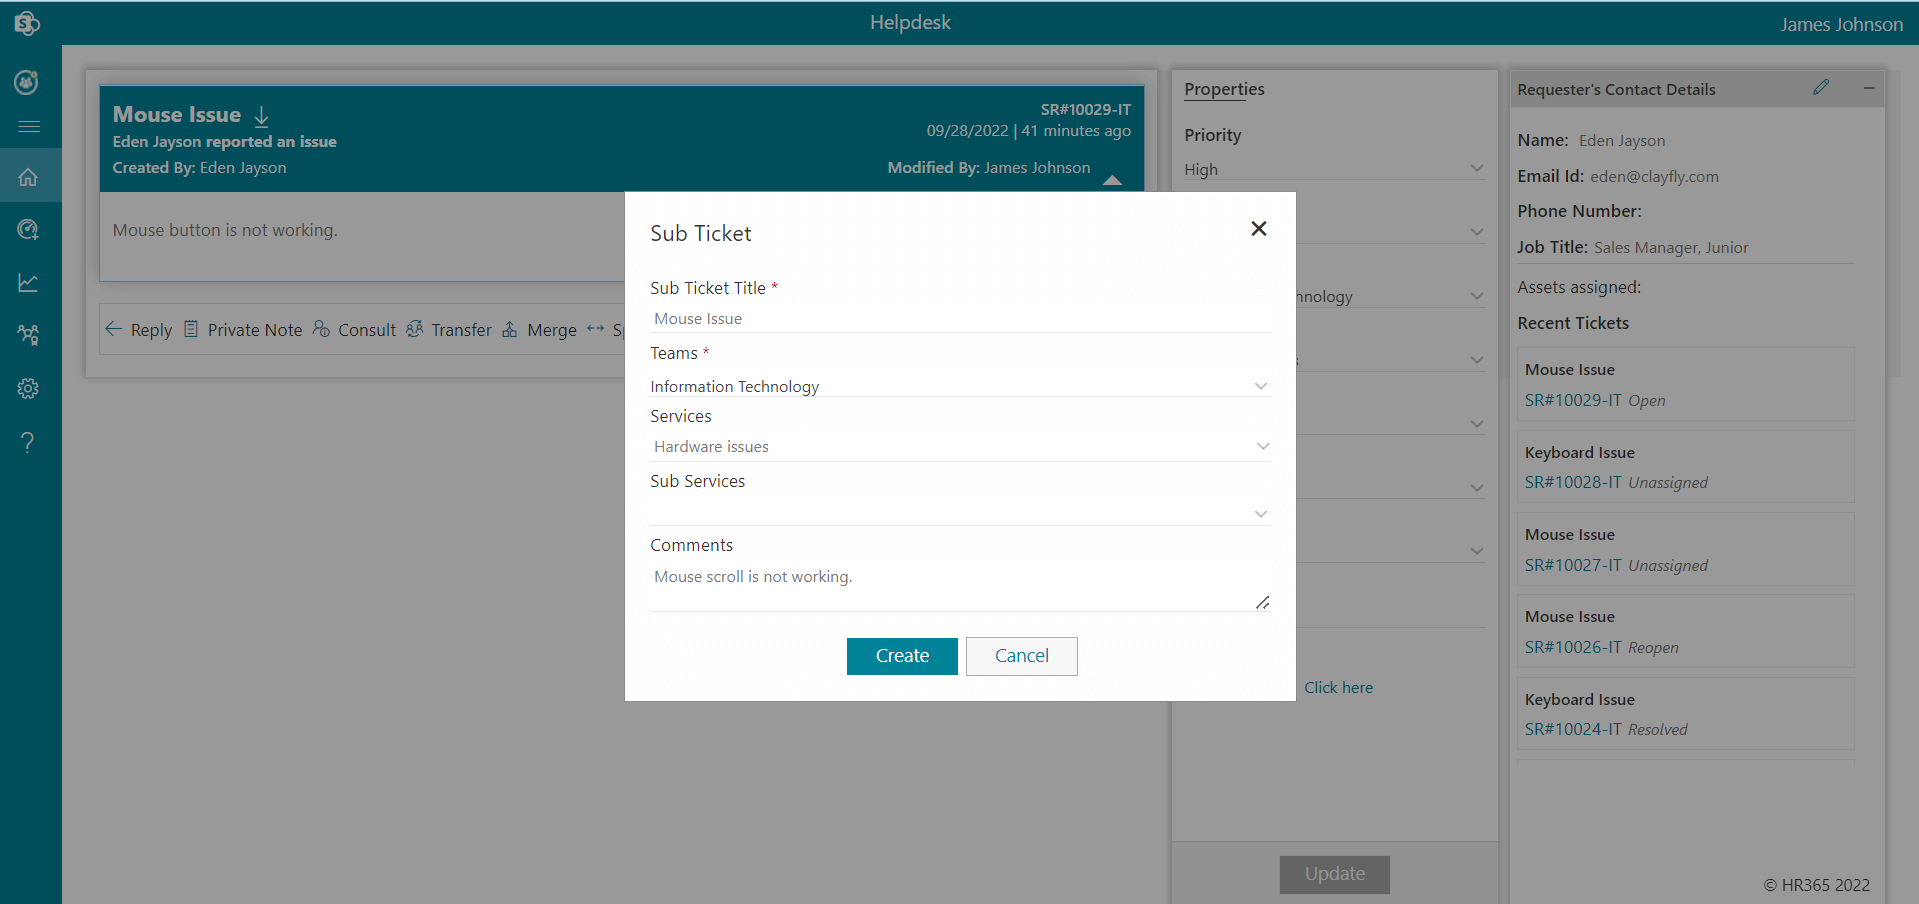
-
Sub ticket created and displayed on home page.

Sub Tickets
From here, you can create a sub ticket from a ticket. By default sub tickets are disabled, you can enable it by clicking Enable sub ticket toggle switch. You can Assign Sub Ticket by checking the Teams and/or Teams Members check box and clicking on the Save button as shown below.
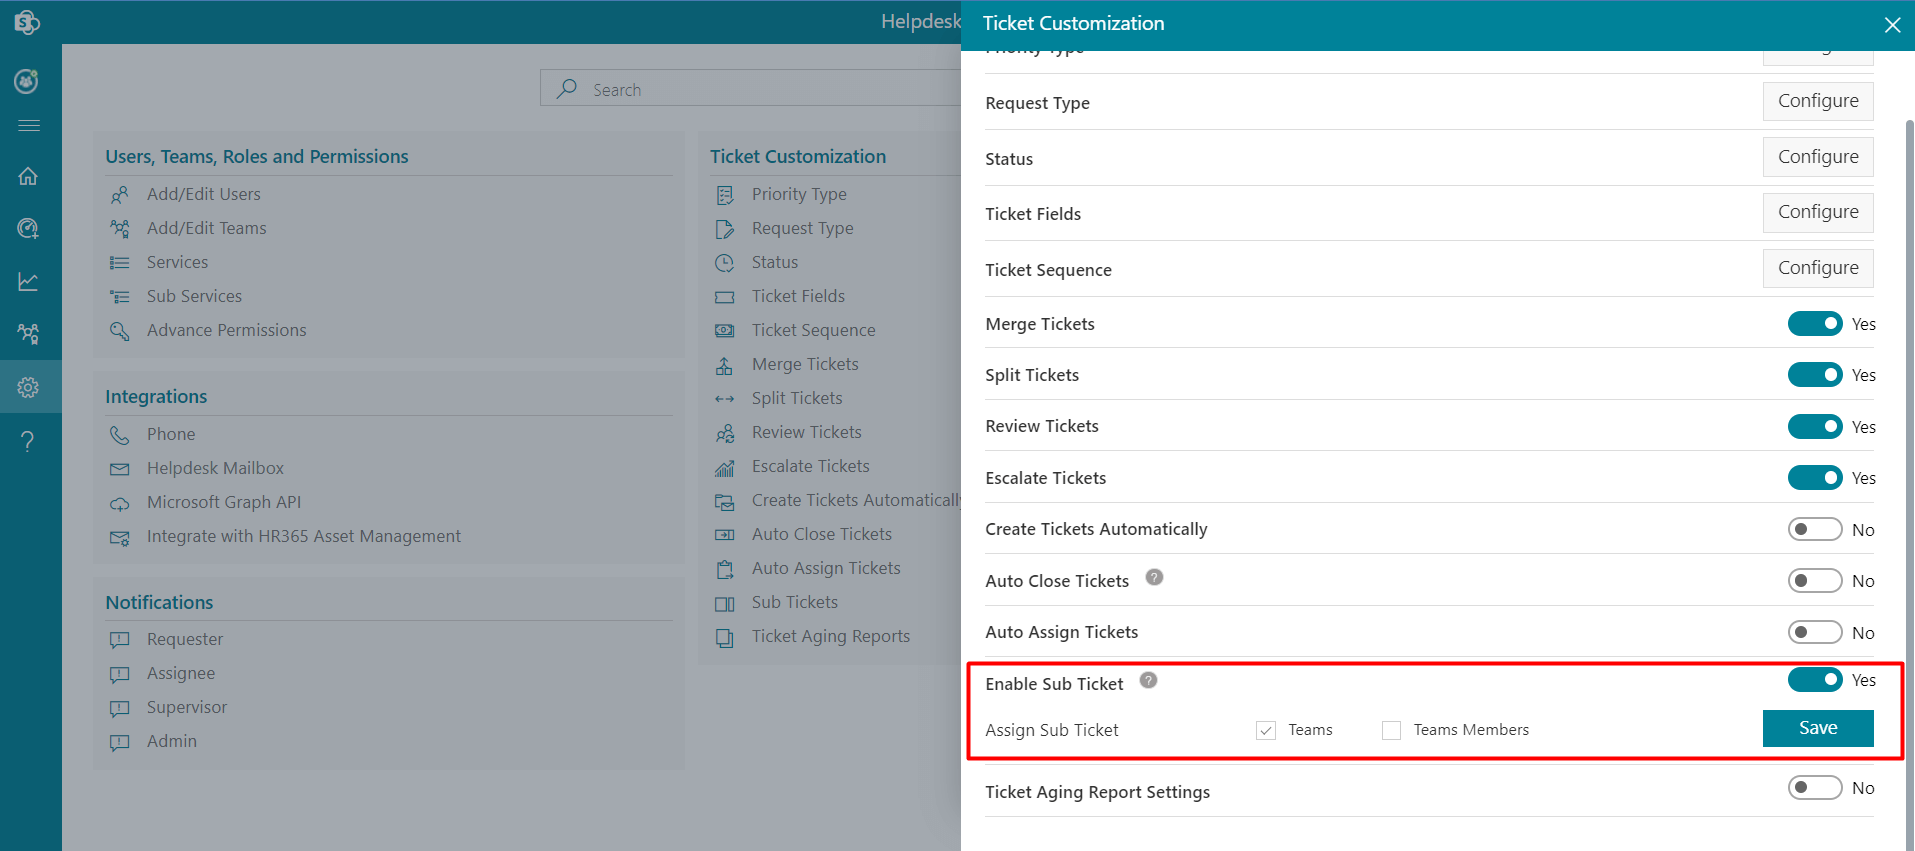
The Sub Ticket option will be displayed on the comment page as shown below.
To create sub tickets, follow the below steps:
You can create multiple sub tickets from a main ticket.
-
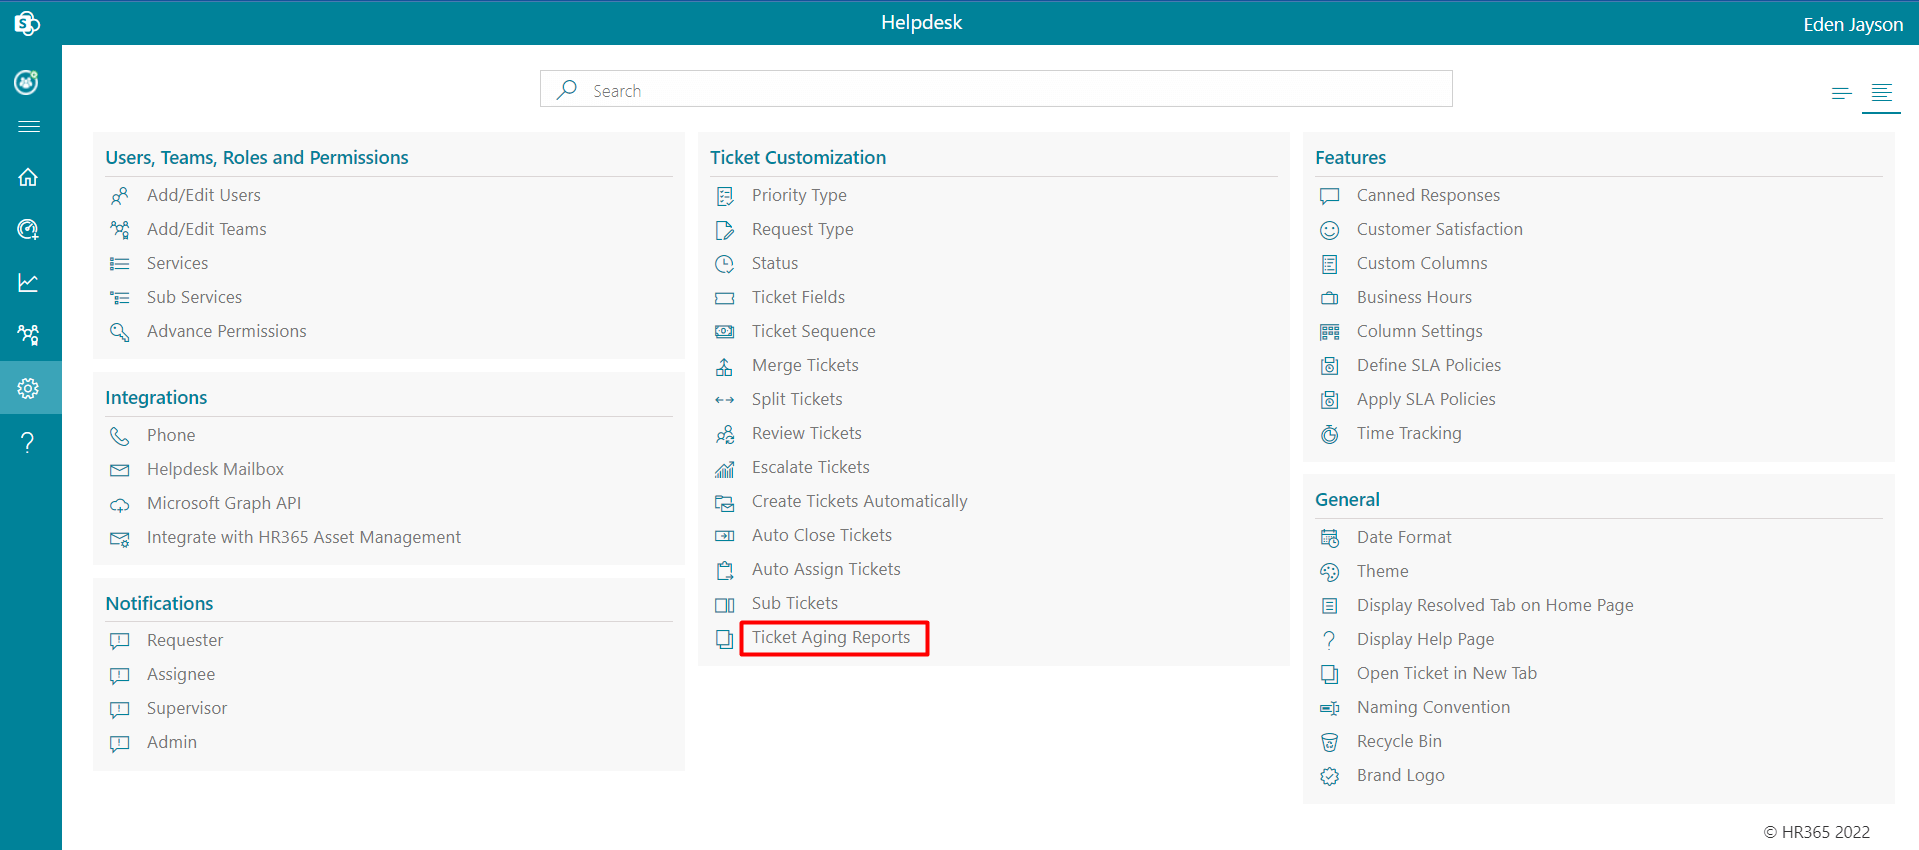
Click on Ticket Aging Reports from Ticket Customizaton setting.
-
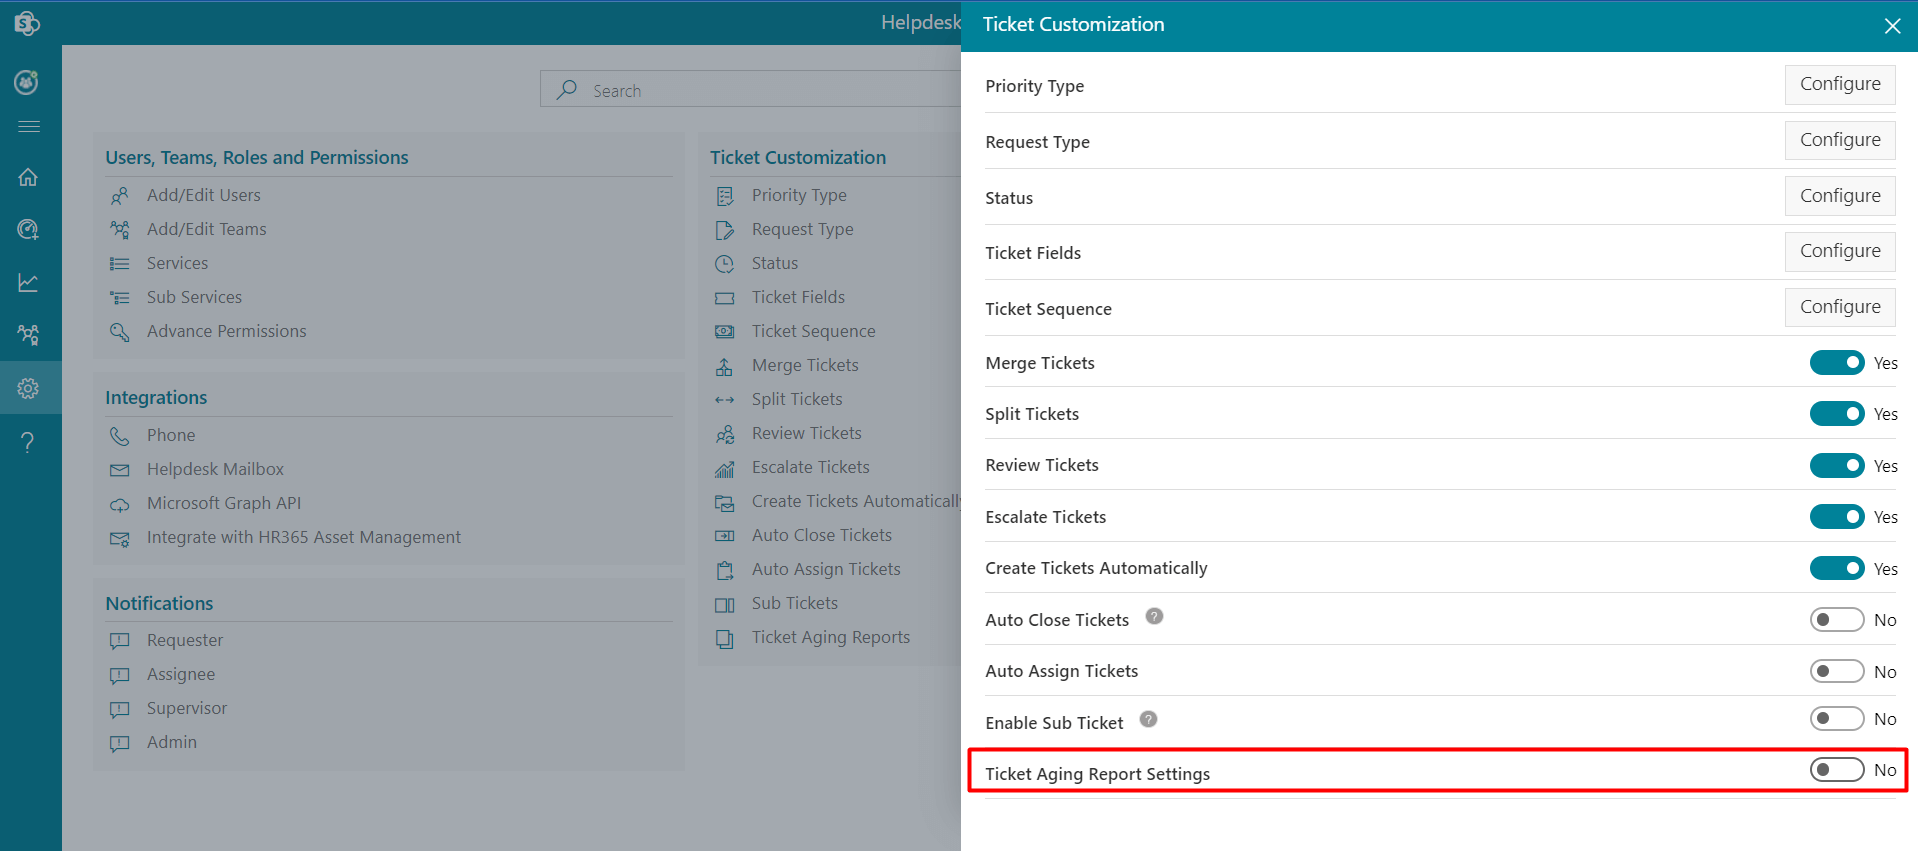
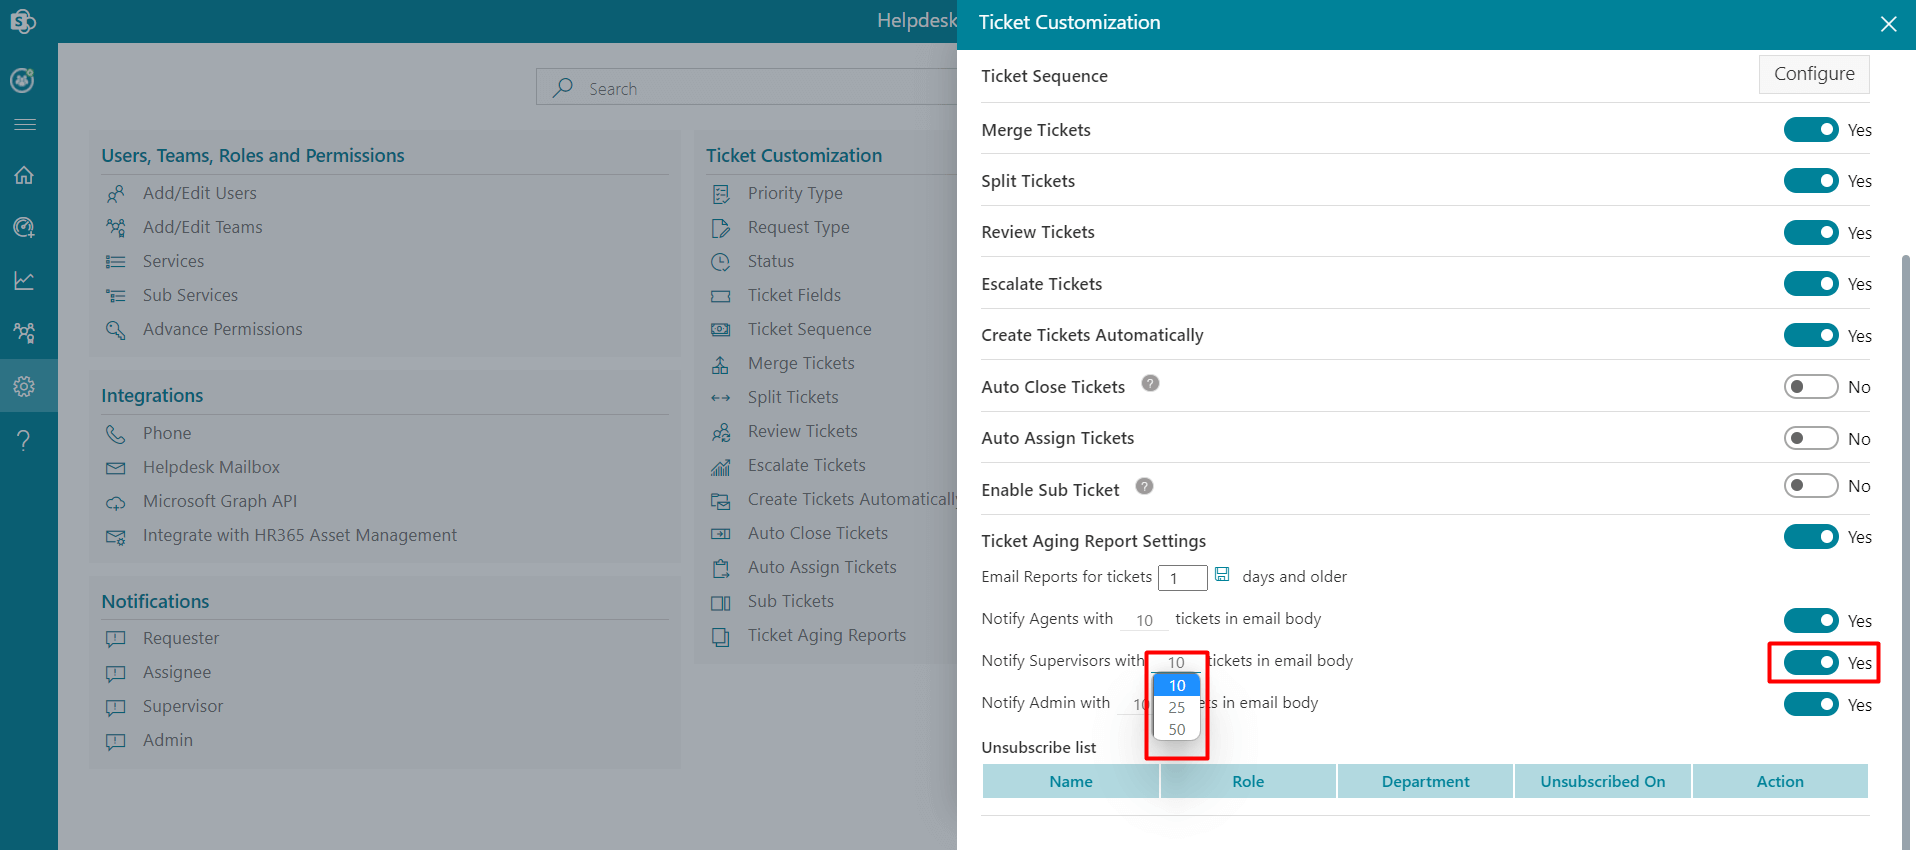
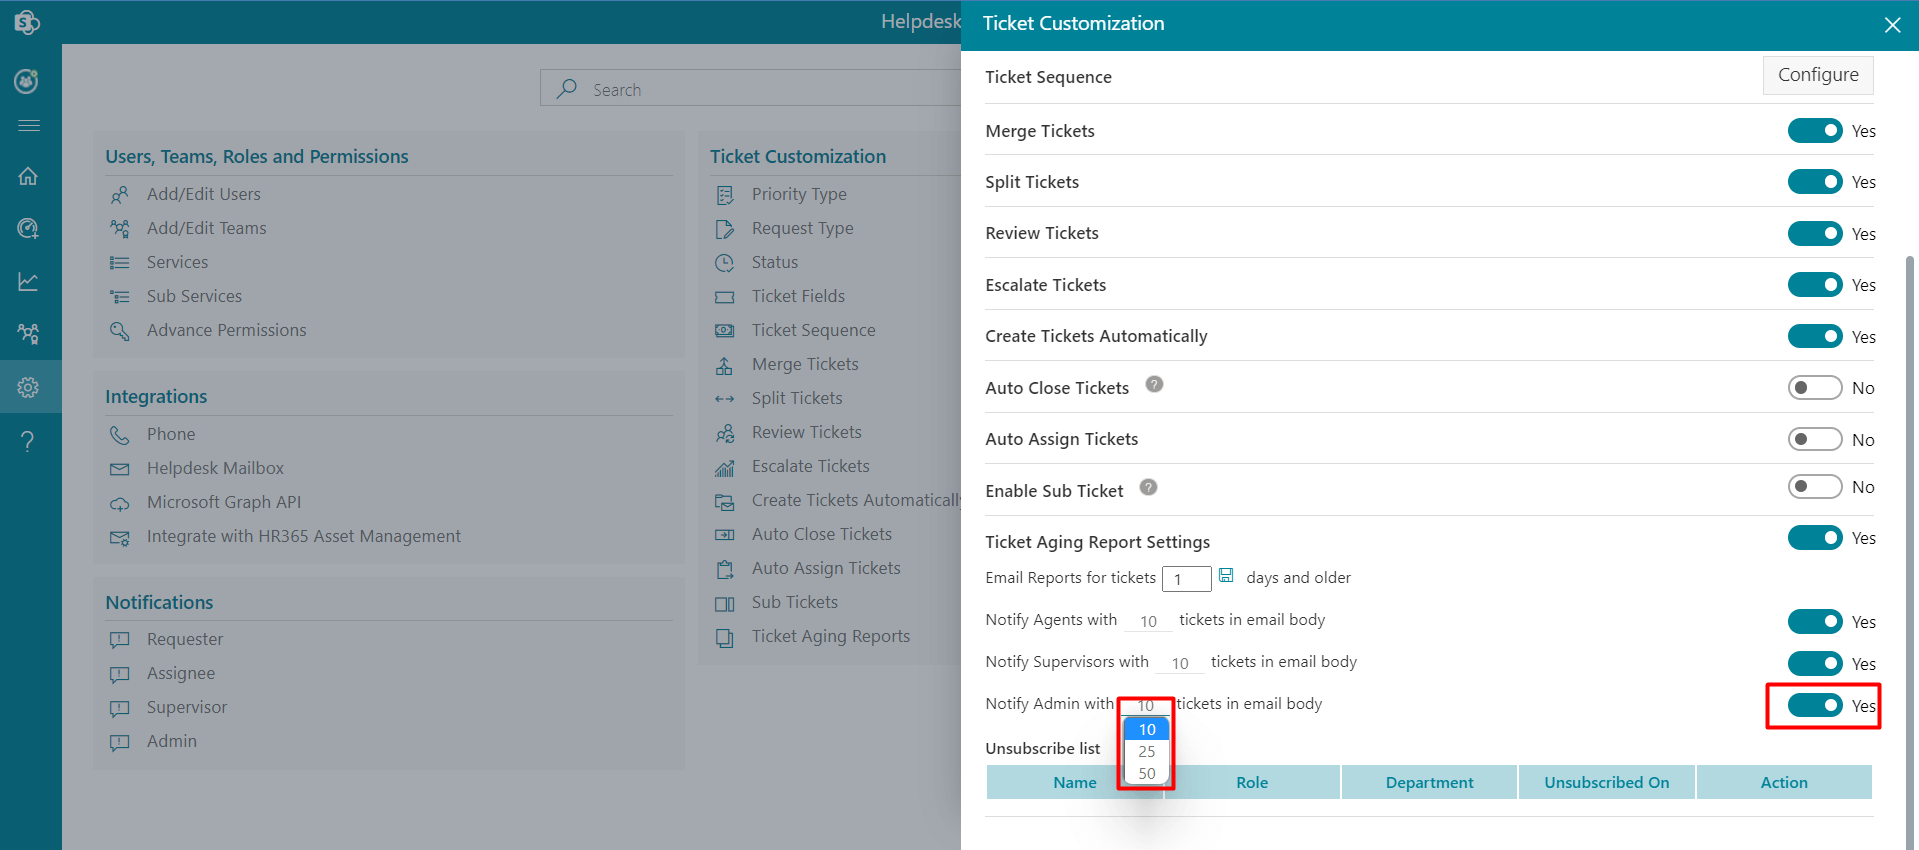
From here, you can enable it by clicking Enable Ticket Aging Report Settings toggle switch.
-
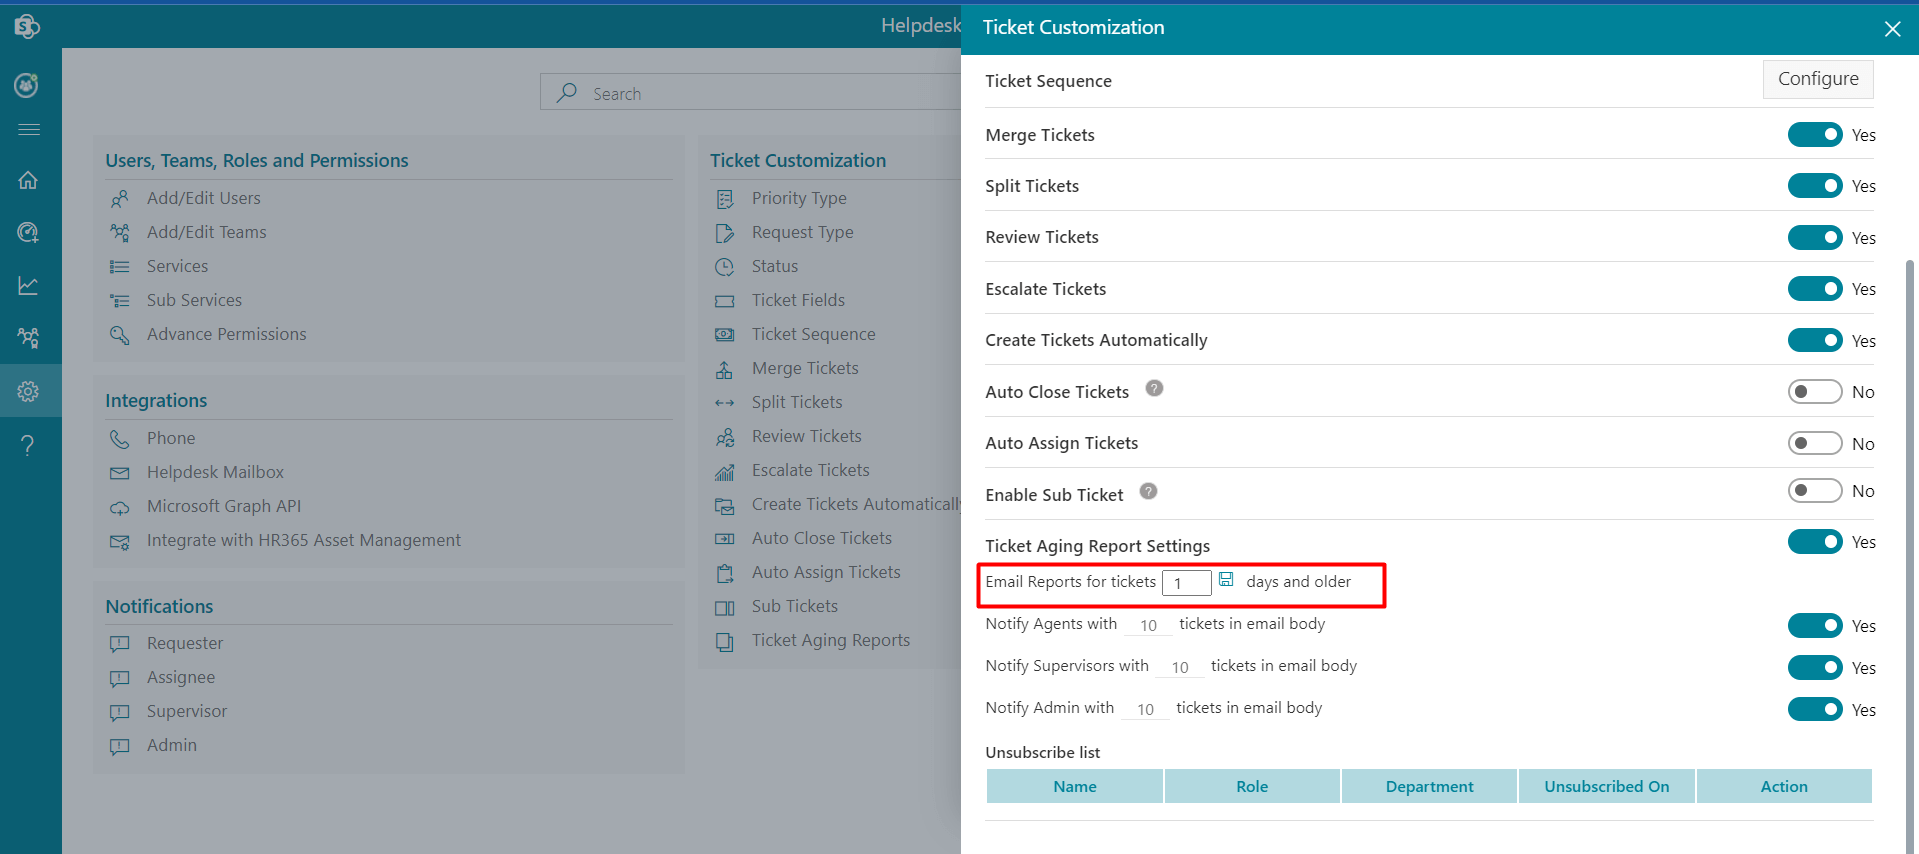
When the Ticket Aging Report Settings are enabled . You can choose how many days older emails should be sent for open tickets from the options below.
-
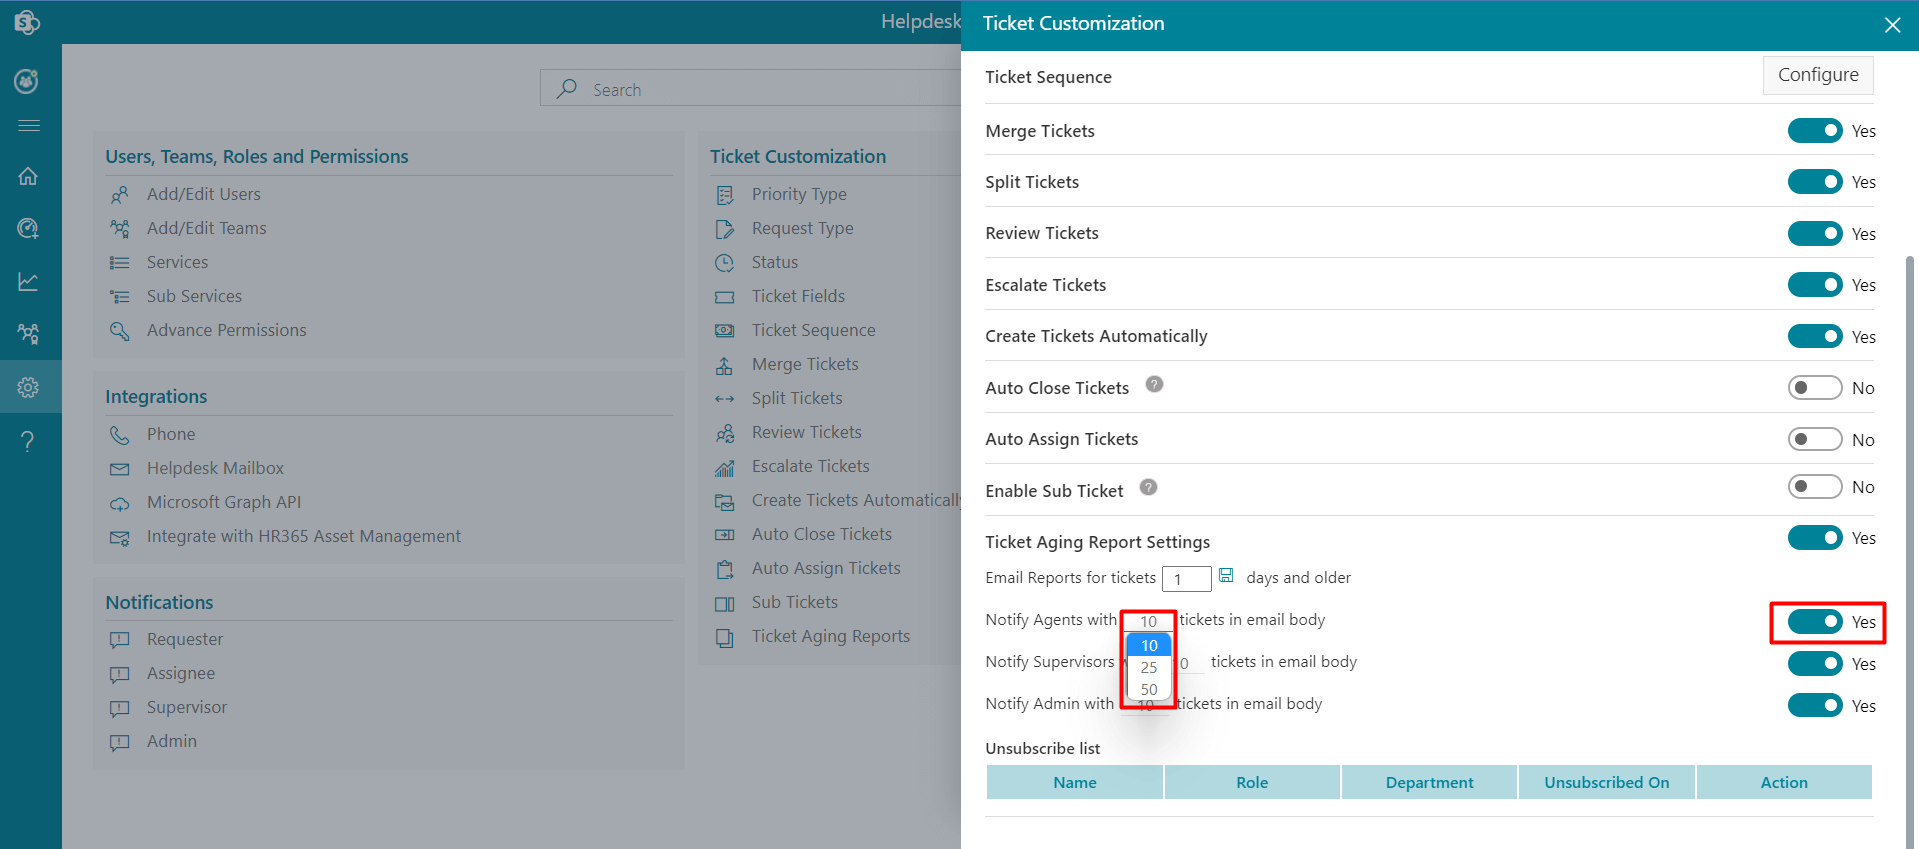
Choose the number of tickets you want to display in the email body, when mail is send to Agent, Supervisors, Admin. You can enable or disable these mail with the toggle switch.
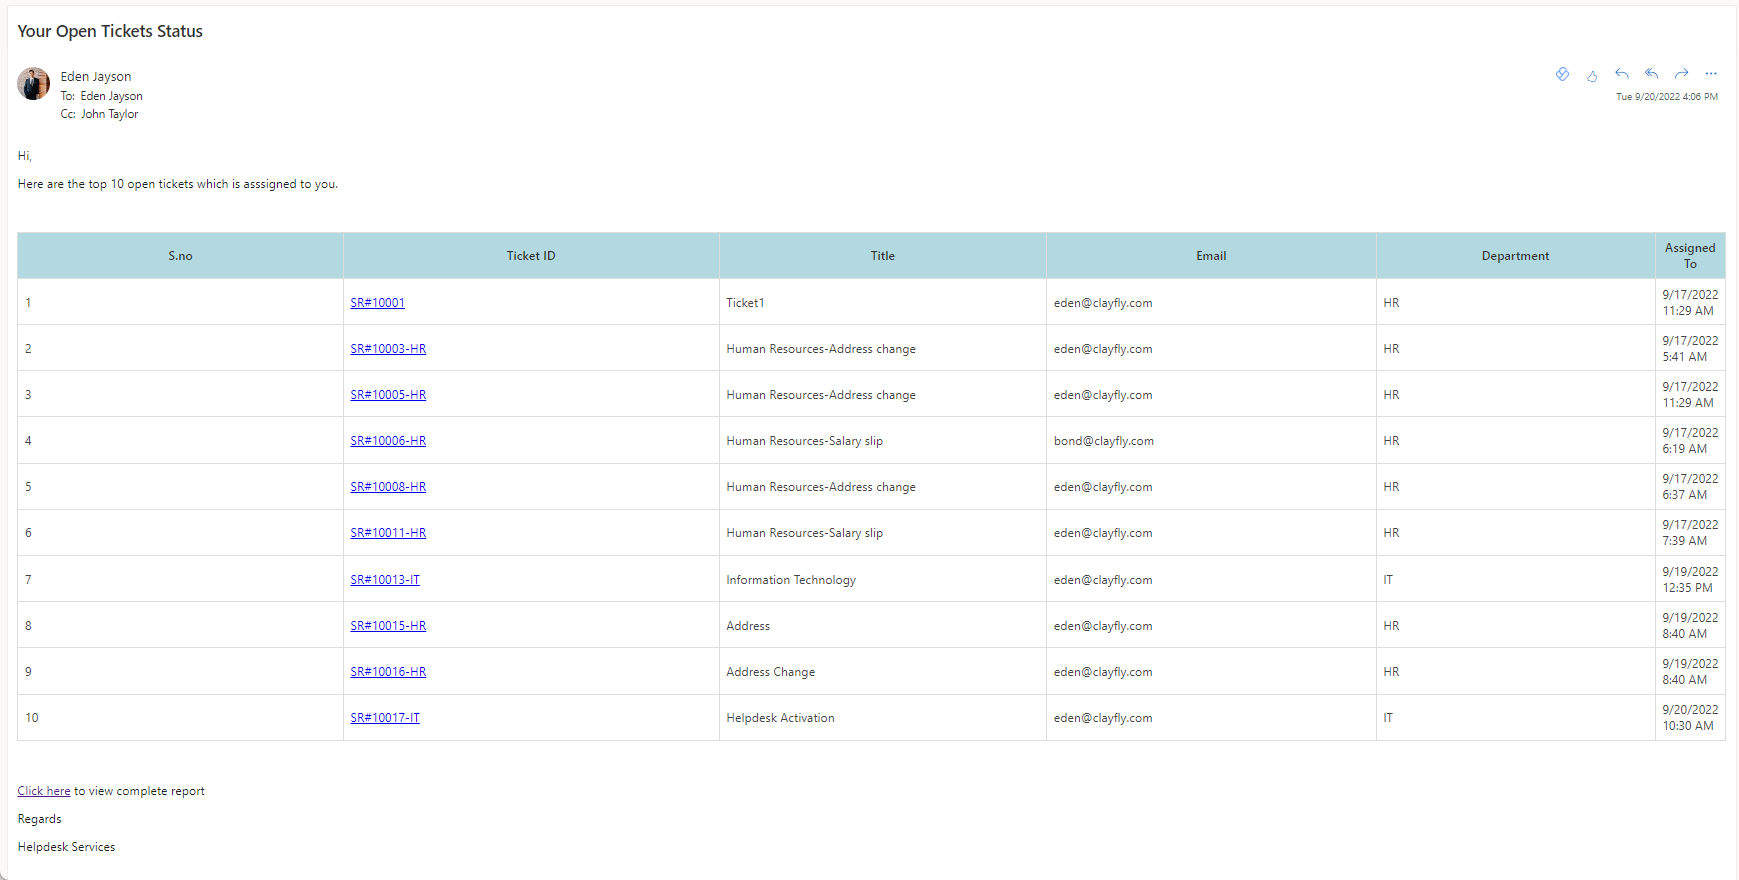
In the body of the email in the SharePoint inbox, the open ticket older mail will appear like this.
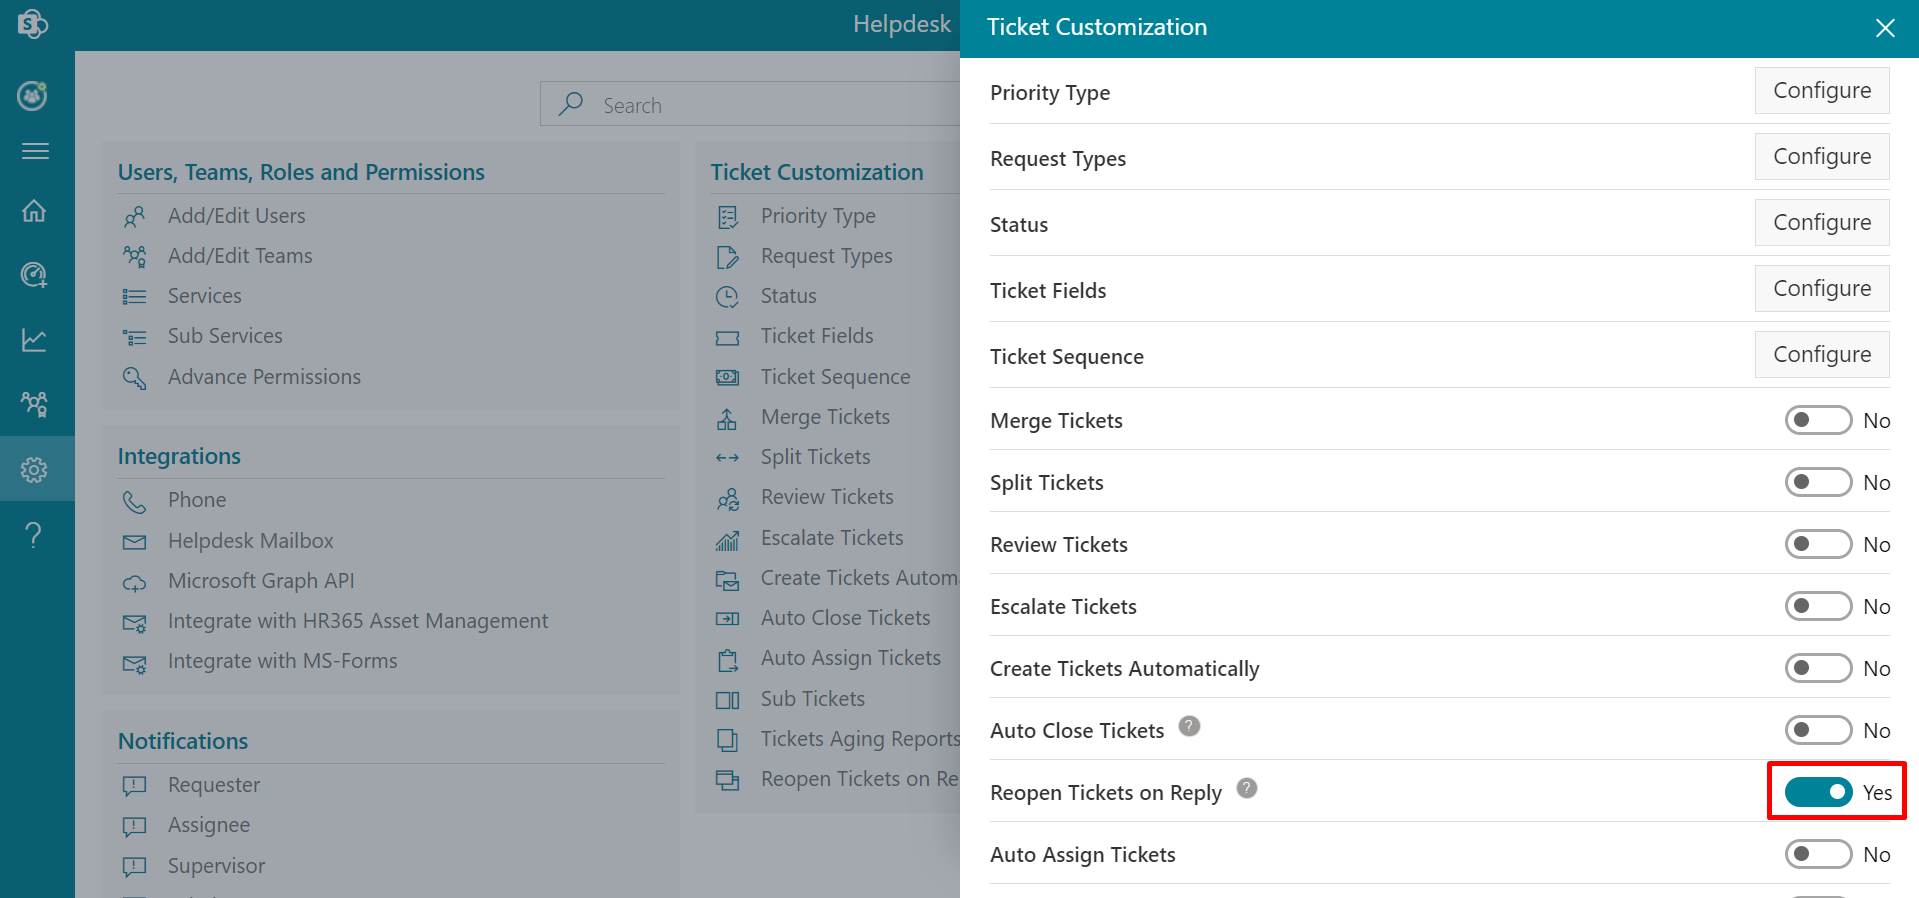
Ticket Aging Reports
-
Click on Reopen Tickets on Reply Ticket Customizaton setting.
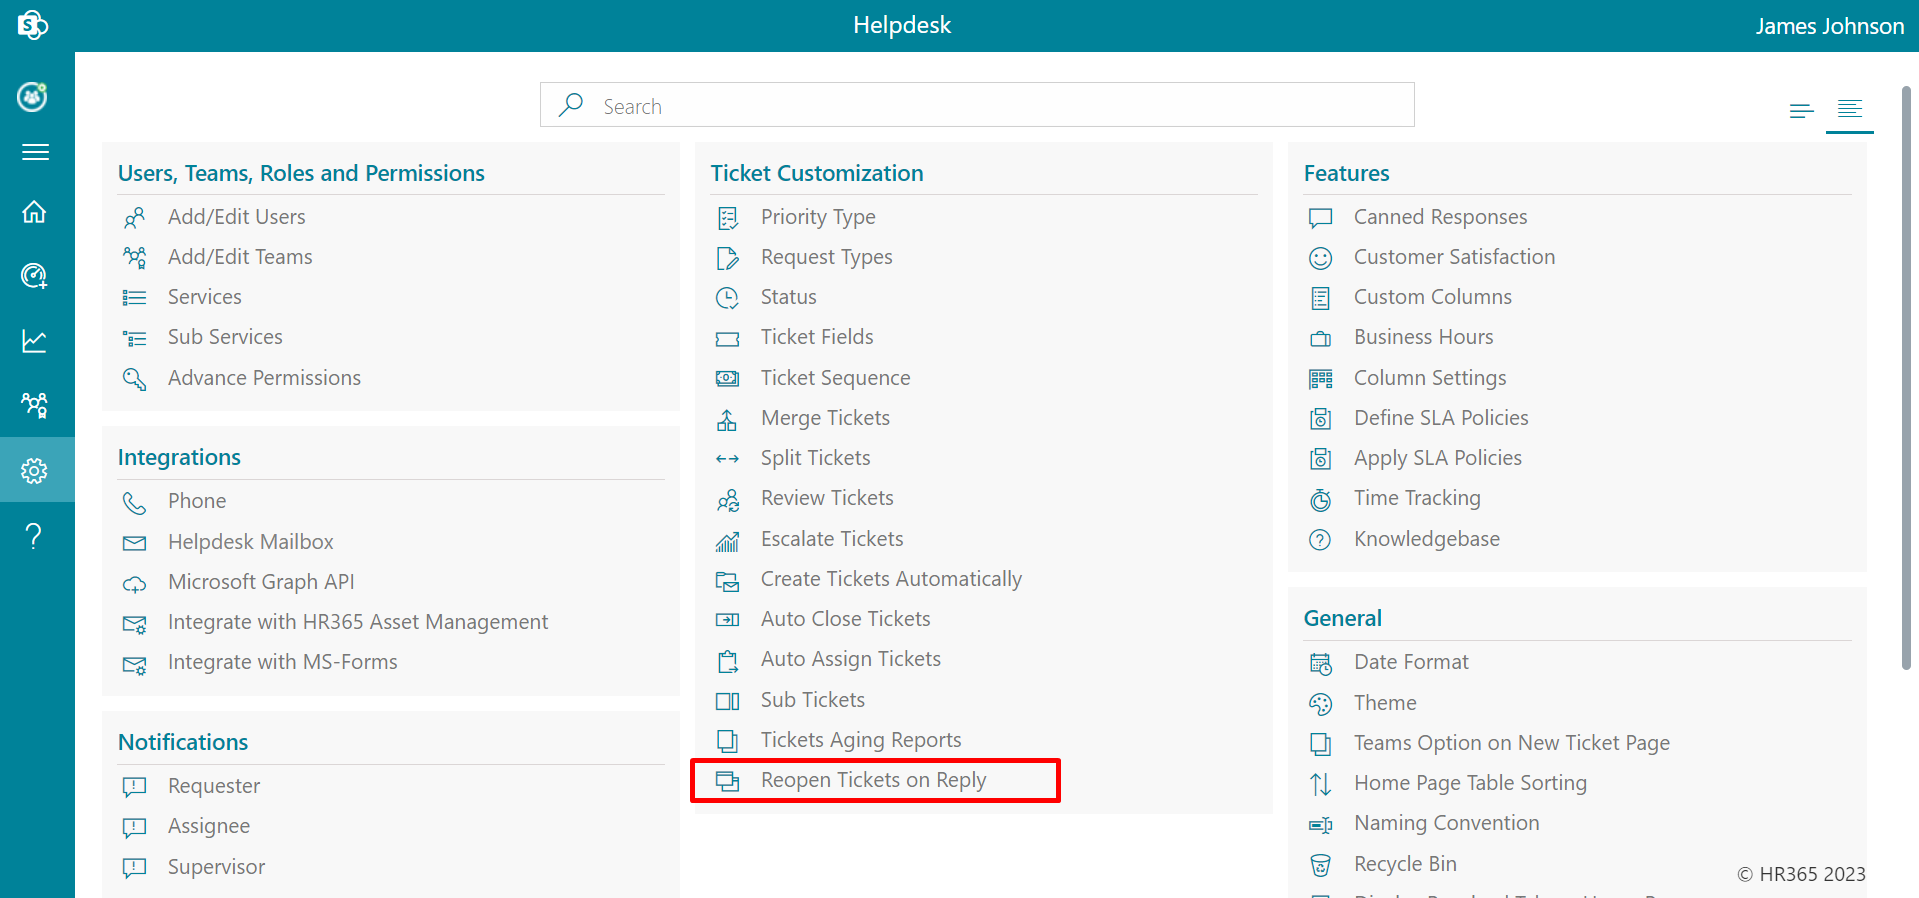
-
From here, you can enable it by clicking enable Reopen Tickets on Reply Settings toggle switch.When toggle is enable, Closed tickets will open if there is any comment from the requester/assignee on the following ticket.