Asset Management
Frequently Asked Questions
- Click on add asset in asset management app.
- You can see all the inventory listed.
- You can select the user to whom you want to assign the asset to and click on assign.
- Similar way you can return the asset.
You can select the scripted columns and show it accordingly.
Open the custom setting from the setting, click on the Home tab. Drag the asset details up or down as per your choice.
- Asset id will be automatically generated in Microsoft asset management.
- You can give asset name of your choice, pre-validated categories and sub-categories will come, categories is mandatory, other fields are not mandatory.
- Vendor name and asset type you can select as per your choice. With asset type selection, you will get the other fields populated as start date and end date or if it the asset type is own, you will gt purchase date and expiry date.
- You can fill out the life-cycle expiry date, and assign own group is the mandatory field to send alerts about expiry of the asset. You can disable the notification for this asset if you wish to.
- If you want to add few more fields in this Microsoft asset management.
- You can select one column and click on update column and rename it from the default column name from column 1 column 2 as per your choice.
- This column will appear in reports page.
- Go to add asset
- Select the asset and click on edit
- Choose disable notification
If the reminder is turned-on, then you can switch it off or visa versa.
On the home page, click on Bulk Assets, this displays Add/Update Multiple Assets page. Download the sample file and enter the details. Finally upload the file.
- You can configure 3 levels of reminders.
- You can check the number of days before the expiry date.
a. First go to ‘ Settings’, then ‘Email Notification’. b. Set 3 reminders as per your choice
- Click on Asset Track.
- Select the asset, it will show when it was assigned and when it was returned it back
You can select currency of your choice and move on.
Select the asset that you want to return and click on return.
- Click on new project. It will navigate to the pop-up page
- And add your project title and click on add button.
- Similar way, you can add your vendor and category also.
- You can select the diiferent filters of start date, end date purchase date, expiry date and price range.
- Based on filters, all the reports will be filtered accordingly, and the same data can be exported. You can apply date filer also.
- Initially all the users are assigned with no access rule.
- You can select user or admin accordingly.
- Number of users or admins selected will be counted towards total license available for the application.
- Please select the category first and then type a new sub-category.
Keywords – Microsoft asset management, Asset management app, Azure asset management, Azure asset inventory, Intune asset management
- In Asset type, we can define type of asset i.e. own asset or leased assets or services. This helps in defining end period in case of it is lease and services. If it is own asset, we can define expiry date.
- Assets can be categorized and sub-categorized under various heads i.e. IT hardware, fixed assets, software, equipment, etc. Further it can be sub-categorized i.e. Server, Desktop, Laptop, switch, etc which help in reporting and dashboard with status of availability, etc.
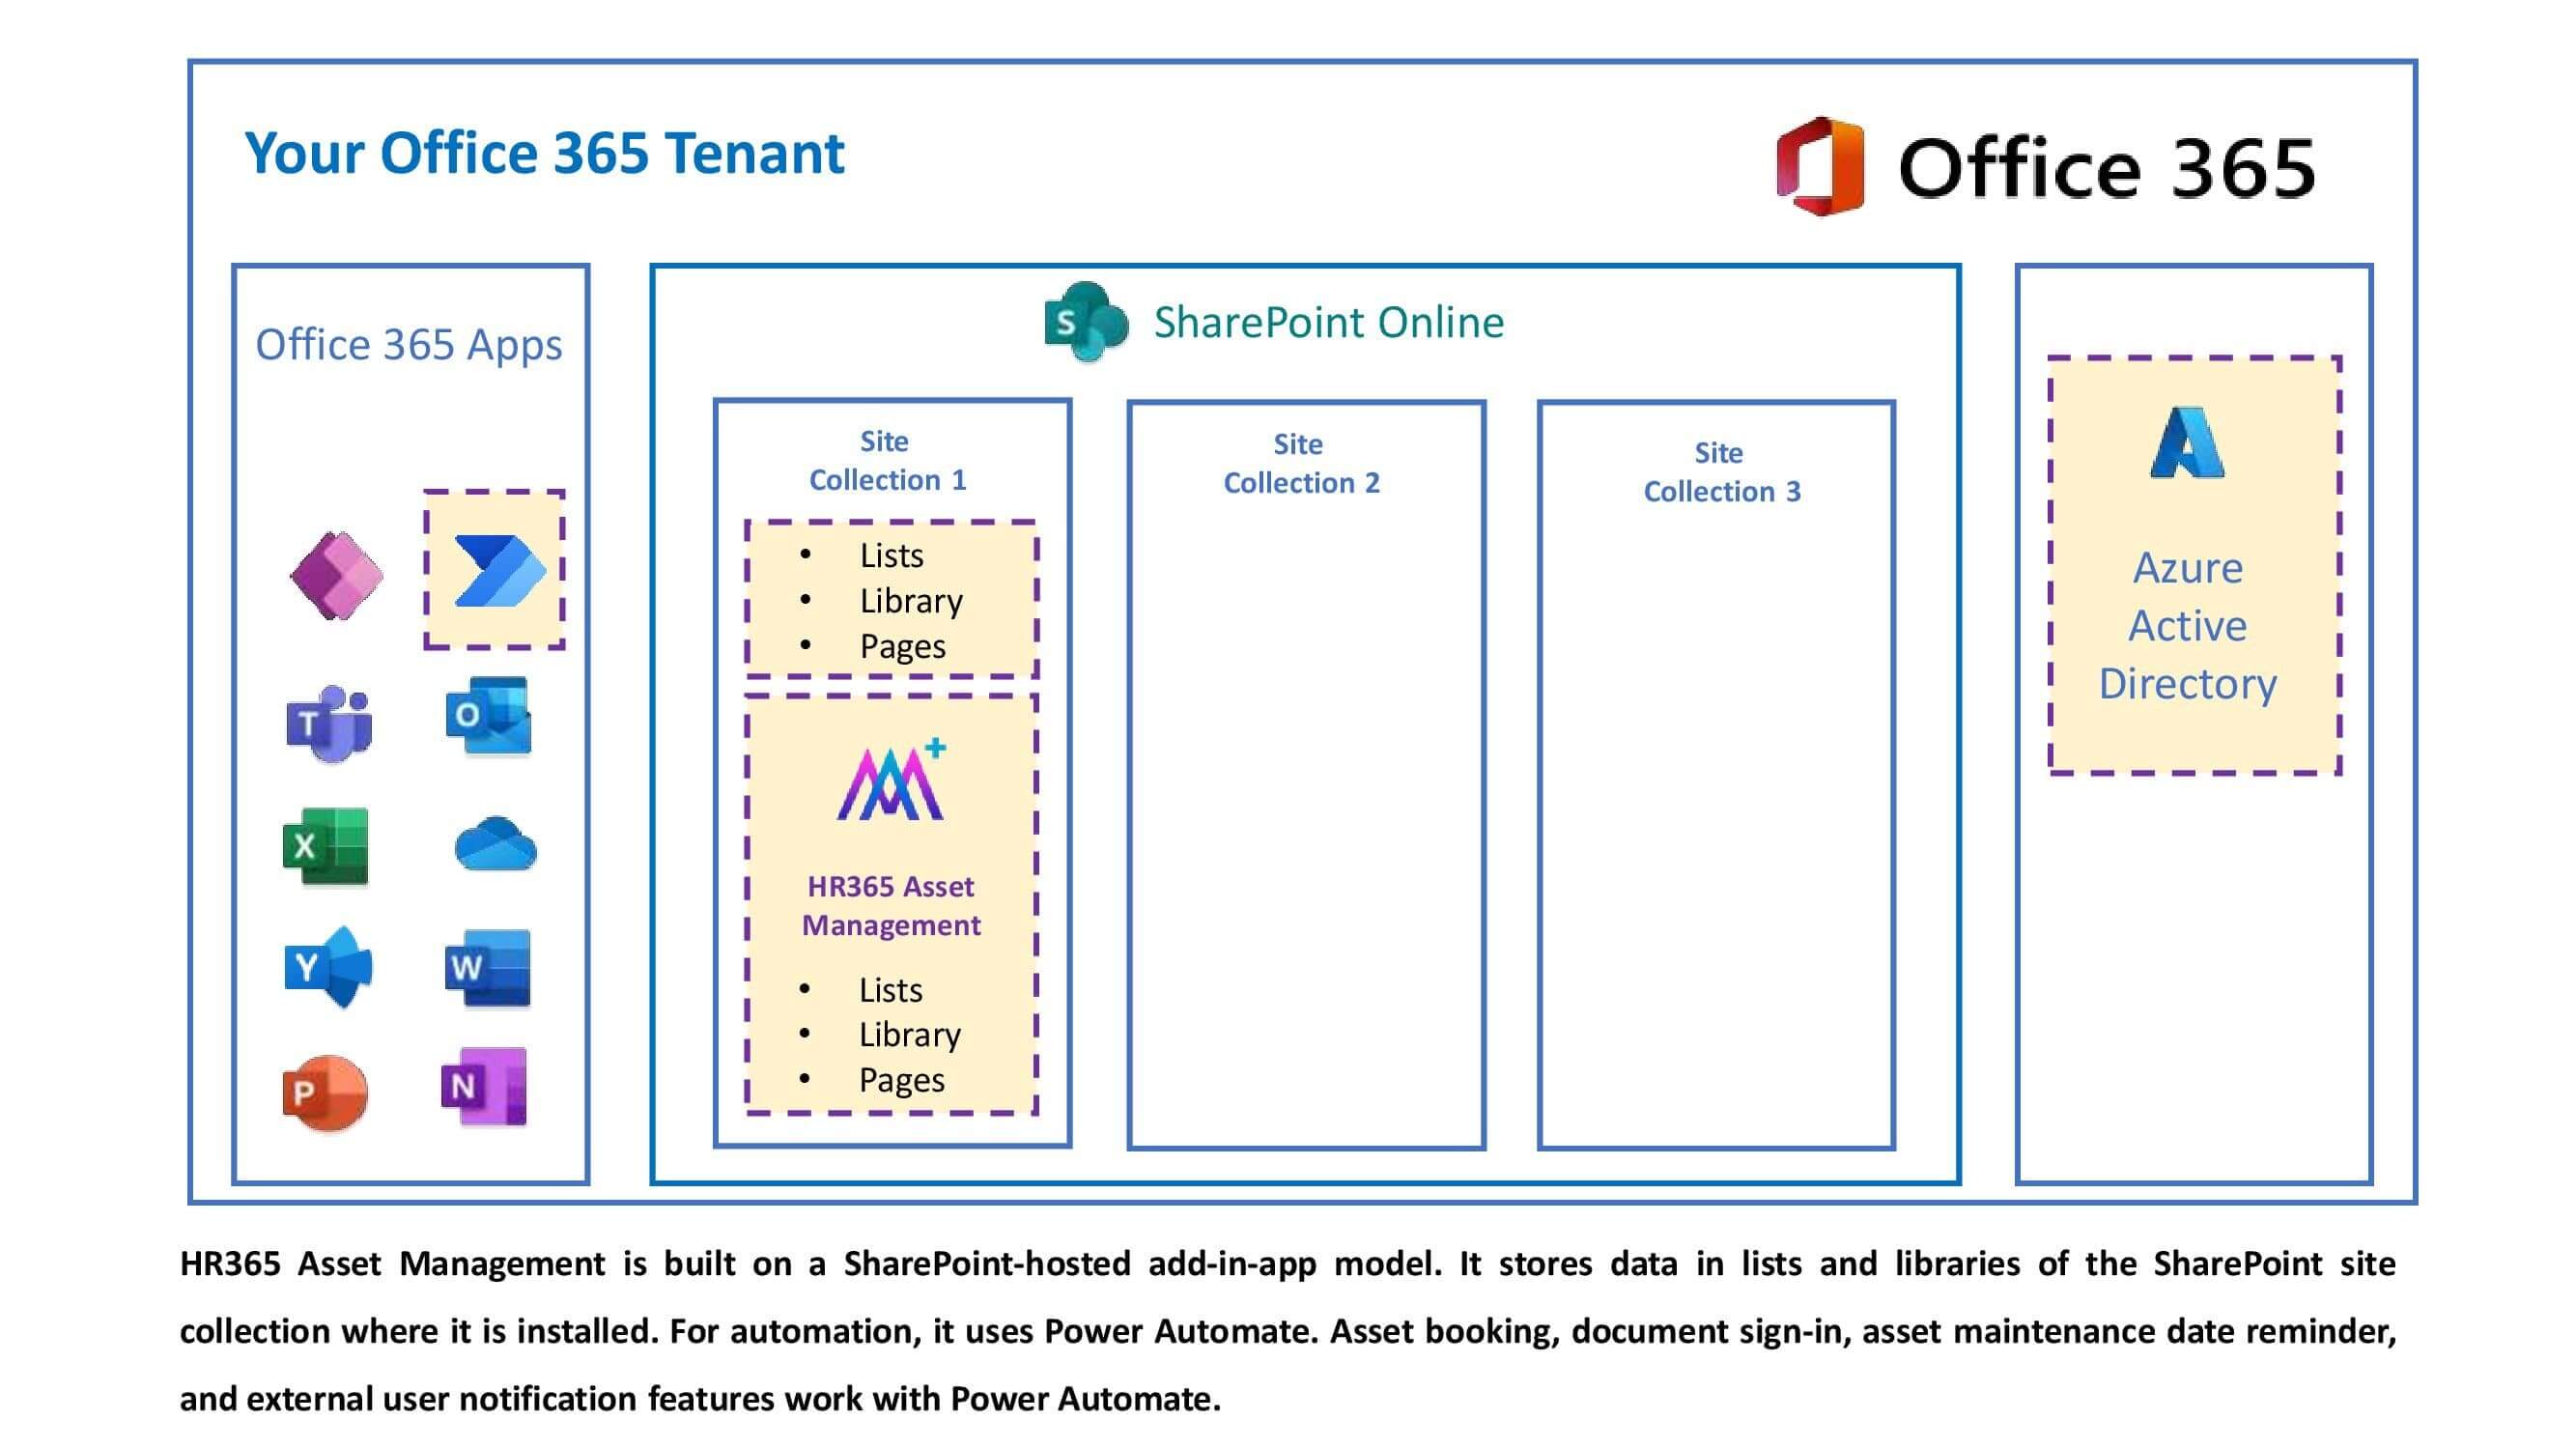
All the data stores in your office 365 tenant. Data stays with you with no access to anybody other than you even we wouldn’t get access.
No, we will not have access to any field from your tenant other than the app email id of the person who has installed the app. Incase of troubleshooting, we need to get on screen sharing to know the issue and provide resolution.