General
In this, we can hide the search filter on the home page, grant the admin role to the user, do collaboration settings, upload company logo, language selection, update user's department, update users location, update users job title, and add custom links.
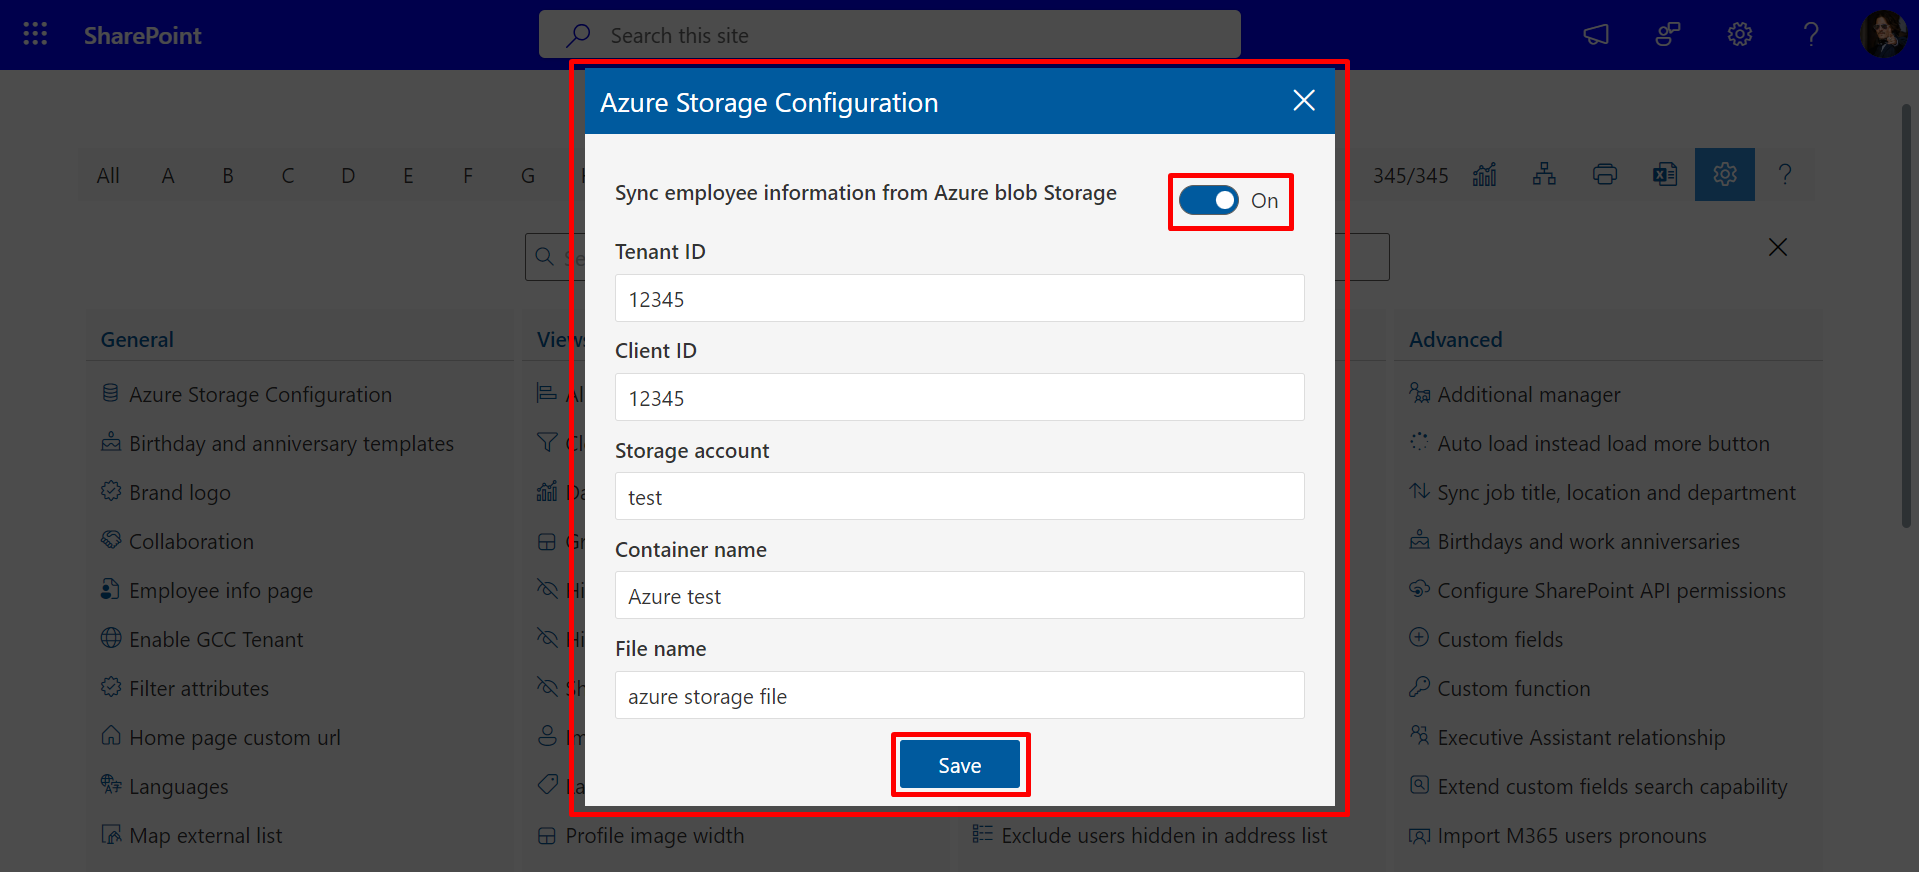
Azure Storage Configuration
This toggle allows you to retrieve user information from Azure.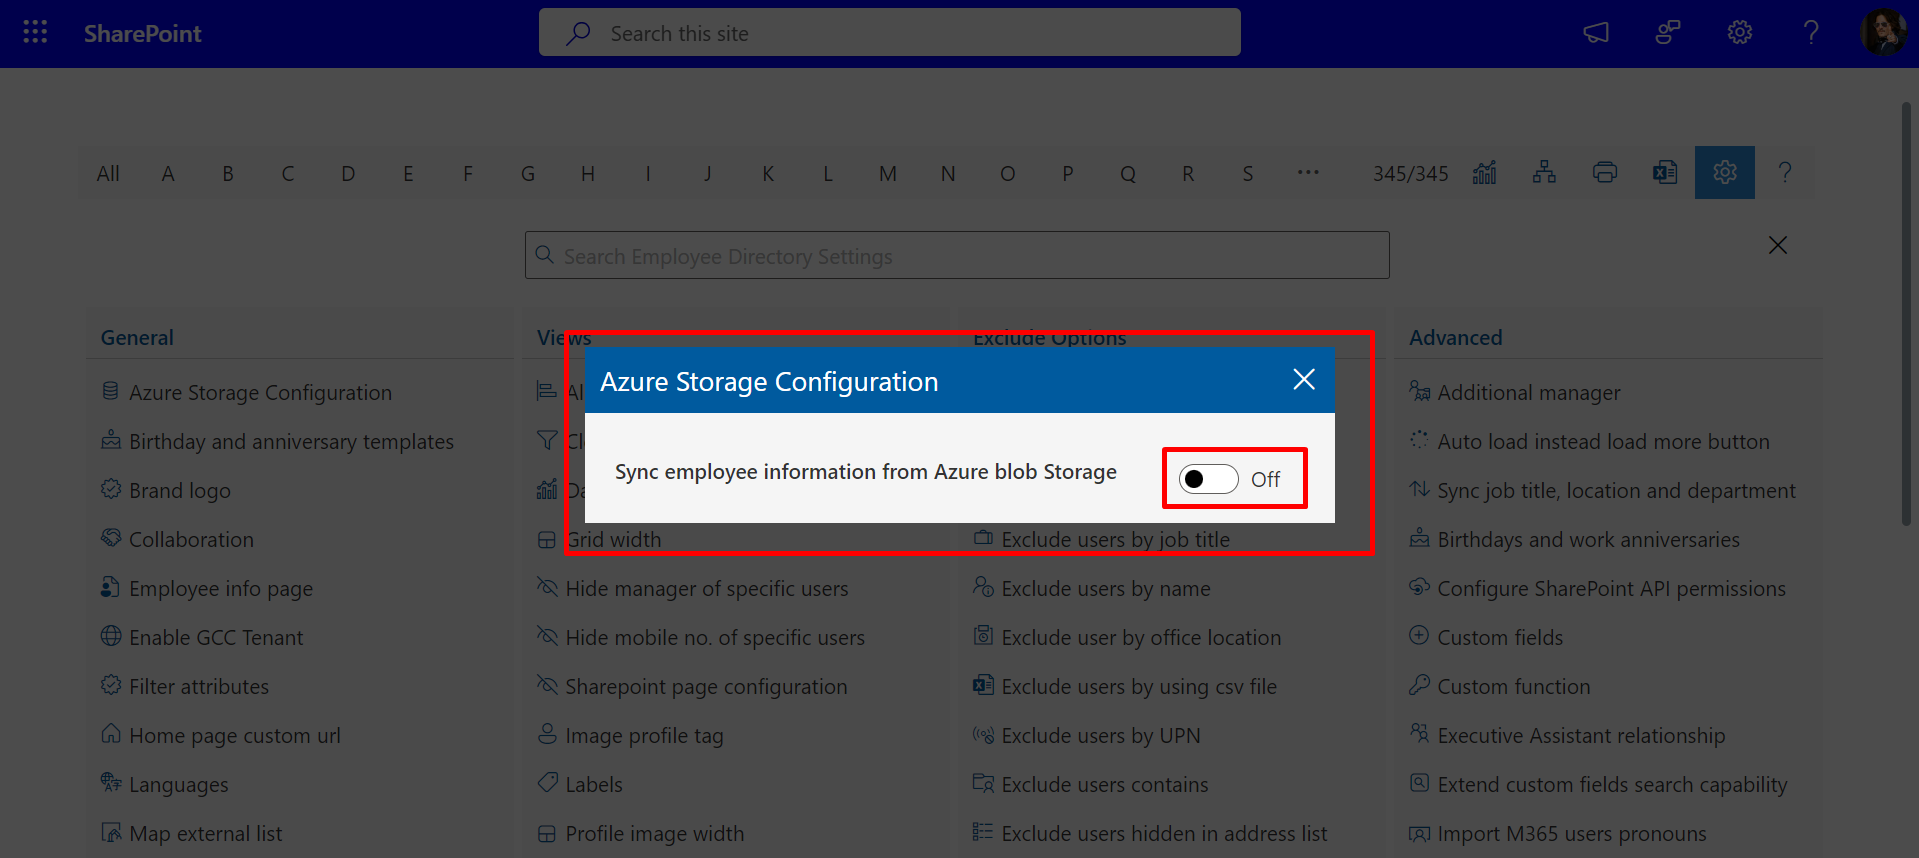
When the Sync employee information from Azure Blob Storage toggle is on, it displays the respective fields, allowing us to fill them in to retrieve information from Azure Blob Storage.
Birthday and anniversary templates
Birthday Template: Customize the email template for employee birthdays. You can include personalized messages, company branding, and specific details to make the email more engaging. Schedule the emails to be sent automatically on the employee's birthday.
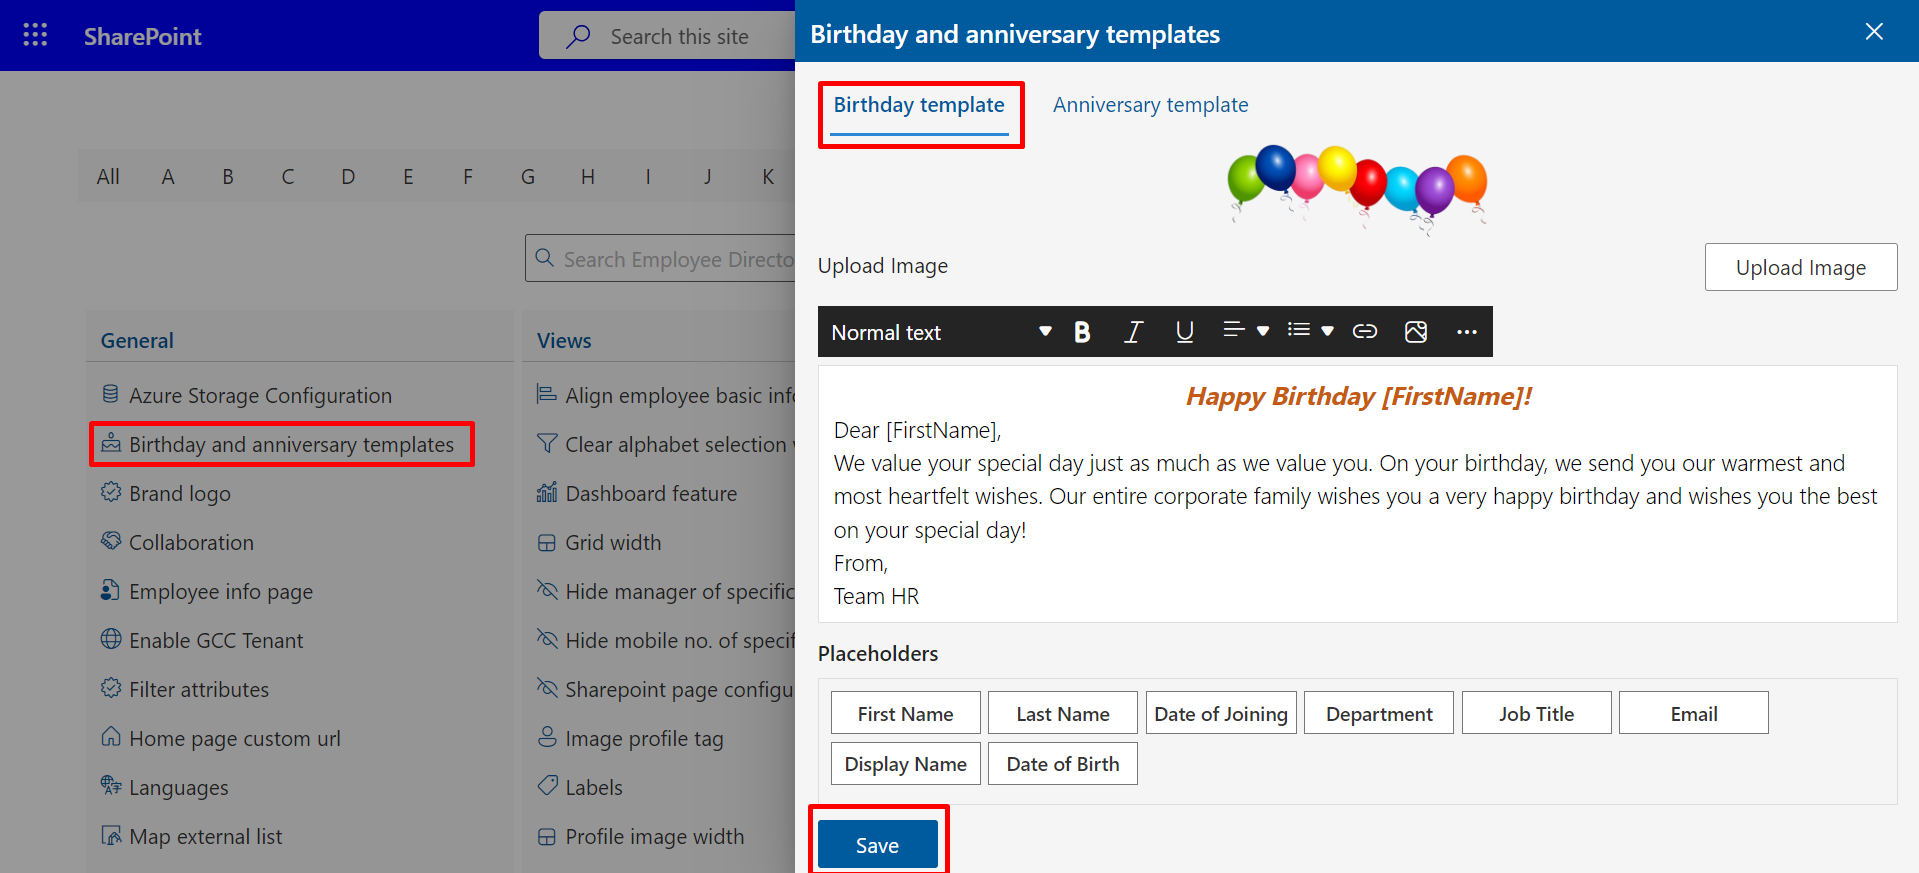
Anniversary Template: Customize the email template for employee work anniversaries. You can include congratulatory messages, milestones achieved, and company branding to recognize the employee's contributions. Schedule the emails to be sent automatically on the employee's anniversary date.

Brand logo
Here you can Update the Brand Logo.
Collaboration
If your organization uses a softphone, please choose either SIP or Tel protocol. Otherwise, you can utilize Microsoft Teams to make calls to employees.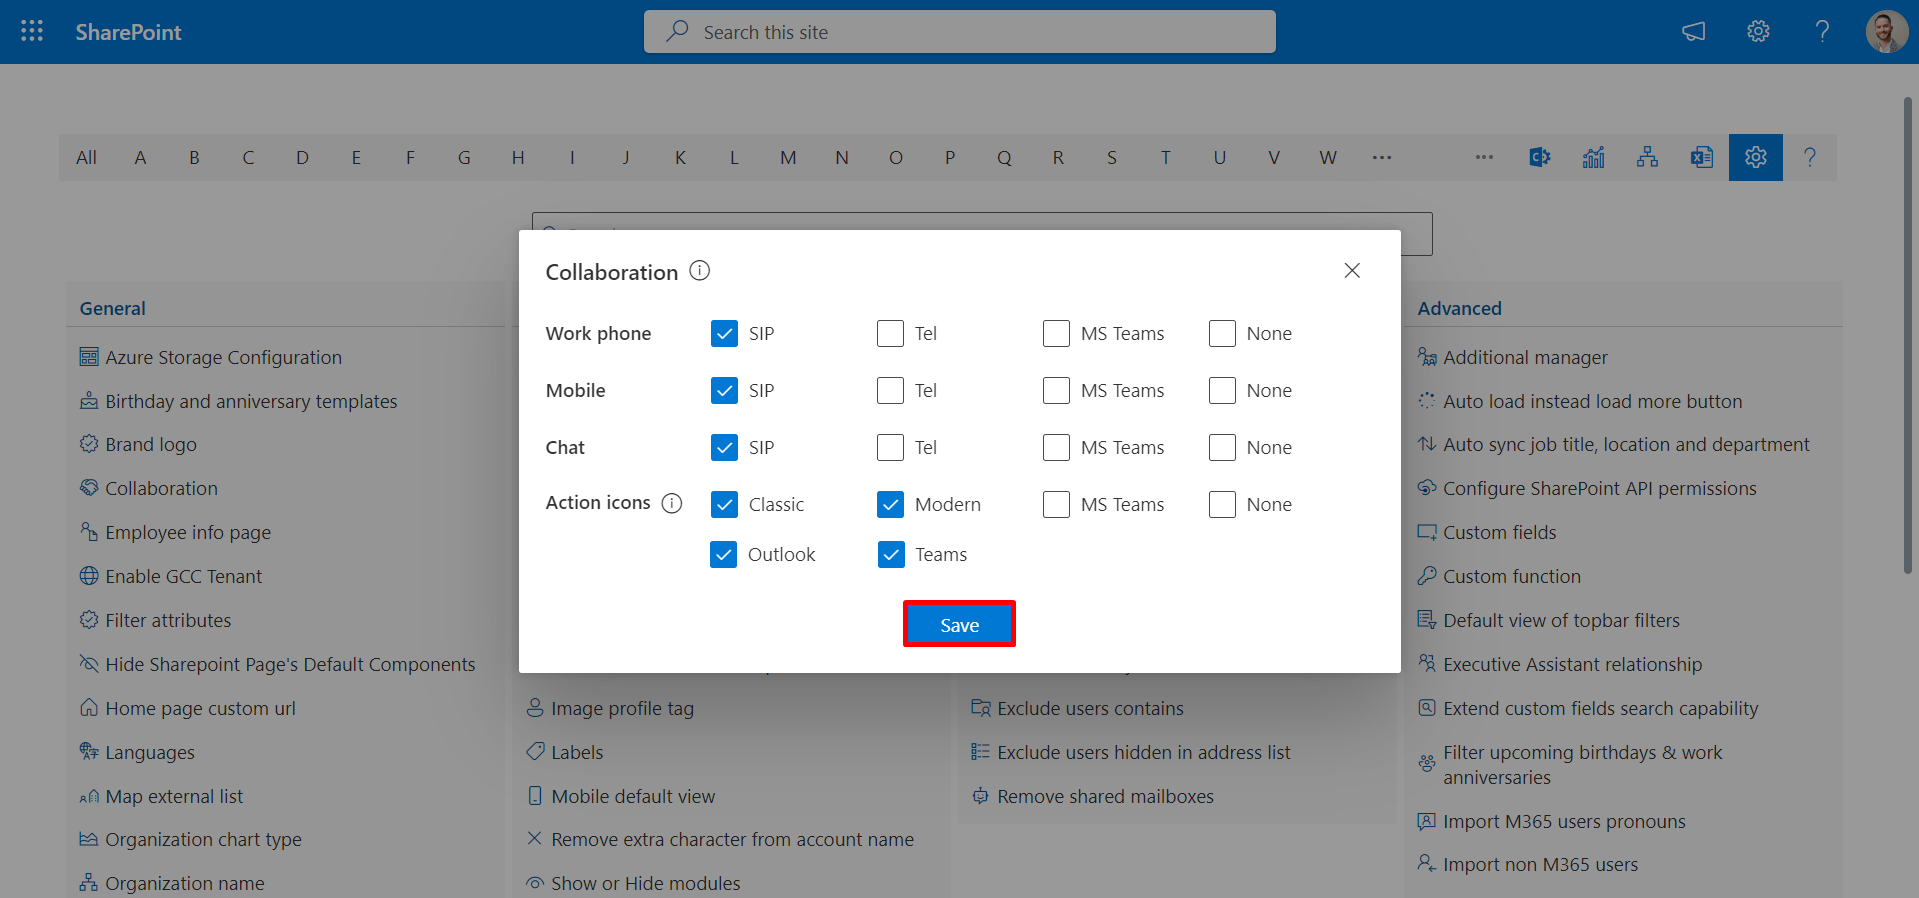
Employee info page
You can define specific url in Azure AD extension attribute column, this setting will enable employee info page. Please refer here on how to setup up extension attributes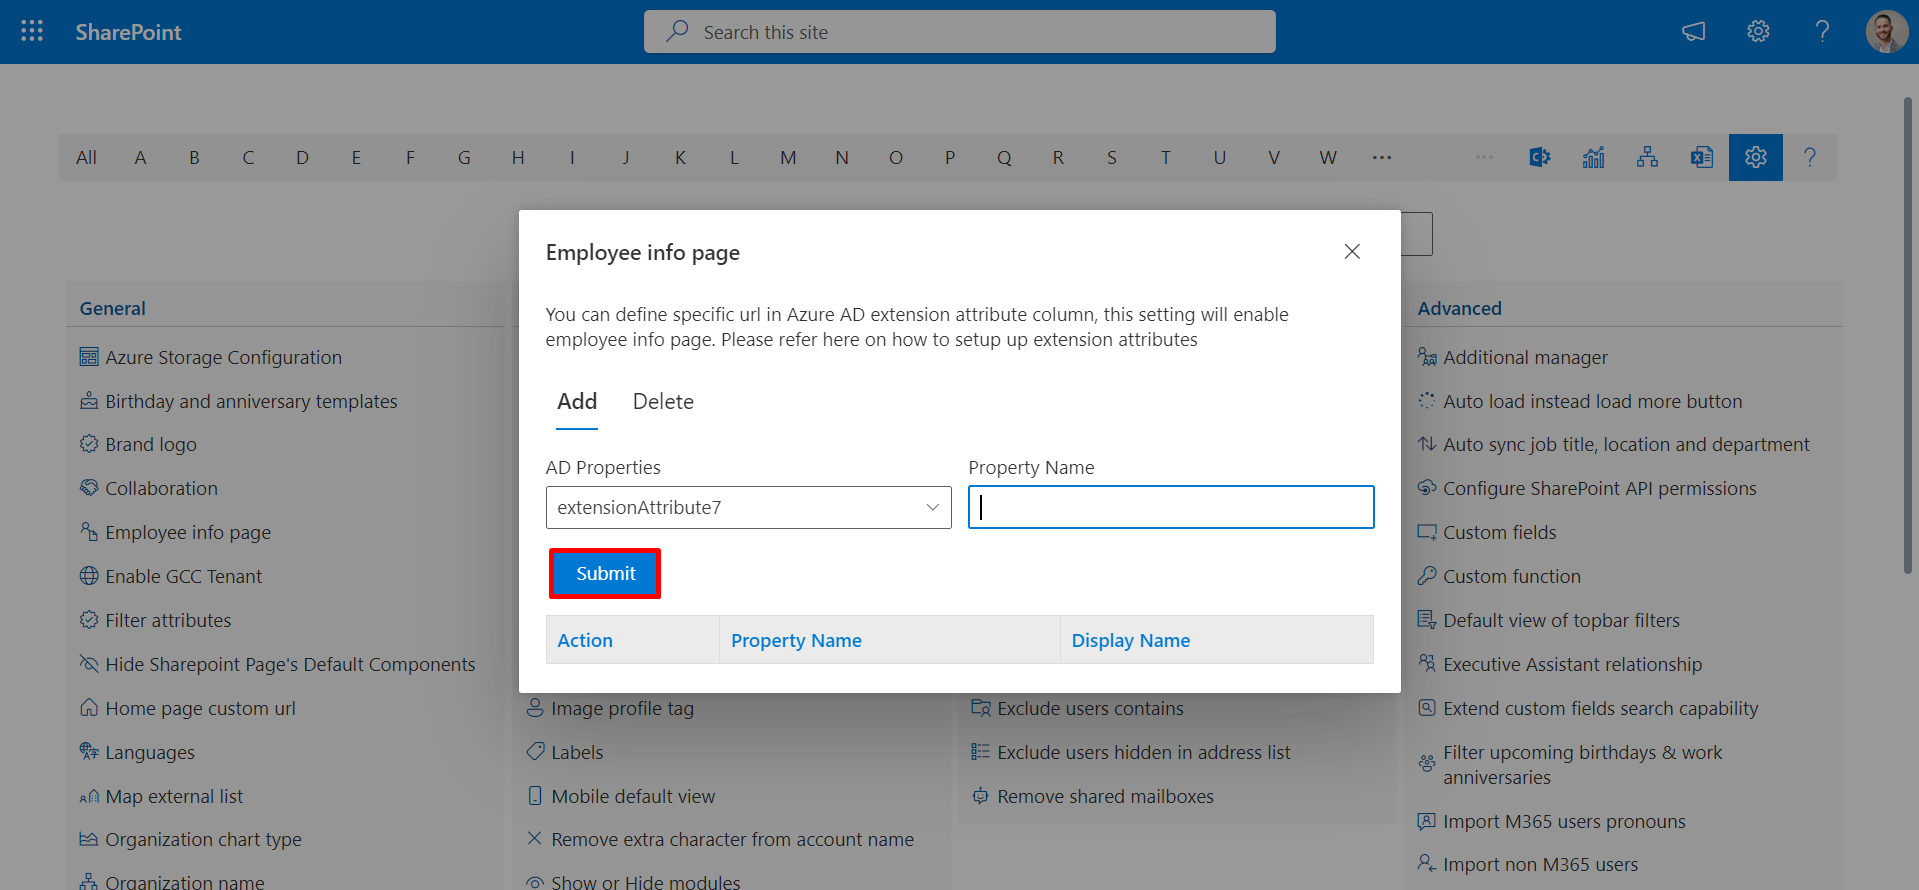
GCC Tenant
If your Microsoft 365 tenant is GCC (US Government Community Cloud), please ensure that the specific setting is enabled in order to ensure compatibility within the GCC environment.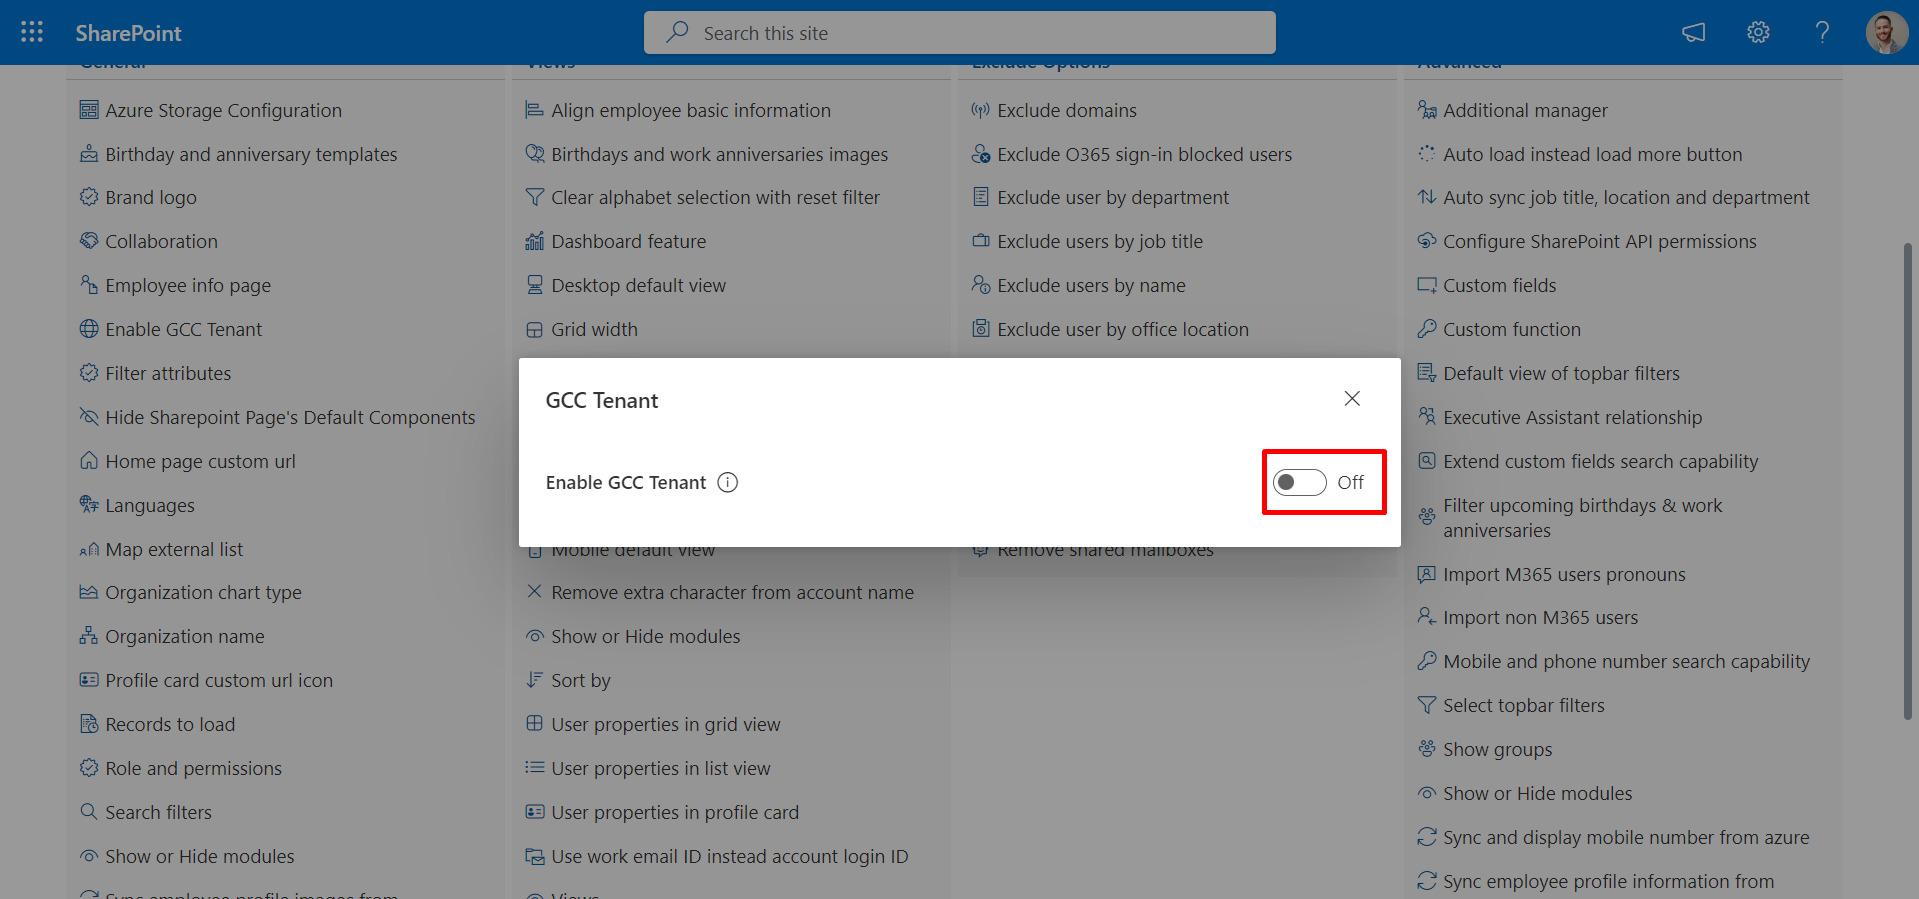
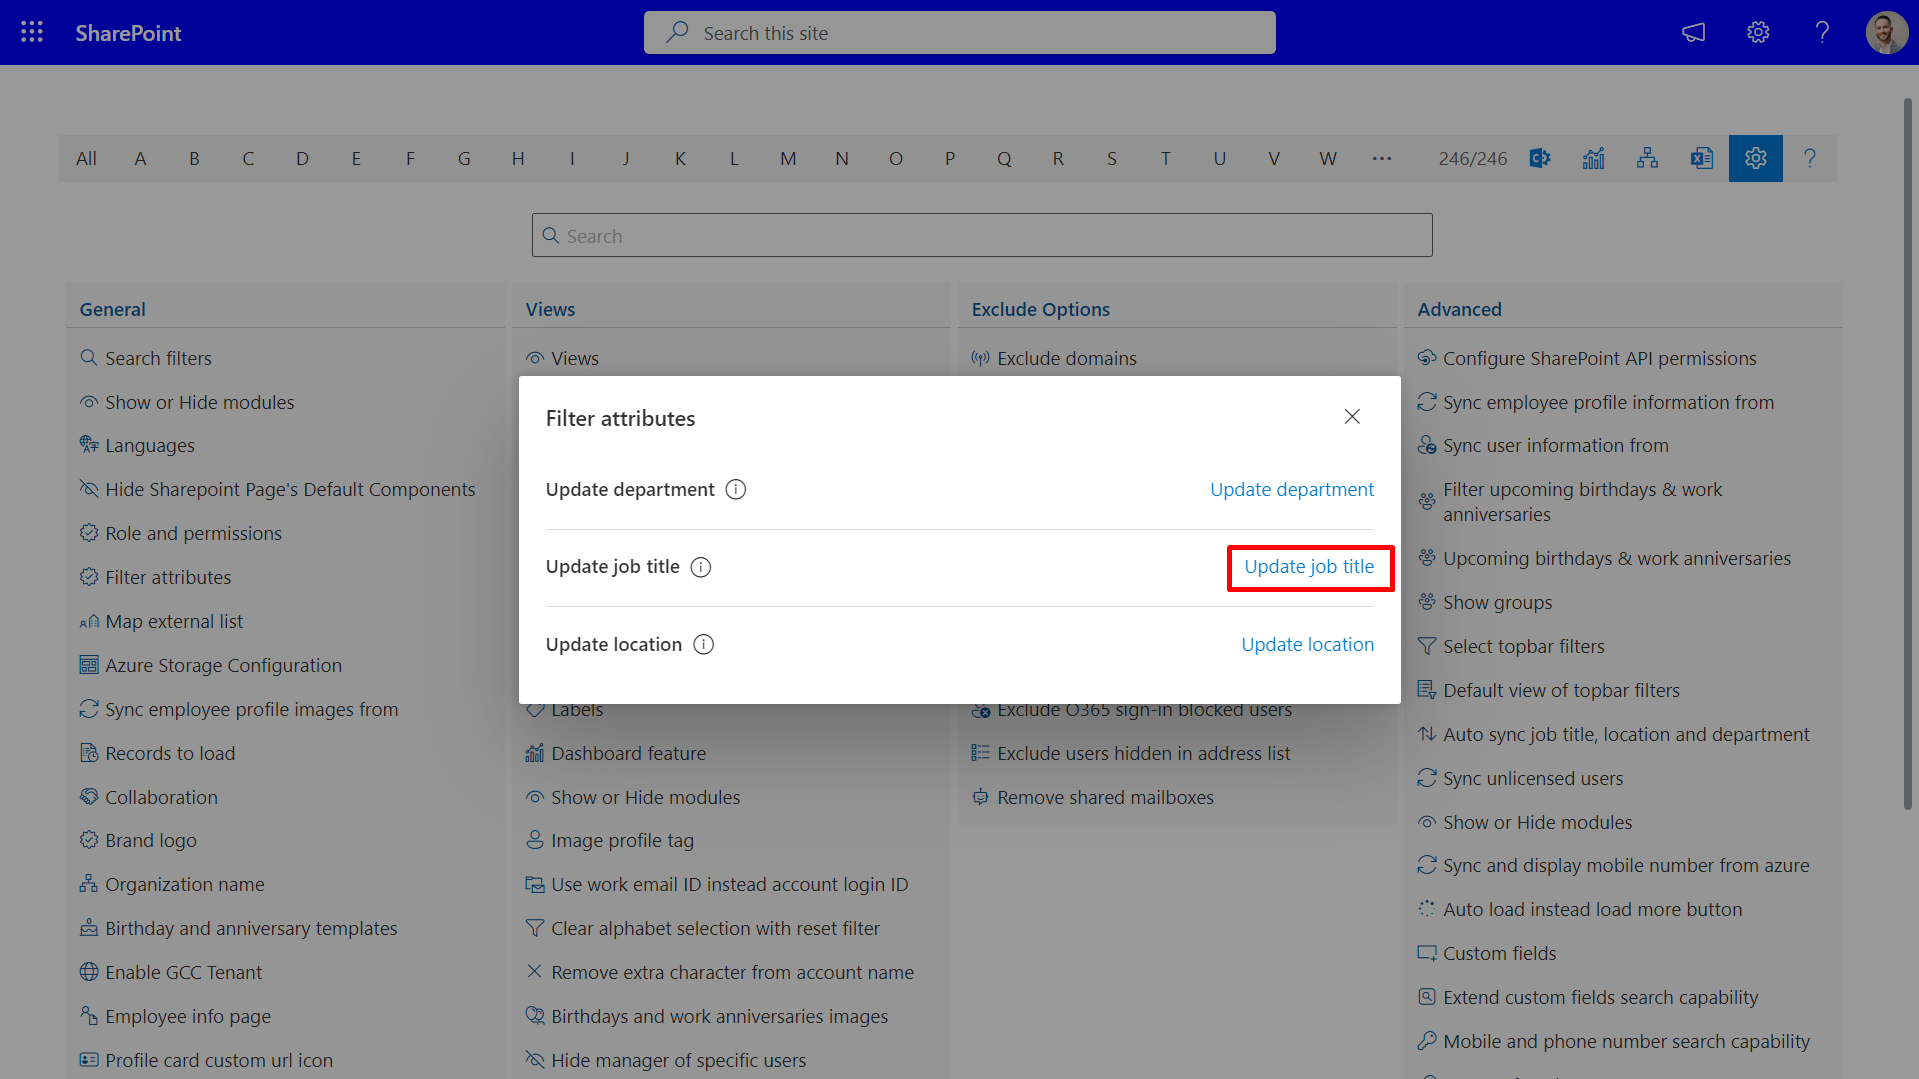
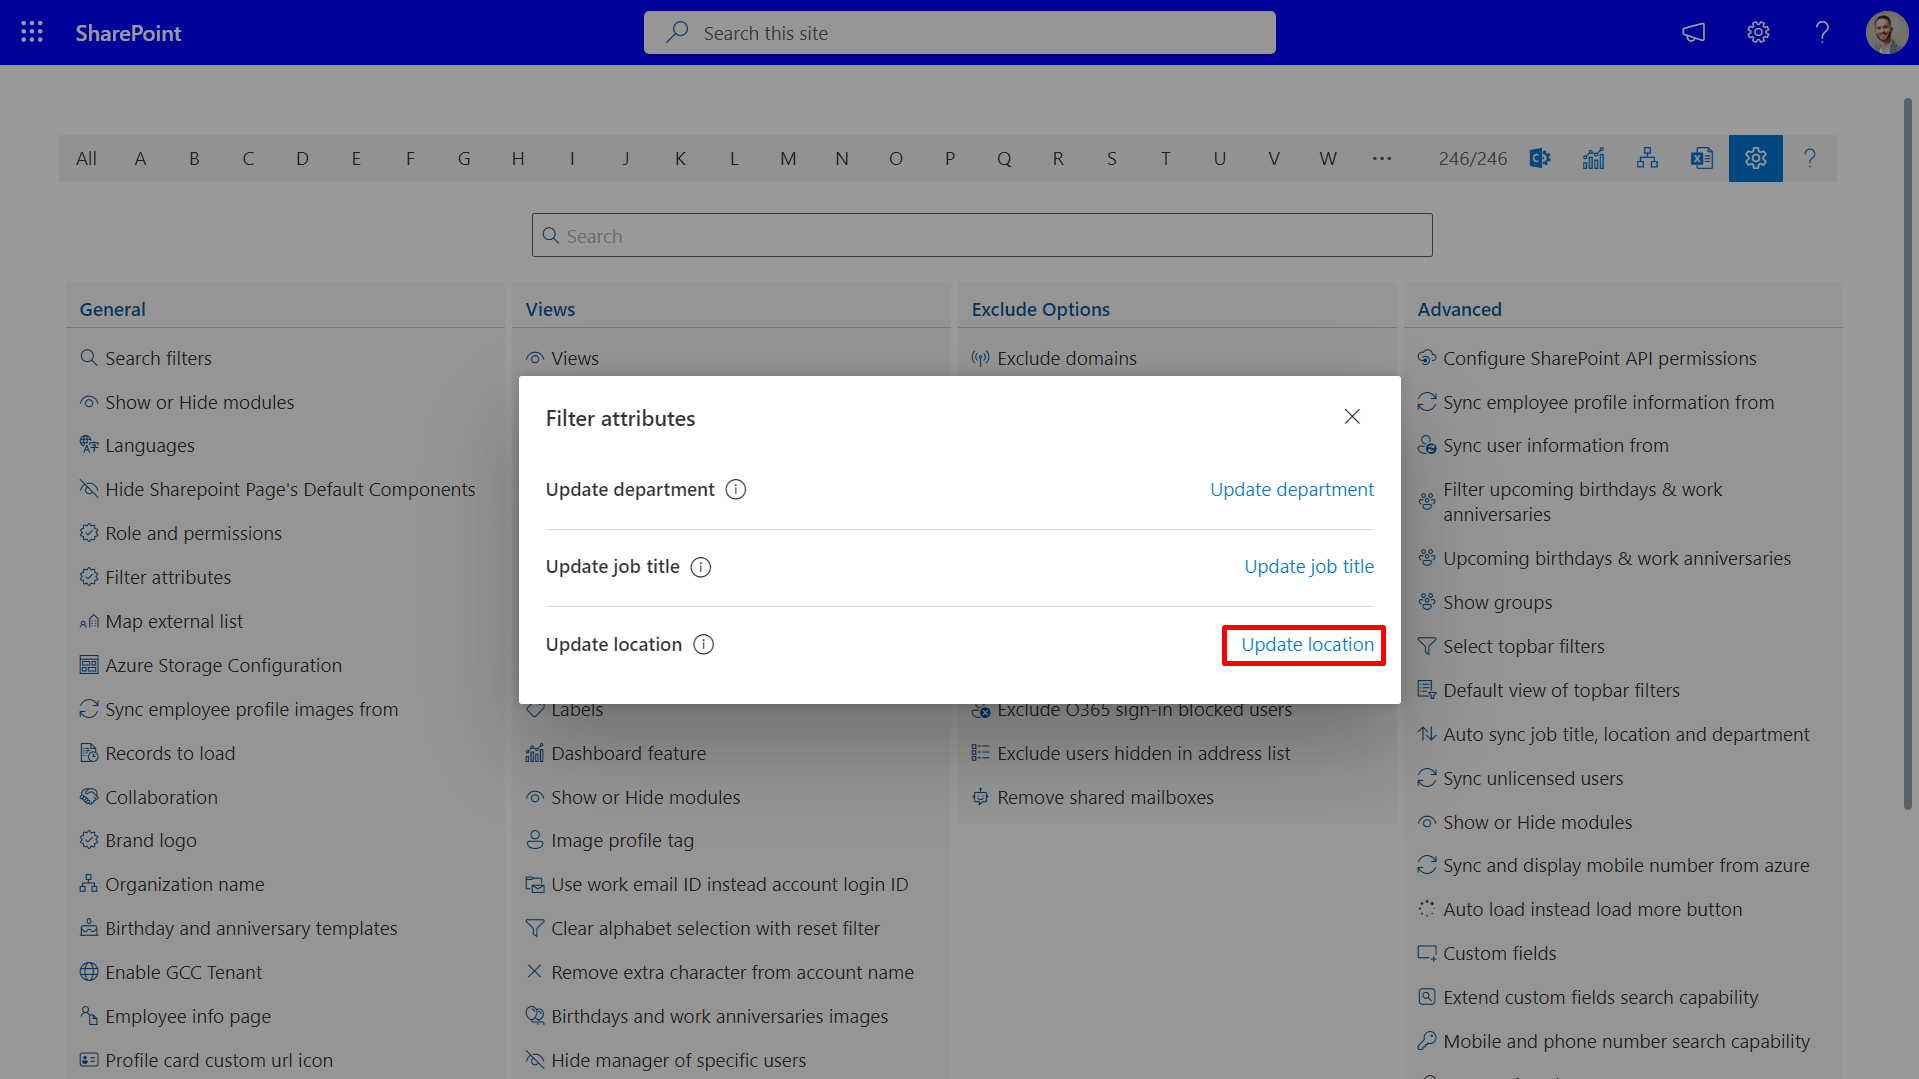
- Update Department
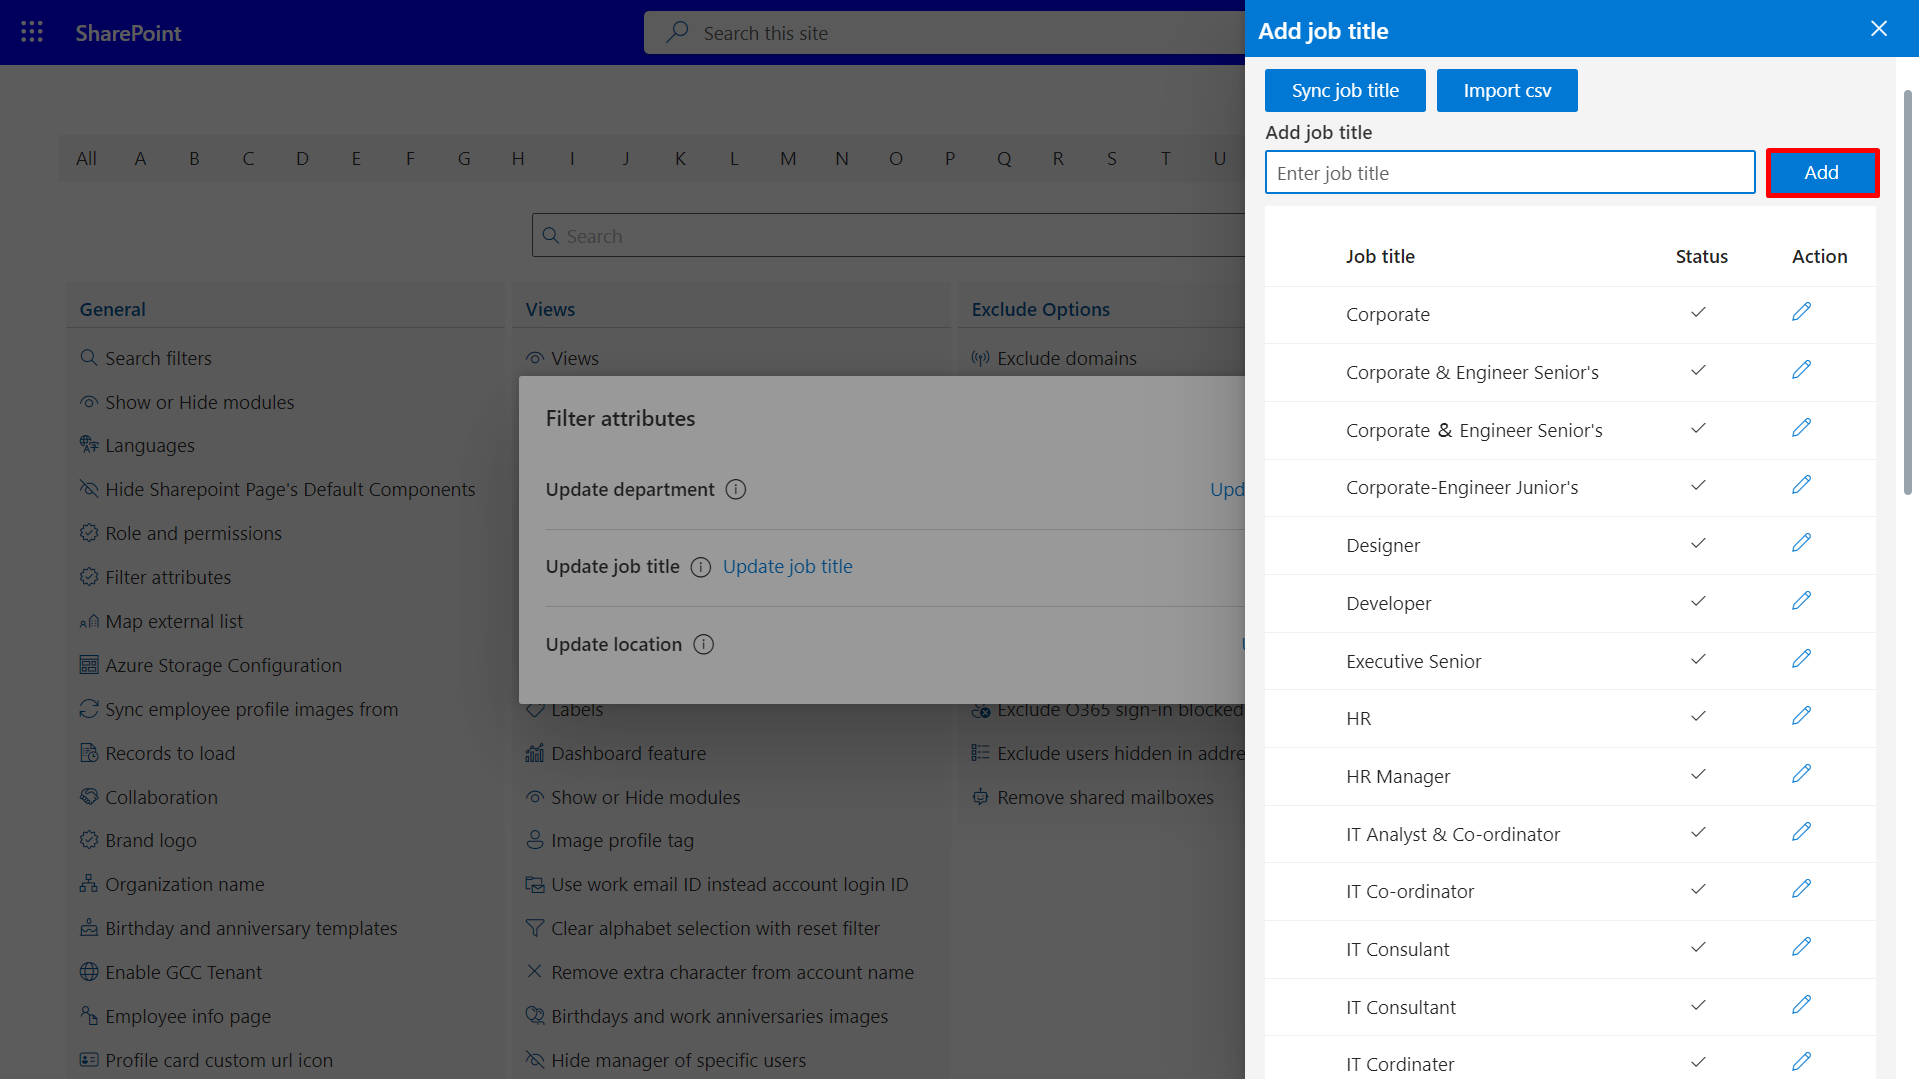
- Update Job Title
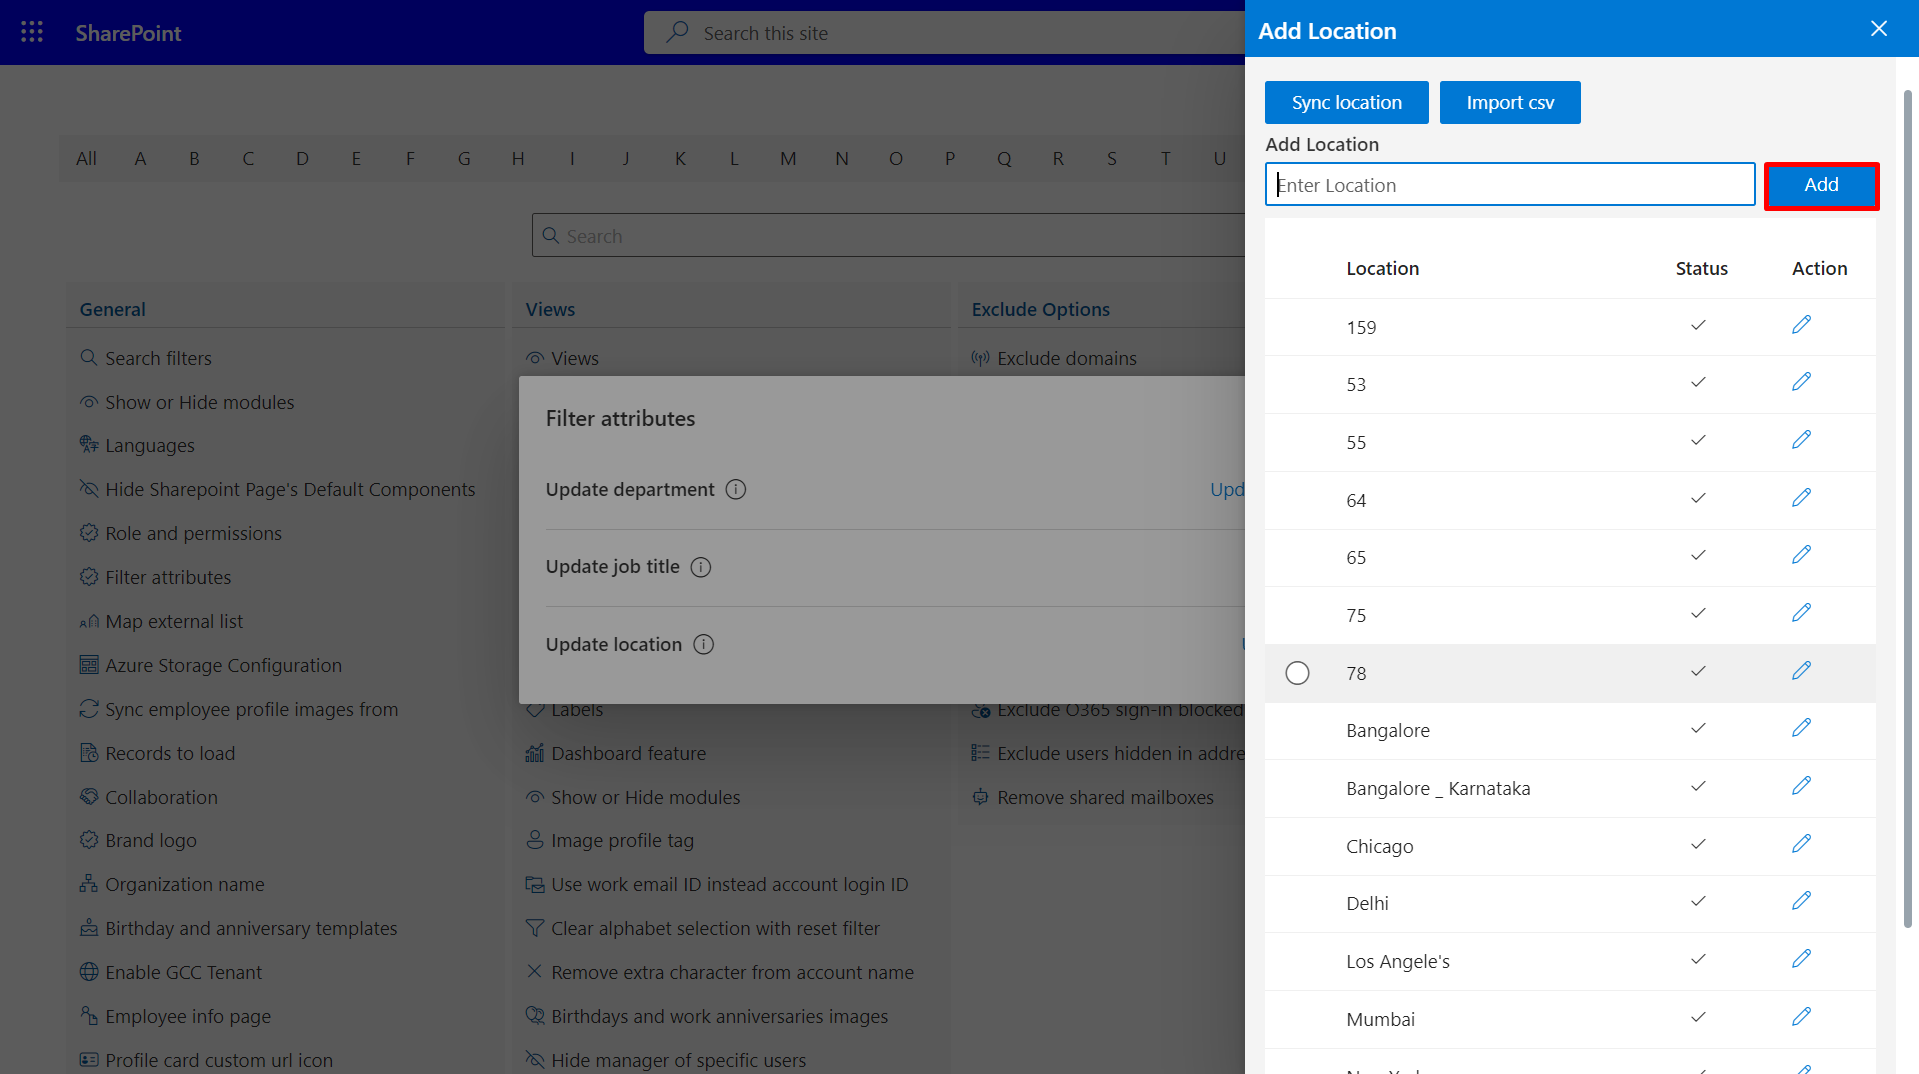
- Update Location
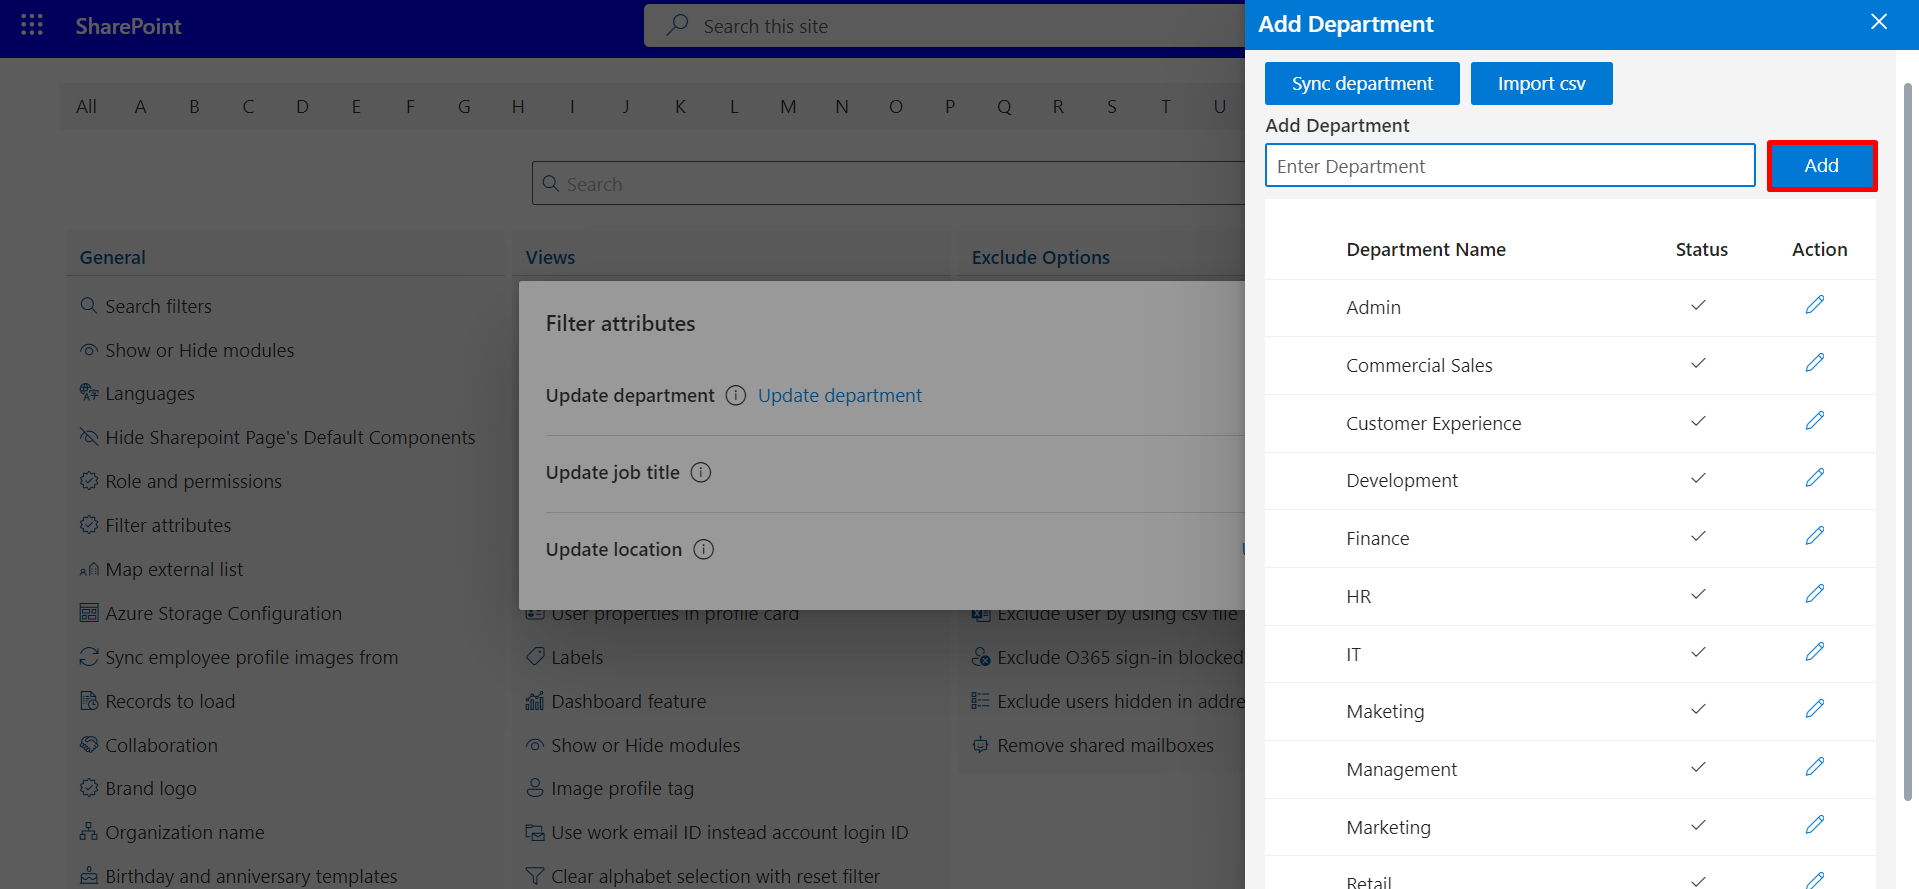
- Update department: This configuration is employed for modifying the user's department.
- Update job title: This configuration is utilized for updating the user's job title.
- Update location: This setting is employed to modify the user's location..
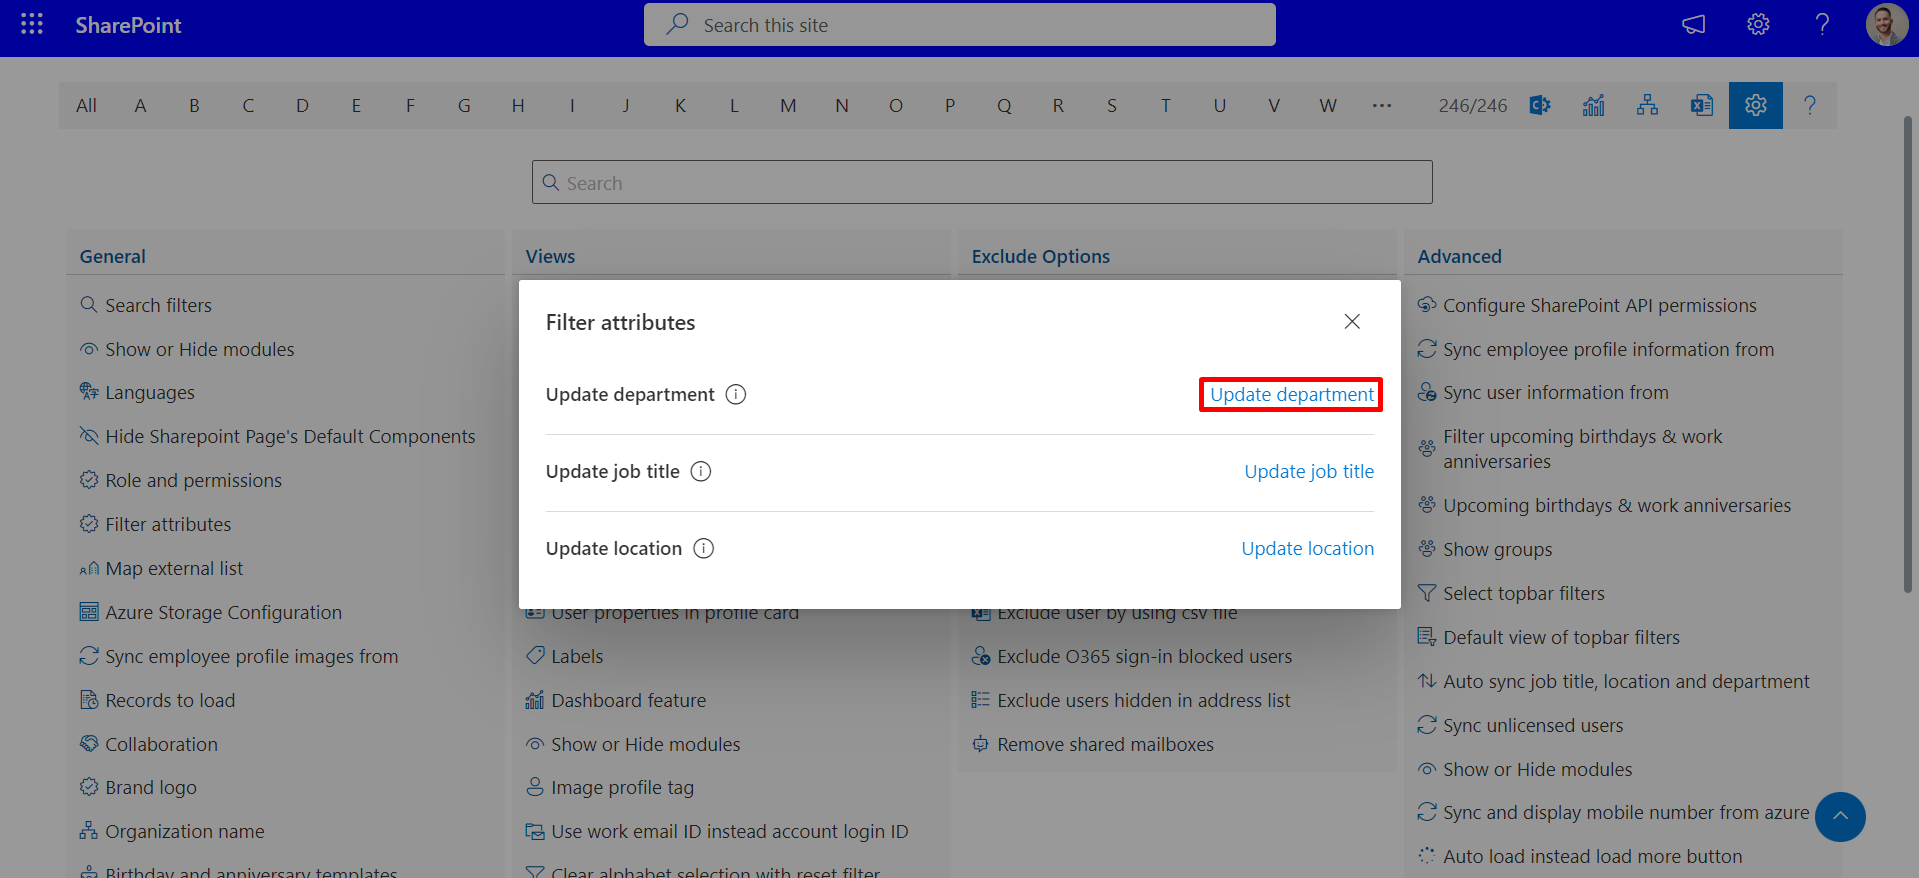
Filter Attributes
You can choose from three filtering attributes: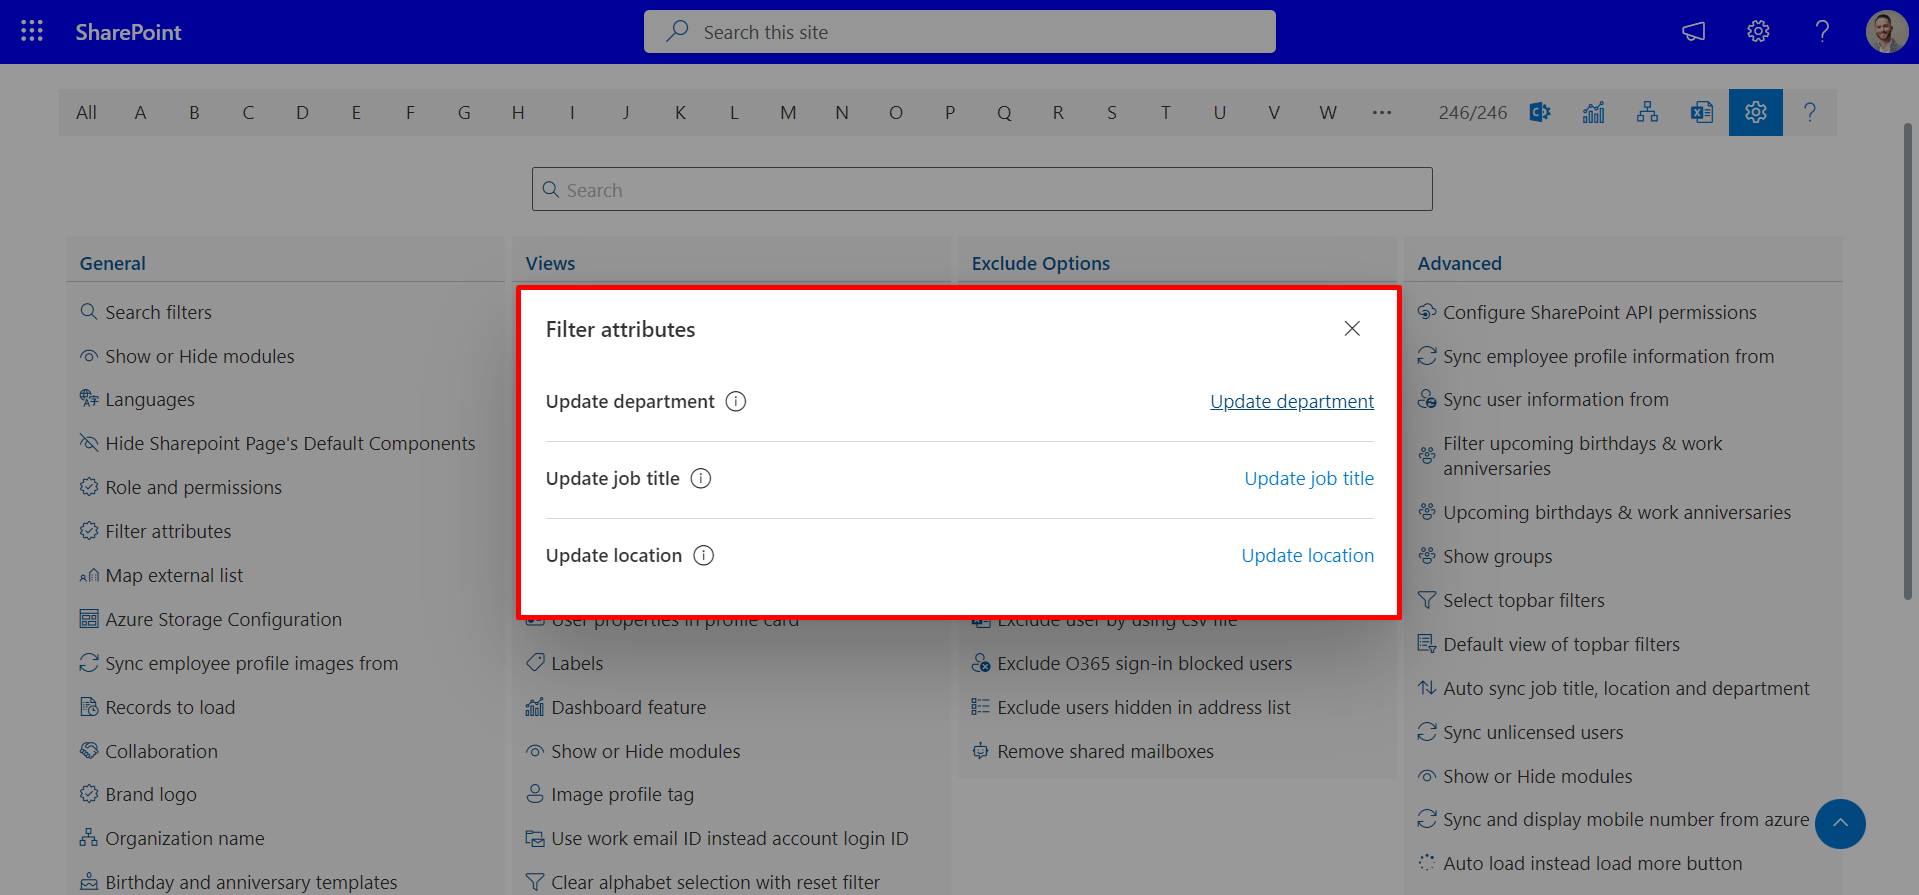
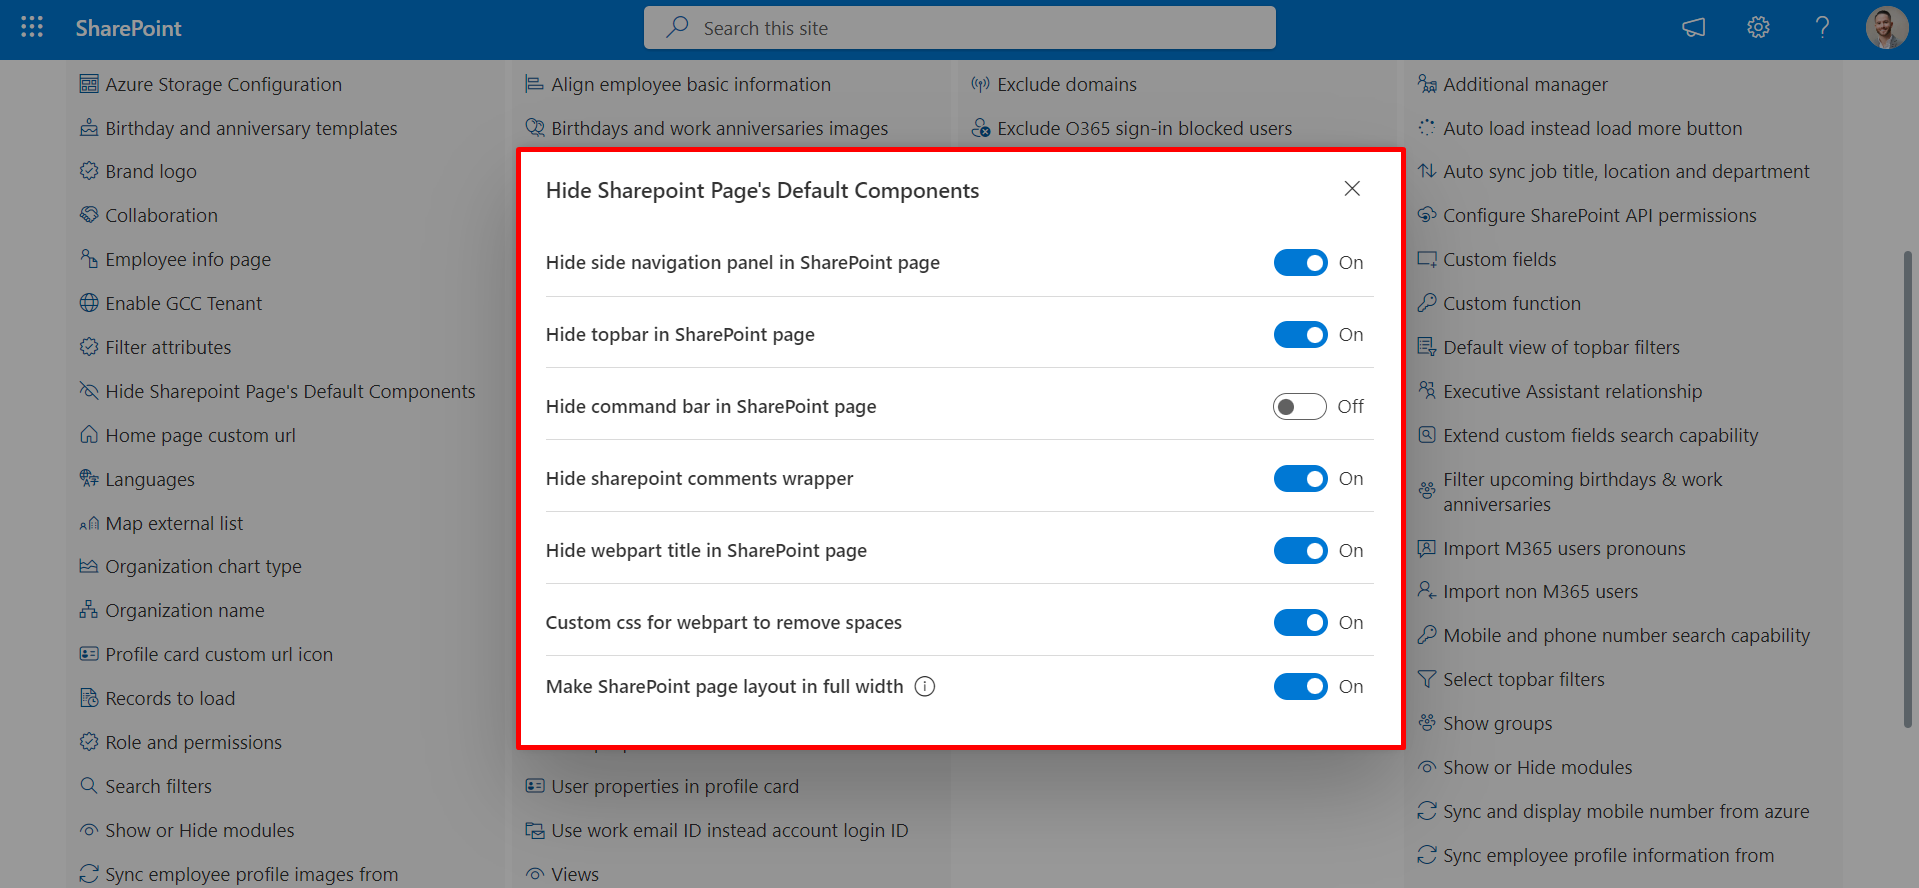
Hide Sharepoint Page's Default Components
From here you can hide sharepoint page default
Hide topbar in SharePoint page: To Enable this toggle you can hide the topbar
in Sharepoint Page.
Hide command bar in SharePoint page: To Enable this toggle you can hide
Command bar from sharepoint page.
Hide sharepoint comments wrapper: Enable this toggle will hide comments
wrapper in sharepoint page where app is running.
Hide webpart title in SharePoint page: Enable this toggle will remove the
Webpart title.
Custom css for webpart to remove spaces: Enable this toggle will remove space
outside of Webpart.
Make SharePoint page layout in full width: Make your SharePoint page width in
full screen for larger resolution where app is running.
Home page custom url
In the custom URL section of the homepage, you can input the URL of your favorite website and navigate there with a single click.
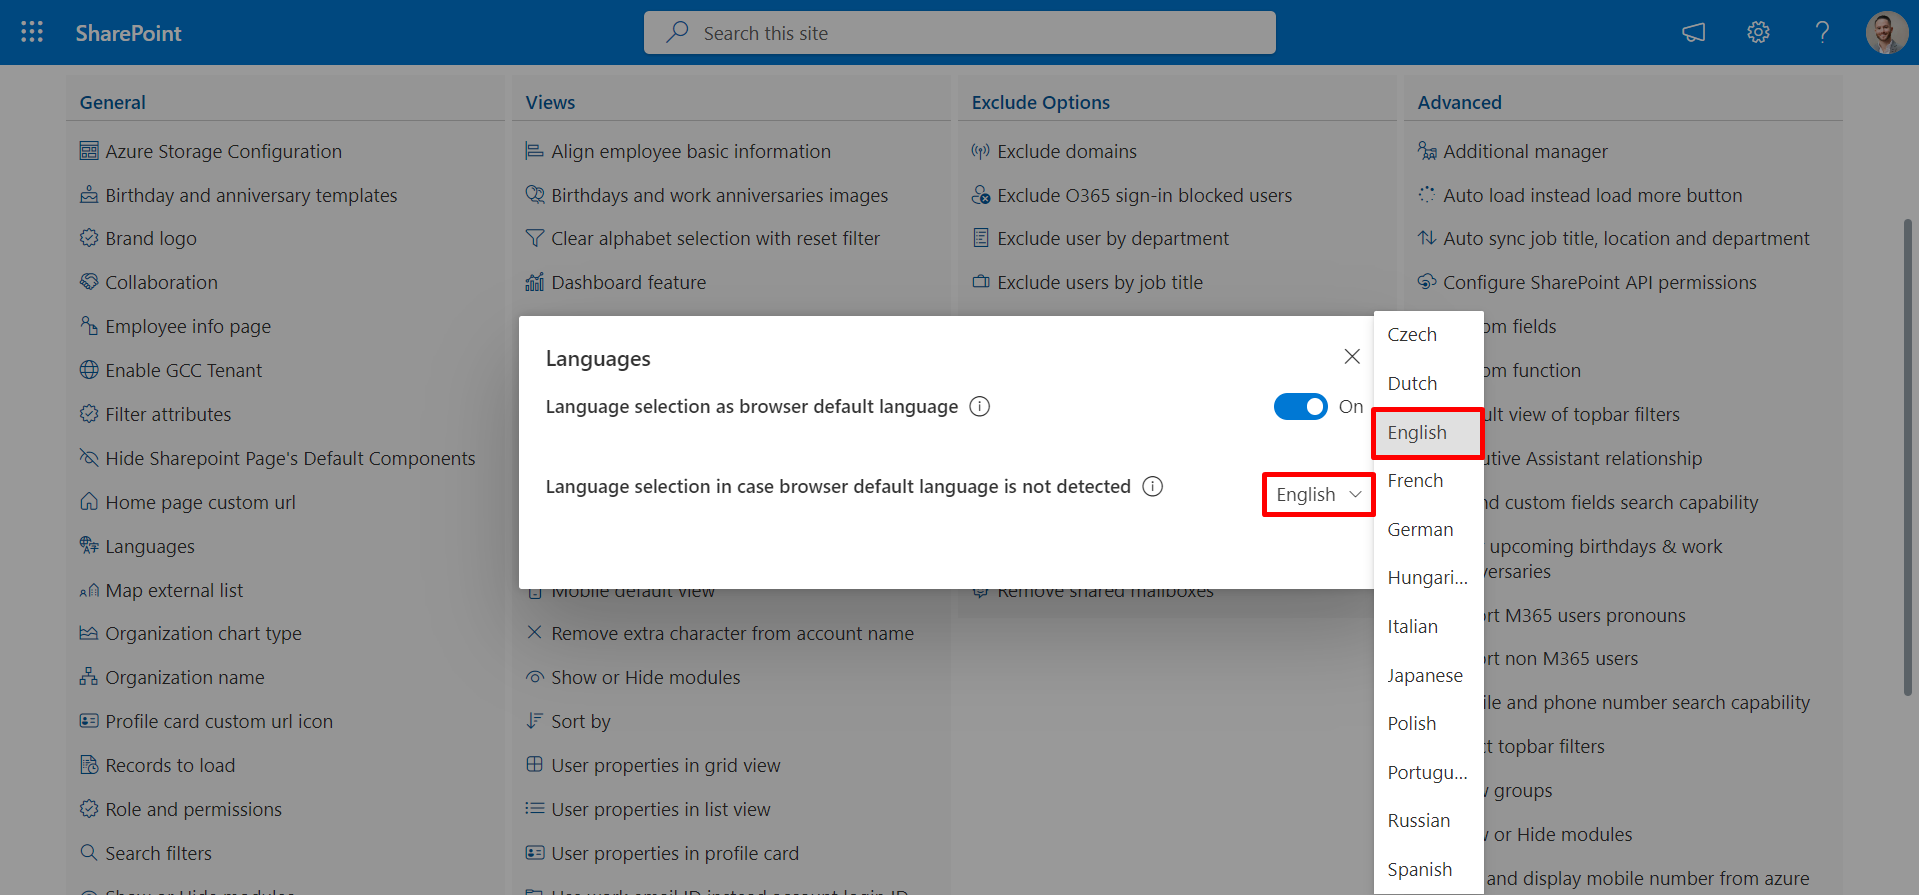
Language selection as browser default language
By default, this feature is enabled. You can disable it from the toggle switch. If
this is enabled, then the language will auto change to the language used in the
browser. Employee Directory can work in Czech, Dutch, English, French, German,
Hungarian, Italian, Japanese, Polish, Portuguese, Russian, and Spanish as per your
browser language.
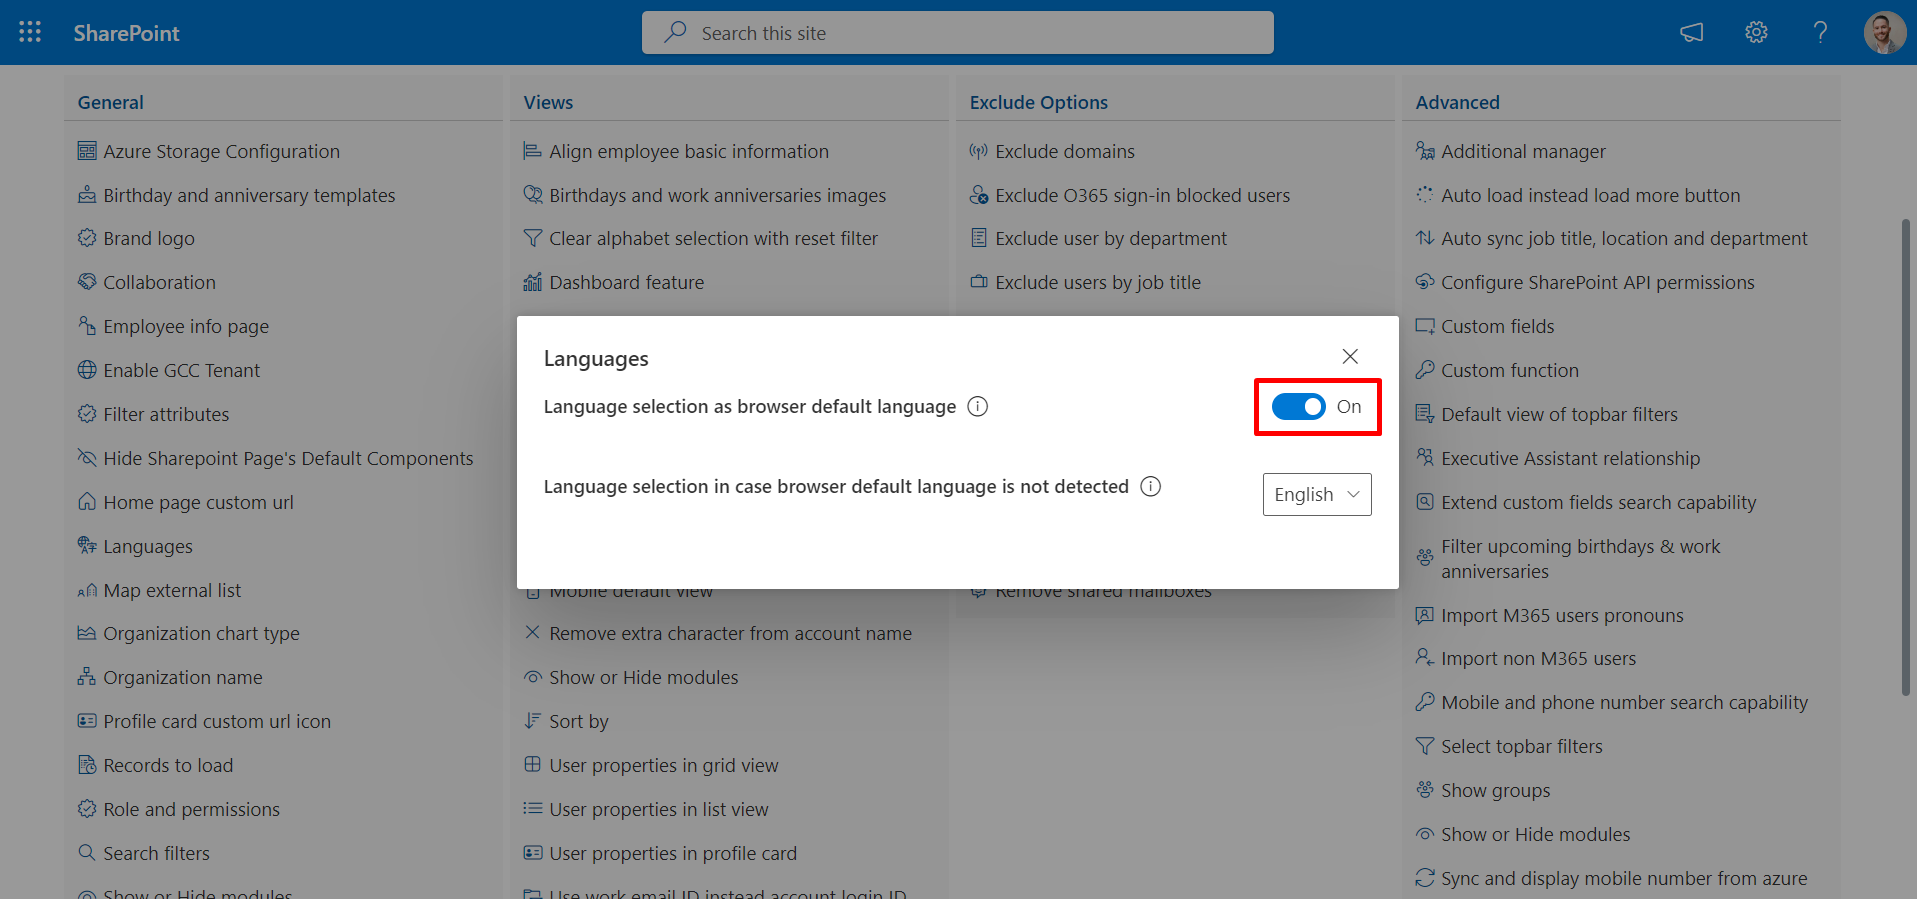
Language selection
From here you can change the language manually. Here the selected language will
reflect for all users, even if the browser language is different. To enable
Language selection, make sure that the Language selection as browser
default language must be in disable condition.
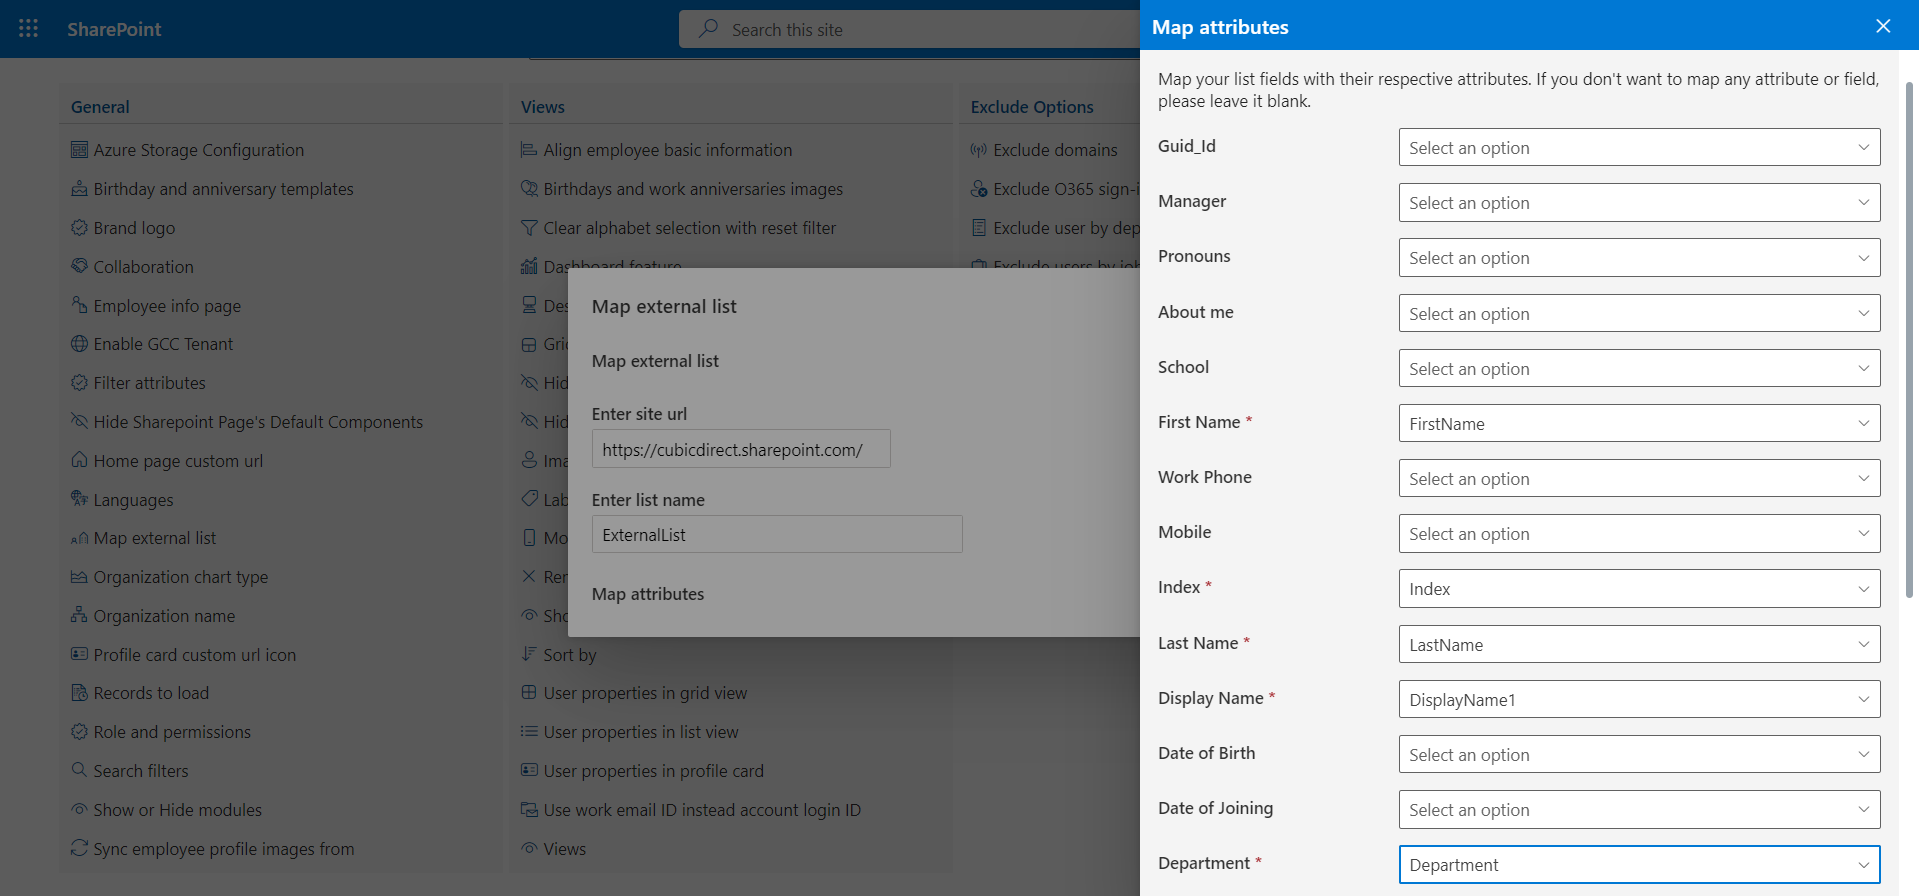
Map external list
In the "Map External List," there is a toggle. By default, this toggle is switched off, signifying that the data originates from the internal list of non-Microsoft 365 (M365).
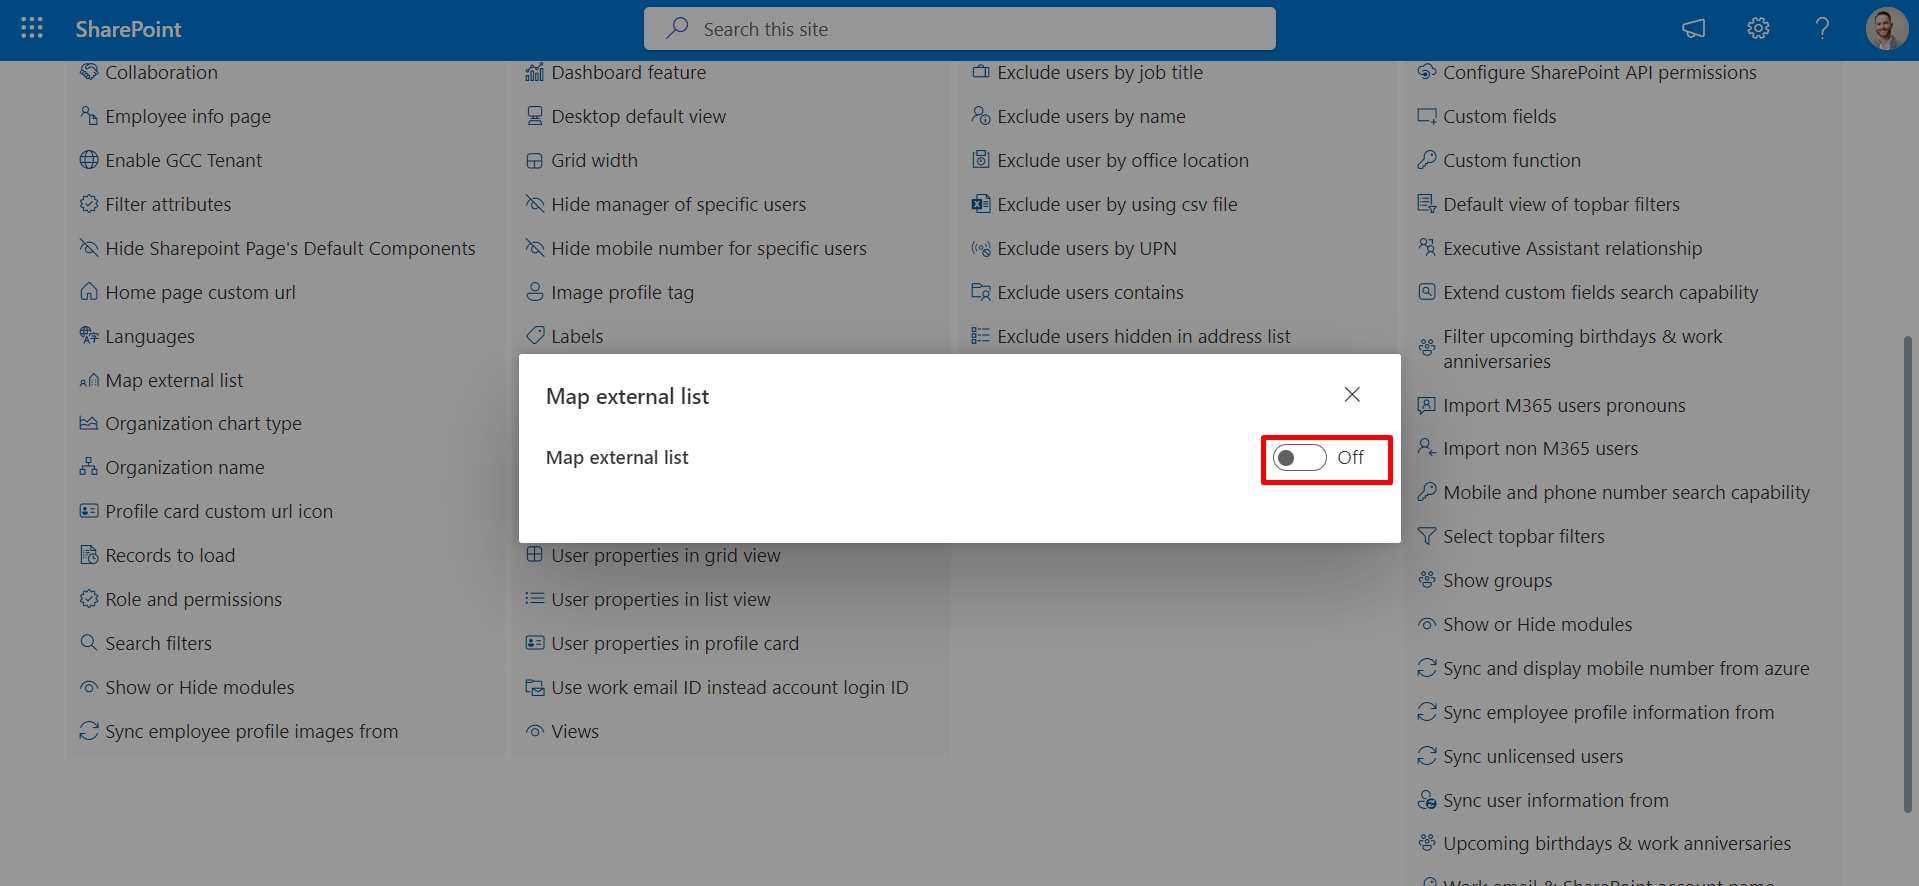
When you activate the toggle, it will request input for two fields: "Enter Site URL": In this field, please input the URL of the external list. "Enter List Name": In this field, enter the list's name.
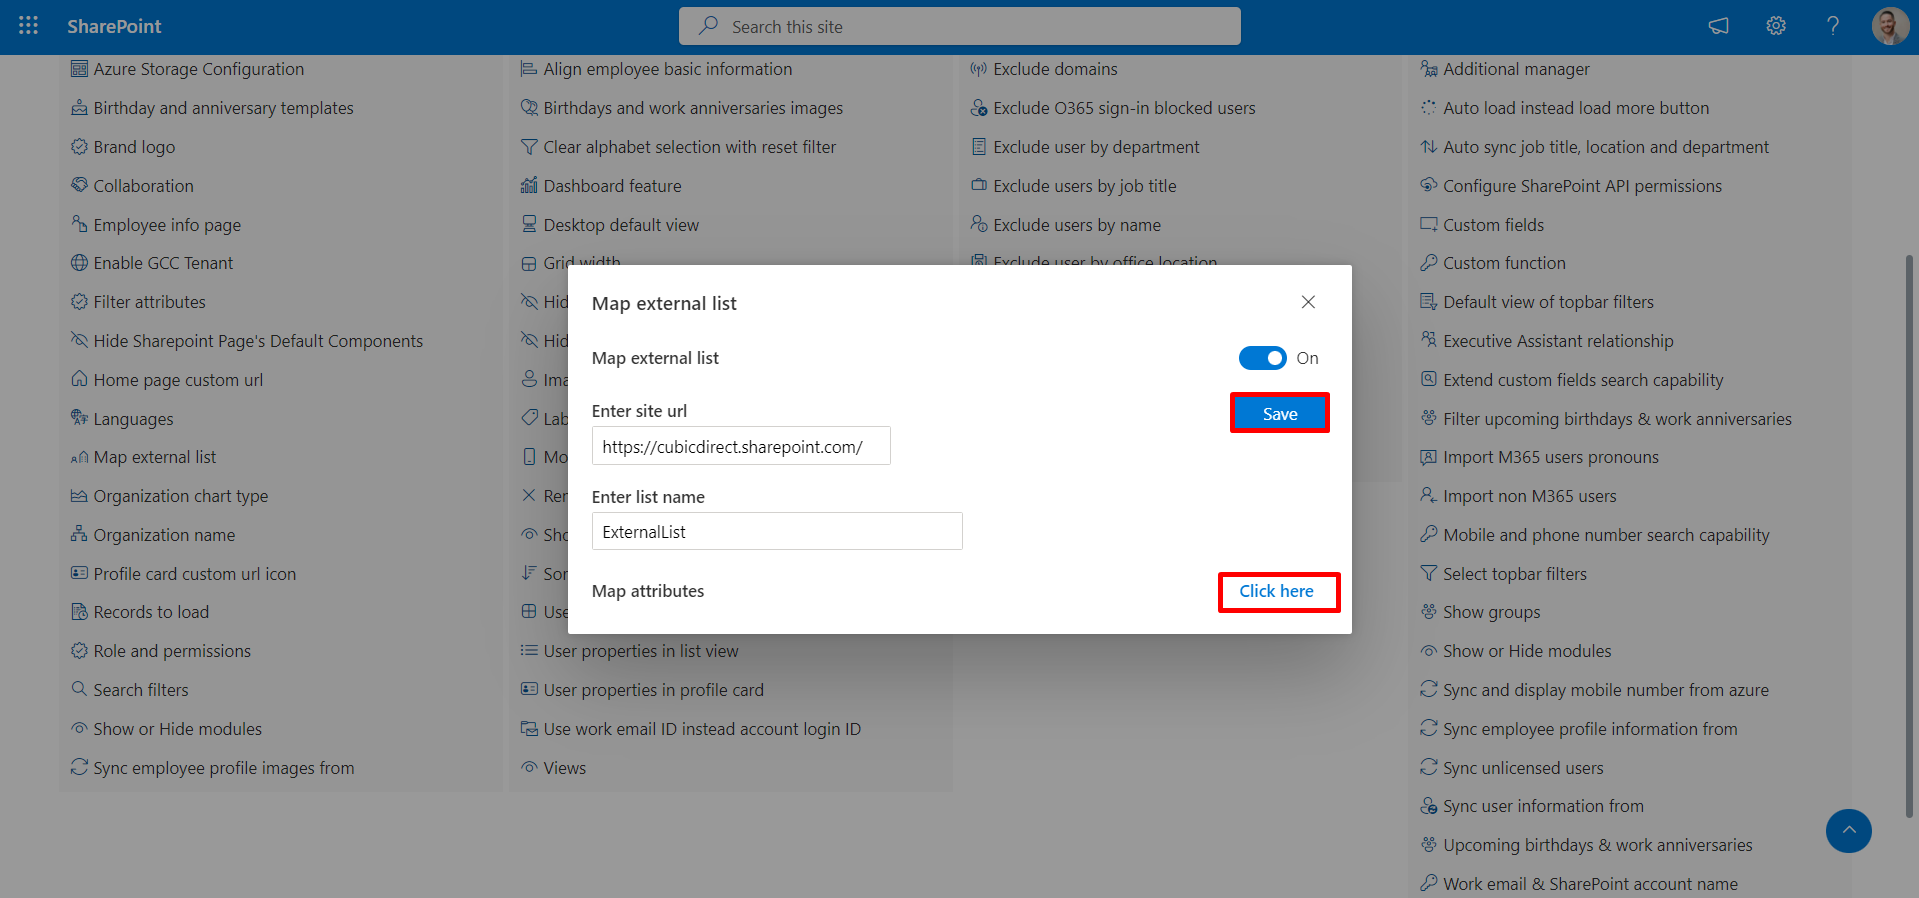
Upon entering this information, selecting "Save" will trigger the appearance of a "Map Attribute Link (click here)." Clicking on this link will open a panel displaying the data sourced from the fields of the external list.
Within this panel, specific fields are designated as mandatory. Only after completing these obligatory fields will the data be visible in the non-M365 view. If these necessary fields are left blank, please review the "Map Attribute Panel" to ensure all essential information is supplied.
Organization chart type
If your organization has 2000 employees or fewer, a complete org chart is readily accessible. However, Microsoft 365 imposes data limits on retrieving records in a single query. If you need to view the org chart for more than 2000 employees, please opt for the dynamic org chart option labeled 'Org Chart - Three Level.'

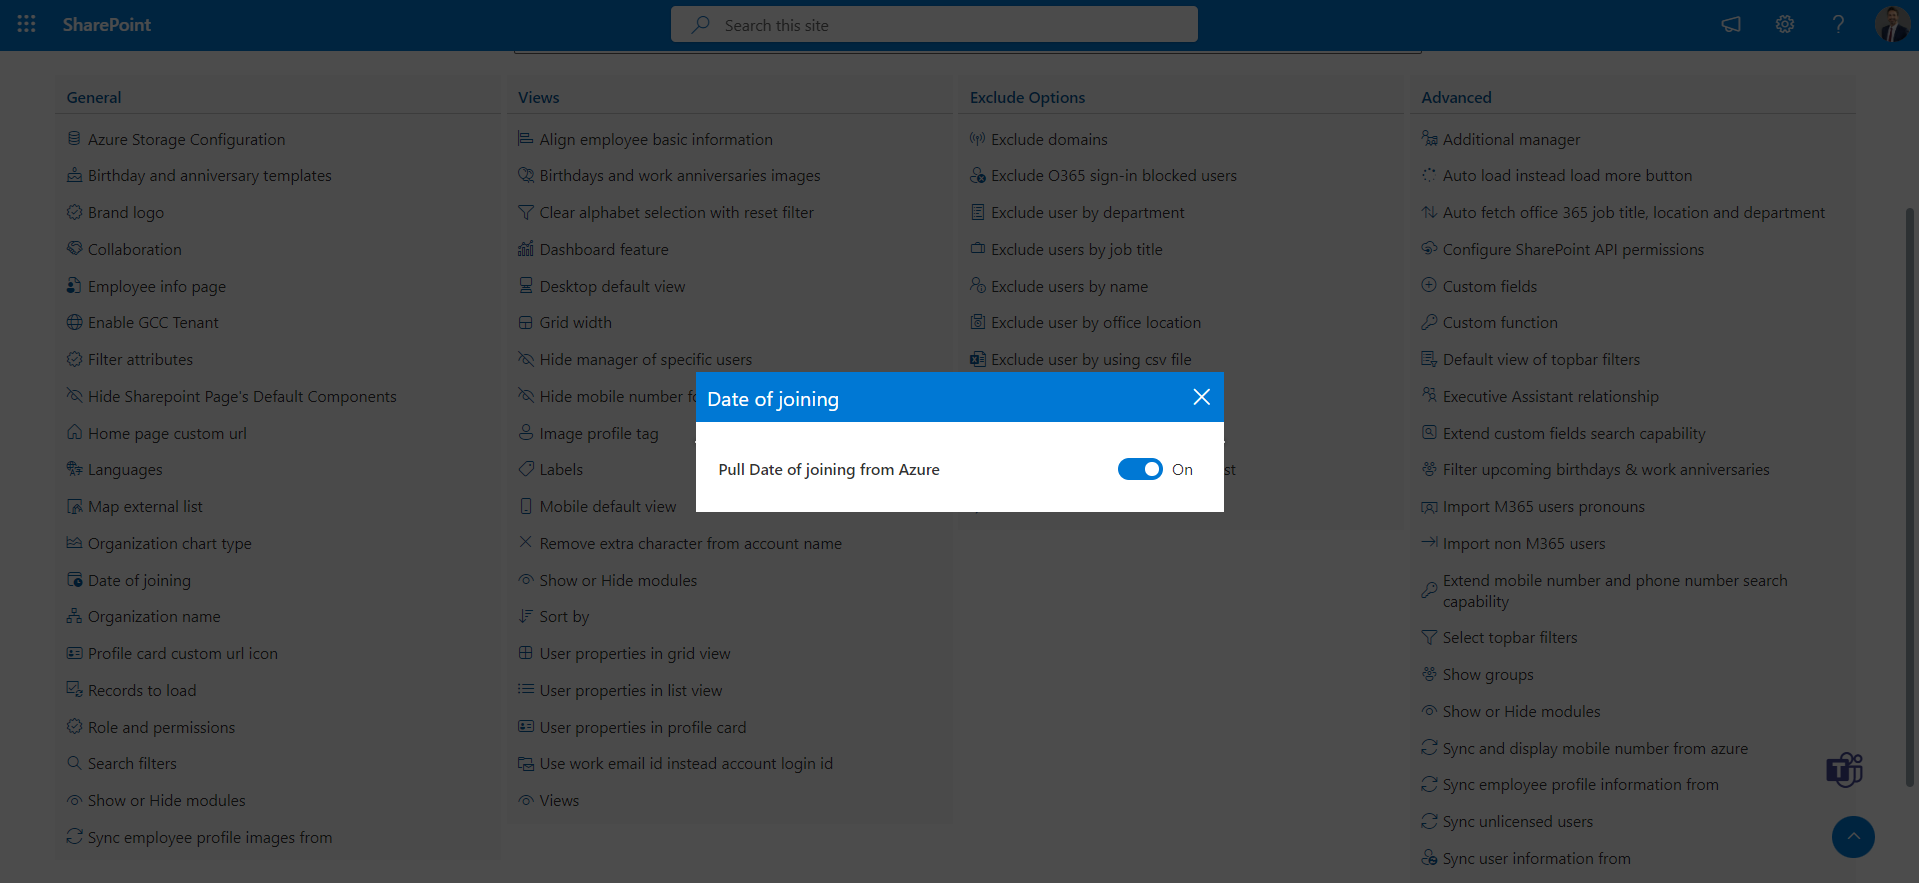
Date of Joining type
When this toggle is enabled, pull the date of joining from Azure. Otherwise, retrieve it from SharePoint Online.
Organization name
Please include your organization's name here. This will ensure accurate QR code generation and proper titling when printing the employee directory as a PDF.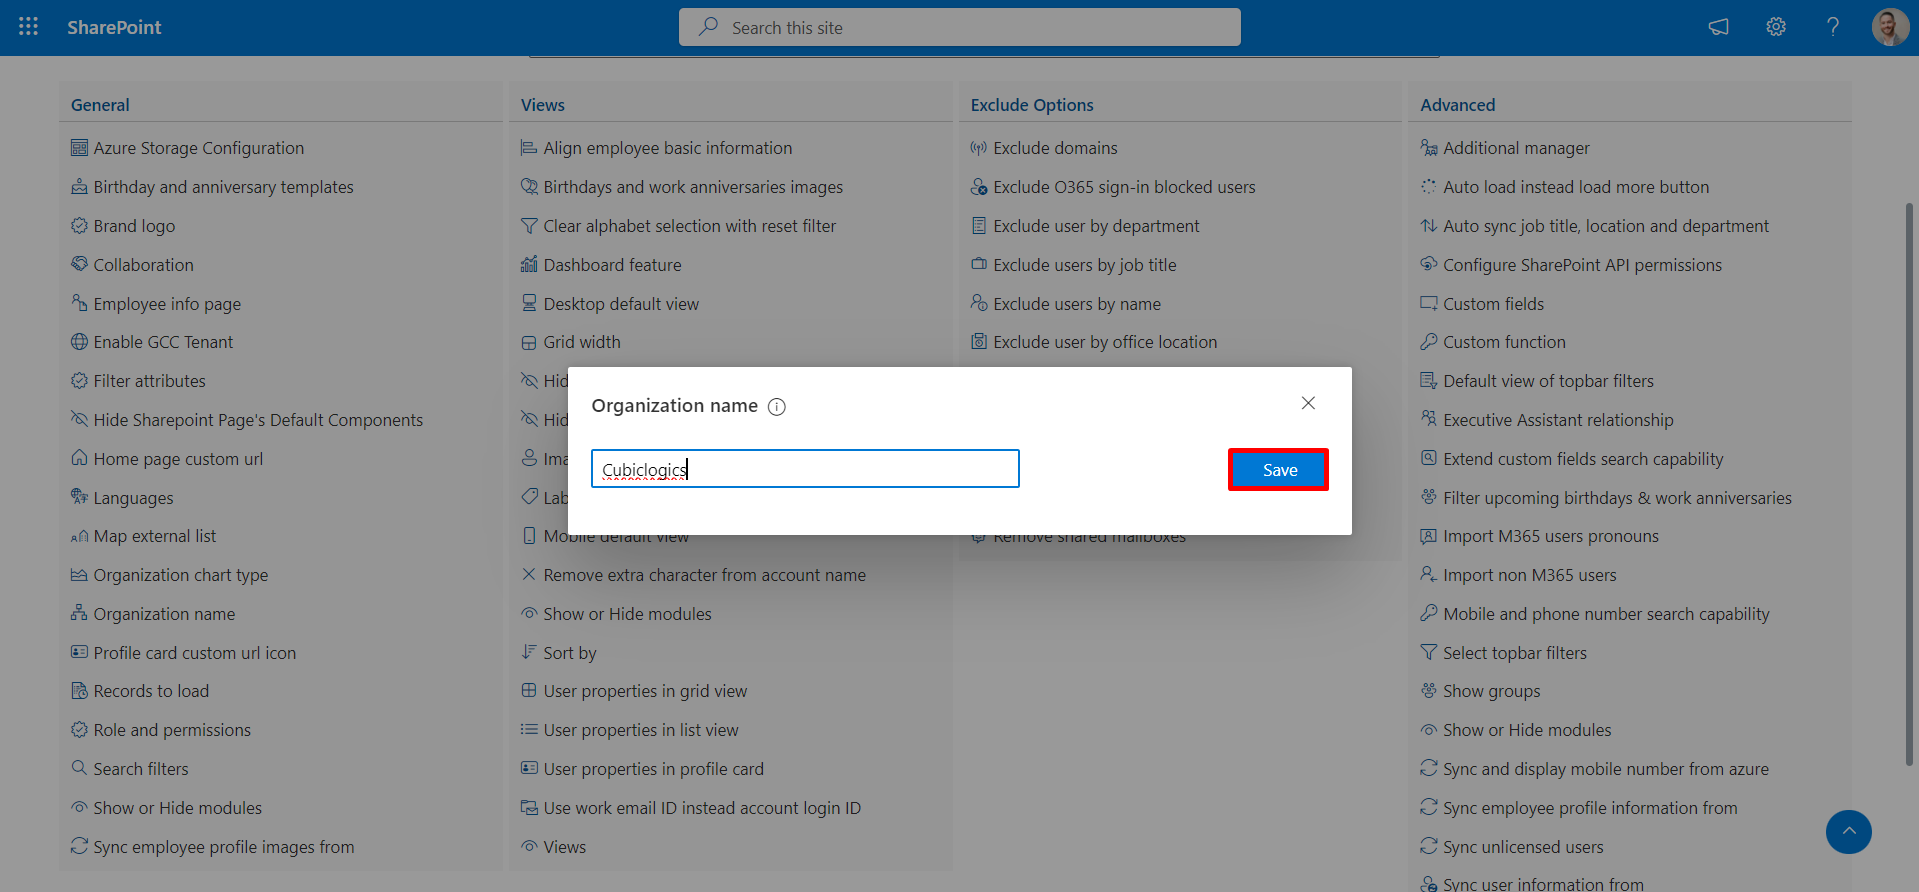
Records to load
Load the number of profiles when the page refreshes or for the initial page load. Consider load times carefully when choosing higher numbers.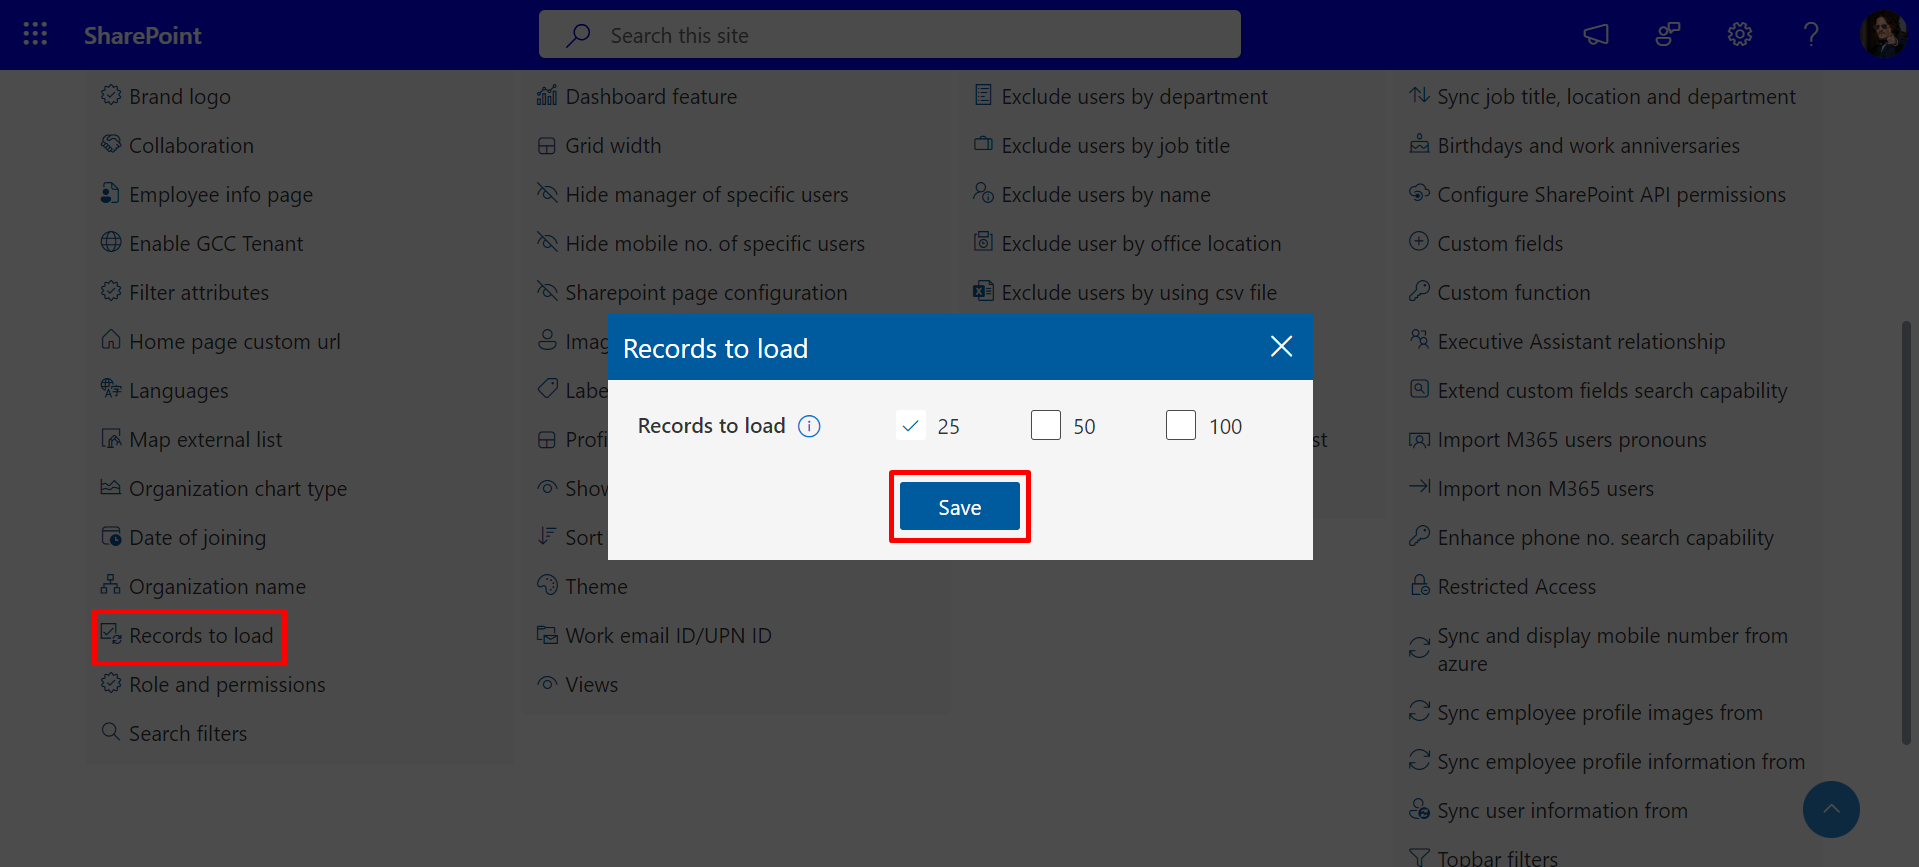
Role and Permissions.
At this location, you have the option to assign or remove roles and permissions.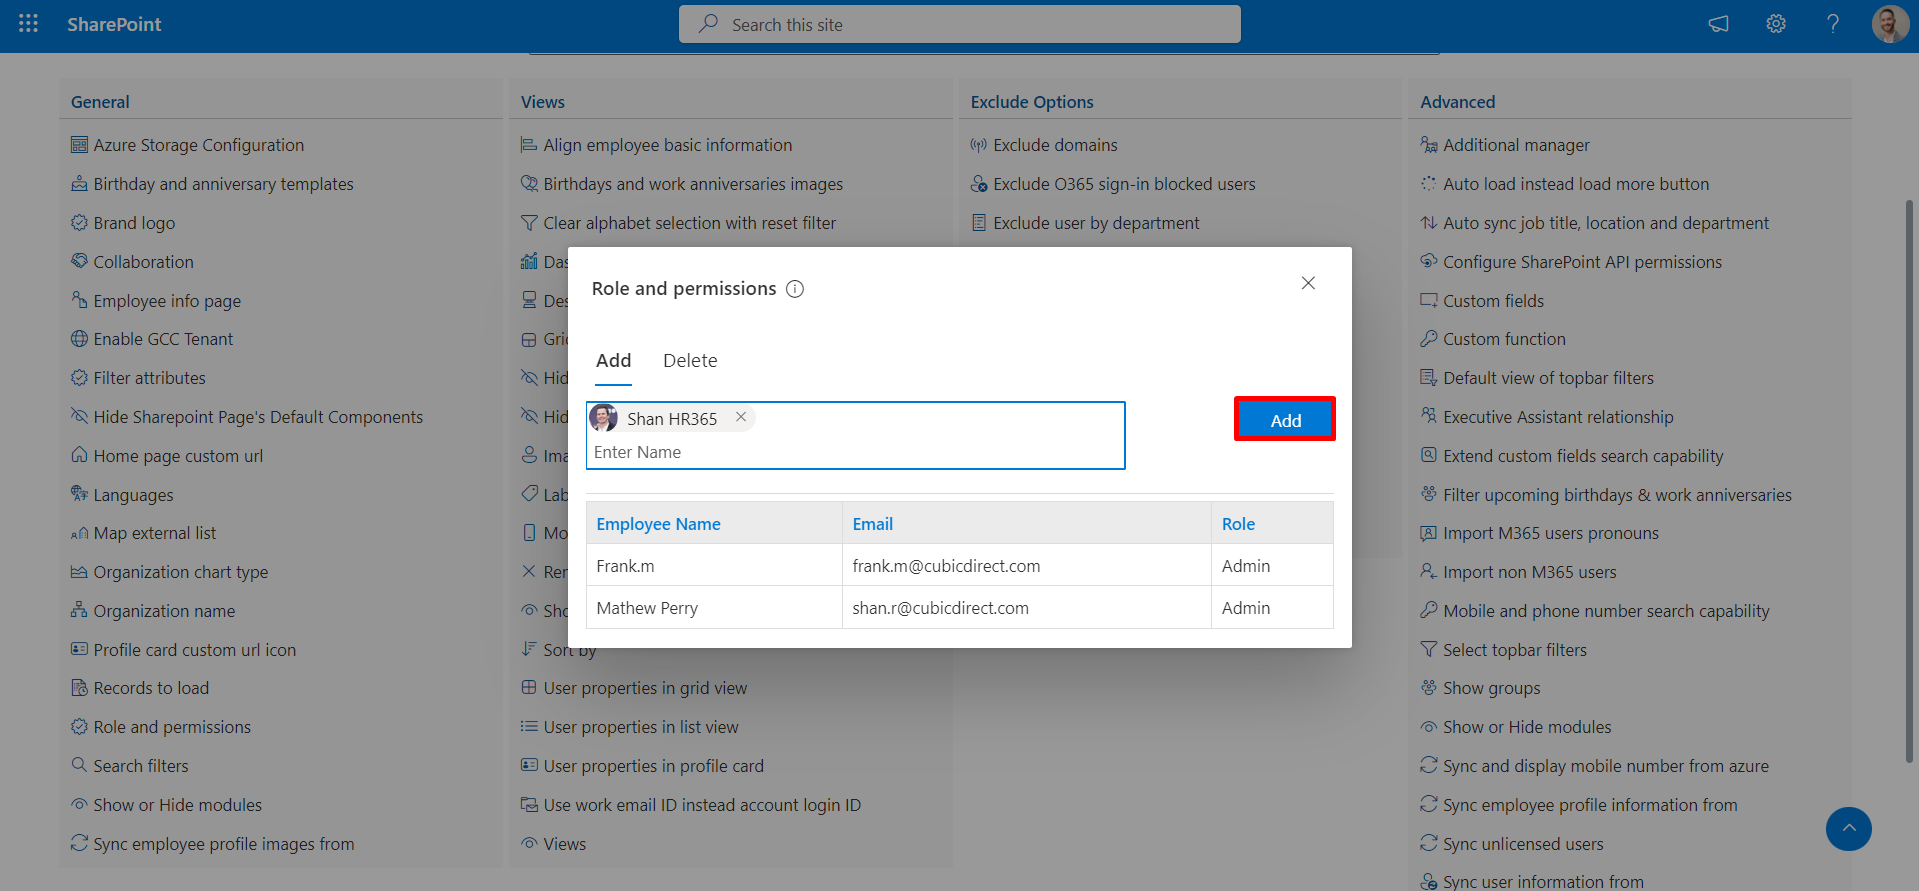
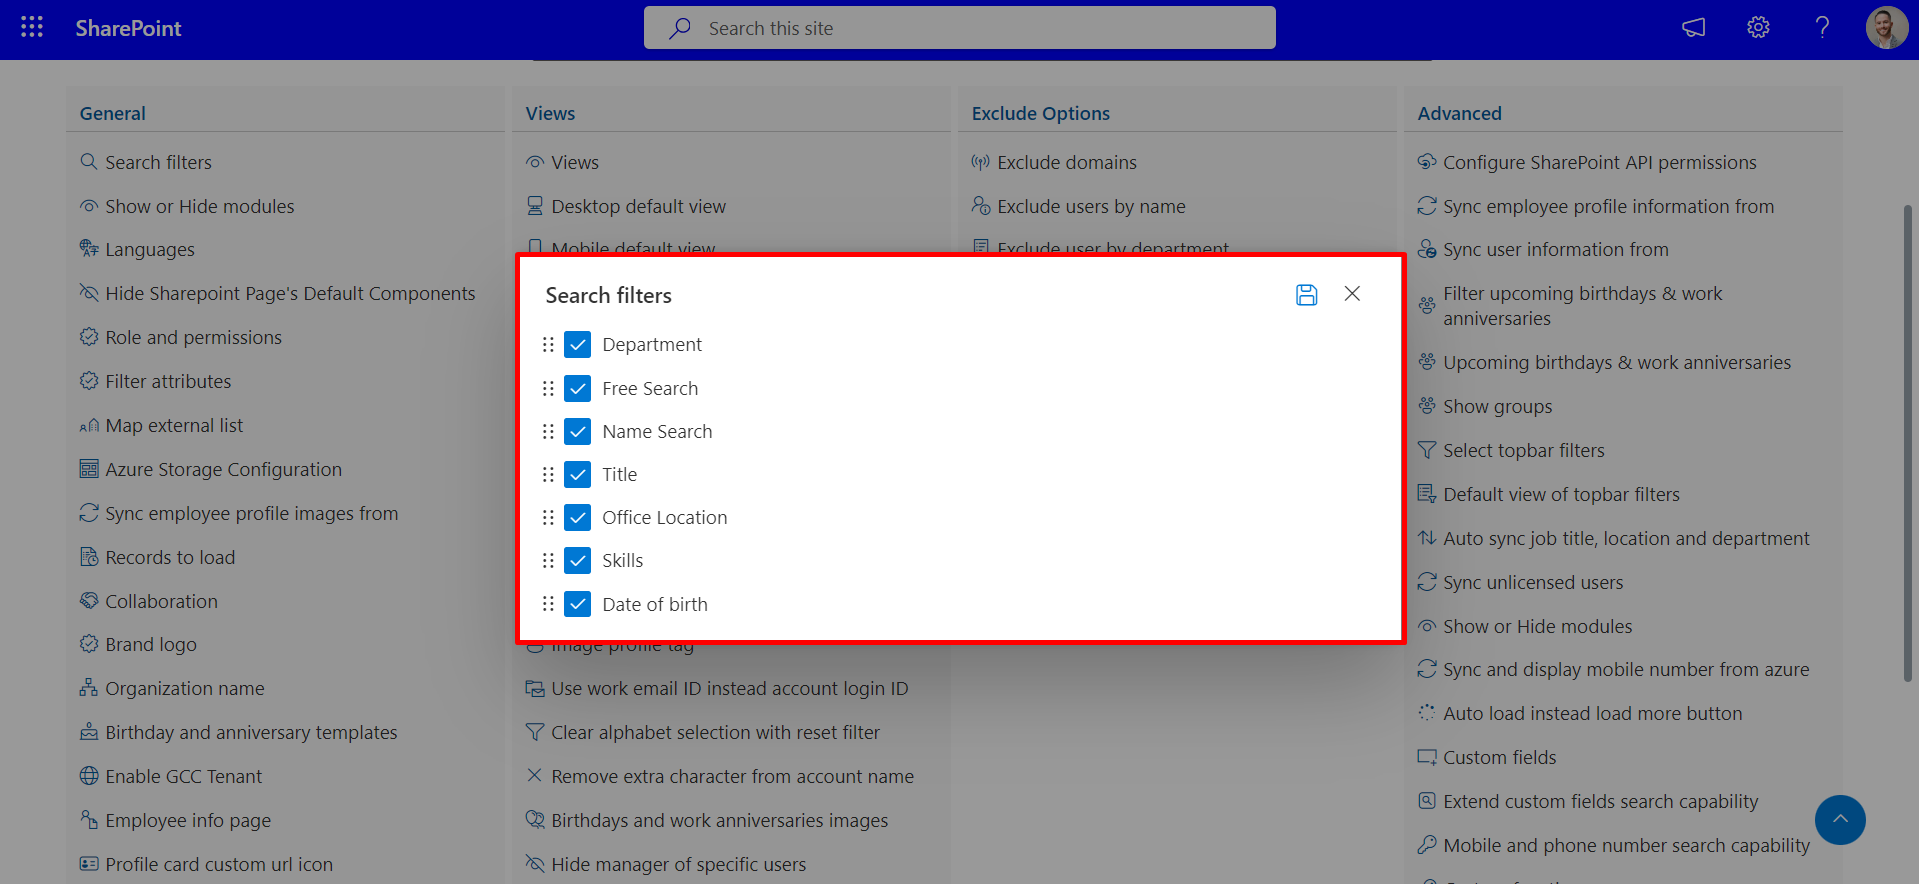
Search filters
Here you can hide or show the search filter and also reorder search filter on the home page. At least one filter is mandatory.
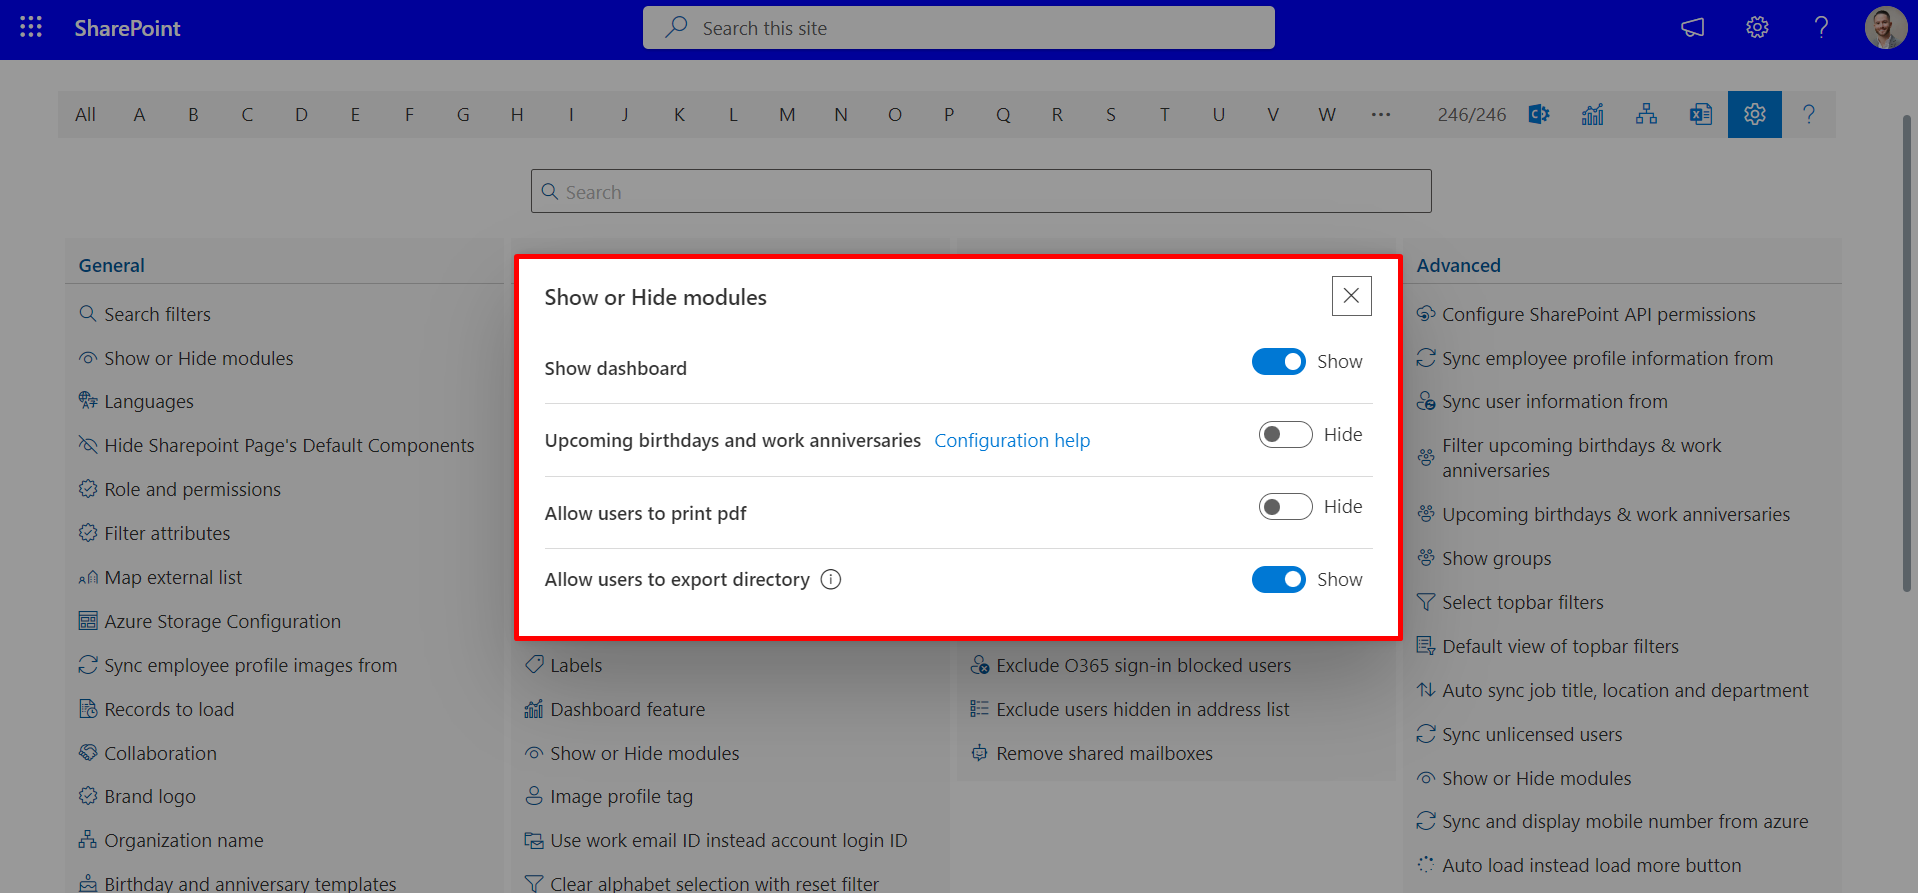
Show or Hide modules
To activate this toggle, you can display or conceal the dashboard and enable the feature to display upcoming birthdays. This will grant users the ability to print or export the directory.