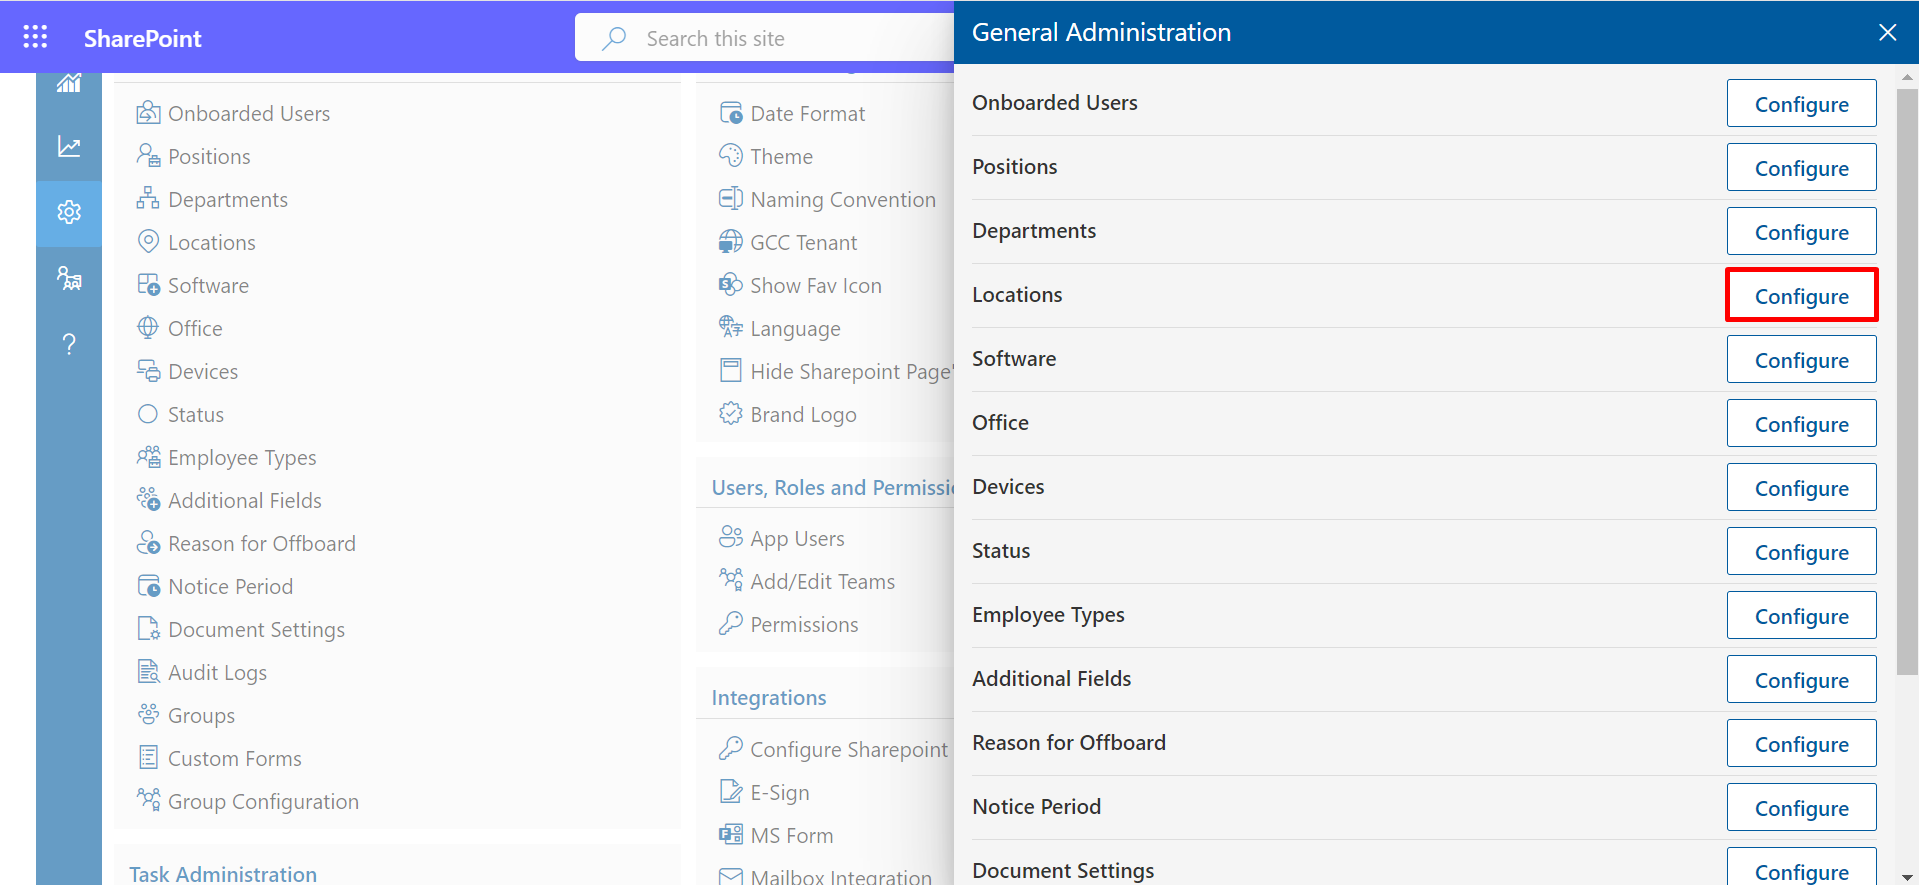
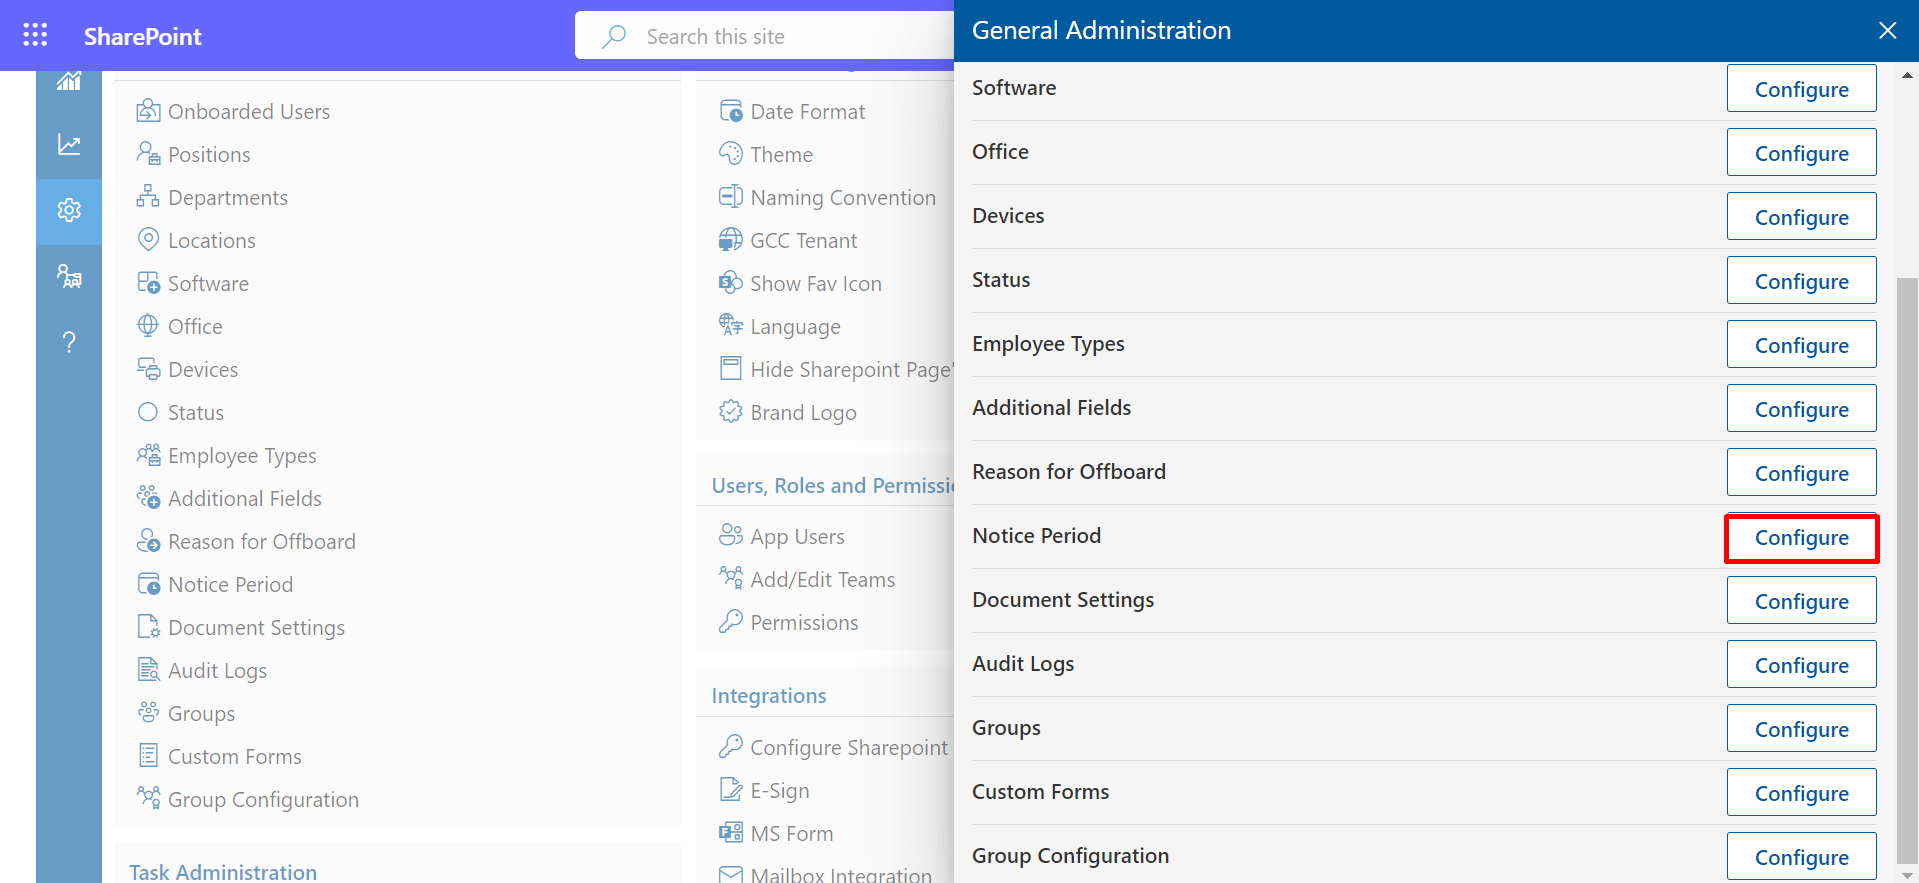
General Administration
Here, you can synchronize Office 365 users, manage positions, departments, locations, add devices, and more.
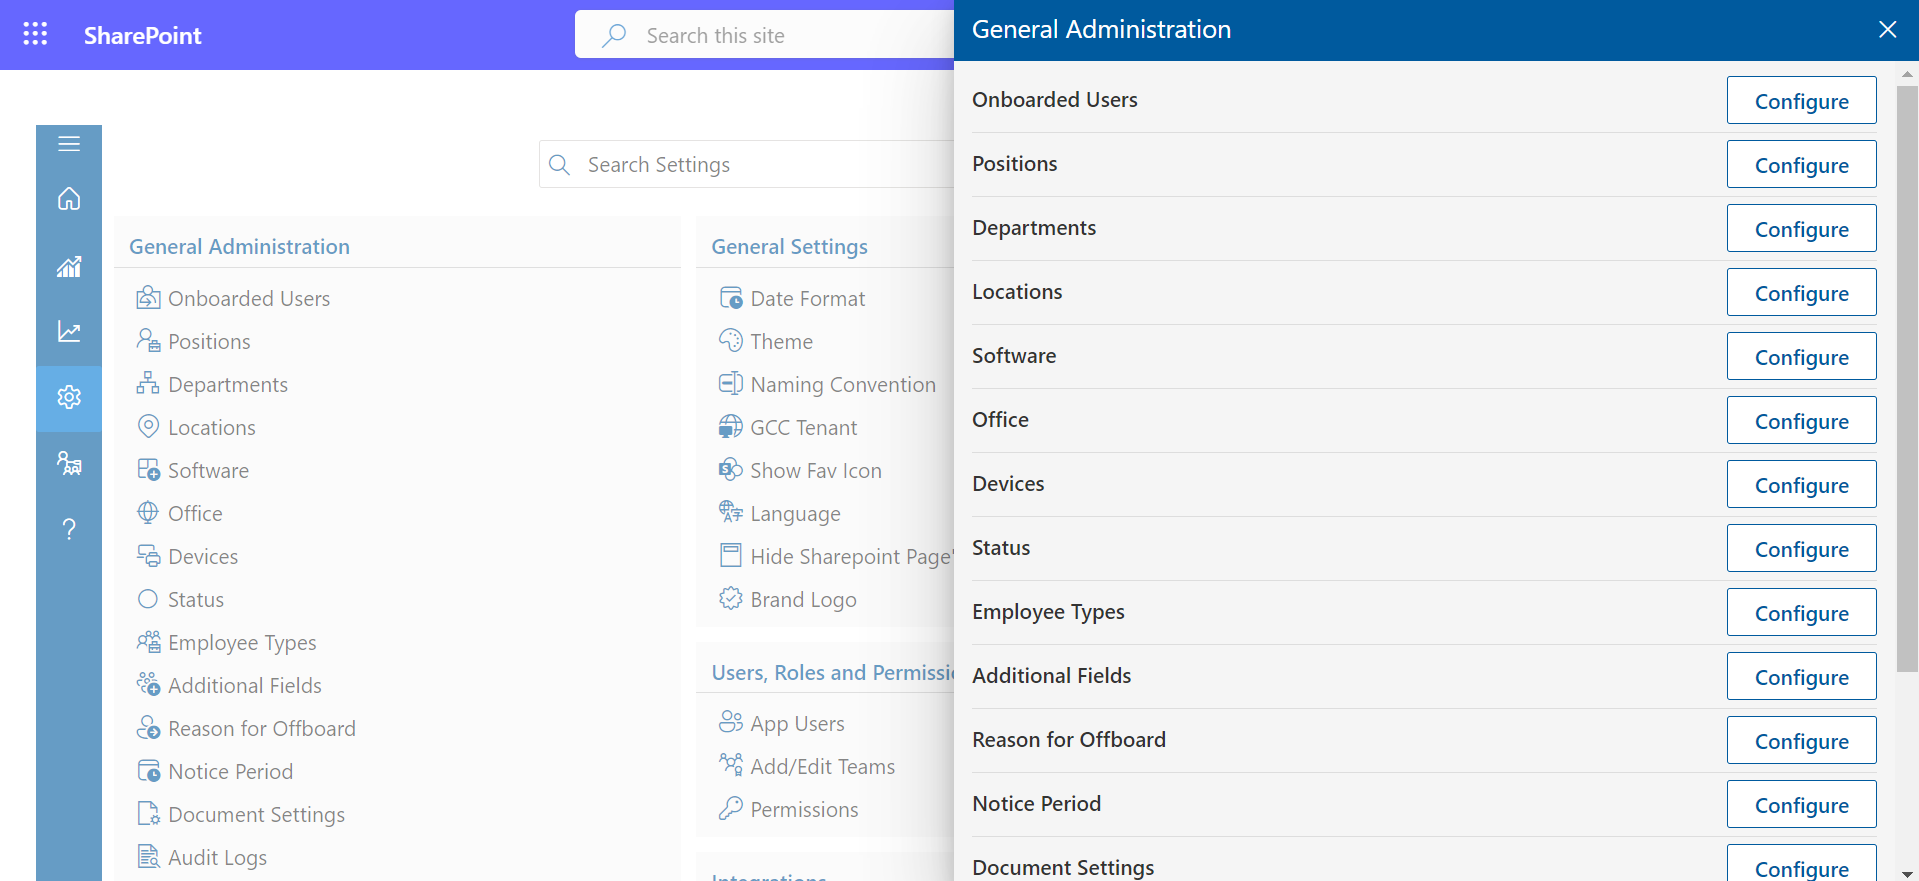
Onboarded Users
-
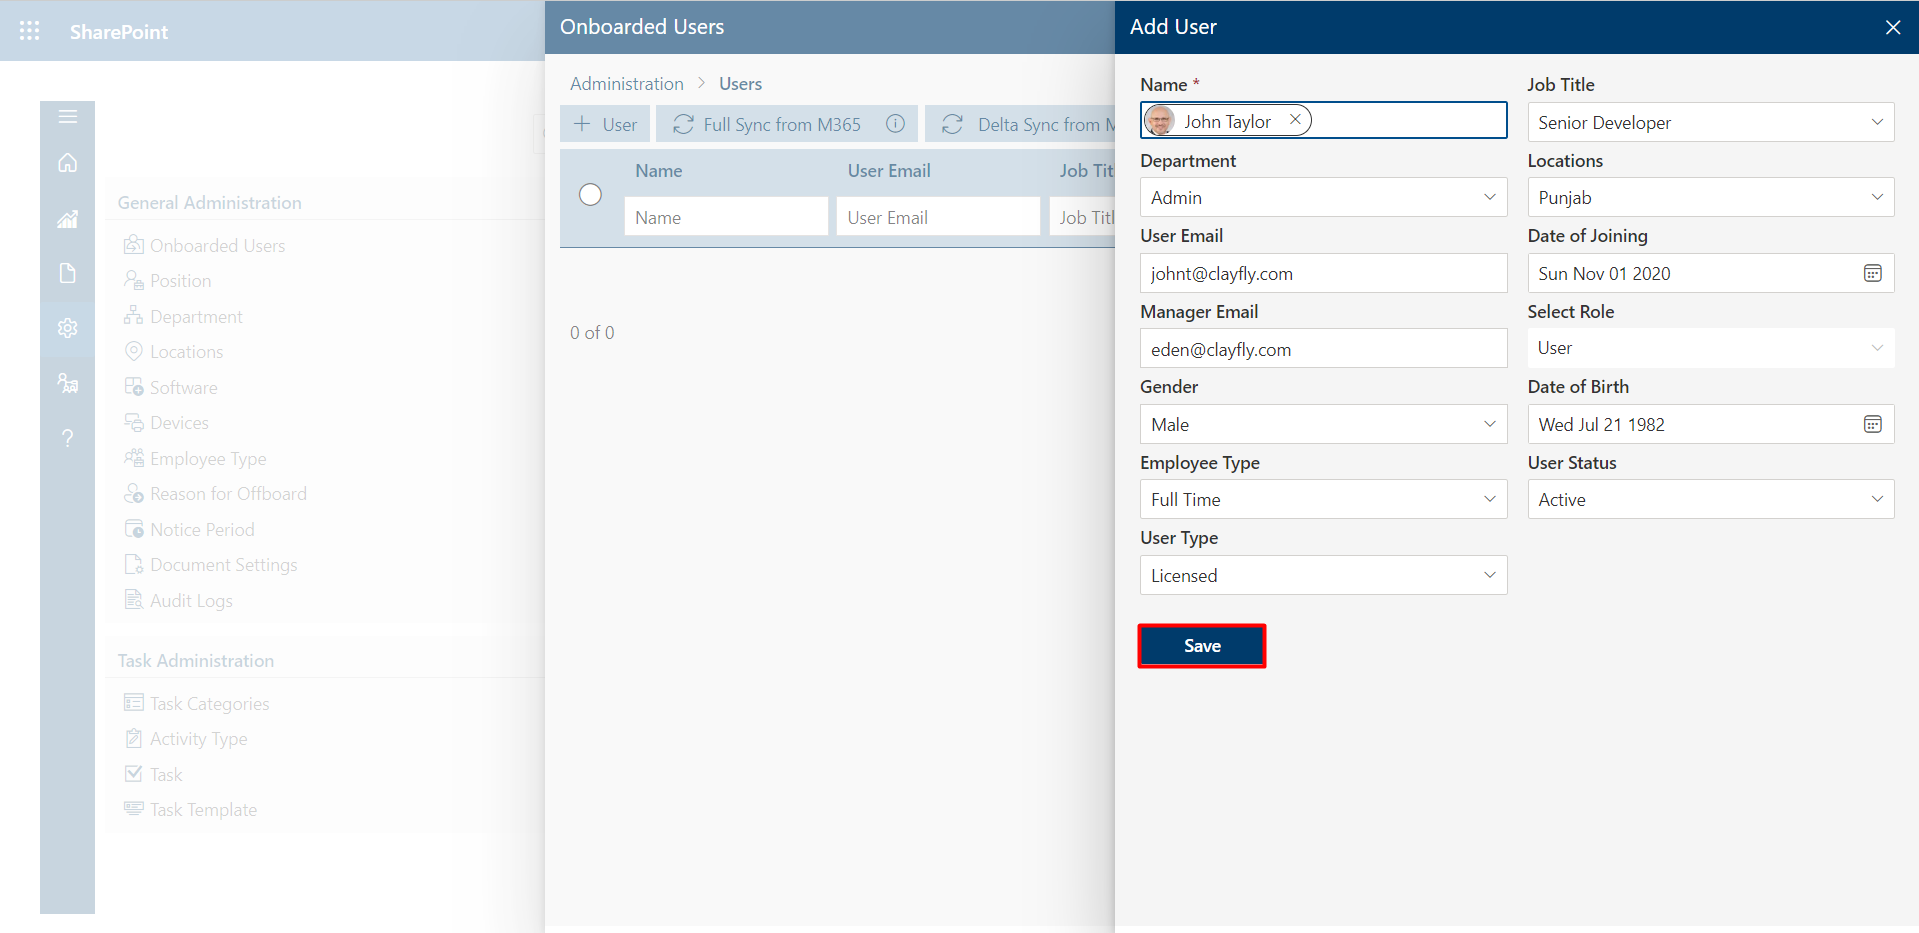
Through this, we can add a User from M365 to the application, and that user
will be directly
onboarded.
-
By Selecting the +User Button, you can add users.
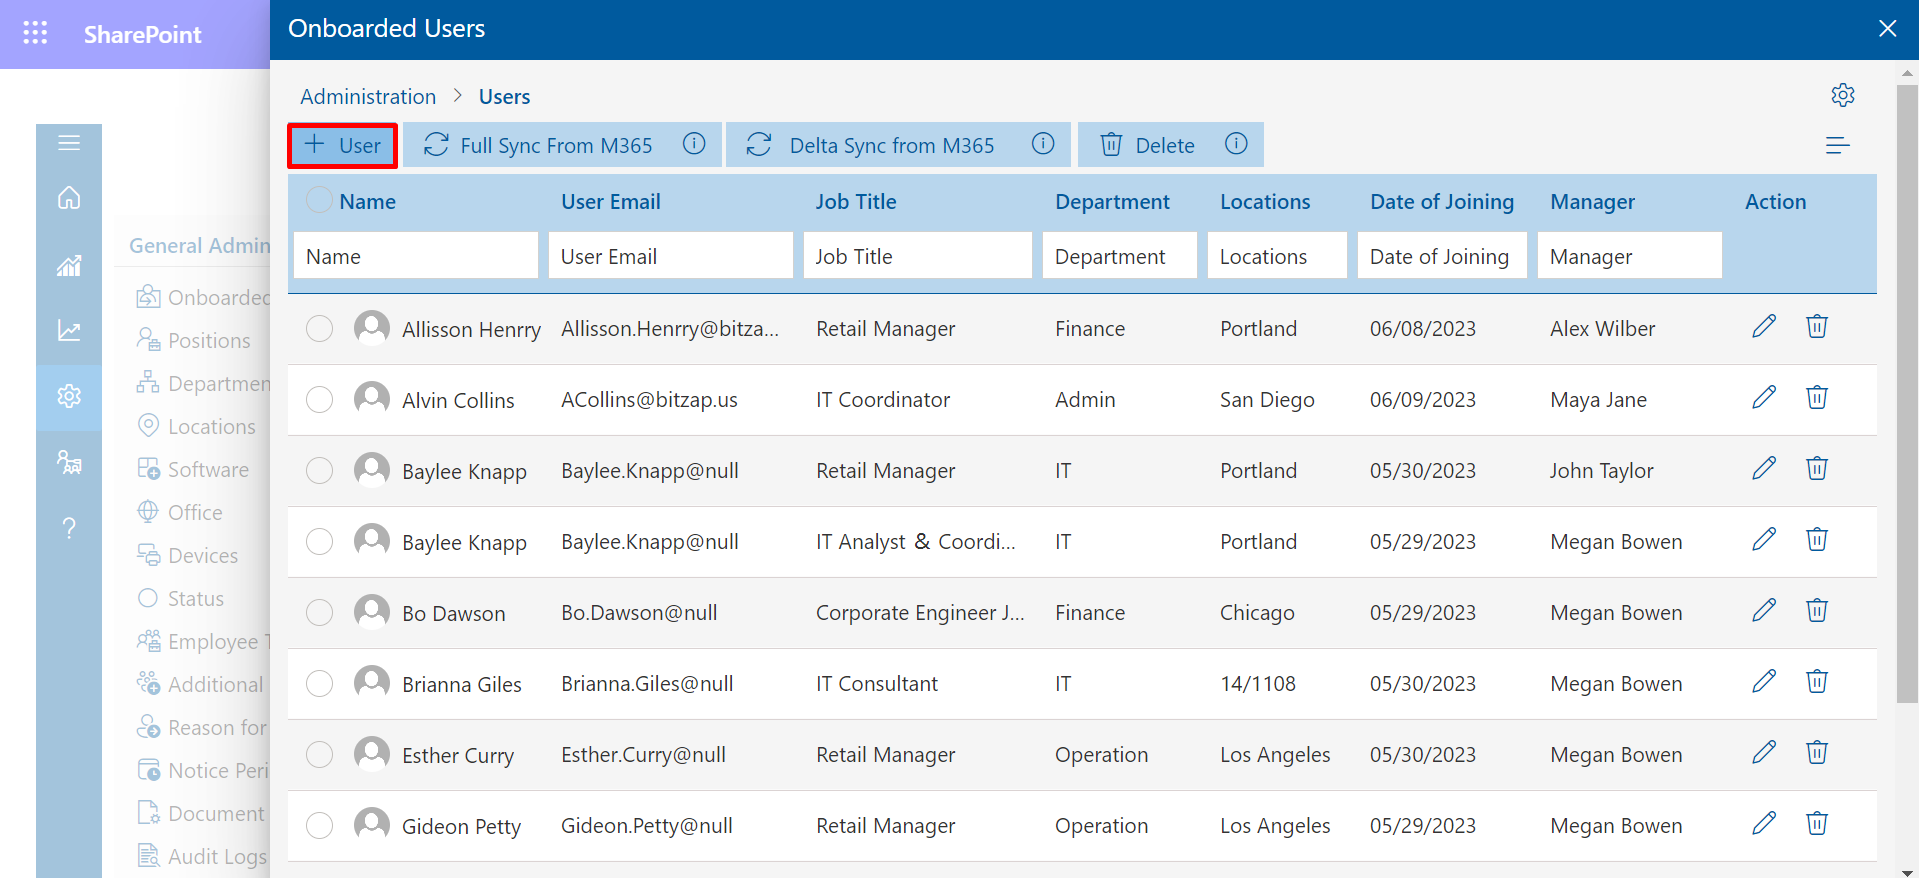
- Fill the user's information Accurately.
-
Click on Save Button.
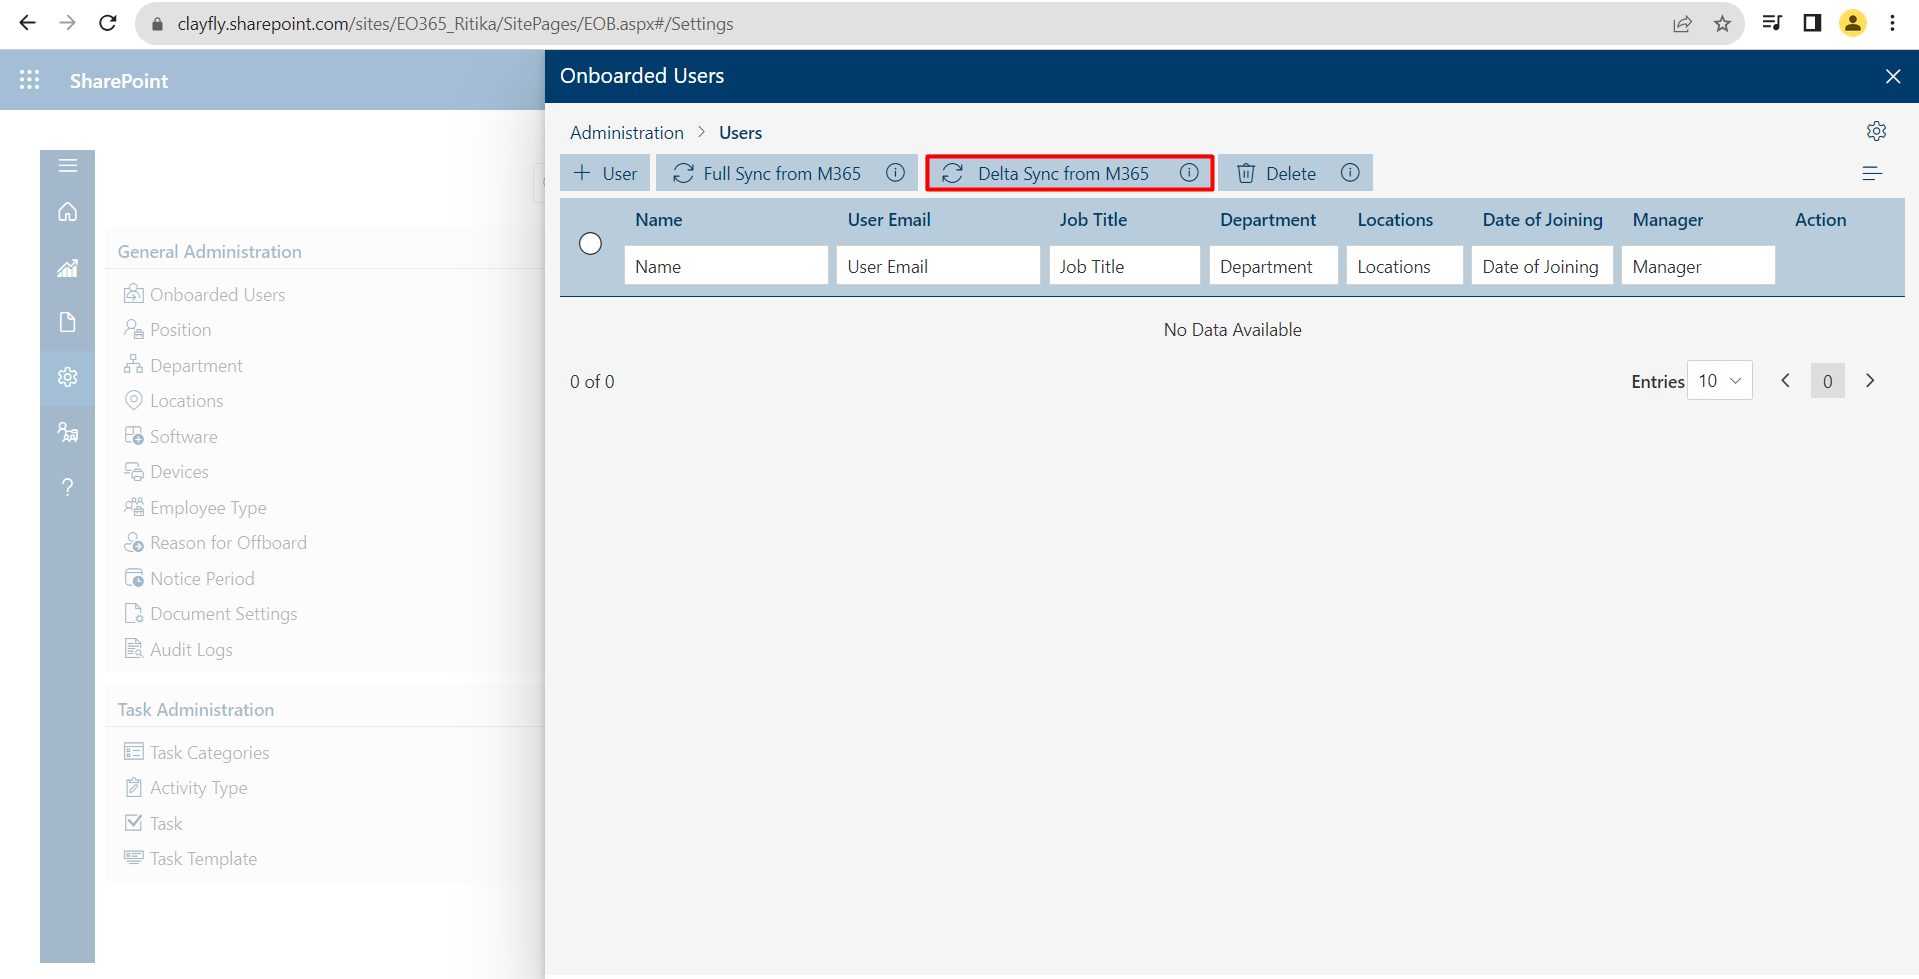
- Only use this option if you desire to sync every user; for user updates, use Delta sync.
- You may access users' most recent updated information as well as those who have joined within the last seven days.
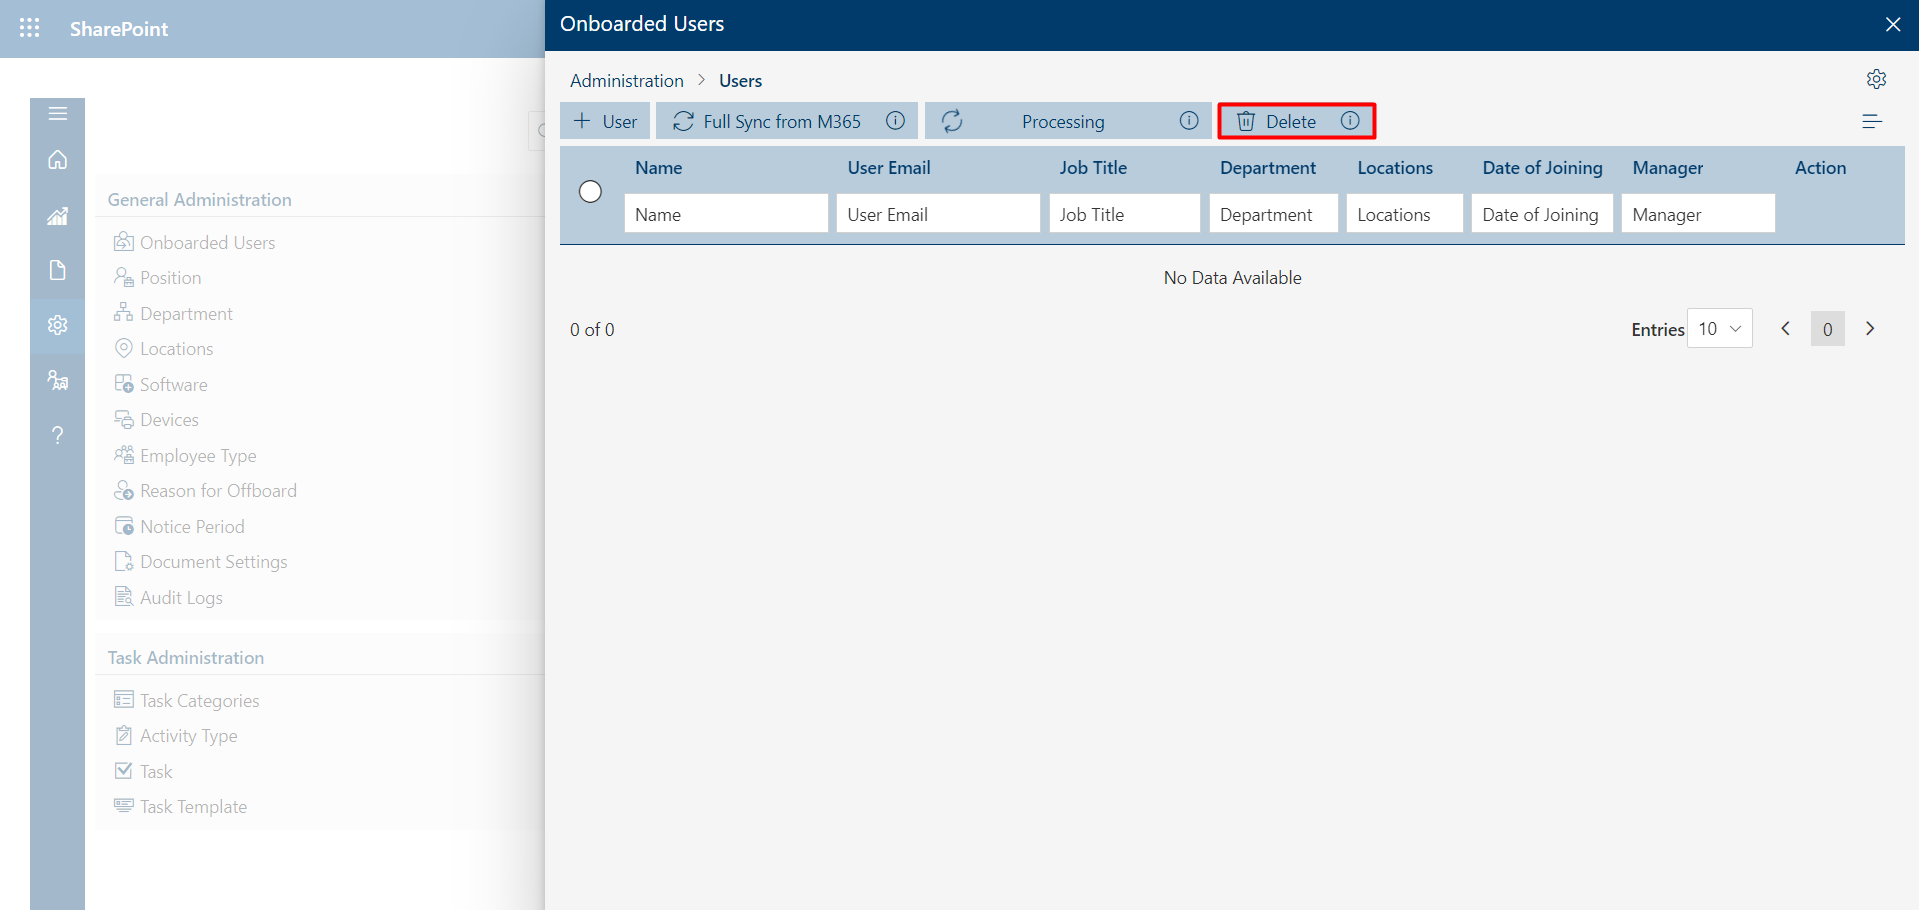
- Using this button, eliminate the numerous users
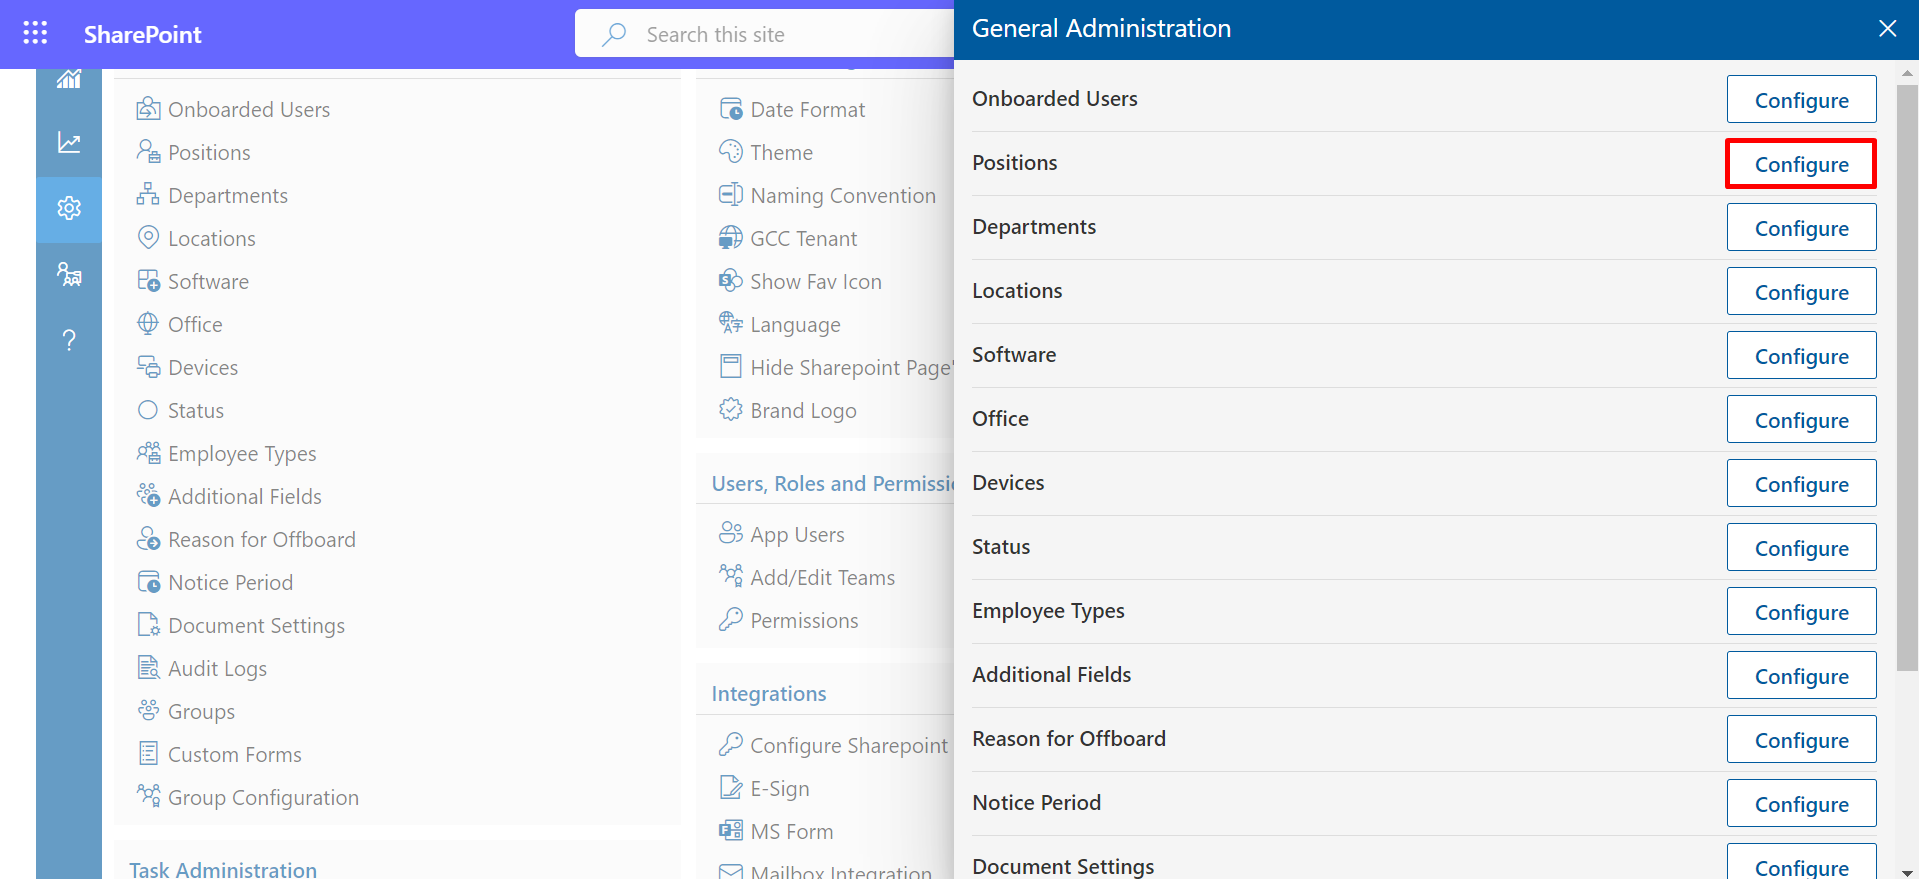
Select configure to continue processing.
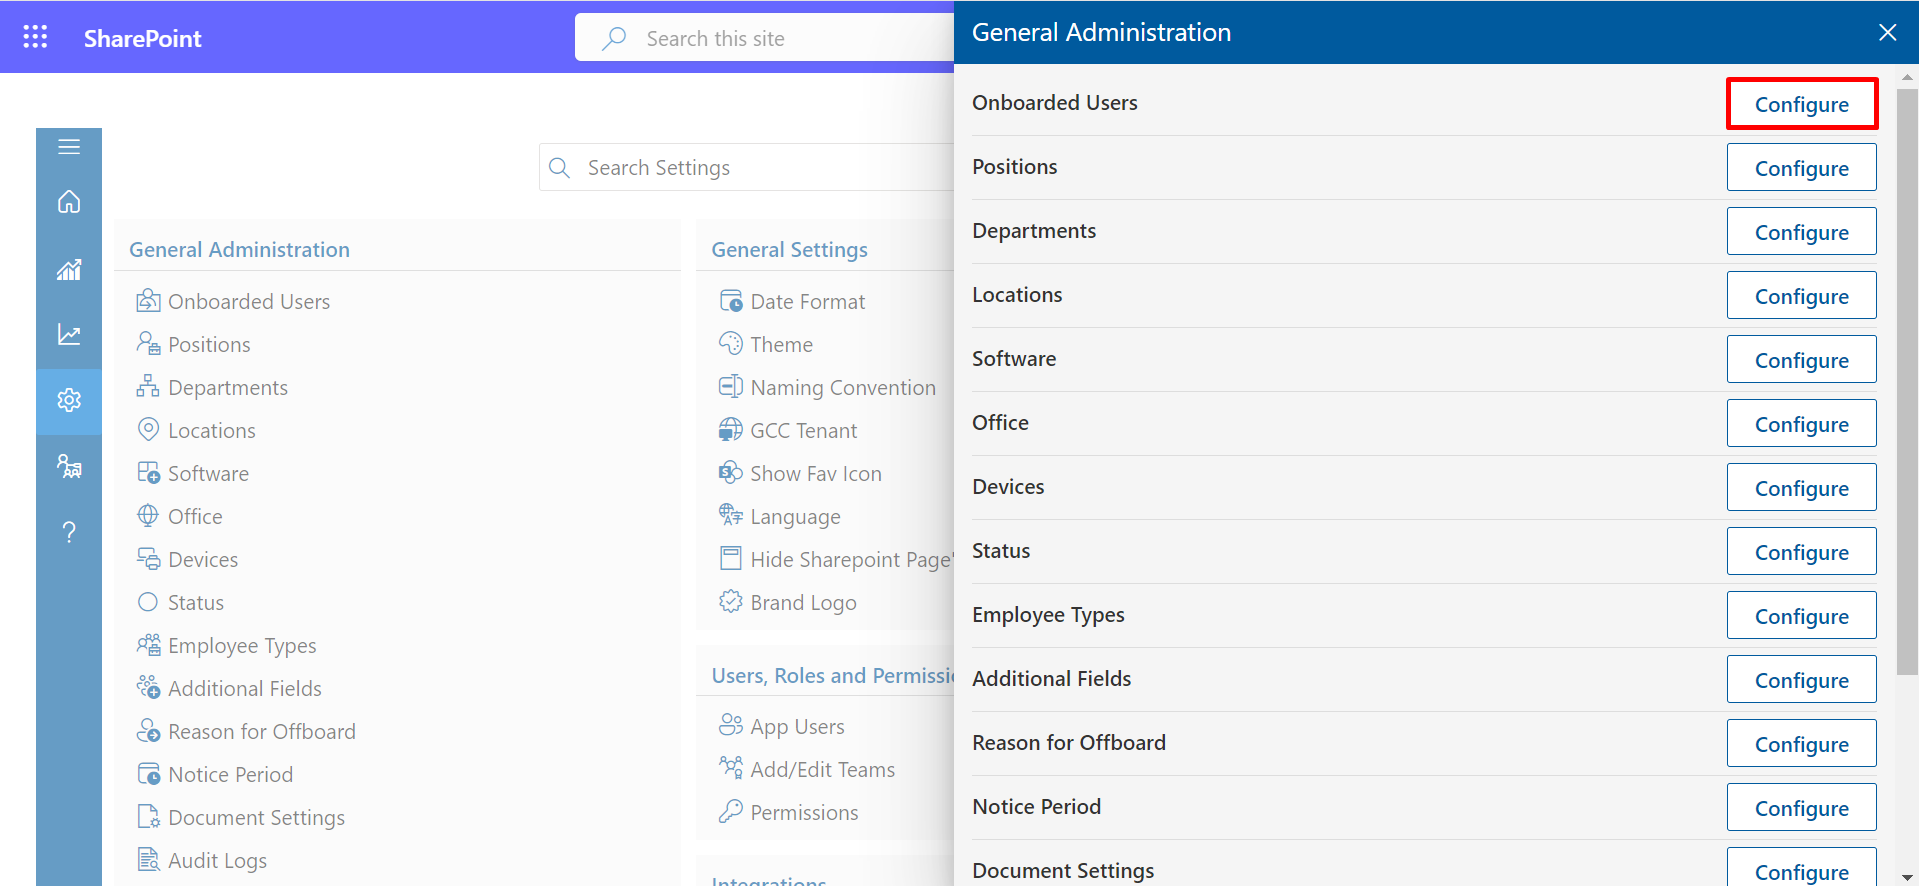
Full Sync from M365

Delta Sync from M365
Delete
Position
-
Here you can add the Positions , which will get reflected in the
PreOnboarding ,
Onboarding and Offboarding sections And the positions produced here
reflect/act as
dropdowns/suggestions that aid in the creation of positions for employee hiring.
-
Select Configure to continue processing.
You may enter your position after clicking on position.
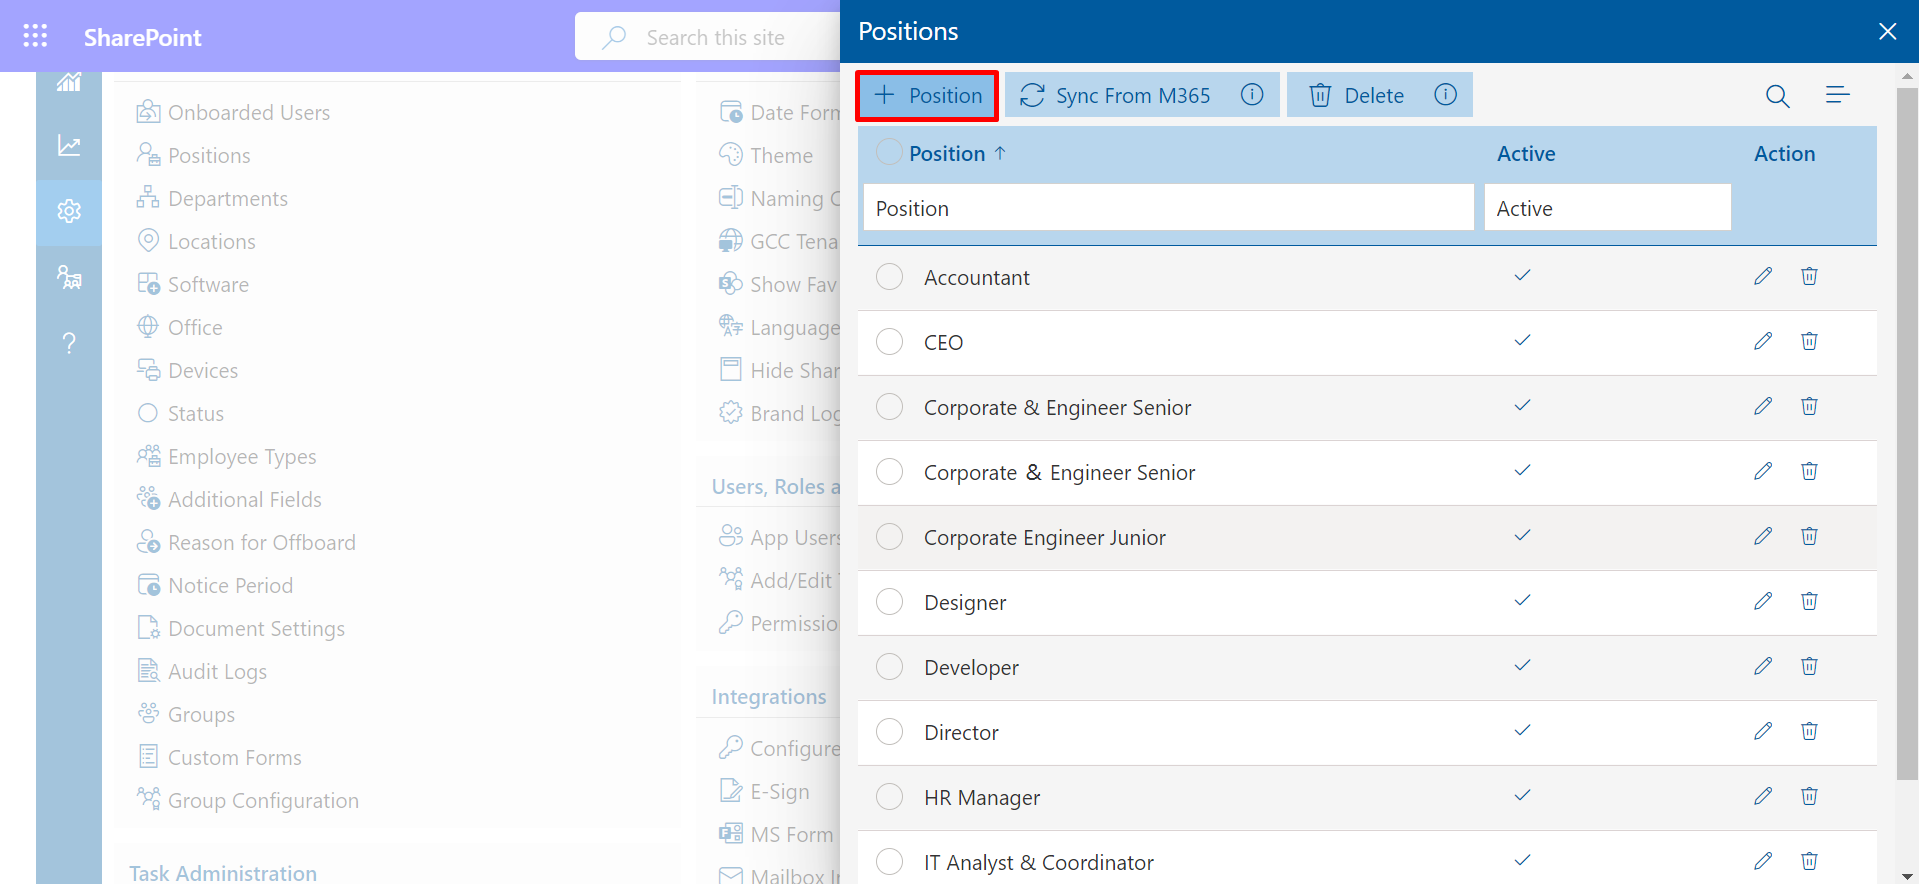
With this function app will pull the position names present in office 365 user's profile.

Click on Delete Button to delete Multiple Positions.

Department
-
Here you can add the Department , which will get reflected in the
PreOnboarding ,
Onboarding and Offboarding sections.
-
Select Configure to continue processing.

You may enter your Department after clicking on +Departments .
Click on save Button.
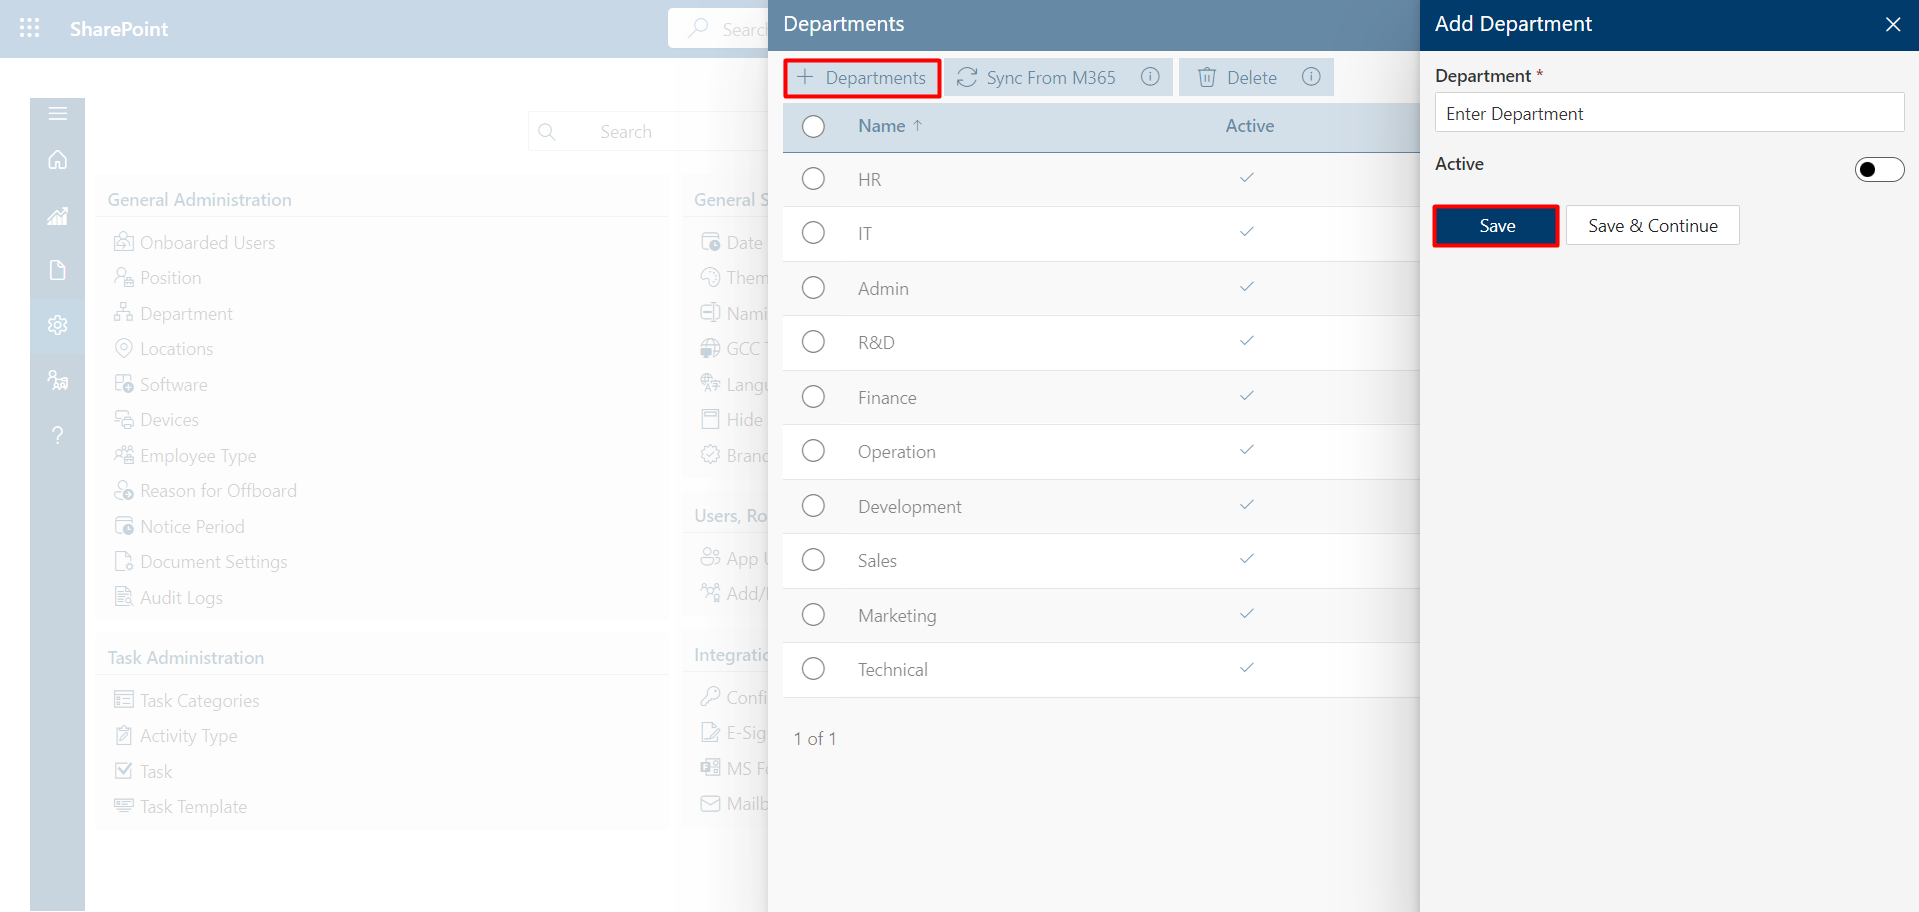
With this function app will pull the Department names present in office 365 user's profile.
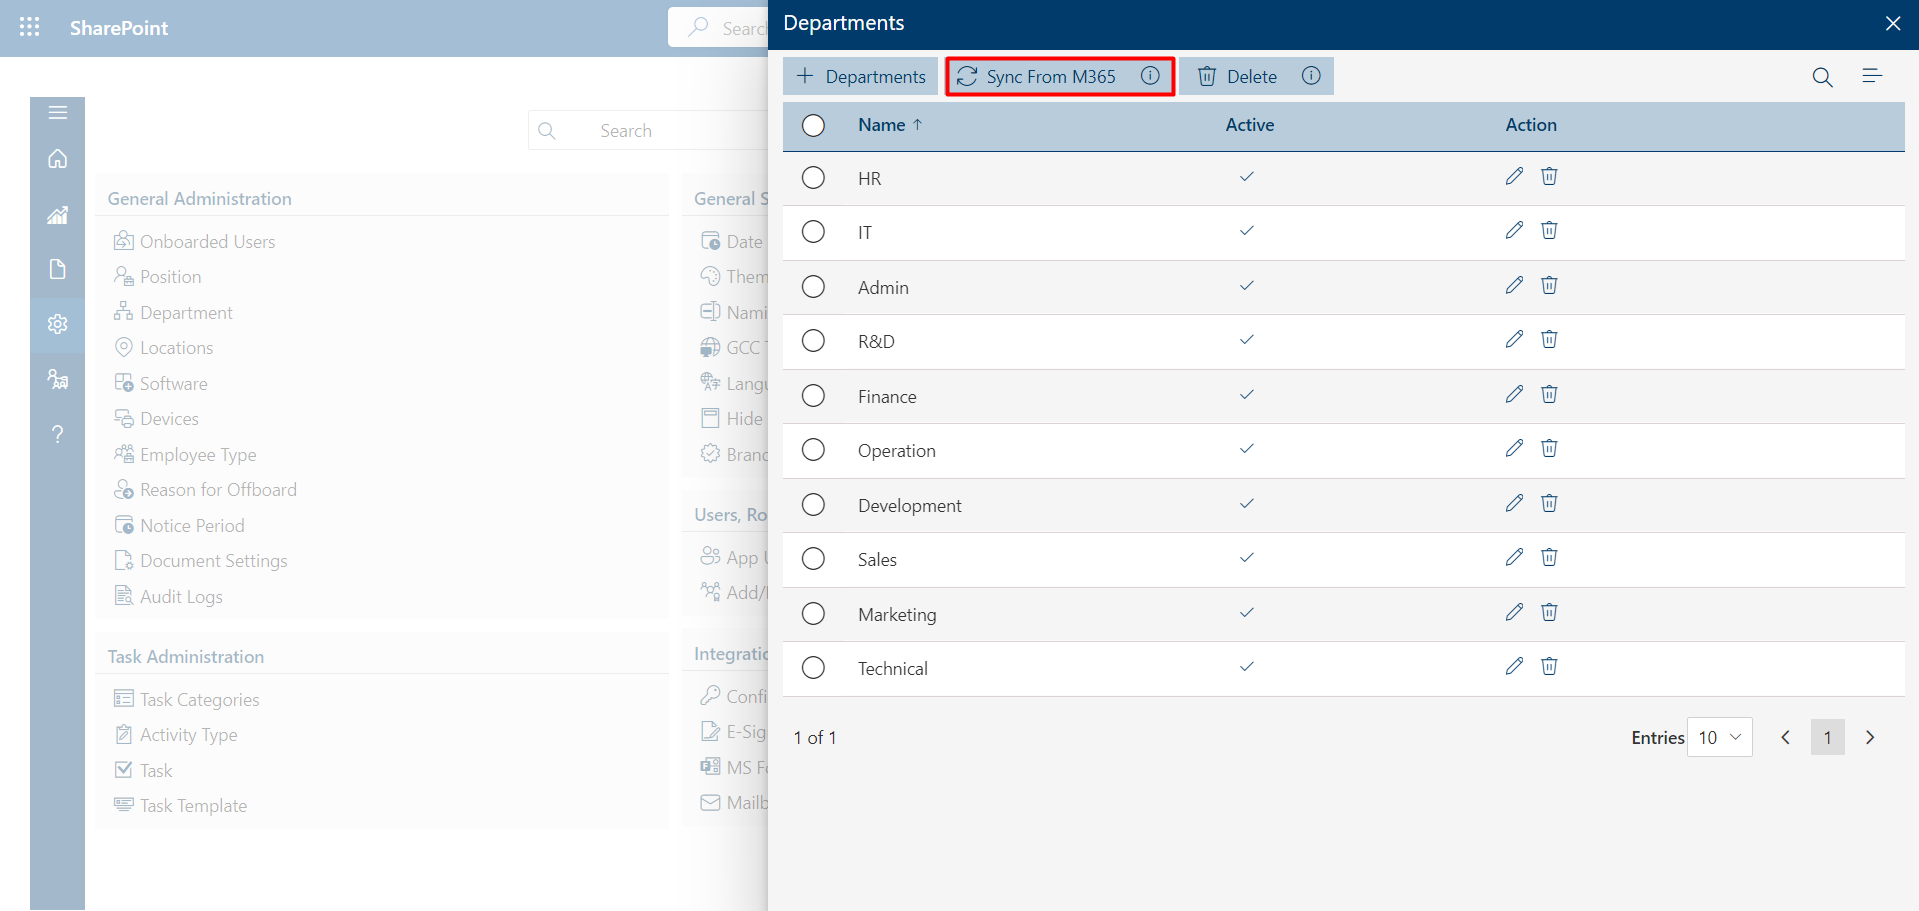
Use this button to remove multiple users.

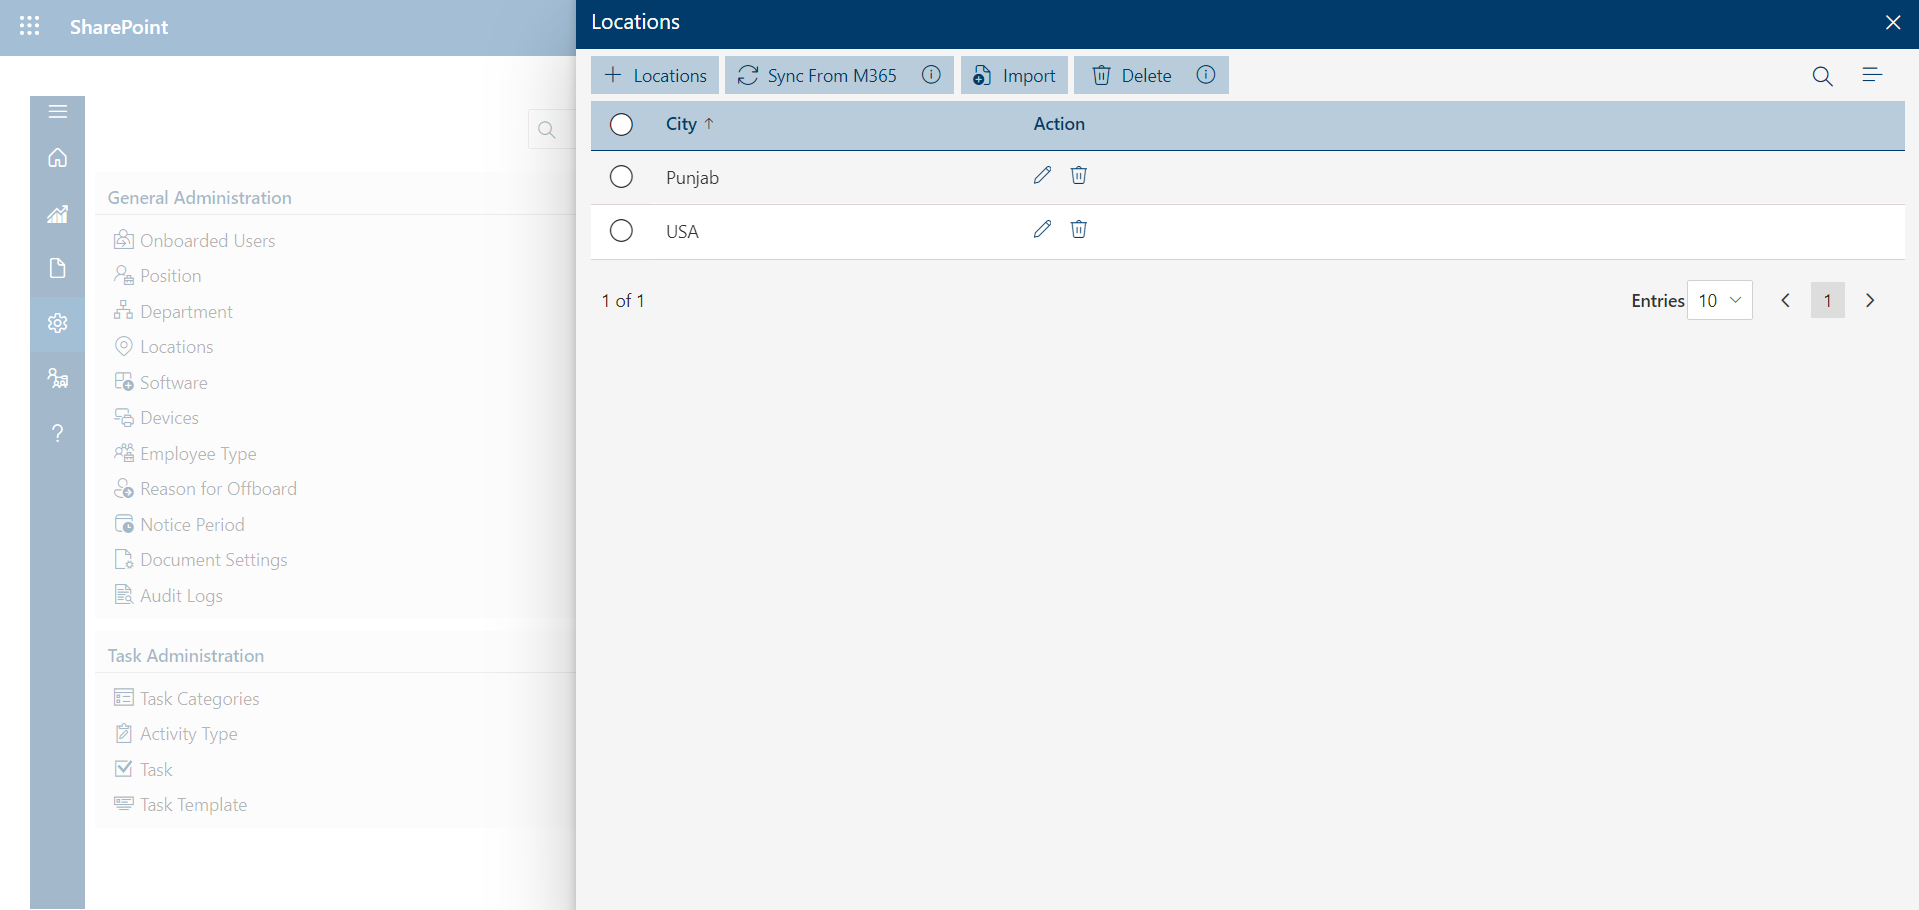
Locations
- Select Configure to continue processing.
-
After clicking on location, you can enter your location.
-
Click on Save Button.
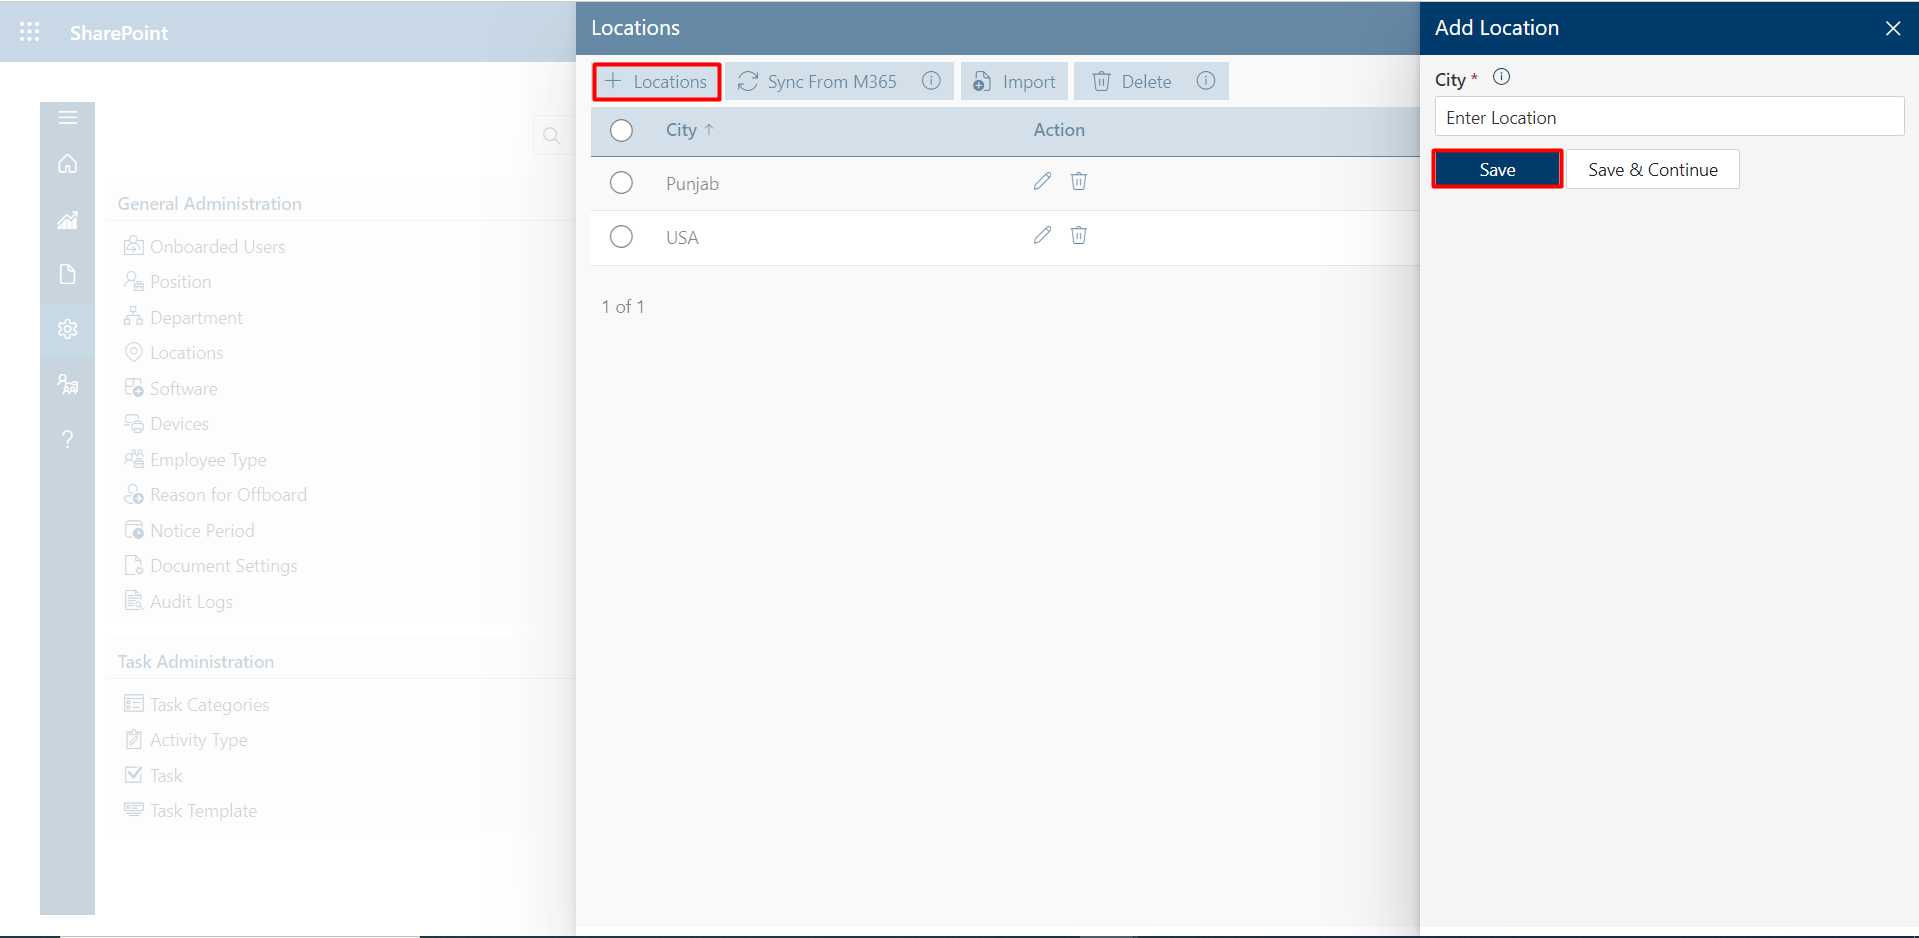
-
With this function app pull the Location names Present in the office 365
user's Profile.
-
To remove numerous locations, use the delete option.
Software
- Select Configure to continue processing.
-
After clicking on +Software Dynamic Software can add.
-
Click on Save Button.
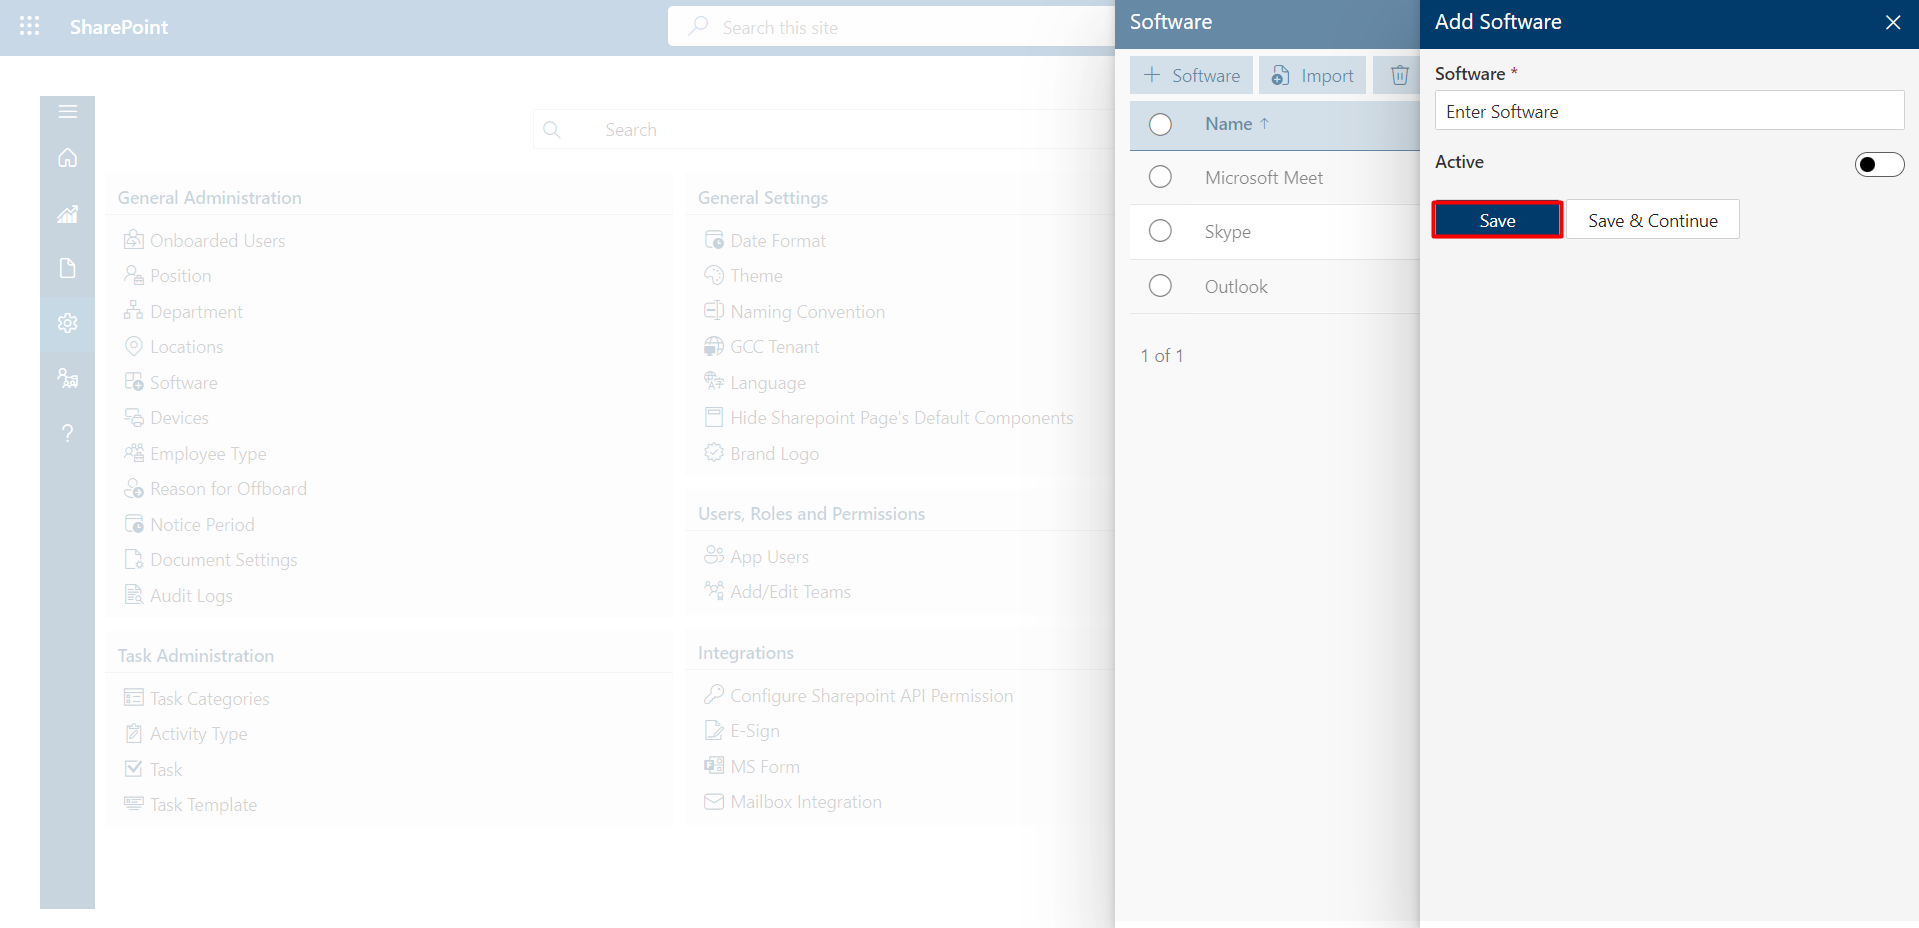
- Import
- To remove numerous Software, use the Delete option.


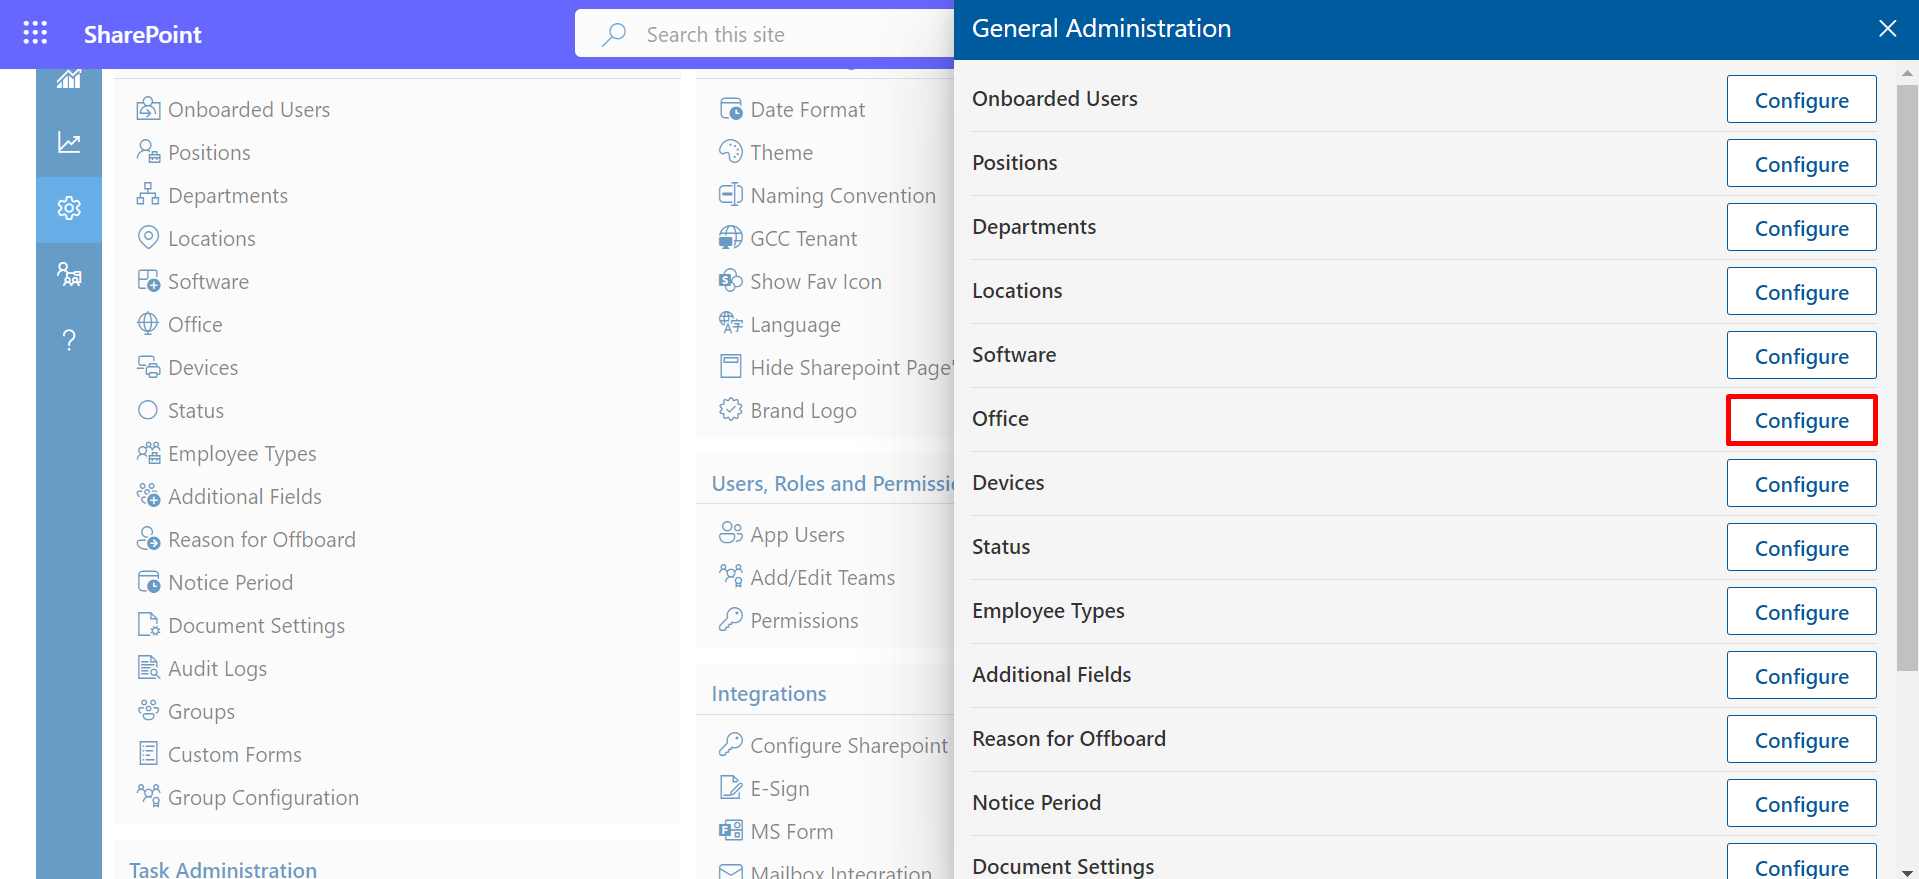
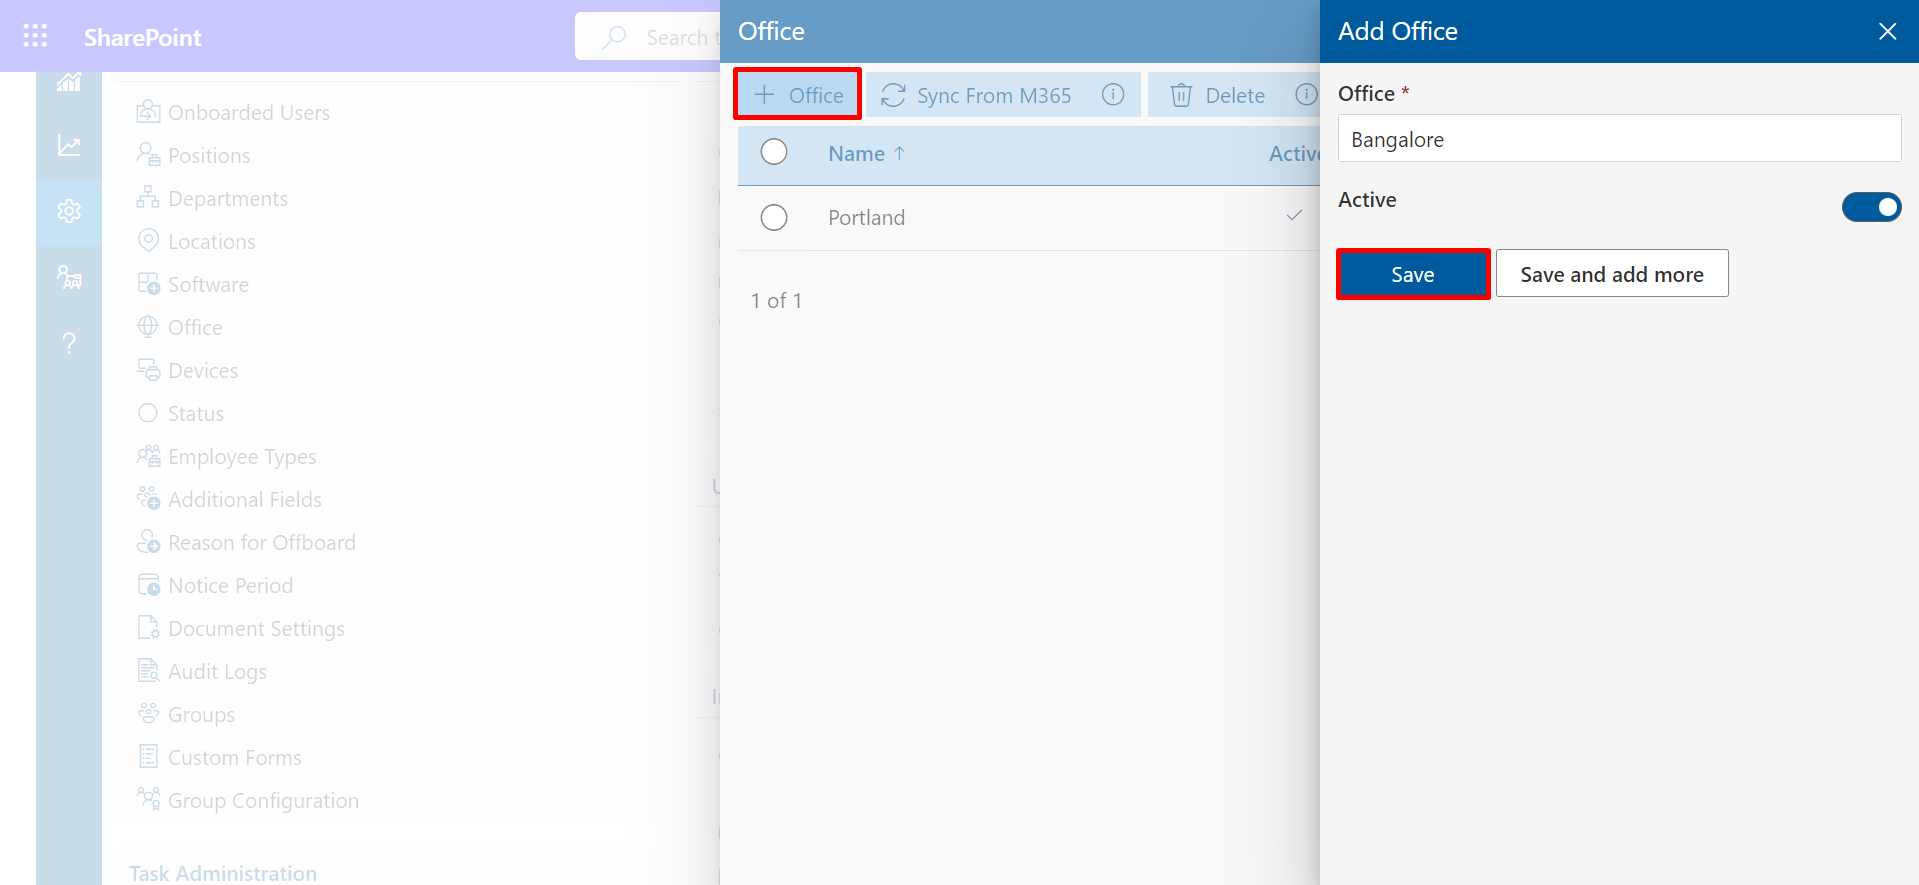
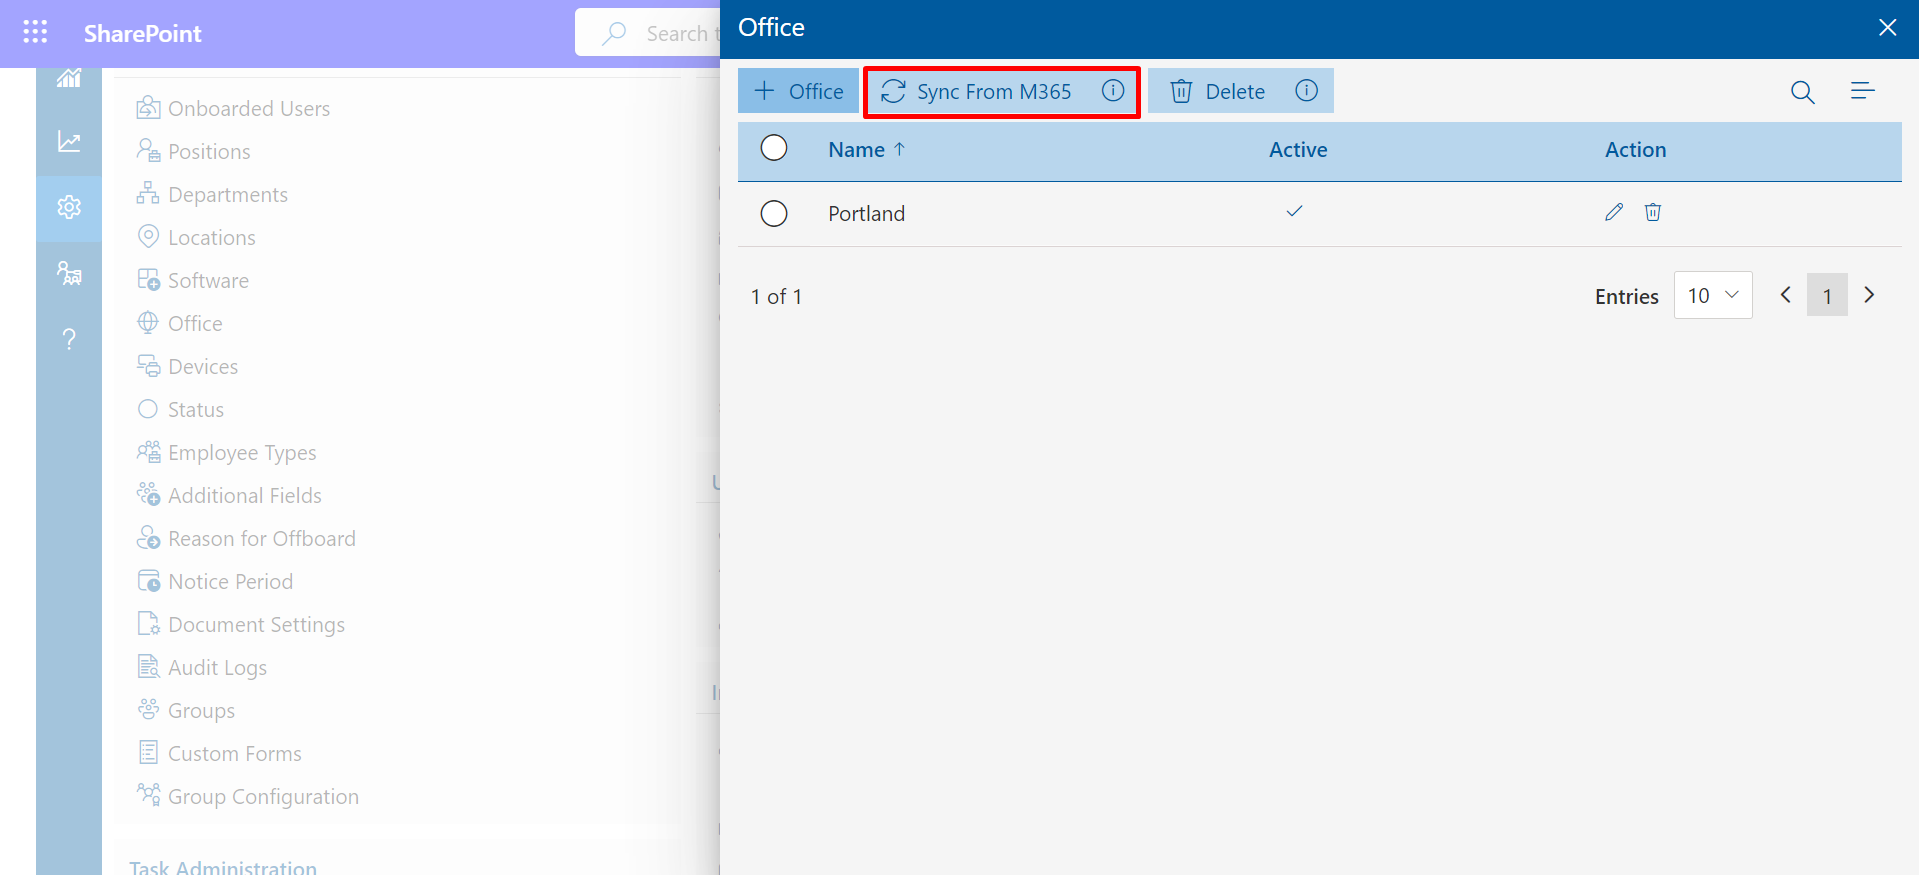
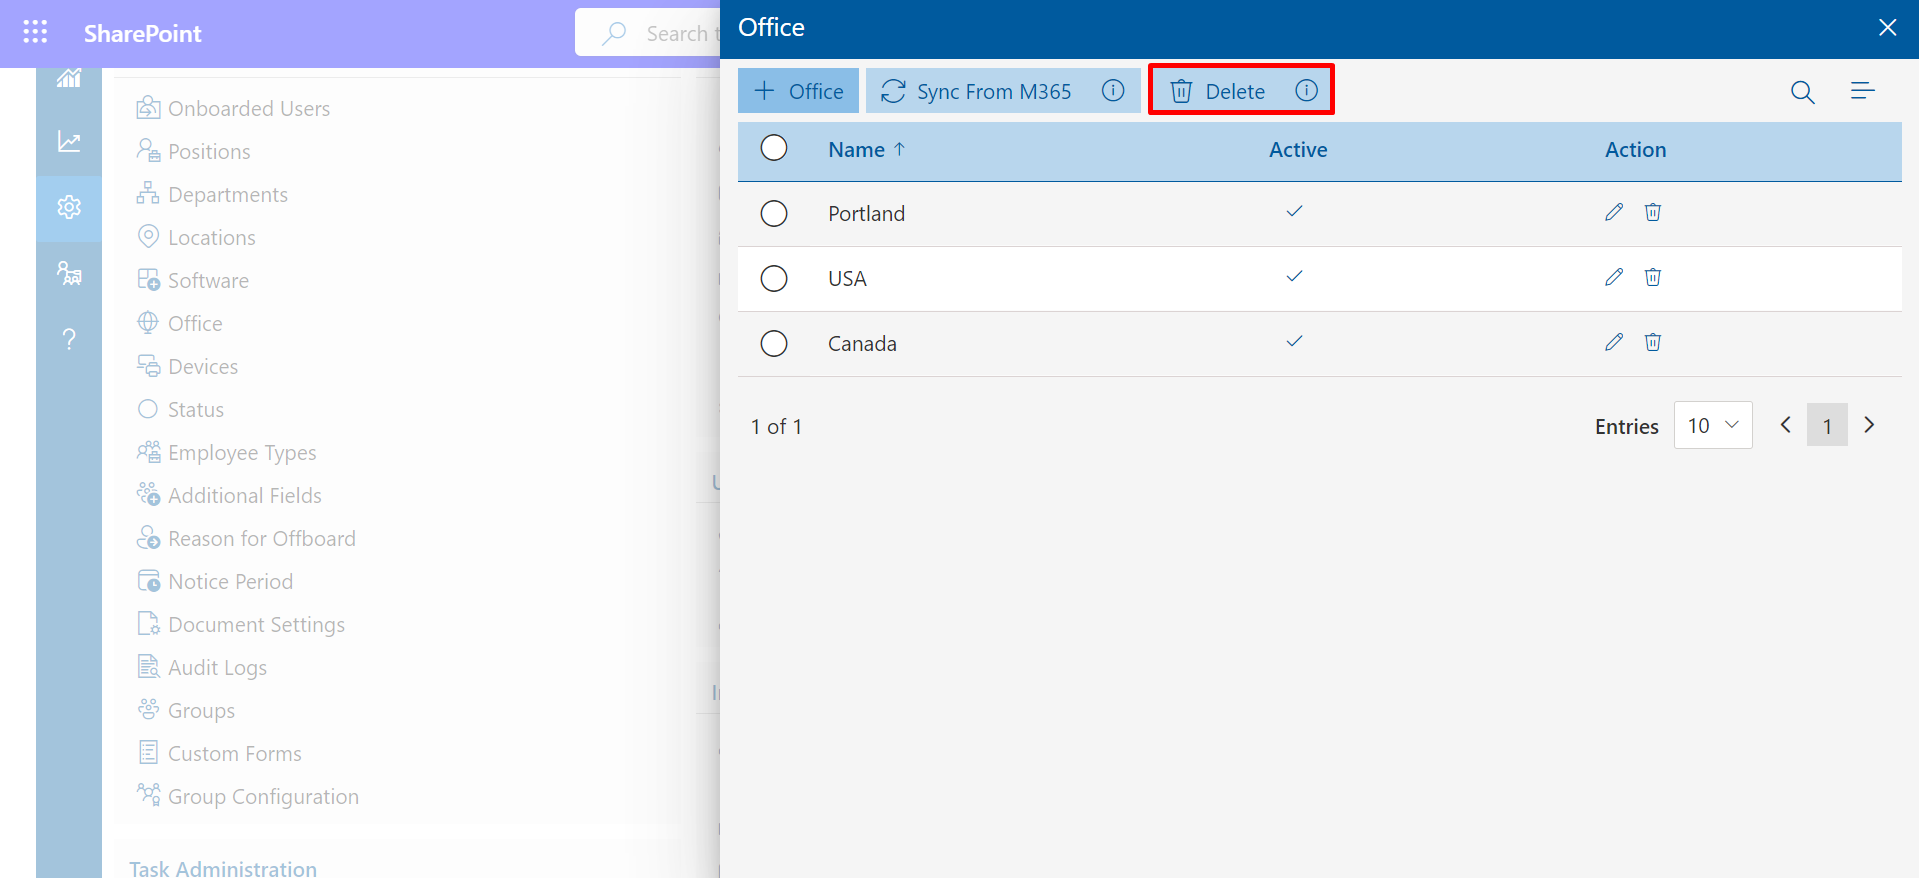
Office
- Select Configure to continue processing.
-
After clicking on +Office Dynamic office can add.
- Click on save button.
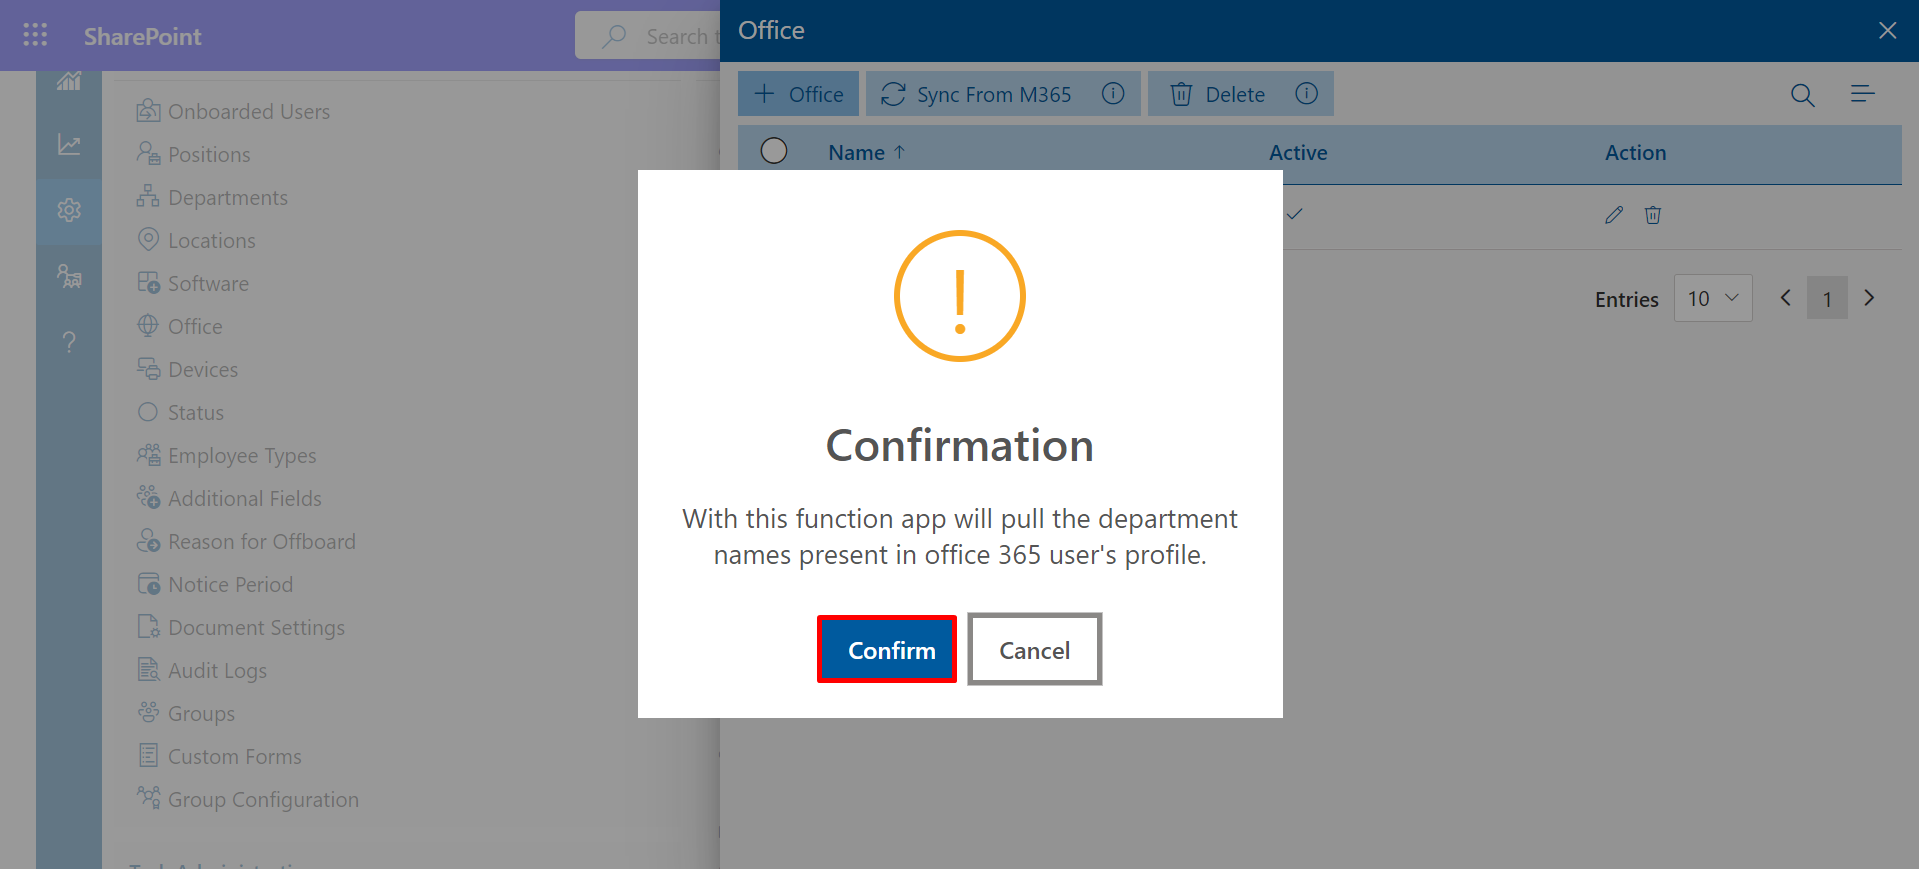
- Sync from M356 This function allows the app to retrieve the department names from the user's profile in Office 365.
- Click on Confirm.
- To remove numerous Office, use the Delete option.
In this section, you have the option to add multiple offices or office branches.
Devices
- Select Configure to continue processing.
-
After clicking on +Device Dynamic Devices can add.
-
Click on Save Button.

-
For this tab, you have the option to import a bulk sample file.

- To remove numerous Device, use the Delete option.
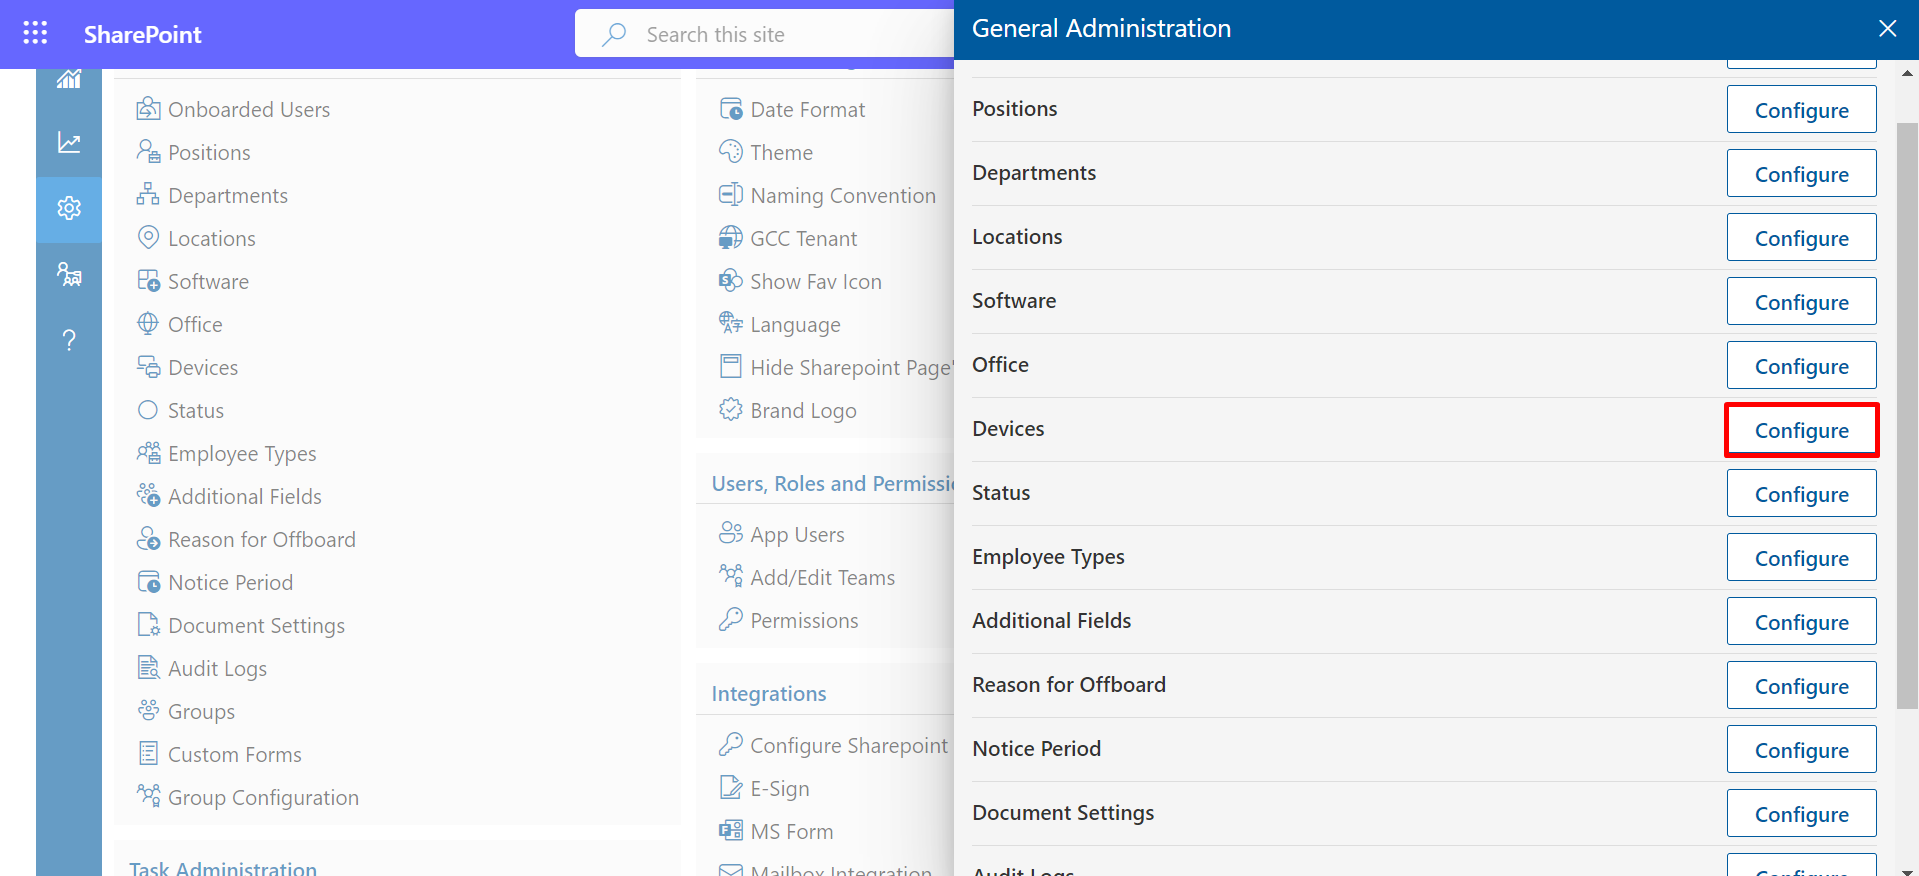


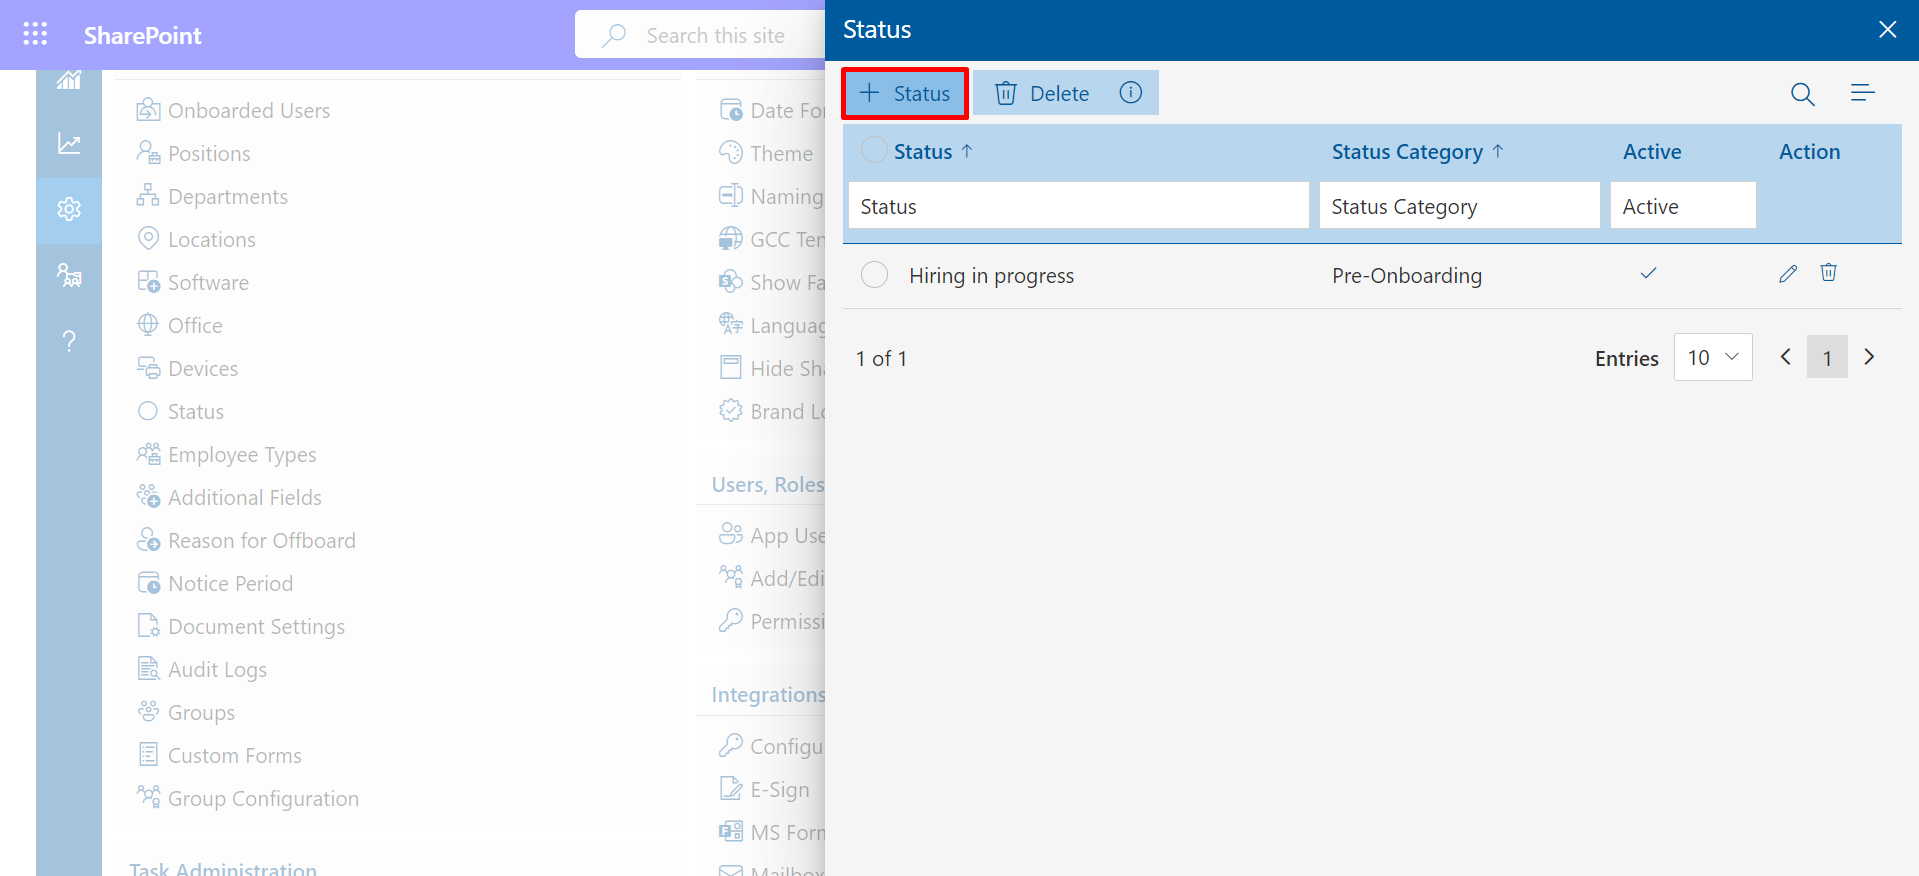
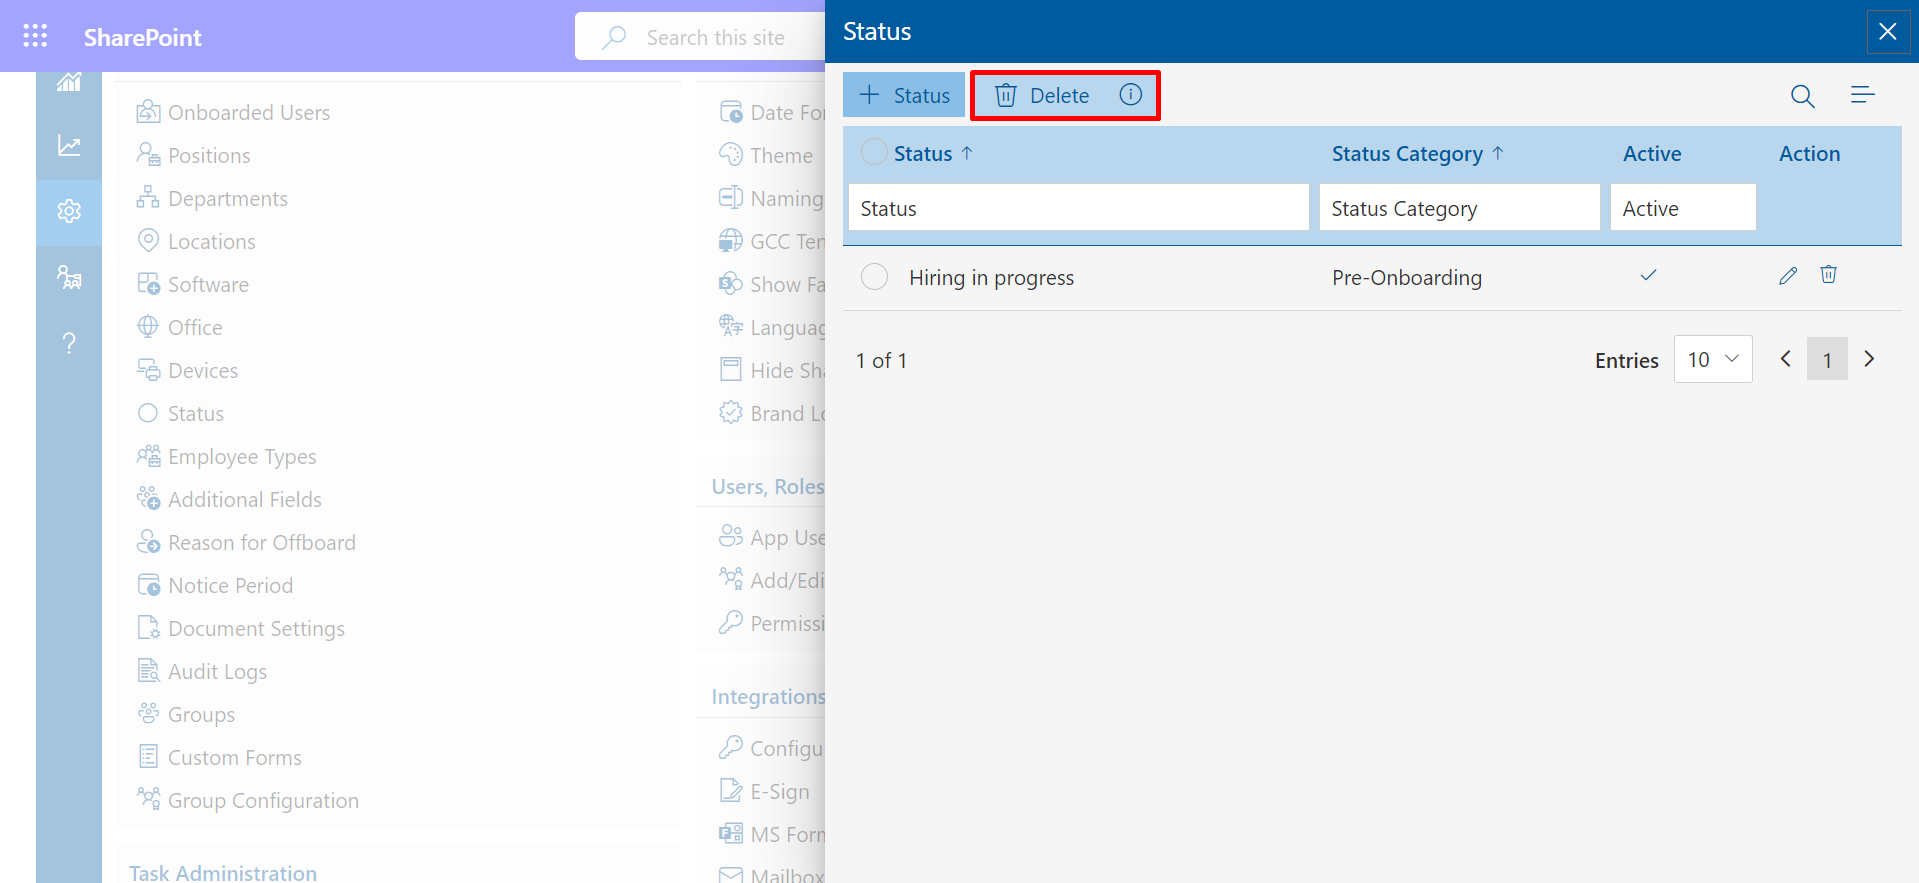
Status
- Select Configure to continue processing.
-
After clicking on +Status Dynamic status can add.
-
Complete the tab by entering the status and then click on the save
button.

- To remove numerous Status, use the Delete option.

Employee-Type
- Select Configure to continue processing.
-
After clicking on +Type Dynamic Employee-Type can add.
-
Click on Save Button.
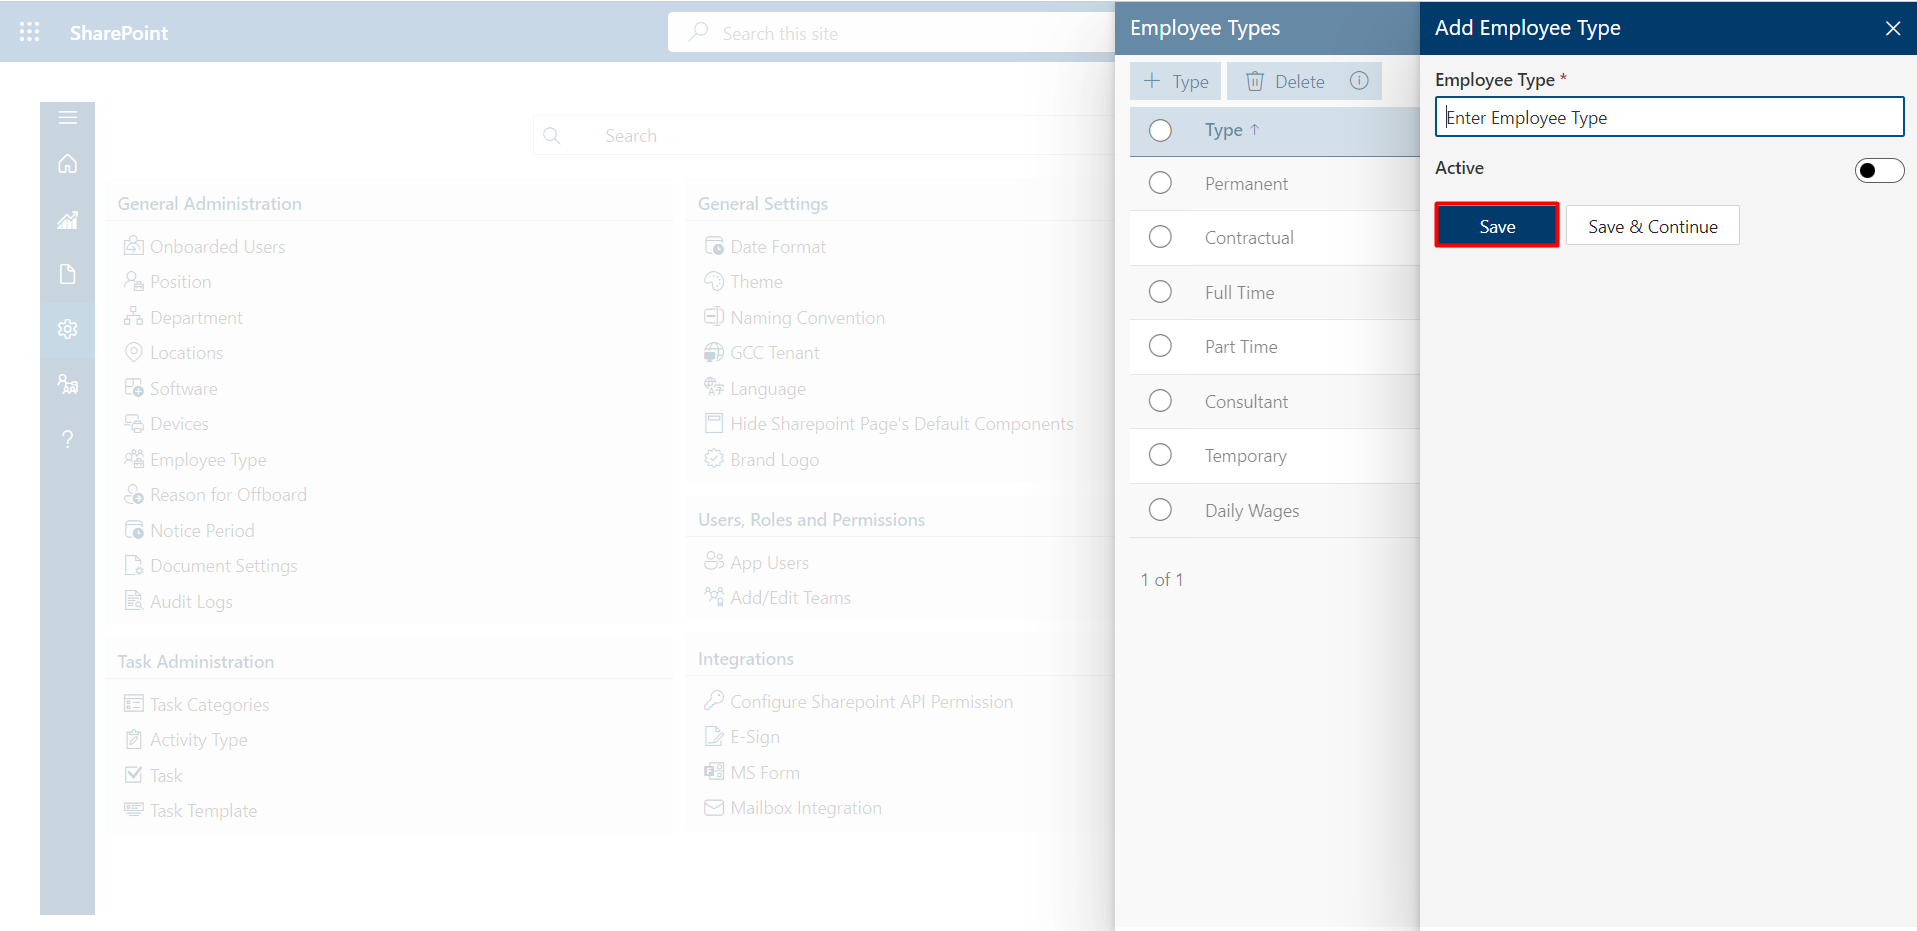
- To remove numerous Device, use the Delete option.


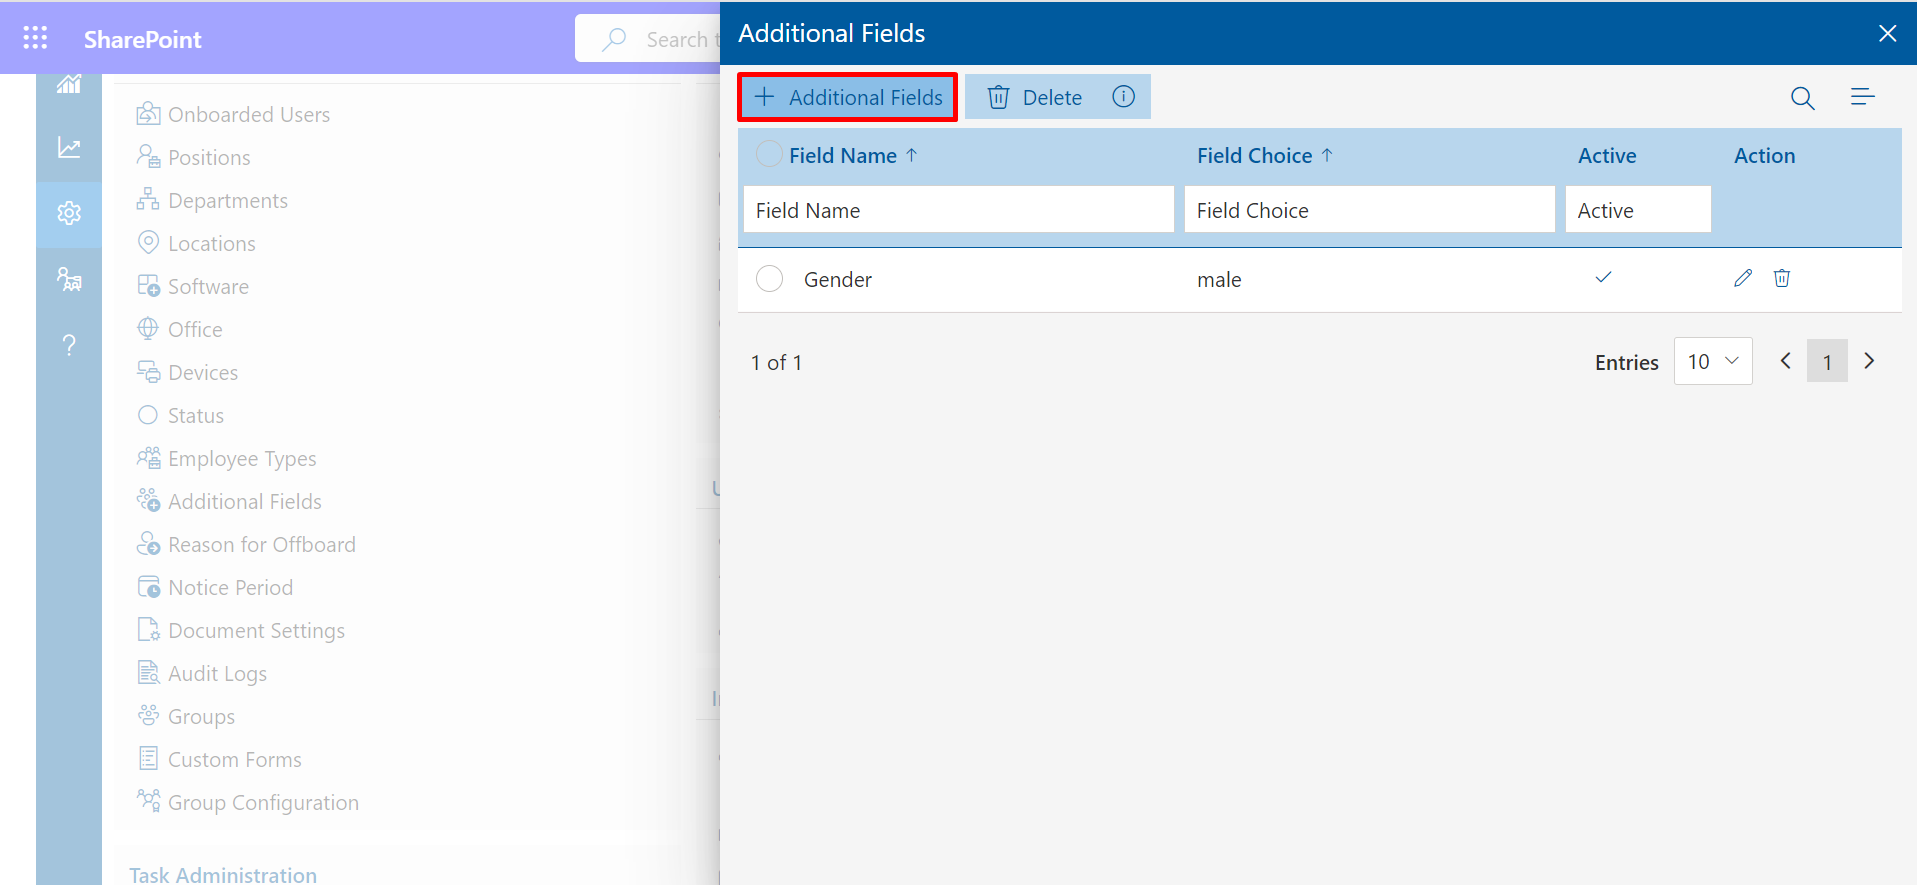
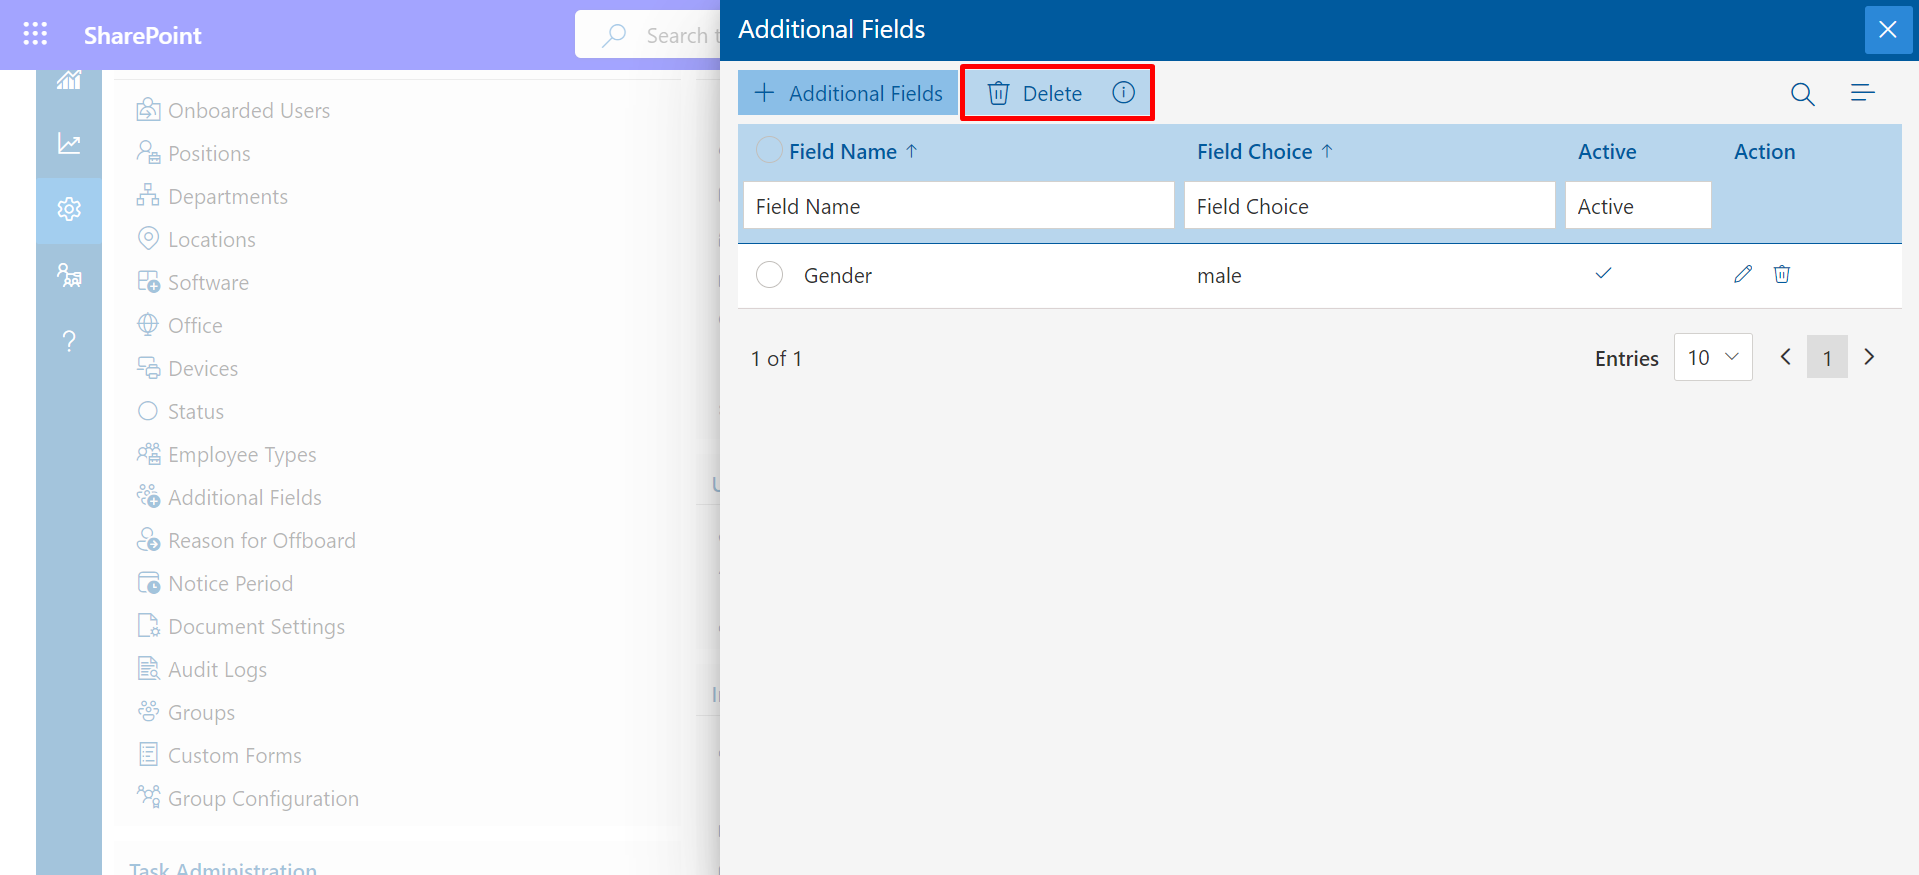
Additional Fields
- Select Configure to continue processing.
-
After clicking on +Additional Fields Dynamic Additional Fields can add.
-
Click on Save Button.
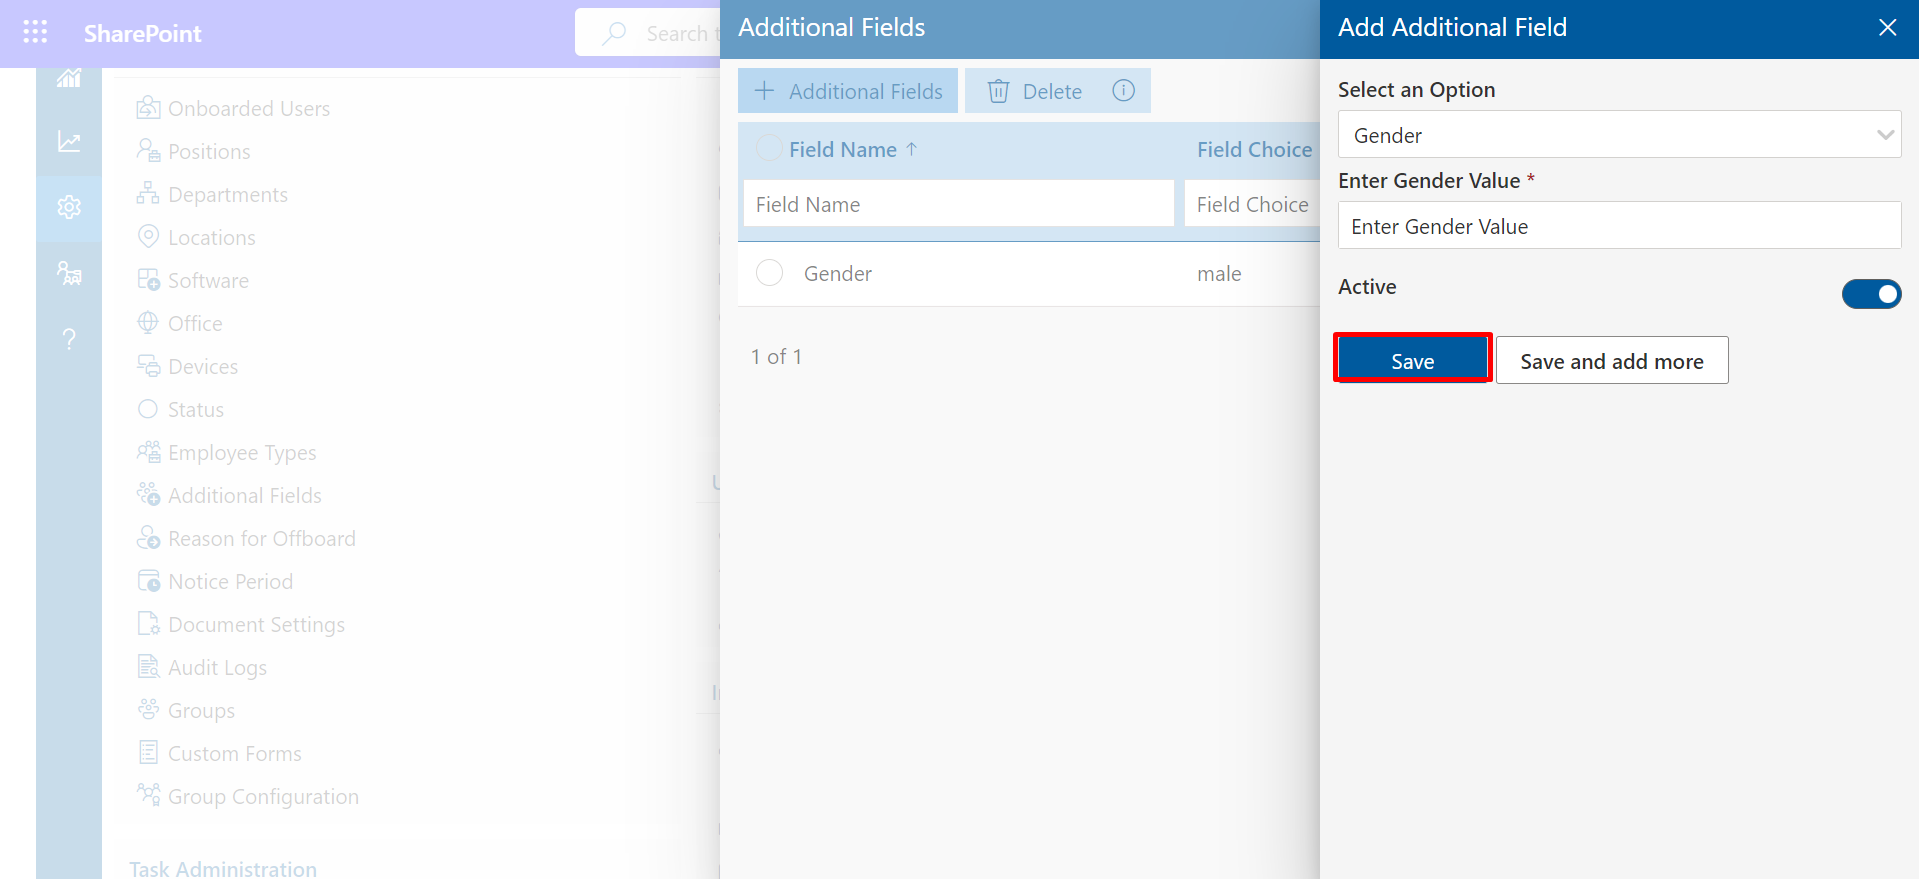
- To remove numerous Device, use the Delete option.

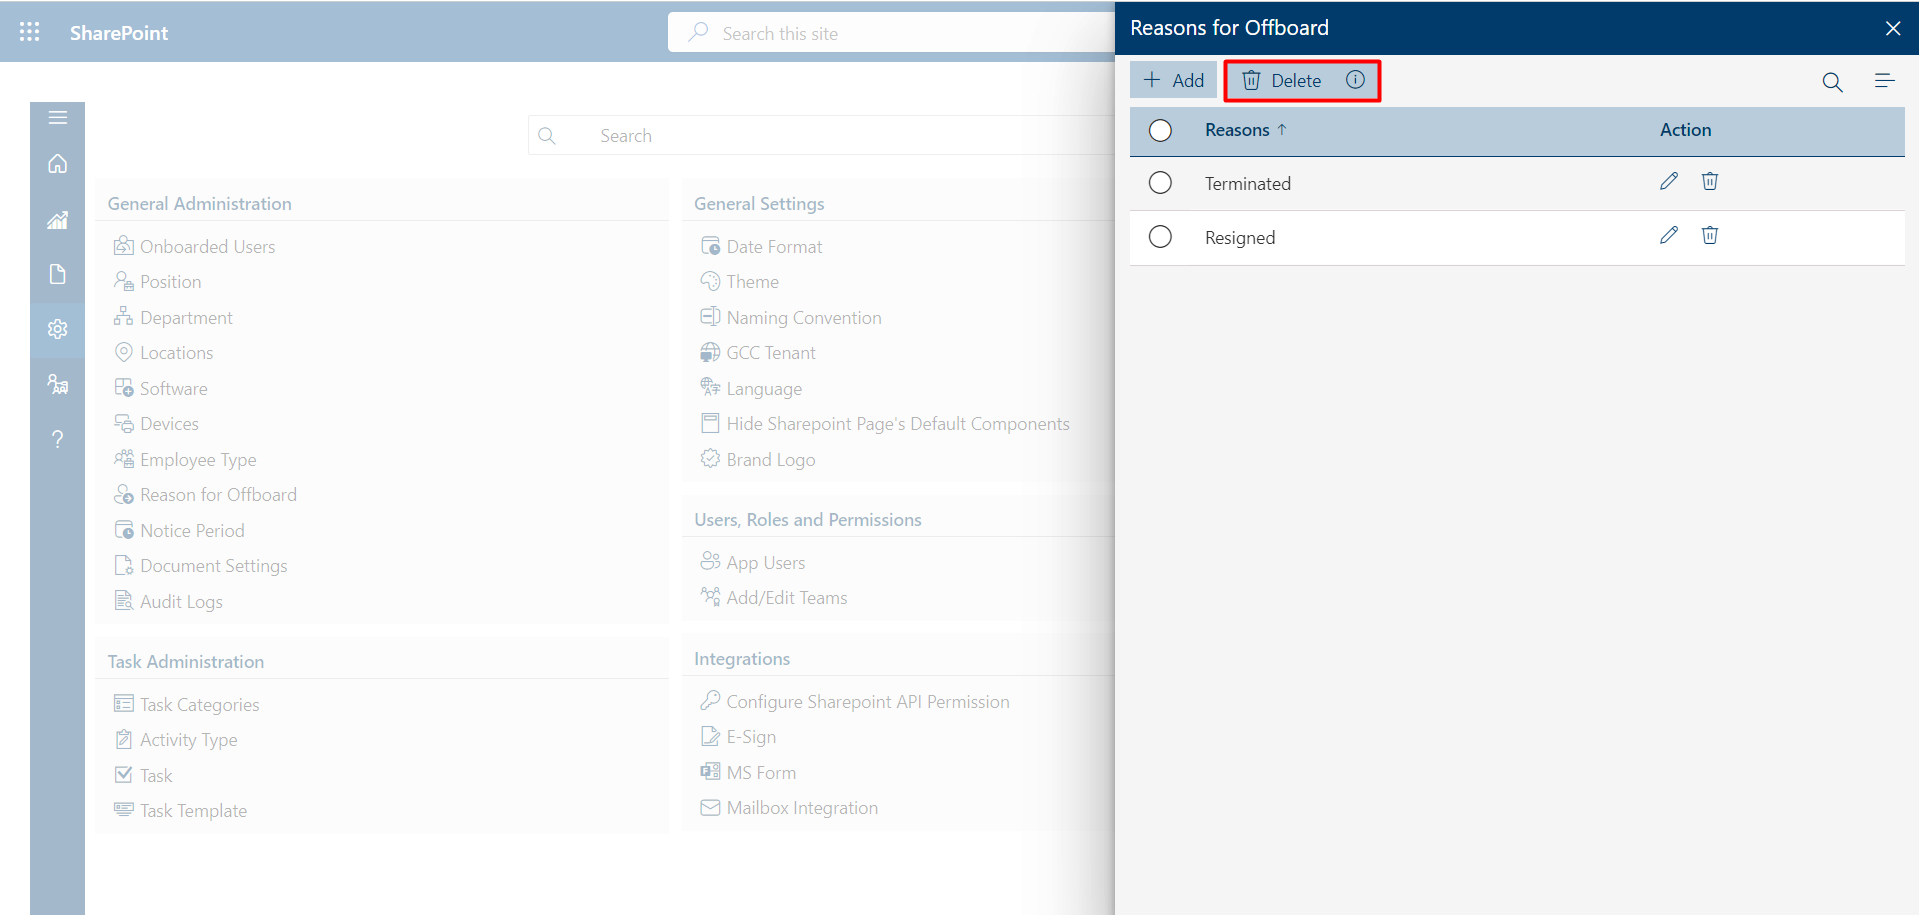
Reason-for-Offboard
- Select Configure to continue processing.
-
After clicking on +Add You Can Enter Dynamic Reason for Offboarding.
-
Click on Save Button.

- To remove numerous Reason , use the Delete option.


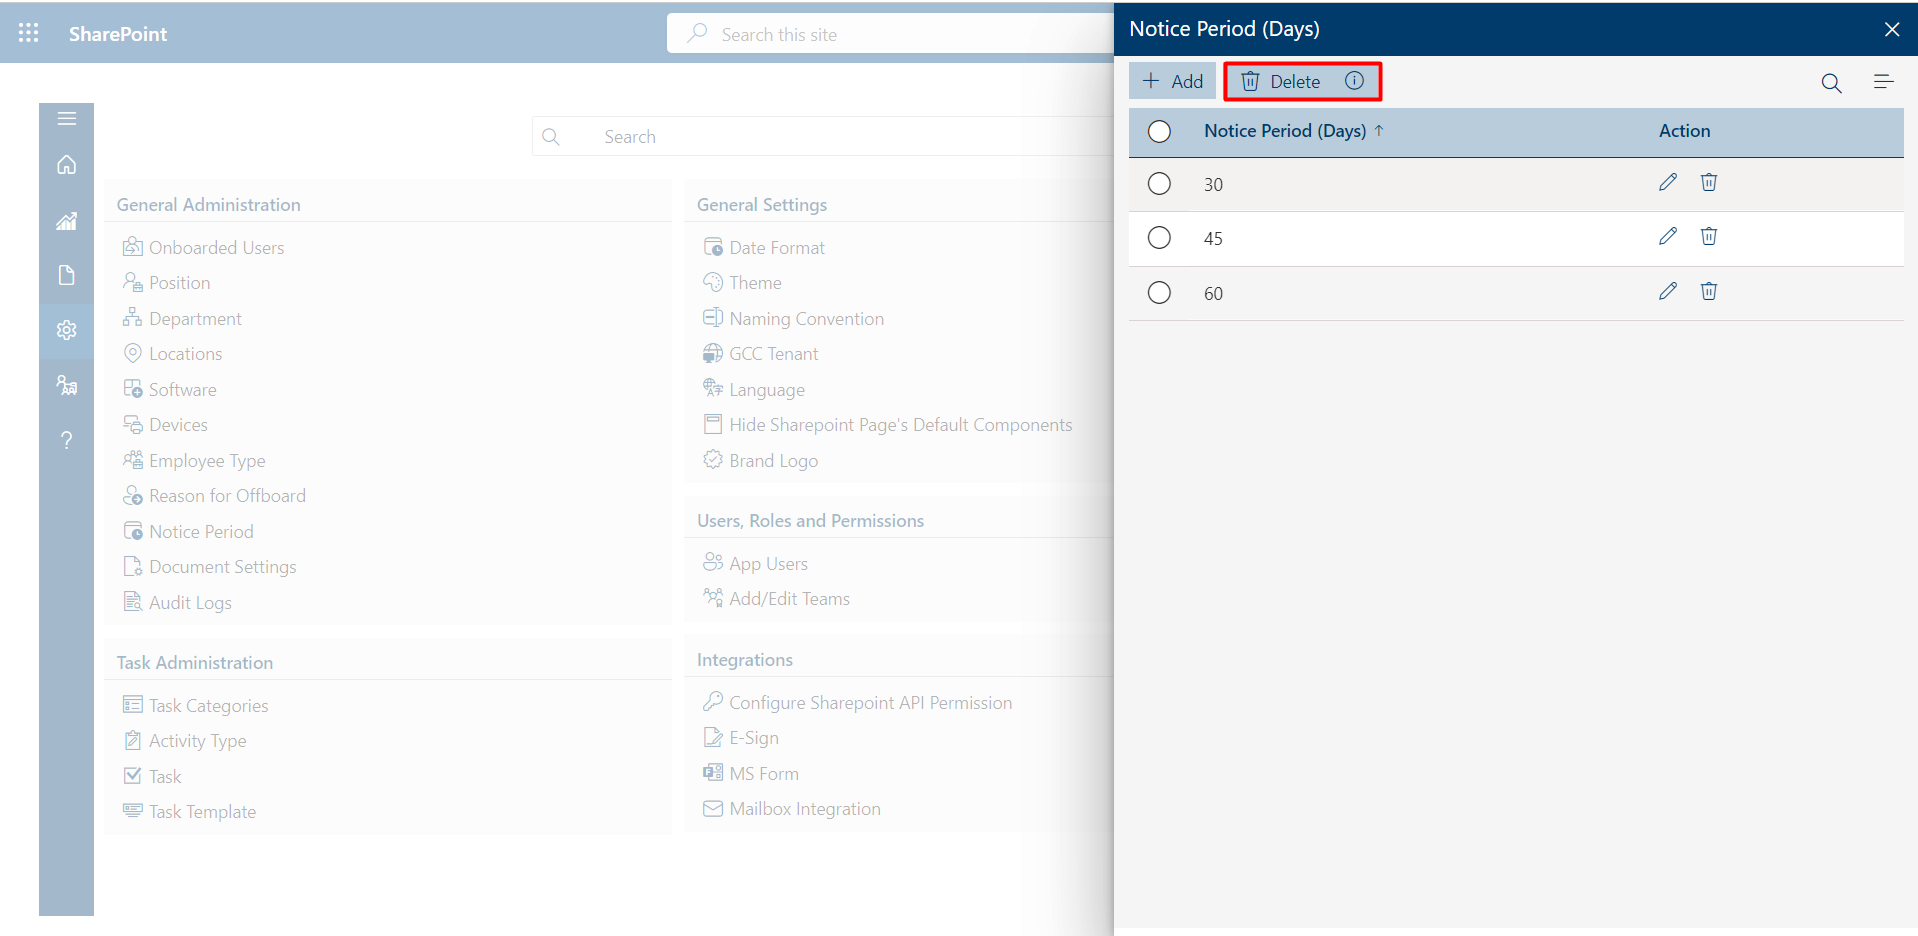
Notice-Period
- Select Configure to continue processing.
-
After clicking on +Add You Can Enter Dynamic Notice Period Days .
-
Click on Save Button.
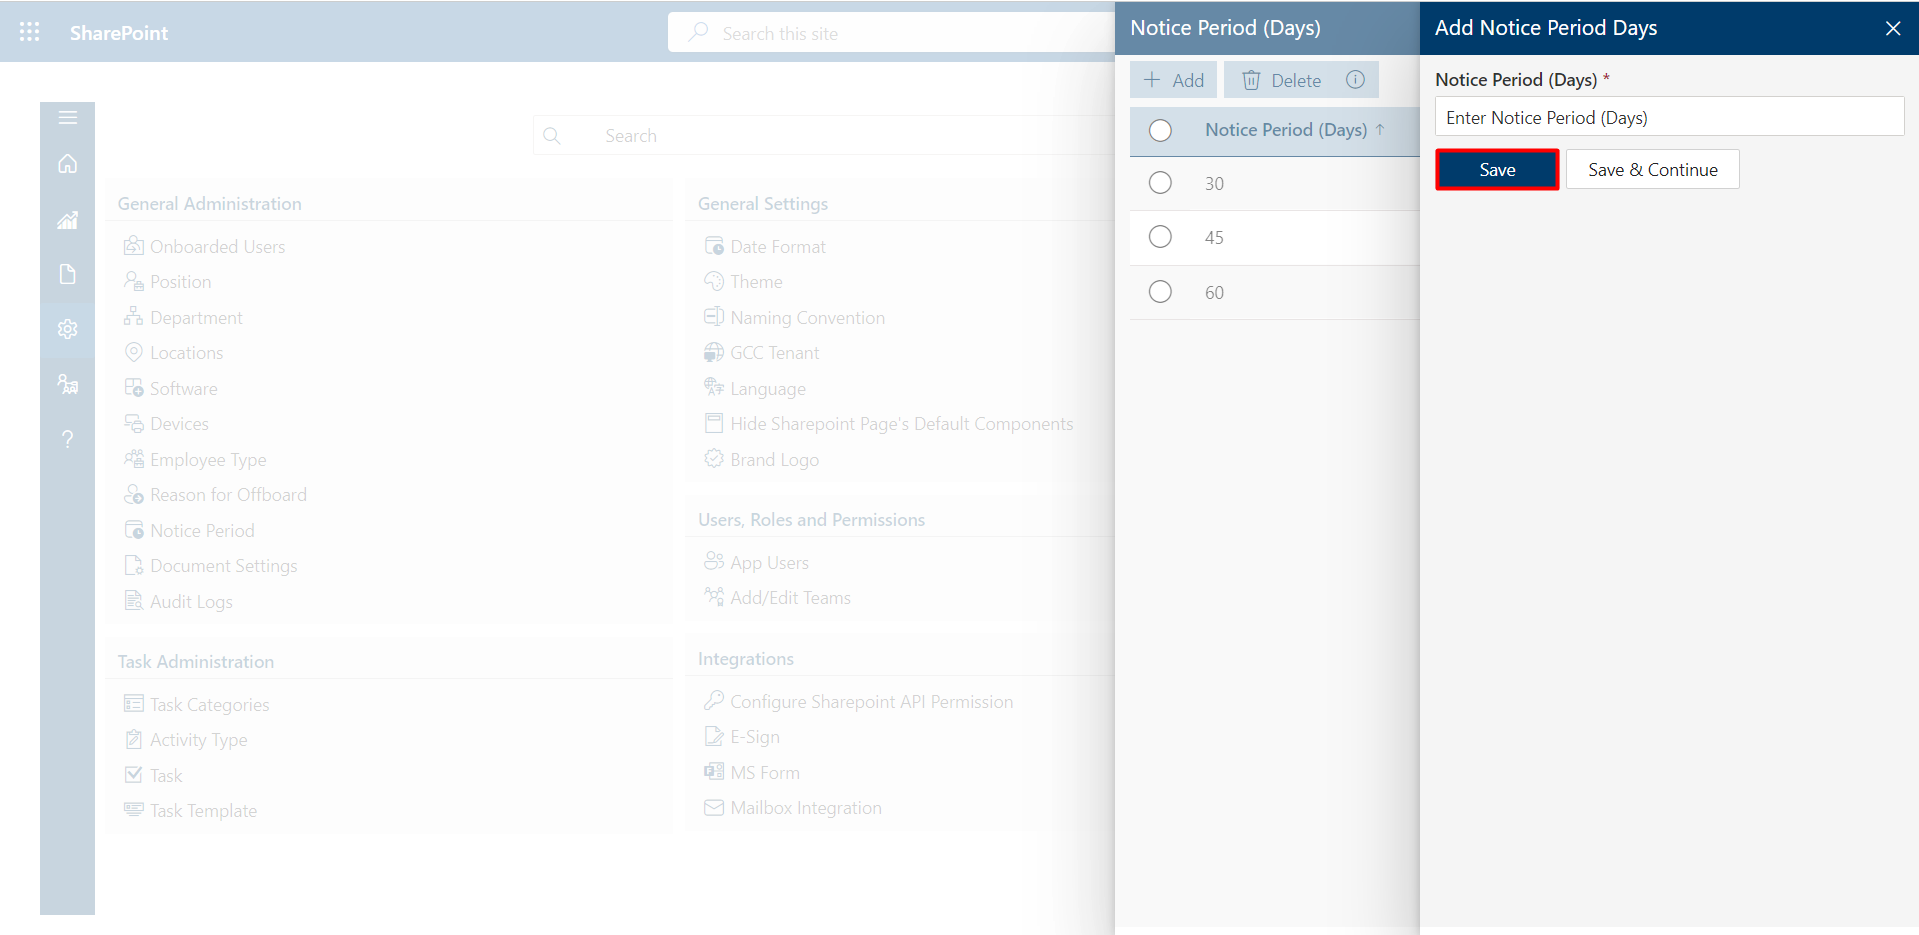
- To remove numerous Notice Period , use the Delete option.

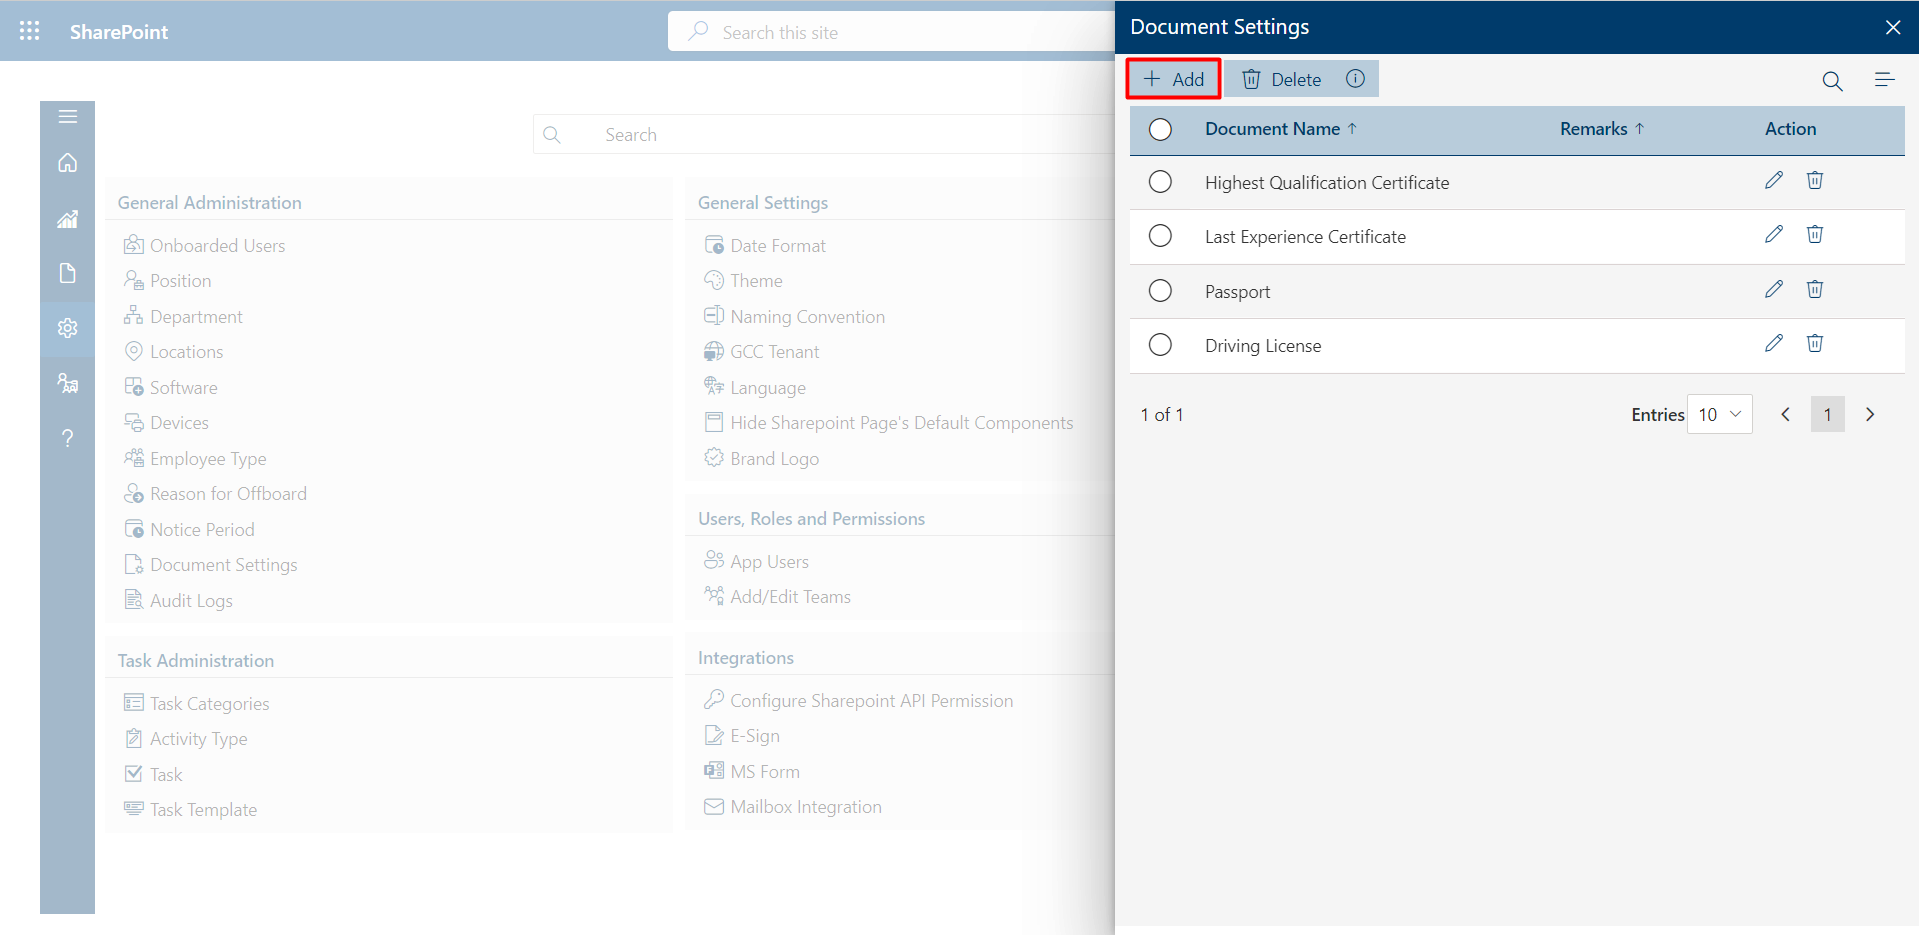
Document Setting
- Select Configure to continue processing.
-
After clicking on +Add You Can Enter Dynamic Document Name .
-
Click on Save Button.

- To remove numerous Documents , use the Delete option.


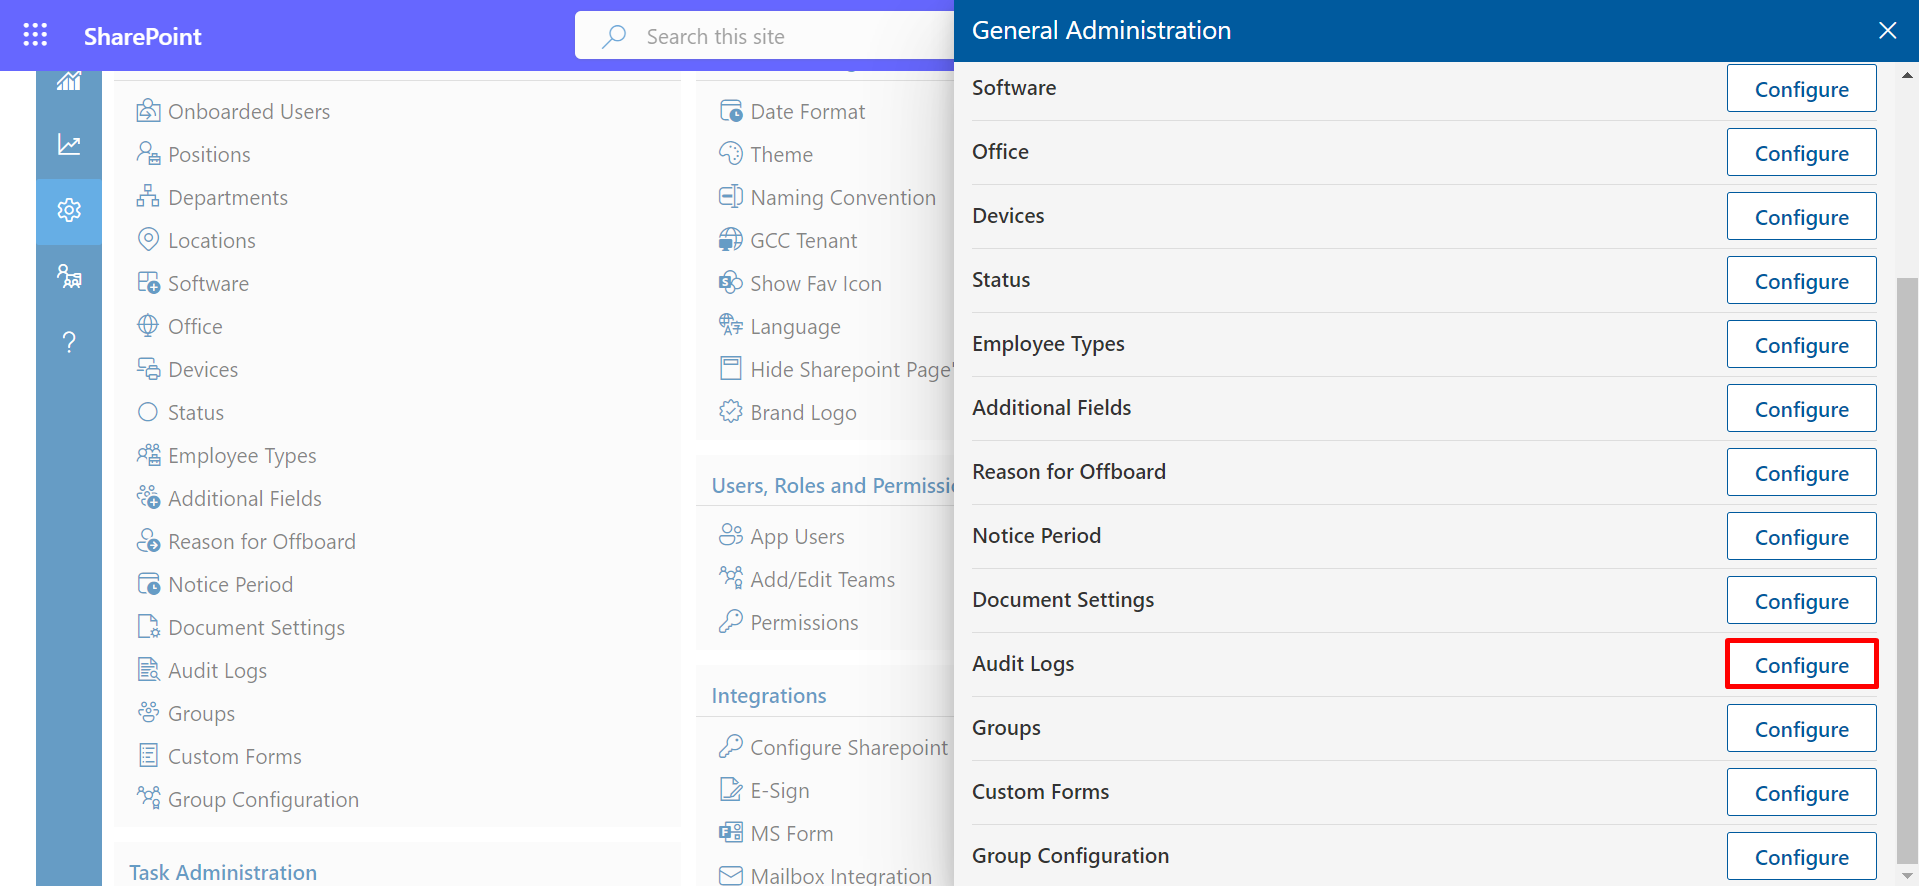
Audit Logs
- Select Configure to continue processing.
-
After clicking on +Add You Can Enter Dynamic Document Name .
-
Click on Save Button.
- To remove numerous Documents , use the Delete option.
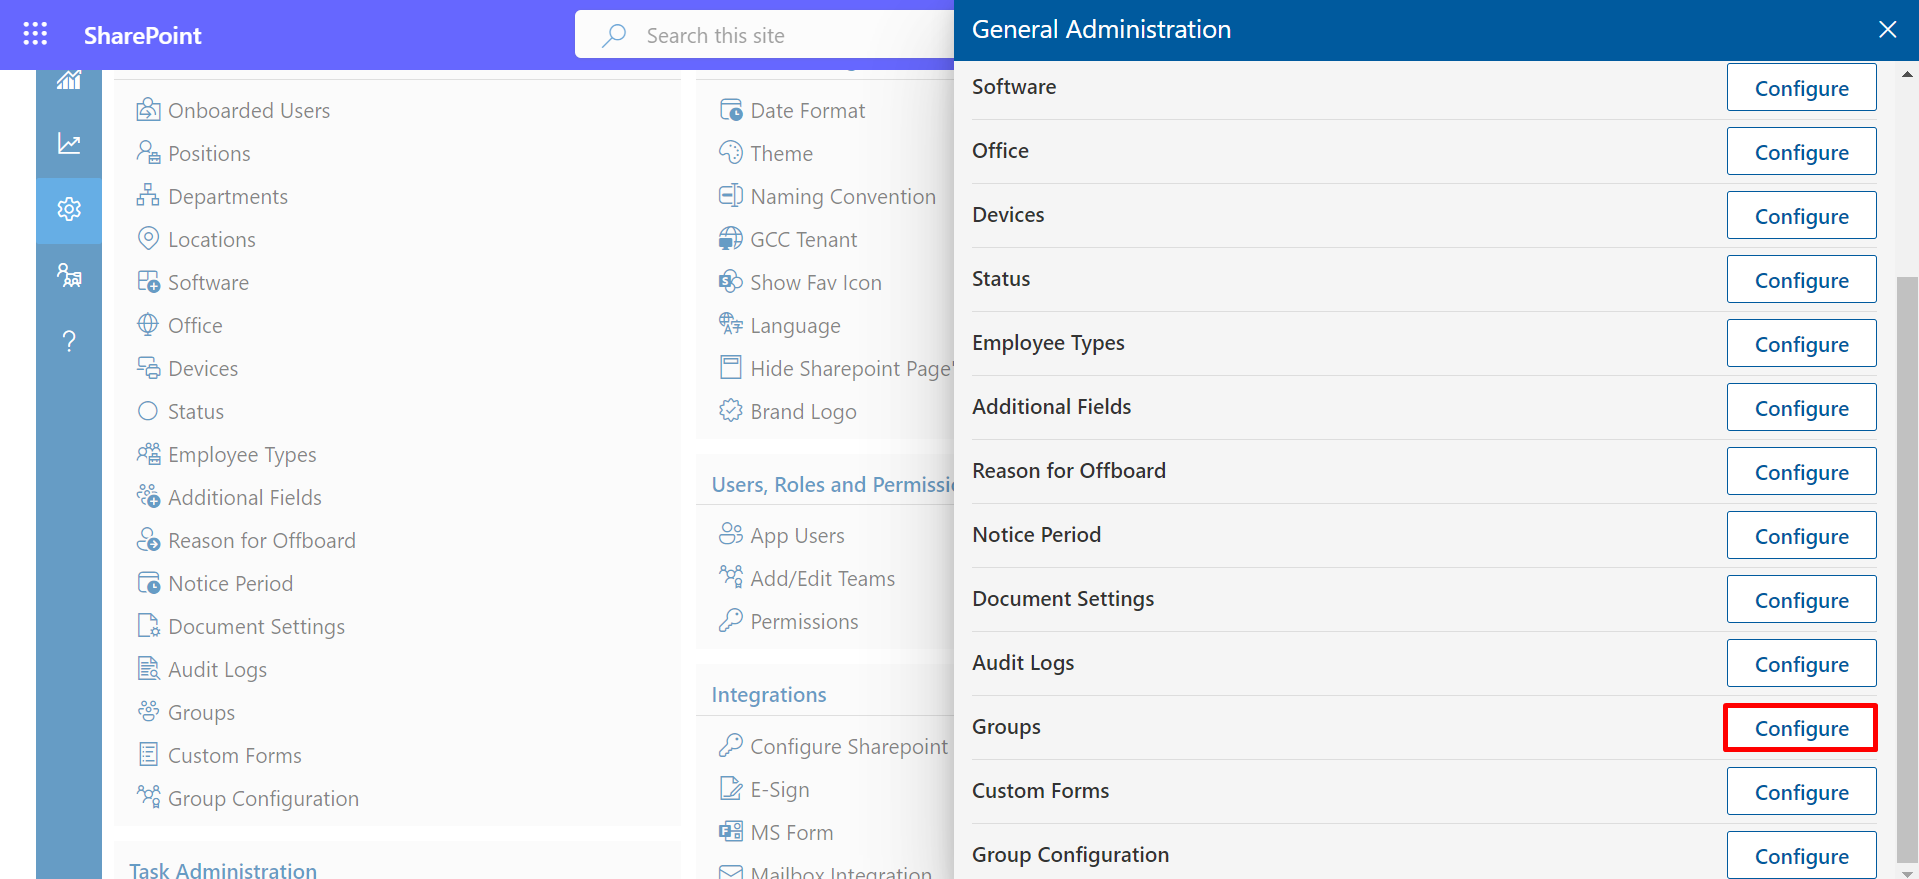
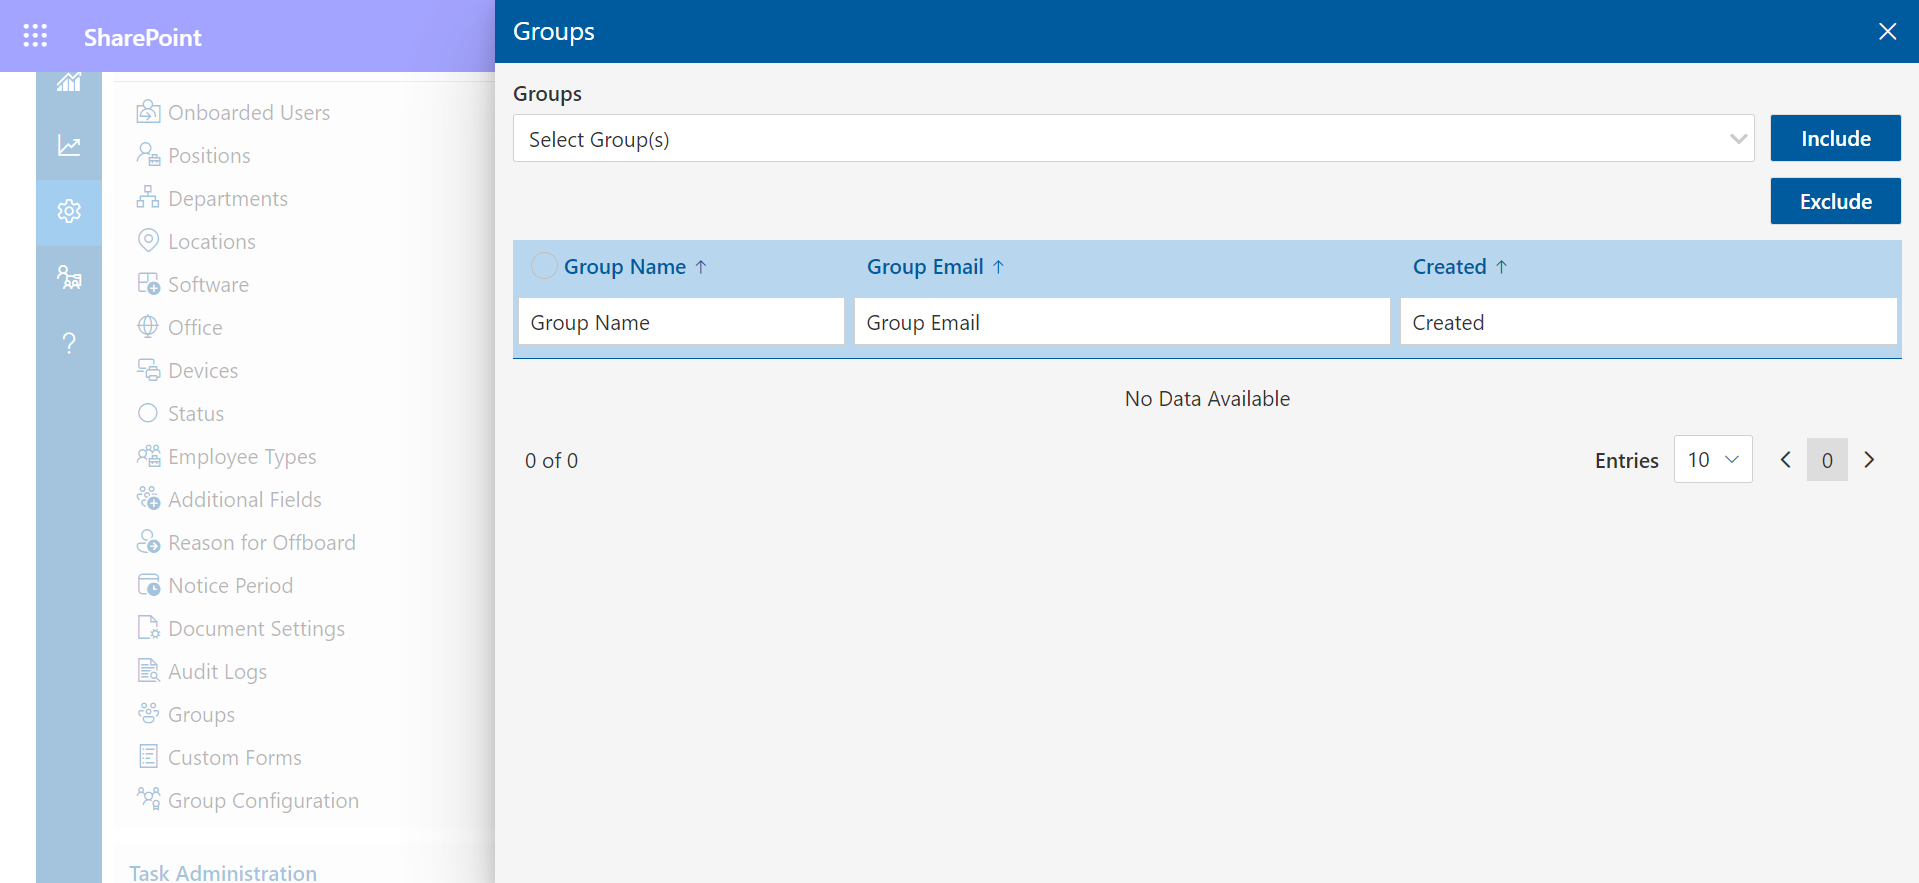
Groups
- Select Configure to continue processing.
- We have the option to include or exclude groups that are already part of a flow. Only the groups that are included will be visible in the application.
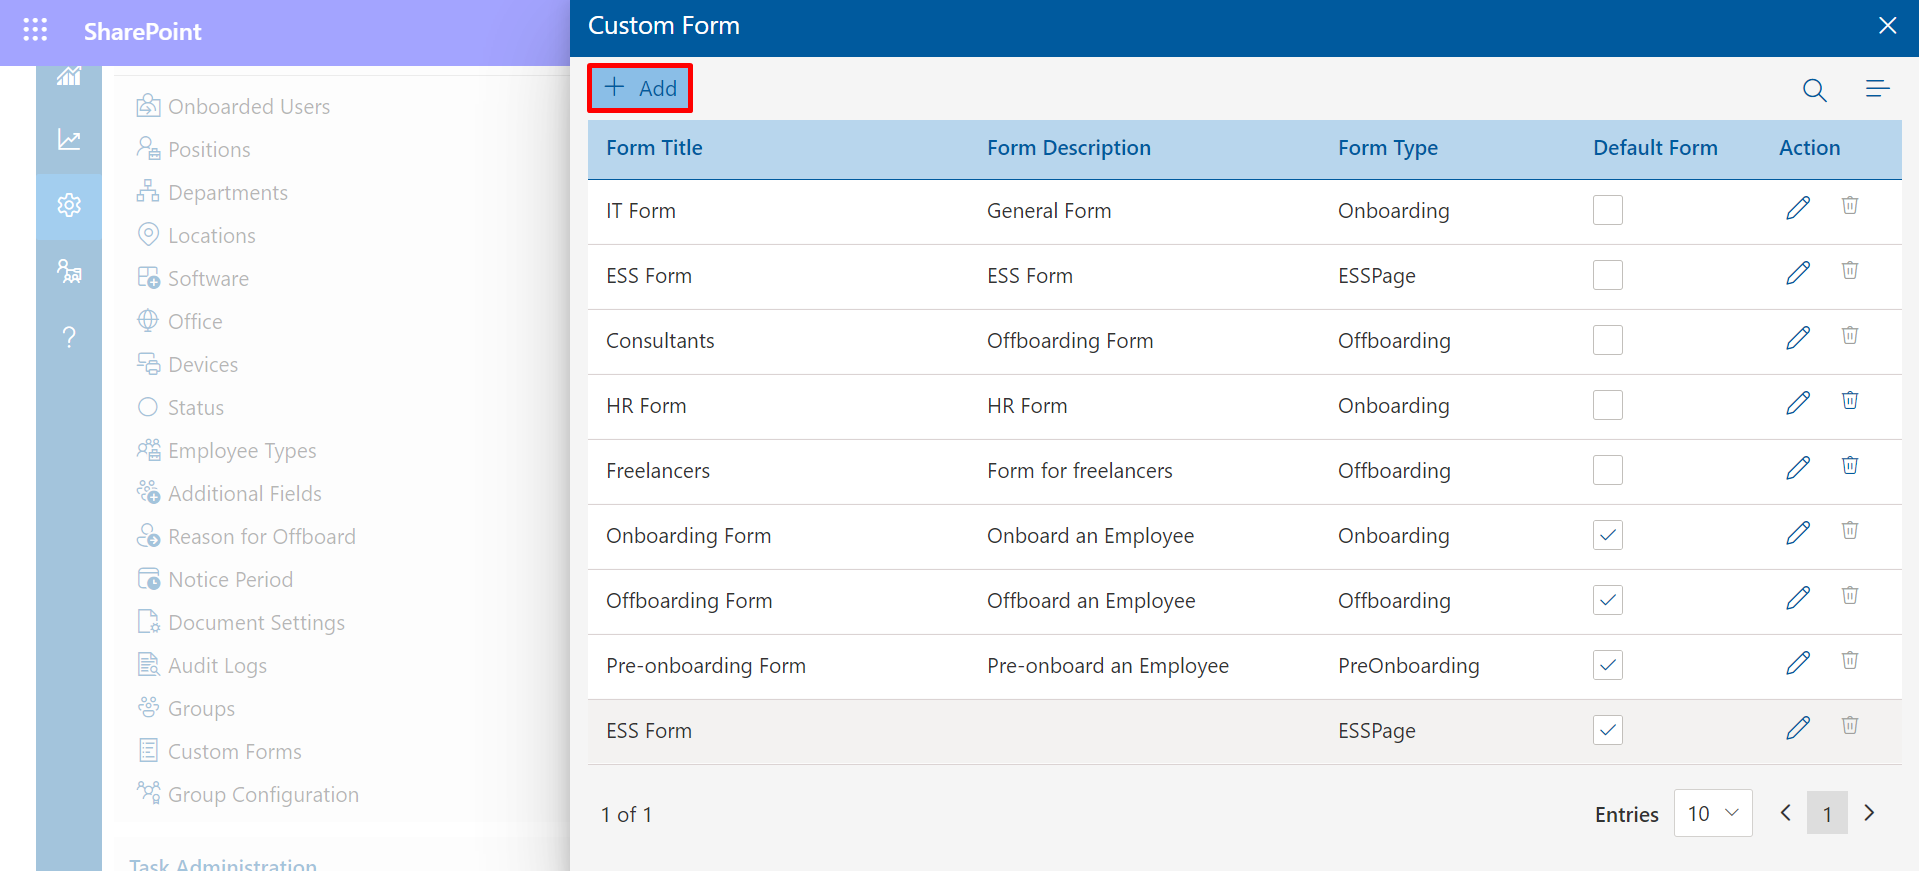
Custom Forms
- Select Configure to continue processing.
-
After clicking on +Add You Can Create Dynamic Custom Forms.
-
To add a custom form, fill in the required fields and then click on the save
icon.
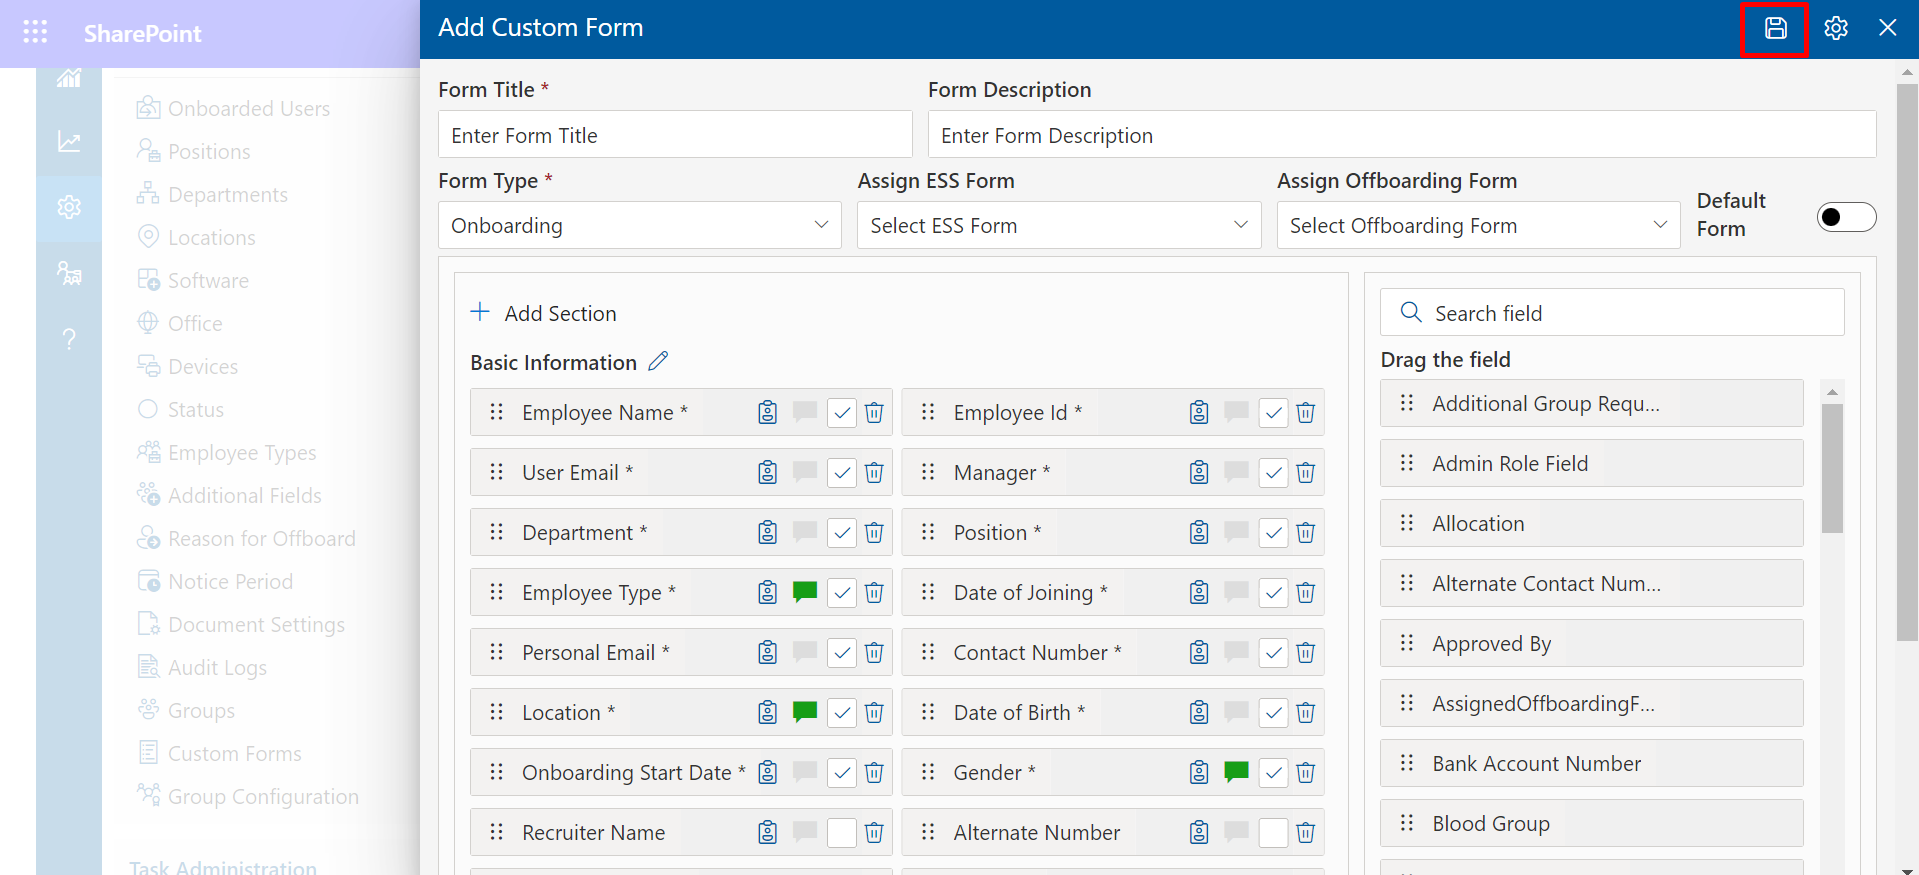
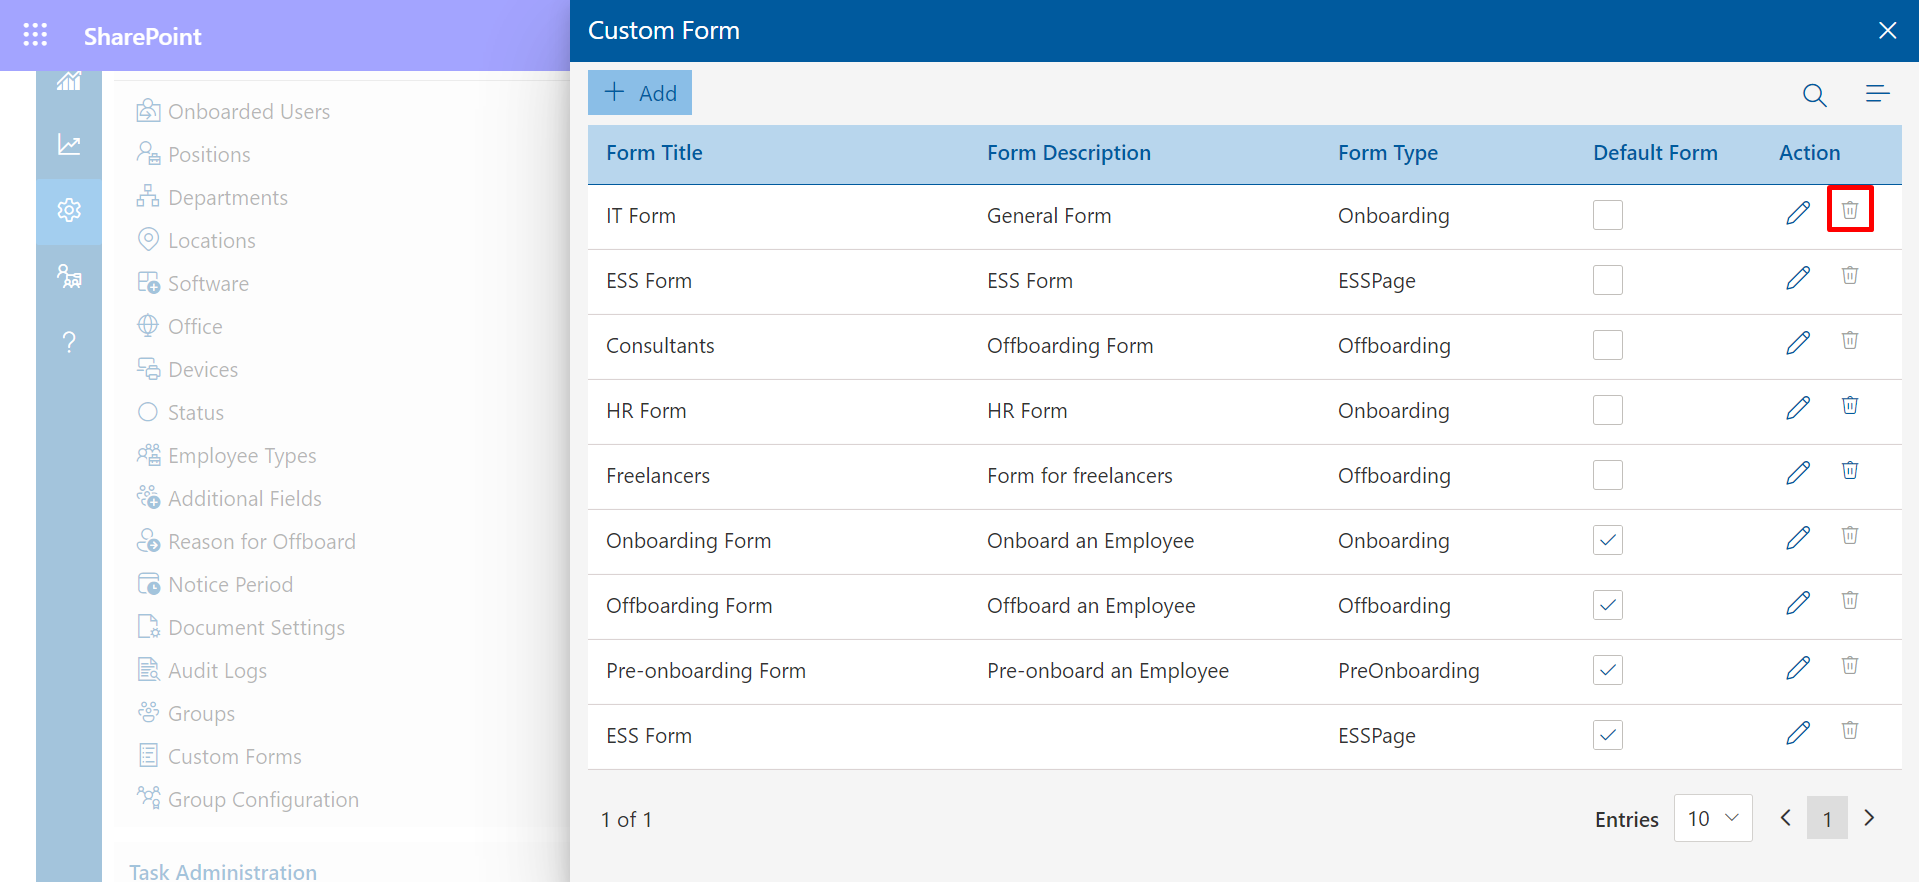
- To remove numerous formr , use the Delete option.