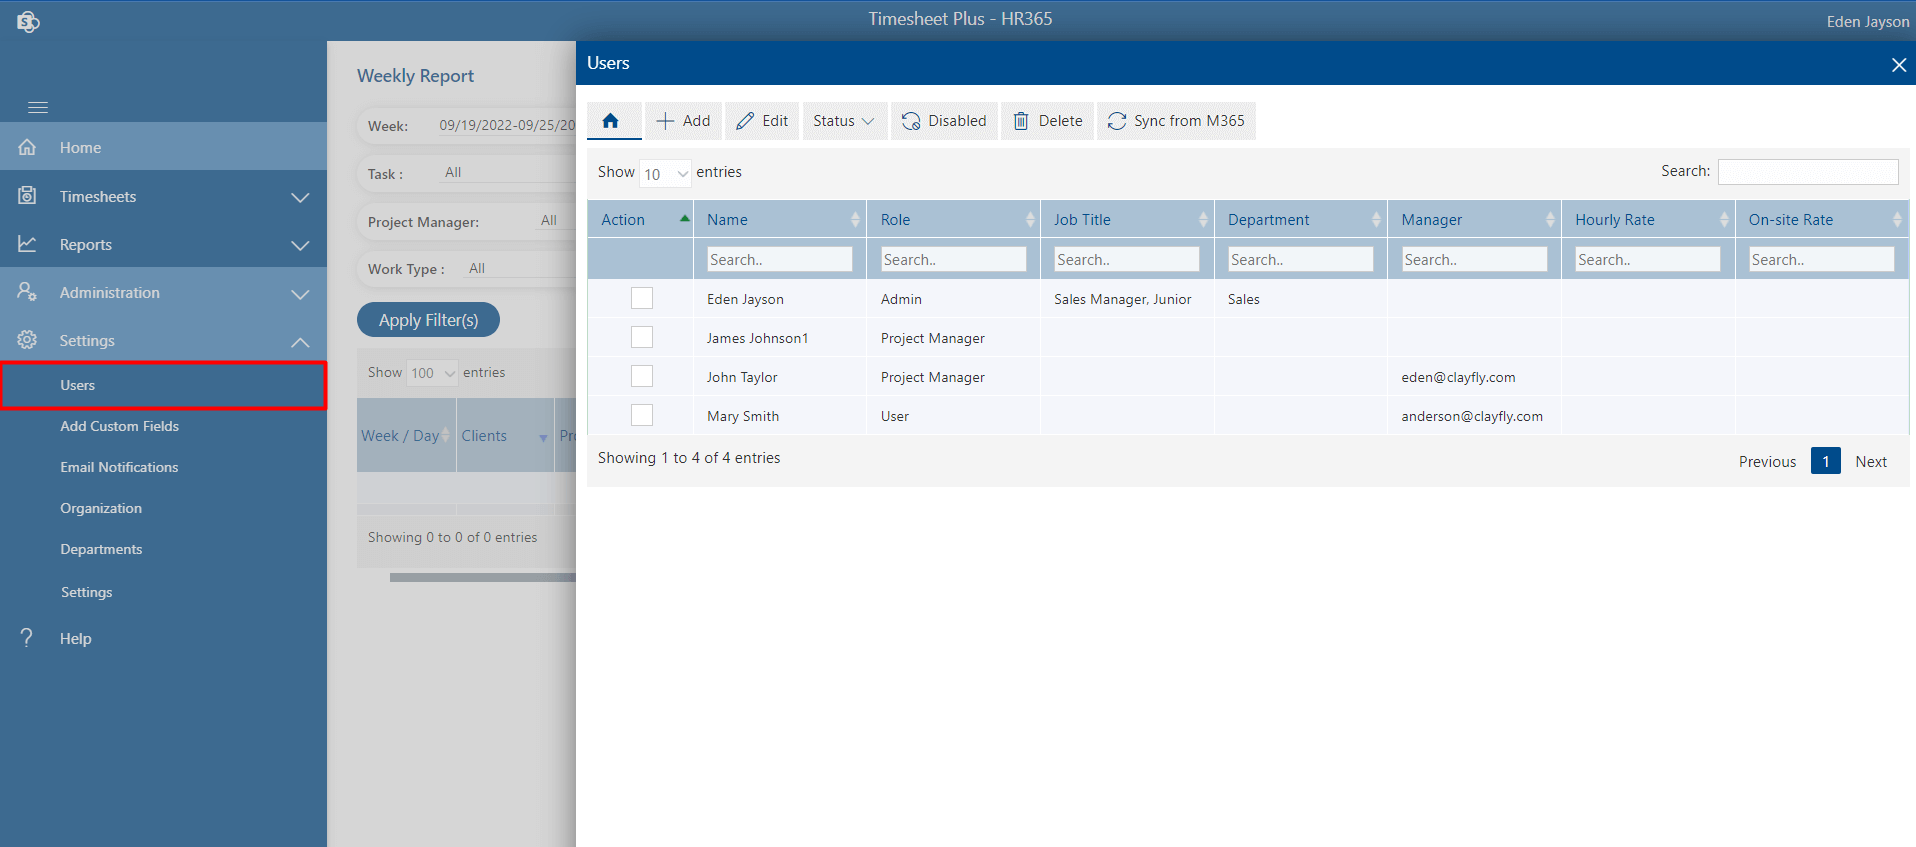
Users
Admin can add users and assign the roles like the user, program manager, project manager, project observer, coordinator, and no access.
Importance of Roles:
Following are the different types of roles in Timesheets.
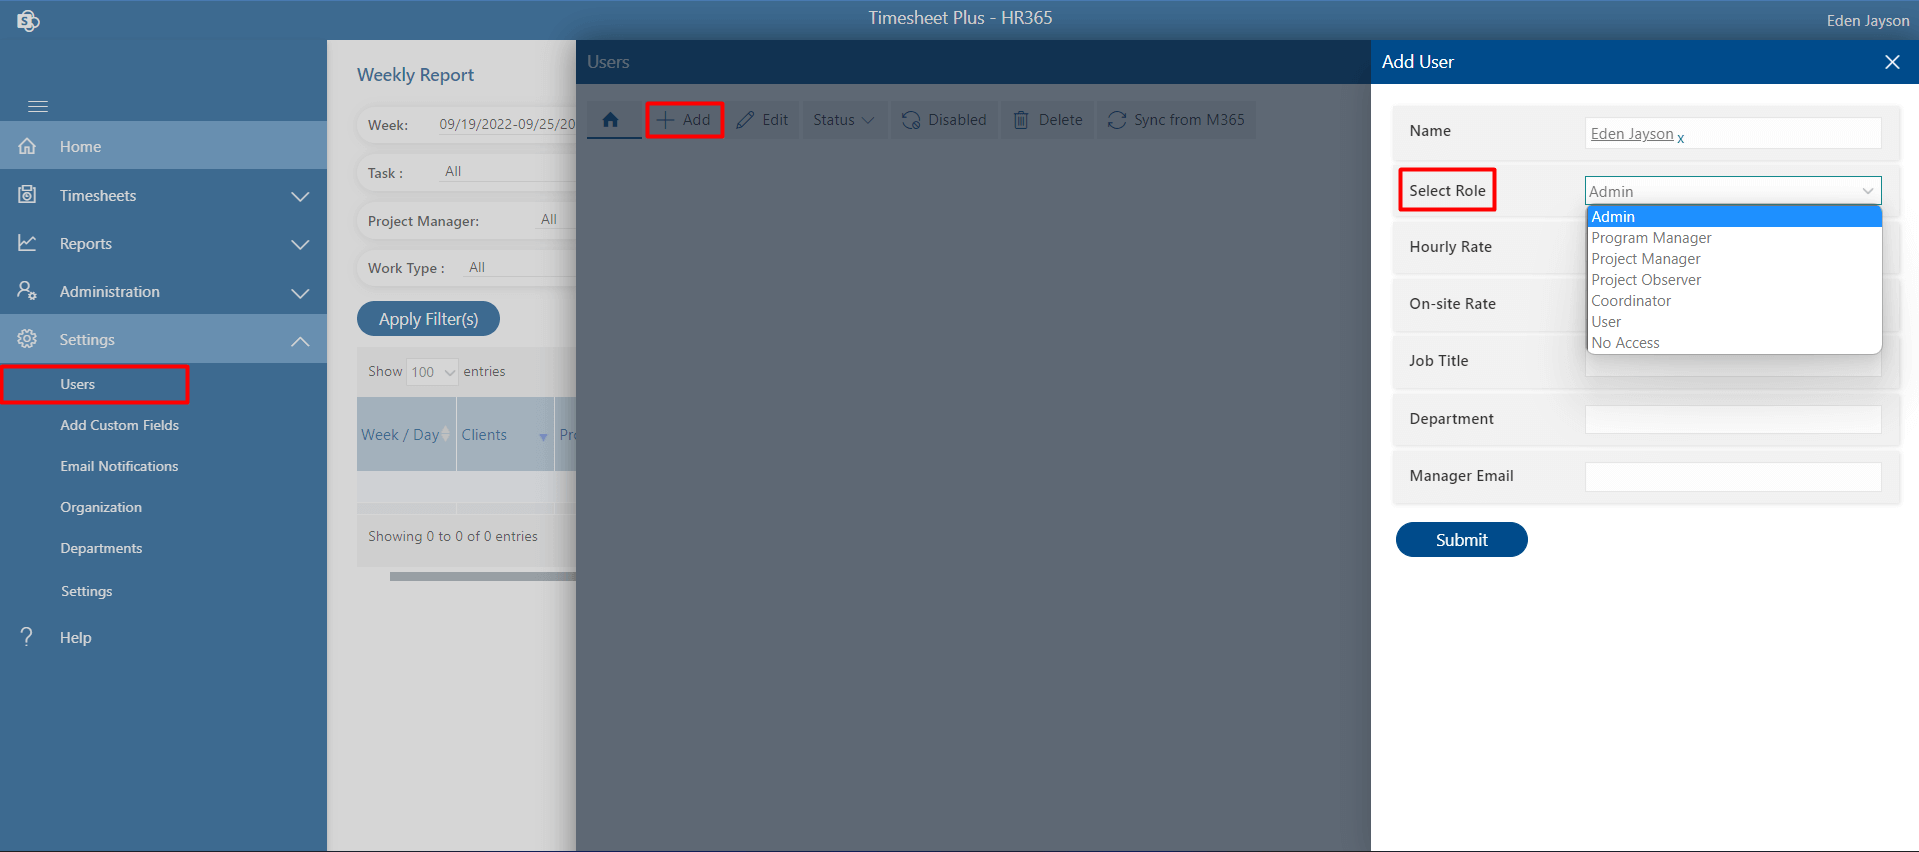
Admin:
- Admins have full control, they can add users, organizations, and departments.
- Can able to edit or cancel approved timesheets for all users.
- only admin can access setting option.
- Can be able to change settings of the application.
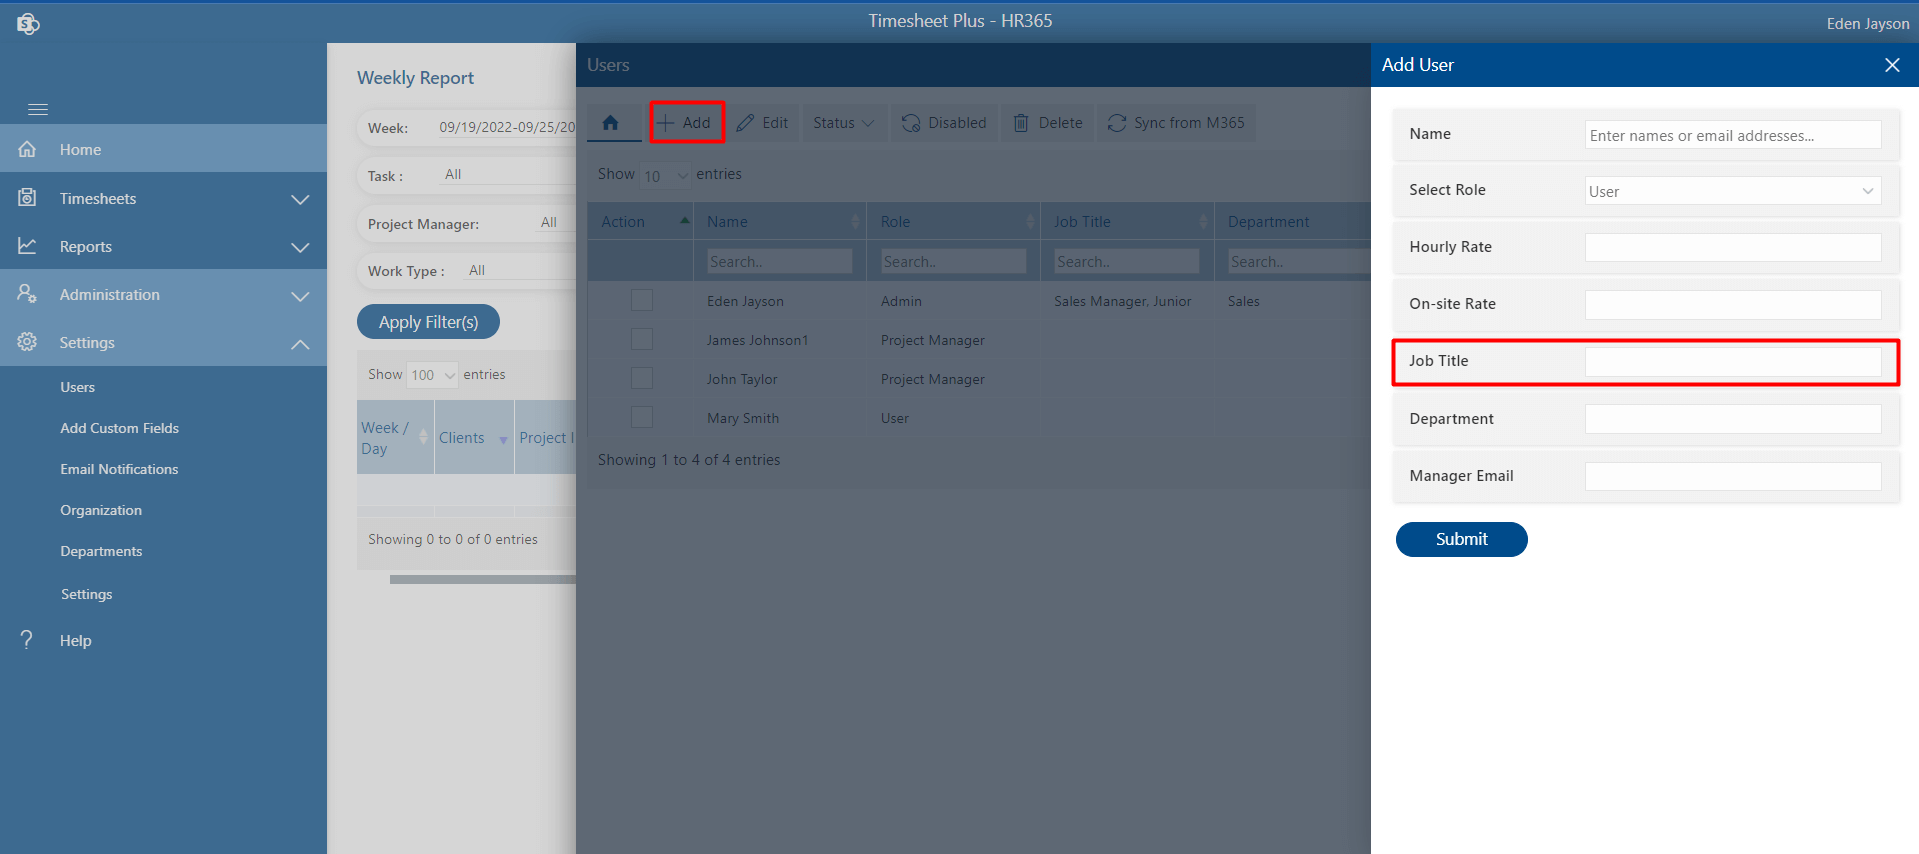
Admin can enable edit option from setting under features, pencil edit icon will display in home page from where admin can edit or cancel.While adding users admin can assign rates for the individual user for making bills - hourly rate and on-site rate.
Program Manager:
- Can able to add new projects and edit projects.
- Can able to add and edit tasks for all projects.
- Can able to add departments and organization.
- Can able to set email notification format.
- Can able to view their project reports and approve their project manager’s timesheets.
- Can able to submit timesheet behalf of another user.
Project Manager:
- Can able to edit their projects.
- Can assign tasks to their projects.
- Can approves timesheet of their projects.
- Can view reports of their projects.
Project Observer:
- Able to create tasks and view specific reports or their project only.
Coordinator:
- Able to view clients, projects, tasks and reports.
No Access:
- User cannot access the application.
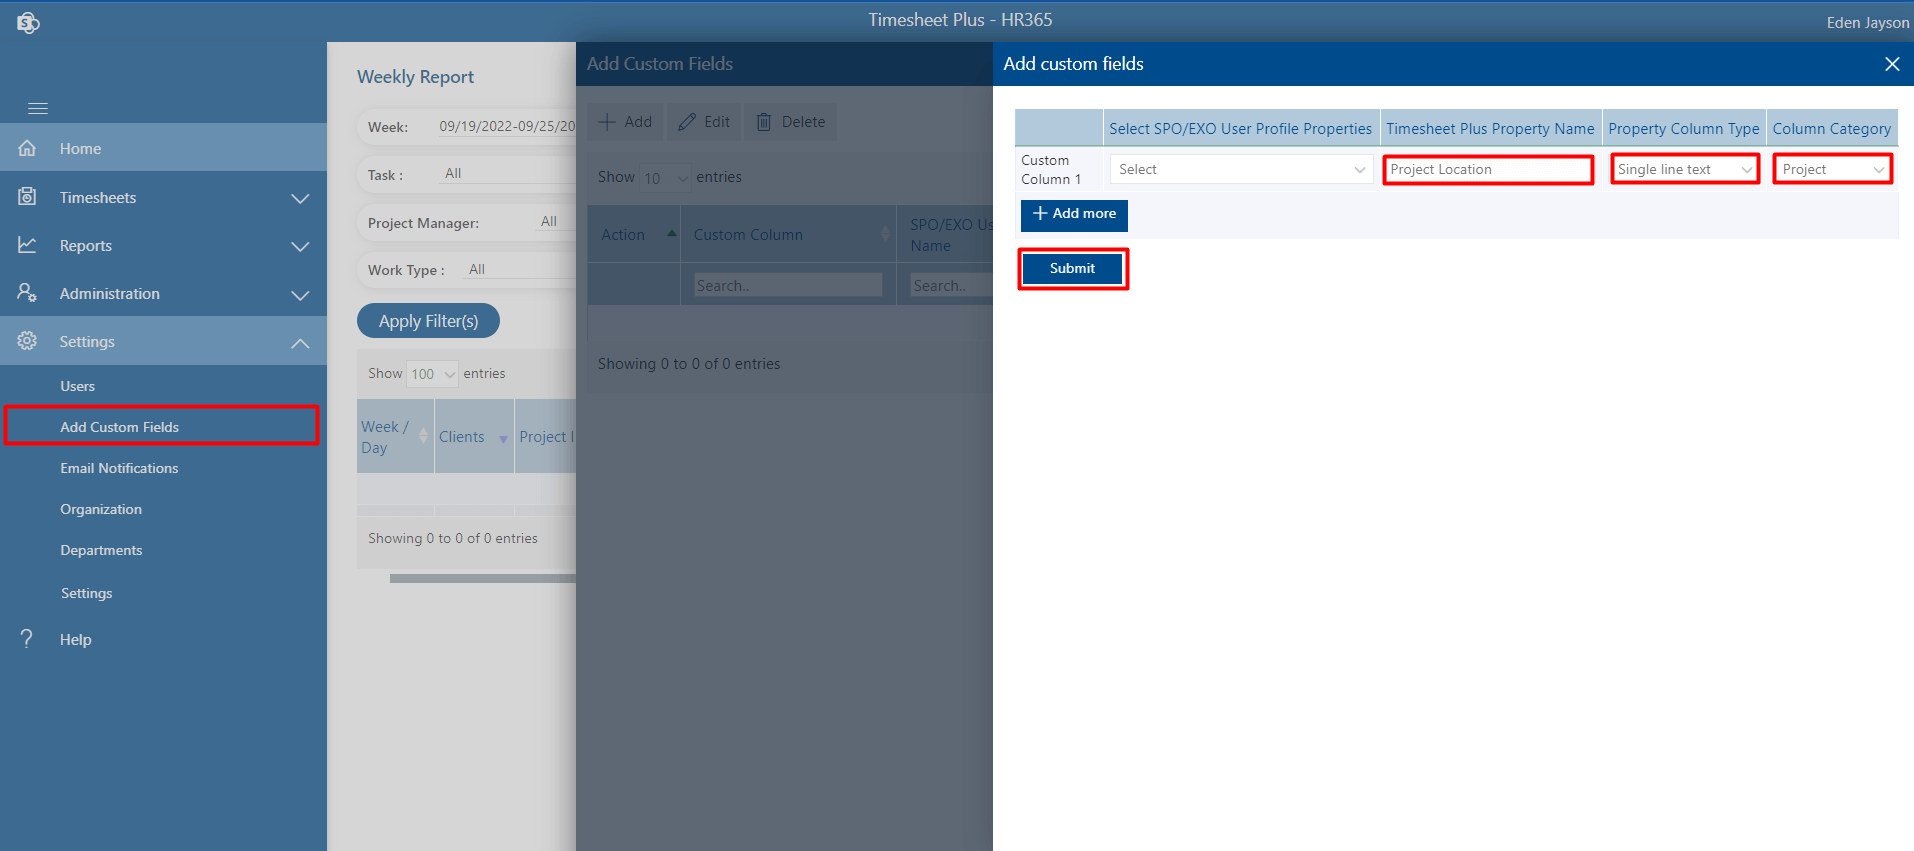
Add Custom Fields
Here admin can define or add a custom field for the project page and add users page.
-
Click on +Add,this display Add custom fields.
-
Enter the Timesheet Property Name field and select Property Column Type and select Column Category as Project.
There is no need to select the SPO user properties field.
-
Click on Submit button.
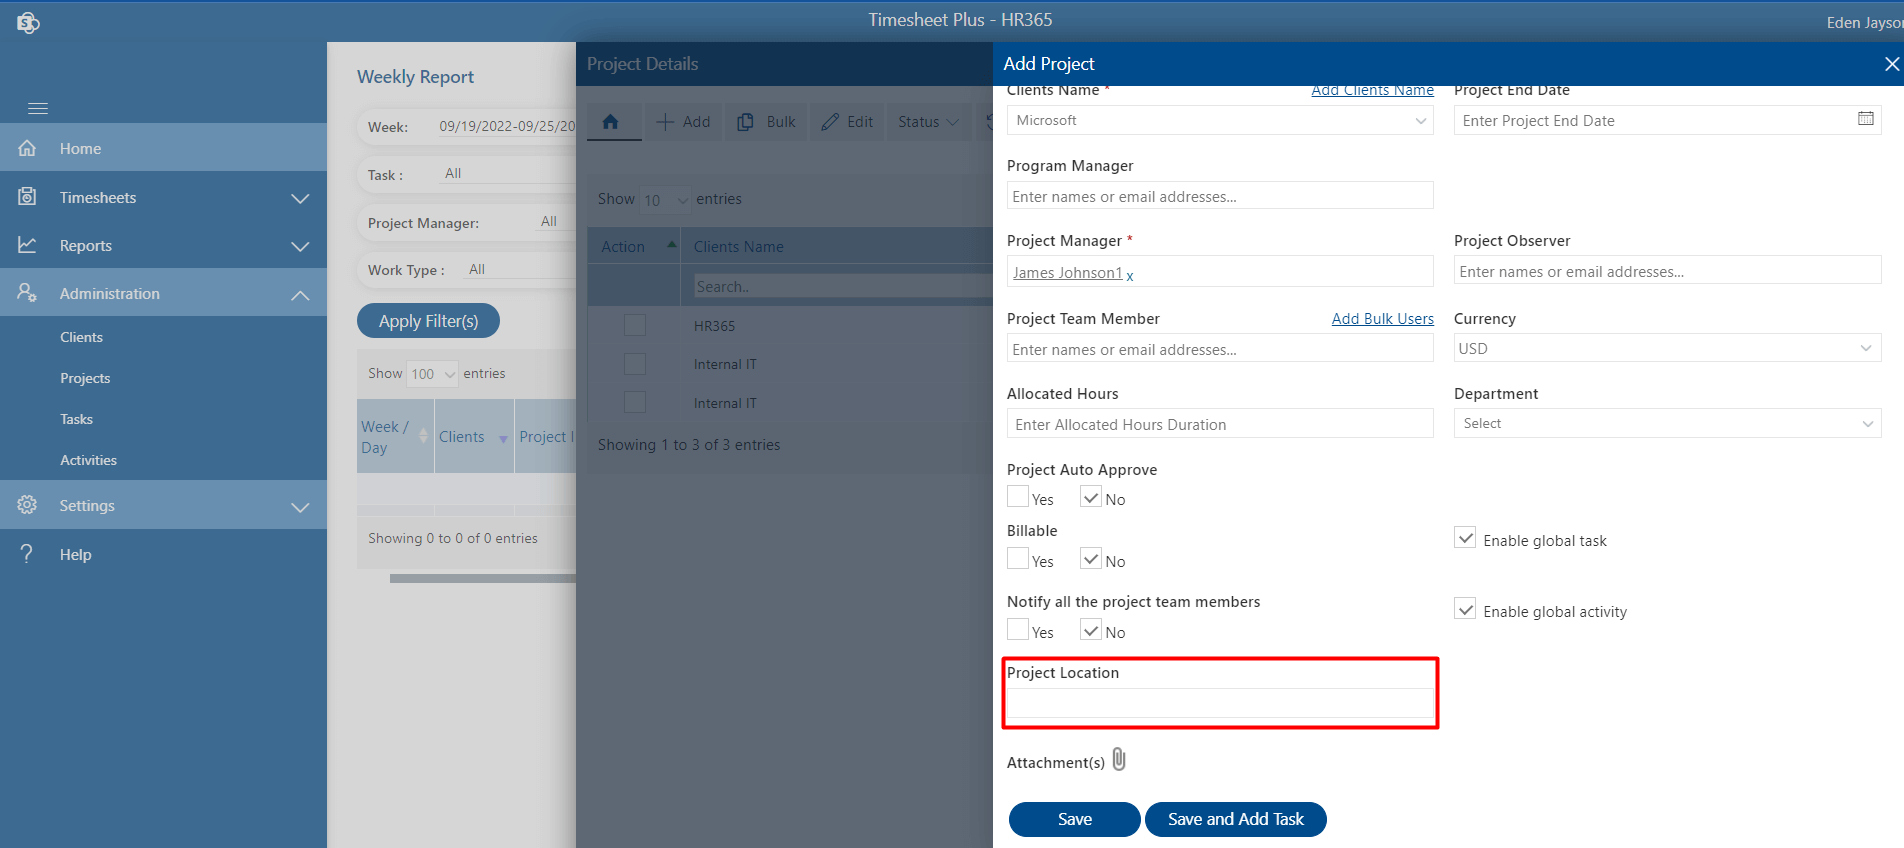
This custom field you can see while adding a project as shown below.

-
Click on +Add,this display Add custom fields.
-
Enter the SPO User Profile Properties or Timesheet Property Name field and select Property Column Type and select Column Category as Users.
If you select SPO User Profile Properties, data will fetch from the SharePoint user profile. There is no need to add it manually. You can select AD or extension properties(you have to sync these properties from the setting page, under the advance settings tab).
-
Click on Submit button.
This custom field you can see in the user table and Add User page open as shown in the below image.
Email Notification
Here admin can able to change the email notification body format for users, managers, and the system.
Users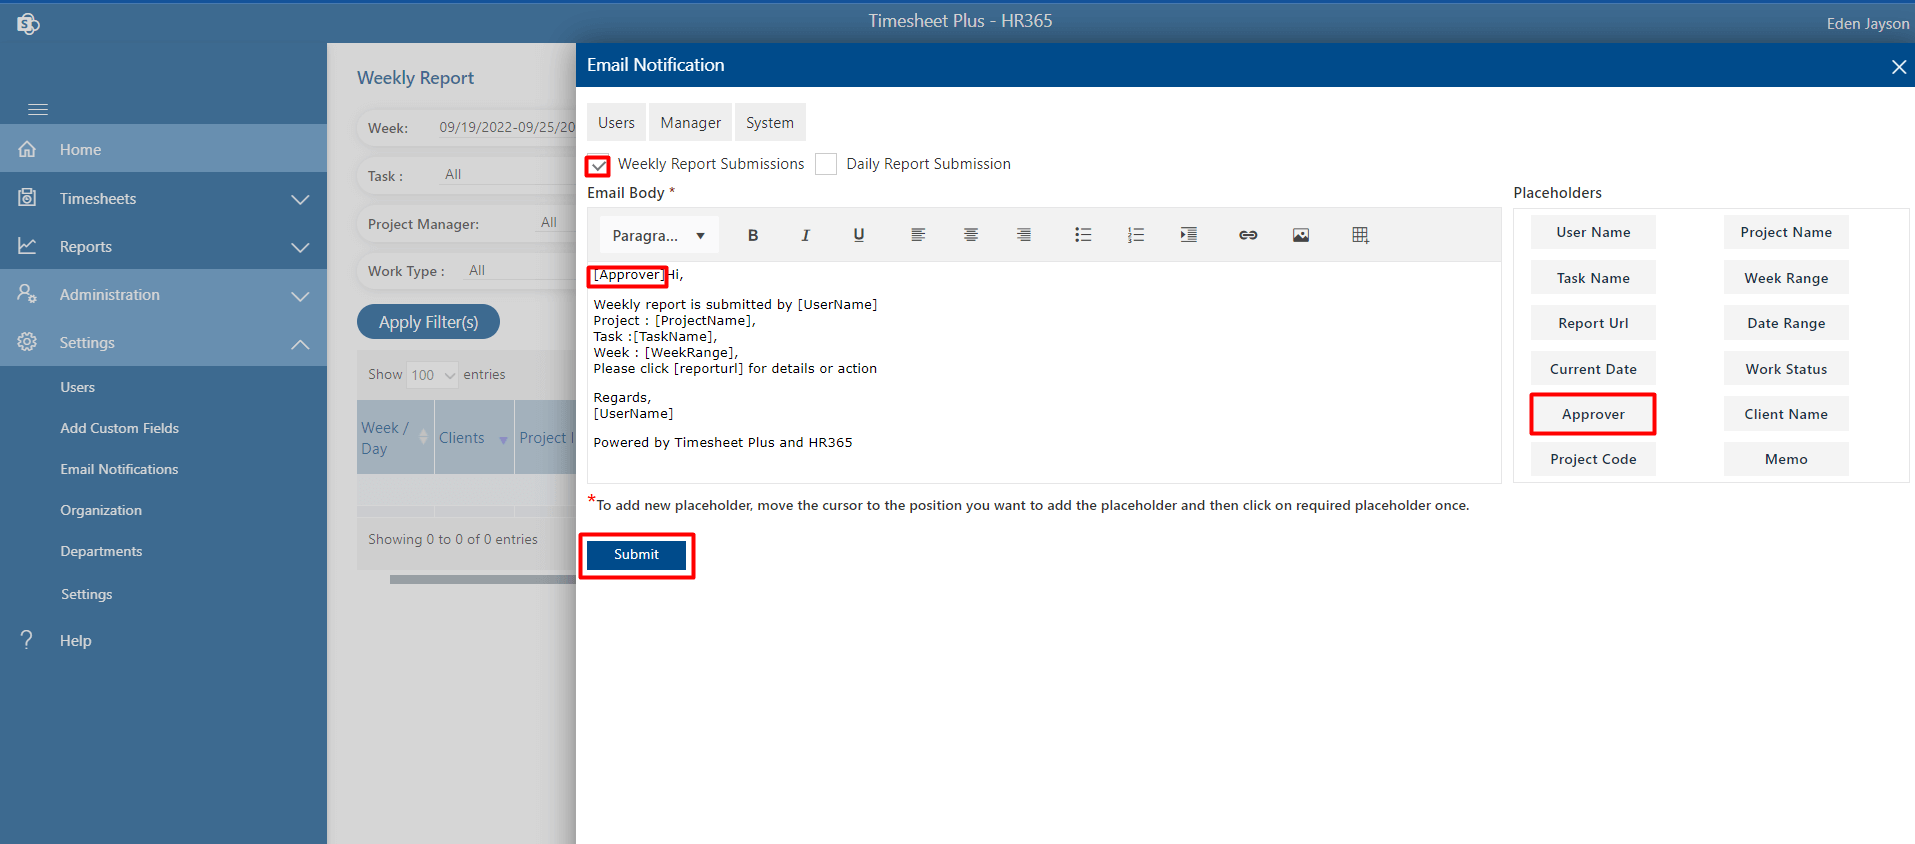
-
First, select the Users tab. Then select the check box either weekly report submission or daily report submission.
-
To add an extra placeholder in the email body, click on the placeholder under the placeholder section.
-
Click on Submit button.
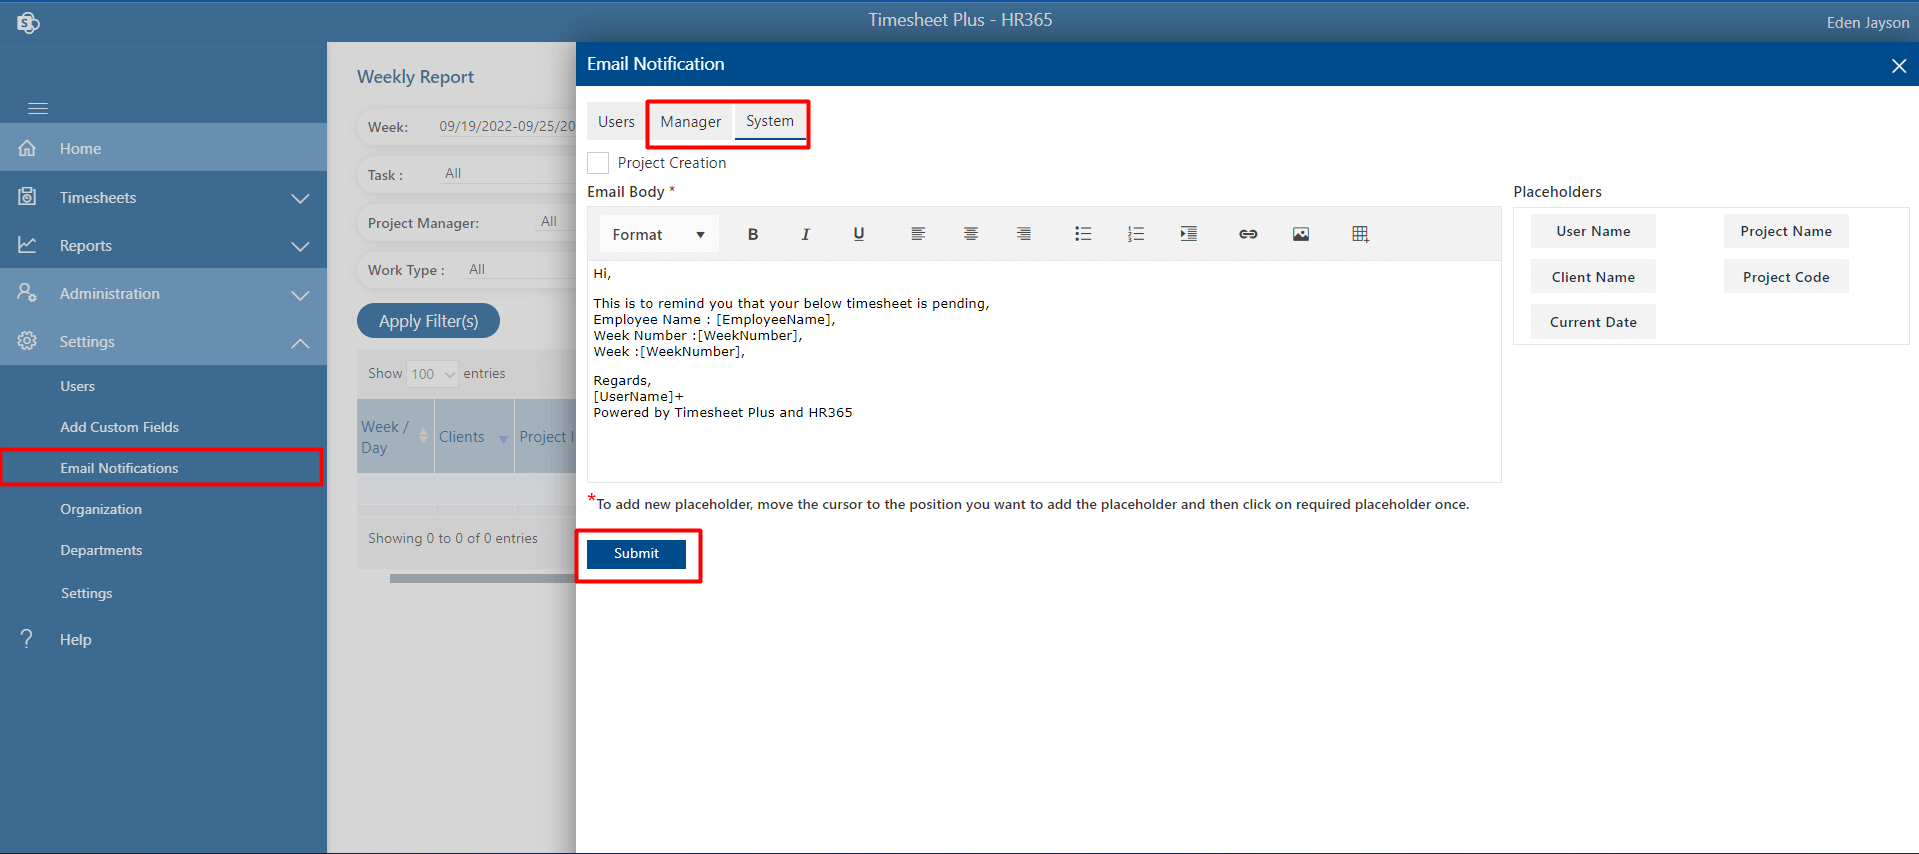
To change email notification of manager and system, follow same step as shown in above
Organization
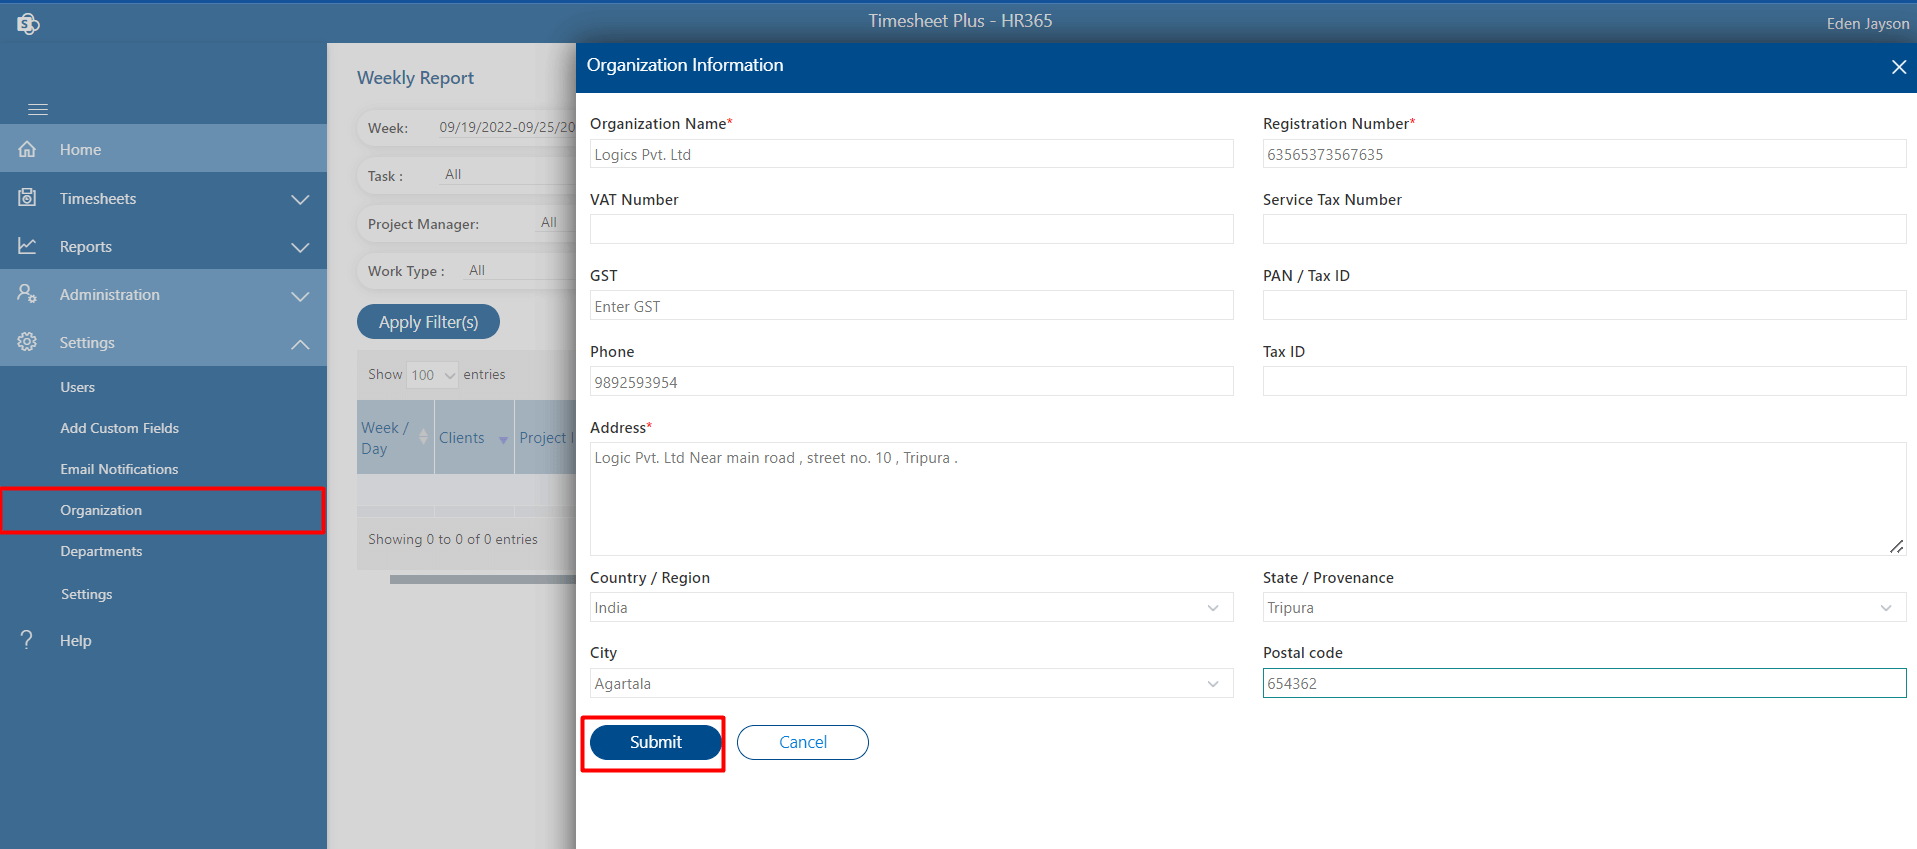
The admin can add organization information like name, registration number, phone, Tax ID, address, country/region, etc.
Add Organization-
Click on the Organization from the side navigation panel under settings, this displays the Organization page.
-
Click on + Add, this displays Organization Information page.

-
Enter the mandatory fields and finally click on Submit button.
Admin can able edit or delete the organization information.
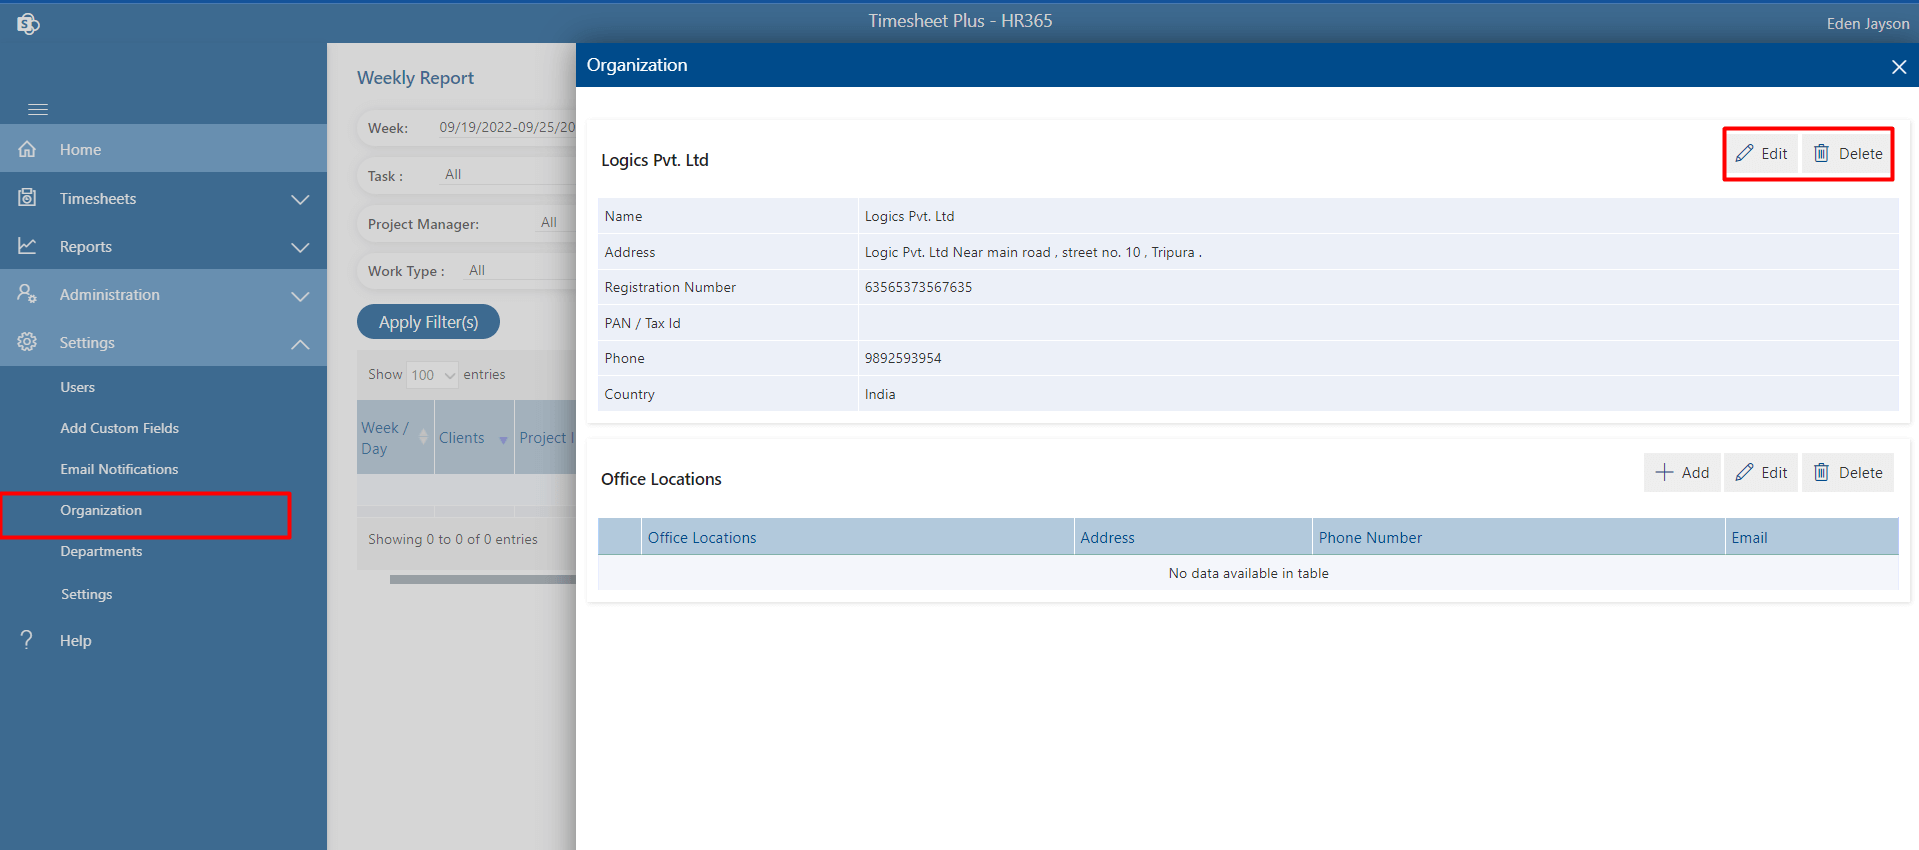
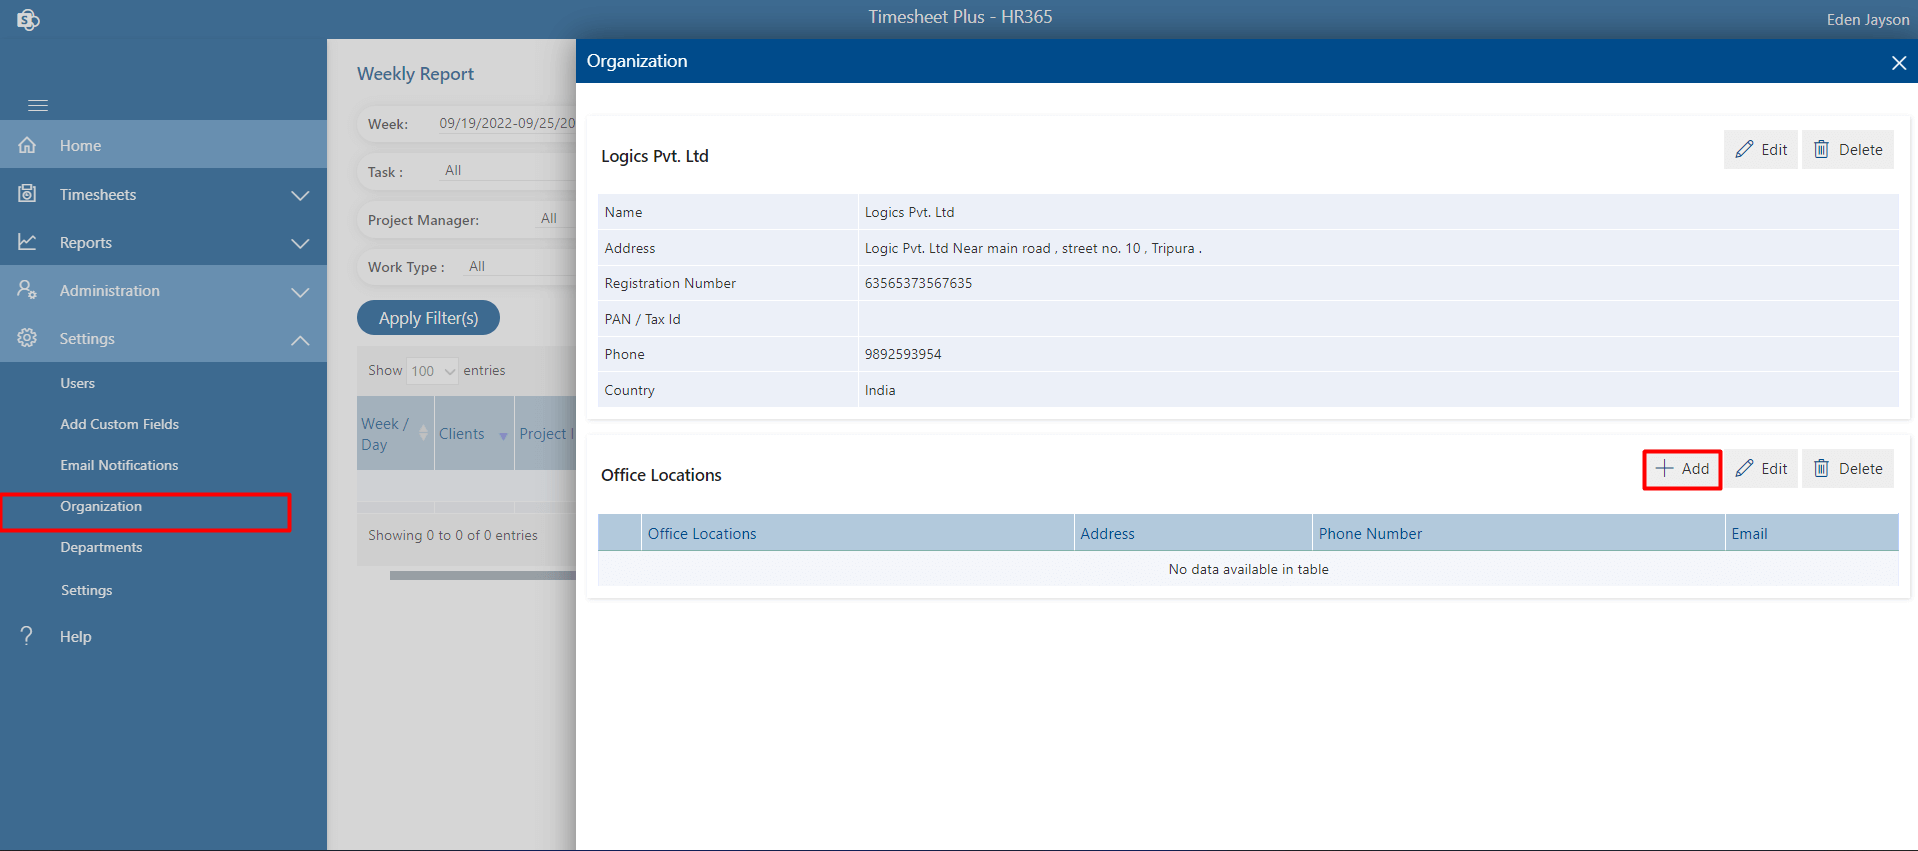
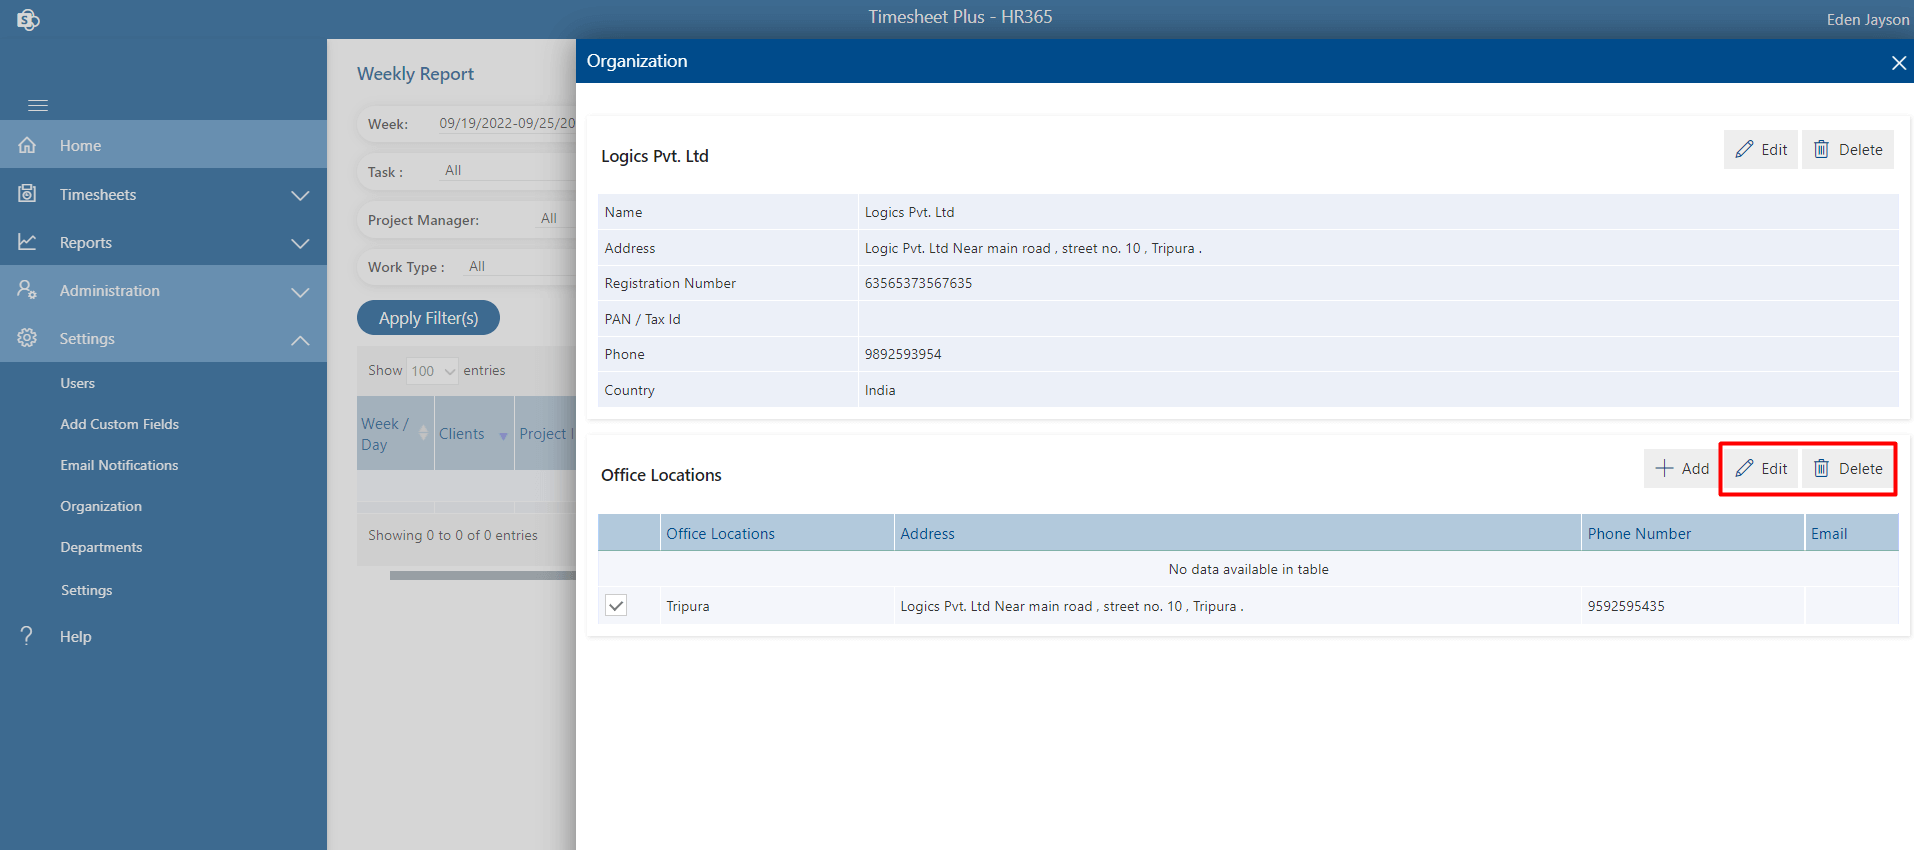
Admin can able to add the office location or Branch location of your organization from the same page.
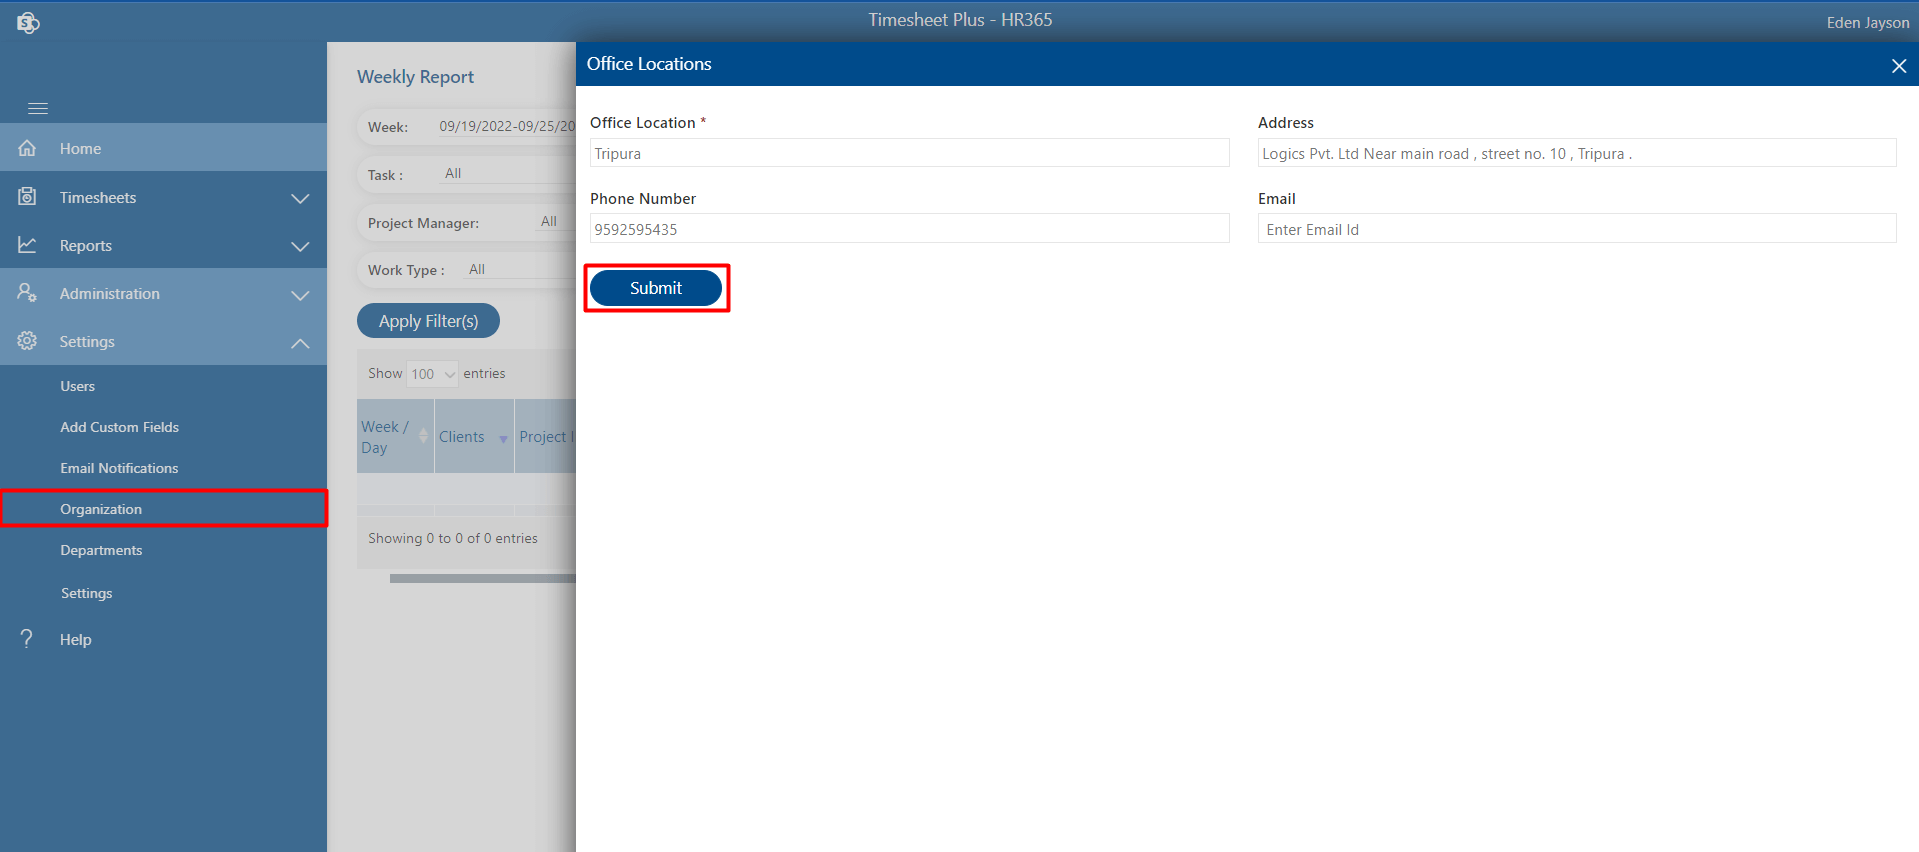
Add Office location-
Click on +Add under office locations, this displays the office location page.
-
Enter the details, and click on Submit button.
Admin can able edit or delete the Office Locations information.
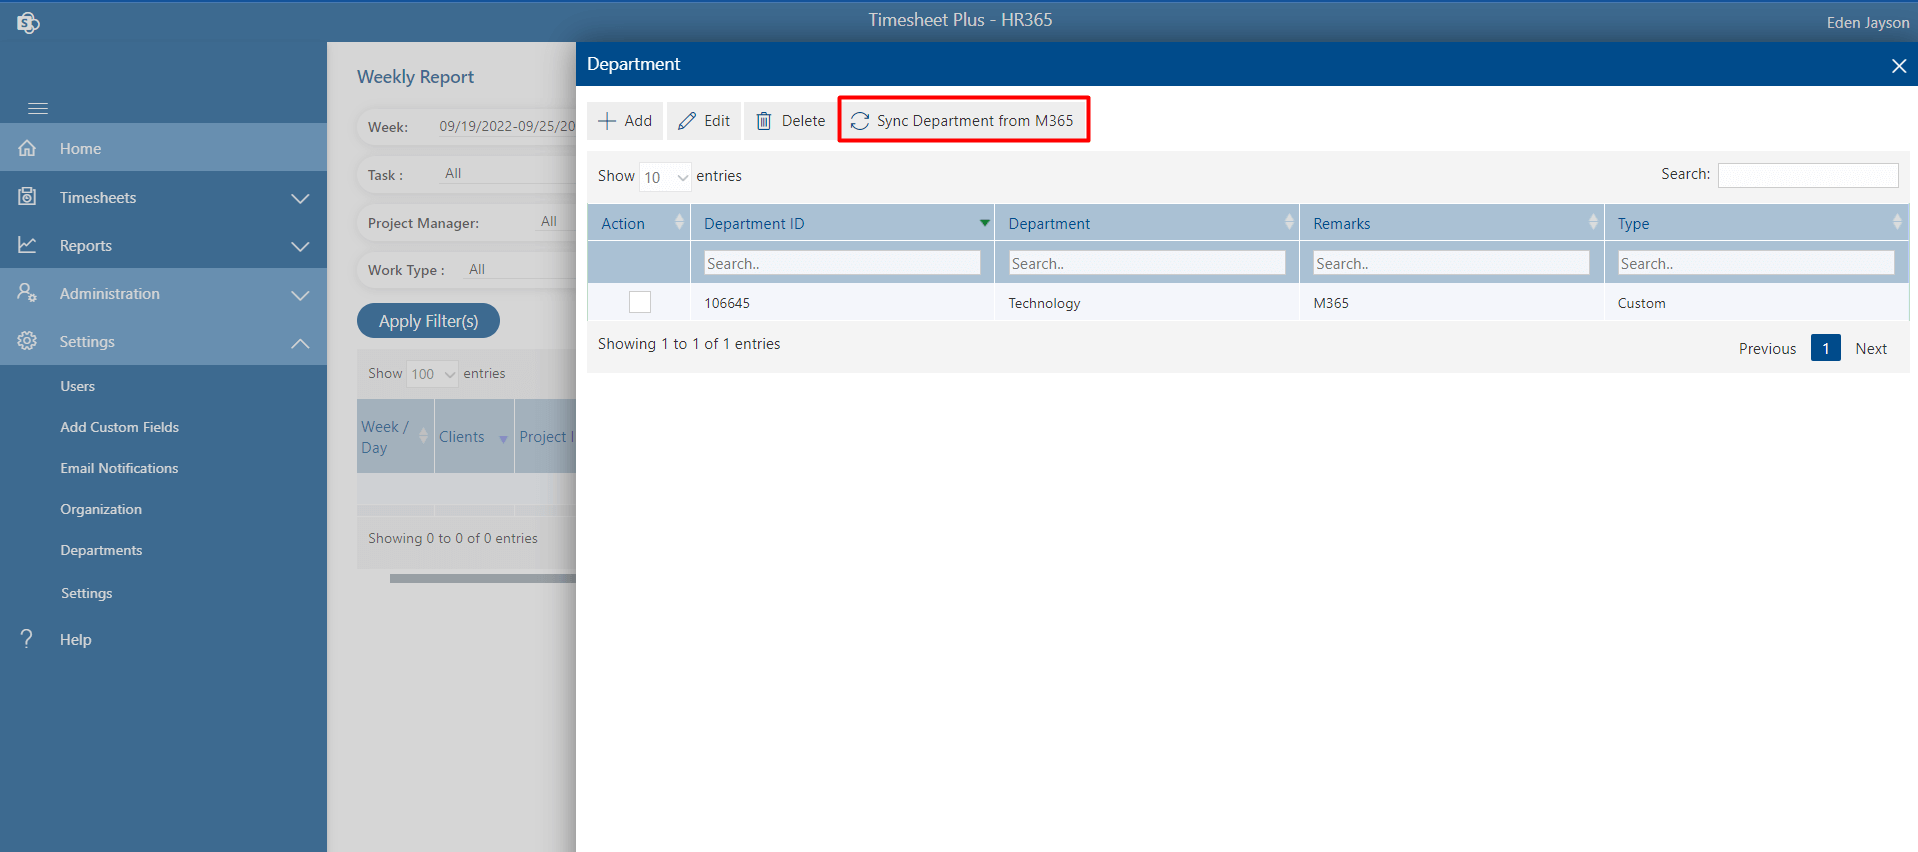
Departments
Here you can add department either manually or sync form M365 in application as shown in below image. You can edit or delete only custom department types.
Add department
-
Click on + Add, this displays Add Department page.
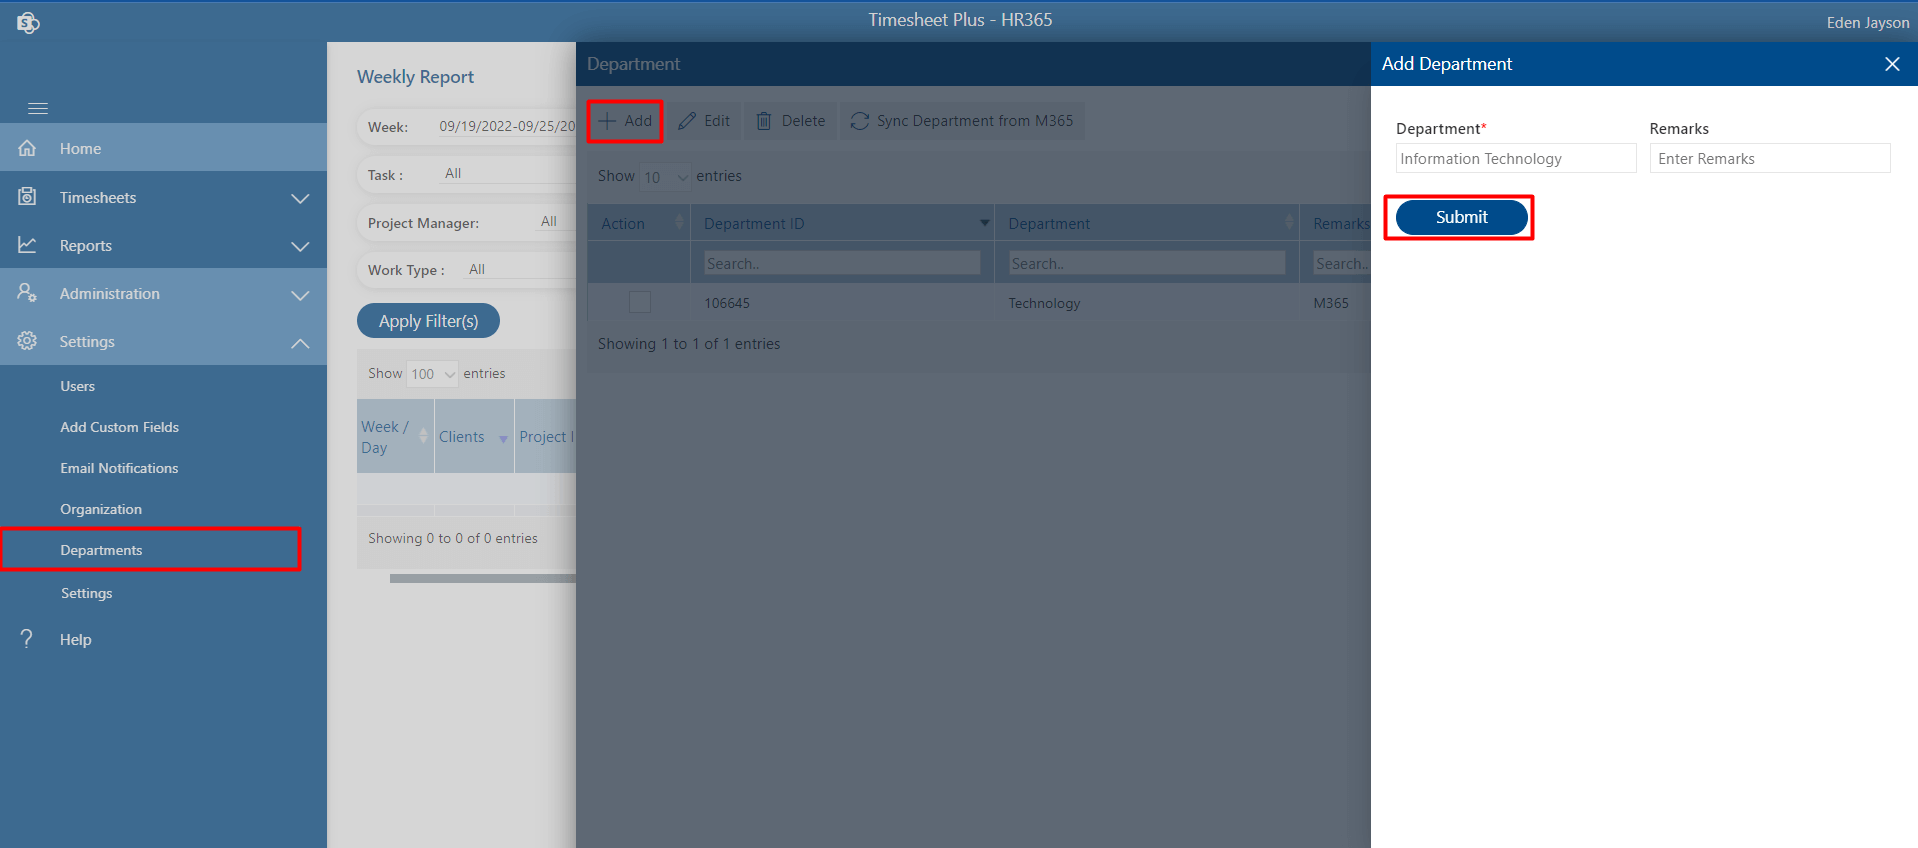
- Add the Department and Remarks.
- Click on the Submit button.
Sync Department from M365: If you click, it will fetch departments available in M365 and push the department names in list.
Search : From here you can search different fields as per Department, Remarks and Type.
Delete : Click the delete icon, this displays a dialog box. Click Yes button.
Edit:- You can edit department and/or remarks. Click the edit icon, this display Edit Department page. Update the department and/or remarks and click on Submit button.