Ticket Mailbox Power Automate configuration
Configuring Ticket Mailbox in Helpdesk 365 using Power Automate.
- You can set up Helpdesk 365 with either a shared mailbox or a service account
mailbox (regular user mailbox).
Note: In the case of a shared mailbox, the logged-in account should have the necessary access. For a service account, you'll need to log in with the appropriate permissions. - The logged-in user must have 'send as delegate' permissions to the shared mailbox.
Prerequisites:
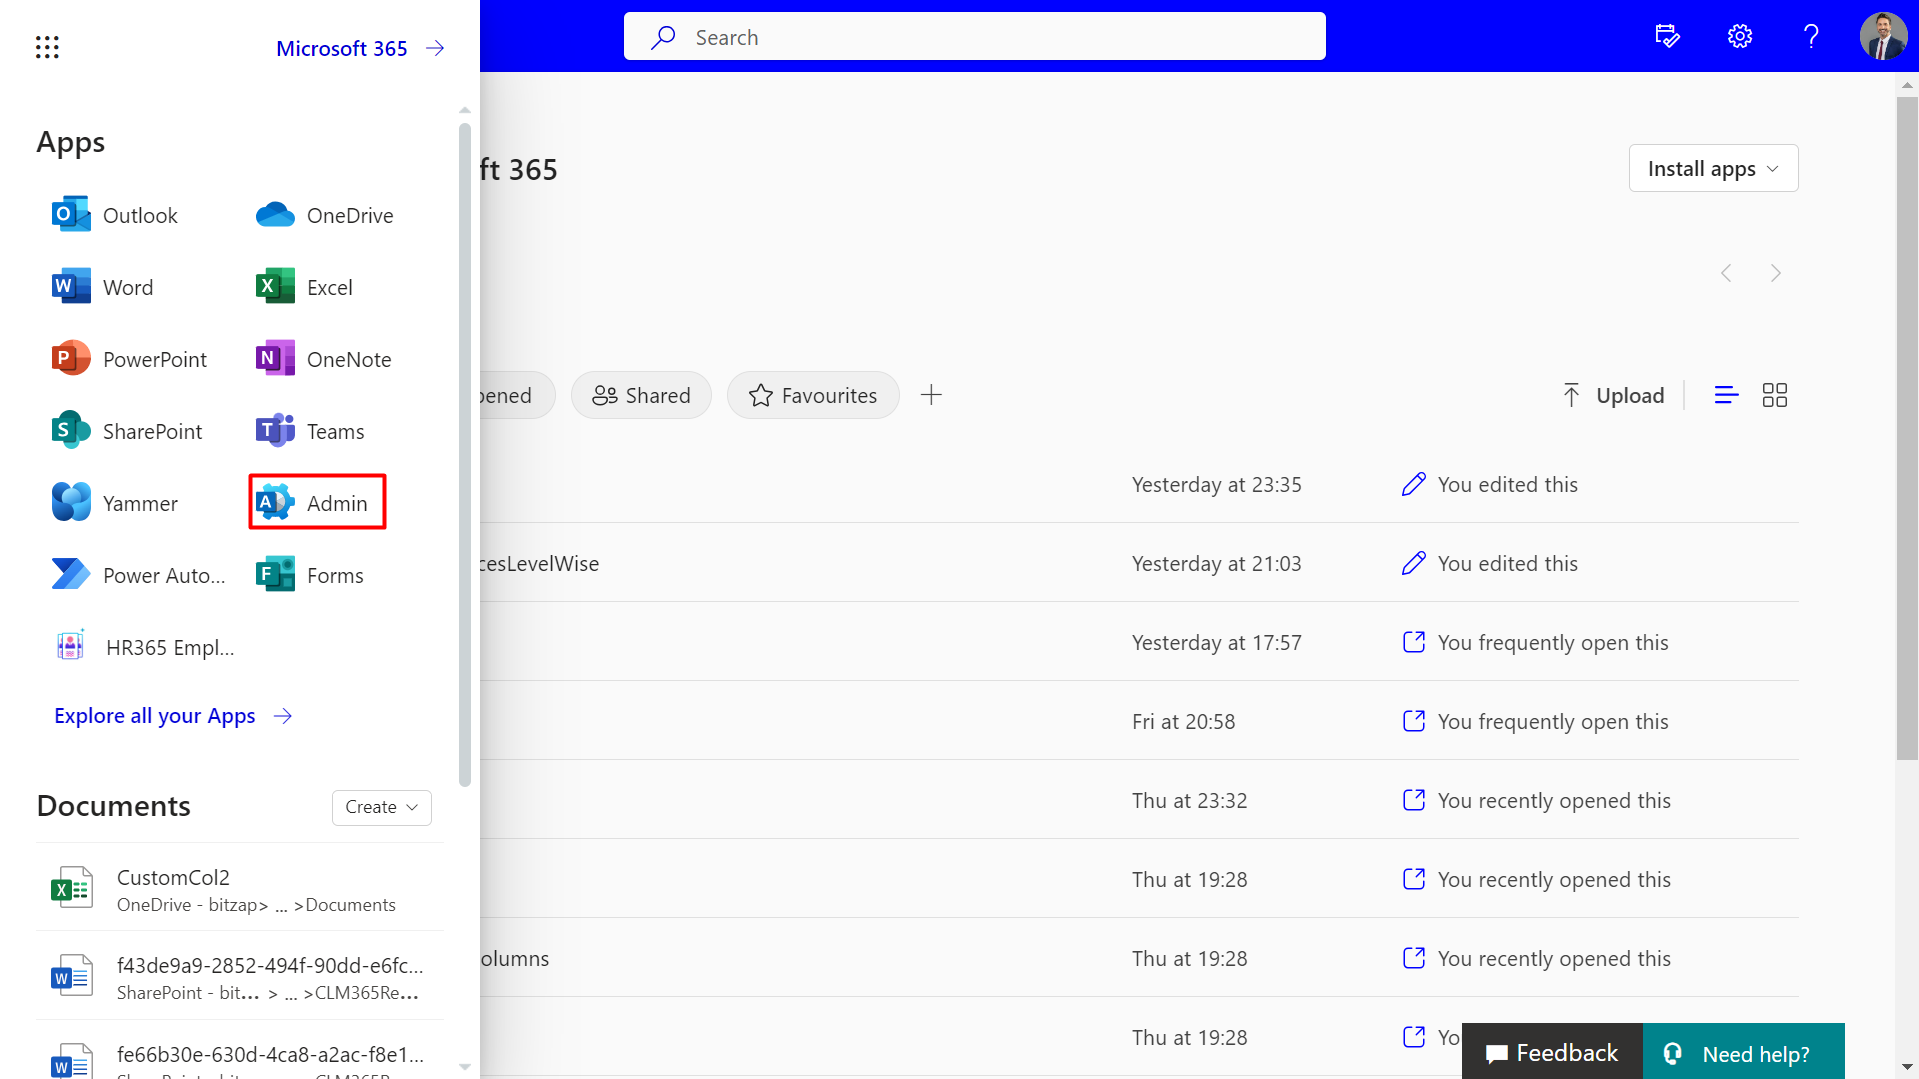
- Sign in to portal.office.com, then access the app launcher and choose 'Admin'.
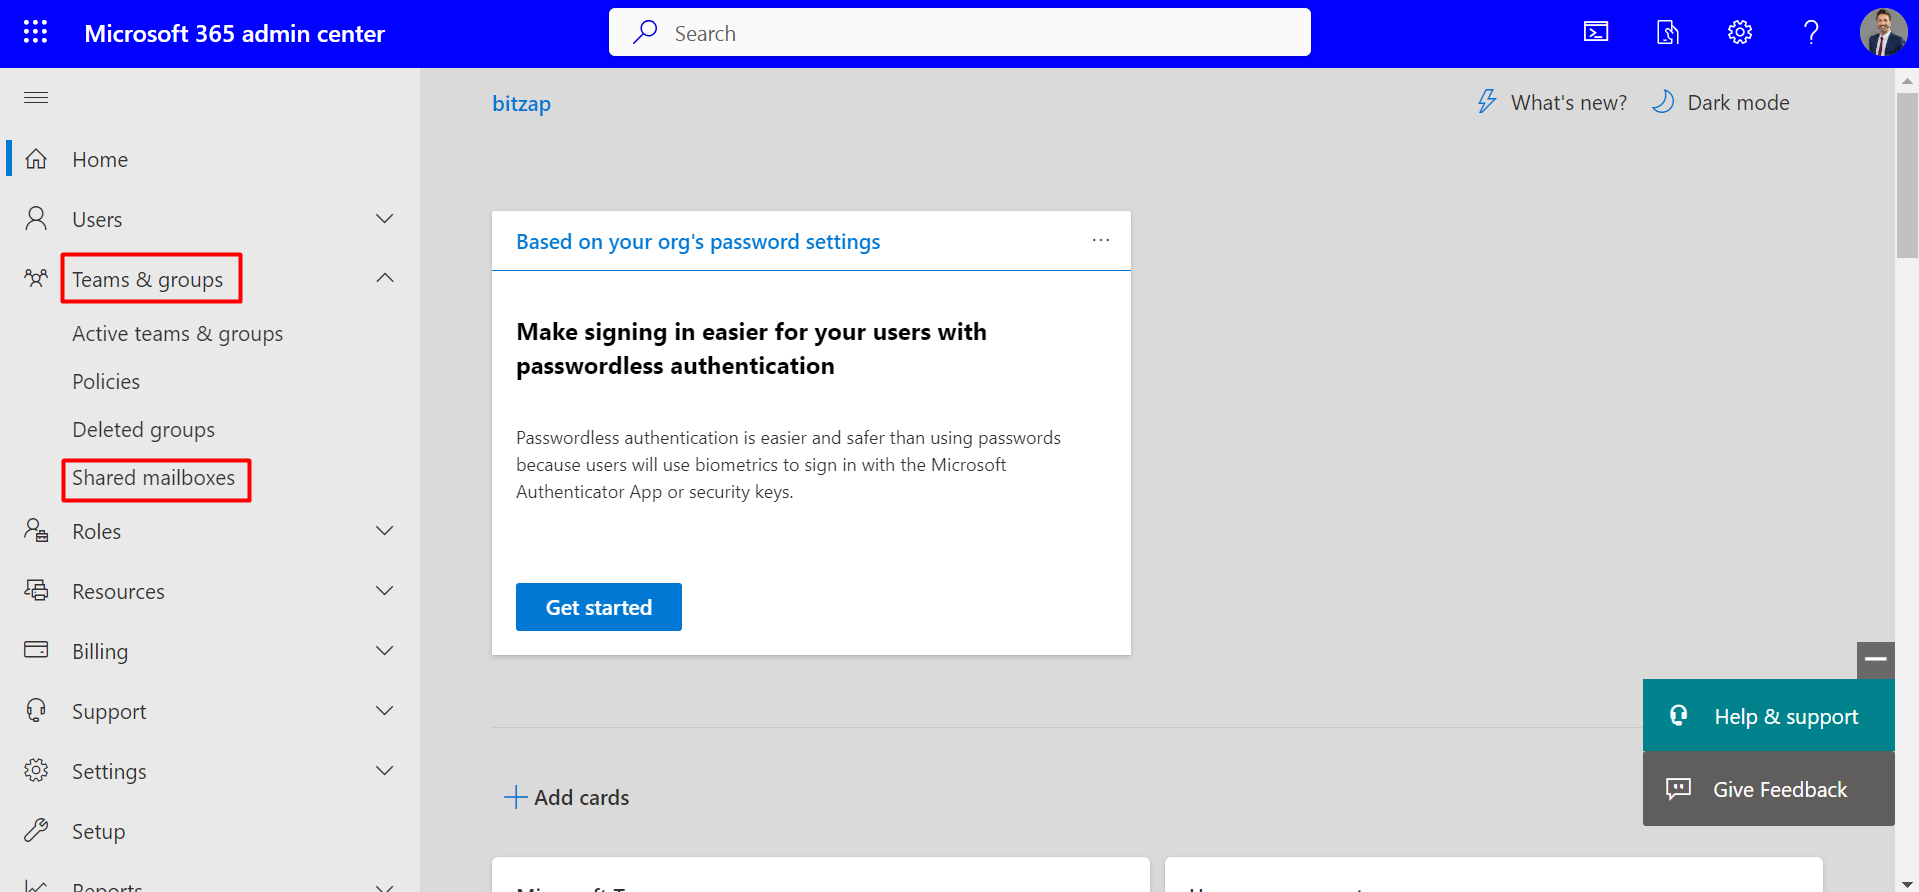
- You will now be directed to the Microsoft 365 admin center. From here, select 'Shared mailboxes' under 'Teams & Groups.
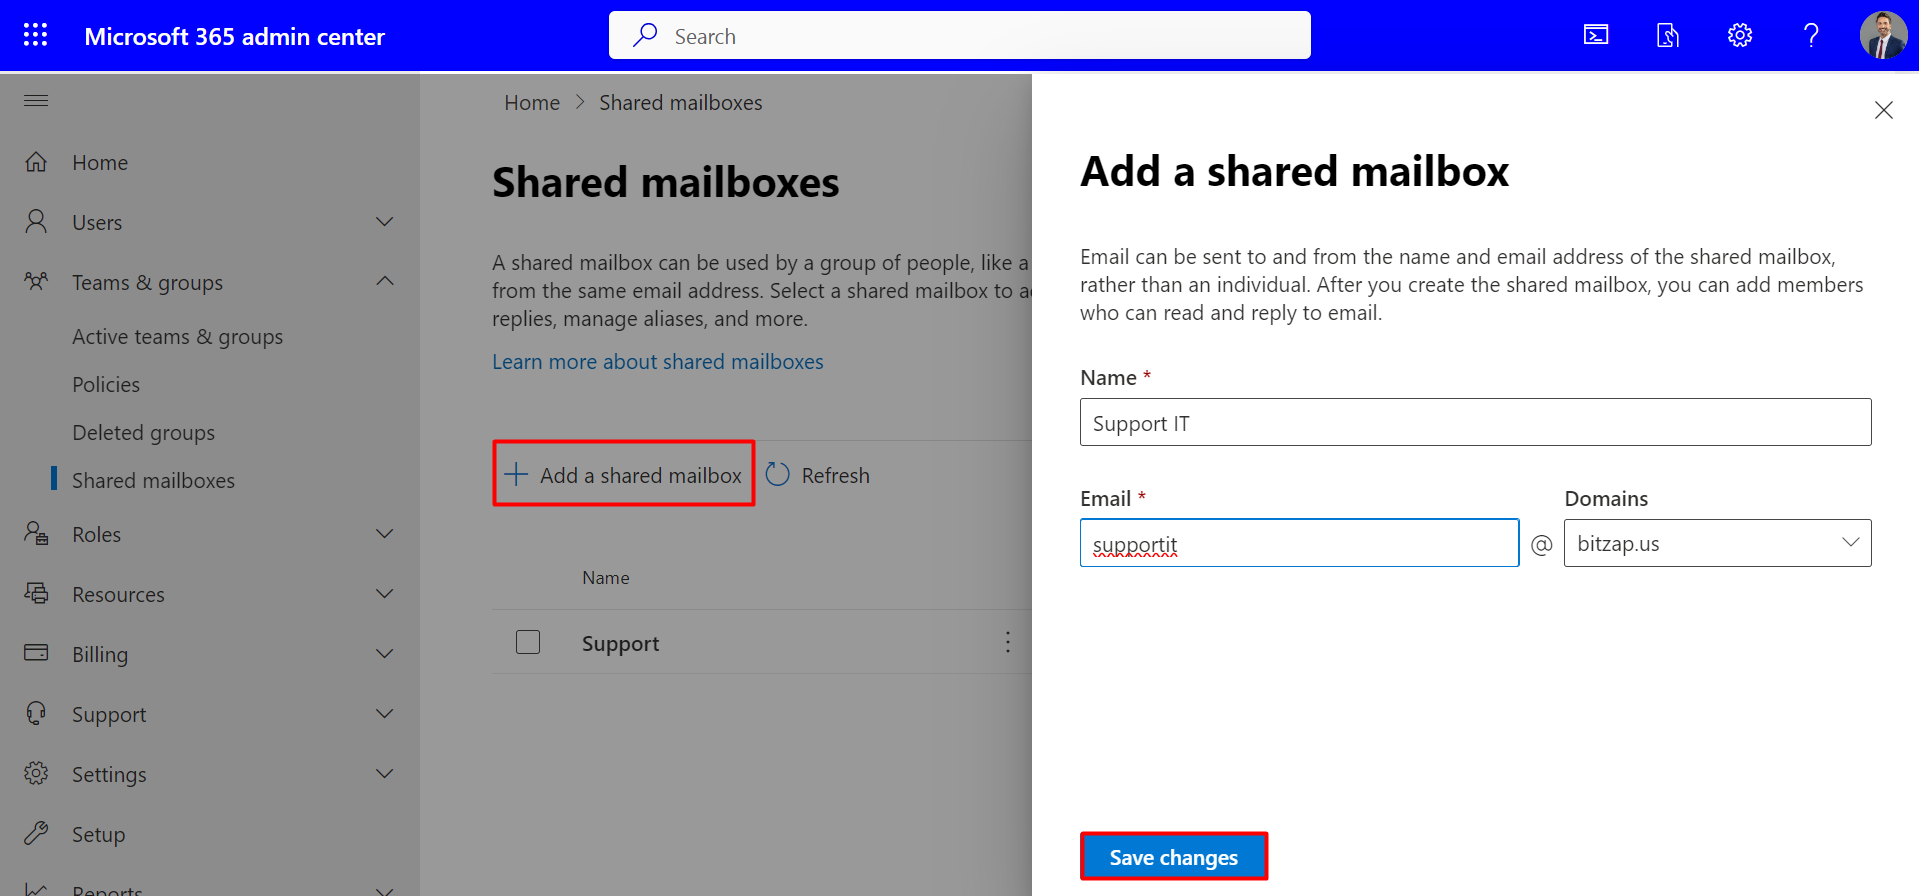
- Next, generate a shared mailbox by clicking 'Add a shared mailbox,' provide the required information, and then save your settings.
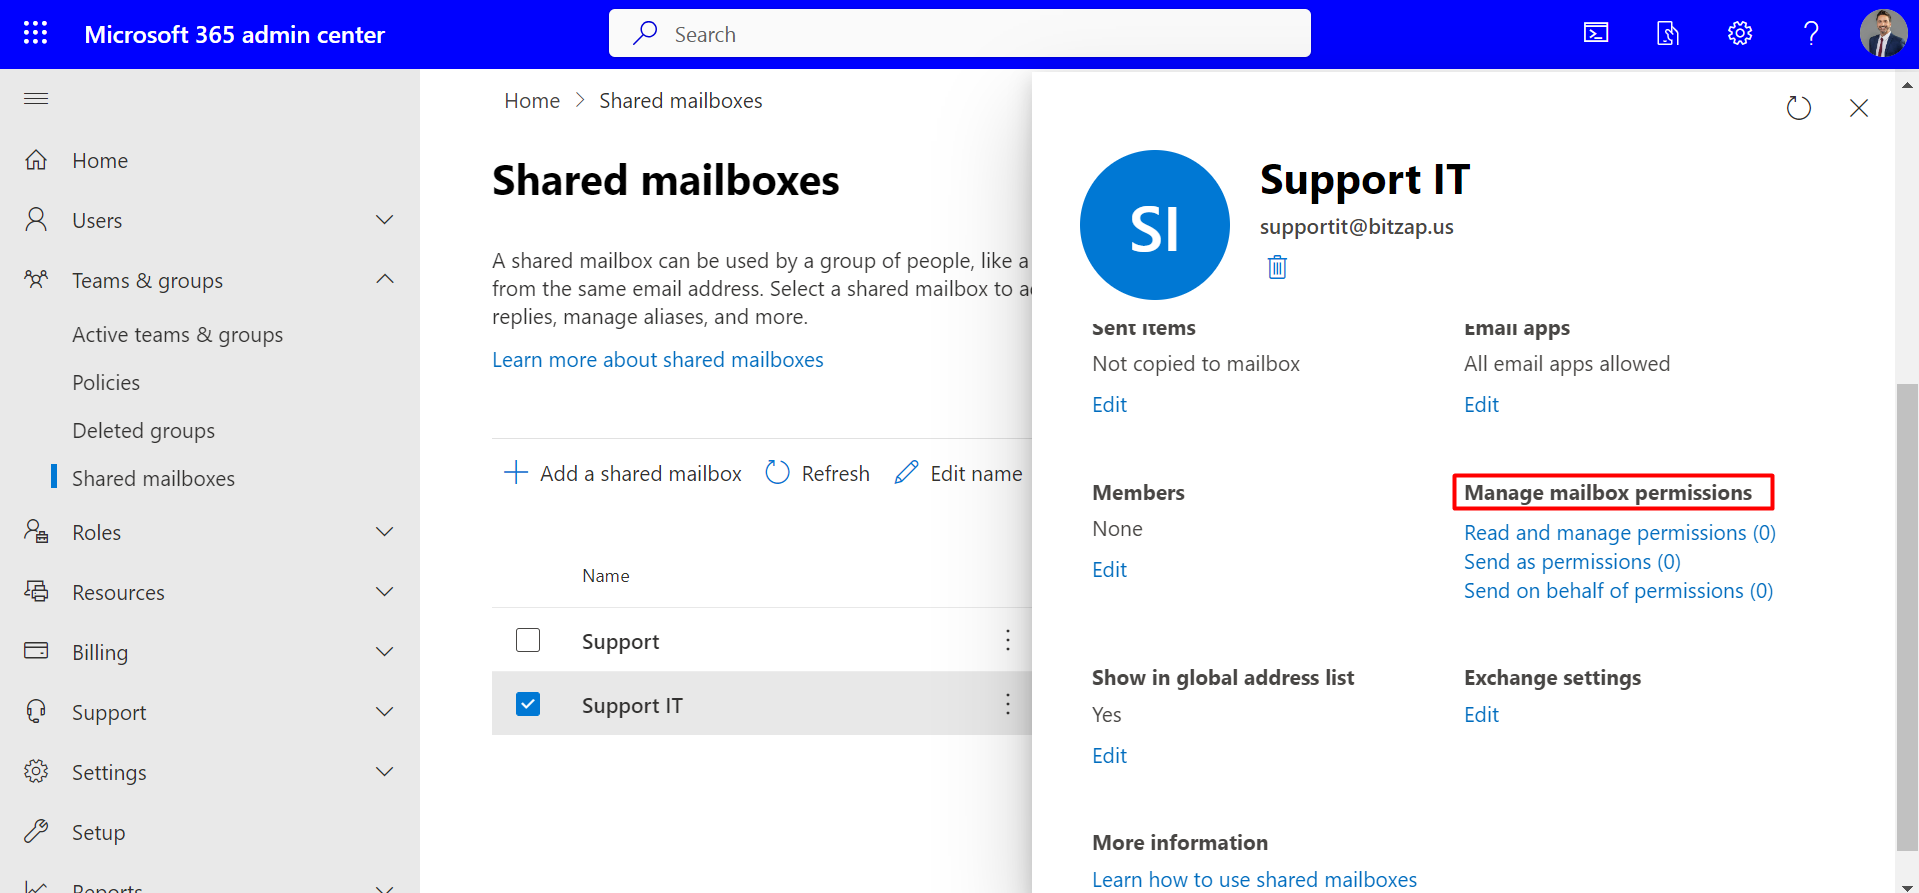
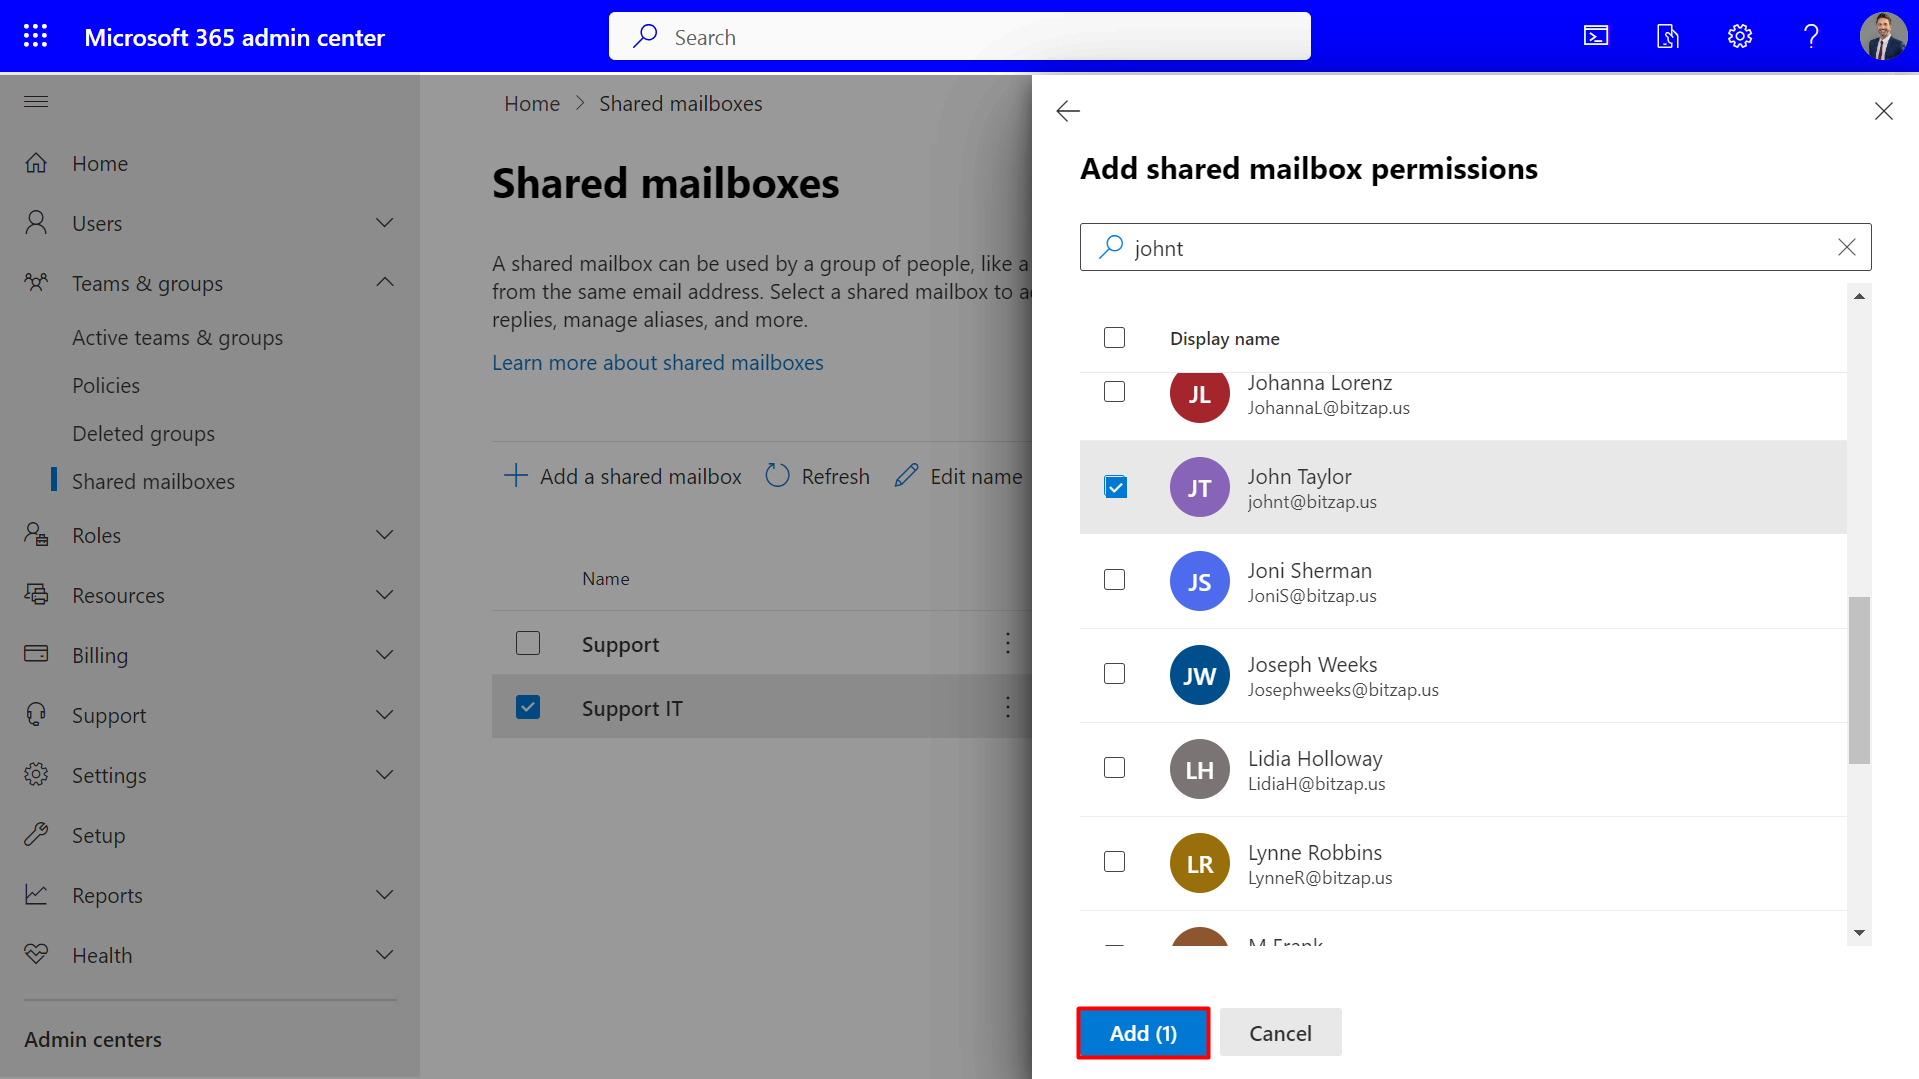
- After successfully creating the shared mailbox, locate it, select it, and scroll down to access Manage mailbox permissions.
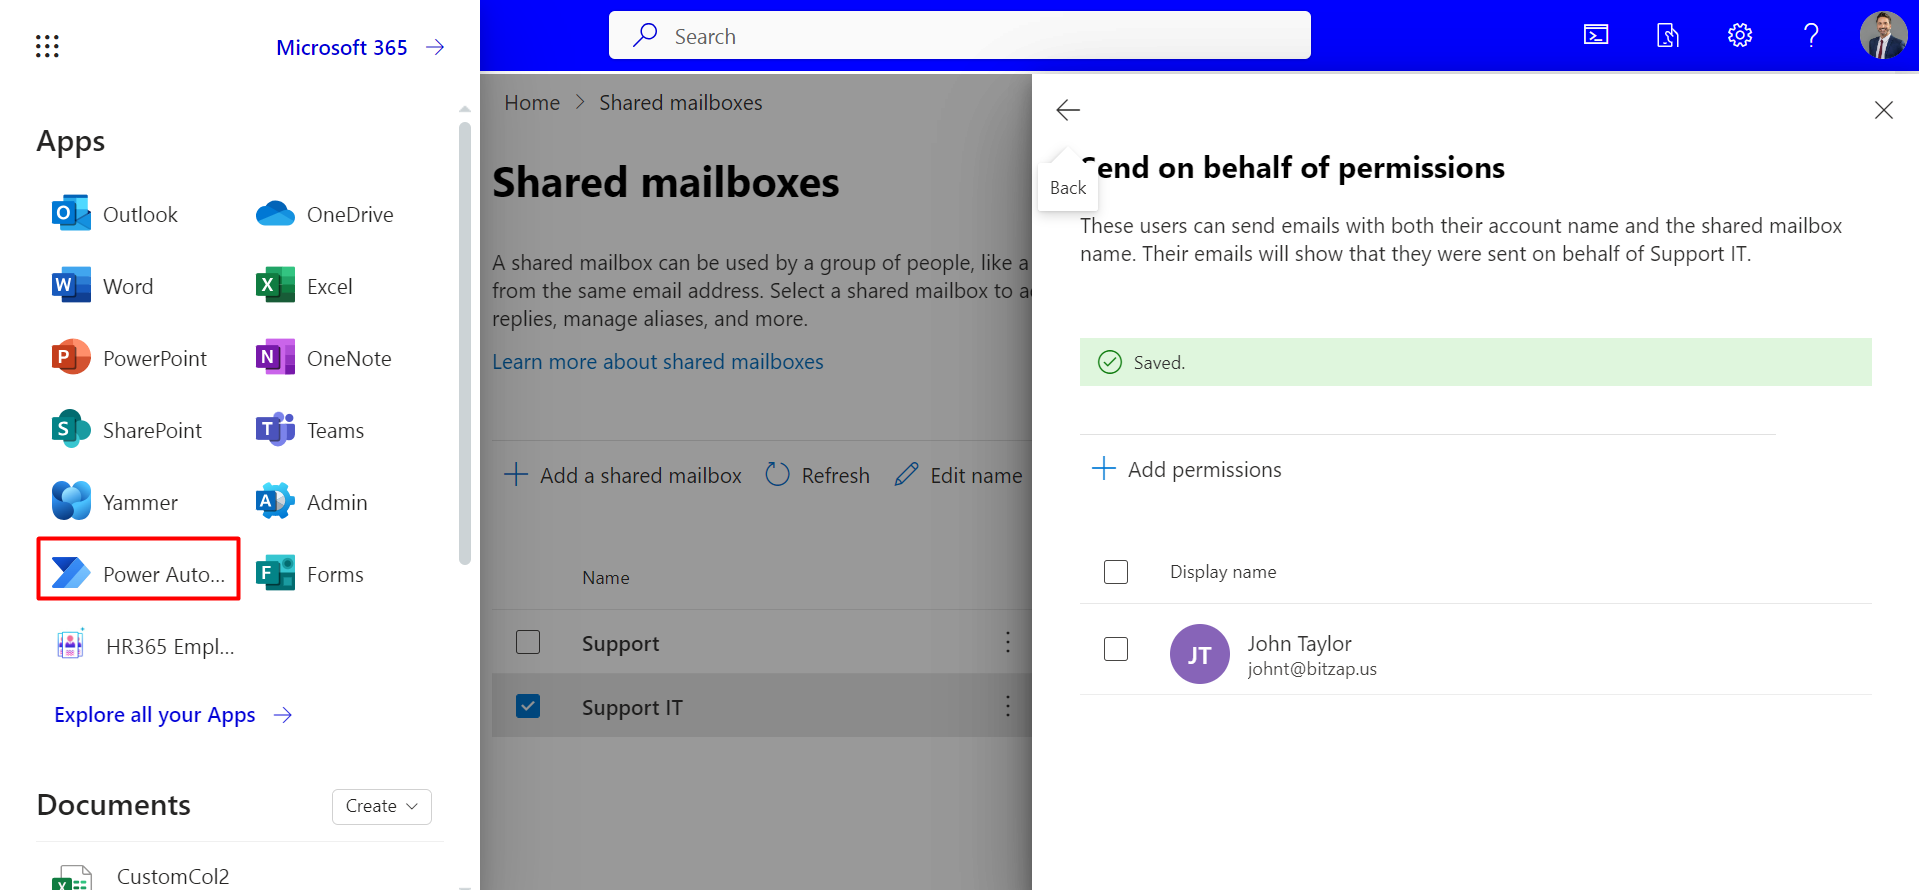
- Grant the logged-in user access to all three mailbox permissions.
- Now, select 'Power Automate' from the app launcher.
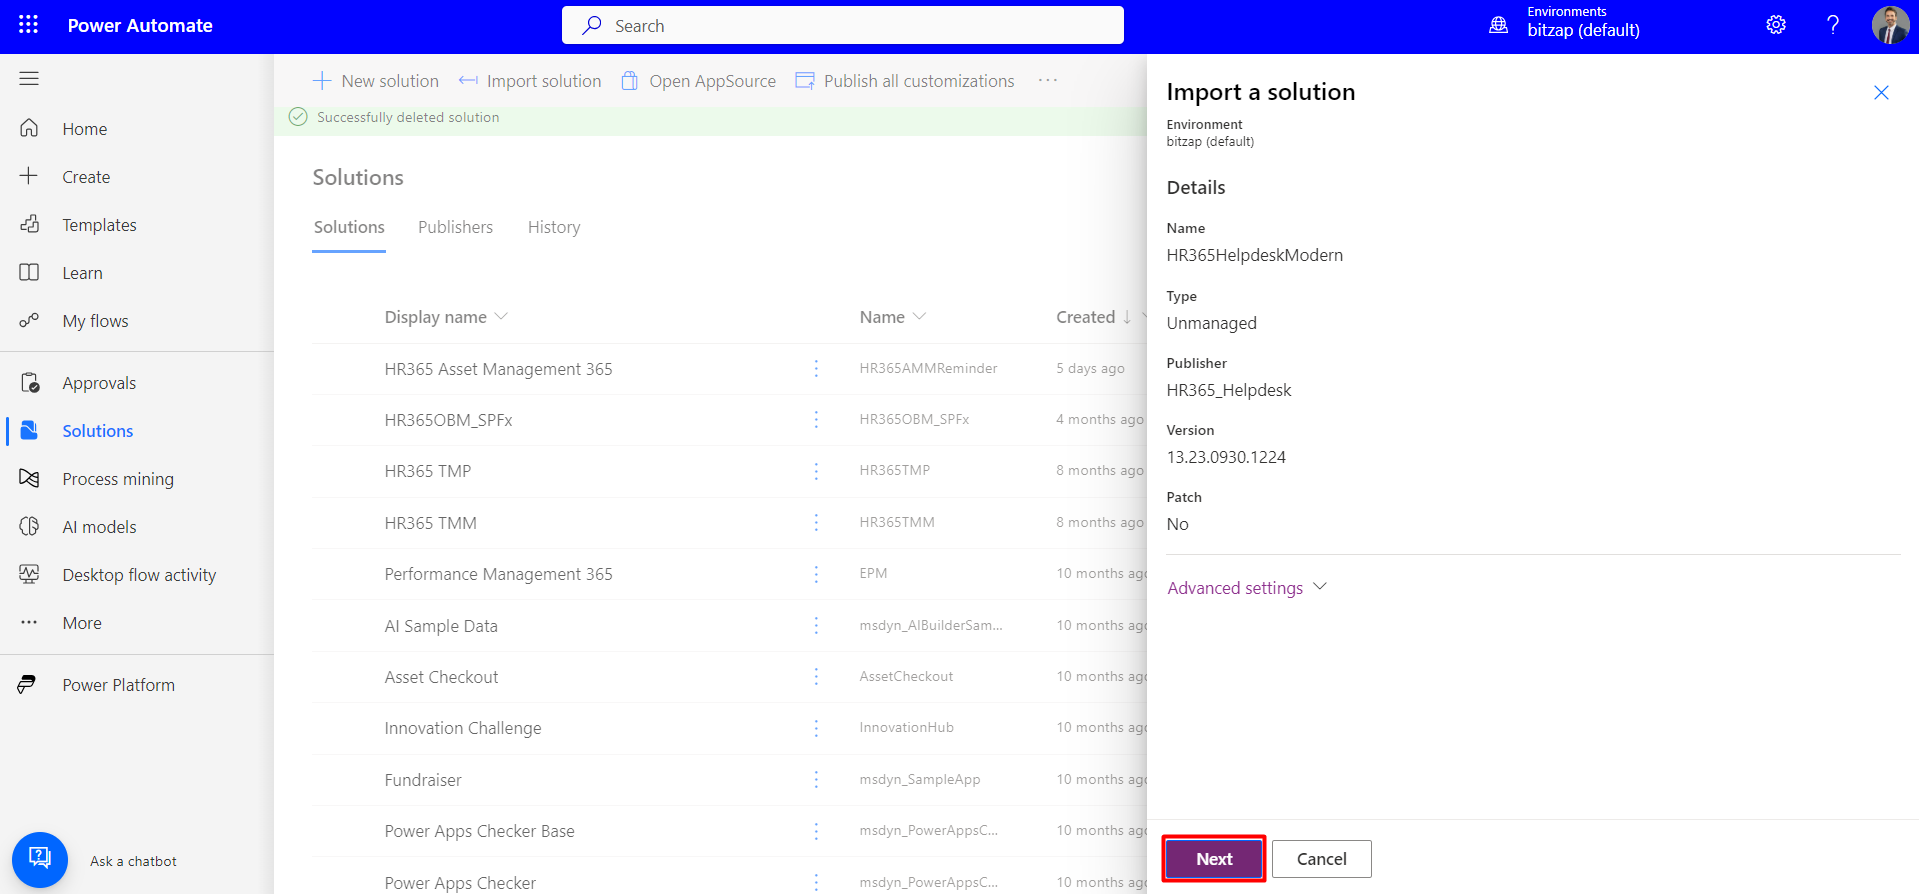
- Click on 'Next'.
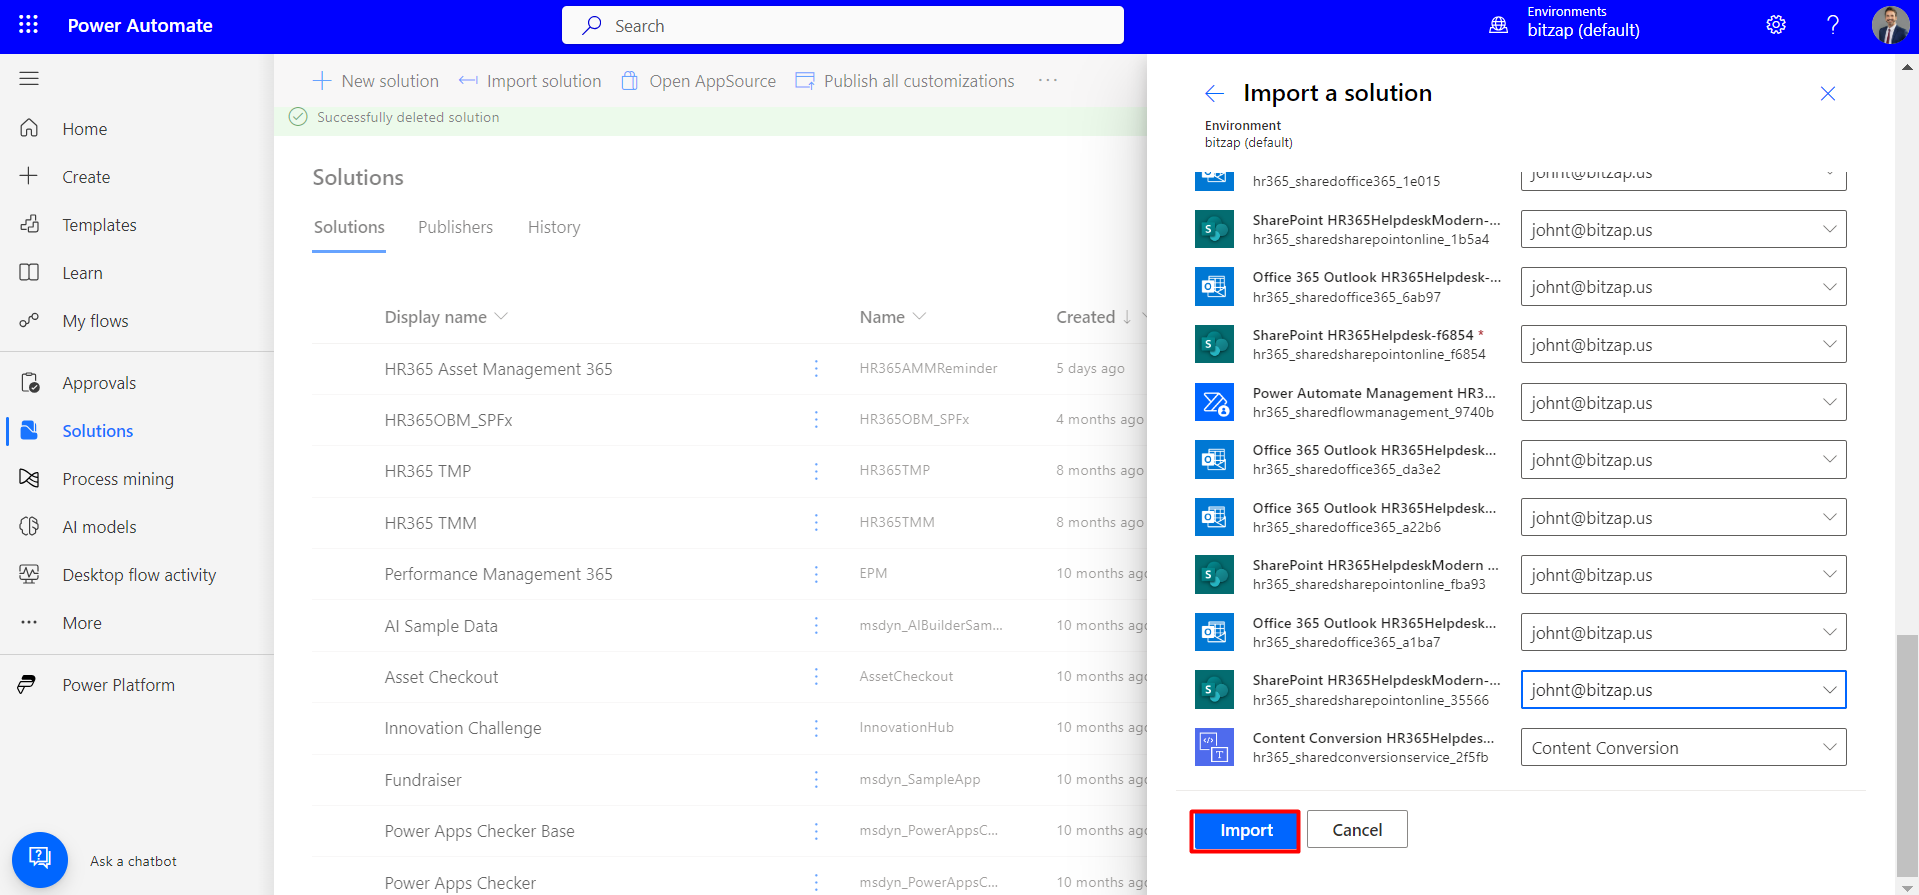
- Choose the connections for the logged-in user from the drop-down list and select 'Import.
- Select the imported solution named 'HR365 Helpdesk Solution.'
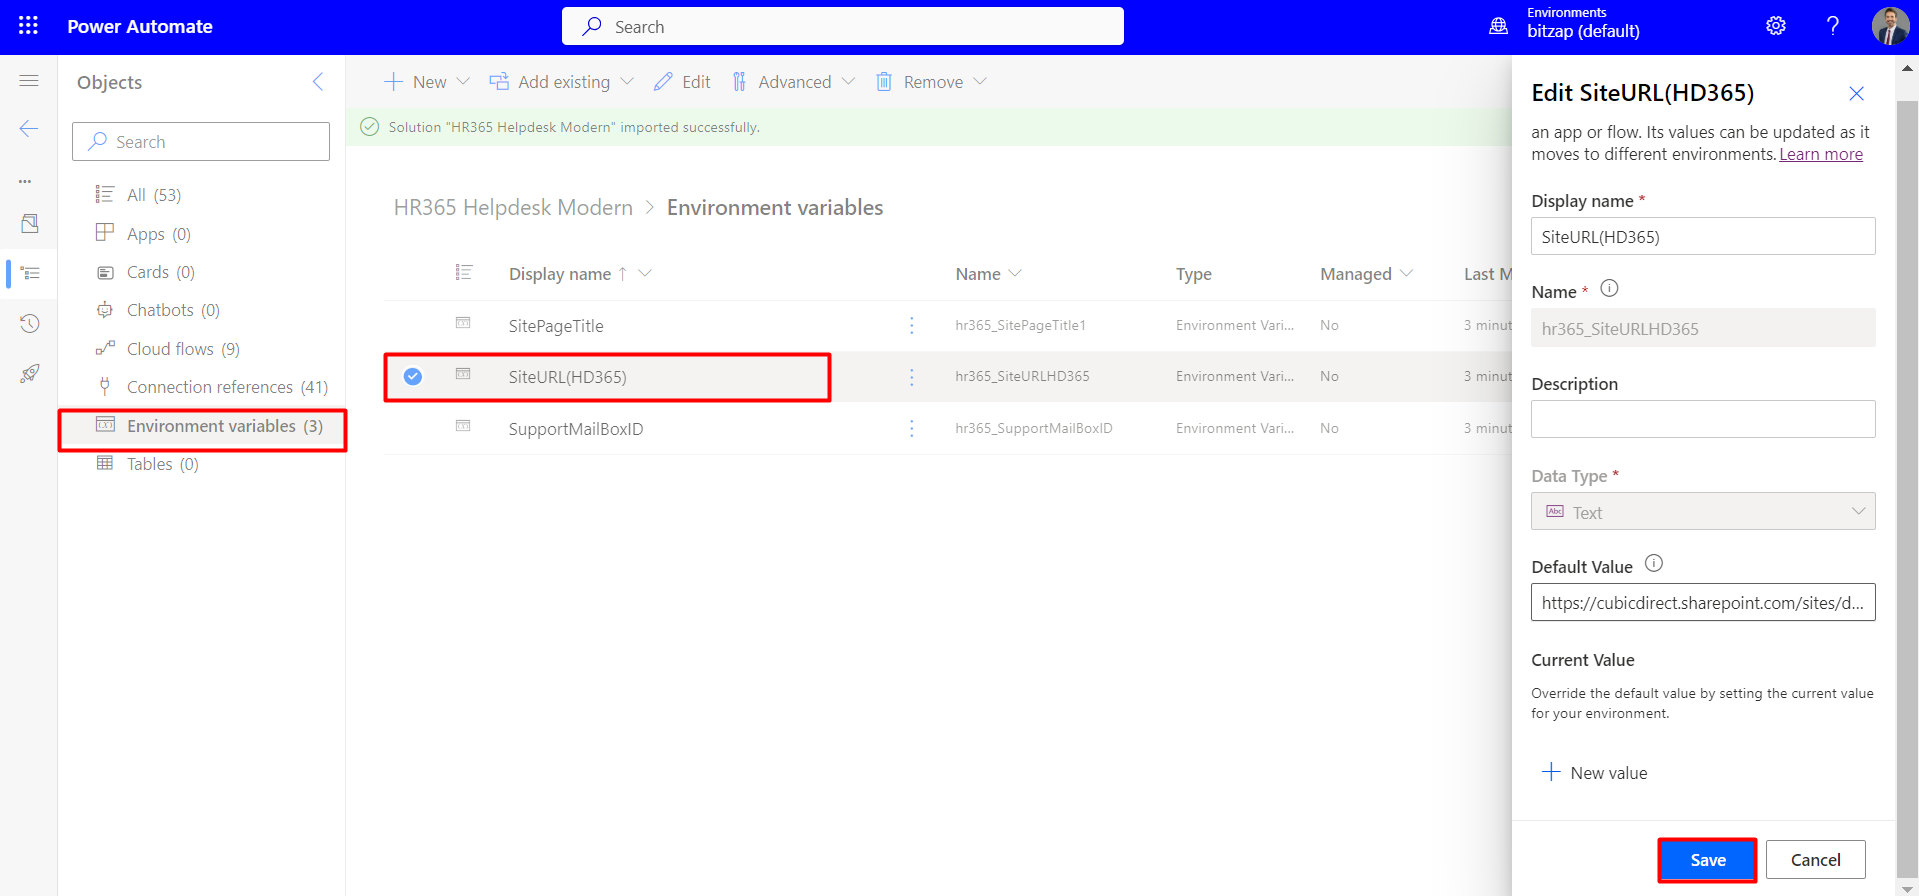
- Navigate to the left-hand side navigation panel, select 'Environment variables,' and then click on the 'Site URL' variable. Replace the default value with your application's site URL.
- Copy the application site URL up to 'sitename' and paste it into the default value field.
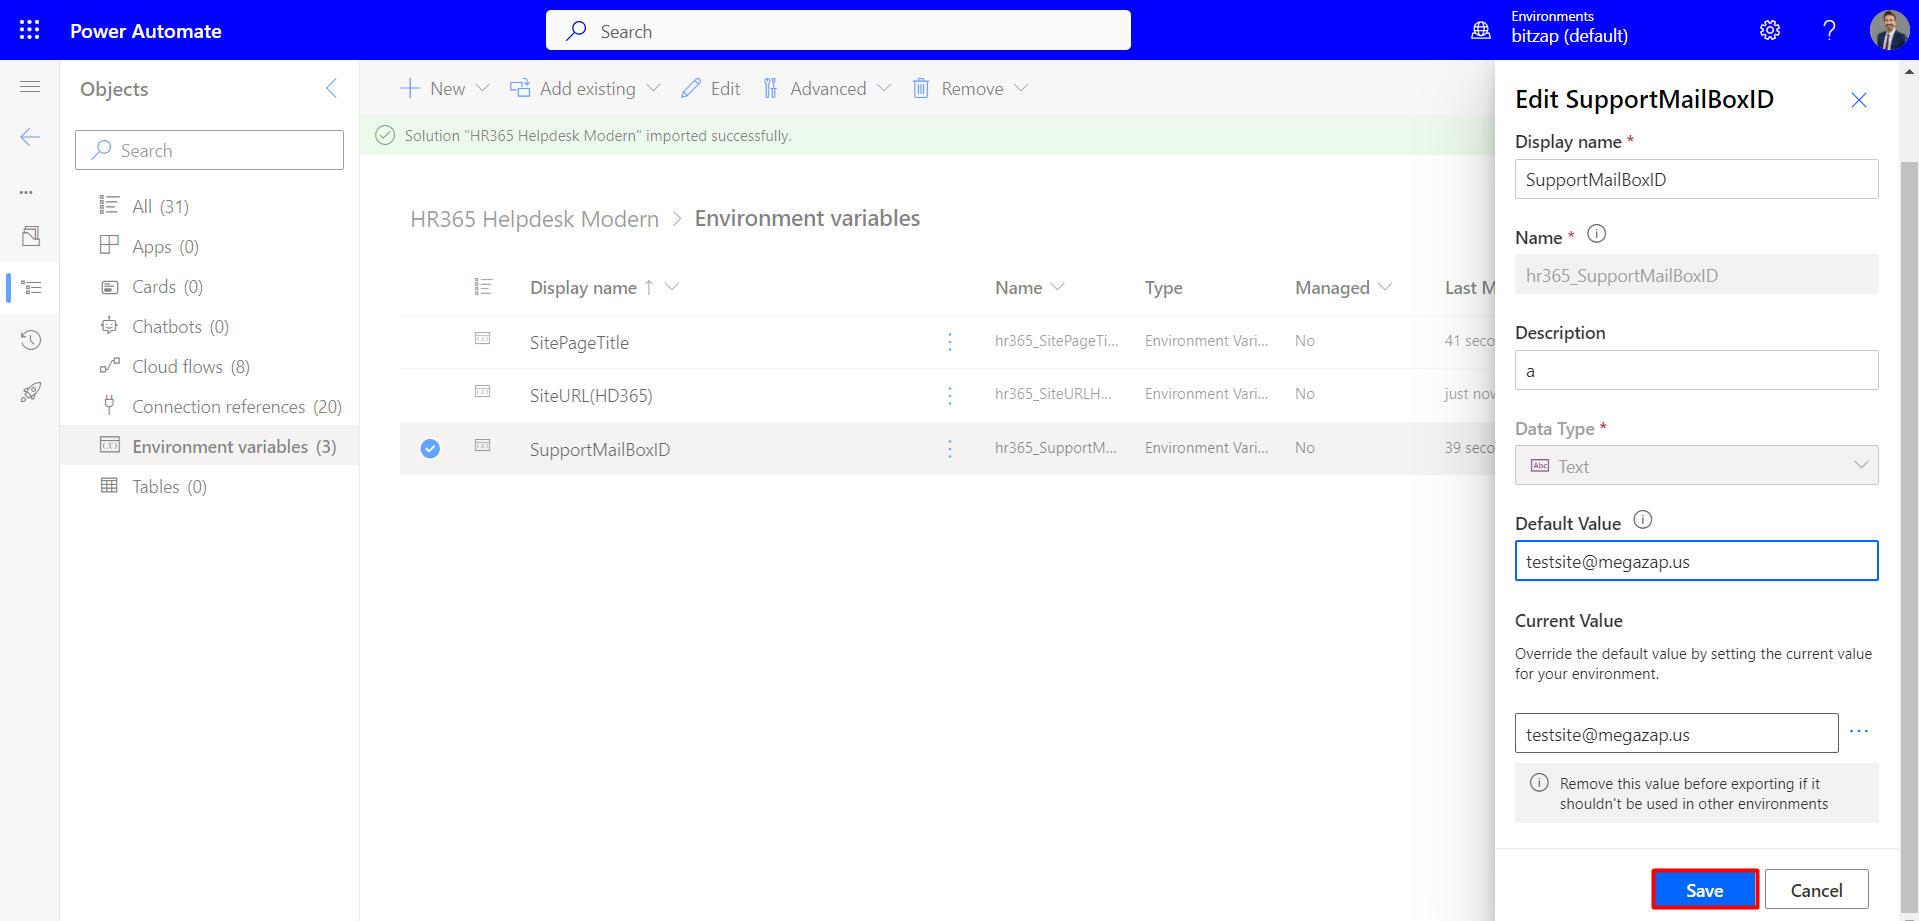
- Next, select 'SupportMailBoxID' under the display name, replace the default value with the ID of your shared mailbox (created in step 4), and then click 'Save'.
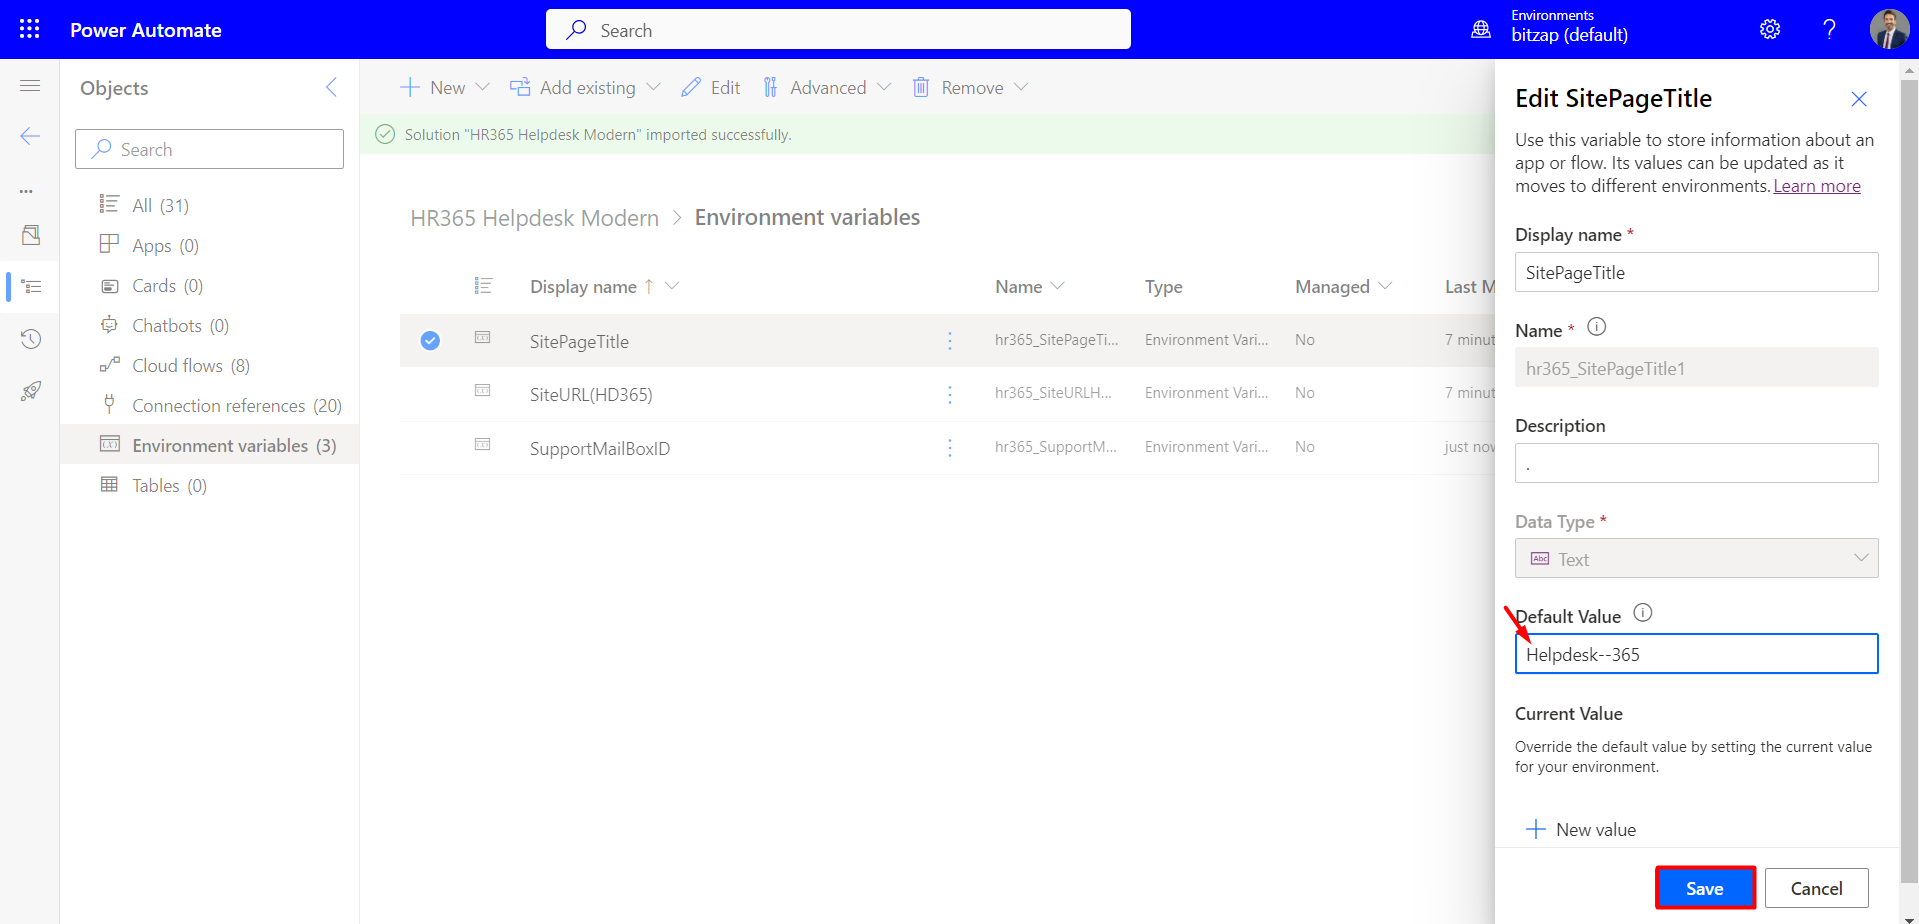
- Under the display name, choose 'SitePageTitle' and replace the default value with your site page title.
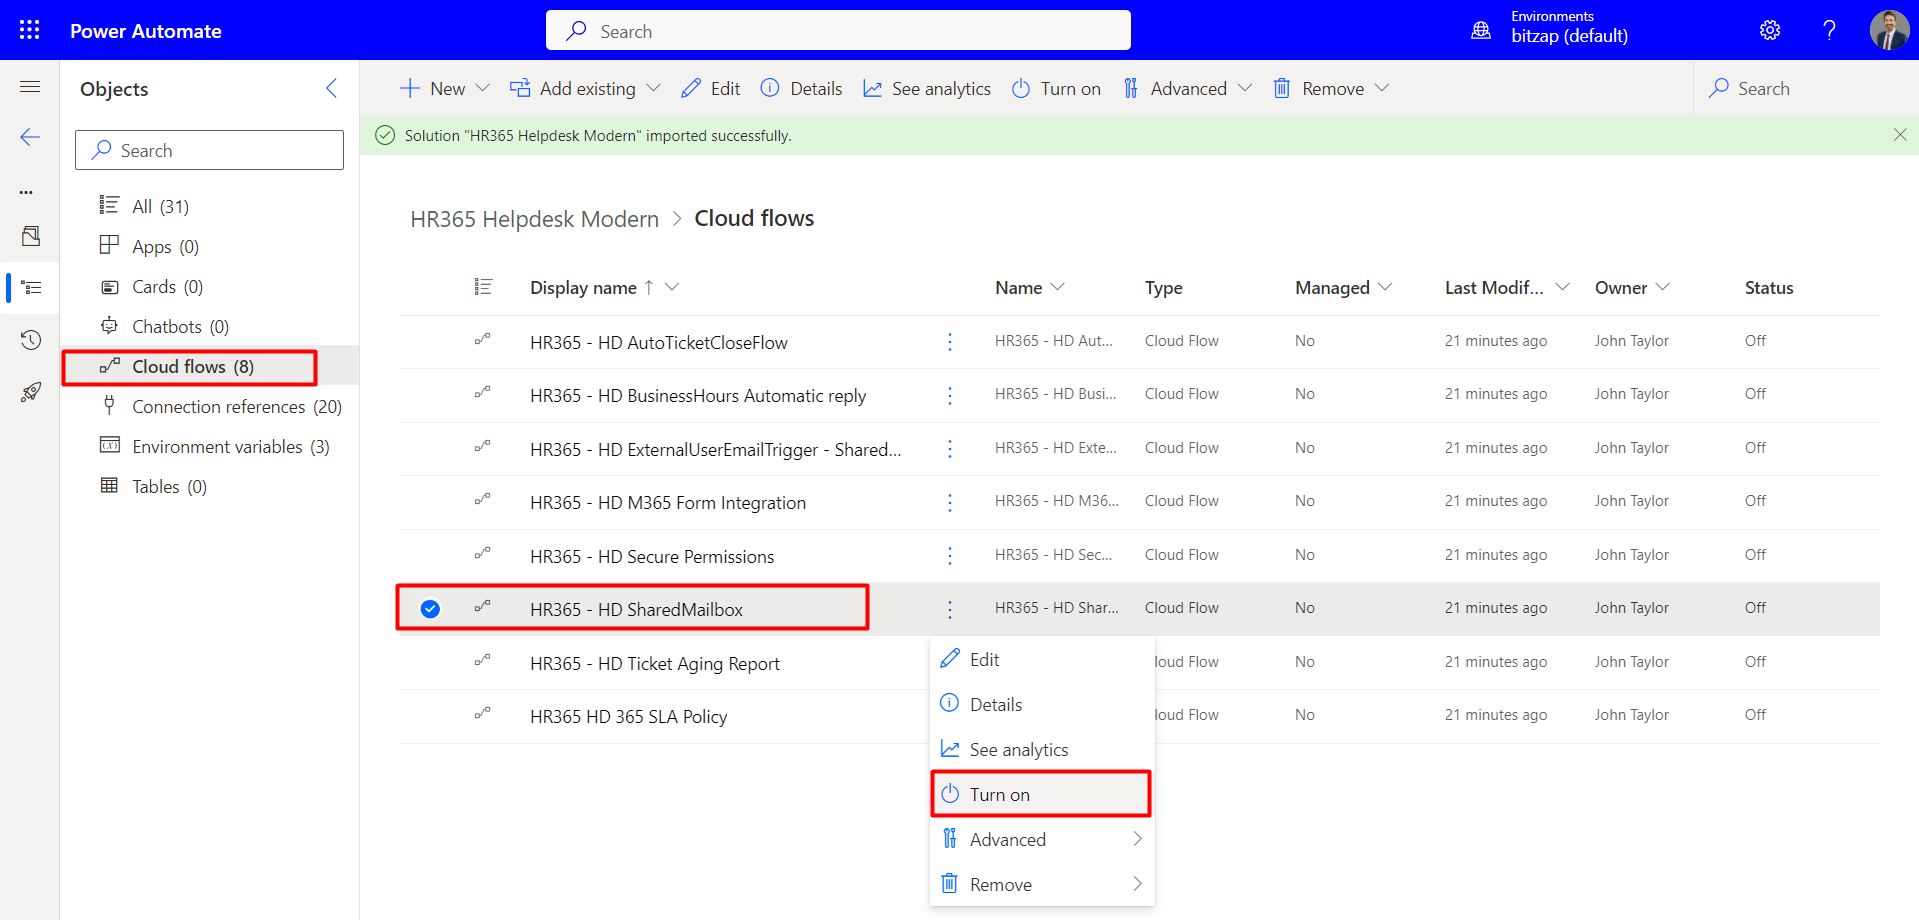
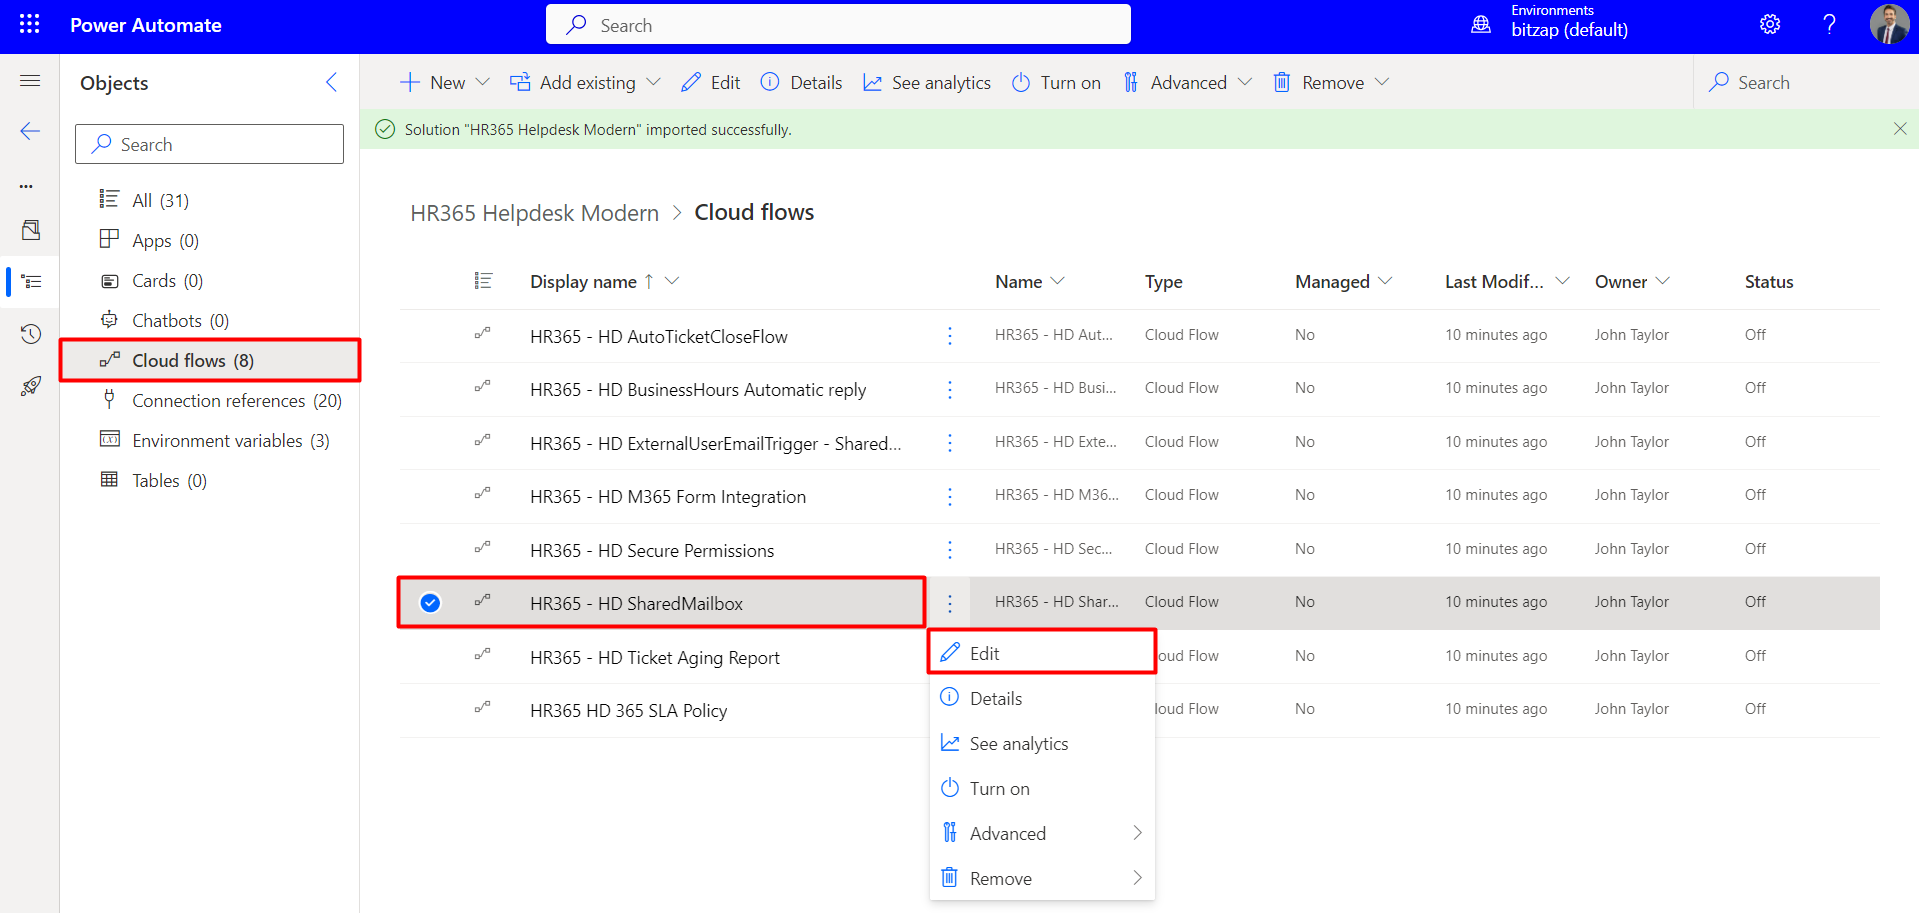
- To edit the flow (HR365 - HD SharedMailbox), click on the vertical ellipsis icon, and then select 'Edit'.
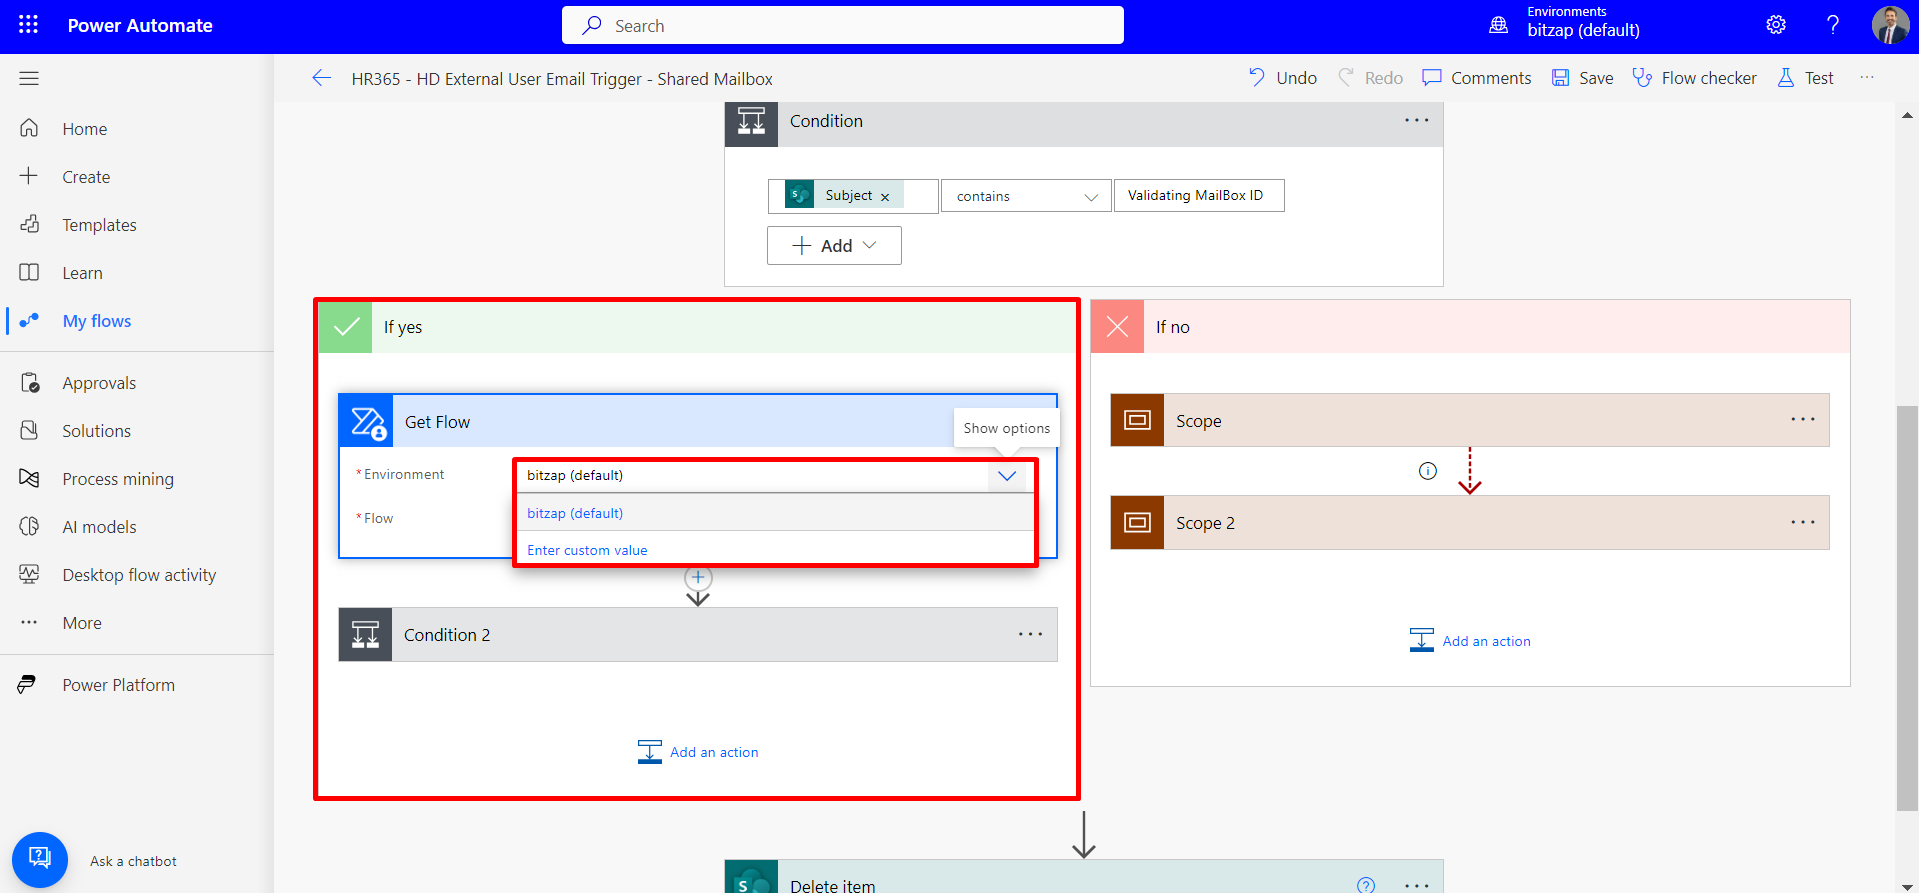
- Select the Environment where you flow is deployed
- Select the shared mailbox.
- In the left navigation panel, navigate to 'Cloud flows.' Enable the flow for 'SharedMailbox' and 'ExternalUserEmail,' as illustrated in the image.
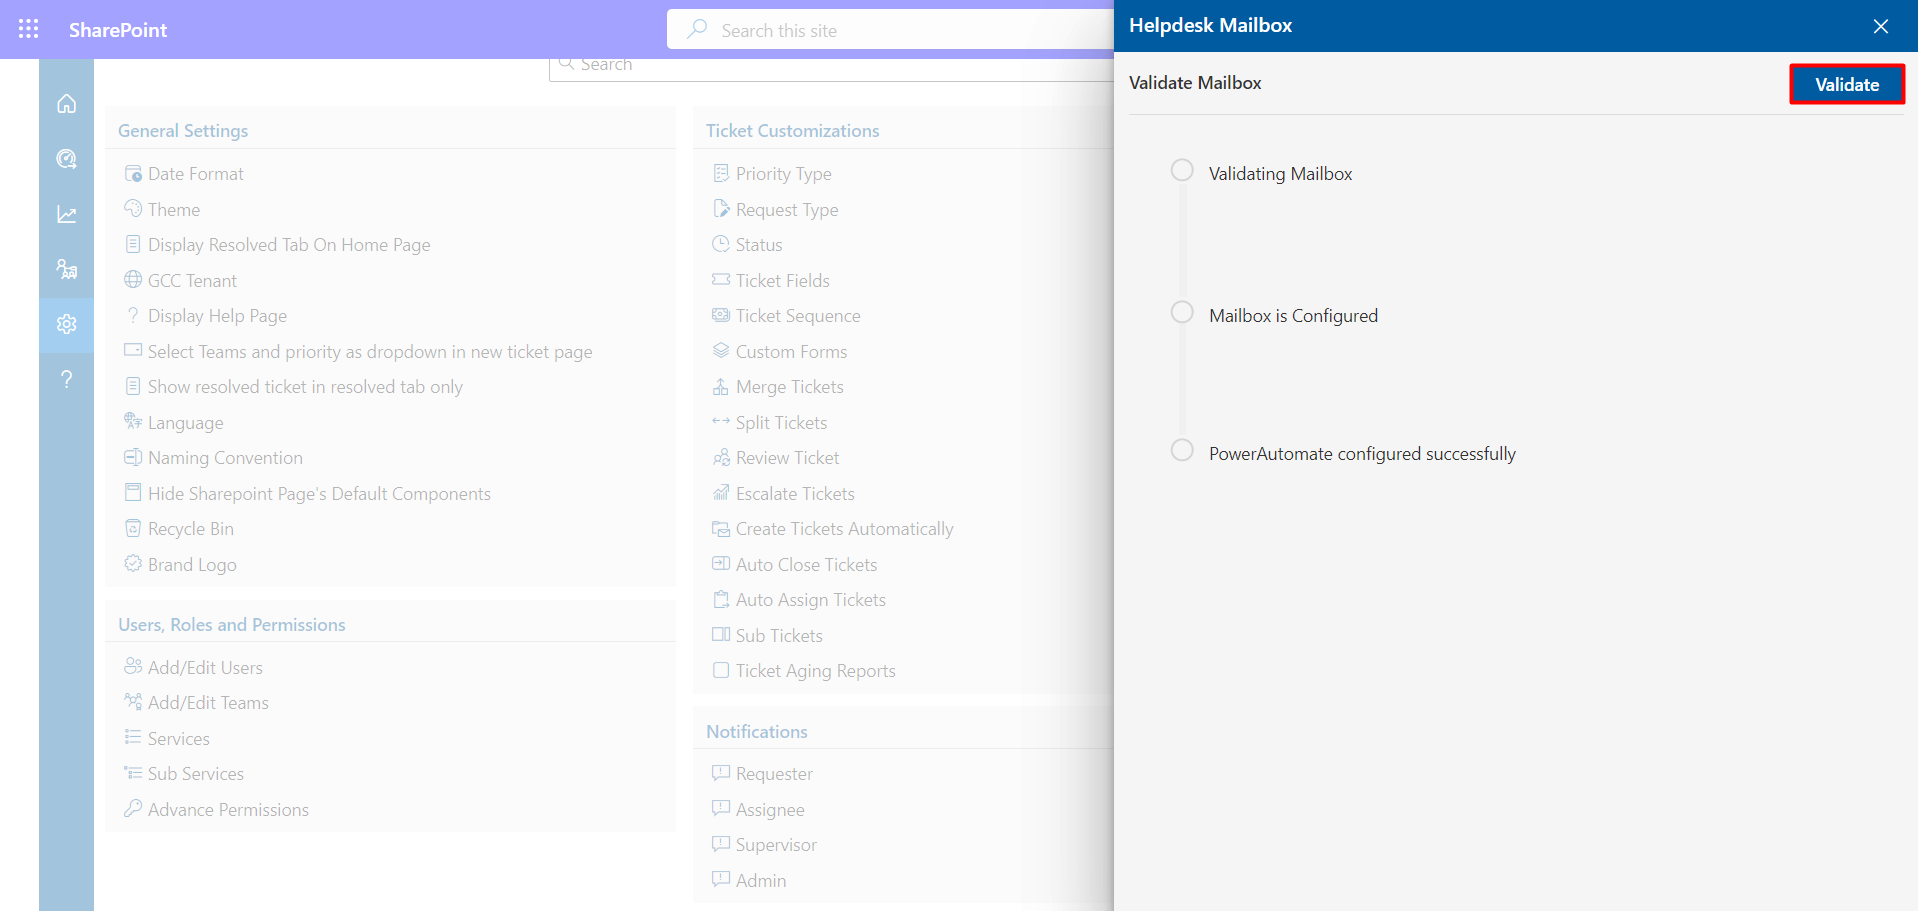
- After activating the flows, visit the Helpdesk application, navigate to settings, and then access 'Helpdesk mailbox.' Click 'Configure' and choose 'Validate.' This action will reveal the configured mailbox.
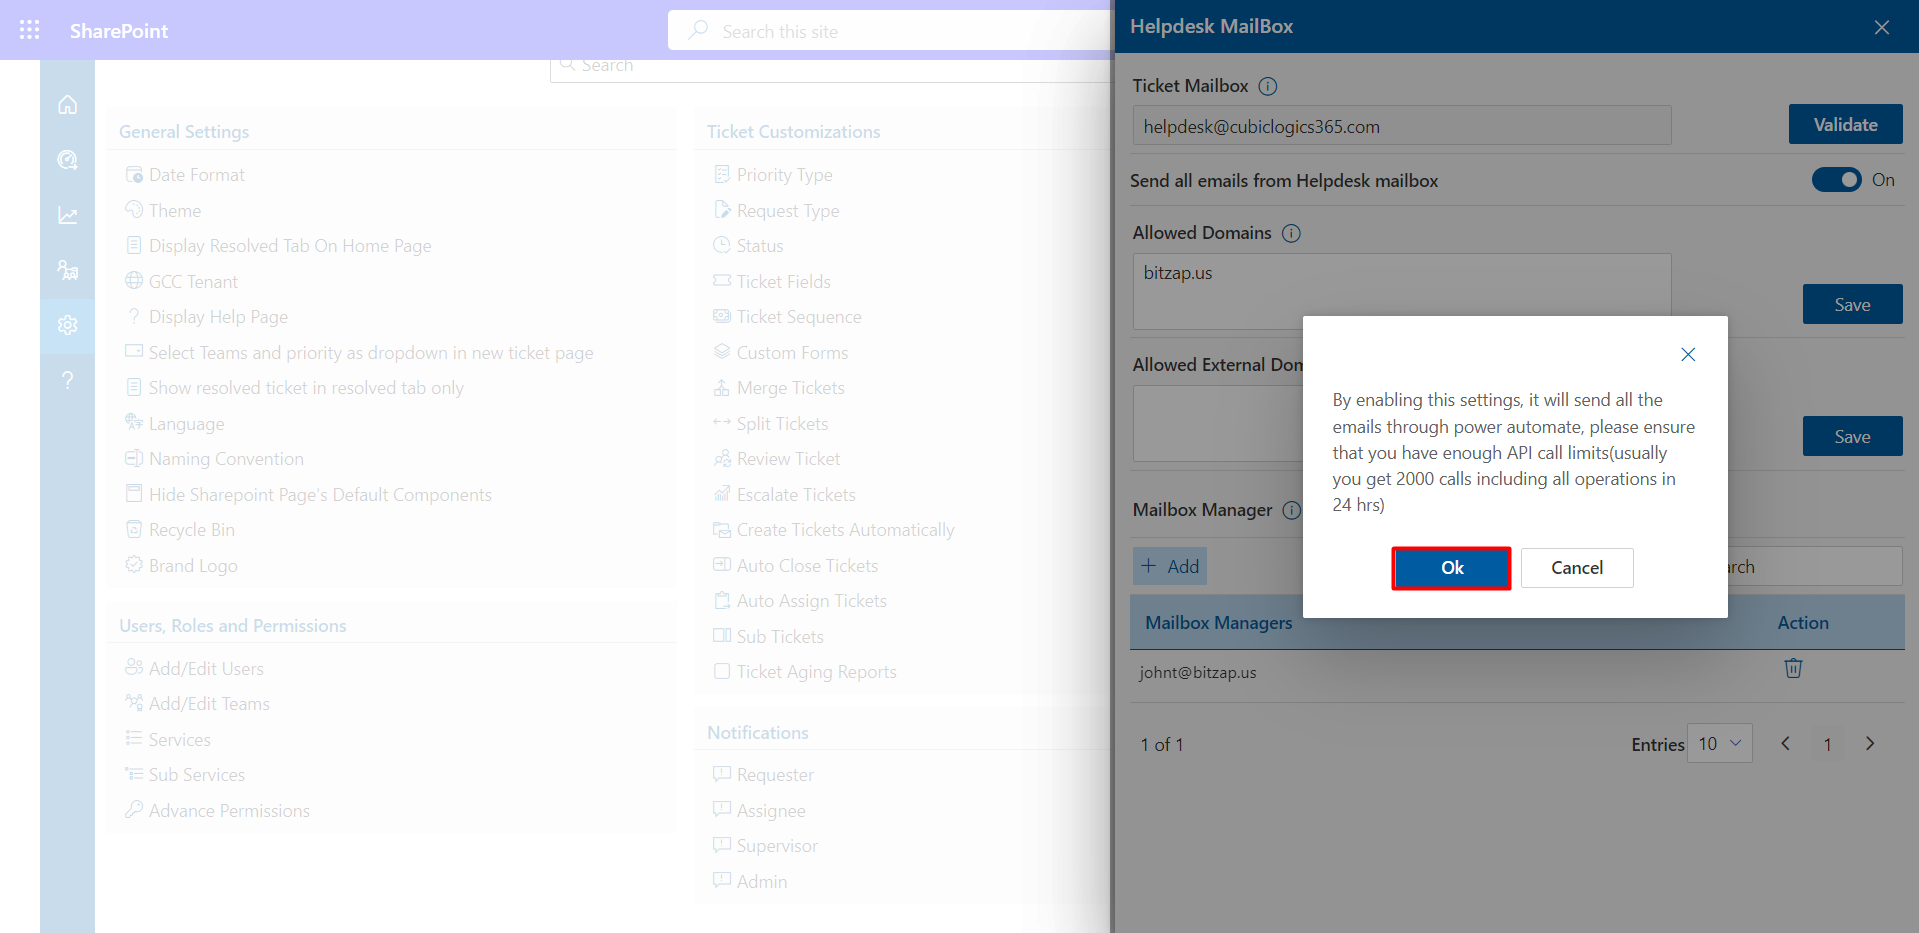
- Now, toggle the switch to enable sending all emails from the Helpdesk mailbox.
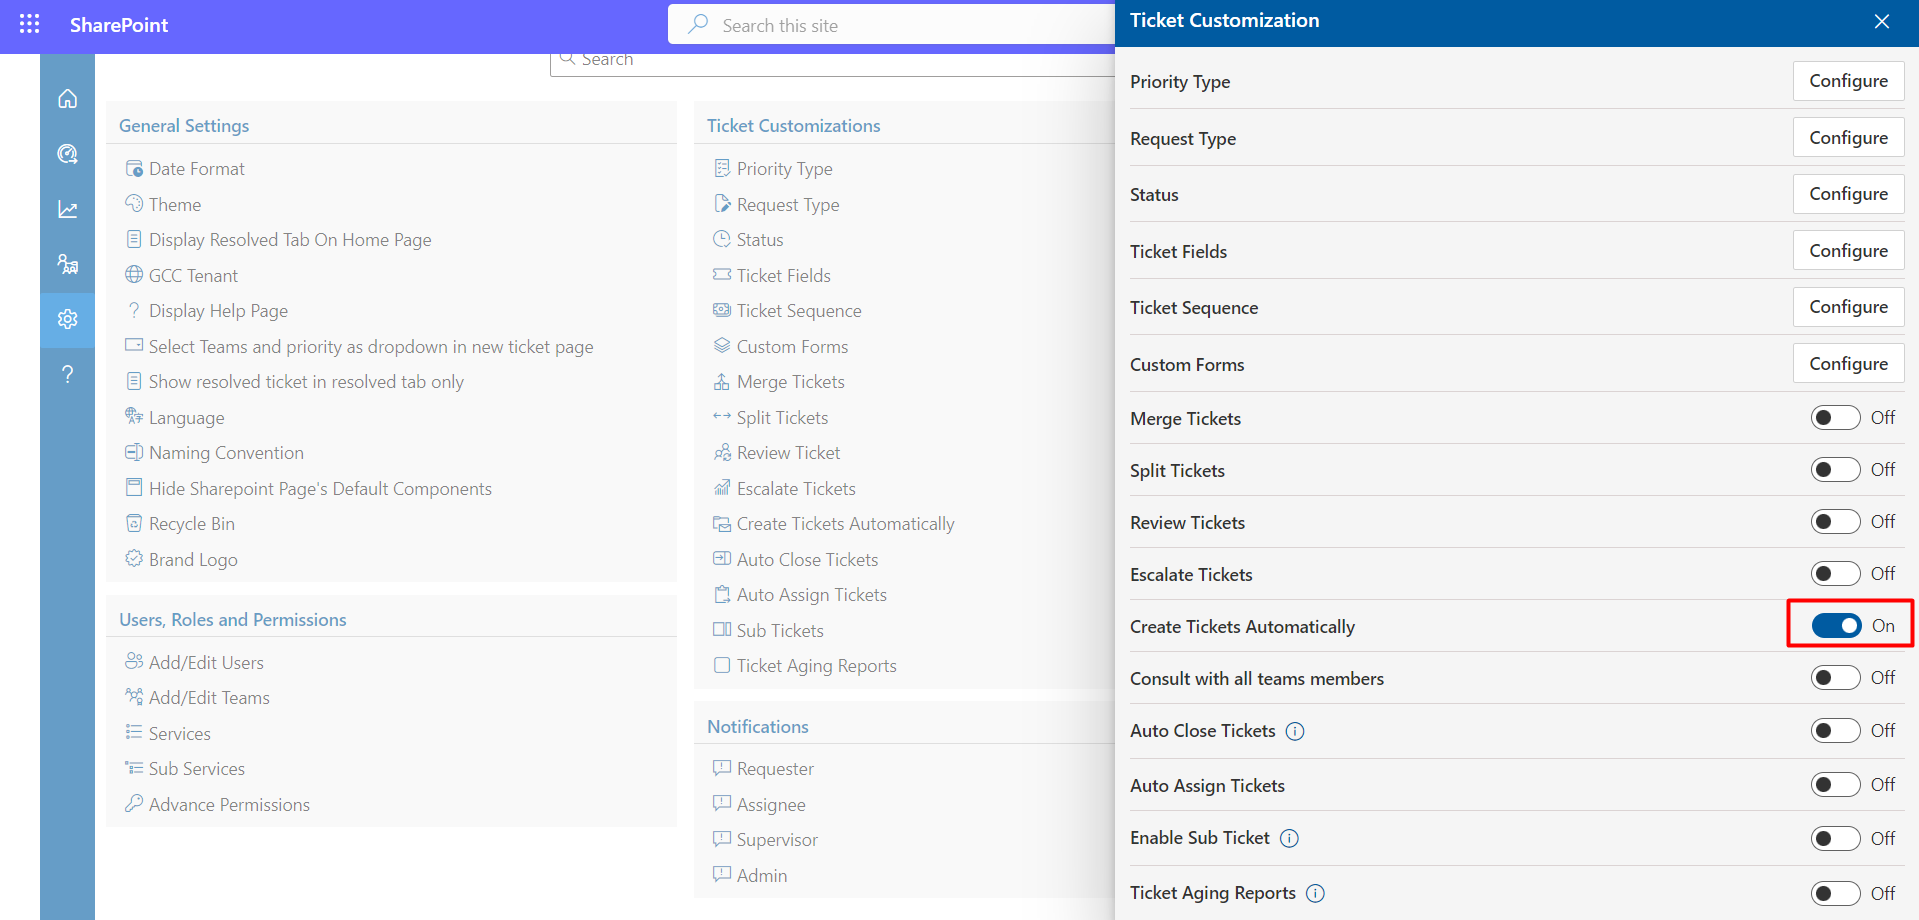
- Move on to the ticket customization section and activate the toggle for automatic ticket creation.
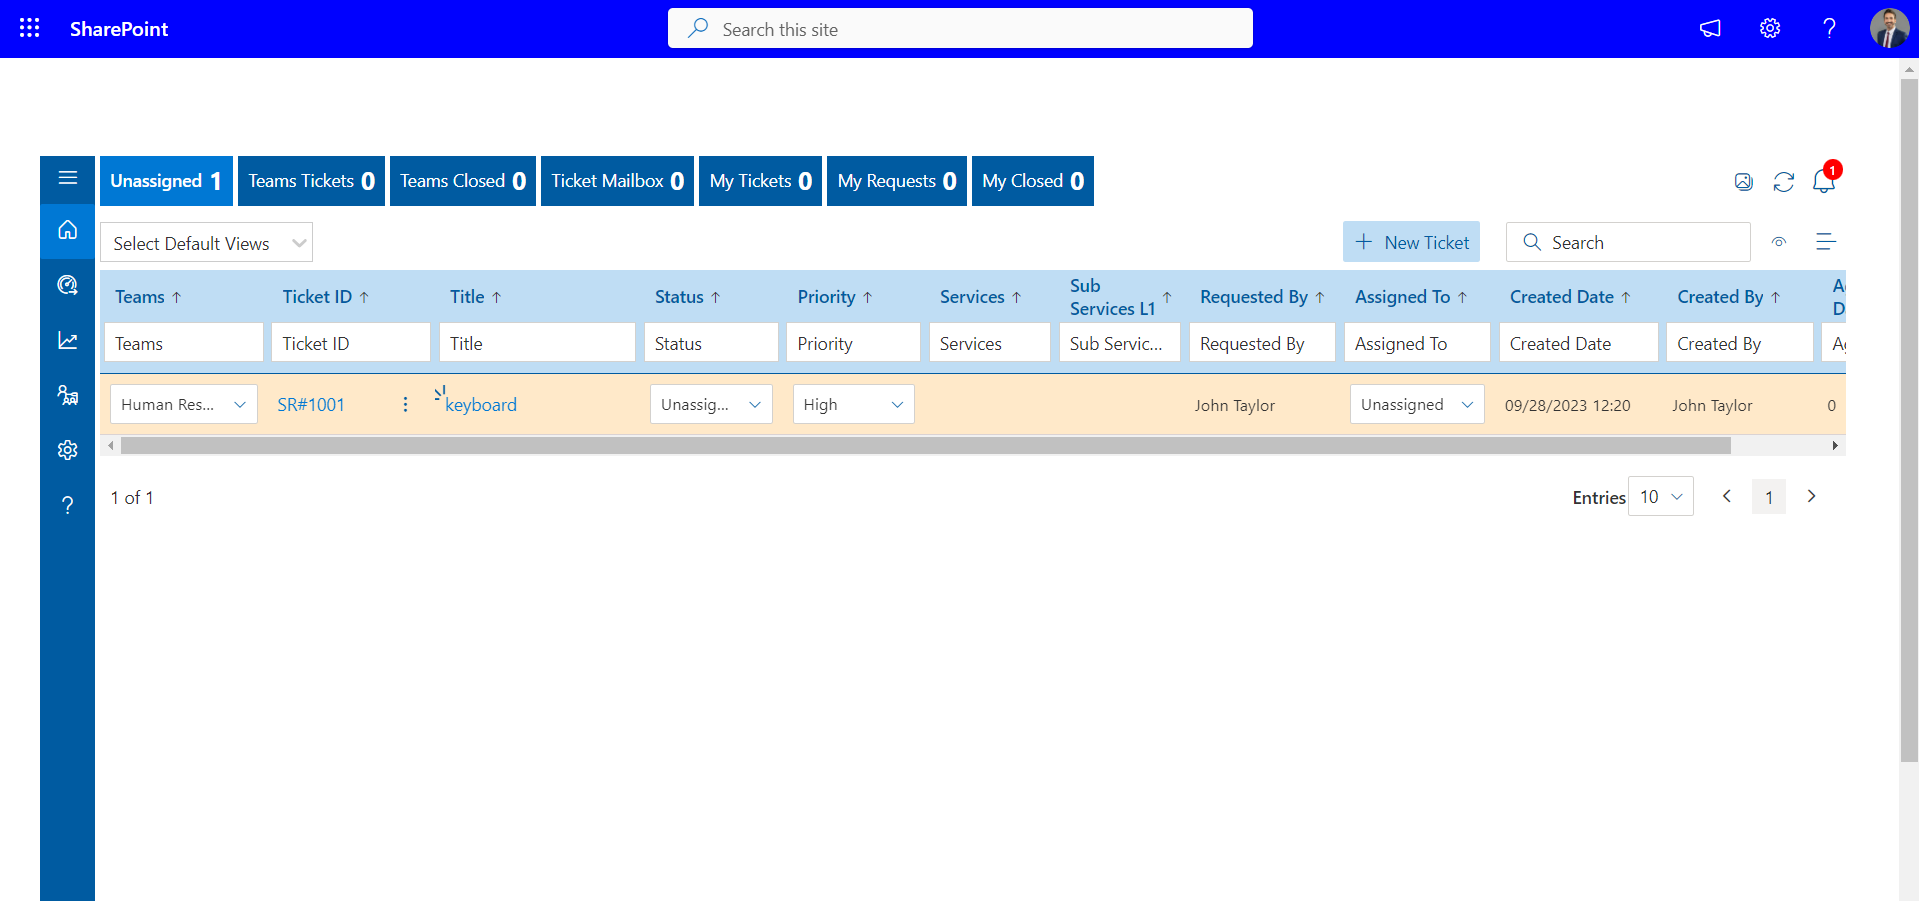
- To verify the setup, test it by sending an email to the shared mailbox ID. For example, Adele Vance (User) sent an email to the configured mailbox, and it was seamlessly converted into a ticket.
Steps to configure the Power Automate flow:
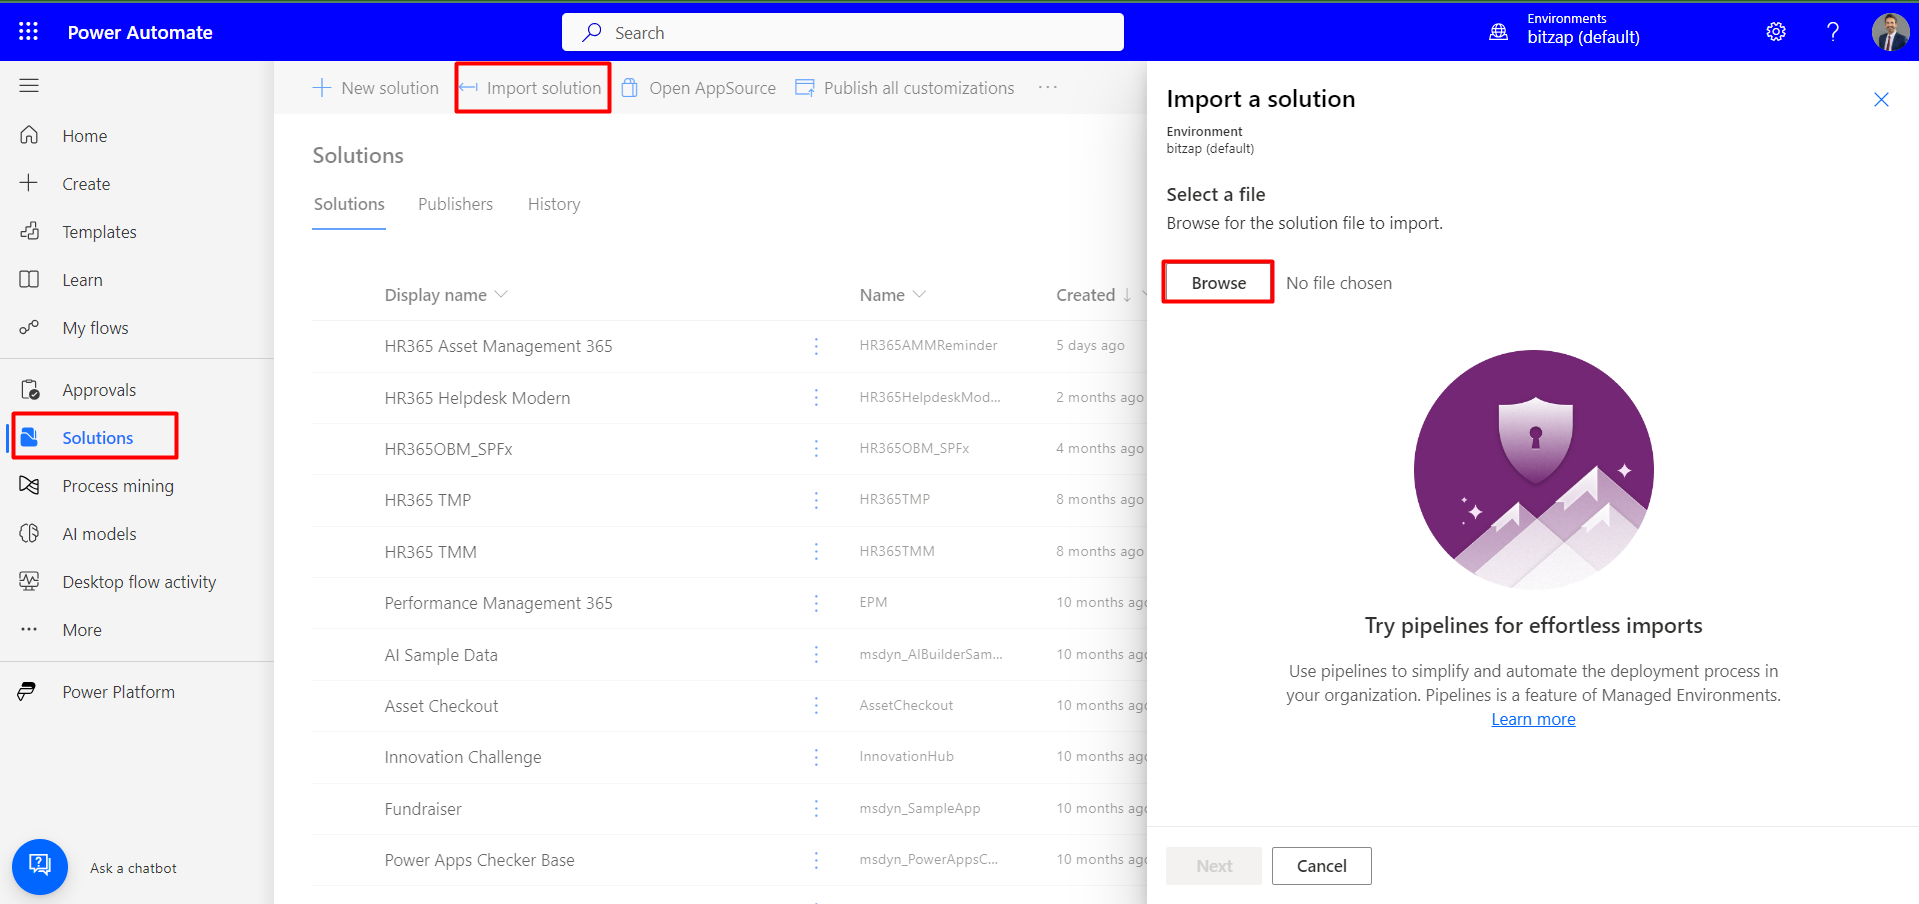
To download the Power Automate solution, click here.
Then, go to the left panel and choose 'Solutions.' Import the solution at the top by
uploading the downloaded file and clicking
Note: Do not unzip the solution file.
Note : If you do not have an existing connection, you can make one by clicking on New Connection.


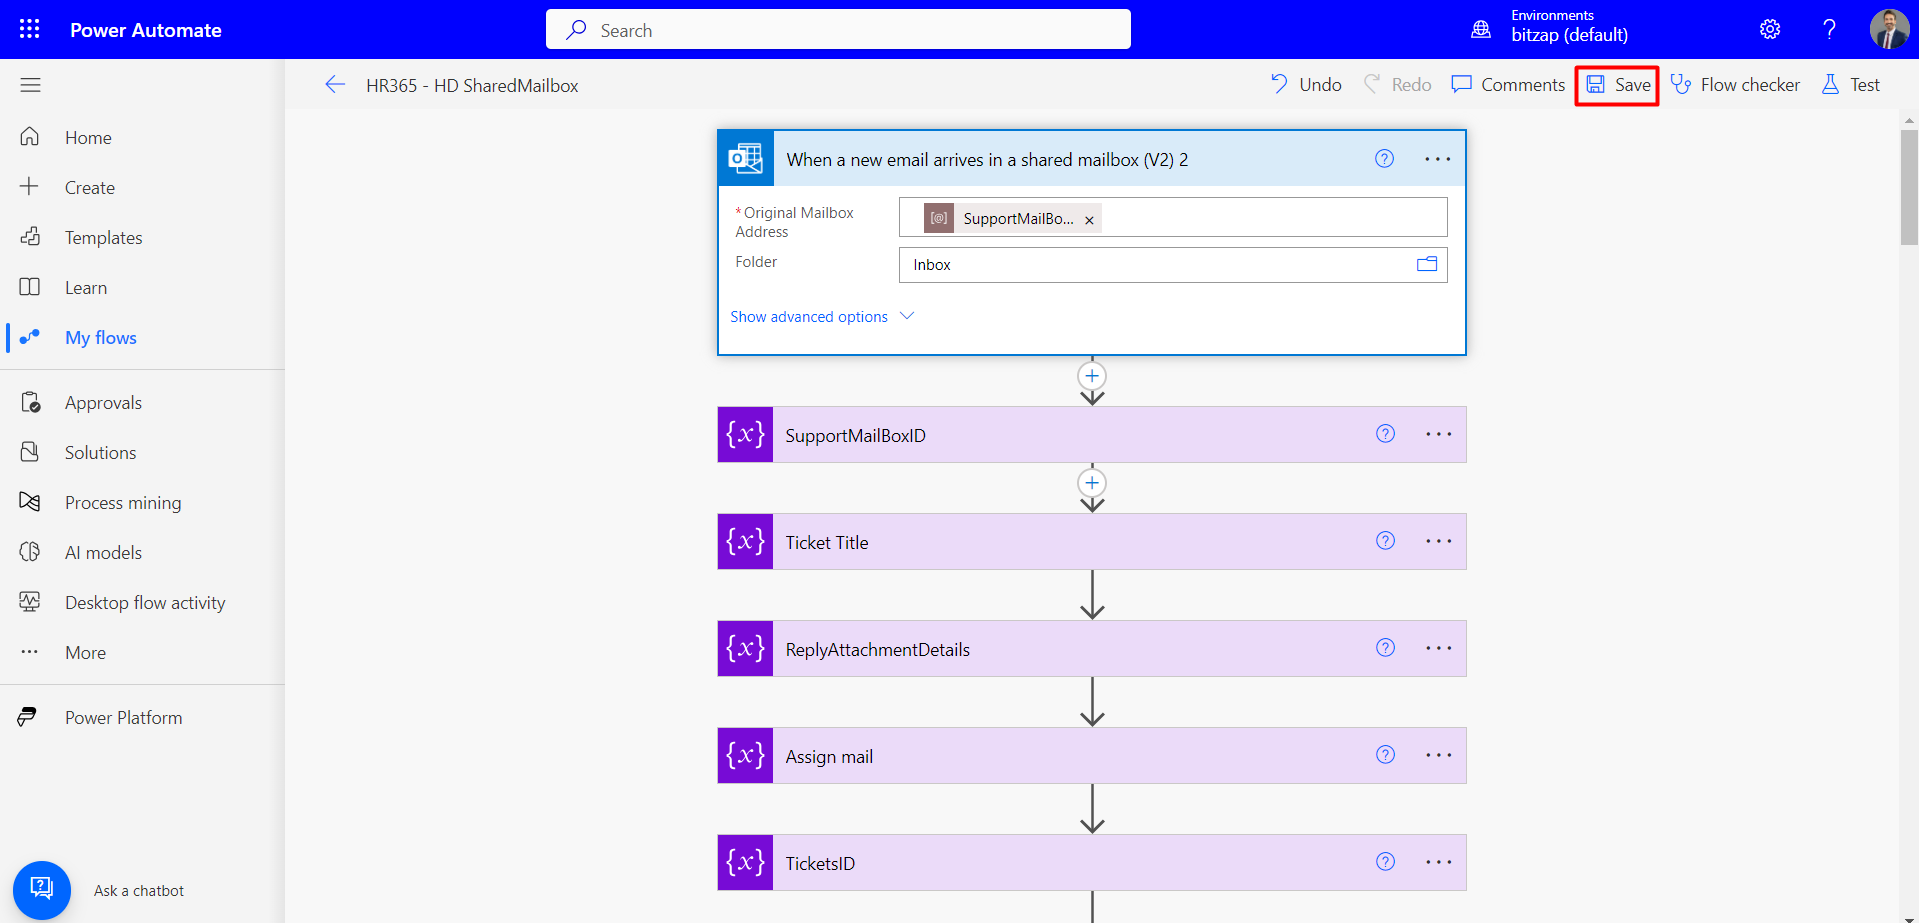
Select the first row (When a new email arrives), and then click on the folder icon. Choose the inbox folder.

After selecting the inbox folder, save the flow by clicking on the save icon.
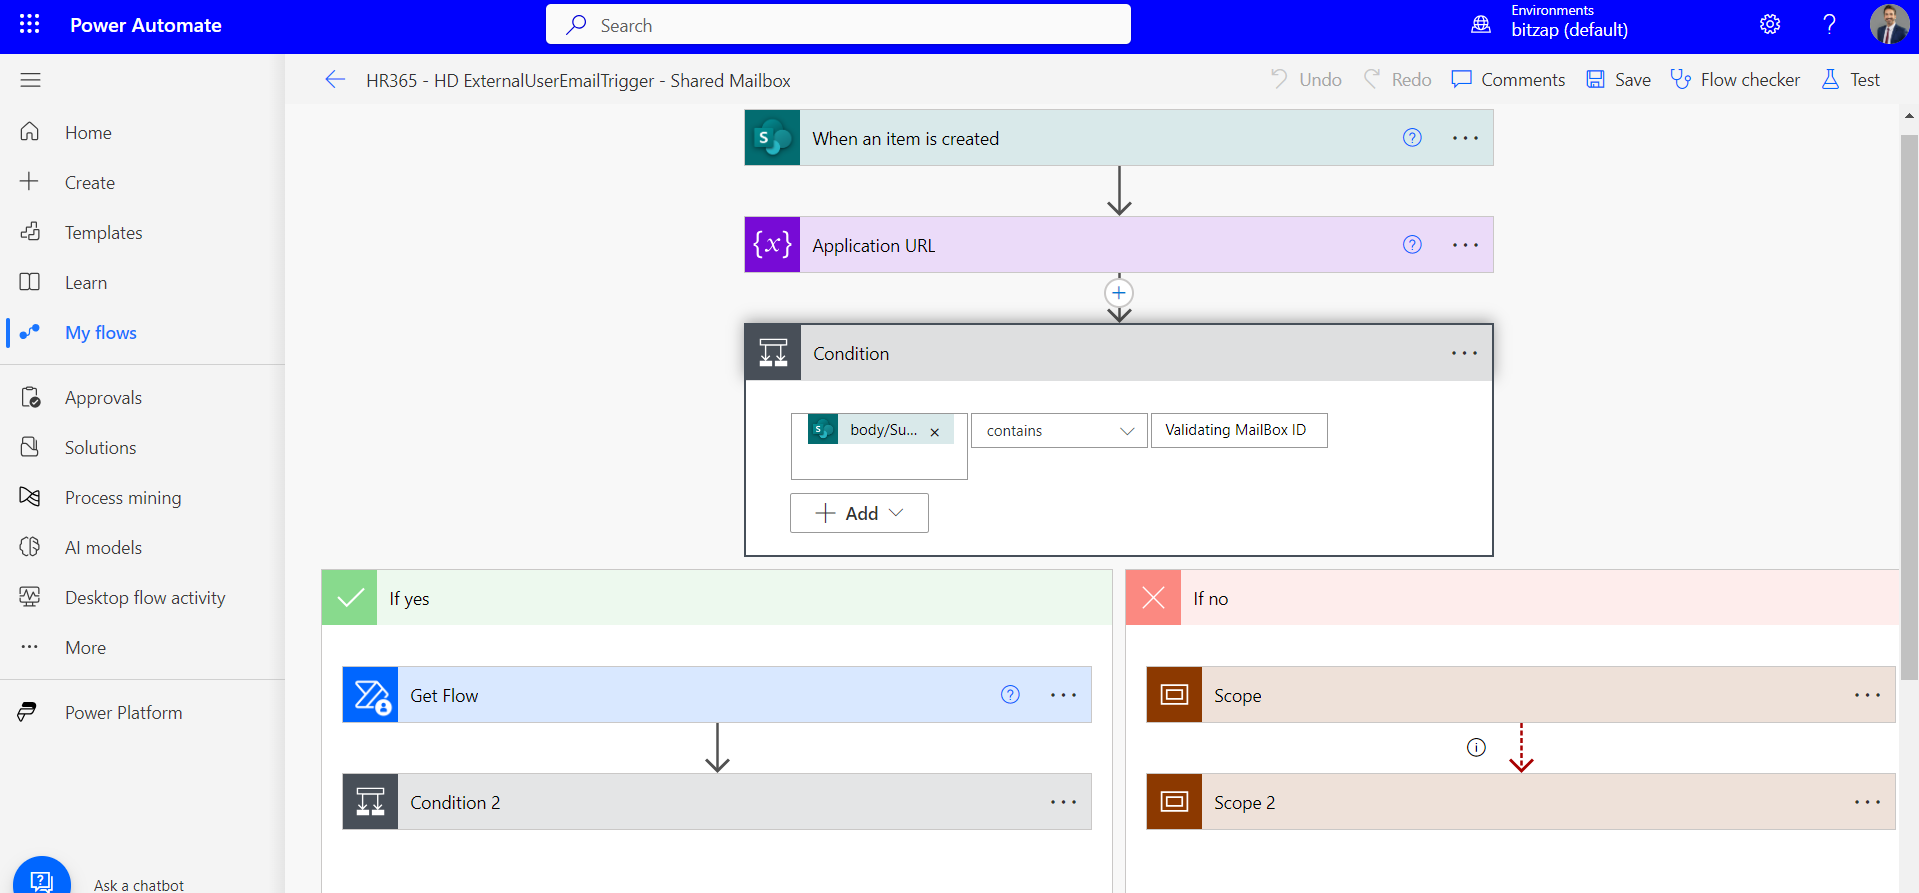
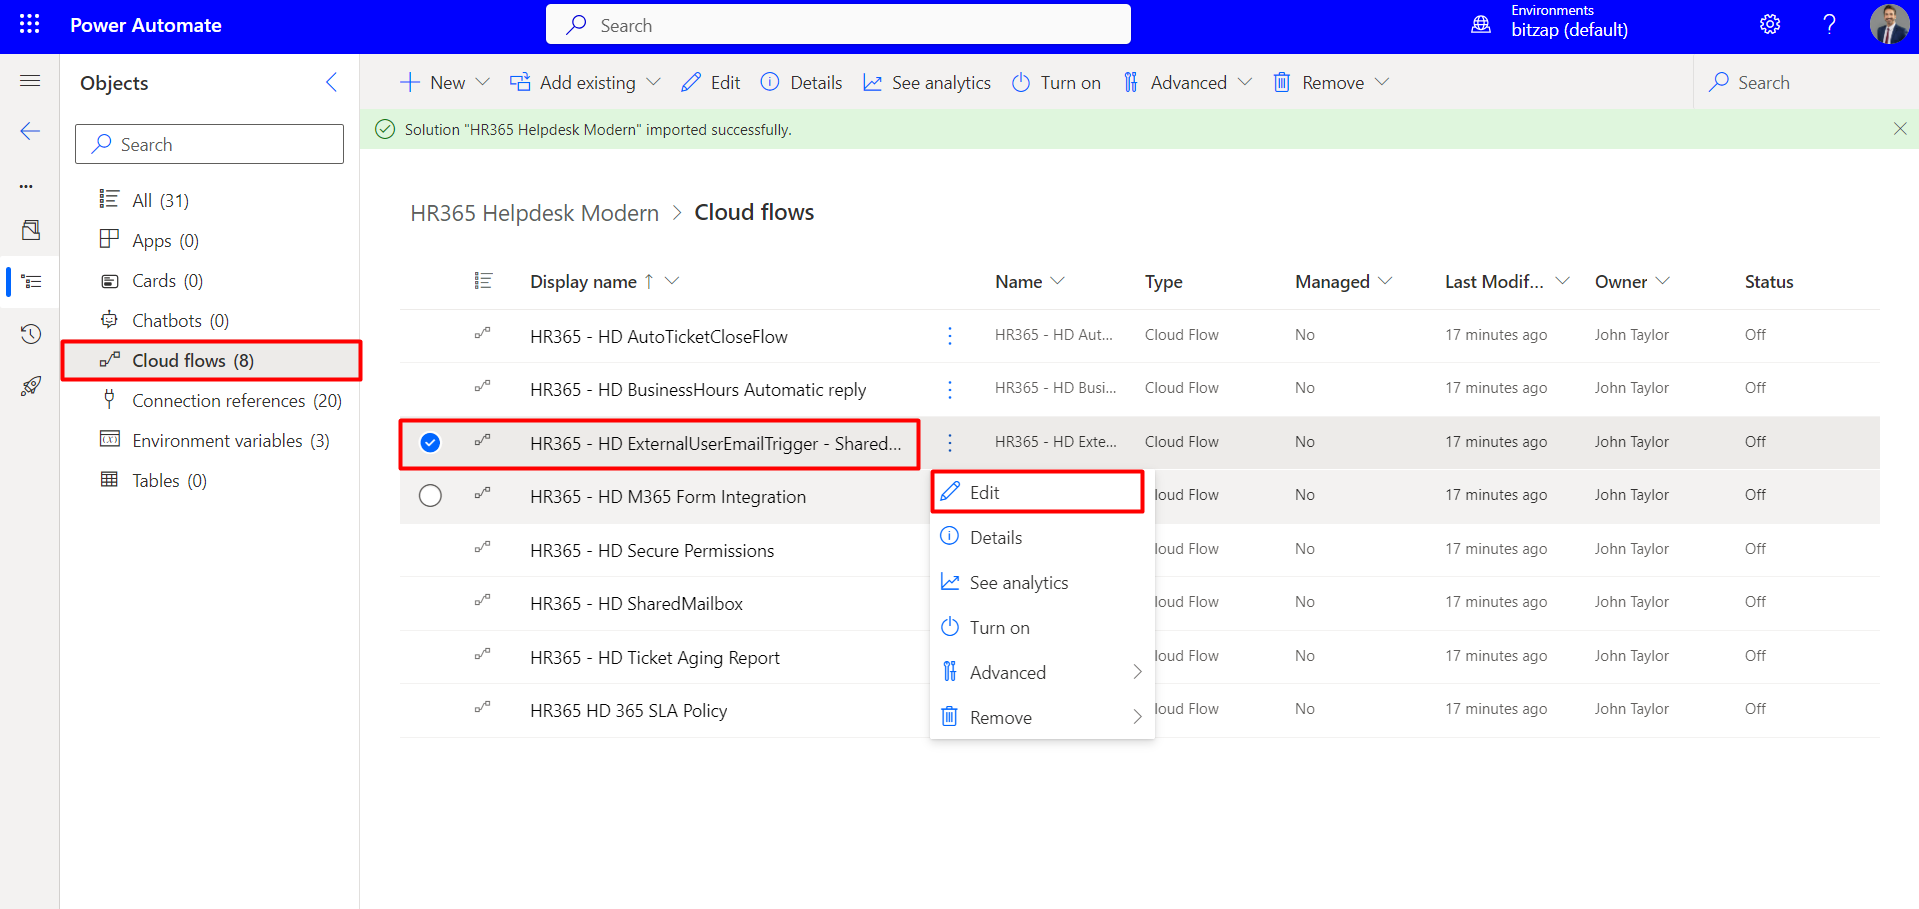
Now edit the flow (HR365 - HD External Email Trigger), click on the vertical ellipsis icon, and then select 'Edit'.
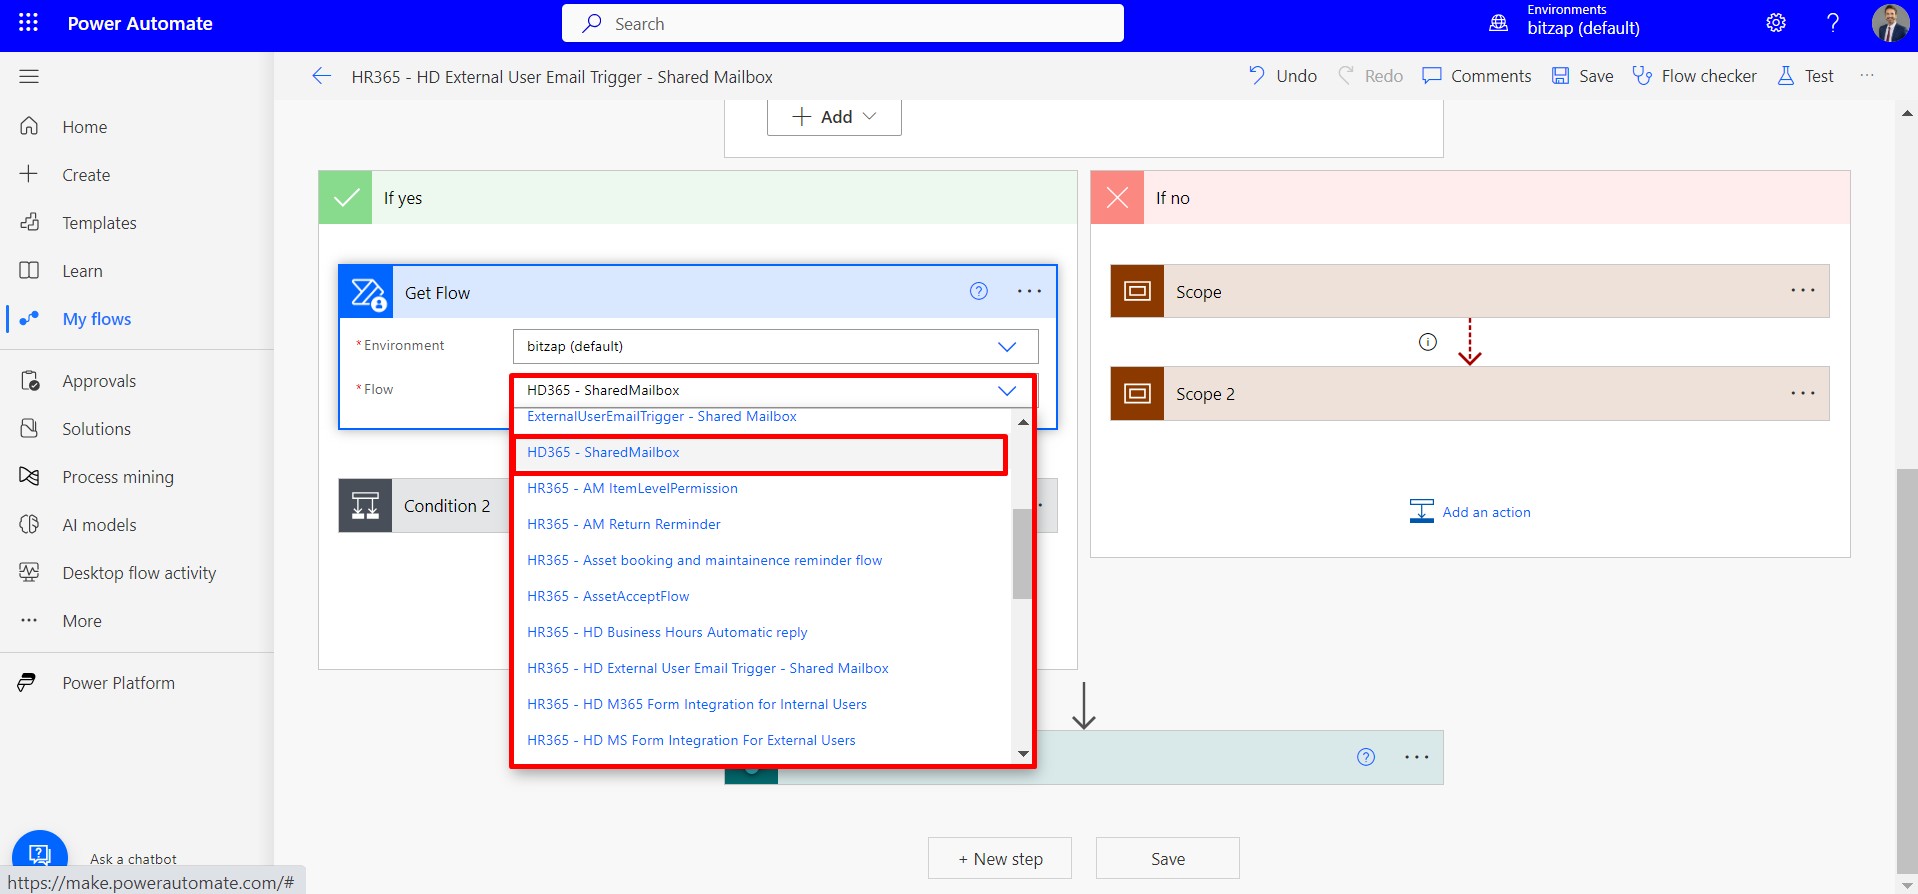
After clicking 'Edit' on 'HR365 - HD External Email Trigger,' go to the condition and click on 'Get Flow.' In the Environment dropdown, choose the default value, and in the flow dropdown, select 'HR365 - HD SharedMailbox.'