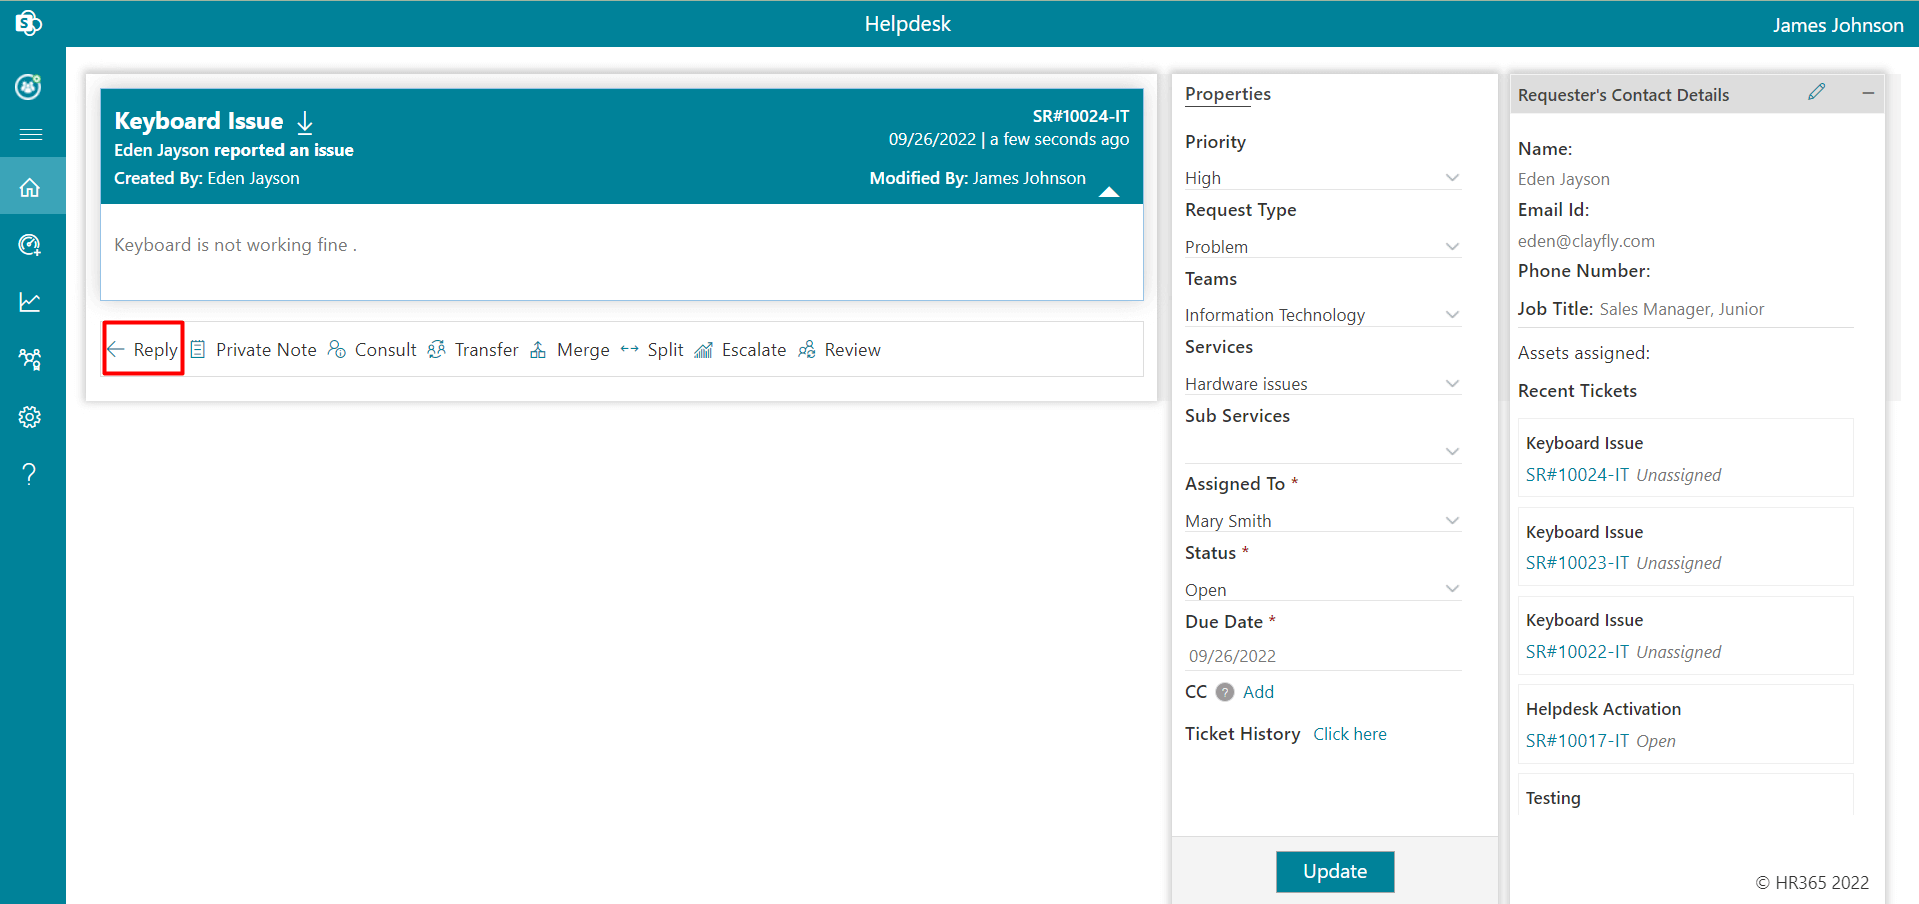
- Reply
- Consult
- Private Notes
- Transfer
- Merge
- Split
- Escalate
- Review
- Sub Tickets
-
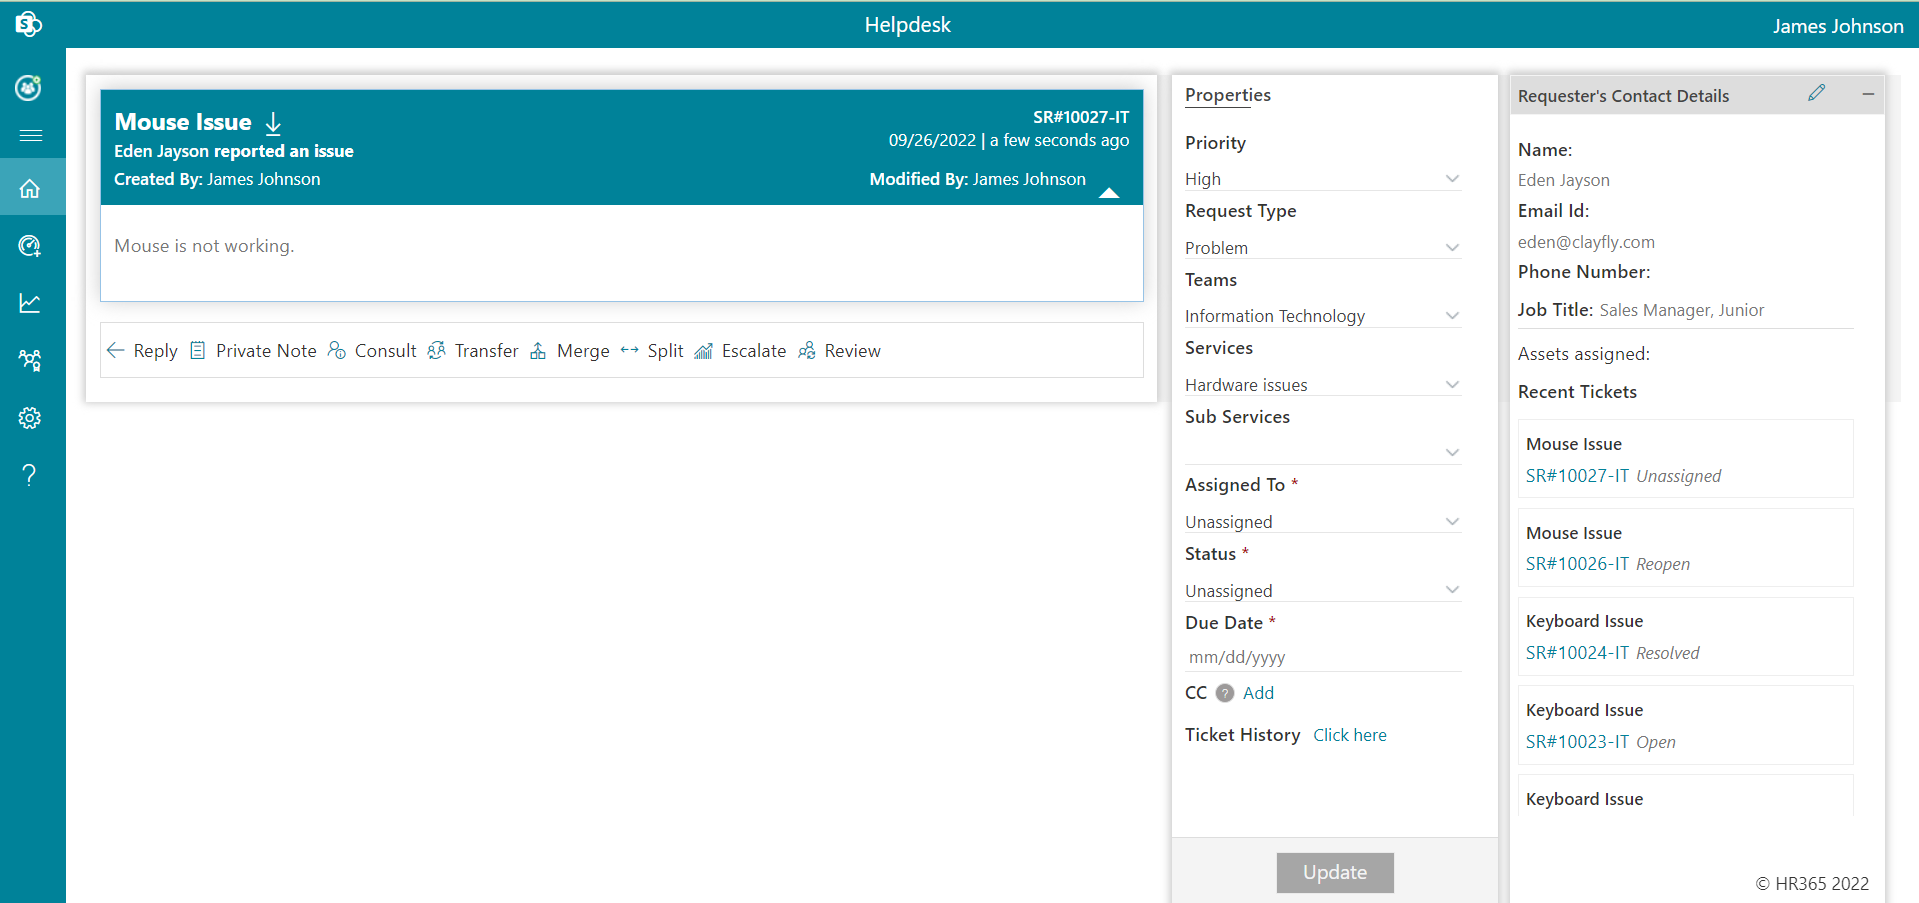
From this page you can assign and update the status of the tickets.
-
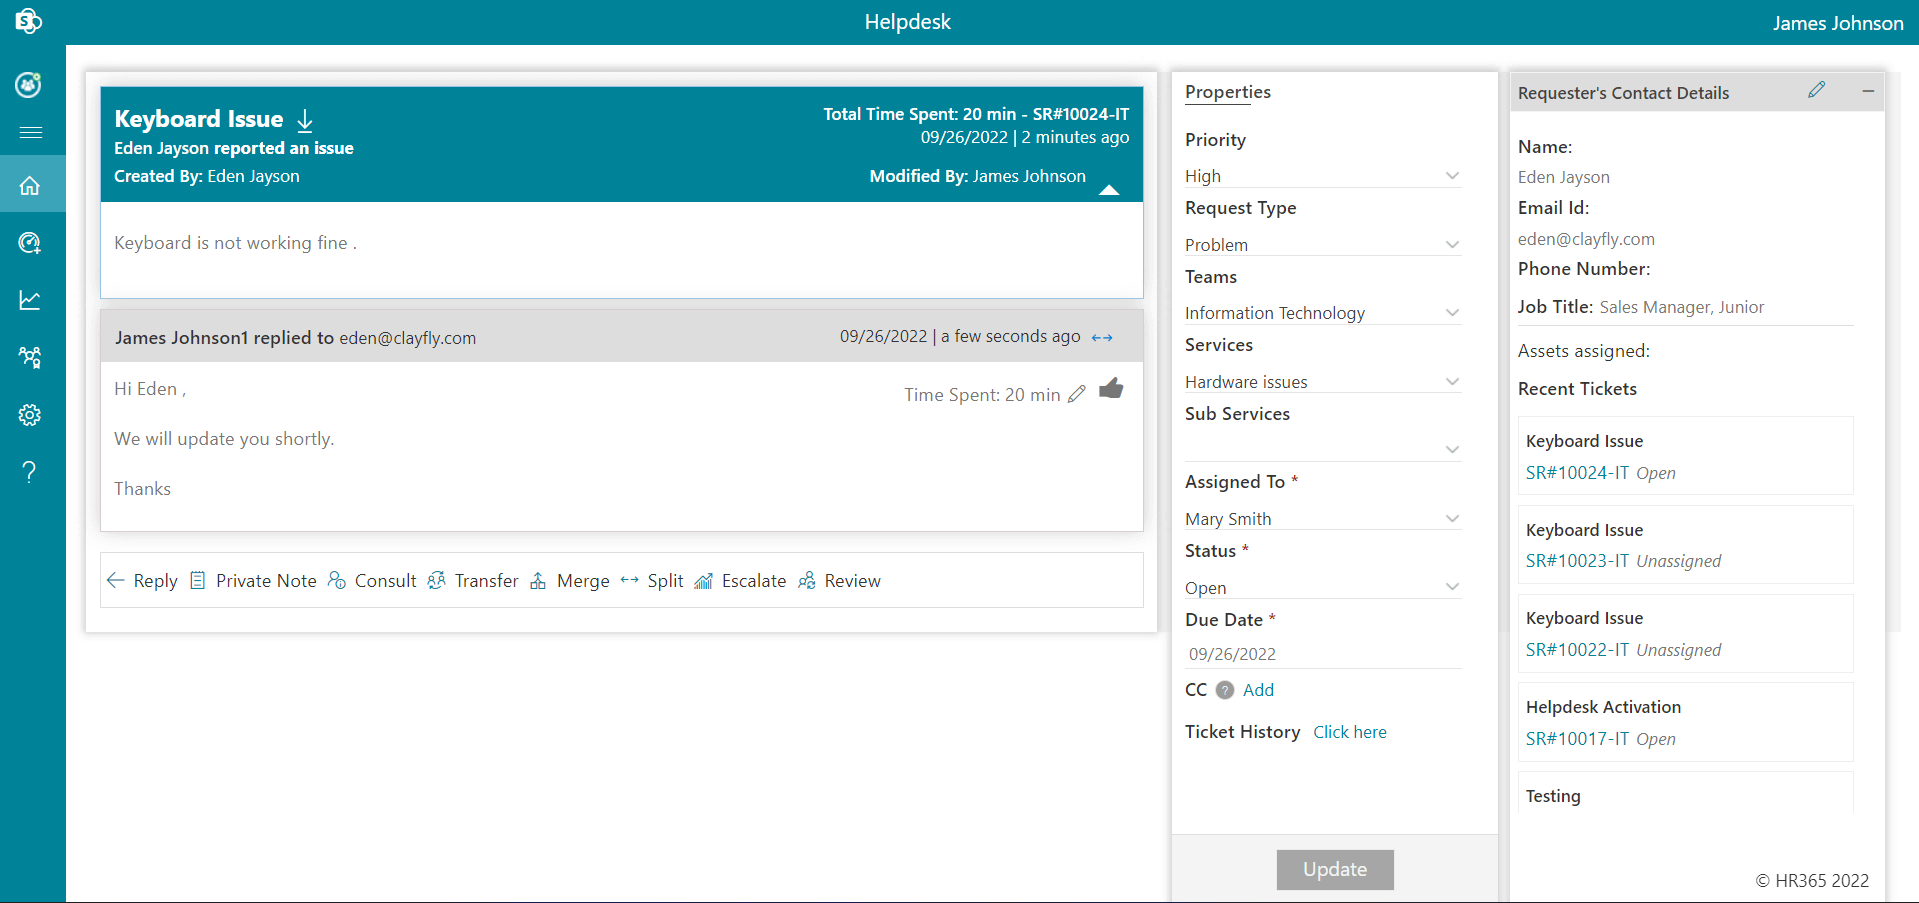
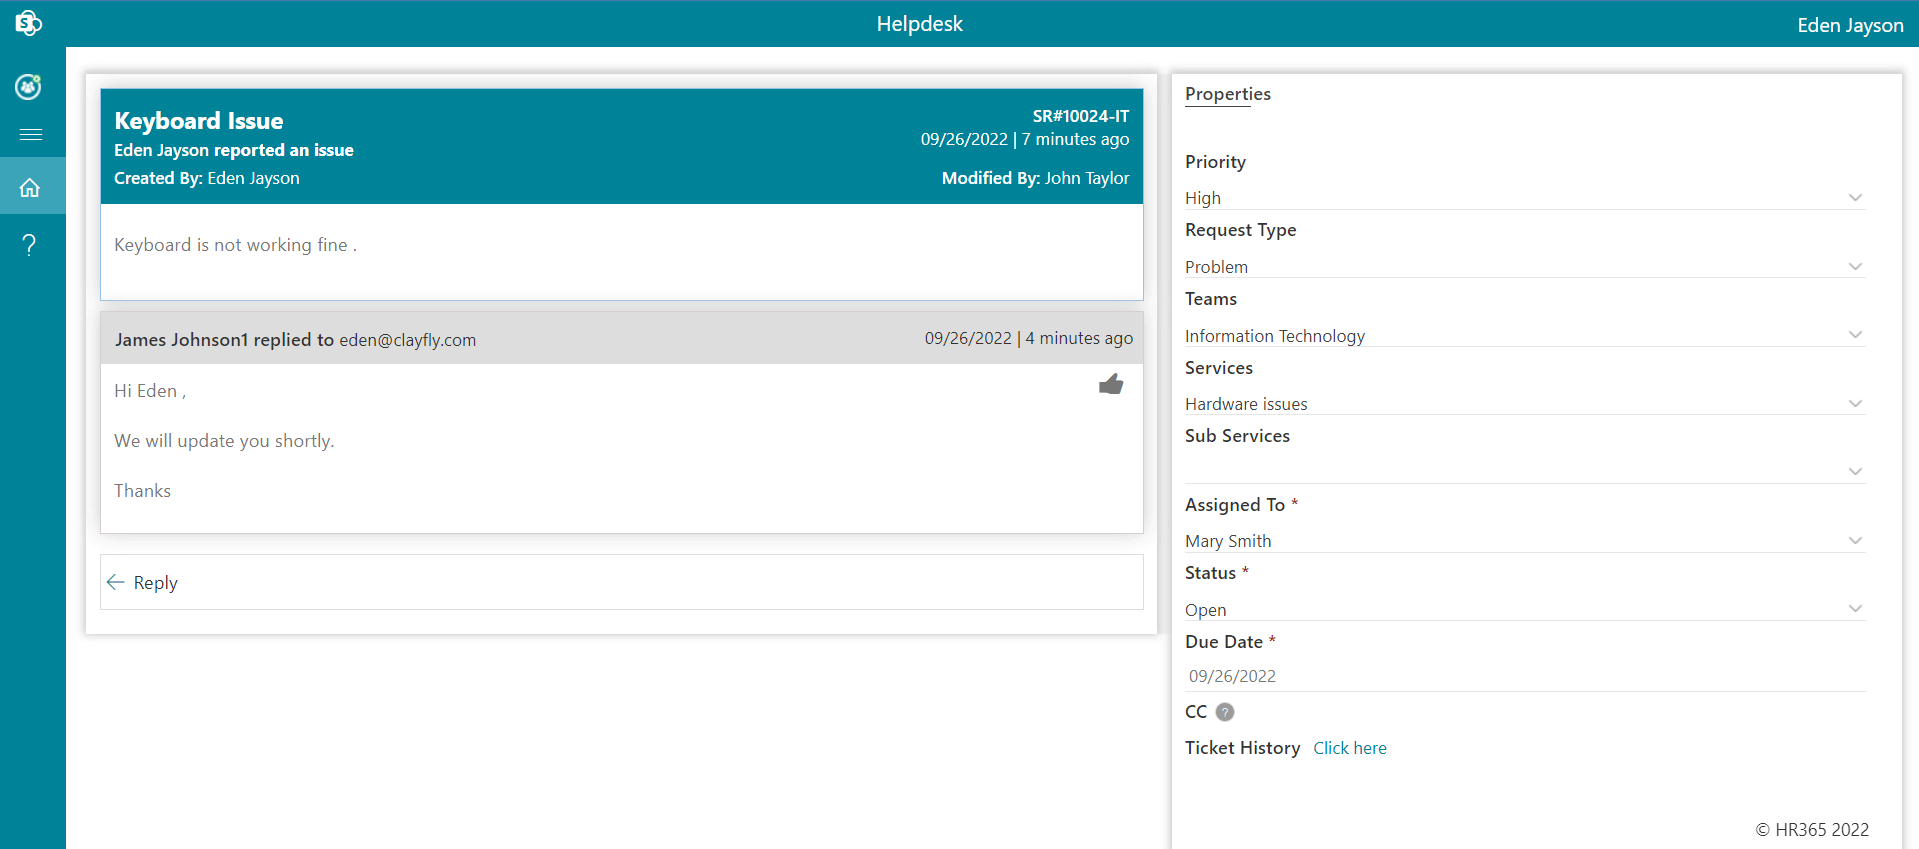
You can Reply to the tickets.
-
The user's message will be answered by an agent in a message box that opens.
-
Message from the agent will be delivered to the user.
-
You can Consult to team member before transferring of the
Tickets.

-
You can talk to the team members about allocating tickets based on
their performance.
To inform the team members, a mail will be sent when you click on Consult button.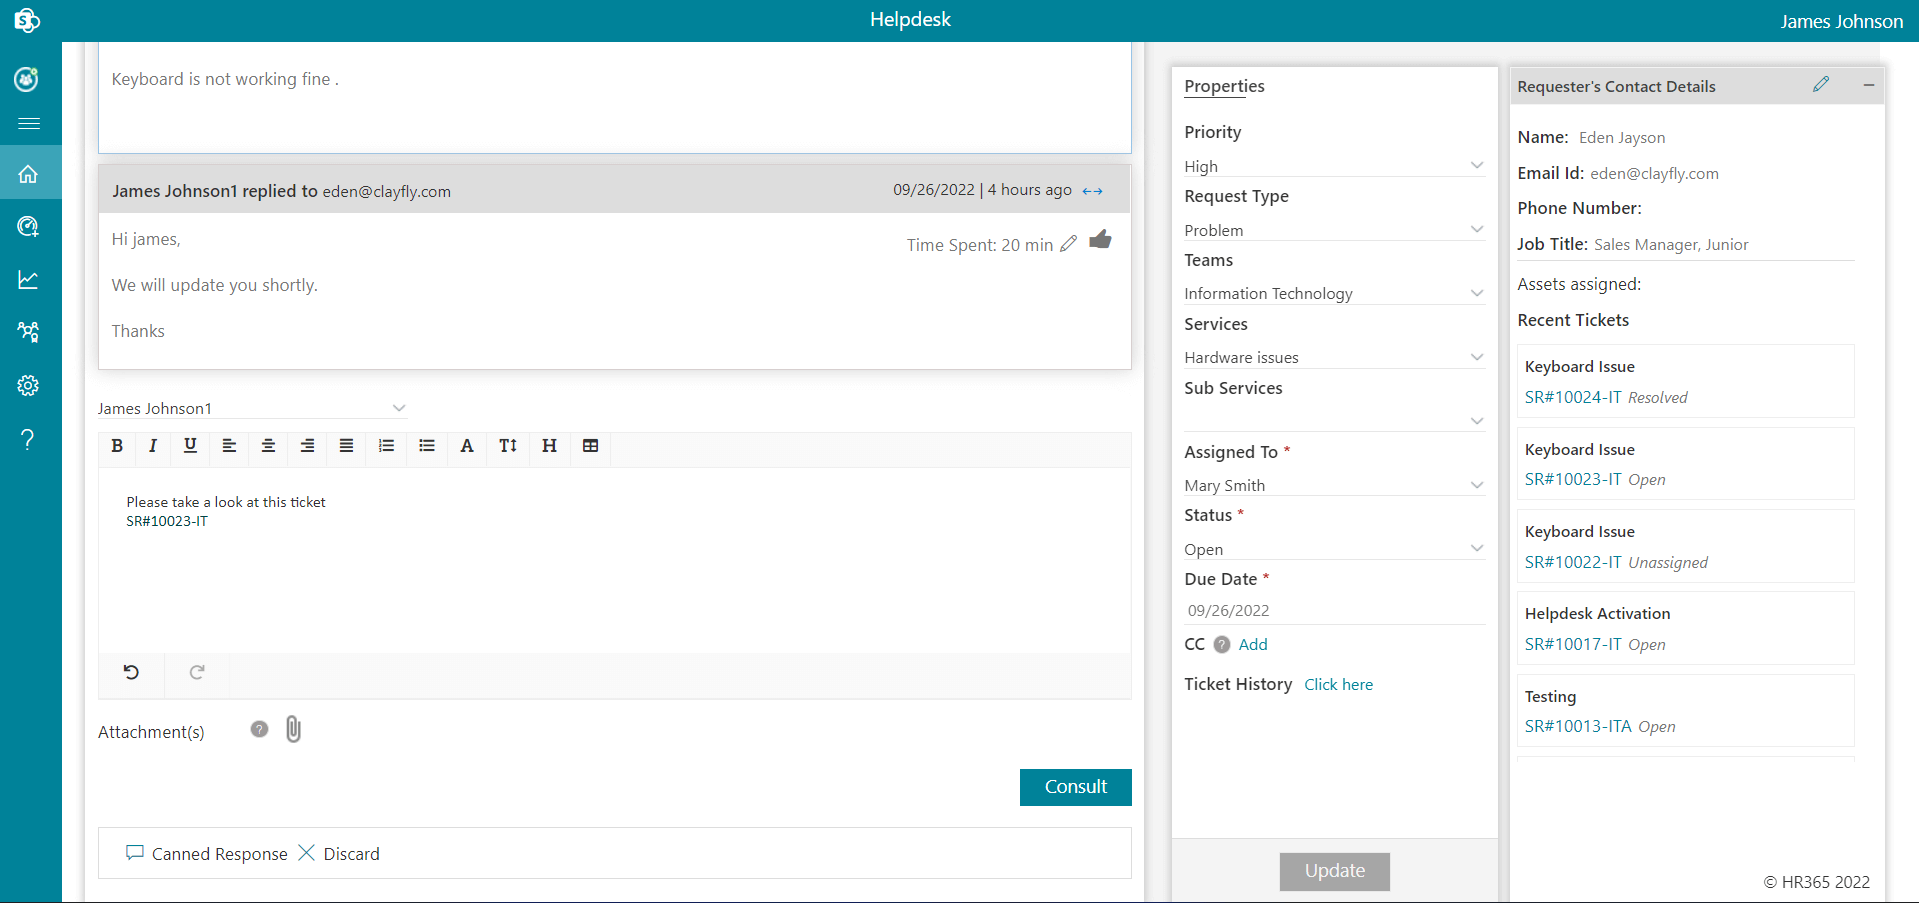
-
You can Transfer the ticket from one department to
another.You can decide to assign the ticket to a specific team
member and/or department..

-
The ticket is assigned to the team member of other team which you selected during transfer of ticket.
-
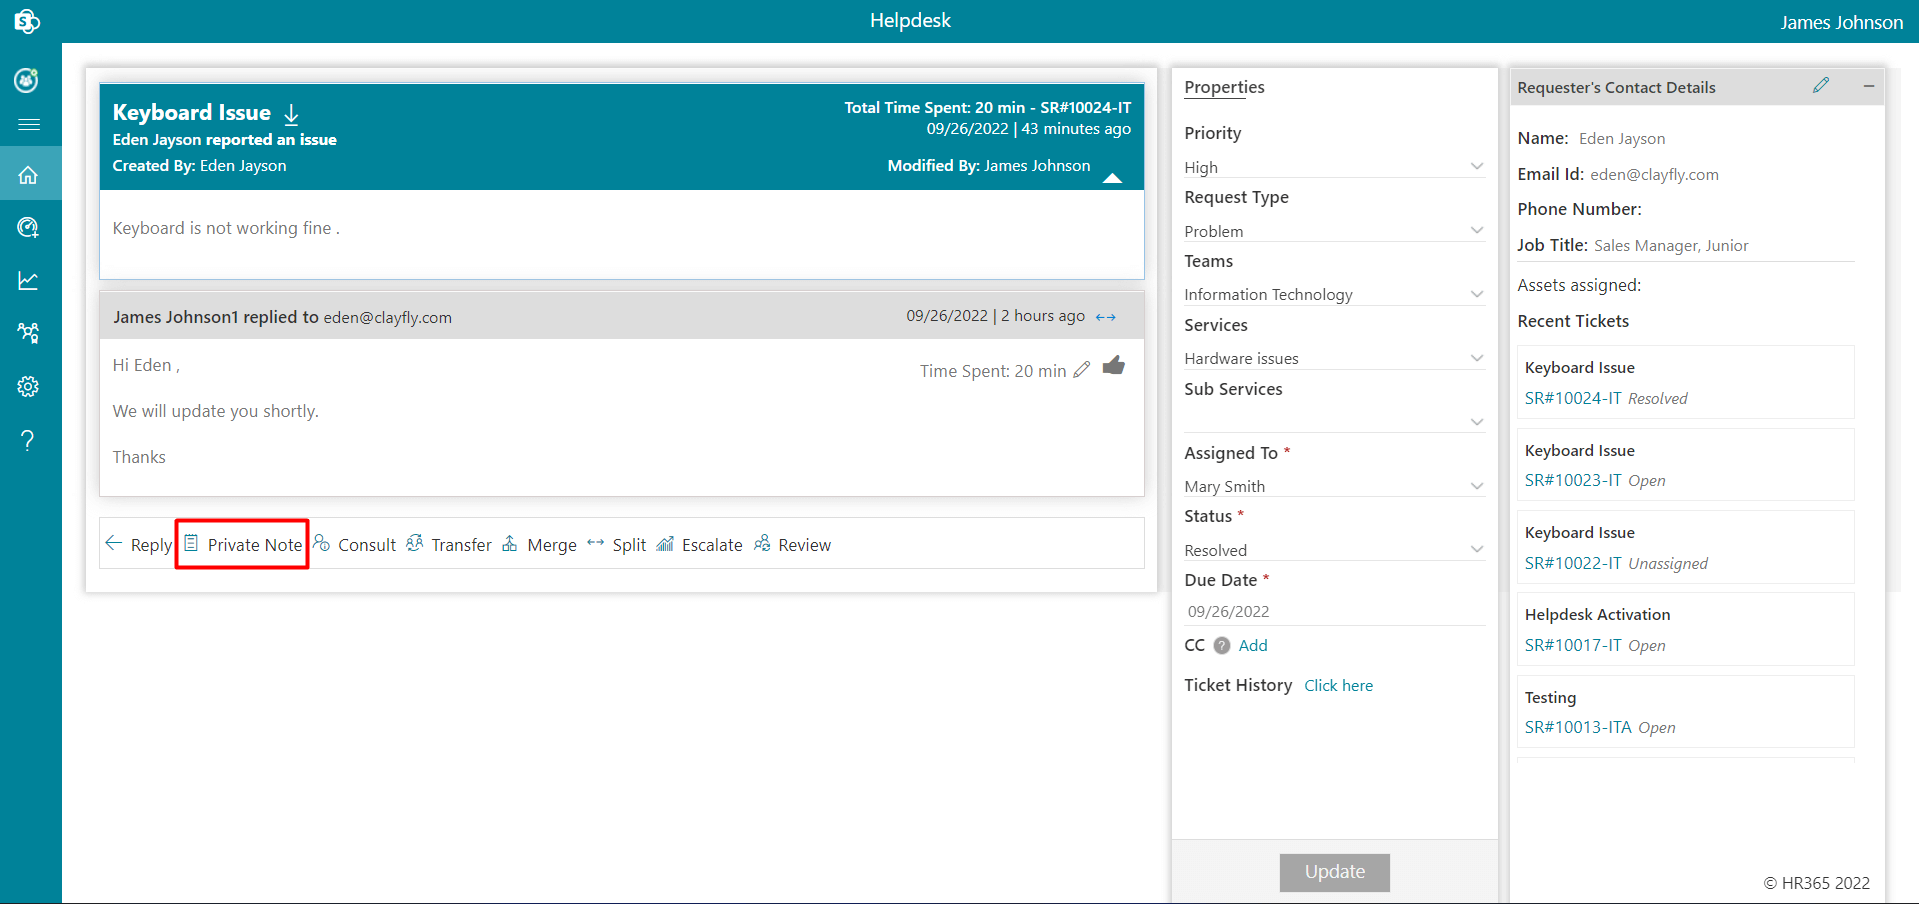
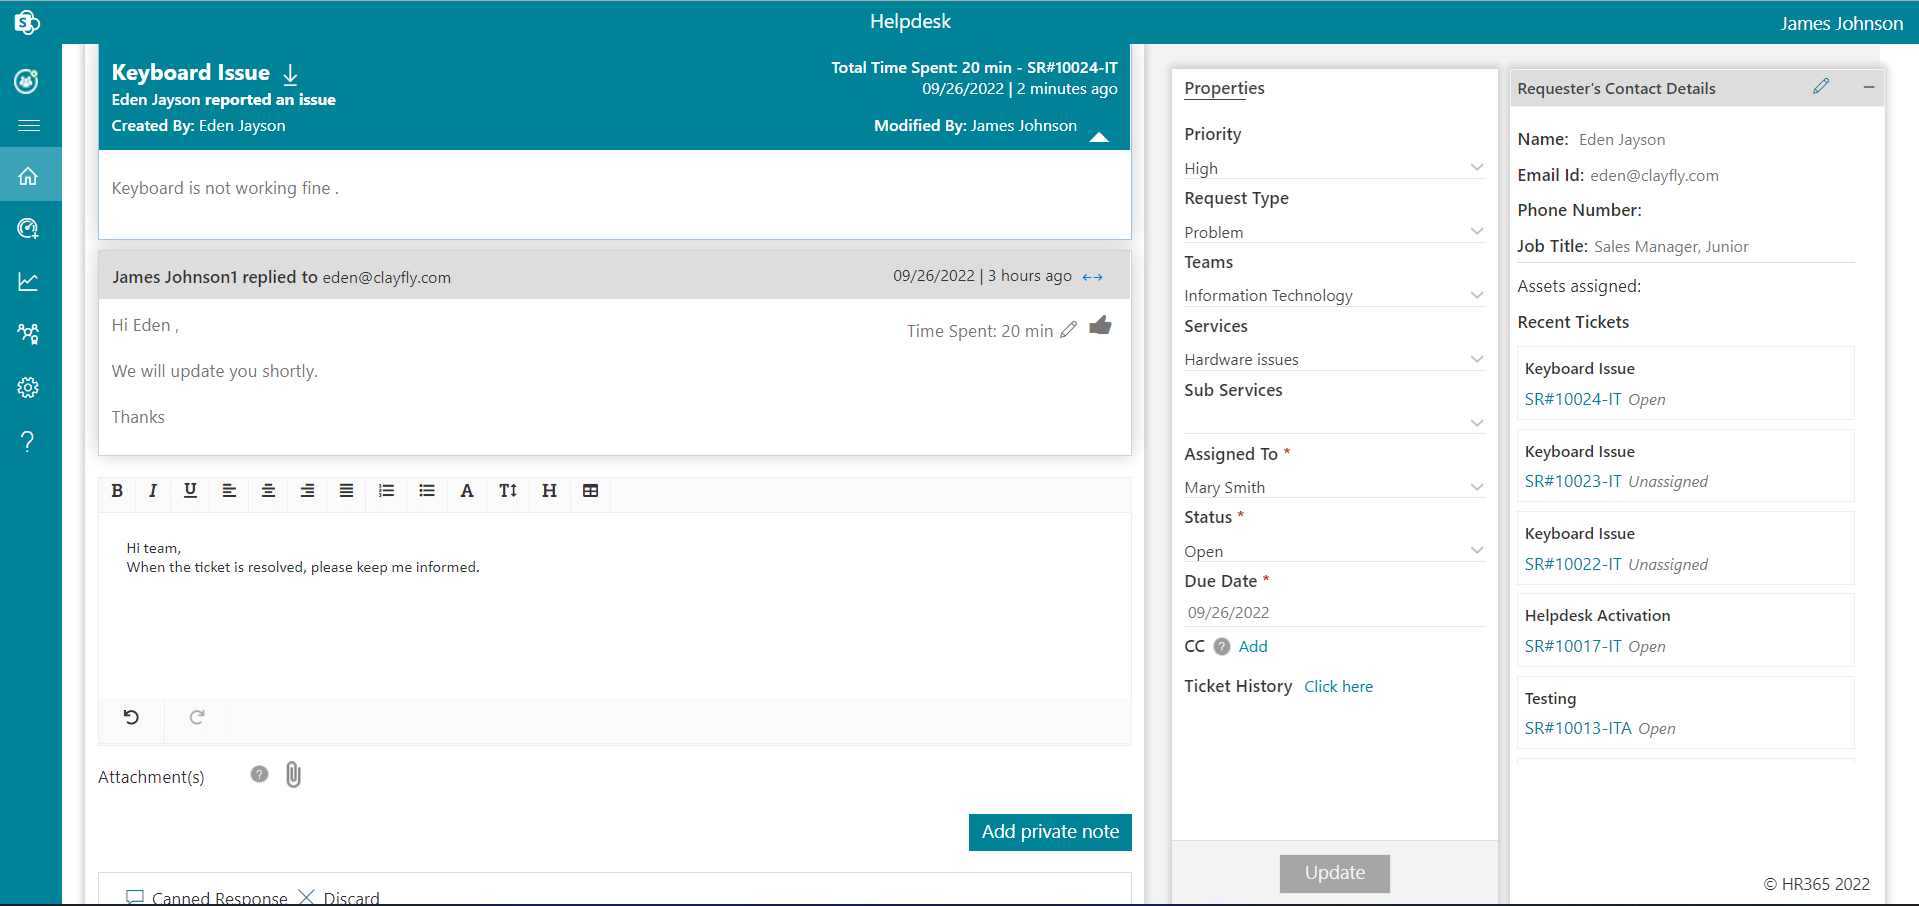
You can add Private Notes for the agent's reference.
-
Users cannot see the private notes that agents share with one
another.
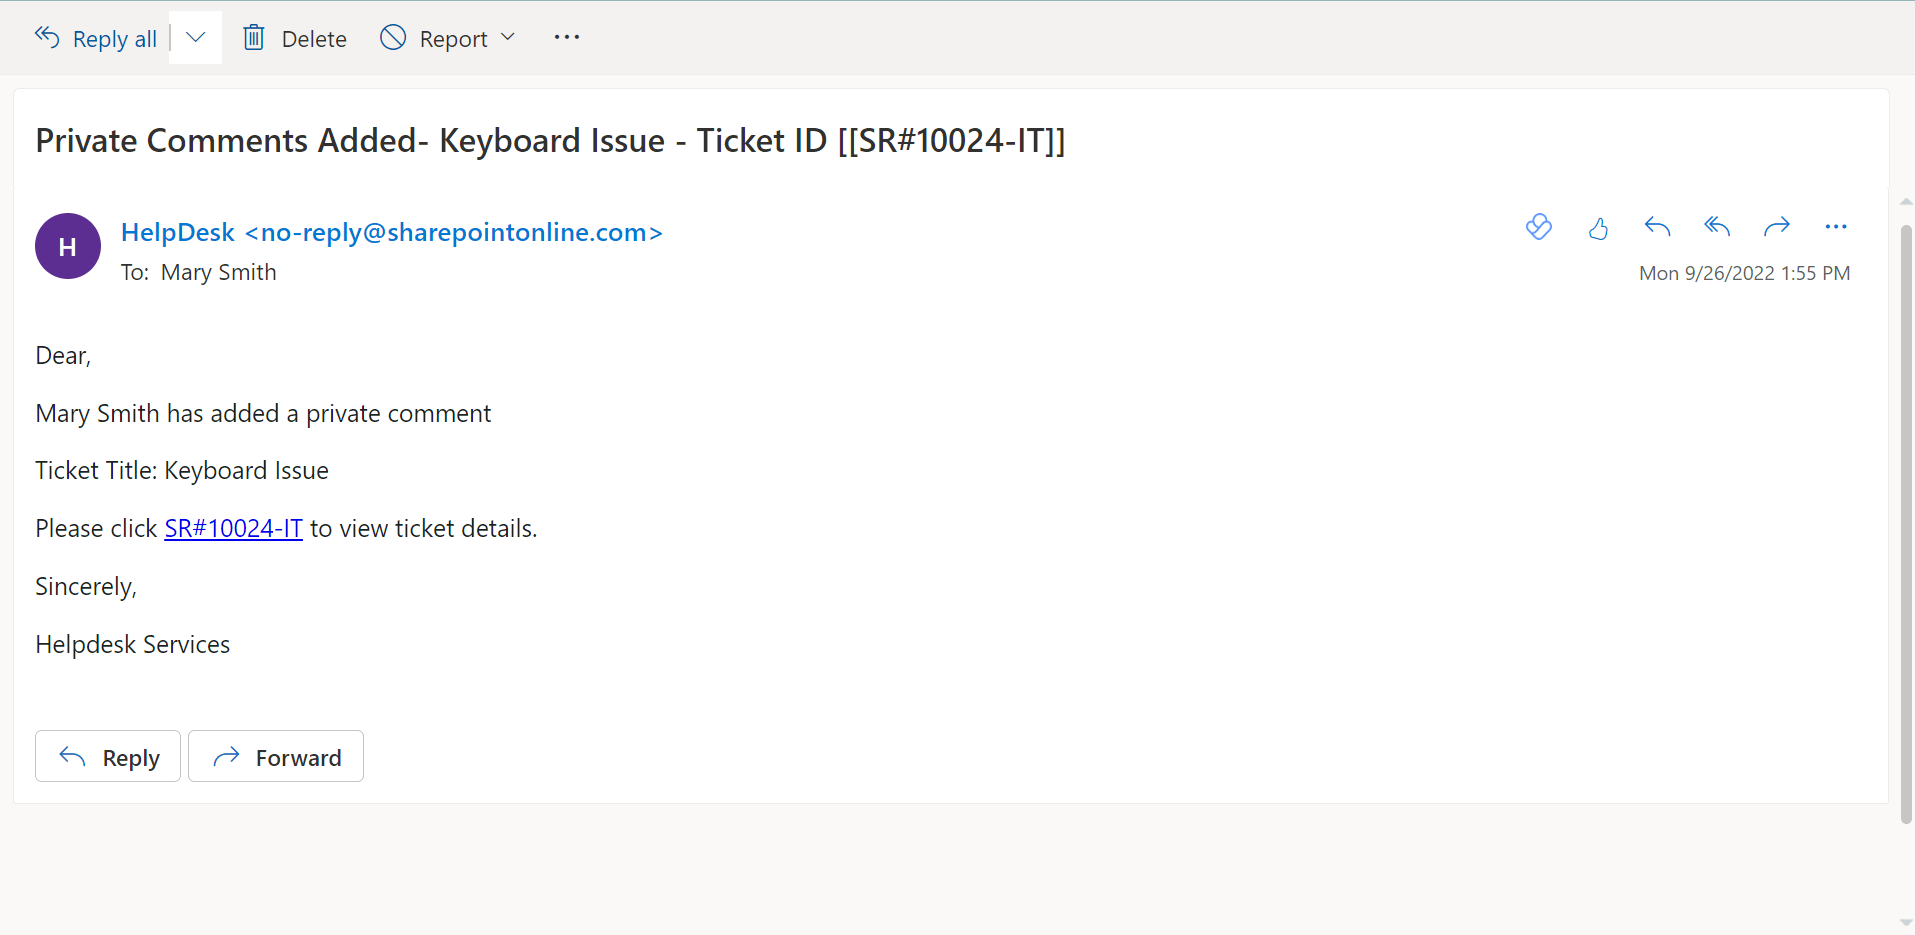
The other team member will receive a mail when you click the "Add
Private Note" button.
-
You can see that the message between the agents is private in this
instance.
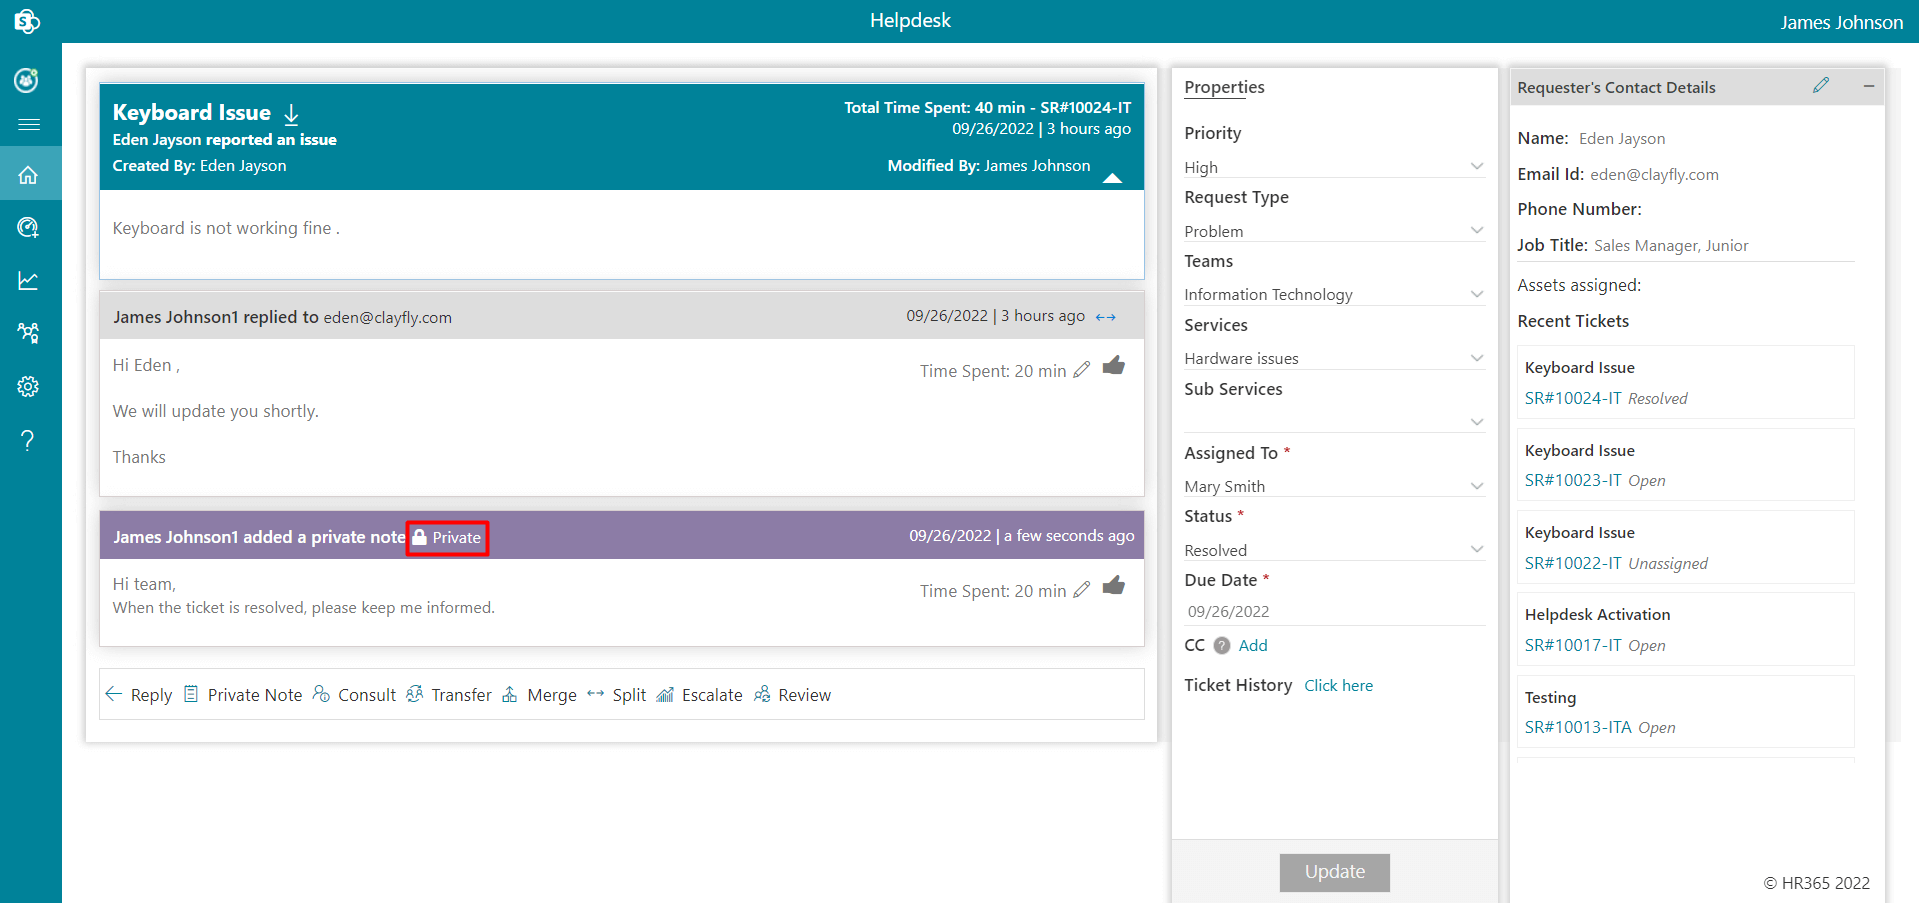
- A ticket assignee is get notified whenever a team member (agents and supervisor) adds a private comments.
-
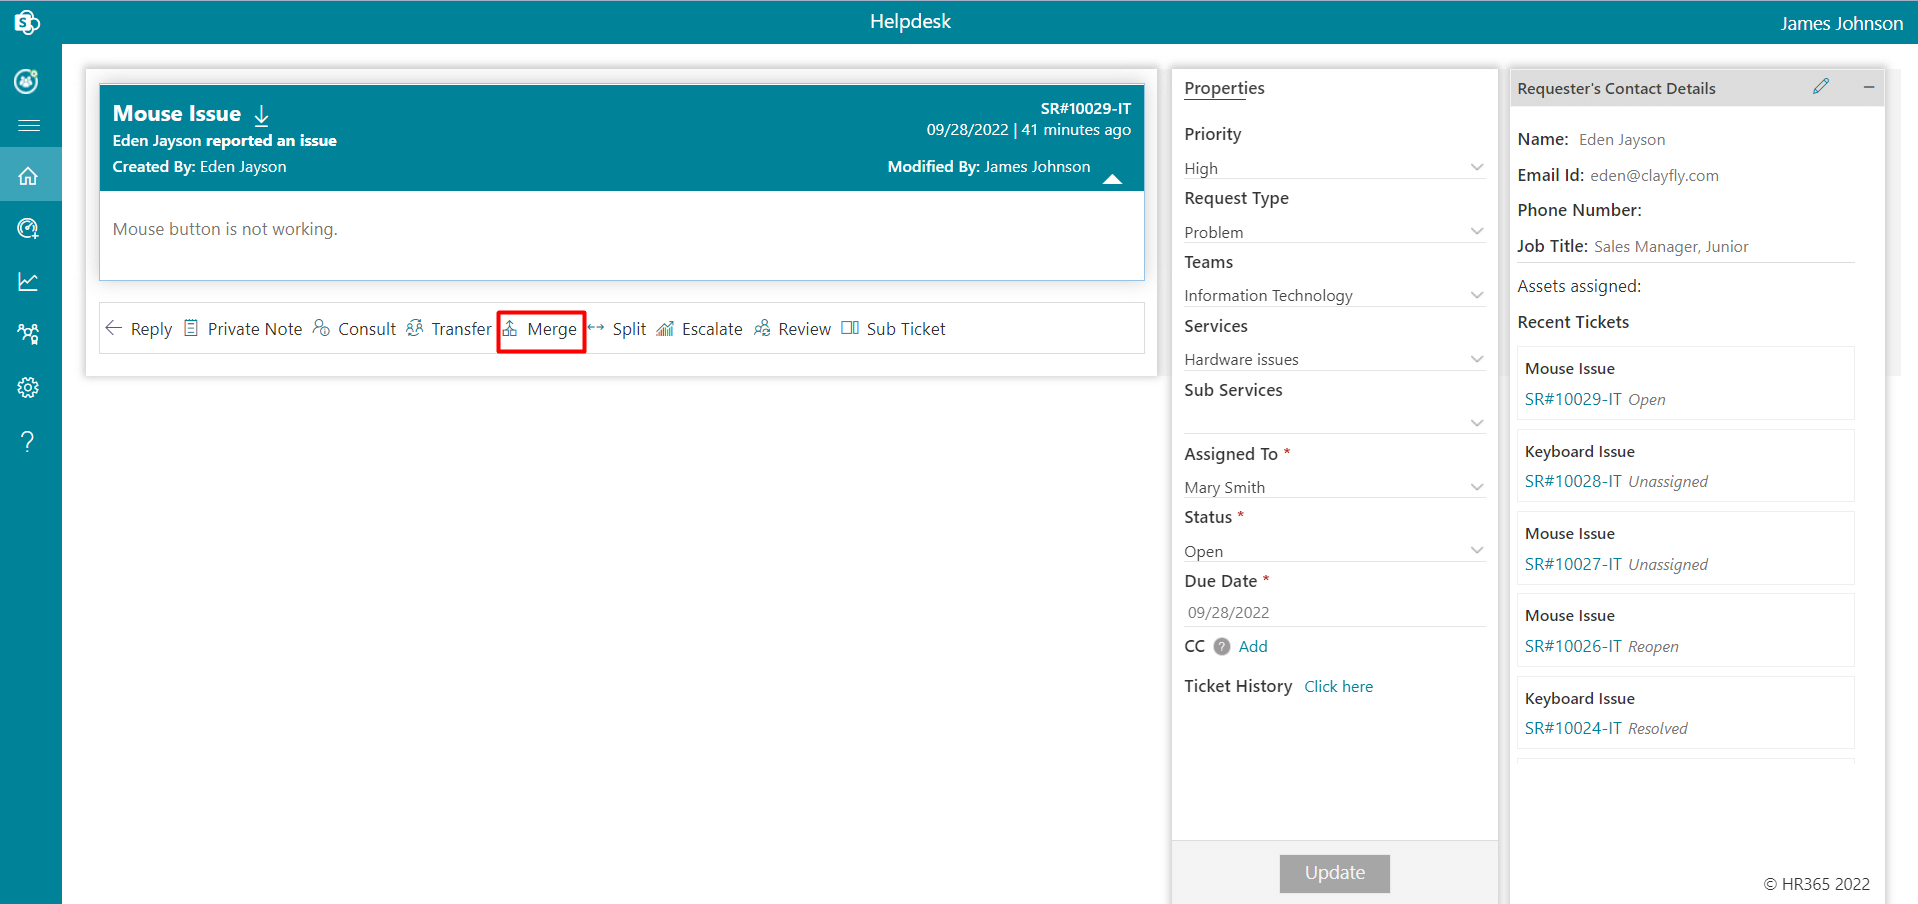
Go to home page and click the Ticket ID to open the comment page.
-
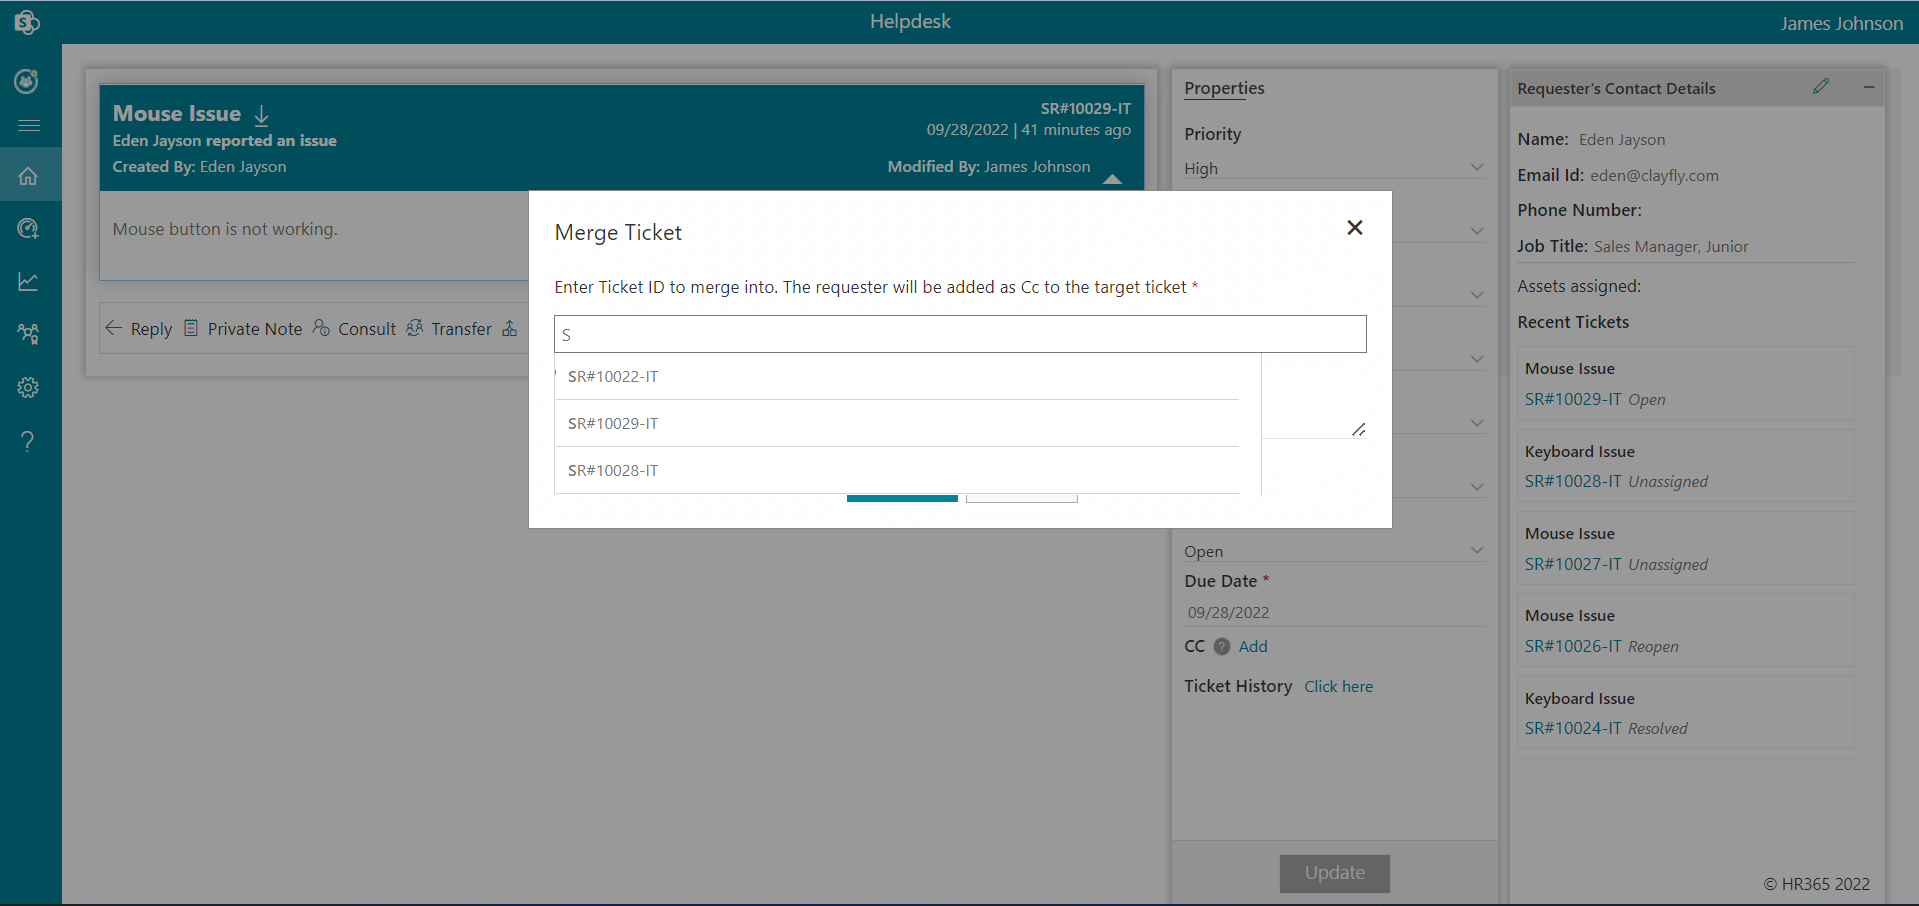
On the comment page, click the Merge button, which displays a pop-up.
-
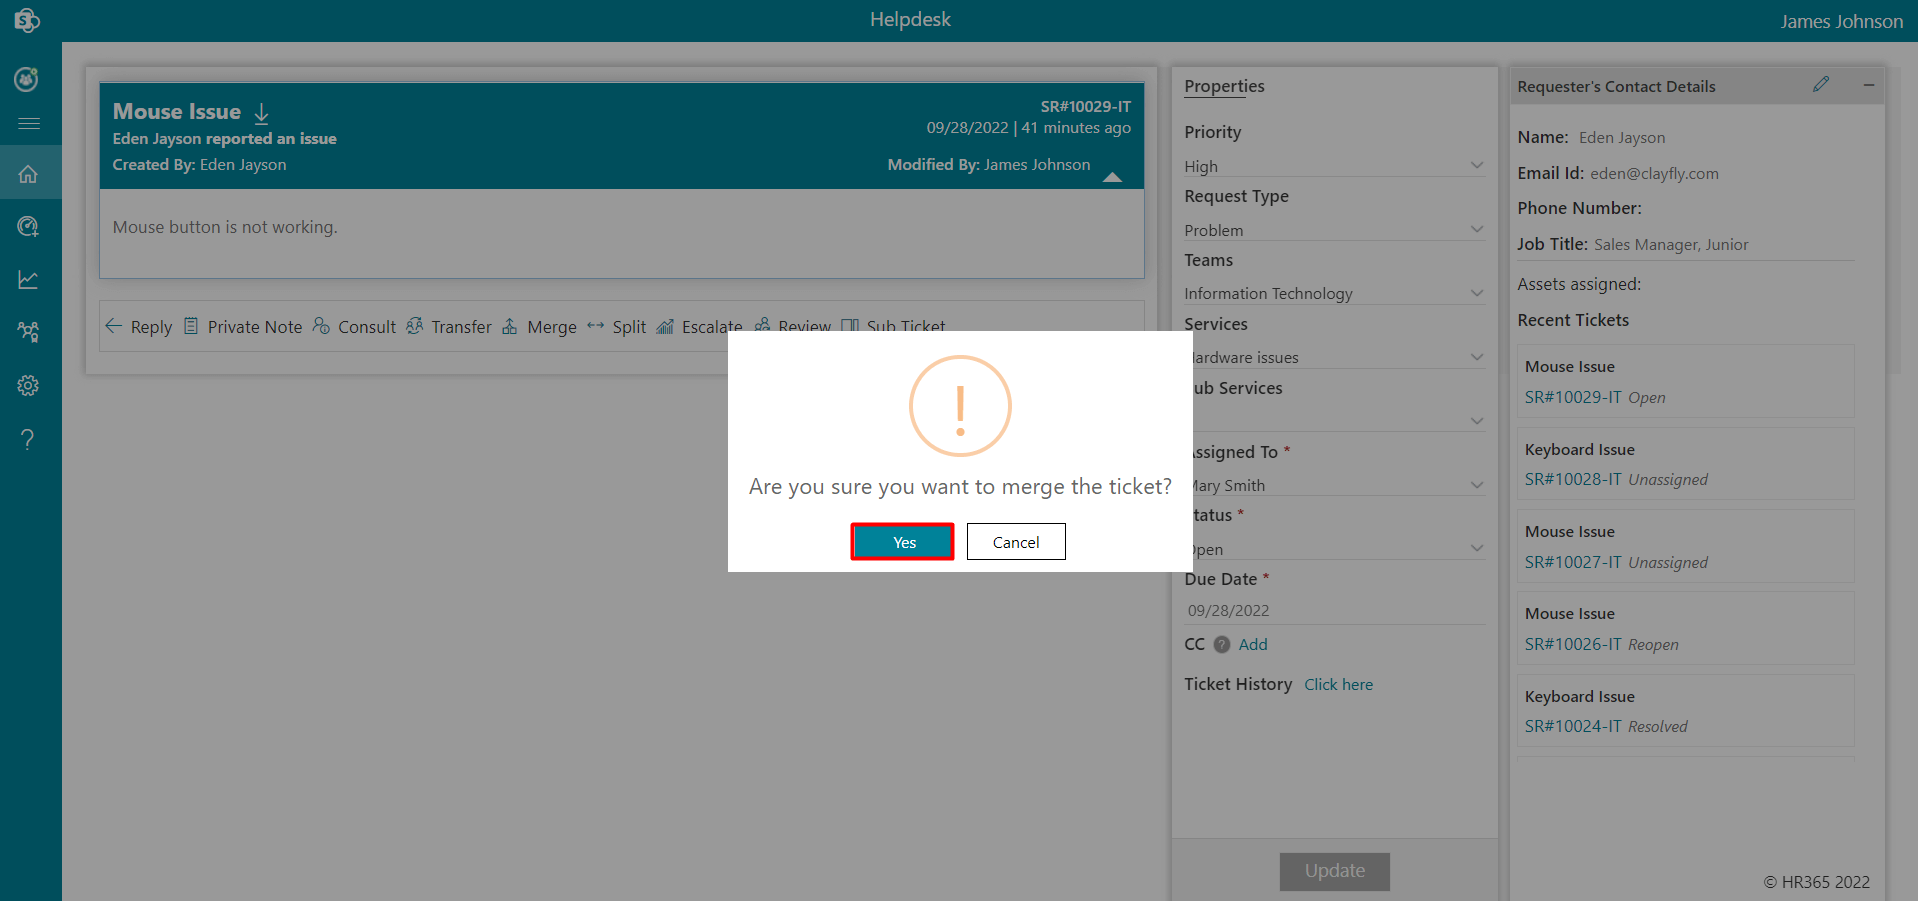
Click the Yes button, which displays merge to pop-up.
-
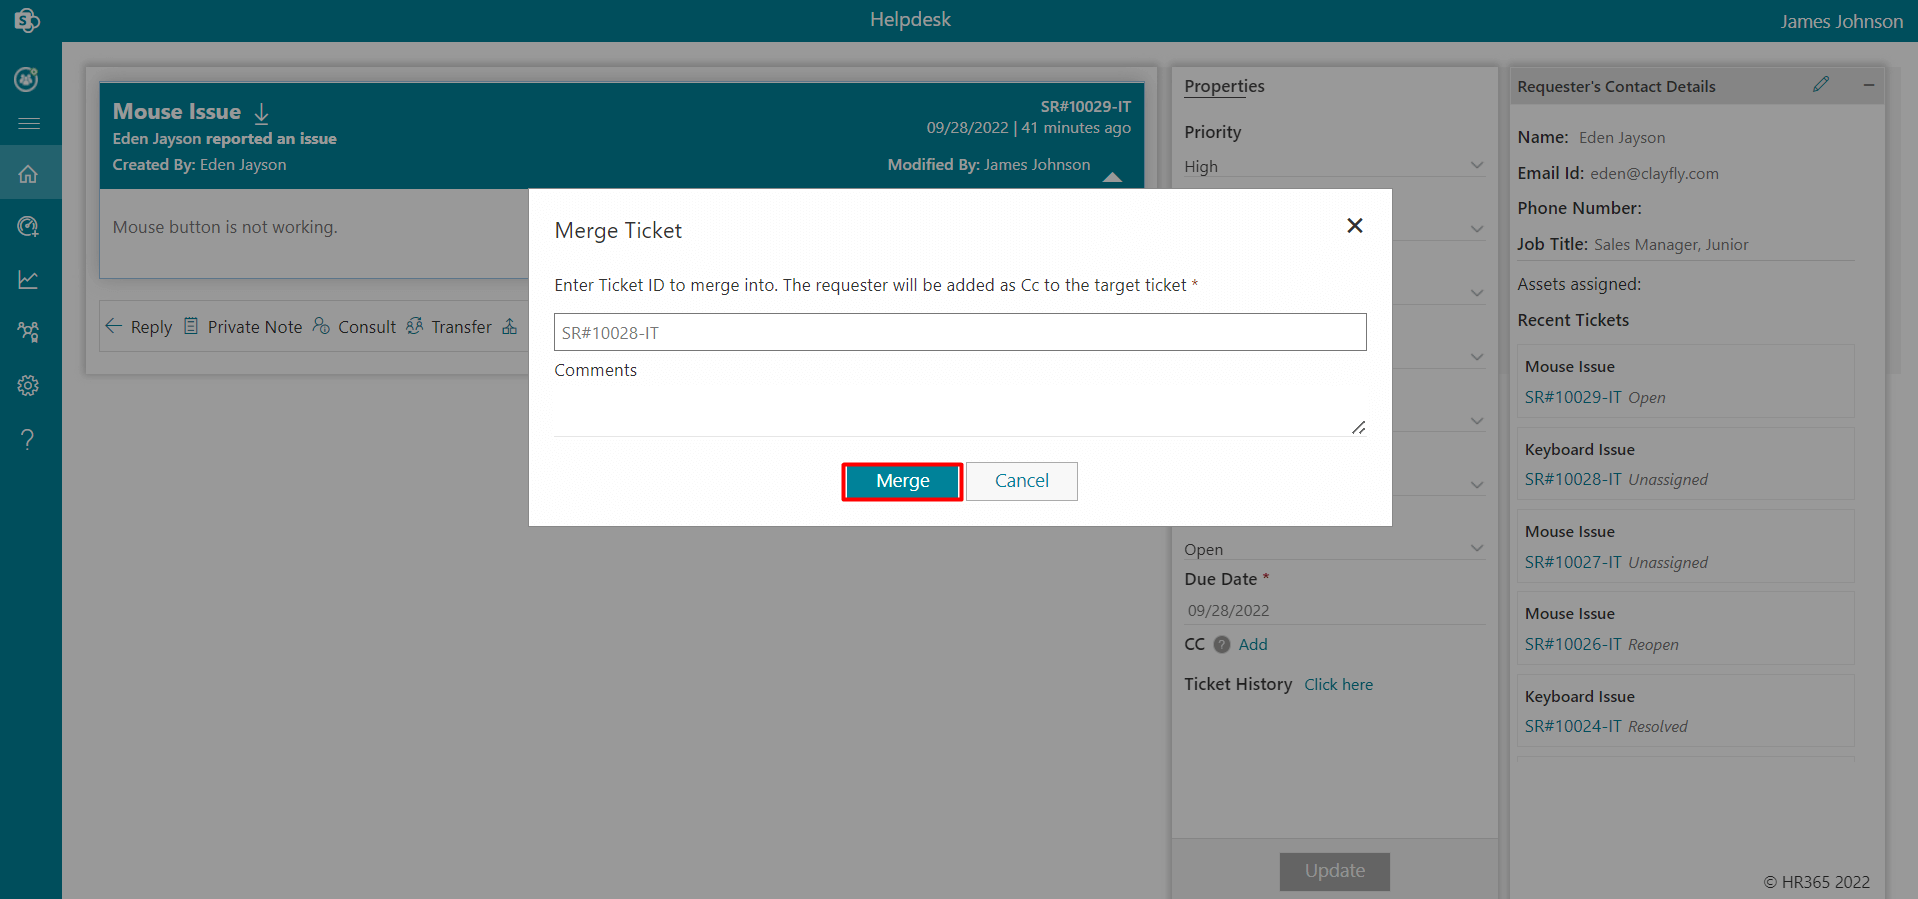
Enter the Ticket ID to merge into.
-
Click the Merge button.
-
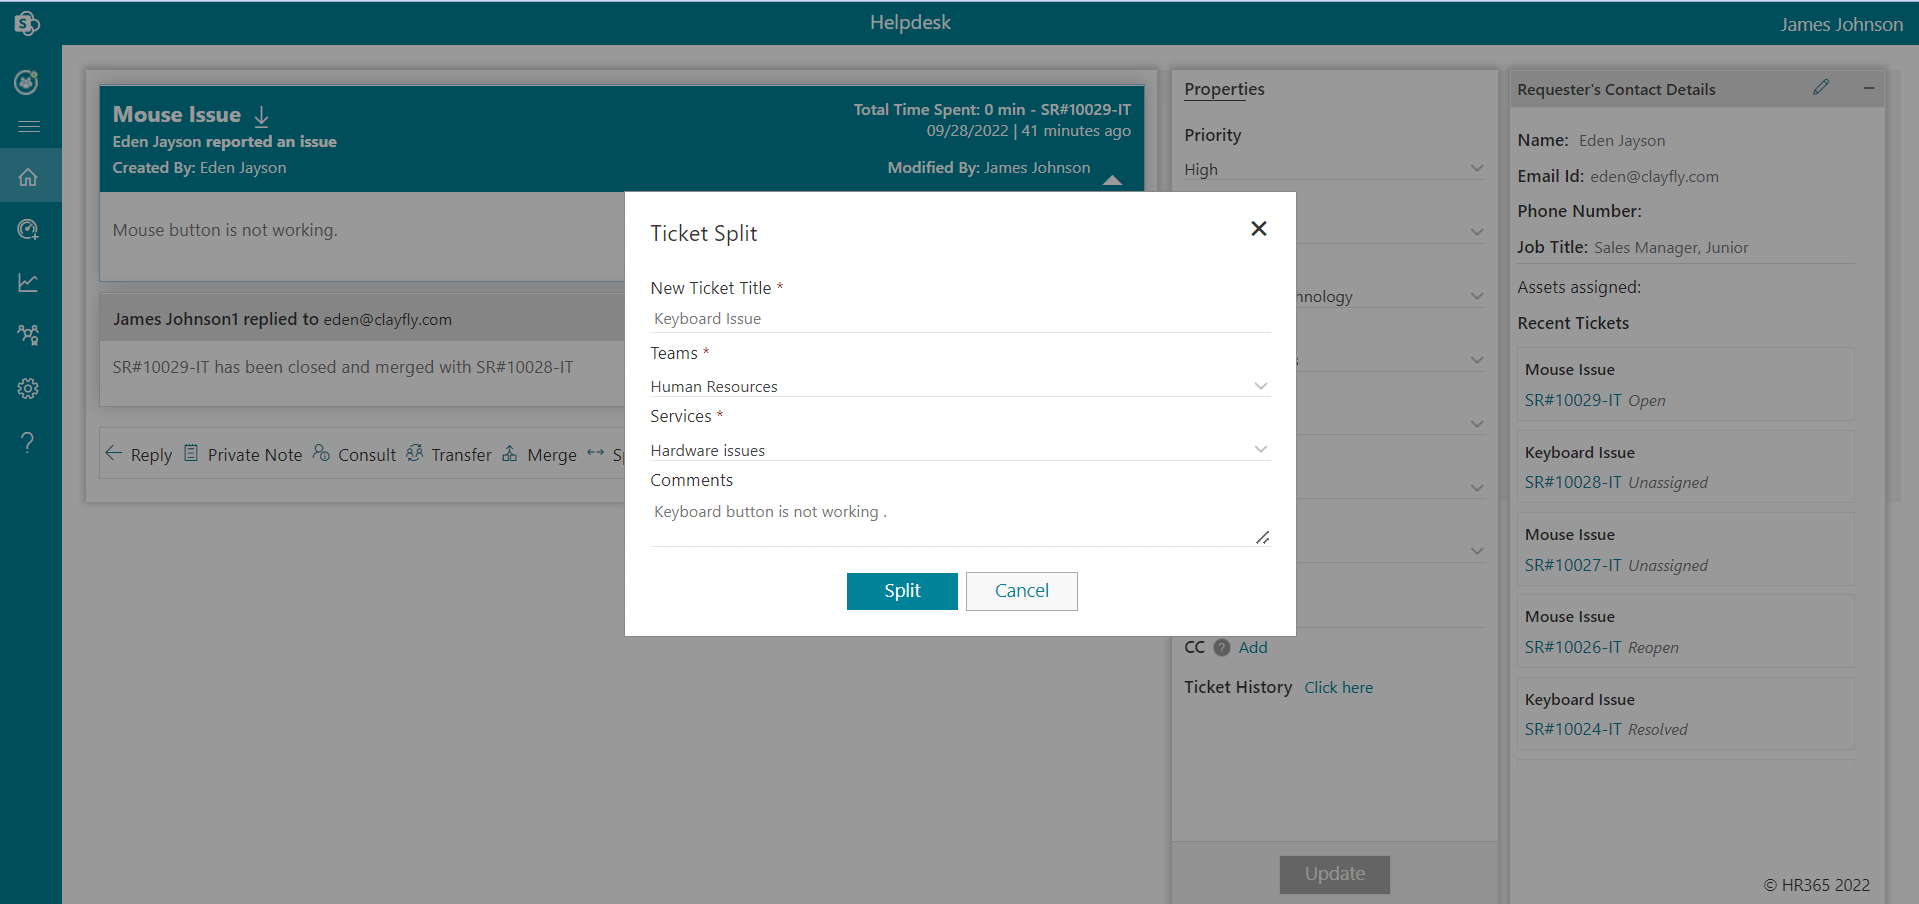
Go to home page and click the Ticket ID to open the comment page.
-
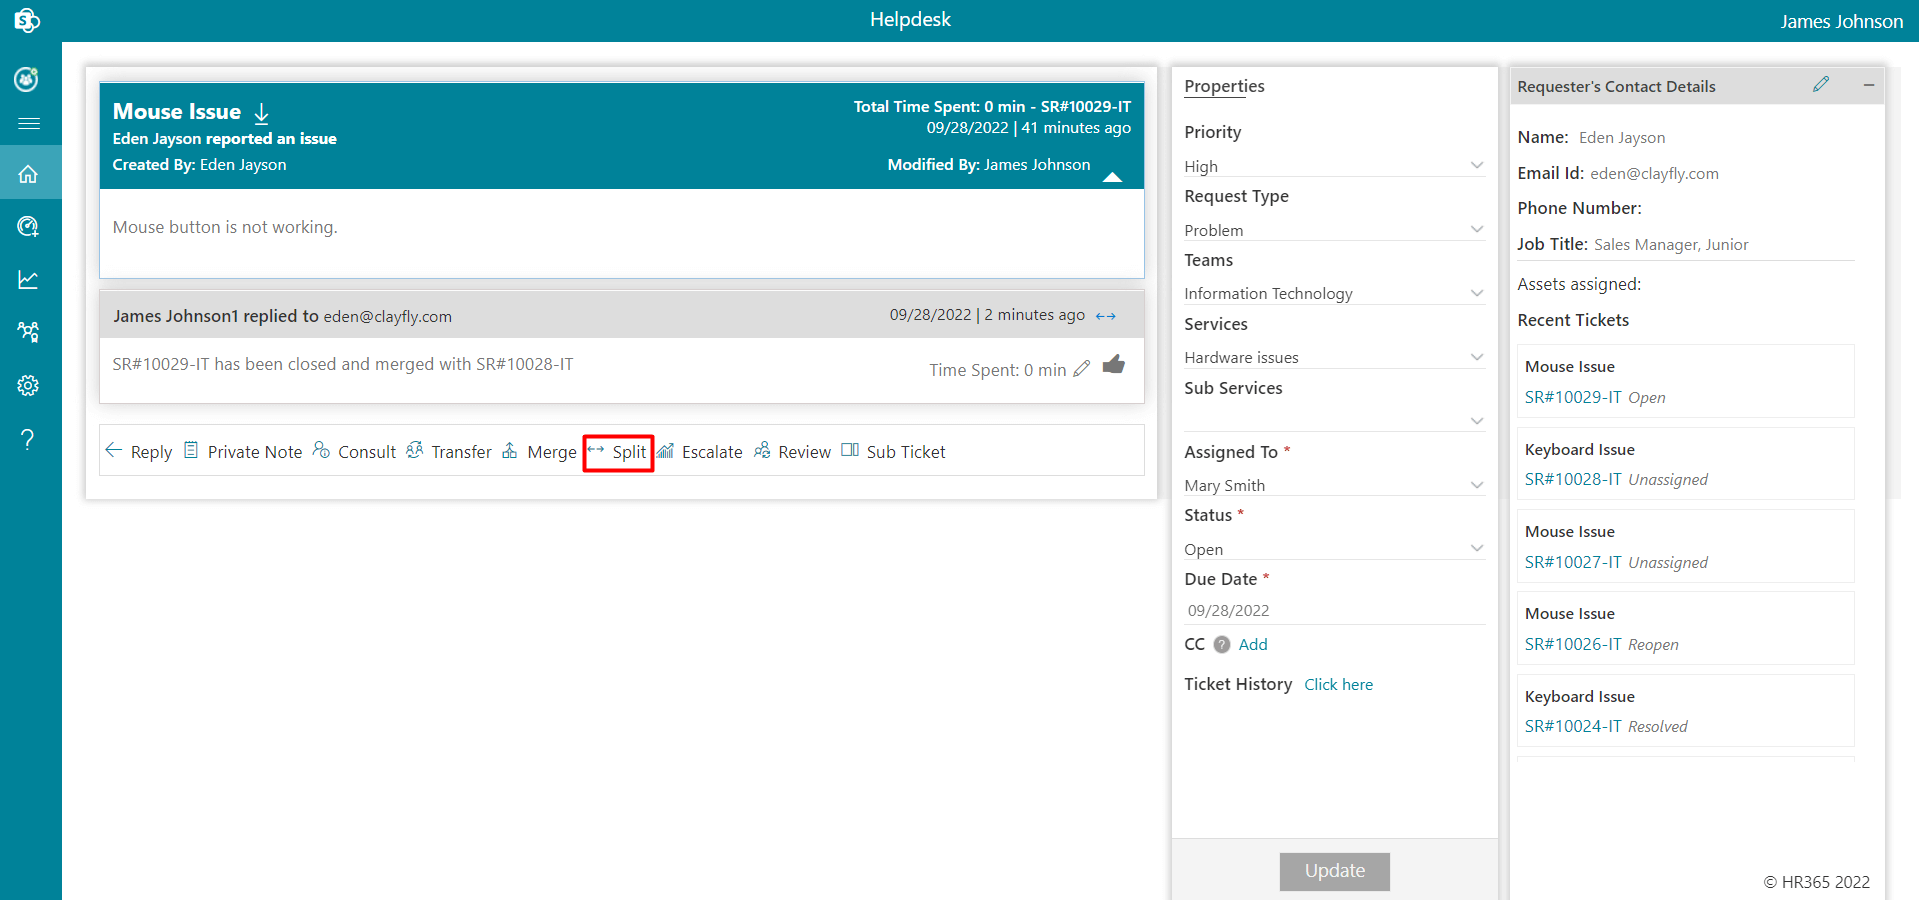
On the comment page, click the Split button, which displays a pop-up.
-
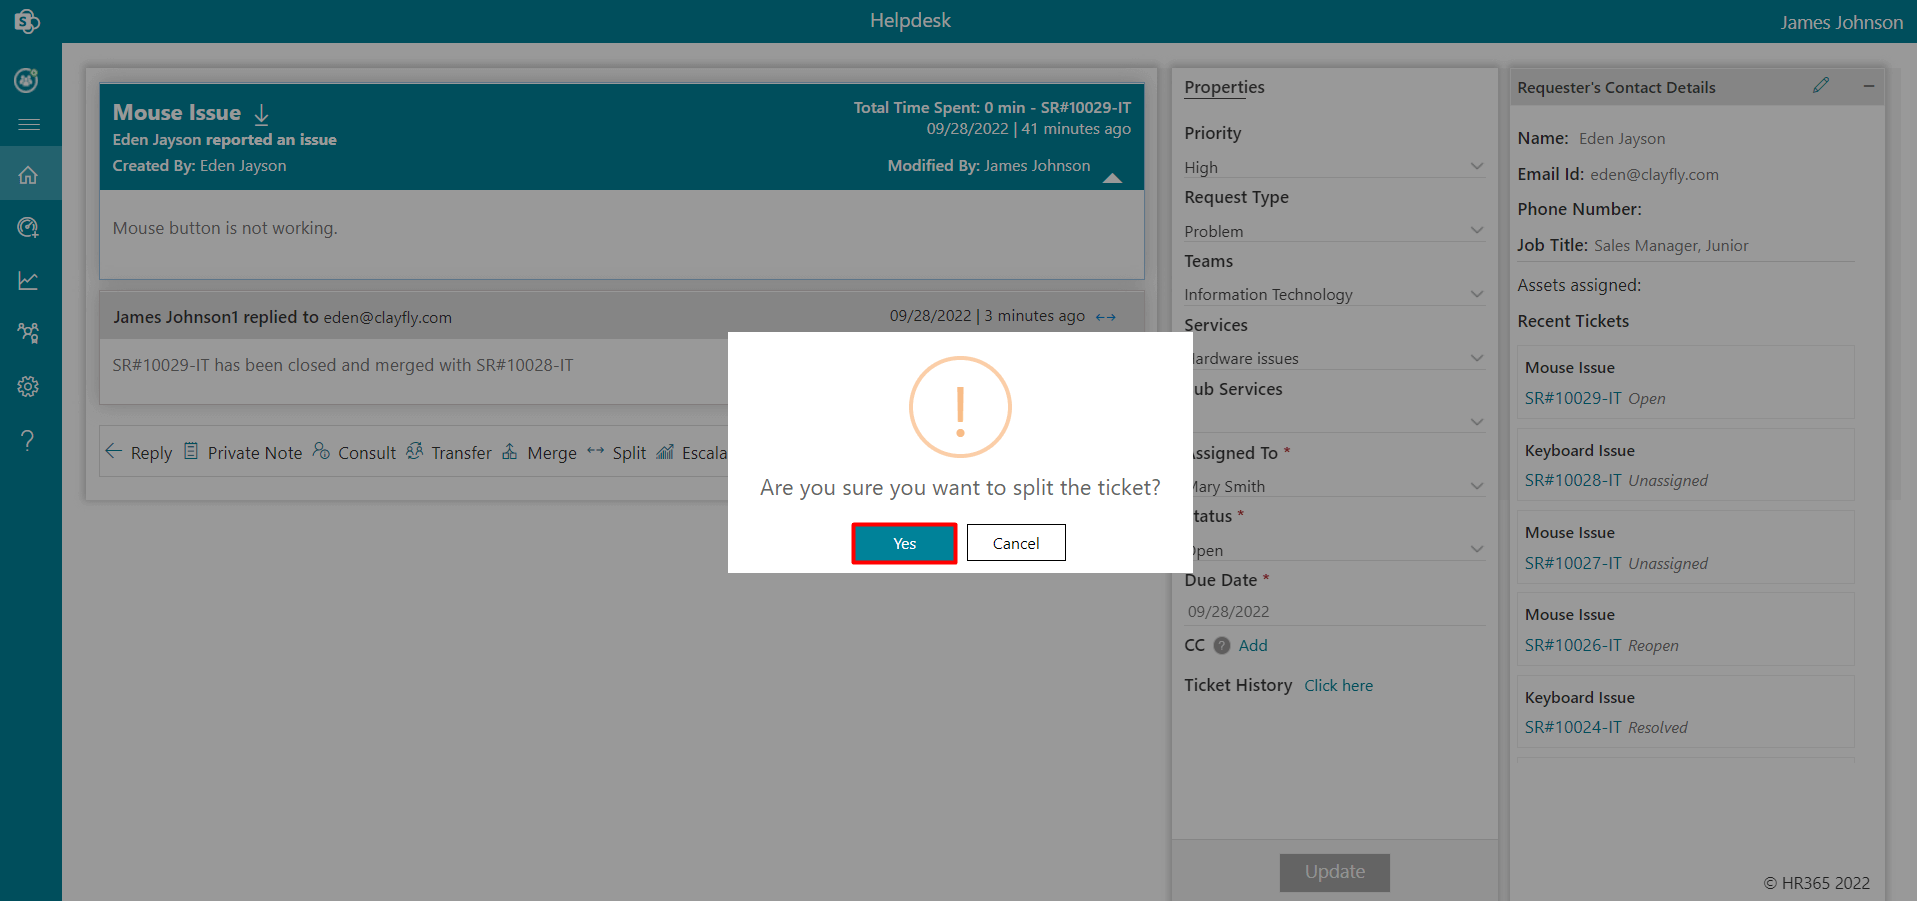
Click the Yes button, which displays Ticket Split to pop-up.
-
Enter New Ticket Title and comments, select Teams and Services to merge into.
-
Click the Split button.
-
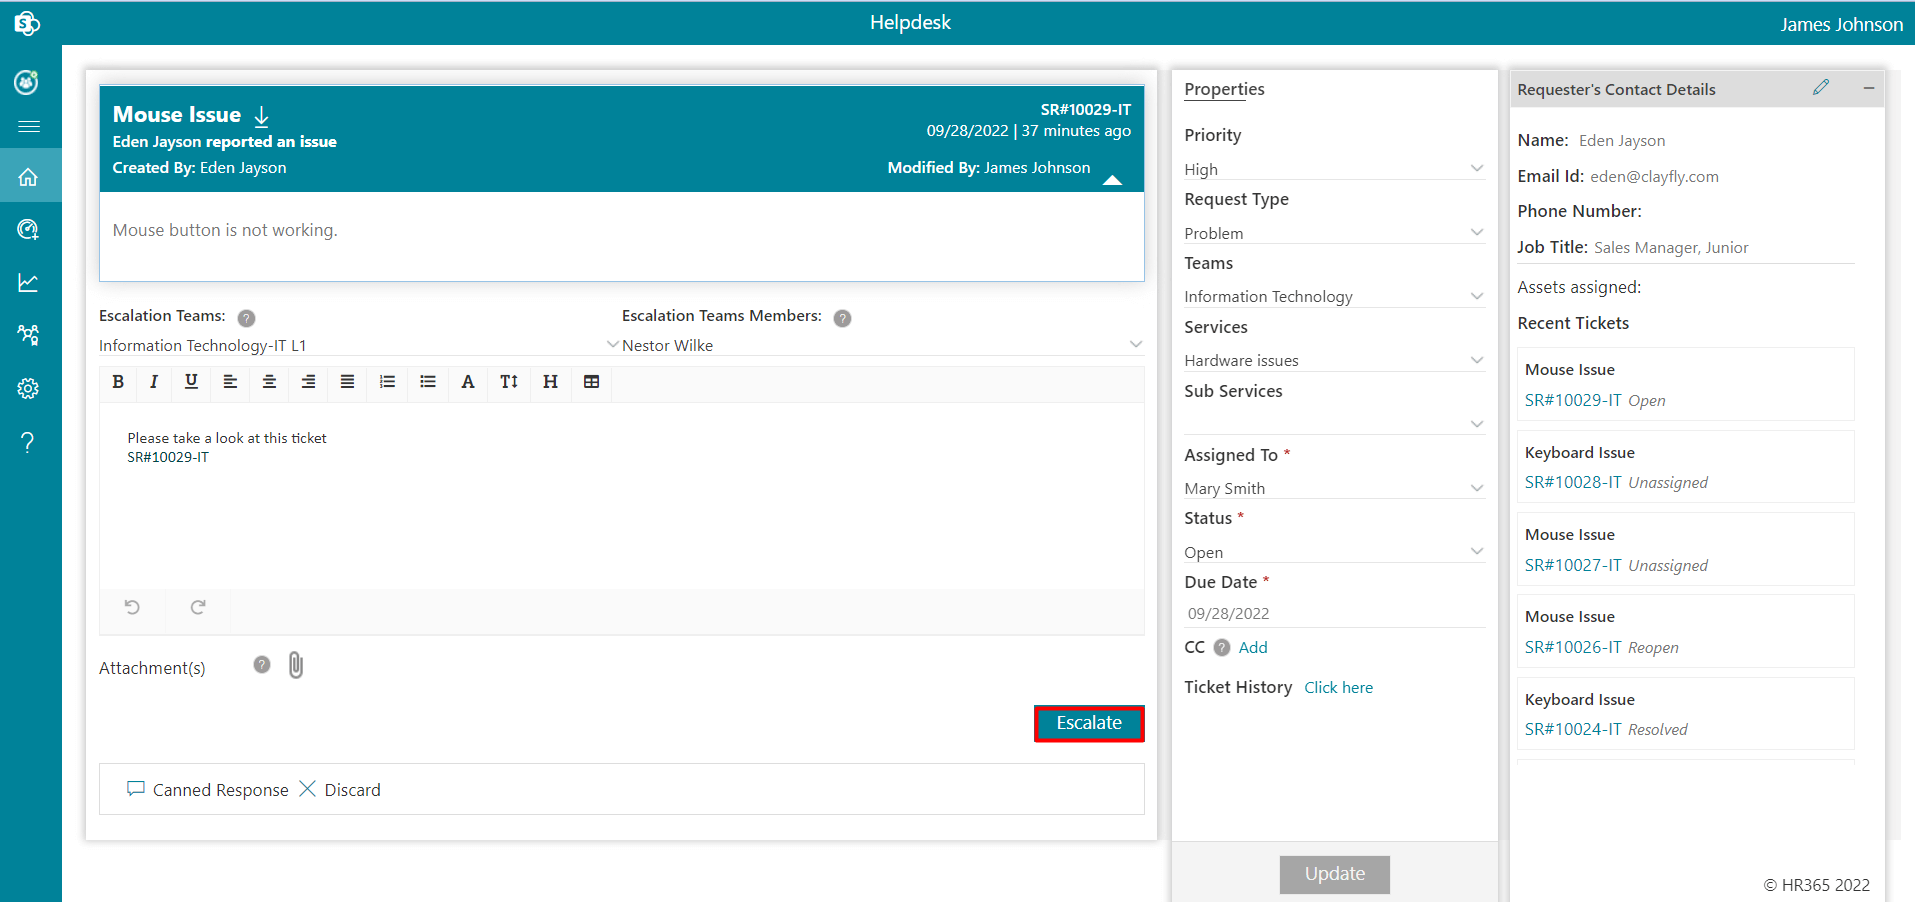
Go to home page and click the Ticket ID to open the comment page.
-
On comment page, click the Escalate button, this displays comment box to write the comments.
-
Select Escalation Teams and Escalation Teams Members.
-
Click the Escalate button.
-
Go to home page and click the Ticket ID to open the comment page.
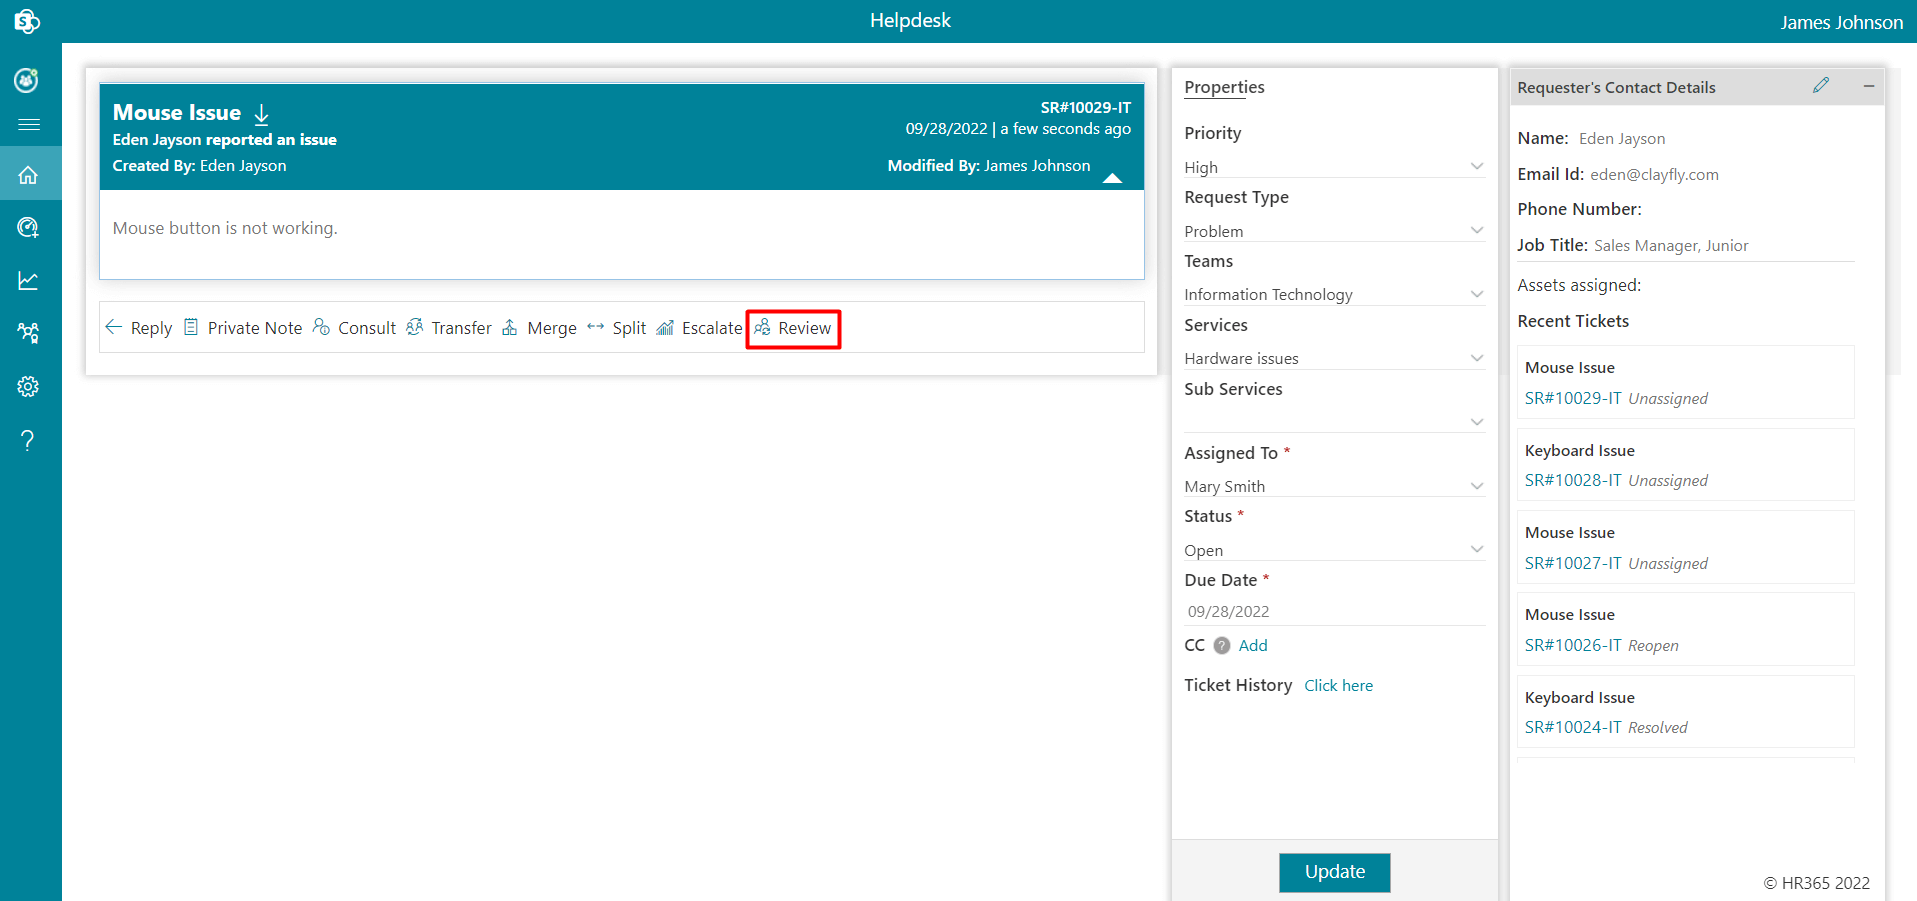
-
On comment page, click the Review button, this displays comment box to write the comments.

-
Select Teams Members with whom you want the share the review.
-
Click the Review button.
-
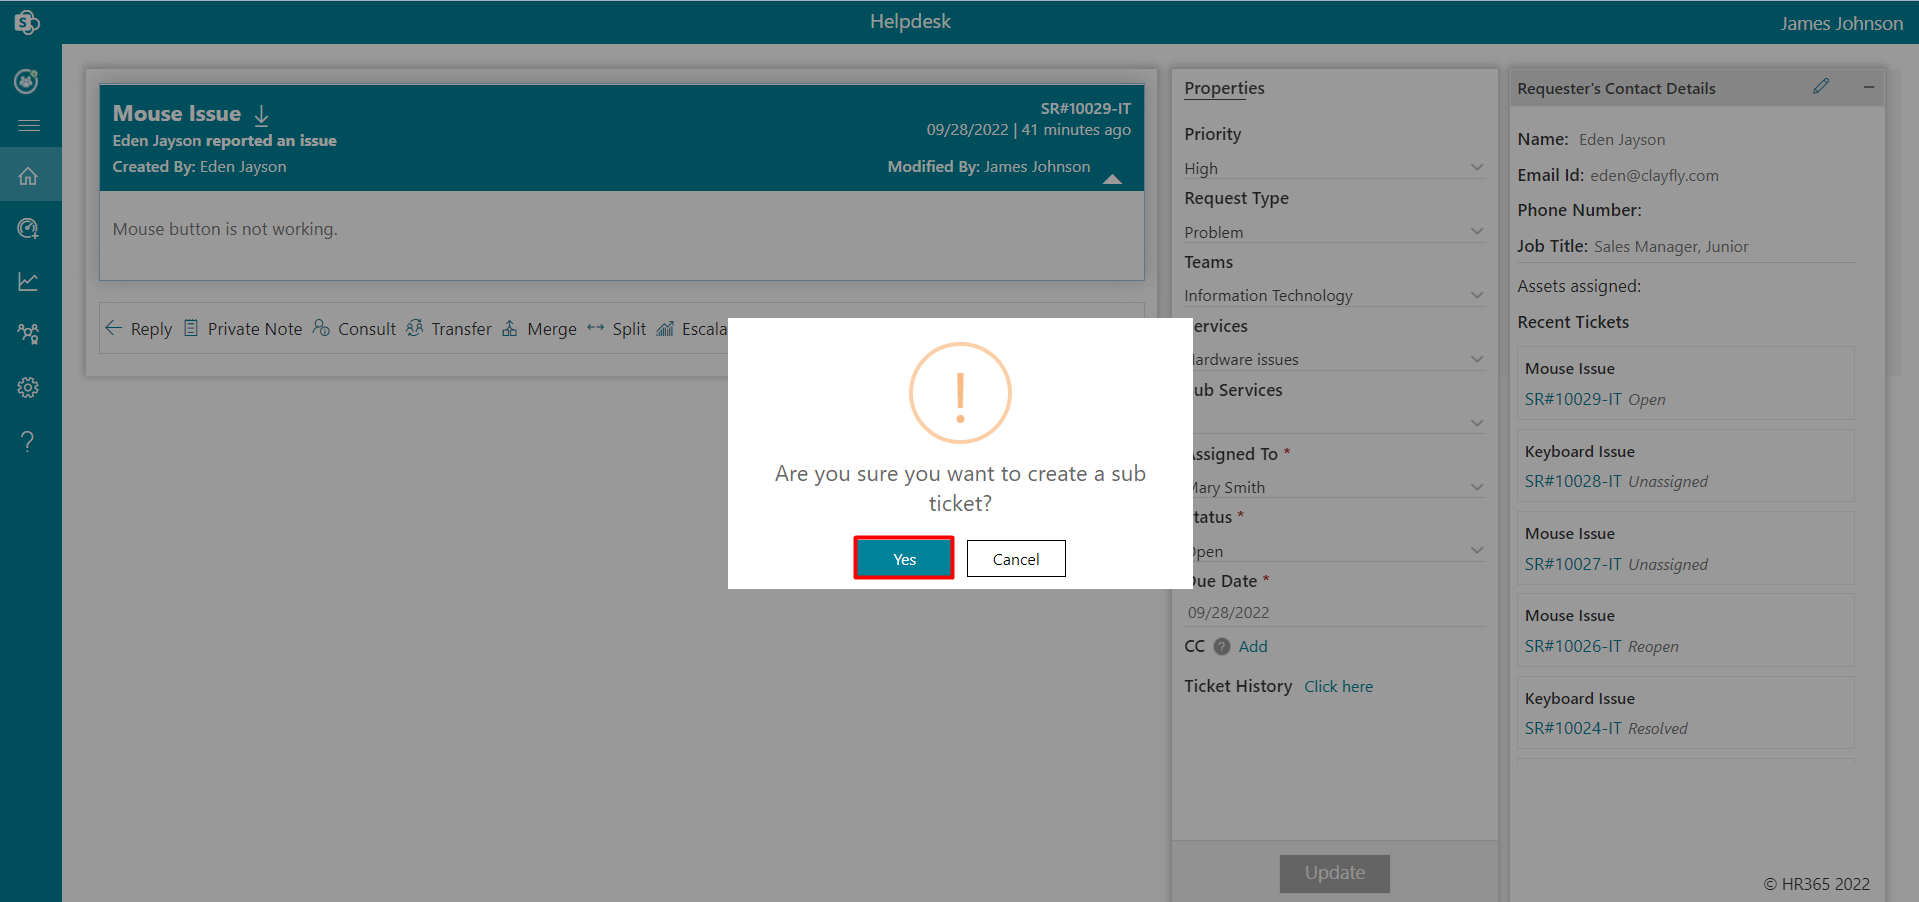
Go to the comment page, click the Sub Ticket option.
-
Select Yes in a dialog box, this displays the Sub Ticket page.
-
Enter Sub Ticket Title and Comments.
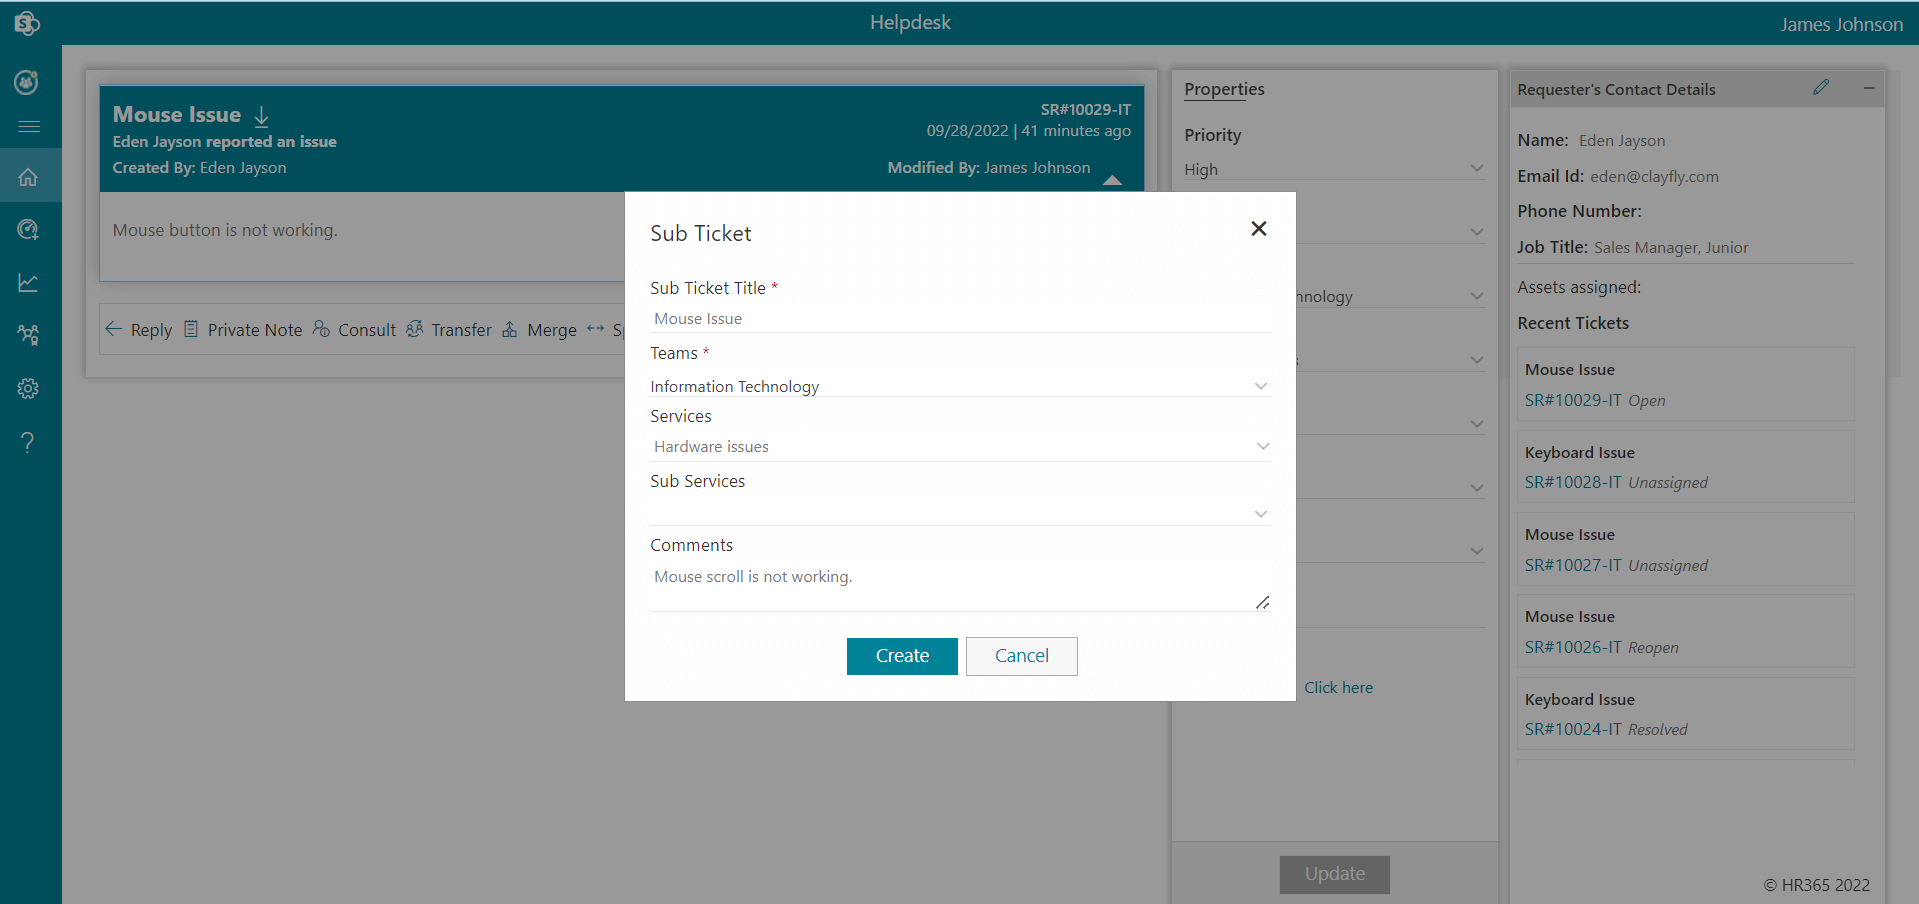
-
Sub ticket created and displayed on home page.

-
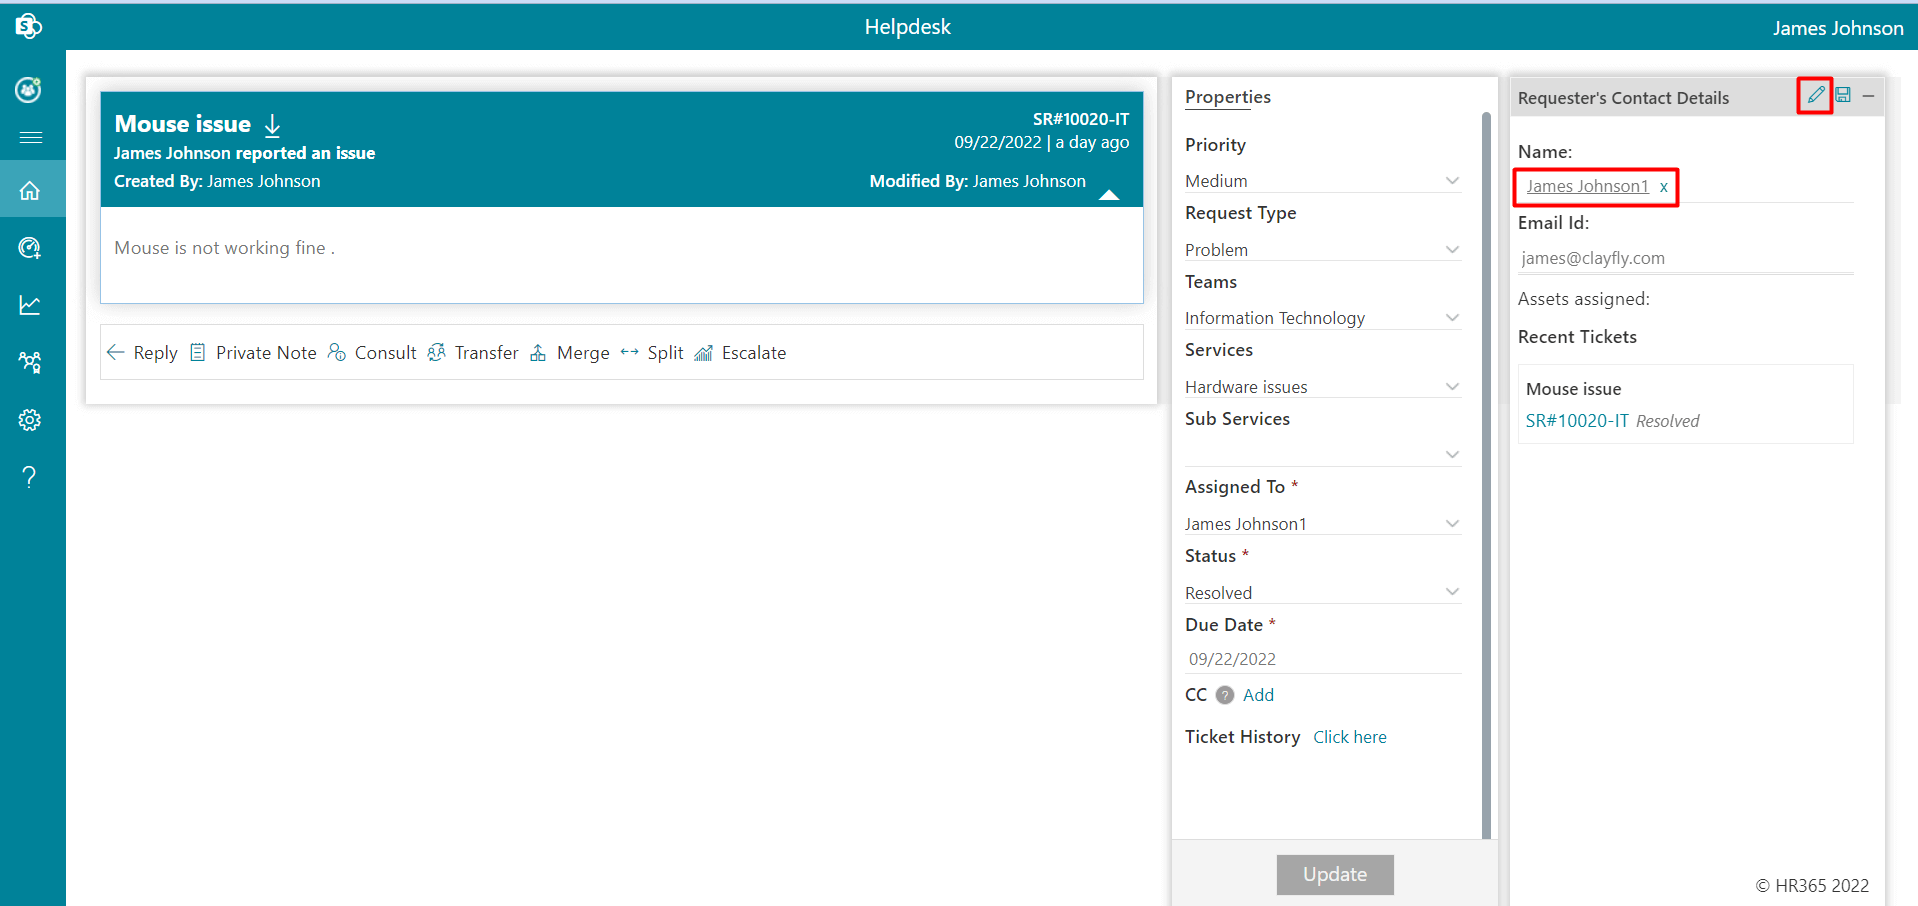
Admin can edit or change the ticket requester name on the comment page.
-
CC users auto pickup in the ticket properties panel.

Comment Page
Some "ticket actions" are shown below on the comment page :
You will redirect to comments page of particular ticket once you click on Ticket ID or Title from home page.
Reply
Consult
Transfer
Private Notes
Merge Tickets
Once the admin enables the merge ticket option from the settings, it displays on the ticket comment page from where the admin or ticket assignee can merge the ticket with another ticket using the ticket ID.
The ticket on which you would like to merge with other tickets with ticket ID will get closed and the ticket assigned and ticket requester will get notified about the ticket merge. In this way ticket merging work.
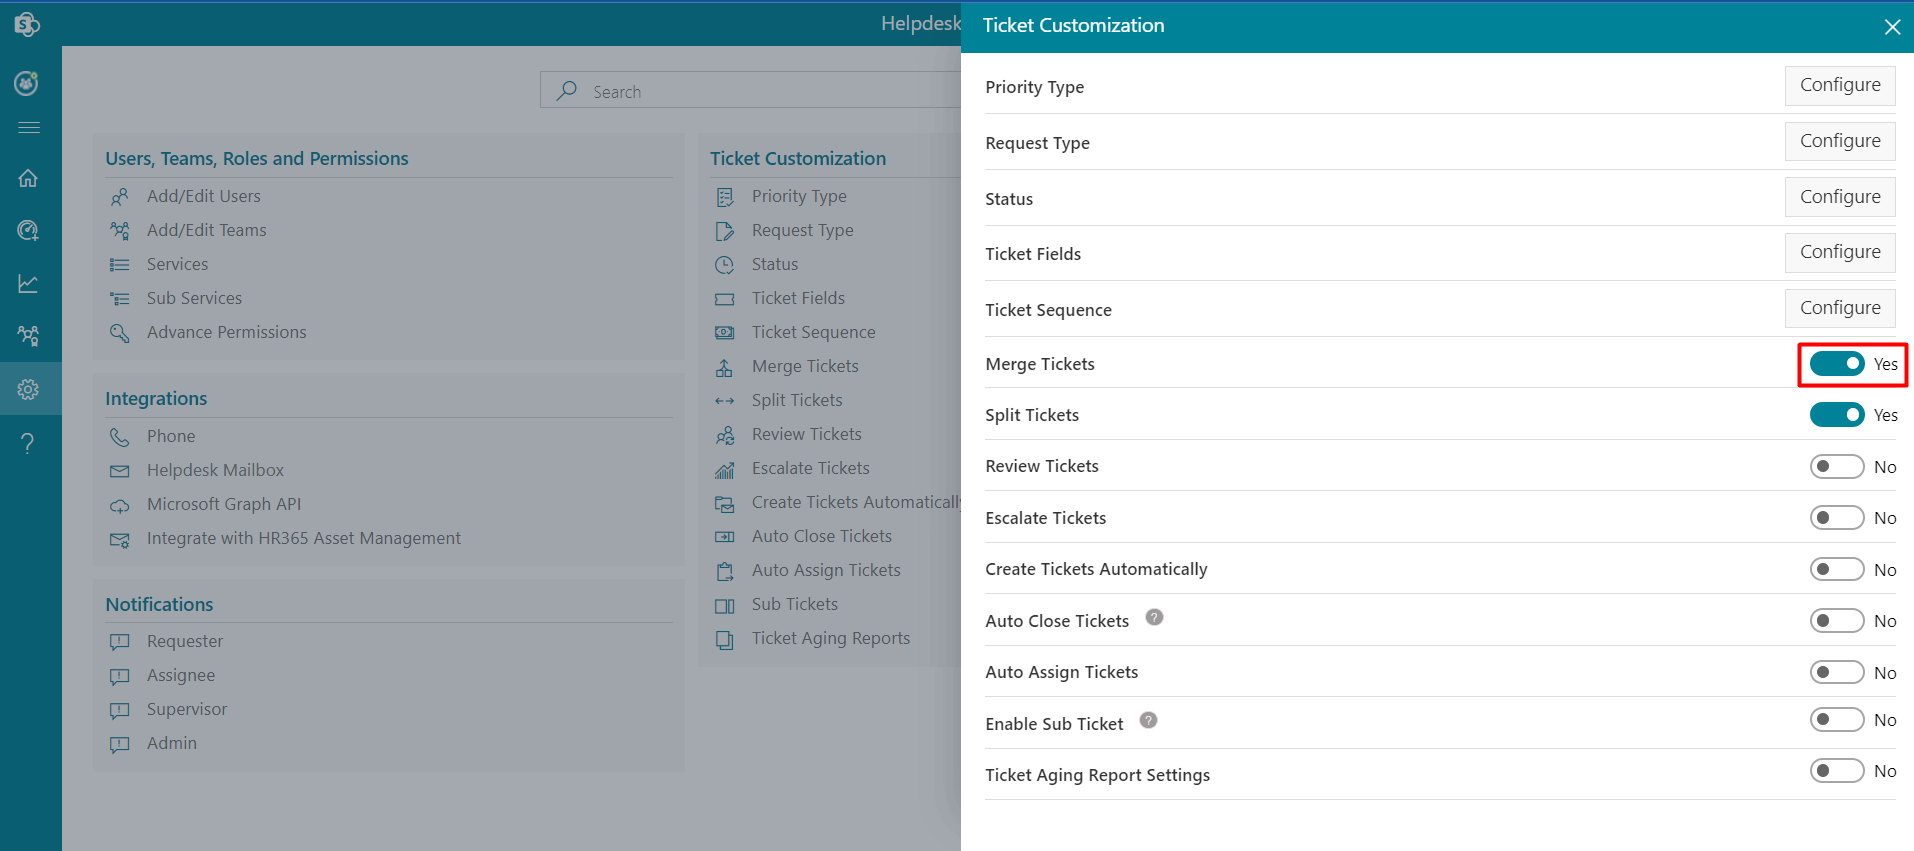
To merge the tickets, follow the steps:
Split Tickets
You can split the ticket.Admin can enable the toggle switch for split tickets.
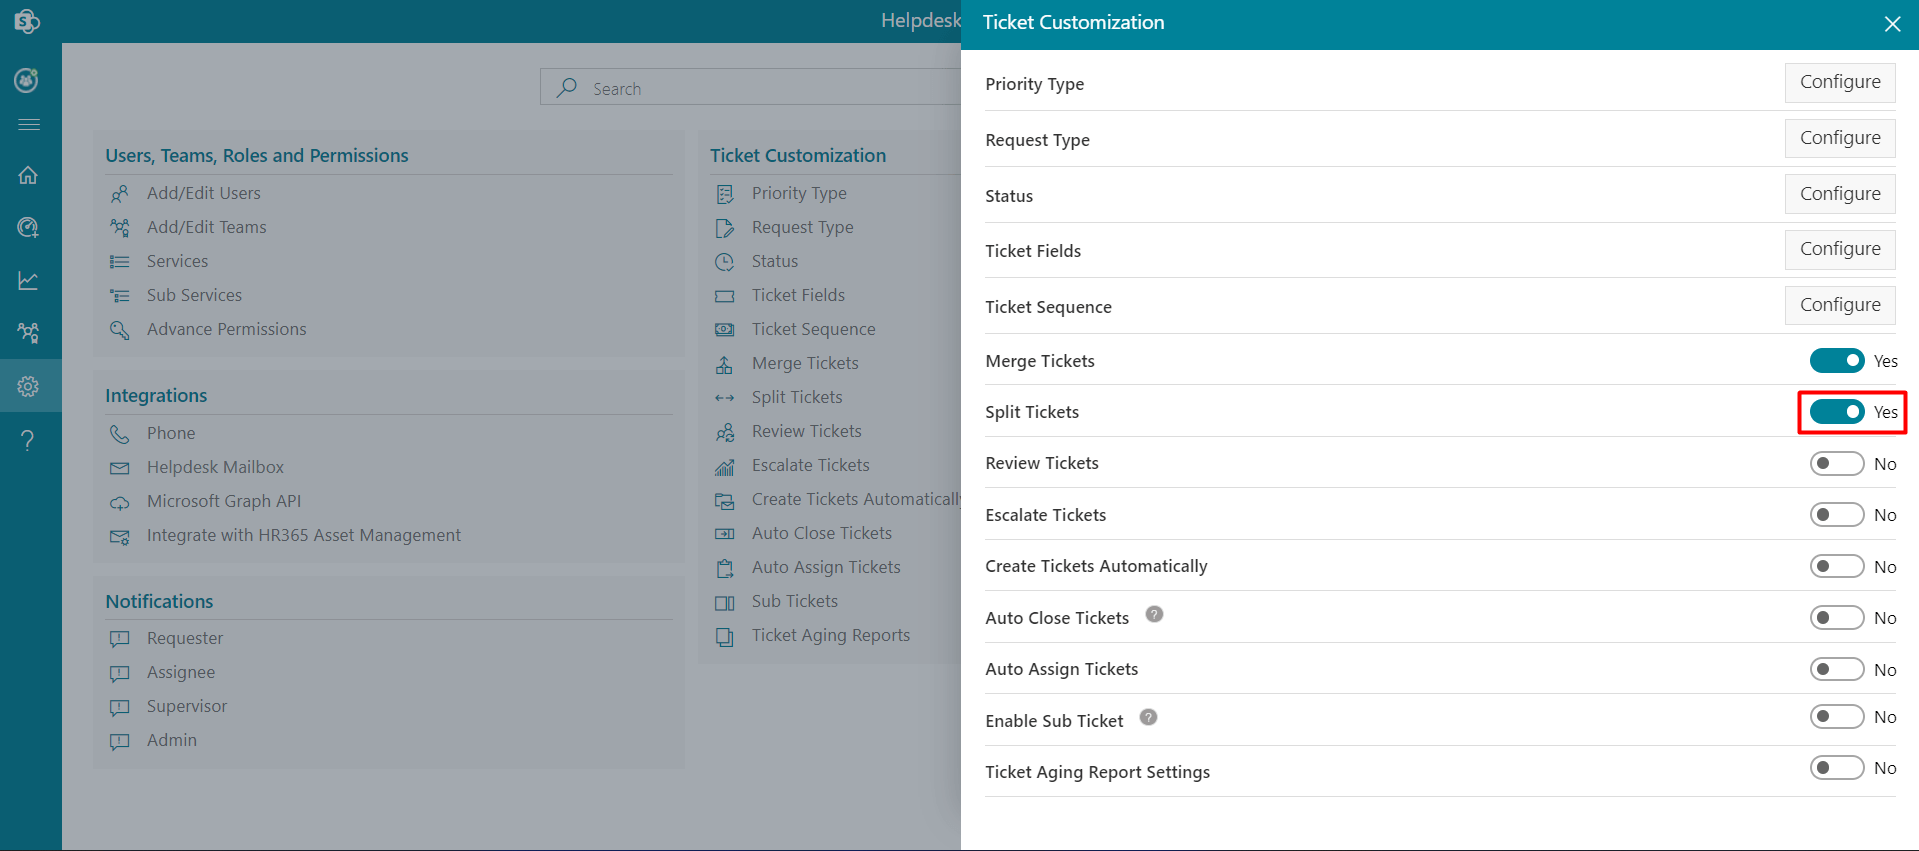
To split the ticket, follow the steps:
Escalate Tickets
From here, you can escalate any issue if the ticket is not resolved within a specific time interval.
To esalate the issue, follow the steps:
Review Tickets
Admin can enable the toggle switch for review ticket.
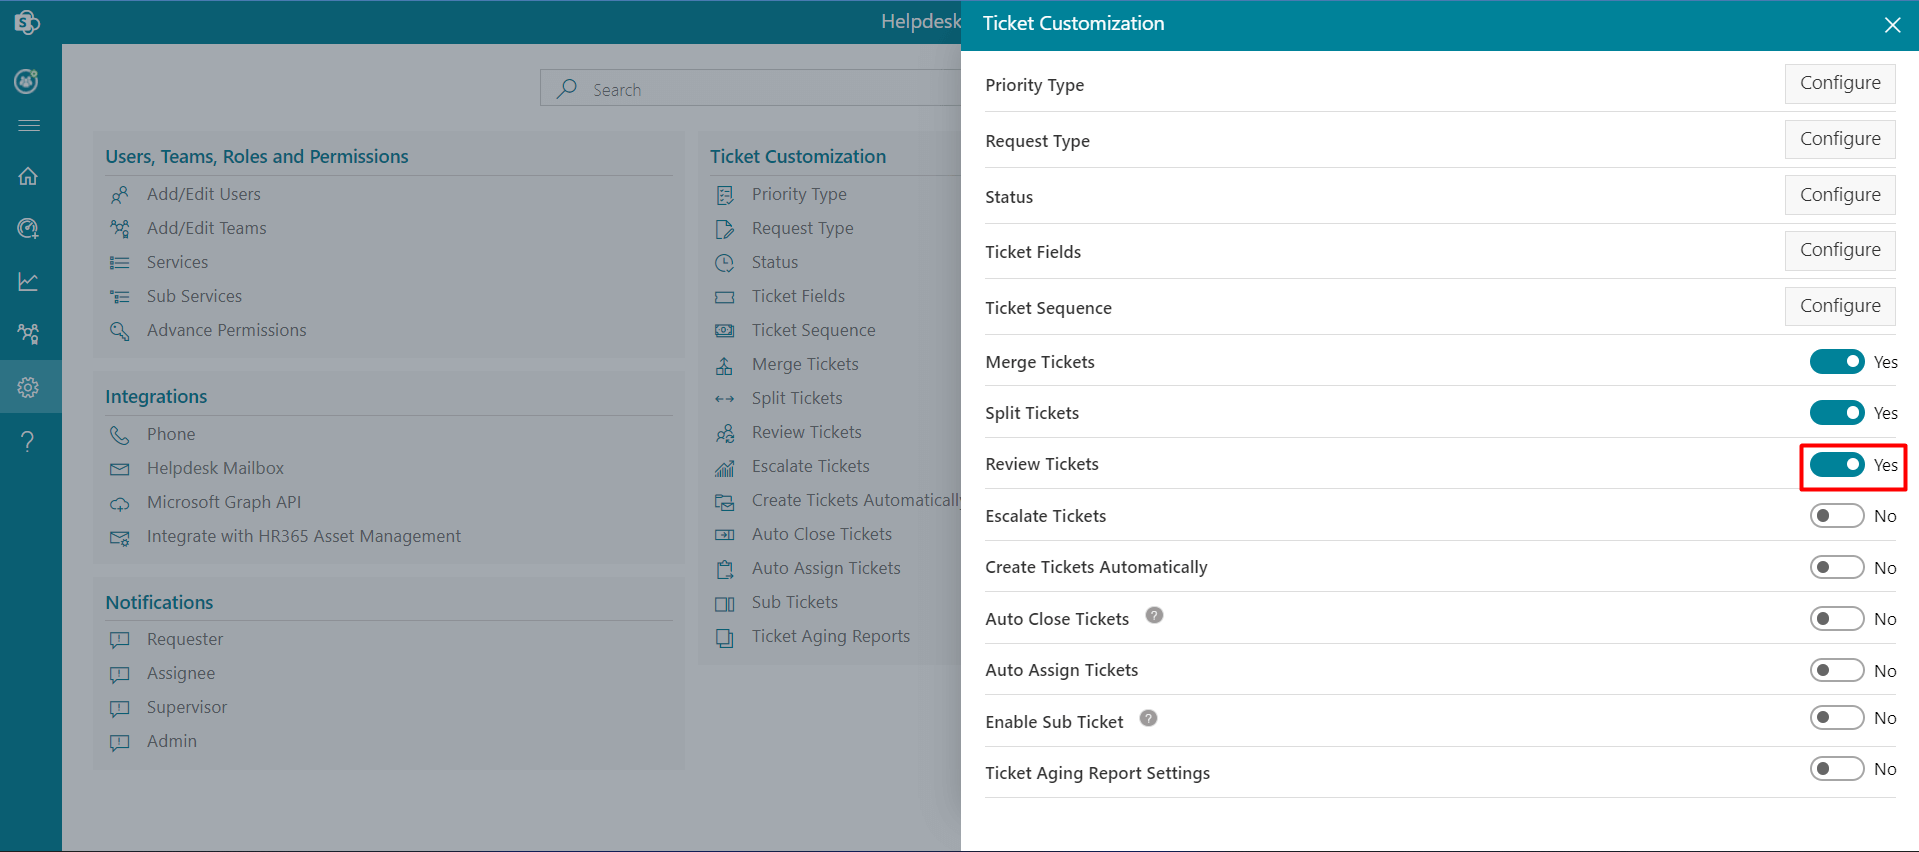
To review the tickets, follow the steps:
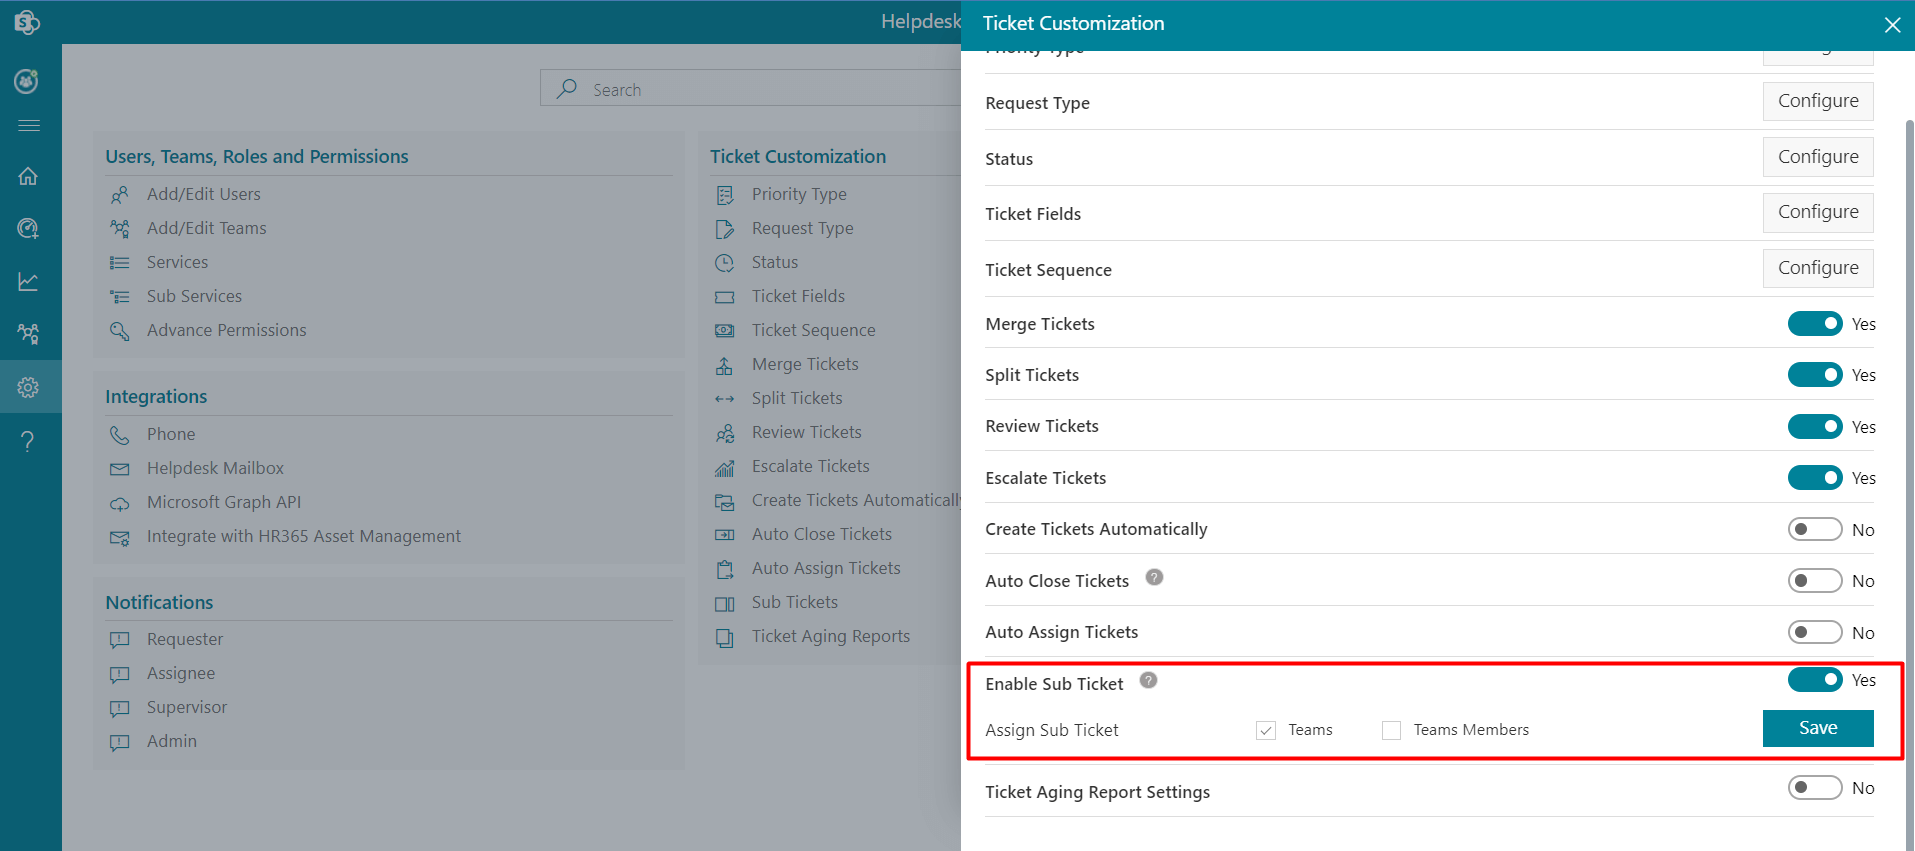
Sub Tickets
From here, you can create a sub ticket from a ticket. By default sub tickets are disabled, you can enable it by clicking Enable sub ticket toggle switch. You can Assign Sub Ticket by checking the Teams and/or Teams Members check box and clicking on the Save button as shown below.
The Sub Ticket option will be displayed on the comment page as shown below.
To create sub tickets, follow the below steps:
You can create multiple sub tickets from a main ticket.