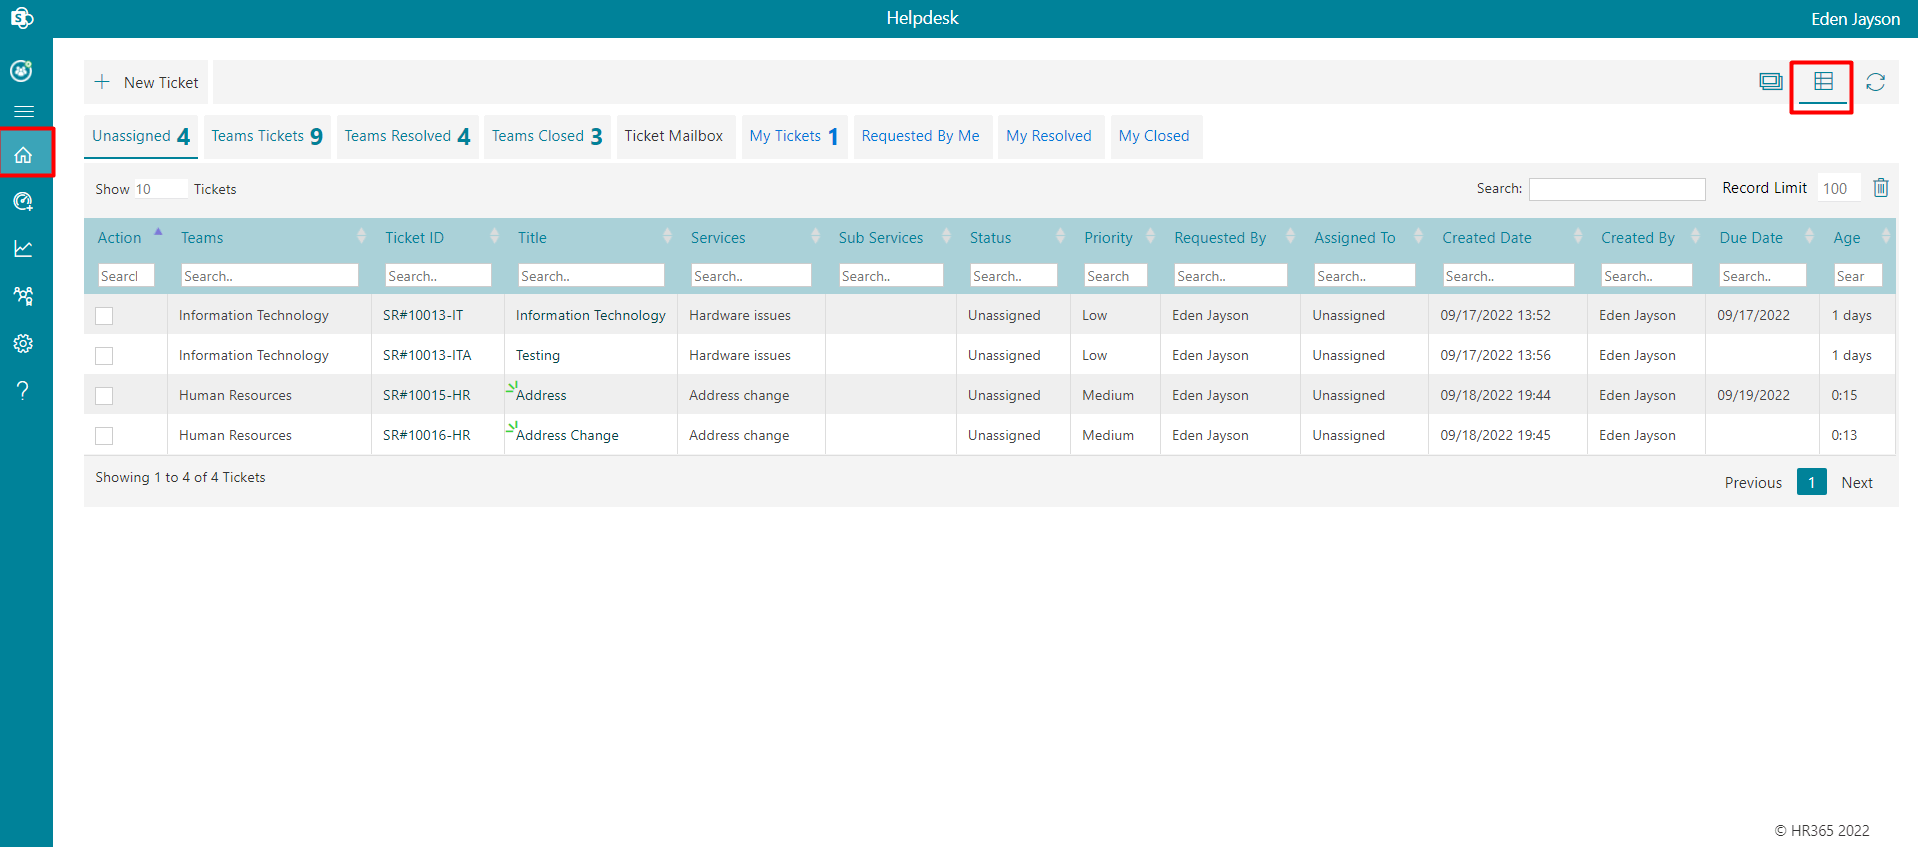
- Unassigned: All raised tickets will be accessible here to the Admins. From here the admin can assign tickets to agents and supervisors.
- Team Tickets: The Agents and Supervisors can see the tickets assigned to them and their team members here.
- Teams Closed Ticket: The Agents or Supervisors can see those tickets which have been closed (Ticket’s status is updated as closed). Admin can view closed tickets of all teams.
- My Closed: Admin, Supervisor, and Agents can see their tickets that have been closed.
- Unassigned: All raised tickets will be accessible here to the Admins. From here the admin can assign tickets to agents and supervisors.
- Team Tickets: The Agents and Supervisors can see the tickets assigned to them and their team members here.
- Teams Closed Ticket: The Agents or Supervisors can see those tickets which have been closed (Ticket’s status is updated as closed). Admin can view closed tickets of all teams.
- Ticket Mailbox: The tickets raised from helpdesk email ID will come under Ticket Mailbox. Admin can view such tickets. Admin can give access to view ticket mailbox to Ticket Mail Manager from settings.
- My Tickets: Respective Agents or Supervisors can view the tickets only when they are assigned to them.
- Requested By Me: Admins, Supervisors, and Agents can see their raised tickets in this tab.
- My Closed: Admins, Supervisor and Agent can see their tickets that have been closed.
Home Page
In home page, you have Kanban and Table views. In top right corner of home page, you can switch the views by clicking the kanban or table view. To refresh the page you can click the refresh icon from top right corner of home page.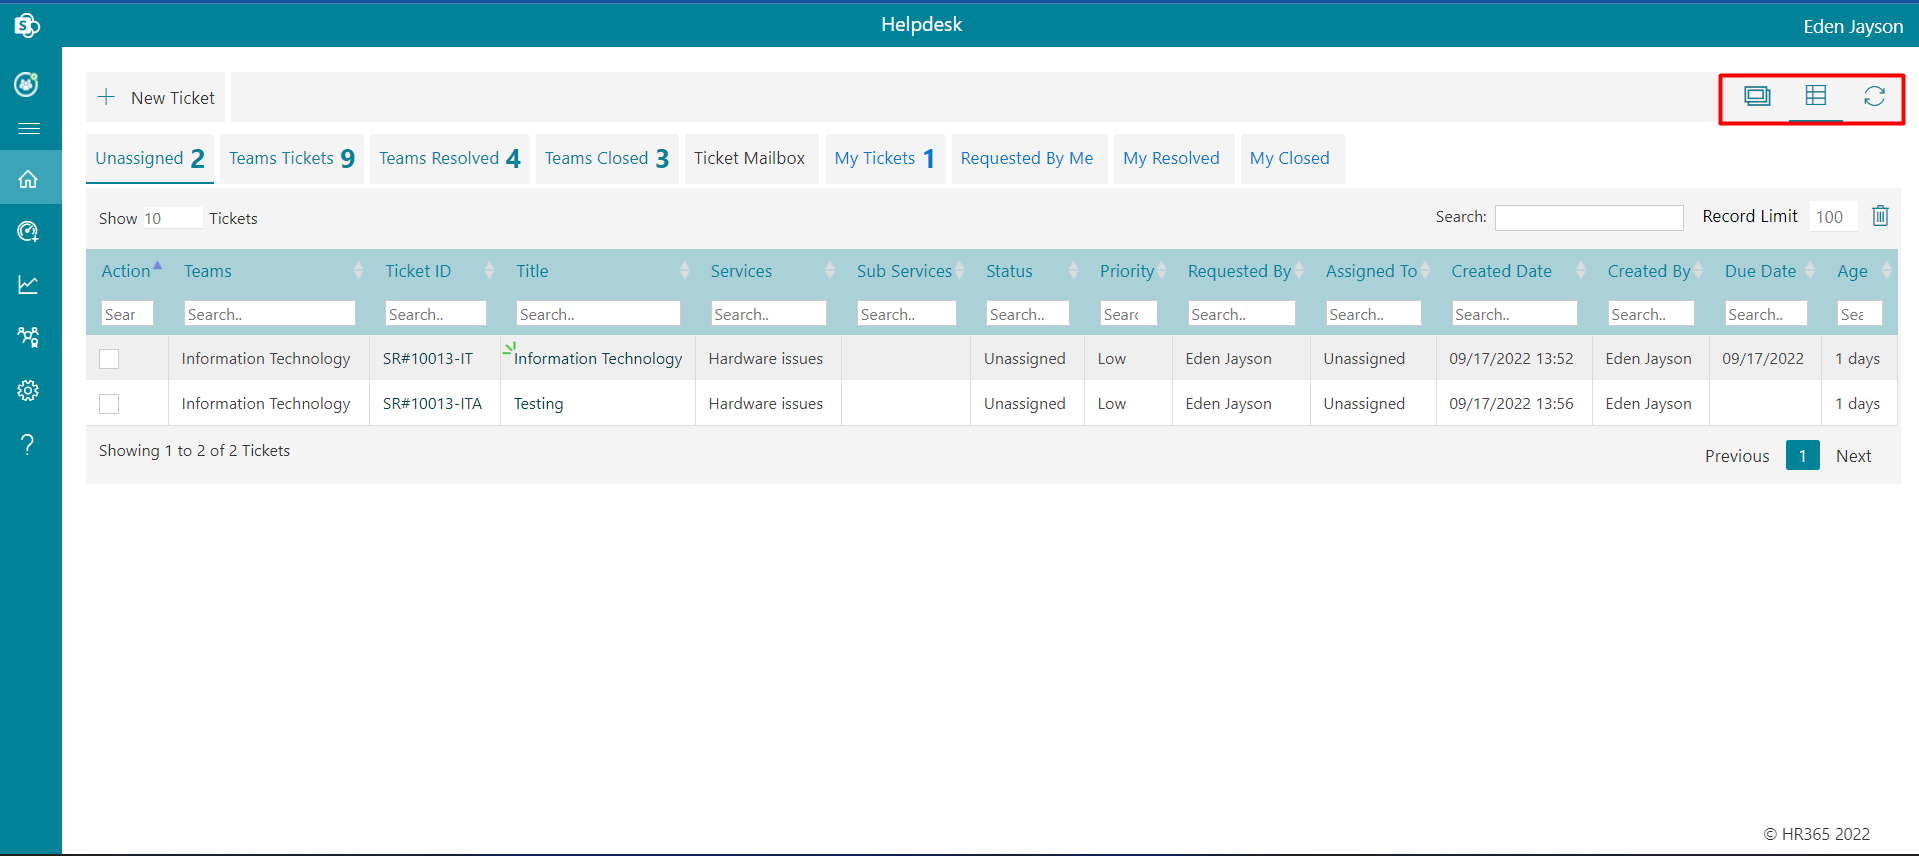
Kanban view
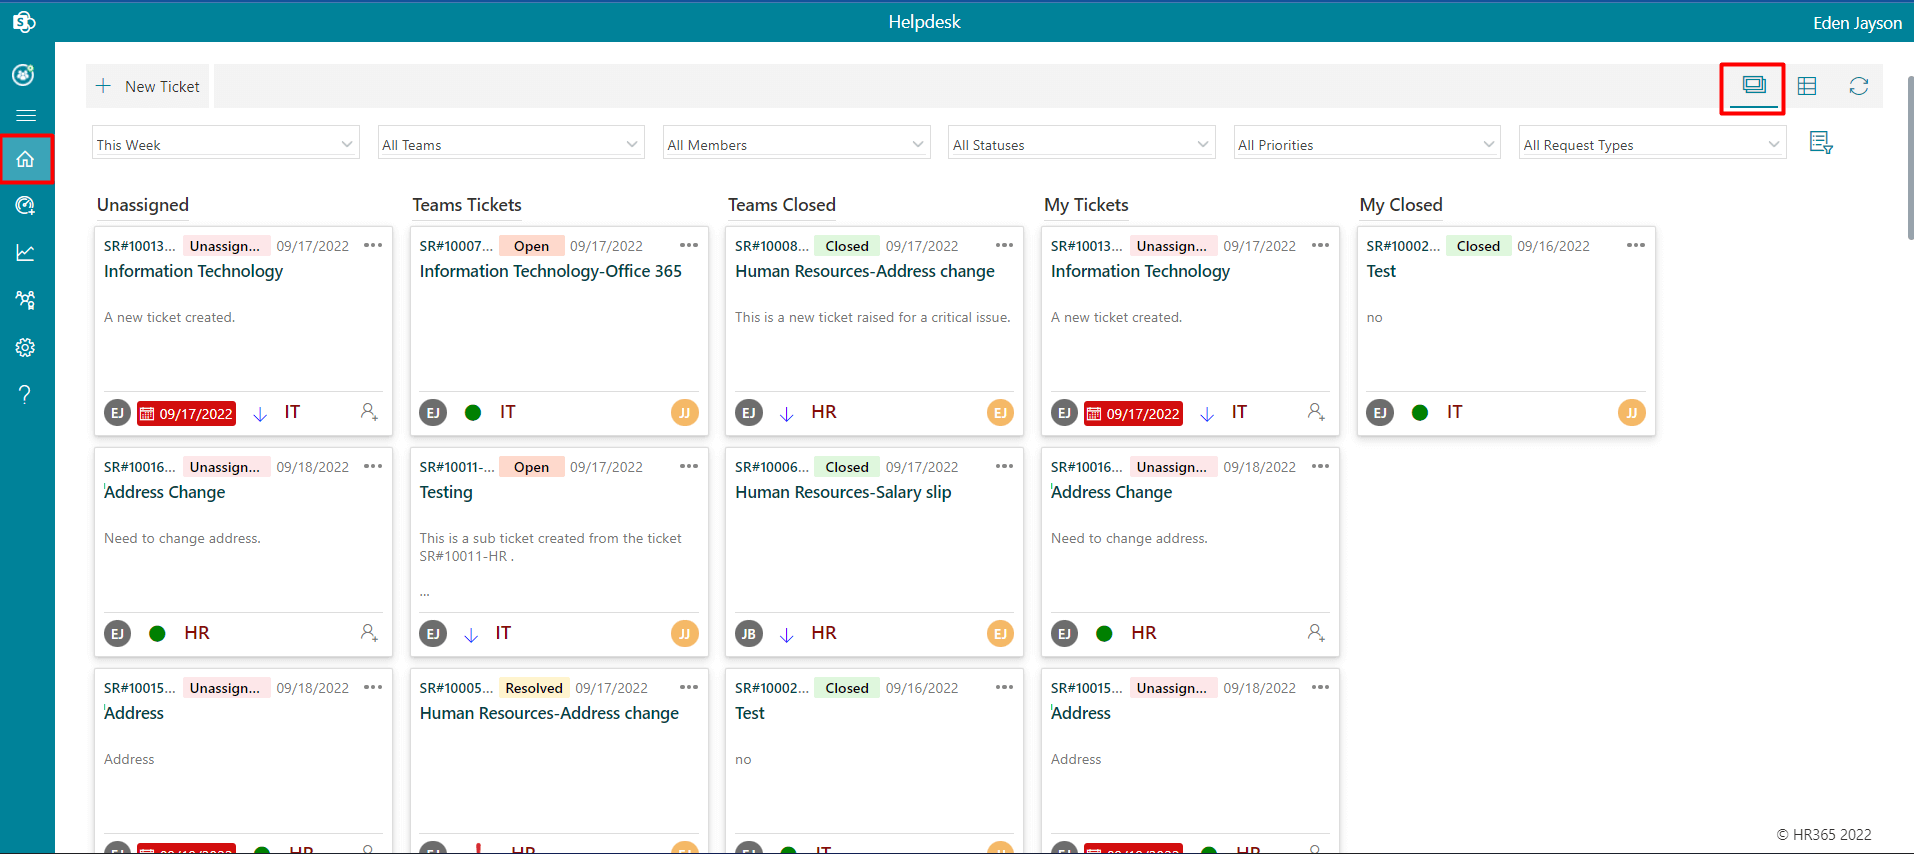
Table view
Kanban View
To create new tickets in kanbal view, follow the below steps:
- Go to home page and select kanban view.
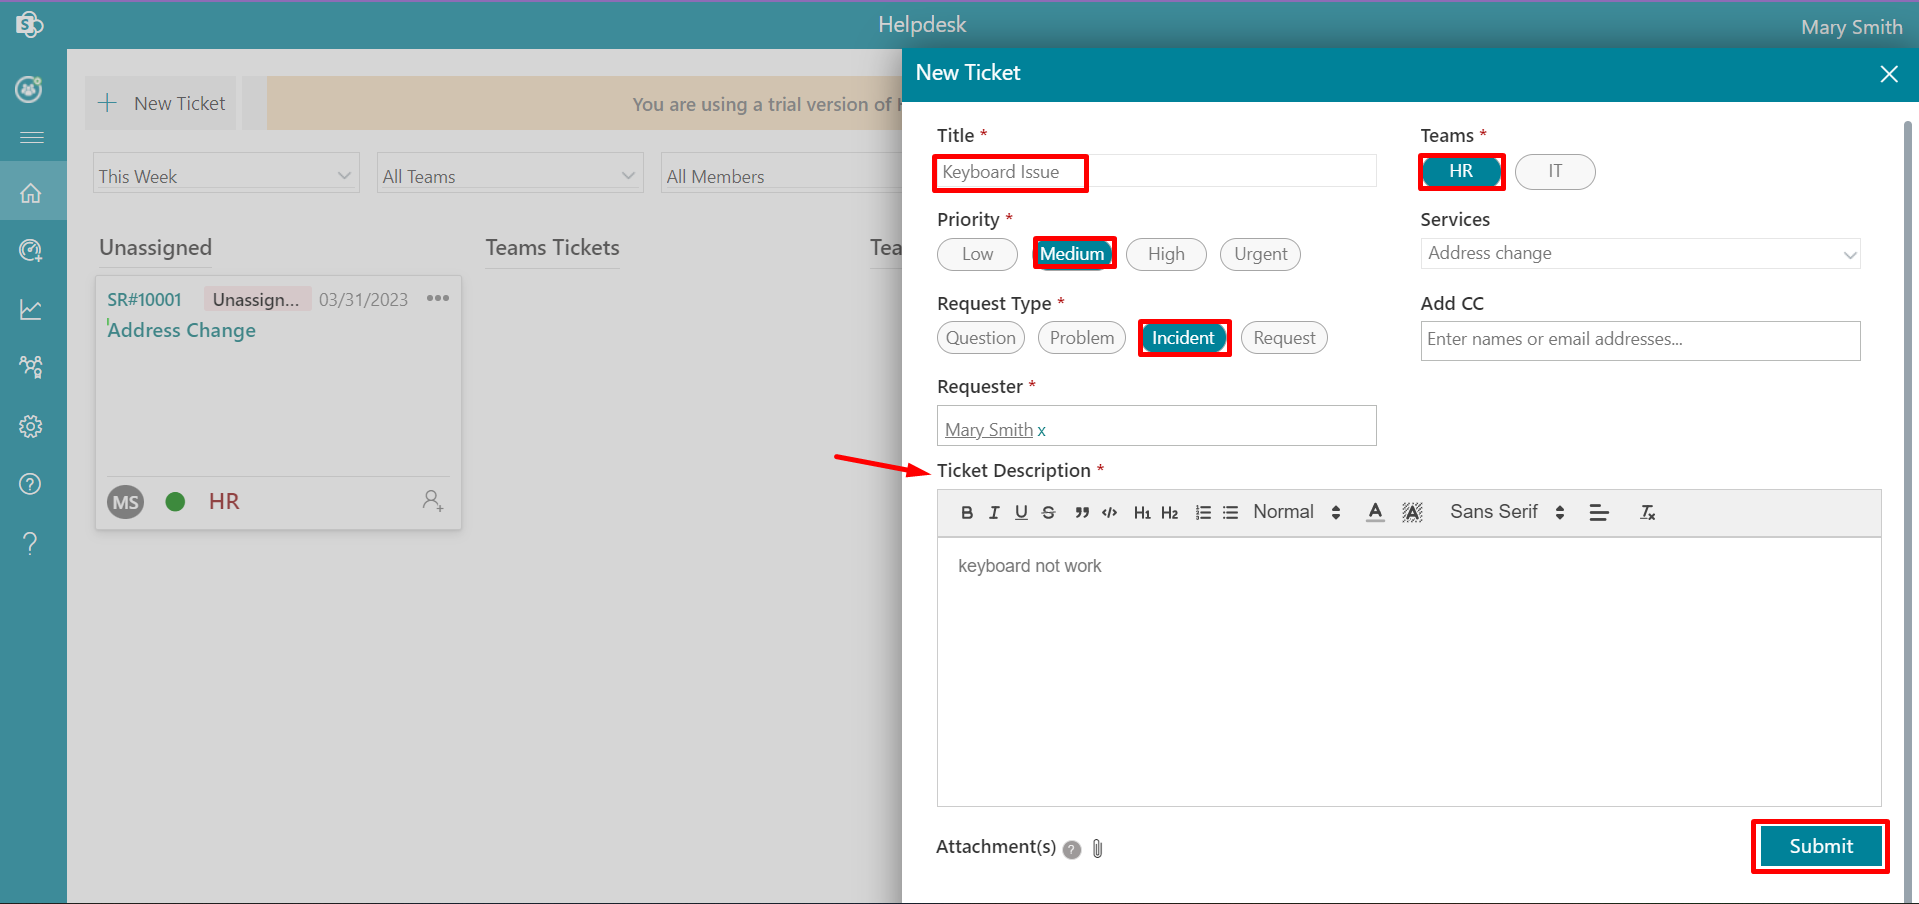
- Click on +New Ticket, this displays New Ticket page.
- Enter Title, Priority, Request type, Teams, service, Requester and Ticket Discription.
- Can also copy-paste screenshots in the ticket description.
- Click the Submit button.
To assign tickets in kanbal view, follow the below steps:
- Drag the ticket from Unassigned column and drop it in Teams Tickets column, this displays Assign to pop-up.
- Select the Teams, Assigned to and Status.
- Click the Submit button.
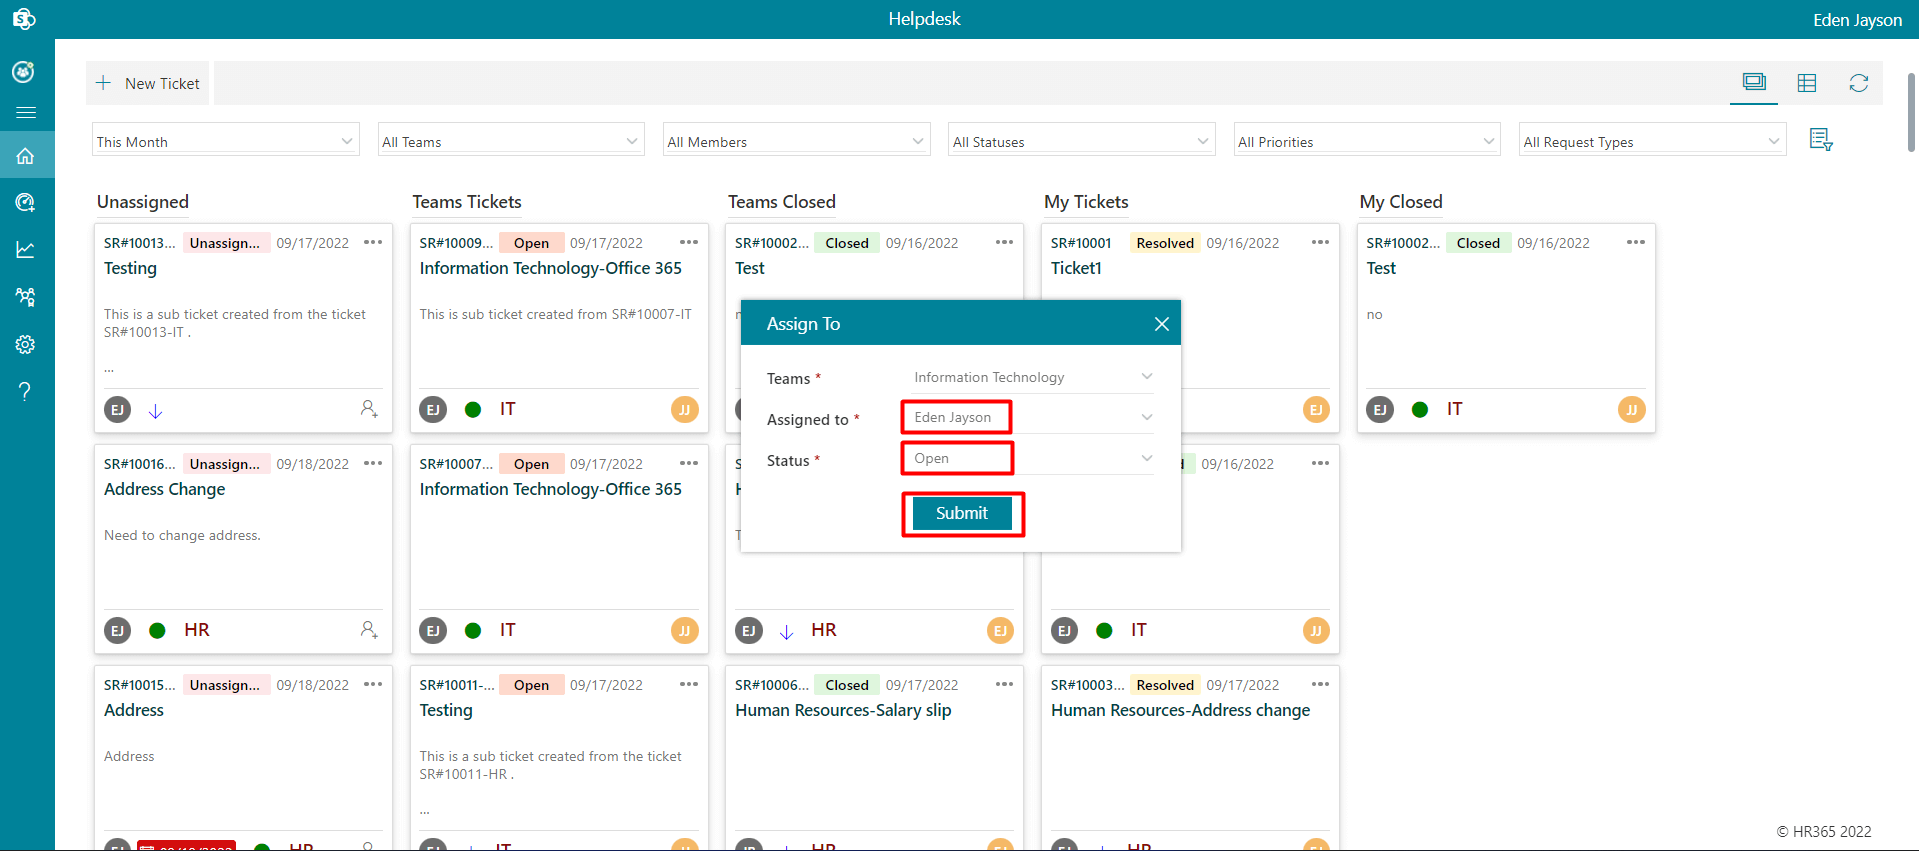
Table View
To create new tickets in table view, follow the below steps:
- Go to home page and select Table view.
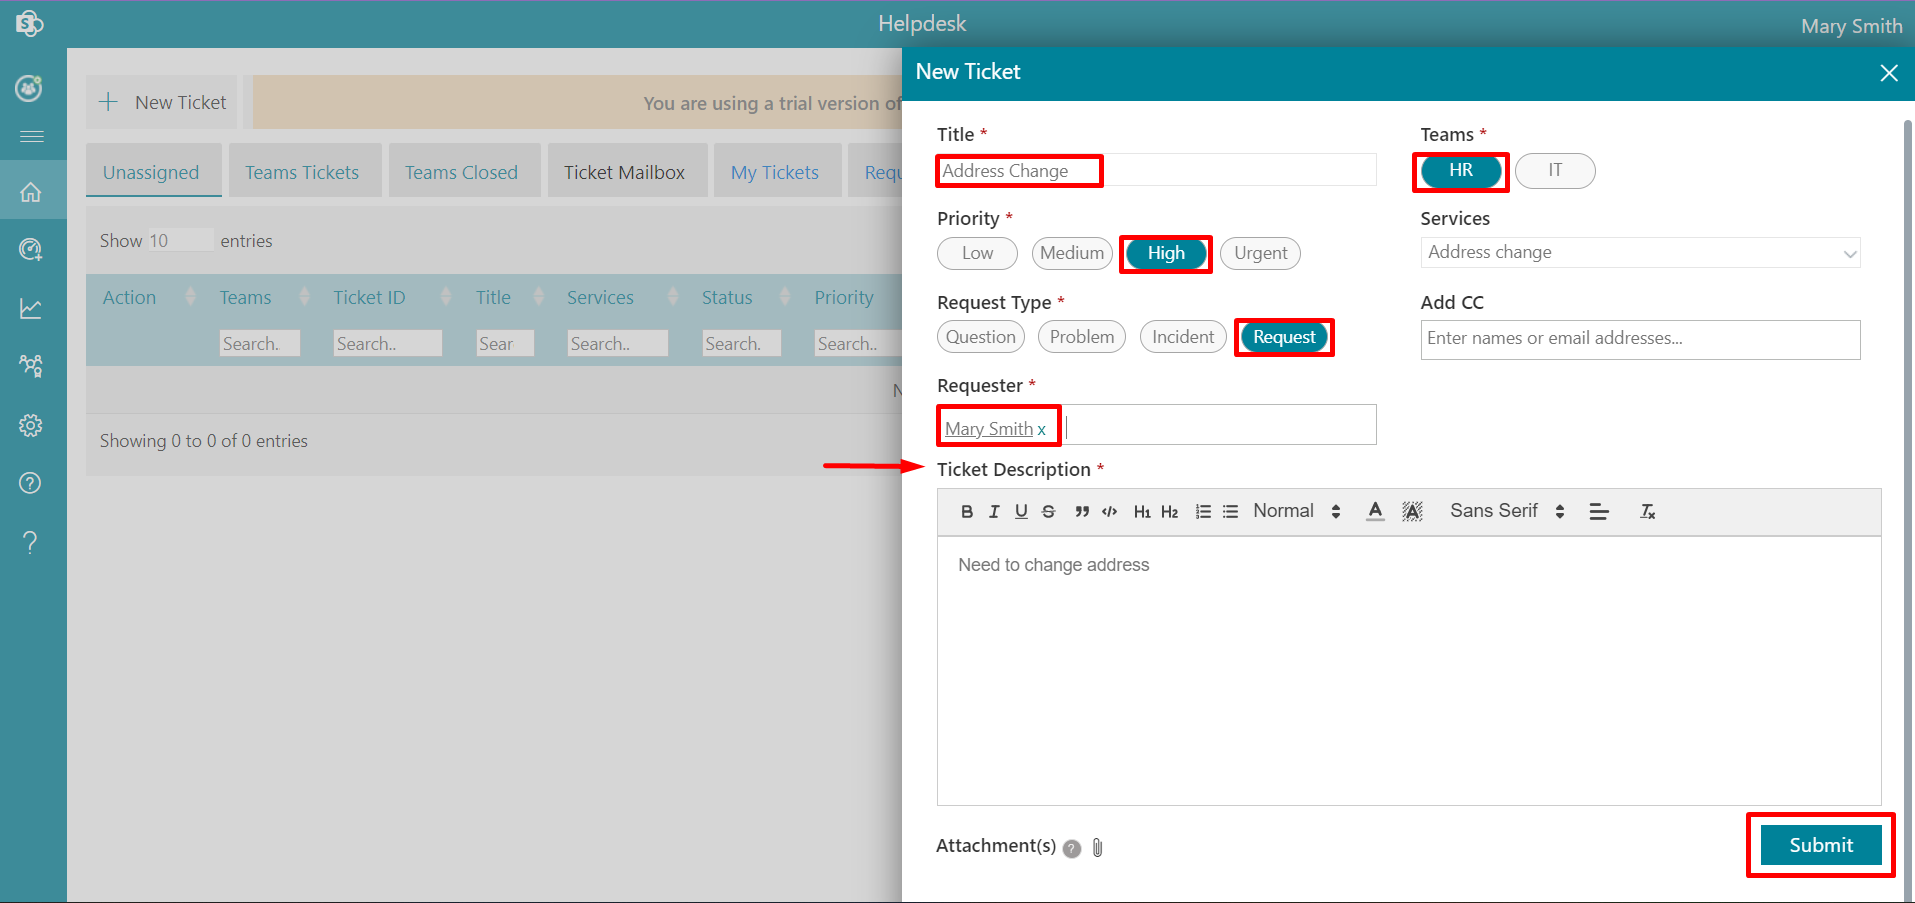
- Click on +New Ticket, this displays New Ticket page.
- Enter Title, Priority, Request type, Teams, service, Requester and Ticket Discription.
- Can also copy-paste screenshots in the ticket description.
- Click the Submit button.
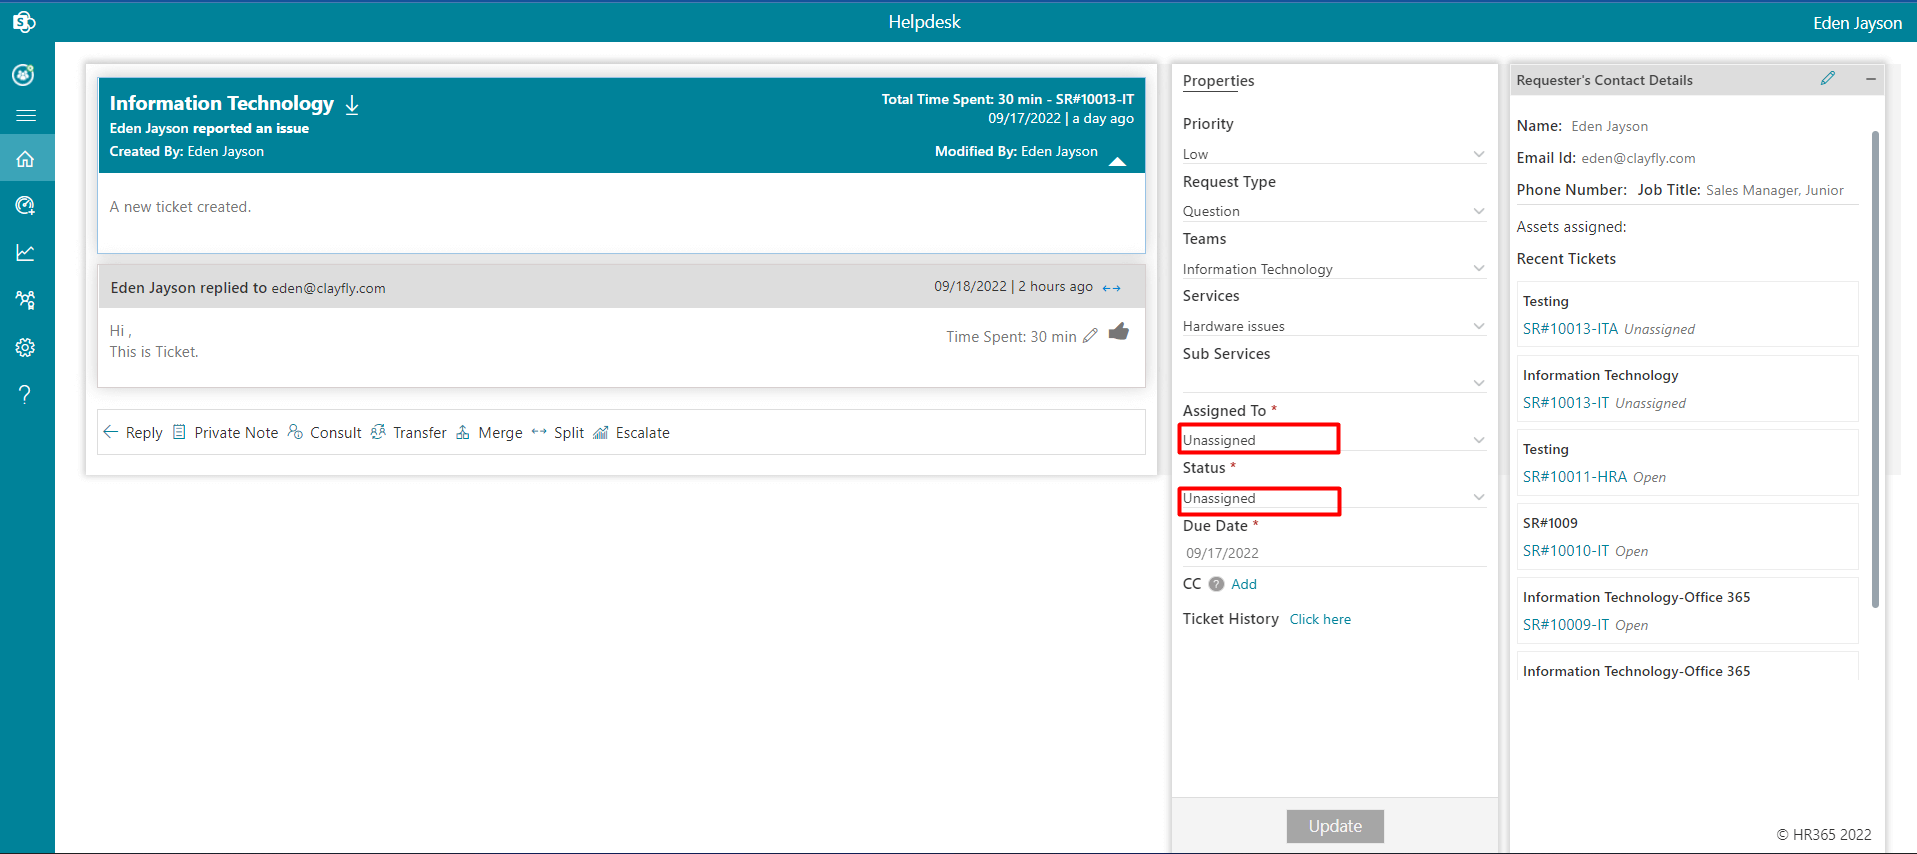
To assign tickets in table view, follow the below steps:
- Click on Ticket ID or Title from home page.
- Enter the Assigned to and Status in comment page under properties.
- Click the Update button.